|
[Last Edit: Shawnson]
[#1]
Just getting started. Powder should be here in 3 weeks and i will be able to run my first rounds.
Getting started in this hobby has been a true exercise in patients. 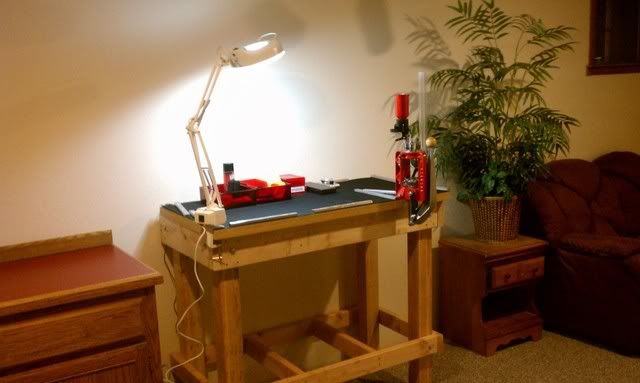  |
|
|
|
|
[#2]
I have a question for the guys who have sections of T-rail imbedded into their benches and their presses mounted on pieces of material. Any concerns with all that leverage in the press breaking the T-rail mounting hardware?
|
|
|
|
|
[#3]
Originally Posted By YoMoFo: Nice job on that bench.Here it is with some stain/poly all in one stff applied, and a few pieces parts here and there... my press is on backorder until june, so it's a matter of stocking up on components until then http://i1325.photobucket.com/albums/u636/SixPack_Saturday/20130313_162233_zpsd6d3f4de.jpg Buddy was right on the lower shelf.
|
|
|
|
|
[#4]
I built a second, smaller bench off to the side of my main bench to mount my Rock Chucker since my RL550B took its place on the main bench. In light of some newer members posting their benches, I swiped the idea of building a lower shelf, and doing such made this guy ROCK SOLID.
Panther standing guard while I take a break 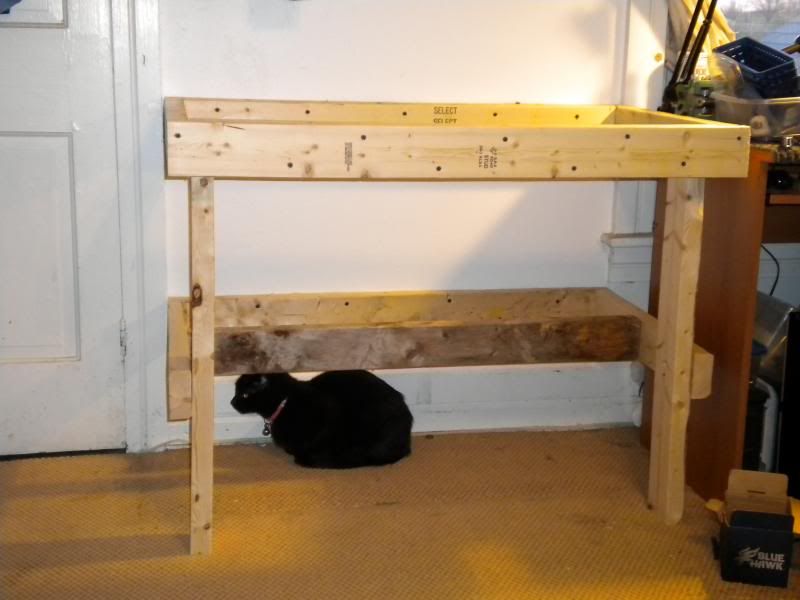
Completed, will mount my press soon 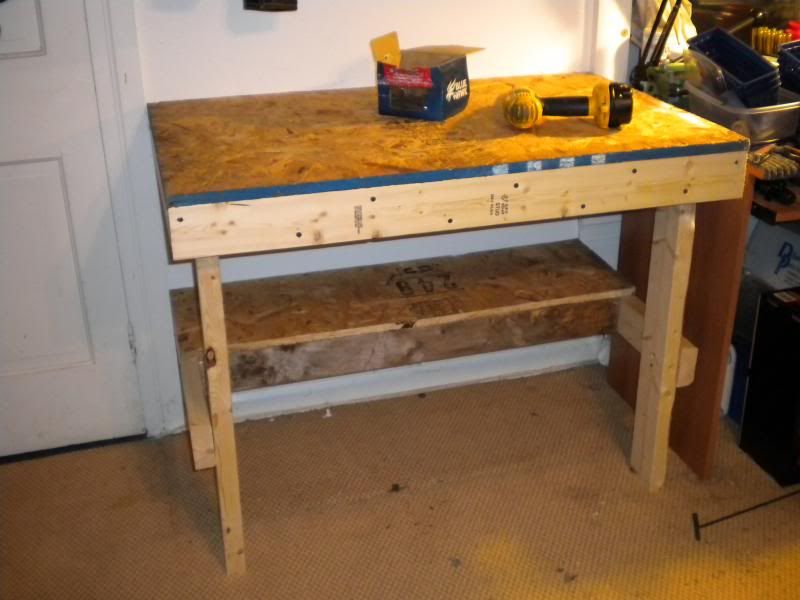
|
|
|
|
|
[#5]
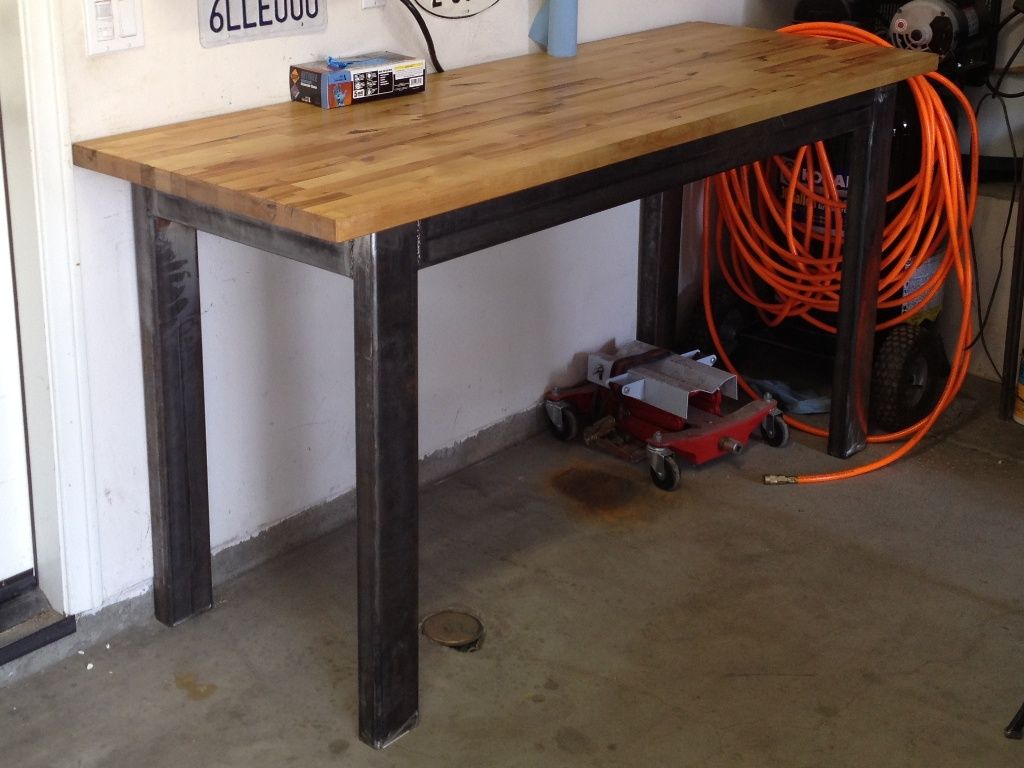
Here's my take on a bench. I wanted to make sure that I had something that was stout. So I went with 3/16 2X4 steel beams and solid butcher block from Ikea. 176 lbs of steel and 64 lbs for the wood. I figured 240 lbs should be solid.
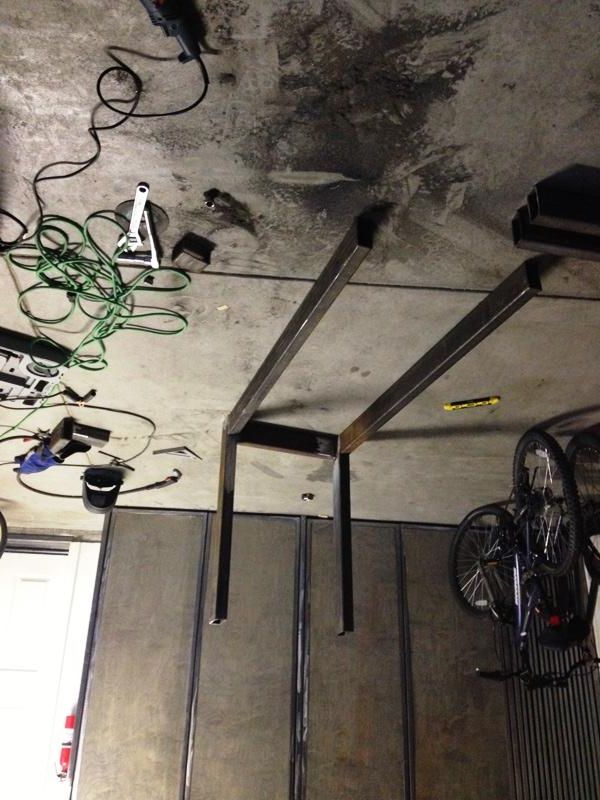
The small welder I had wasn't able to give enough juice for mig welding so I had to go with the Flux Core wire, <DO NOT LIKE> messy messy welds... 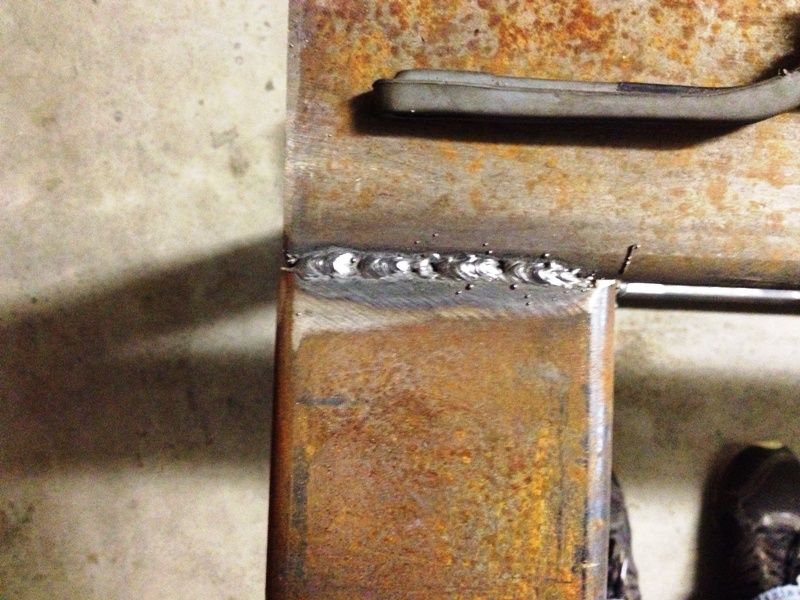
I also have this in my garage so I wanted the equipment to be portable. I ended up drilling in inserts to the block. They hold down the case trimmer and press without any issues. 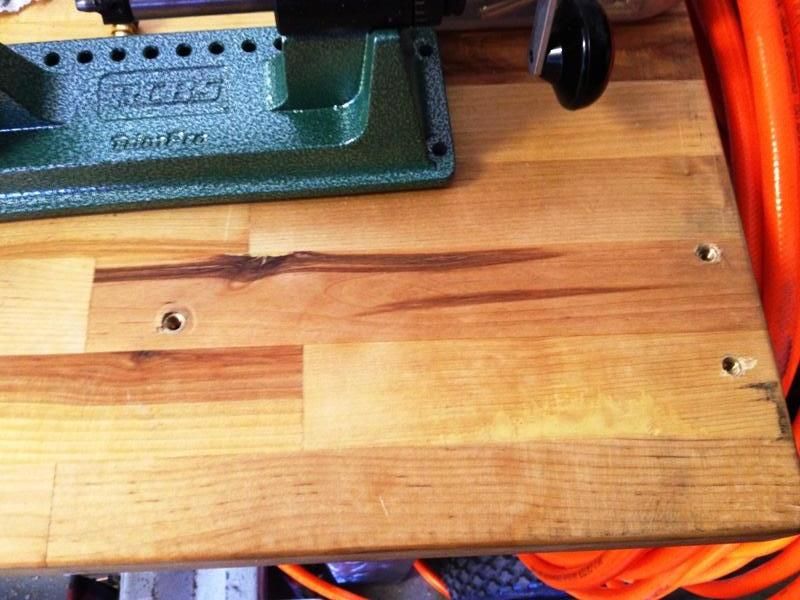
The only issue I had was catching my arm on the rod in the de-priming die. It split open about 3 millimeters wide and 2 inches long, but strangely just bleed from certain areas. I'm guessing I was a layer away from a really bad day. Hence the custom wine cork on the top of the rod.... 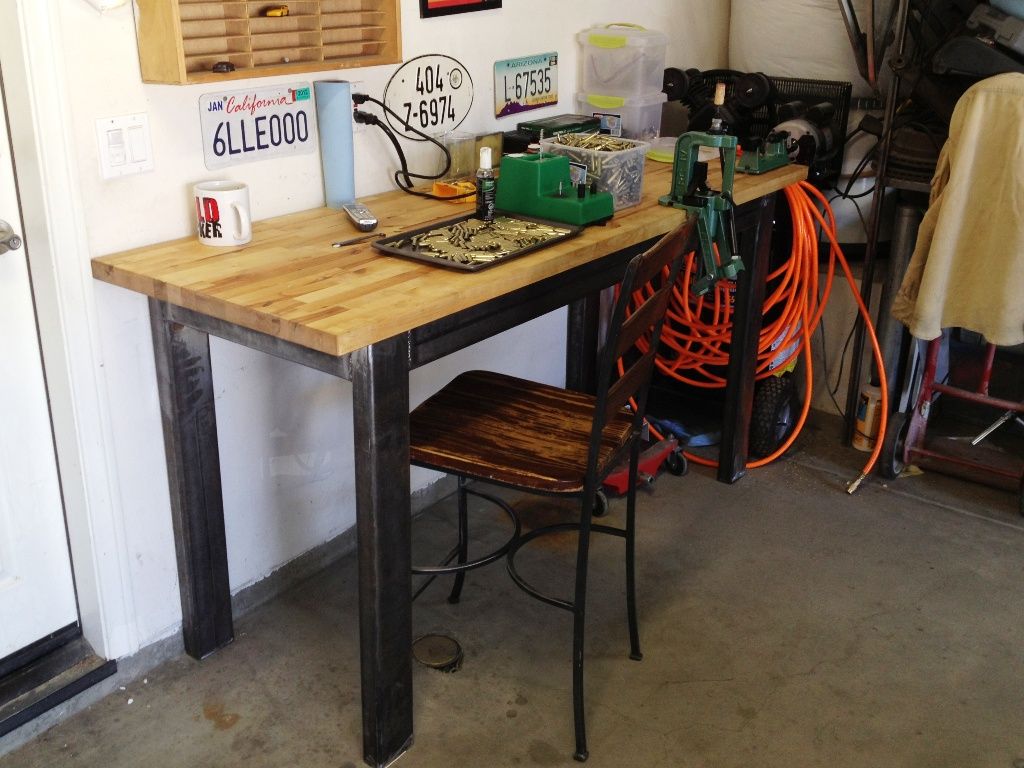
First time I used the bench I de-primed and shaped around 1,100 rounds of LC 5.56. Down the road we'll get a progressive but for now I'm happy learning slowly. |
|
|
|
|
[#6]

Finally found a plastic storage box at Wal-Fart that was large enough to hold my gear but just low enough to slide under the bed. |
|
|
|
|
[#7]
Originally Posted By CaliMiner: Here's my take on a bench. I wanted to make sure that I had something that was stout. So I went with 3/16 2X4 steel beams and solid butcher block from Ikea. 176 lbs of steel and 64 lbs for the wood. I figured 240 lbs should be solid. http://i1276.photobucket.com/albums/y463/Caliminer/b1_zpsf76a5974.jpg The small welder I had wasn't able to give enough juice for mig welding so I had to go with the Flux Core wire, <DO NOT LIKE> messy messy welds... http://i1276.photobucket.com/albums/y463/Caliminer/b2_zps99767e01.jpg I also have this in my garage so I wanted the equipment to be portable. I ended up drilling in inserts to the block. They hold down the case trimmer and press without any issues. http://i1276.photobucket.com/albums/y463/Caliminer/b4_zpsf47638e5.jpg http://i1276.photobucket.com/albums/y463/Caliminer/b3_zpsd339b52a.jpg The only issue I had was catching my arm on the rod in the de-priming die. It split open about 3 millimeters wide and 2 inches long, but strangely just bleed from certain areas. I'm guessing I was a layer away from a really bad day. Hence the custom wine cork on the top of the rod.... http://i1276.photobucket.com/albums/y463/Caliminer/b5_zps962ebd2d.jpg First time I used the bench I de-primed and shaped around 1,100 rounds of LC 5.56. Down the road we'll get a progressive but for now I'm happy learning slowly. That's a strong "I'm a fabricator not a woodworker" bench. Well done. |
|
|
|
|
[#8]
Originally Posted By dryflash3:
Originally Posted By CaliMiner:
Here's my take on a bench. I wanted to make sure that I had something that was stout. So I went with 3/16 2X4 steel beams and solid butcher block from Ikea. 176 lbs of steel and 64 lbs for the wood. I figured 240 lbs should be solid. http://i1276.photobucket.com/albums/y463/Caliminer/b1_zpsf76a5974.jpg The small welder I had wasn't able to give enough juice for mig welding so I had to go with the Flux Core wire, <DO NOT LIKE> messy messy welds... http://i1276.photobucket.com/albums/y463/Caliminer/b2_zps99767e01.jpg I also have this in my garage so I wanted the equipment to be portable. I ended up drilling in inserts to the block. They hold down the case trimmer and press without any issues. http://i1276.photobucket.com/albums/y463/Caliminer/b4_zpsf47638e5.jpg http://i1276.photobucket.com/albums/y463/Caliminer/b3_zpsd339b52a.jpg The only issue I had was catching my arm on the rod in the de-priming die. It split open about 3 millimeters wide and 2 inches long, but strangely just bleed from certain areas. I'm guessing I was a layer away from a really bad day. Hence the custom wine cork on the top of the rod.... http://i1276.photobucket.com/albums/y463/Caliminer/b5_zps962ebd2d.jpg First time I used the bench I de-primed and shaped around 1,100 rounds of LC 5.56. Down the road we'll get a progressive but for now I'm happy learning slowly. That's a strong "I'm a fabricator not a woodworker" bench. Well done. agreed. After a nuclear blast and your house is leveled, the bench will still be standing 
|
|
|
|
|
[Last Edit: ChevelleDave]
[#9]
I guess I'll throw in a couple pic's of My bench.
 " "
I drilled and tapped a piece of 1/2" steel, then I can switch between My SS press, and the progressive.  " "
|
|
|
|
|
[Last Edit: ekimnaheem]
[#10]
Originally Posted By ChevelleDave:
I guess I'll throw in a couple pic's of My bench. http://i1302.photobucket.com/albums/ag124/71metbu/reloading/loadingbench002_zpse508173b.jpg" I drilled and tapped a piece of 1/2" steel, then I can switch between My SS press, and the progressive. http://i1302.photobucket.com/albums/ag124/71metbu/reloading/loadingbench004_zps92cf1895.jpg" Another garage loader! We should have our our support group for those of us who are not allowed in the house.... The kids got the extra room over the garage as their "play room" and never play in there. It's just filled with their unwanted crap now... Went down in flames fighting that battle with the wifey. She did let me buy a fridge and I put up some dart boards. Slowly working towards taking over the whole garage. HOA won't let me put a shed out back either.
|
|
|
|
|
[#11]
 Apologies for the mess.....had a massive "sorting" session going on. Hornady LockNLoad is on the right....you can't see it from the pic but I have an LED lamp that illuminates the shell plate to verify powder etc. The single stage LEE is setup on the front of the bench. I like it here when I am reloading rifle rounds.....gives me more space when taking shells out of holders and measuring. Behind the door on the left of the pic is my "Processing area"....I have two tumblers that run and sifting apparatus to separate media from the shells. This is a WORK in progress.....the room is 24' by 20' and I will be making a bench that is dedicated to firearm cleaning/maintenance in the next month.... Plans for finishing off the space are getting closer to fruition.....finding the time to "make it pretty" will come soon but for now this works just great for me! Cheers, Mike :) |
|
|
|
OH, USA
|
[#12]
Here is my closet that I converted into my reloading station. Adding on to it as we speak though. |
|
|
|
[#13]
Just getting started. 5' steel bench and Dillon XL650. First setup will be for 9mm, then 45ACP. Once I've cut my teeth, I'll move into .223 / .308.

|
|
|
|
|
[#14]
|
|
|
|
|
[Last Edit: MikeSH]
[#15]
Here is my mess,
The round you see is the 1st complete one out of my 550b. |
|
|
|
|
[#16]
Originally Posted By YoMoFo:
Here it is with some stain/poly all in one stff applied, and a few pieces parts here and there... my press is on backorder until june, so it's a matter of stocking up on components until then http://i1325.photobucket.com/albums/u636/SixPack_Saturday/20130313_162233_zpsd6d3f4de.jpg I really like how that turned out, especially the recessed ledge. I want one very similar to your bench. Other than a top of 30" and a ledge of 18", what are the other dimensions of your bench if you don't mind? |
|
|
|
IN, USA
|
[#17]


|
|
|
|
[#18]
Originally Posted By mlp1911: http://i247.photobucket.com/albums/gg148/mlp1911/DSCN2767_zps57a4dba2.jpg http://i247.photobucket.com/albums/gg148/mlp1911/DSCN2770_zpsea137b89.jpg That is a beautiful workspace! |
|
|
|
|
[#19]
Originally Posted By eric10mm:
I have a question for the guys who have sections of T-rail imbedded into their benches and their presses mounted on pieces of material. Any concerns with all that leverage in the press breaking the T-rail mounting hardware? I was only slightly concerned about the hardware at first. My real big concern was the hardware pulling through the top material. So, fender washers underneath seemed like a good idea. After two years of some pretty hard jobs, the t-rails have been solid. I no longer have any concerns. I did use the double track and put the two track down, with one track up. That way, I was able to double the number of bolts. Don't know if this was necessary, but it definitely provides more surface area for the track in the channel. |
|
|
|
|
[#20]
Originally Posted By mlp1911:
http://i247.photobucket.com/albums/gg148/mlp1911/DSCN2767_zps57a4dba2.jpg http://i247.photobucket.com/albums/gg148/mlp1911/DSCN2770_zpsea137b89.jpg Holy carp!! That's awesome! That would be a great environment to spend many many hours in! |
|
|
|
IN, USA
|
[#21]
Originally Posted By goodrat:
Originally Posted By mlp1911:
http://i247.photobucket.com/albums/gg148/mlp1911/DSCN2767_zps57a4dba2.jpg http://i247.photobucket.com/albums/gg148/mlp1911/DSCN2770_zpsea137b89.jpg Holy carp!! That's awesome! That would be a great environment to spend many many hours in! Thanks. It's been a great winter project. |
|
|
|
[#22]
Originally Posted By mlp1911:
Originally Posted By goodrat:
Originally Posted By mlp1911:
http://i247.photobucket.com/albums/gg148/mlp1911/DSCN2767_zps57a4dba2.jpg http://i247.photobucket.com/albums/gg148/mlp1911/DSCN2770_zpsea137b89.jpg Holy carp!! That's awesome! That would be a great environment to spend many many hours in! Thanks. It's been a great winter project. I like the strong mount for the RCBS Reloader Spec-5 press. Sweet. Did you make that? |
|
|
|
|
[#23]
Originally Posted By RugRat: Originally Posted By eric10mm: I have a question for the guys who have sections of T-rail imbedded into their benches and their presses mounted on pieces of material. Any concerns with all that leverage in the press breaking the T-rail mounting hardware? I was only slightly concerned about the hardware at first. My real big concern was the hardware pulling through the top material. So, fender washers underneath seemed like a good idea. After two years of some pretty hard jobs, the t-rails have been solid. I no longer have any concerns. I did use the double track and put the two track down, with one track up. That way, I was able to double the number of bolts. Don't know if this was necessary, but it definitely provides more surface area for the track in the channel. Thanks for the information. Could you post a pic of your installation, especially the tracks you used? |
|
|
|
|
[Last Edit: RLR350]
[#24]
Originally Posted By eric10mm:
Originally Posted By RugRat:
Originally Posted By eric10mm:
I have a question for the guys who have sections of T-rail imbedded into their benches and their presses mounted on pieces of material. Any concerns with all that leverage in the press breaking the T-rail mounting hardware? I was only slightly concerned about the hardware at first. My real big concern was the hardware pulling through the top material. So, fender washers underneath seemed like a good idea. After two years of some pretty hard jobs, the t-rails have been solid. I no longer have any concerns. I did use the double track and put the two track down, with one track up. That way, I was able to double the number of bolts. Don't know if this was necessary, but it definitely provides more surface area for the track in the channel. Thanks for the information. Could you post a pic of your installation, especially the tracks you used? I'd like to see your installation, too. I dado'd the bench and set the track in. I used drywall screws, but will probably change to through bolts, however, even the screws I used are doing fine. Here is a site for the t track. I just used the universal and cut it to lengths I needed. Rockwell ETA: If I were building a layered plywood bench top again I cut the top layer into sections allowing space for the rails instead of dadoing the spaces later. I'd make the t rails the depth of the whole bench (front to back) instead of just 12" like I did. Here is a picture of three. I have a total of four spaced 12" on center. The other one is under the loading blocks. 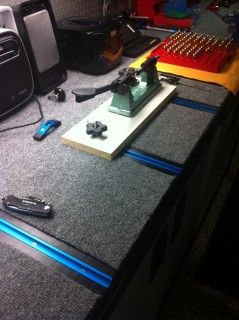
|
|
|
|
|
[#25]
Originally Posted By RLR350:
Originally Posted By eric10mm:
Originally Posted By RugRat:
Originally Posted By eric10mm:
I have a question for the guys who have sections of T-rail imbedded into their benches and their presses mounted on pieces of material. Any concerns with all that leverage in the press breaking the T-rail mounting hardware? I was only slightly concerned about the hardware at first. My real big concern was the hardware pulling through the top material. So, fender washers underneath seemed like a good idea. After two years of some pretty hard jobs, the t-rails have been solid. I no longer have any concerns. I did use the double track and put the two track down, with one track up. That way, I was able to double the number of bolts. Don't know if this was necessary, but it definitely provides more surface area for the track in the channel. Thanks for the information. Could you post a pic of your installation, especially the tracks you used? I'd like to see your installation, too. I dado'd the bench and set the track in. I used drywall screws, but will probably change to through bolts, however, even the screws I used are doing fine. Here is a site for the t track. I just used the universal and cut it to lengths I needed. Rockwell ETA: If I were building a layered plywood bench top again I cut the top layer into sections allowing space for the rails instead of dadoing the spaces later. I'd make the t rails the depth of the whole bench (front to back) instead of just 12" like I did. Here is a picture of three. I have a total of four spaced 12" on center. The other one is under the loading blocks. http://i369.photobucket.com/albums/oo134/rlr350/garage23.jpg Looks like you have carpet on your table. If you do, ever worry about static electricity? |
|
|
|
IN, USA
|
[#26]
Originally Posted By ThePontificator:
Originally Posted By mlp1911:
Originally Posted By goodrat:
Originally Posted By mlp1911:
http://i247.photobucket.com/albums/gg148/mlp1911/DSCN2767_zps57a4dba2.jpg http://i247.photobucket.com/albums/gg148/mlp1911/DSCN2770_zpsea137b89.jpg Holy carp!! That's awesome! That would be a great environment to spend many many hours in! Thanks. It's been a great winter project. I like the strong mount for the RCBS Reloader Spec-5 press. Sweet. Did you make that? Thanks. I actually made both strong mounts. The 650 stays mounted on the bench and the RCBS gets removed from the mounting plate when not in use. |
|
|
FL, USA
|
[#27]
Originally Posted By TannerB:
Finally finished my bench up this week. <a href="http://imageshack.us/photo/my-images/40/img20130324201631.jpg/" target="_blank">http://img40.imageshack.us/img40/9040/img20130324201631.jpg</a> Uploaded with ImageShack.us I really like those BCM posters. Think ill have to order them for my room. |
|
|
|
[#28]
Originally Posted By RLR350:
Originally Posted By eric10mm:
Originally Posted By RugRat:
Originally Posted By eric10mm:
I have a question for the guys who have sections of T-rail imbedded into their benches and their presses mounted on pieces of material. Any concerns with all that leverage in the press breaking the T-rail mounting hardware? I was only slightly concerned about the hardware at first. My real big concern was the hardware pulling through the top material. So, fender washers underneath seemed like a good idea. After two years of some pretty hard jobs, the t-rails have been solid. I no longer have any concerns. I did use the double track and put the two track down, with one track up. That way, I was able to double the number of bolts. Don't know if this was necessary, but it definitely provides more surface area for the track in the channel. Thanks for the information. Could you post a pic of your installation, especially the tracks you used? I'd like to see your installation, too. I dado'd the bench and set the track in. I used drywall screws, but will probably change to through bolts, however, even the screws I used are doing fine. Here is a site for the t track. I just used the universal and cut it to lengths I needed. Rockwell ETA: If I were building a layered plywood bench top again I cut the top layer into sections allowing space for the rails instead of dadoing the spaces later. I'd make the t rails the depth of the whole bench (front to back) instead of just 12" like I did. Here is a picture of three. I have a total of four spaced 12" on center. The other one is under the loading blocks. http://i369.photobucket.com/albums/oo134/rlr350/garage23.jpg I think this might be the solution I was looking for. I currently have my case trimmer mounted on top of a piece of 2x4, mounted on my desk, and it is always in the way. Would these tracks hold up well enough for a press? Or is light duty its limitation? |
|
|
|
|
[Last Edit: ThePontificator]
[#29]
Portable reloading bench for home and range use:


|
|
|
|
|
[#30]

|
|
|
|
|
[#31]
trimmer type?
|
|
|
|
|
[#32]
|
|
|
|
CO, USA
|
[#33]
My playroom.

|
|
|
|
[#34]
where did you get that sweet poster? must have |
|
|
|
IL, USA
|
[#35]
Originally Posted By ozzie839:
where did you get that sweet poster? must have http://www.ebay.com/itm/American-Standard-Bullet-Poster-Cartridge-Comparison-Guide-/321050044328?pt=LH_DefaultDomain_0&hash=item4ac012e7a8 |
|
|
CO, USA
|
[#36]
Originally Posted By ozzie839:
where did you get that sweet poster? must have The site I got it from is all screwed up now evidently, but it looks like Cabela's has it now as well. Here |
|
|
|
[Last Edit: ozzie839]
[#37]
The site I got it from is all screwed up now evidently, but it looks like Cabela's has it now as well.
thanks both of you, def. need that for my room, I spent some time coming up with a future bench for when I get a house, i will post some pictures of it in the morning and some of my actual bench i have now very soon ETA: ran out and got a picture, crappy cell phone, and I am no where near where i want to be, not pictured is my case prep station, pictured is my Lee pro 1000 on a inline stand 
ETA #2: here is the bench design I've been working on, it will be sturdier than the rock of Gibraltar, the middle section will be for gun cleaning and working on guns, the right section for pistol and shotgun pressed and the left side strictly for rifle set up, each side will have its own case prep area, and the cabinets will have locks to keep people (and future kids out) from supplies and tools, I won't be building this for probably a year or 2 but when i do it will be awesome, between the cabinets and bench is pegboard 
|
|
|
|
VA, USA
|
[#38]
The apartment special...
 |
|
|
PA, USA
|
[#39]
the basement is finished which means I'm now in a large closet.

|
|
|
|
[#40]
Originally Posted By LieutenantG:
The apartment special... http://i1284.photobucket.com/albums/a573/Joseph_Grimison/photo_zps3c68b8da.jpg I like the holes drilled out for the dies. Do you slide the bench forward or to the right to allow handle clearance? How high off the bottom piece is the top of the upper shelf? |
|
|
|
VA, USA
|
[#41]
Yeah I slide it forward when I use it. I forget how high exactly the top shelf it just high enough for the handle to go all the way down.
Originally Posted By ThePontificator: Originally Posted By LieutenantG: The apartment special... http://i1284.photobucket.com/albums/a573/Joseph_Grimison/photo_zps3c68b8da.jpg I like the holes drilled out for the dies. Do you slide the bench forward or to the right to allow handle clearance? How high off the bottom piece is the top of the upper shelf? |
|
|
IL, USA
|
[#42]
Mines in my garage but its more of a man cave than a garage, theres never a car in it


My stand I made for the Lee and my led light rig job lol 
|
|
|
|
[#43]
Just finished today, still need bins and holders and a trimmer station, using a cordless drill atm.
I like a large work area. Shitty cell pic. 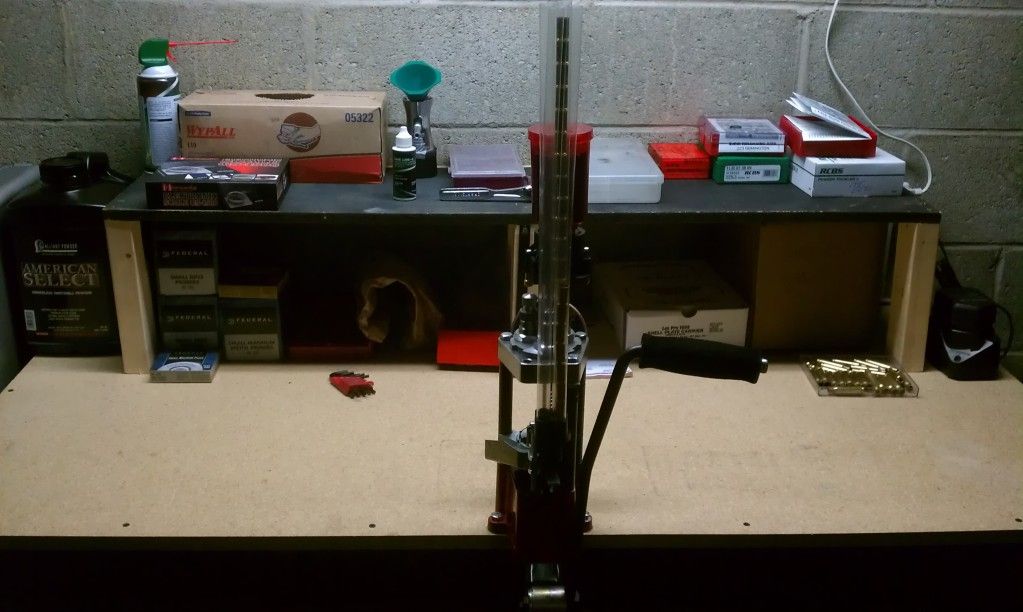
|
|
|
|
|
[#44]
Originally Posted By full_metal_jacket:
Mines in my garage but its more of a man cave than a garage, theres never a car in it <a href="http://s531.photobucket.com/user/ryan20021982/media/IMG_4421.jpg.html" target="_blank">http://i531.photobucket.com/albums/dd352/ryan20021982/IMG_4421.jpg</a> <a href="http://s531.photobucket.com/user/ryan20021982/media/IMG_4422.jpg.html" target="_blank">http://i531.photobucket.com/albums/dd352/ryan20021982/IMG_4422.jpg</a> My stand I made for the Lee and my led light rig job lol <a href="http://s531.photobucket.com/user/ryan20021982/media/IMG_4423.jpg.html" target="_blank">http://i531.photobucket.com/albums/dd352/ryan20021982/IMG_4423.jpg</a> Dang, dude! Where's the wet bar and recliner? . That is an awesome setup.
|
|
|
|
|
[#45]
Got my 1050 last week, my Dad built me a riser so I could set it back off the bench and get some height as I am 6'2" so it was a little low for me, did the same with my Rockchucker.


1st rounds, 124gr Rainers over 3.2gr Titegroup. 

|
|
|
|
|
[#46]
Originally Posted By coryumph: Originally Posted By ozzie839: where did you get that sweet poster? must have The site I got it from is all screwed up now evidently, but it looks like Cabela's has it now as well. Here I bought one too . I got it off the Ebay site, but it looks cheaper at Cabela's. |
|
|
|
|
[#47]


Adding the rest of the Black and Decker set-up when I can. Its a start and I do not mind it one bit. The cabinet to the right is FULL of reloading equipment, I also added better lighting. |
|
|
|
AZ, USA
|
[#48]
Well this thread has been kind of stale for a while now. So I'll add my project to the mix.
It's not done and mounted yet but I've started on it and hope to have it hop this weekend! Went from this... 
To this... 
I've settled on some good outdoor indoor carpet, tightly woven and durable as a cover for the table. I did some research on static discharge and gunpowder explosions and found a lot of conjecture and theory but not much to suggest it's happened in the last 5-10 years. Then I cam across this little article and that settled the debate. Static Discharge and gun powder The link is for some reason not working for me this morning, but last night I read the article and the writer basically took black powder, smokeless powder and ground up versions of both and ran electrical current through and on top of them in a range of 10-40K volts (might have been watts, i can't remember) and the powder did nothing. If someone can do that, I have a hard time believing that static electricity can ignite the powder. The writters explanation was that modern powder is a better conductor of electricity due to graphite in the mix than anything. He further postulated that had the powder been hit by a current that had heat associated with it, then the heat would be the igniting factory not the electrical current. So back to the table. What are all the holes for I'm sure many of you are asking. Starting from bottom left the first set of holes are for my Dillon Super Swage to slide in and lock into positions, up top the two large holes are for some PVC tubes I made to hold long items. Back down to the oddly phallic shaped hole pattern (Not sure how that happened ) that will hold my single stage lee press with a hole for primers to fall through. Up top I have a cut out for wires or anything that needs to run down the back of the table and then back down to the right those holes are for my Hornady LNL AP and bullet feeder with another hold for the cords to run through. And then finally in the top right corner my super swage and single stage press will be store there when not in use and I made it easy to slide them in rather than having to take the bolts all the way out over and over again. |
|
|
|
[#49]
Originally Posted By ShootersElement:
Well this thread has been kind of stale for a while now. So I'll add my project to the mix. It's not done and mounted yet but I've started on it and hope to have it hop this weekend! Went from this... http://i62.photobucket.com/albums/h113/Seed_of_Ares/IMAG0247_zps013cc8ec.jpg To this... http://i62.photobucket.com/albums/h113/Seed_of_Ares/IMAG0251_zps8abd172e.jpg I've settled on some good outdoor indoor carpet, tightly woven and durable as a cover for the table. I did some research on static discharge and gunpowder explosions and found a lot of conjecture and theory but not much to suggest it's happened in the last 5-10 years. Then I cam across this little article and that settled the debate. Static Discharge and gun powder The link is for some reason not working for me this morning, but last night I read the article and the writer basically took black powder, smokeless powder and ground up versions of both and ran electrical current through and on top of them in a range of 10-40K volts (might have been watts, i can't remember) and the powder did nothing. If someone can do that, I have a hard time believing that static electricity can ignite the powder. The writters explanation was that modern powder is a better conductor of electricity due to graphite in the mix than anything. He further postulated that had the powder been hit by a current that had heat associated with it, then the heat would be the igniting factory not the electrical current. So back to the table. What are all the holes for I'm sure many of you are asking. Starting from bottom left the first set of holes are for my Dillon Super Swage to slide in and lock into positions, up top the two large holes are for some PVC tubes I made to hold long items. Back down to the oddly phallic shaped hole pattern (Not sure how that happened ) that will hold my single stage lee press with a hole for primers to fall through. Up top I have a cut out for wires or anything that needs to run down the back of the table and then back down to the right those holes are for my Hornady LNL AP and bullet feeder with another hold for the cords to run through. And then finally in the top right corner my super swage and single stage press will be store there when not in use and I made it easy to slide them in rather than having to take the bolts all the way out over and over again. Thats pretty cool, I'm interested to see the end result. Right now my benches are just plywood topped, but I have been giving some thought to a plug-in type setup, maybe something with rails. Unfortunately I am not in the position to make a steel top like what you did |
|
|
|
|
[#50]
Originally Posted By ShootersElement:
Well this thread has been kind of stale for a while now. So I'll add my project to the mix. It's not done and mounted yet but I've started on it and hope to have it hop this weekend! Went from this... http://i62.photobucket.com/albums/h113/Seed_of_Ares/IMAG0247_zps013cc8ec.jpg To this... http://i62.photobucket.com/albums/h113/Seed_of_Ares/IMAG0251_zps8abd172e.jpg I've settled on some good outdoor indoor carpet, tightly woven and durable as a cover for the table. I did some research on static discharge and gunpowder explosions and found a lot of conjecture and theory but not much to suggest it's happened in the last 5-10 years. Then I cam across this little article and that settled the debate. Static Discharge and gun powder The link is for some reason not working for me this morning, but last night I read the article and the writer basically took black powder, smokeless powder and ground up versions of both and ran electrical current through and on top of them in a range of 10-40K volts (might have been watts, i can't remember) and the powder did nothing. If someone can do that, I have a hard time believing that static electricity can ignite the powder. The writters explanation was that modern powder is a better conductor of electricity due to graphite in the mix than anything. He further postulated that had the powder been hit by a current that had heat associated with it, then the heat would be the igniting factory not the electrical current. So back to the table. What are all the holes for I'm sure many of you are asking. Starting from bottom left the first set of holes are for my Dillon Super Swage to slide in and lock into positions, up top the two large holes are for some PVC tubes I made to hold long items. Back down to the oddly phallic shaped hole pattern (Not sure how that happened ) that will hold my single stage lee press with a hole for primers to fall through. Up top I have a cut out for wires or anything that needs to run down the back of the table and then back down to the right those holes are for my Hornady LNL AP and bullet feeder with another hold for the cords to run through. And then finally in the top right corner my super swage and single stage press will be store there when not in use and I made it easy to slide them in rather than having to take the bolts all the way out over and over again. My understanding is that people are more concerned about primer ignition than powder ignition. Someone correct me if that's wrong. Table looks cool! |
|
|
|
 Win a FREE Membership!
Sign up for the ARFCOM weekly newsletter and be entered to win a free ARFCOM membership. One new winner* is announced every week!
You will receive an email every Friday morning featuring the latest chatter from the hottest topics, breaking news surrounding legislation, as well as exclusive deals only available to ARFCOM email subscribers.

AR15.COM is the world's largest firearm community and is a gathering place for firearm enthusiasts of all types.
From hunters and military members, to competition shooters and general firearm enthusiasts, we welcome anyone who values and respects the way of the firearm.

Subscribe to our monthly Newsletter to receive firearm news, product discounts from your favorite Industry Partners, and more.
Copyright © 1996-2024 AR15.COM LLC. All Rights Reserved.
Any use of this content without express written consent is prohibited.
AR15.Com reserves the right to overwrite or replace any affiliate, commercial, or monetizable links, posted by users, with our own.


