SC, USA
|
[#1]
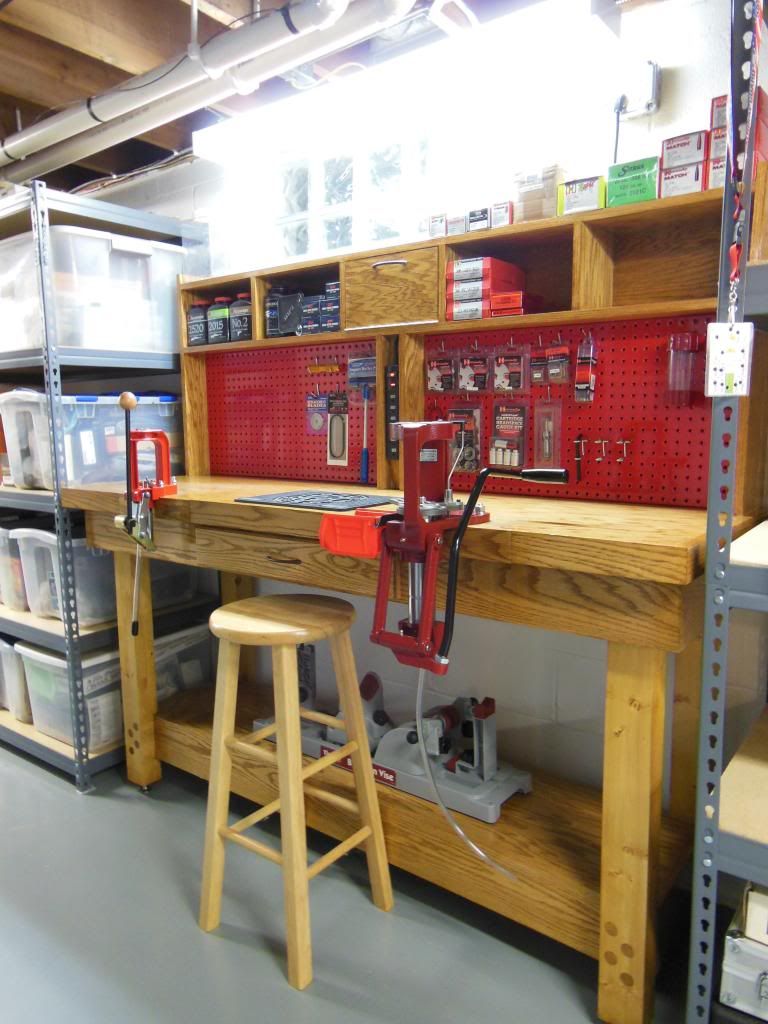
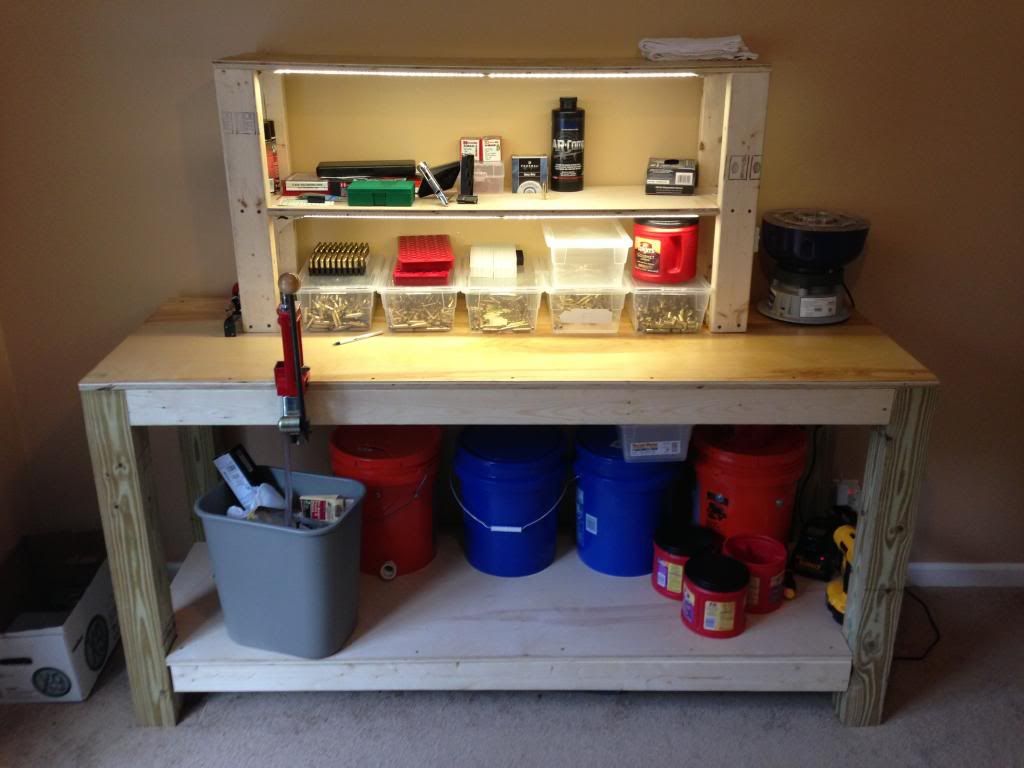
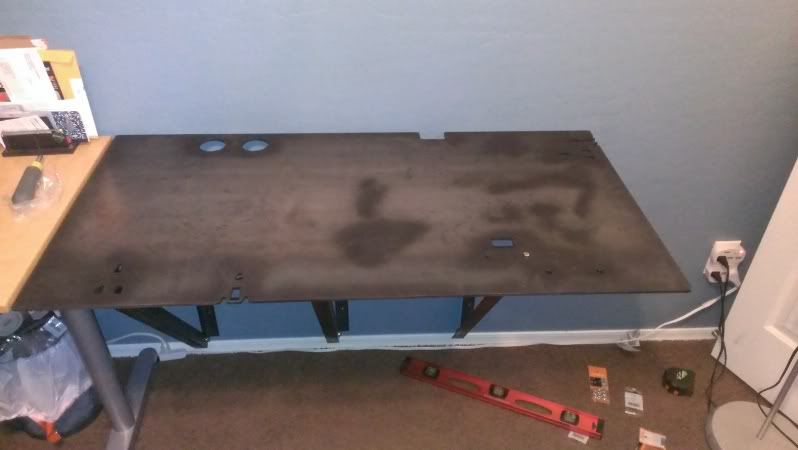
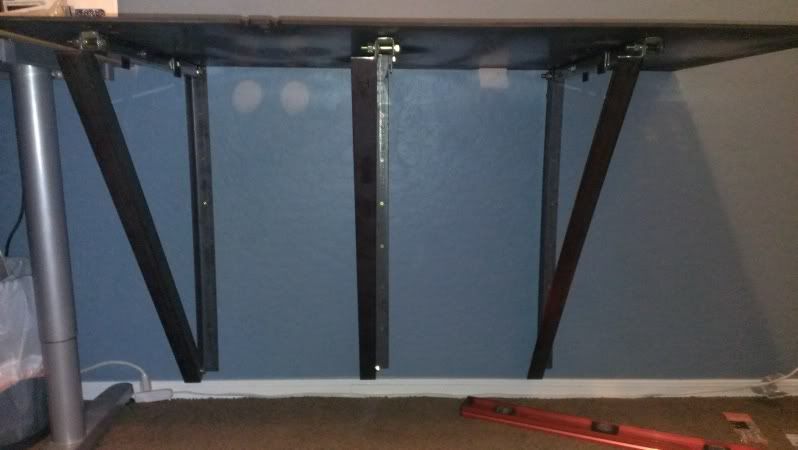
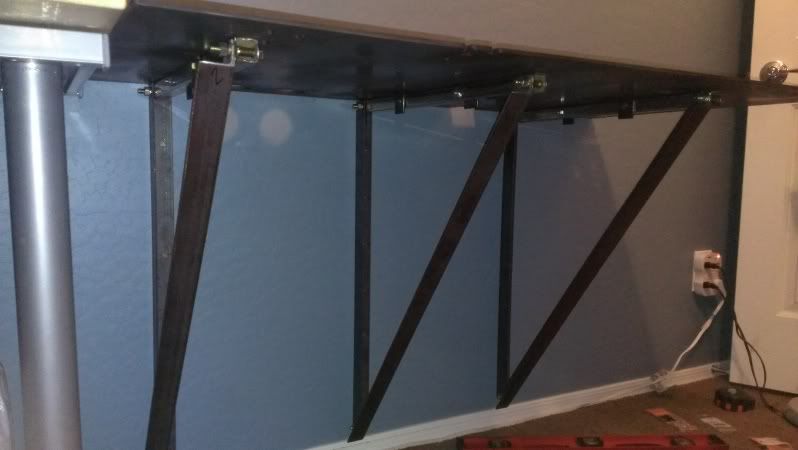
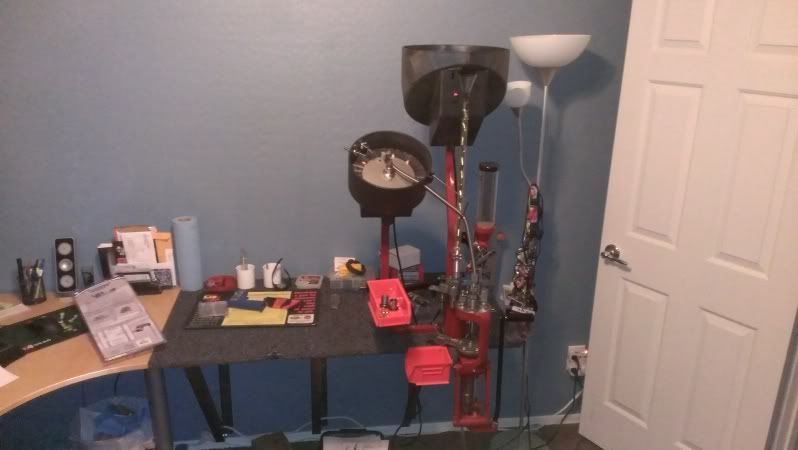
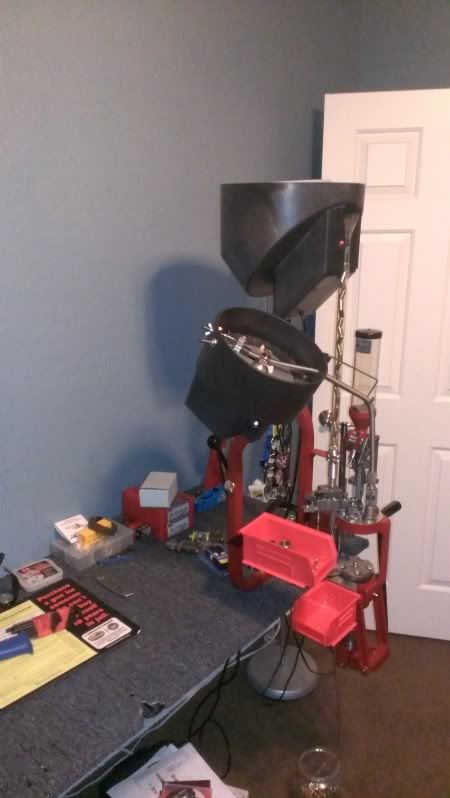
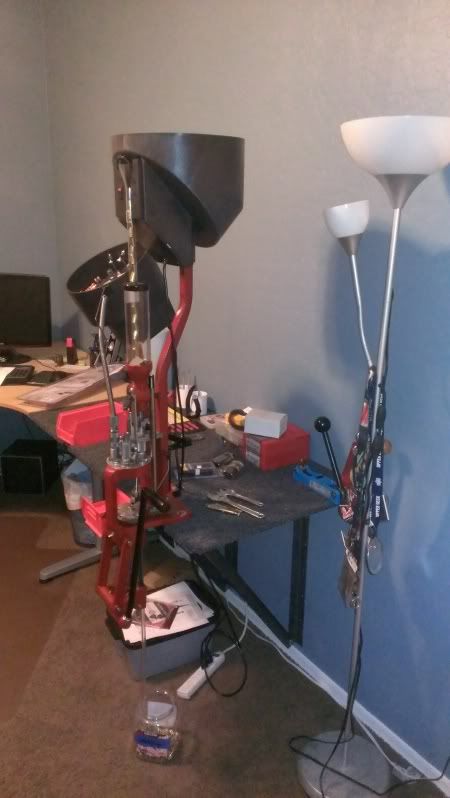
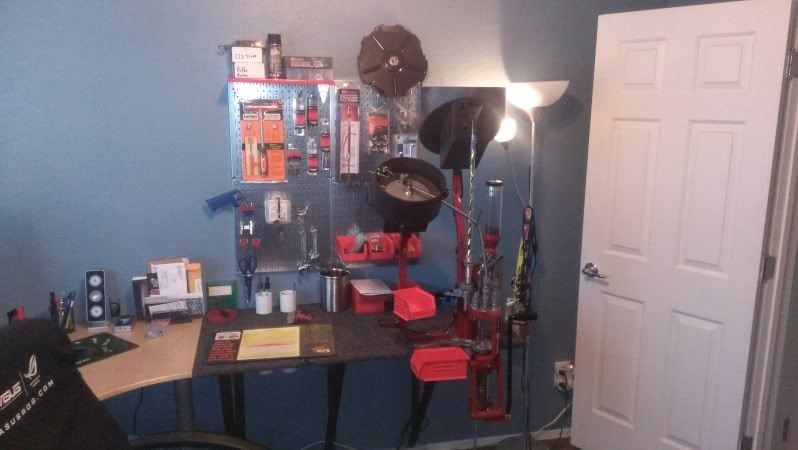
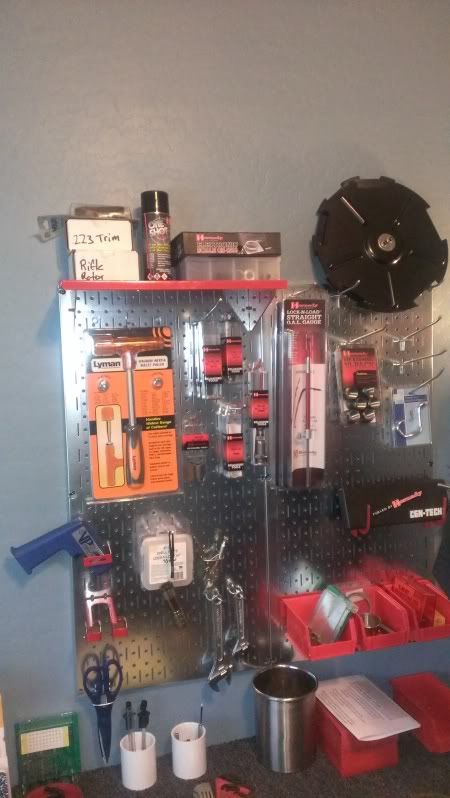
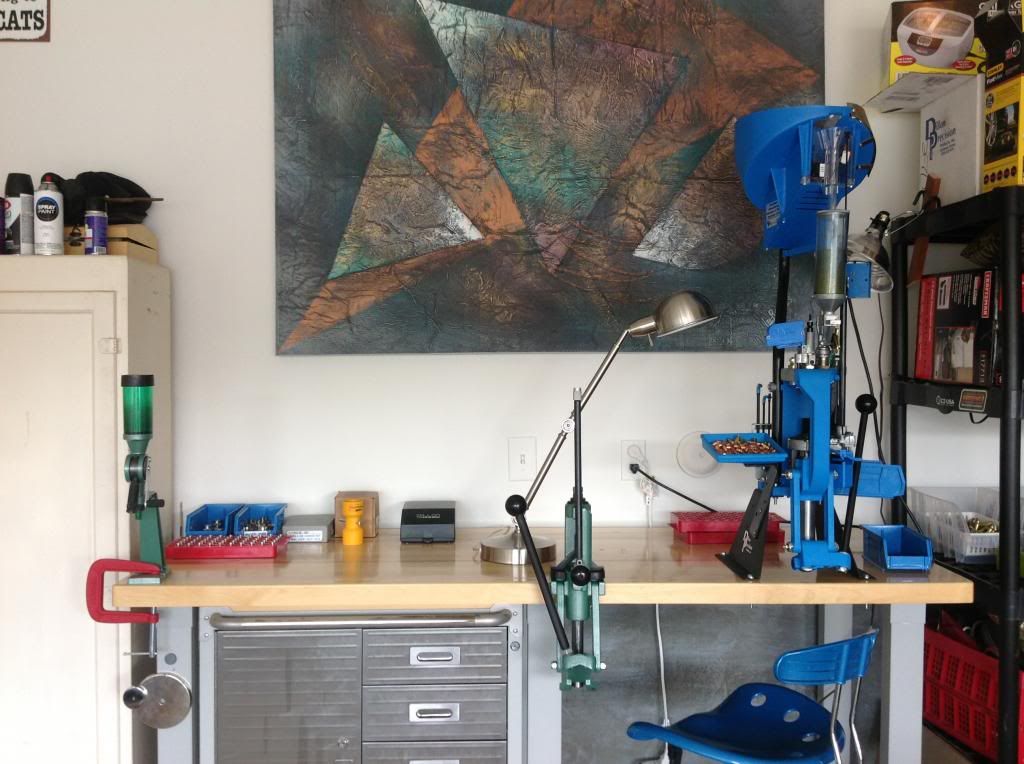
Just got into reloading built the bench and set everything up this week. Around $80 in lumber and $20 for lighting. First time I ever built something like this, it was fun and now I have plenty of room to work.
 " /> " />
|
|
|
AZ, USA
|
[#2]
Originally Posted By Burbs83:
Just got into reloading built the bench and set everything up this week. Around $80 in lumber and $20 for lighting. First time I ever built something like this, it was fun and now I have plenty of room to work.http://<a href=http://i274.photobucket.com/albums/jj252/Burbs83/image_zps79ed8d32.jpg</a>" /> Looks good, what press is that? |
|
|
|
[#3]
Originally Posted By ShootersElement:
Originally Posted By Burbs83:
Just got into reloading built the bench and set everything up this week. Around $80 in lumber and $20 for lighting. First time I ever built something like this, it was fun and now I have plenty of room to work.http://<a href=http://i274.photobucket.com/albums/jj252/Burbs83/image_zps79ed8d32.jpg</a>" /> Looks good, what press is that? Lee Challenger Breech Lock single stage press http://www.midwayusa.com/product/176078/lee-challenger-breech-lock-single-stage-press |
|
|
|
NC, USA
|
[#4]
ESD, or Electro-Static-Discharge is totally dependent on the difference of potential between two conductive surfaces. The potential is held as a charge of electrons and the conductive surfaces can be a coating of electrons on a non-conductive material, essentially known as a capacitor.
The discharge is measured in Volts (Potential or Pressure), Amps/Current (Strength or Volume) and Resistance (Discharge Time). A normal/general static charge potential is based on many factors including humidity, properties of the static generators, etc. Just moving ones arm inside a shirt to brush ones hair can generate a potential of over 13,000 volts. Scooting across a poly carpet can generate a potential of 300,000 volts! But it is not the Voltage that contains all of the energy of the Static Discharge. It is also a combination of the amount of electrons available and the rate at which they discharge the difference of potential. An example is a lightning bolt. That is just a huge static discharge based on a huge potential of power. Power, or Watts is a mathematical formula of the Voltage times the Current in Amps. In comparison, a static discharge from shuffling across a poly carpet is very small when compared to a lightning bolt. Having a huge voltage without much current is what we experience in our average static shock. The Voltage is not what stops your heart, it's the amount of current. The current in a static shock is very small. Therefore it will generate very little heat (power). Heat would be the primary reason for a static discharge to ignite smokeless powder or a primer. The heat would have to be intense enough and of long enough in duration to cause the powder or primer to ignite. The rate of discharge also plays an important role on its heat potential. A slow steady discharge caused by resistance will not generate the heat that an immediate zero resistance discharge would cause. Is it possible? Could a bolt of lightning ignite gun powder or primers? Yes it could, but the conditions for an everyday type static zap would have to be abnormally large and of specific values for a static shock to ignite gun powder in its solid state. A static shock occurs because of the difference in potential between two objects. If one object has a 100,000 volt potential related to ground and another object has 100,000 volt potential related to ground, Zero volts potential exist between the two objects and no static discharge will occur between the two objects. Grounding objects discharges the static to make the difference of potential between the objects at zero potential. Ground is a common electrical reference but it could be anything that makes the difference of potential between objects zero. So, if you roll around on new carpeting with a chair or shuffle your feet on carpet, etc. it is possible that you could generate enough static potential in the right circumstances to ignite a primer or powder. But it is not something that will happen readily or frequently. It would be considered a rare instance. Possible, but not probable. Remember that smokeless powder will burn, not explode. I personally have grounded my bench and press. I use an alligator clip to clip on my press with a wire to the electrical outlet ground. |
|
|
|
[#5]
This is a thread about reloading benches. That's the topic for this thread.
If you want to post about static electricity, start a thread and discuss. But not in this thread. dryflash3
|
|
|
|
AZ, USA
|
[Last Edit: dryflash3]
[#6]
Originally Posted By dryflash3: This is a thread about reloading benches. That's the topic for this thread. If you want to post about static electricity, start a thread and discuss. But not in this thread. dryflash3 Just for clarification, the above user was replying to my post about my reloading bench being metal and the chances of static electricity. So I guess I got things off track a little, so my apologies. Why doesn't matter, that post is way off topic in this thread. dryflash3 |
|
|
TX, USA
|
[Last Edit: number1olddog]
[#7]

|
|
|
|
[Last Edit: 98cobra]
[#8]
Sold the above autodrive . 
Current look of the reloading cave |
|
|
|
|
[#9]
Originally Posted By 98cobra:
http://i74.photobucket.com/albums/i243/98Cobras/20130329_185526.jpg Sold the above autodrive .http://i74.photobucket.com/albums/i243/98Cobras/20130502_000713.jpg Current look of the reloading cave Sweet mother of God |
|
|
|
|
[Last Edit: DonOhio39]
[#10]
Not nearly as fancy as some of the set ups I've seen in this thread but it gets the job done.

The base of the bench was an old kitchen counter that I repurposed for my needs about 10 years ago. The place where the white pad is used to be where the sink was located. I originally intended to coat the new top with poly, but I had an upcoming match and needed to get some loading done. Shit happens, right? The press is mounted on a double thickness of 3/4" ply and secured to the bench with 3 threaded knobs that screw into T-Nuts under the benchtop. I've got a Dillon SDB that mounts the same way. Not as elegant as the slide outs in some of the earlier posts, but functional. Same basic type setup for the lubersizer. BTW, the c-clamp hanging on the right side of the press is just there to be out of the way, serves no use until I need it I just put up the shelves so my dies would be handier to reach, and clear some space in my metal shelving unit on the opposite wall. I COULD get some space by getting rid of the mini-fridge, but, not gonna happen! This thread kind of kickstarted me to tidy up a little and add the shelves, that's OK, I didn't need that money for anything else Don in Ohio |
|
|
|
|
[#11]
Originally Posted By DonOhio39:
Not nearly as fancy as some of the set ups I've seen in this thread but it gets the job done. http://www.hunt101.com/data/556/medium/reloading_bench1.jpg The base of the bench was an old kitchen counter that I repurposed for my needs about 10 years ago. The place where the white pad is used to be where the sink was located. I originally intended to coat the new top with poly, but I had an upcoming match and needed to get some loading done. Shit happens, right? The press is mounted on a double thickness of 3/4" ply and secured to the bench with 3 threaded knobs that screw into T-Nuts under the benchtop. I've got a Dillon SDB that mounts the same way. Not as elegant as the slide outs in some of the earlier posts, but functional. Same basic type setup for the lubersizer. BTW, the c-clamp hanging on the right side of the press is just there to be out of the way, serves no use until I need it I just put up the shelves so my dies would be handier to reach, and clear some space in my metal shelving unit on the opposite wall. I COULD get some space by getting rid of the mini-fridge, but, not gonna happen! This thread kind of kickstarted me to tidy up a little and add the shelves, that's OK, I didn't need that money for anything else Don in Ohio Mini-fridge |
|
|
|
AZ, USA
|
[#12]
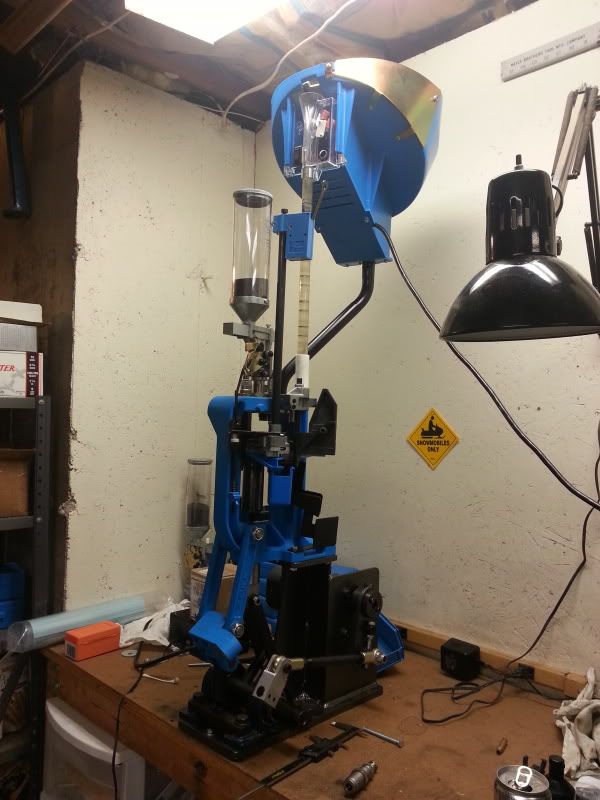
So I finally got my press set up on my metal bench. I'm really digging it so far. I'm not done with this yet, but it's workable at this point. Next is some metal peg board I have and some more storage and then cleaning it up to make it look nicer.

|
|
|
NY, USA
|
[#13]
bump to top
|
|
|
AZ, USA
|
[Last Edit: ShootersElement]
[#14]
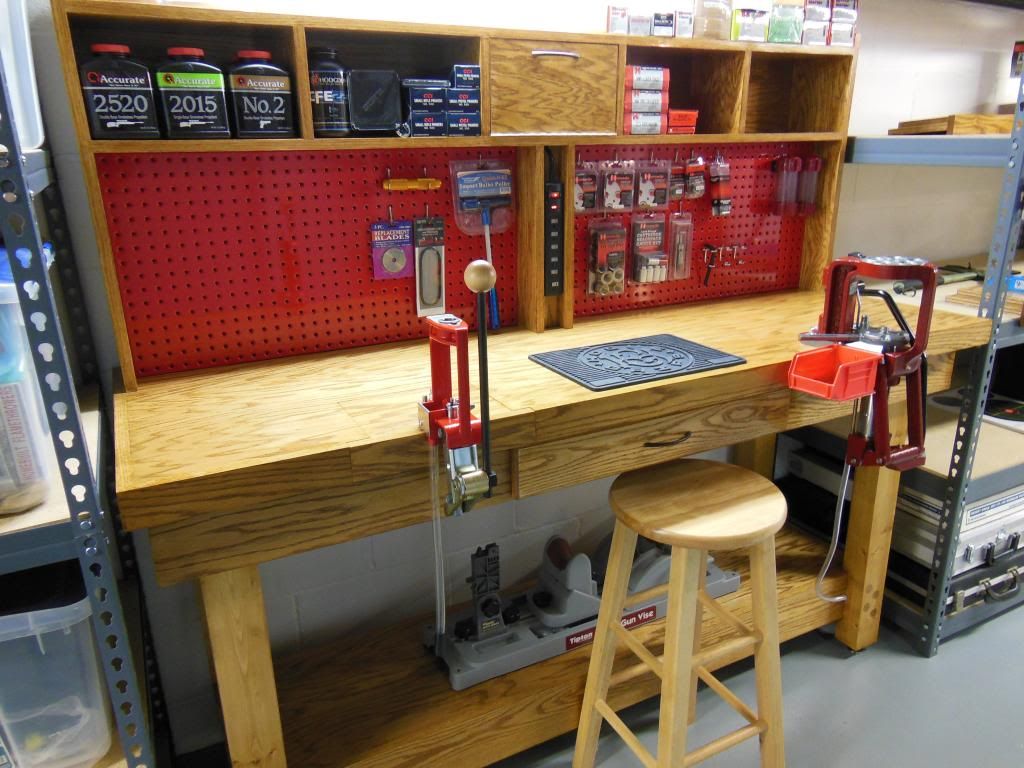
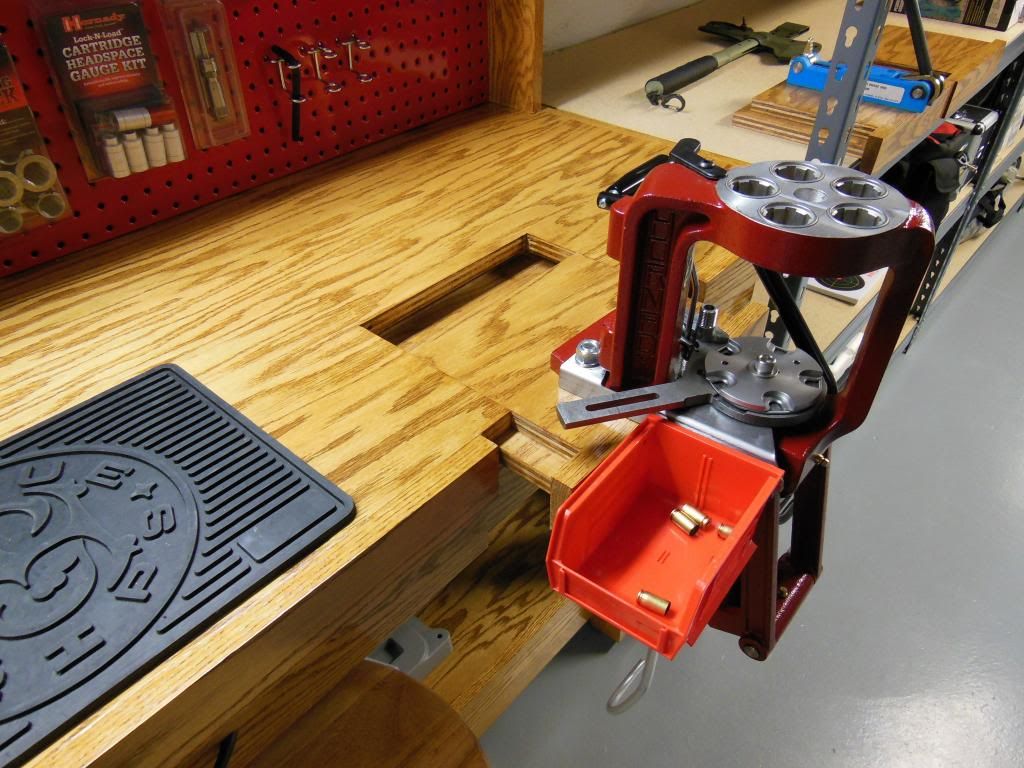
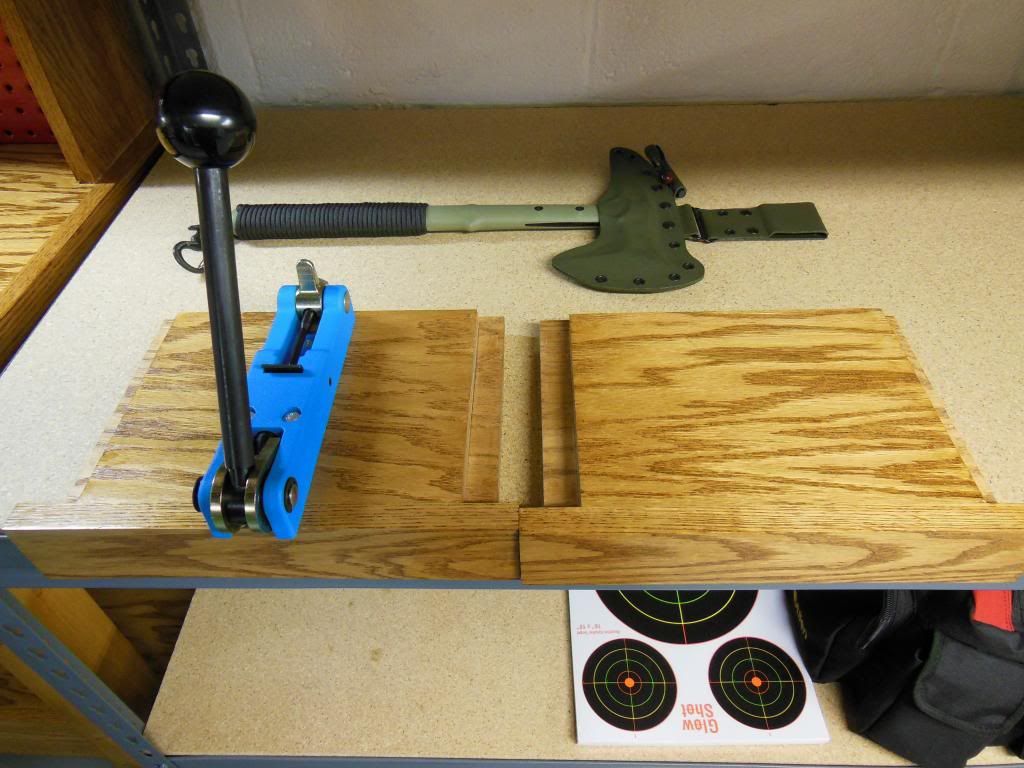
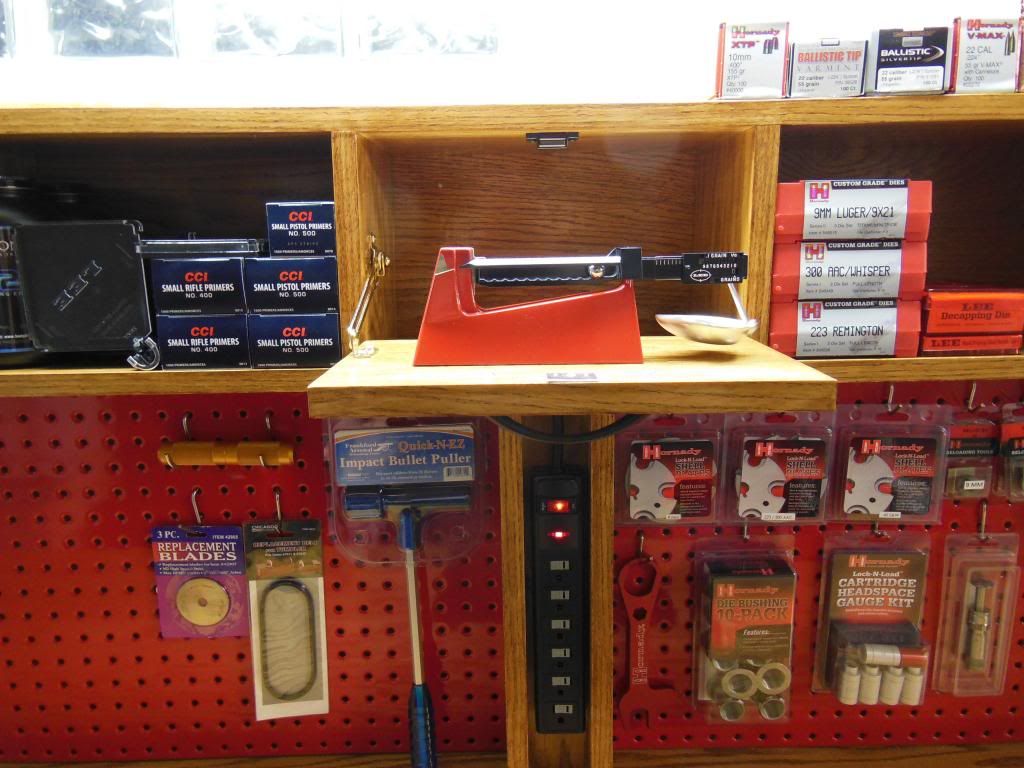
Final set up config:
Here's my single stage and my swage tool. 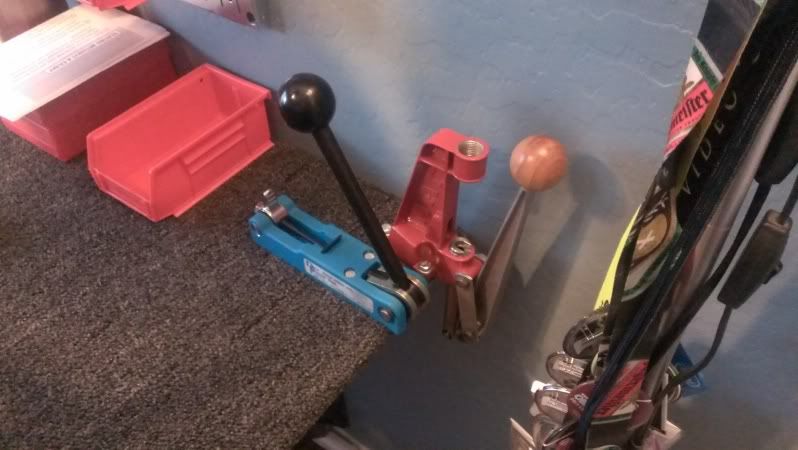
|
|
|
PA, USA
|
[#15]
Originally Posted By 98cobra:
http://i74.photobucket.com/albums/i243/98Cobras/20130329_185526.jpg Sold the above autodrive .http://i74.photobucket.com/albums/i243/98Cobras/20130502_000713.jpg Current look of the reloading cave Wow!! What would cost more, my divorice or your reloading room? |
|
|
|
[Last Edit: TheBigAR2003]
[#16]
Just got my reloading area setup but havent actually loaded any rounds yet i still need to find some powder i have everything else i need
I bought the lee single stage anniversary kit 
|
|
|
|
|
[#18]
Originally Posted By samurai84:
I used this thread for some ideas for my bench so I thought I would share now that it's finally finished. <a href="http://s1319.photobucket.com/user/samurai8400/media/Reloading%20Bench/DSCN0032_zps1d06f48c.jpg.html" target="_blank">http://i1319.photobucket.com/albums/t673/samurai8400/Reloading%20Bench/DSCN0032_zps1d06f48c.jpg</a> <a href="http://s1319.photobucket.com/user/samurai8400/media/Reloading%20Bench/DSCN0033_zps0d8e6e5c.jpg.html" target="_blank">http://i1319.photobucket.com/albums/t673/samurai8400/Reloading%20Bench/DSCN0033_zps0d8e6e5c.jpg</a> It has removable inserts for different pieces of equipment. <a href="http://s1319.photobucket.com/user/samurai8400/media/Reloading%20Bench/DSCN0034_zps8a1e3253.jpg.html" target="_blank">http://i1319.photobucket.com/albums/t673/samurai8400/Reloading%20Bench/DSCN0034_zps8a1e3253.jpg</a> <a href="http://s1319.photobucket.com/user/samurai8400/media/Reloading%20Bench/DSCN0035_zps5546a254.jpg.html" target="_blank">http://i1319.photobucket.com/albums/t673/samurai8400/Reloading%20Bench/DSCN0035_zps5546a254.jpg</a> Left a few inserts blank to turn it back into a plain top bench when needed. <a href="http://s1319.photobucket.com/user/samurai8400/media/Reloading%20Bench/DSCN0031_zps60382deb.jpg.html" target="_blank">http://i1319.photobucket.com/albums/t673/samurai8400/Reloading%20Bench/DSCN0031_zps60382deb.jpg</a> Put the scale at eye level so I wouldn't have to bend over to check it. <a href="http://s1319.photobucket.com/user/samurai8400/media/Reloading%20Bench/DSCN0036_zpsd70bbd0d.jpg.html" target="_blank">http://i1319.photobucket.com/albums/t673/samurai8400/Reloading%20Bench/DSCN0036_zpsd70bbd0d.jpg</a> <a href="http://s1319.photobucket.com/user/samurai8400/media/Reloading%20Bench/DSCN0037_zps282ded9f.jpg.html" target="_blank">http://i1319.photobucket.com/albums/t673/samurai8400/Reloading%20Bench/DSCN0037_zps282ded9f.jpg</a> outstanding bench sir 
|
|
|
|
TX, USA
|
[#19]
Originally Posted By samurai84:
I used this thread for some ideas for my bench so I thought I would share now that it's finally finished. <a href="http://s1319.photobucket.com/user/samurai8400/media/Reloading%20Bench/DSCN0032_zps1d06f48c.jpg.html" target="_blank">http://i1319.photobucket.com/albums/t673/samurai8400/Reloading%20Bench/DSCN0032_zps1d06f48c.jpg</a> <a href="http://s1319.photobucket.com/user/samurai8400/media/Reloading%20Bench/DSCN0033_zps0d8e6e5c.jpg.html" target="_blank">http://i1319.photobucket.com/albums/t673/samurai8400/Reloading%20Bench/DSCN0033_zps0d8e6e5c.jpg</a> It has removable inserts for different pieces of equipment. <a href="http://s1319.photobucket.com/user/samurai8400/media/Reloading%20Bench/DSCN0034_zps8a1e3253.jpg.html" target="_blank">http://i1319.photobucket.com/albums/t673/samurai8400/Reloading%20Bench/DSCN0034_zps8a1e3253.jpg</a> <a href="http://s1319.photobucket.com/user/samurai8400/media/Reloading%20Bench/DSCN0035_zps5546a254.jpg.html" target="_blank">http://i1319.photobucket.com/albums/t673/samurai8400/Reloading%20Bench/DSCN0035_zps5546a254.jpg</a> Left a few inserts blank to turn it back into a plain top bench when needed. <a href="http://s1319.photobucket.com/user/samurai8400/media/Reloading%20Bench/DSCN0031_zps60382deb.jpg.html" target="_blank">http://i1319.photobucket.com/albums/t673/samurai8400/Reloading%20Bench/DSCN0031_zps60382deb.jpg</a> Put the scale at eye level so I wouldn't have to bend over to check it. <a href="http://s1319.photobucket.com/user/samurai8400/media/Reloading%20Bench/DSCN0036_zpsd70bbd0d.jpg.html" target="_blank">http://i1319.photobucket.com/albums/t673/samurai8400/Reloading%20Bench/DSCN0036_zpsd70bbd0d.jpg</a> <a href="http://s1319.photobucket.com/user/samurai8400/media/Reloading%20Bench/DSCN0037_zps282ded9f.jpg.html" target="_blank">http://i1319.photobucket.com/albums/t673/samurai8400/Reloading%20Bench/DSCN0037_zps282ded9f.jpg</a> Amazing Bench, I have been watching this thread for ideas and for sure your is the best.. any chance of getting plans? |
|
|
|
[#20]
Beautiful bench samurai84. Some constructive criticism, IMHO.
The powder scale: Being that high you might drop some powder when traveling from the dispenser which I assume will be on the table also when you upgrade to a digital scale, it might be too high to place the digital scale there. I'd probably just have an empty slot there. I'd put the powder storage down on the lower shelf and save the upper area for primers. Bullets down below too, wherever you are keeping them. |
|
|
|
|
[#21]
Originally Posted By samurai84:
 very creative |
|
|
|
|
[Last Edit: Tom488]
[#22]
What an awesome-looking bench! Very well done. Any problem with the tool inserts trying to walk out on you while you're using the presses? What about some holes drilled through the bench top, on either side of the insert slot, with corresponding holes drilled through the inserts, so that when the insert is in place, you can drop in some pins/dowels to lock the insert in place? The same way you lock in a tool head into a Dillon or RCBS progressive press.
|
|
|
|
|
[#23]
Nice job samurai84, very well done.
I'm curious about how well the inserts stay in place (just like him ^^ ). |
|
|
|
|
[#24]
Originally Posted By ozzie839:
Originally Posted By samurai84:
I used this thread for some ideas for my bench so I thought I would share now that it's finally finished. <a href="http://s1319.photobucket.com/user/samurai8400/media/Reloading%20Bench/DSCN0032_zps1d06f48c.jpg.html" target="_blank">http://i1319.photobucket.com/albums/t673/samurai8400/Reloading%20Bench/DSCN0032_zps1d06f48c.jpg</a> <a href="http://s1319.photobucket.com/user/samurai8400/media/Reloading%20Bench/DSCN0033_zps0d8e6e5c.jpg.html" target="_blank">http://i1319.photobucket.com/albums/t673/samurai8400/Reloading%20Bench/DSCN0033_zps0d8e6e5c.jpg</a> It has removable inserts for different pieces of equipment. <a href="http://s1319.photobucket.com/user/samurai8400/media/Reloading%20Bench/DSCN0034_zps8a1e3253.jpg.html" target="_blank">http://i1319.photobucket.com/albums/t673/samurai8400/Reloading%20Bench/DSCN0034_zps8a1e3253.jpg</a> <a href="http://s1319.photobucket.com/user/samurai8400/media/Reloading%20Bench/DSCN0035_zps5546a254.jpg.html" target="_blank">http://i1319.photobucket.com/albums/t673/samurai8400/Reloading%20Bench/DSCN0035_zps5546a254.jpg</a> Left a few inserts blank to turn it back into a plain top bench when needed. <a href="http://s1319.photobucket.com/user/samurai8400/media/Reloading%20Bench/DSCN0031_zps60382deb.jpg.html" target="_blank">http://i1319.photobucket.com/albums/t673/samurai8400/Reloading%20Bench/DSCN0031_zps60382deb.jpg</a> Put the scale at eye level so I wouldn't have to bend over to check it. <a href="http://s1319.photobucket.com/user/samurai8400/media/Reloading%20Bench/DSCN0036_zpsd70bbd0d.jpg.html" target="_blank">http://i1319.photobucket.com/albums/t673/samurai8400/Reloading%20Bench/DSCN0036_zpsd70bbd0d.jpg</a> <a href="http://s1319.photobucket.com/user/samurai8400/media/Reloading%20Bench/DSCN0037_zps282ded9f.jpg.html" target="_blank">http://i1319.photobucket.com/albums/t673/samurai8400/Reloading%20Bench/DSCN0037_zps282ded9f.jpg</a> outstanding bench sir That's a bangin bench! |
|
|
|
OH, USA
|
[Last Edit: samurai84]
[#25]
Originally Posted By bags533:
Nice job samurai84, very well done. I'm curious about how well the inserts stay in place (just like him ^^ ). I was going to install brass bushings in each insert and a threaded t-nut into the base and then tighten each piece down with a threaded handle when needed. However, after using the presses for a while I find that the do not move at all, this is probably due to the fact that most of the force is exerted vertically and not horizontally. Plus the inserts are cut to a very tight tolerance and you have to pull them totally straight out to remove them. |
|
|
OH, USA
|
[#26]
Amazing Bench, I have been watching this thread for ideas and for sure your is the best.. any chance of getting plans?
[/quote] Sorry, no plans, I just made up the measurements and construction as I went along mostly to fit the space I was going to put it in. |
|
|
|
[#27]
Originally Posted By samurai84:
Originally Posted By bags533:
Nice job samurai84, very well done. I'm curious about how well the inserts stay in place (just like him ^^ ). I was going to install brass bushings in each insert and a threaded t-nut into the base and then tighten each piece down with a threaded handle when needed. However, after using the presses for a while I find that the do not move at all, this is probably due to the fact that most of the force is exerted vertically and not horizontally. Plus the inserts are cut to a very tight tolerance and you have to pull them totally straight out to remove them. Probably a dumb question, but what kind of saw did you use or how did you get the cuts so square in the back corners of the top layer cut outs? Nice job - and I see you do wood working similar to me - no plans, make it up as you go. |
|
|
|
|
[#28]
Originally Posted By RLR350:
Probably a dumb question, but what kind of saw did you use or how did you get the cuts so square in the back corners of the top layer cut outs? Not to speak for Samurai84, but whenever I do stuff like that, I usually drill holes @ the corners (1" Forstner bit, usually), play connect-the-dots with a circular saw, then square up the corners with a jig saw. |
|
|
|
|
[#29]
Originally Posted By Tom488:
Originally Posted By RLR350:
Probably a dumb question, but what kind of saw did you use or how did you get the cuts so square in the back corners of the top layer cut outs? Not to speak for Samurai84, but whenever I do stuff like that, I usually drill holes @ the corners (1" Forstner bit, usually), play connect-the-dots with a circular saw, then square up the corners with a jig saw. This. Wayyyyyyyy back in shop class, we were taught to use a drill press to drill a very precisely placed hole at the corners of a square inside cut, which allows for less tension on the waste piece when cutting. Of course back then, our teacher was really particular about who used the table saw, but a band saw makes this sort of cut pretty easy. That doesn't mean you don't drill those holes first, but they can be a lot smaller, leaving a lot less to clean up. Oh, and having a decent fence to guide the work is pretty mandatory, at least for me. Freehand cuts tend to be...irregular, to say the least. 
|
|
|
|
|
[#30]


|
|
|
|
|
[#31]
Originally Posted By bkirkwood: http://i673.photobucket.com/albums/vv94/bkirk87/20130519_120447_zpsf03b75f0.jpg http://i673.photobucket.com/albums/vv94/bkirk87/20130519_120424_zps10c839b3.jpg http://i673.photobucket.com/albums/vv94/bkirk87/20130519_120524_zps1da283a7.jpg Nice primer stash! Any chance of getting a picture of your plate carrier holder?
|
|
|
|
|
[#32]
Here you go.


And since this is a reloading bench pic thread: 


|
|
|
|
GA, USA
|
[#33]

|
|
|
TX, USA
|
[#34]

|
|
|
USA
|
[#35]
Nothing too exciting.
Harbor Freight bench I picked up during one of their 20% off sales for ~$130. It's mostly wood except for the drawer liners, although the wood is 'joined together' like engineered flooring. I glued it in addition to the screws. I'm considering replacing the bottom shelf with plywood and possibly adding a single rear full height support in the back, but so far it just hasn't been needed, and it's a pretty decent bench for the $. 
|
|
|
|
[#36]
Originally Posted By rtpguy: Nothing too exciting. Harbor Freight bench I picked up during one of their 20% off sales for ~$130. It's mostly wood except for the drawer liners, although the wood is 'joined together' like engineered flooring. I glued it in addition to the screws. I'm considering replacing the bottom shelf with plywood and possibly adding a single rear full height support in the back, but so far it just hasn't been needed, and it's a pretty decent bench for the $. http://i.imgur.com/8k3Wrml.jpg Nice setup you have there. Left side of the bench, what are the sandwiched 2x4's under the bullet puller for?
|
|
|
|
|
[#37]
Originally Posted By dryflash3: Originally Posted By rtpguy: Nothing too exciting. Harbor Freight bench I picked up during one of their 20% off sales for ~$130. It's mostly wood except for the drawer liners, although the wood is 'joined together' like engineered flooring. I glued it in addition to the screws. I'm considering replacing the bottom shelf with plywood and possibly adding a single rear full height support in the back, but so far it just hasn't been needed, and it's a pretty decent bench for the $. http://i.imgur.com/8k3Wrml.jpg Nice setup you have there. Left side of the bench, what are the sandwiched 2x4's under the bullet puller for? Guessing its where he bangs the puller. |
|
|
|
|
[#38]
Originally Posted By 7: Originally Posted By dryflash3: Originally Posted By rtpguy: Nothing too exciting. Harbor Freight bench I picked up during one of their 20% off sales for ~$130. It's mostly wood except for the drawer liners, although the wood is 'joined together' like engineered flooring. I glued it in addition to the screws. I'm considering replacing the bottom shelf with plywood and possibly adding a single rear full height support in the back, but so far it just hasn't been needed, and it's a pretty decent bench for the $. http://i.imgur.com/8k3Wrml.jpg Nice setup you have there. Left side of the bench, what are the sandwiched 2x4's under the bullet puller for? Guessing its where he bangs the puller. Makes sense. |
|
|
|
OK, USA
|
[#39]
Originally Posted By rtpguy:
Nothing too exciting. Harbor Freight bench I picked up during one of their 20% off sales for ~$130. It's mostly wood except for the drawer liners, although the wood is 'joined together' like engineered flooring. I glued it in addition to the screws. I'm considering replacing the bottom shelf with plywood and possibly adding a single rear full height support in the back, but so far it just hasn't been needed, and it's a pretty decent bench for the $. http://i.imgur.com/8k3Wrml.jpg What kind of press is that ? That's kinda what I want to get . I deprime and size then wet tumble . I thing those would be quick for priming , charging and then seating . Anybody have one for sale ? |
|
|
USA
|
[#40]
Originally Posted By dryflash3:
Originally Posted By 7:
Originally Posted By dryflash3:
Originally Posted By rtpguy:
Nothing too exciting. Harbor Freight bench I picked up during one of their 20% off sales for ~$130. It's mostly wood except for the drawer liners, although the wood is 'joined together' like engineered flooring. I glued it in addition to the screws. I'm considering replacing the bottom shelf with plywood and possibly adding a single rear full height support in the back, but so far it just hasn't been needed, and it's a pretty decent bench for the $. http://i.imgur.com/8k3Wrml.jpg Nice setup you have there. Left side of the bench, what are the sandwiched 2x4's under the bullet puller for? Guessing its where he bangs the puller. Makes sense. Exactly right. The bench surface is pretty decent and reasonably thick, but why beat it up with the kinetic puller/hammer? That same pseudo-header/sandwich was actually used to bolt the press to on a really crappy (flexible) bench I had previously. ;) |
|
|
USA
|
[#41]
Originally Posted By okiejack:
Originally Posted By rtpguy:
Nothing too exciting. Harbor Freight bench I picked up during one of their 20% off sales for ~$130. It's mostly wood except for the drawer liners, although the wood is 'joined together' like engineered flooring. I glued it in addition to the screws. I'm considering replacing the bottom shelf with plywood and possibly adding a single rear full height support in the back, but so far it just hasn't been needed, and it's a pretty decent bench for the $. http://i.imgur.com/8k3Wrml.jpg What kind of press is that ? That's kinda what I want to get . I deprime and size then wet tumble . I thing those would be quick for priming , charging and then seating . Anybody have one for sale ? Hornady Lock and Load AP. Like most things reloading right now, you have to keep looking - Cabelas, Midsouth, Midway, .... Dillons seem to be around 8+ week backorder, Hornady LnL AP come and go with different vendors.. |
|
|
|
[#42]
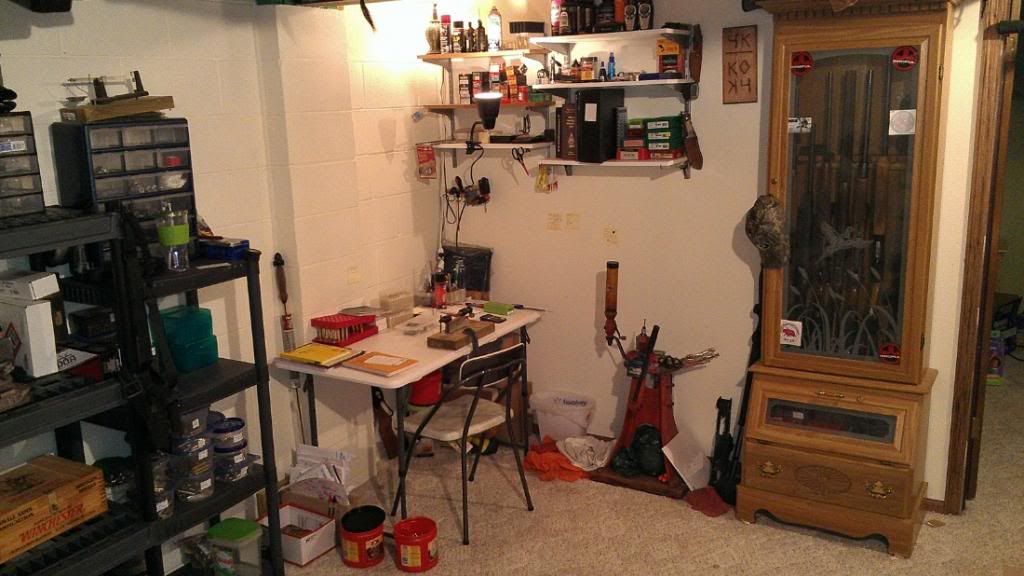
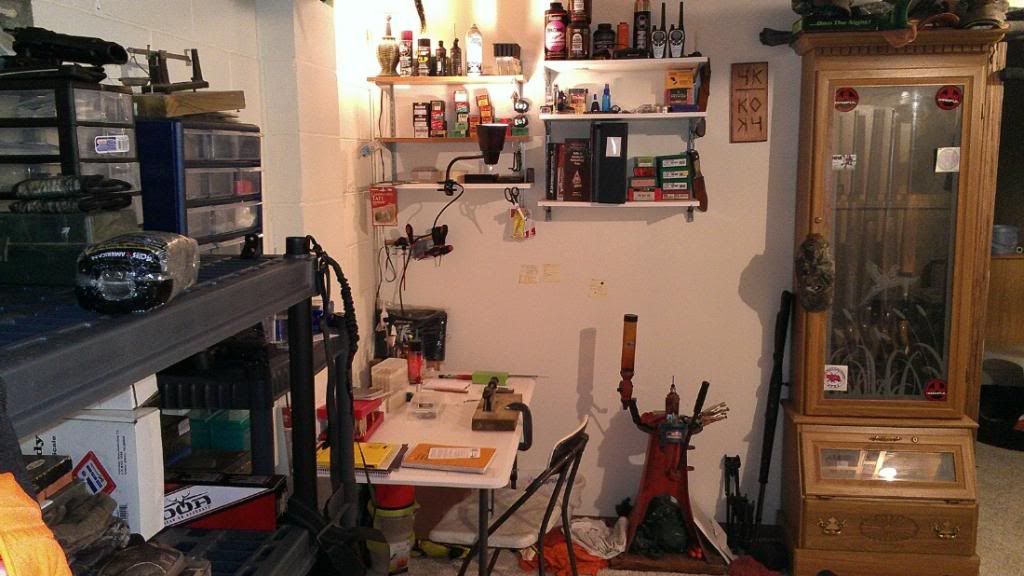
Took a few pics of my setup today. A little different than most I've seen here. Obviously it doubles as my gun cleaning and building/repair area. Lucky enough to have a office room in our house that we weren't using for anything important.
Used office desk$80. 

Built peg board into the back. 
My spent primer setup. Bike waterbottle cage. 
|
|
|
|
|
[#43]
Originally Posted By M4-AR:
Took a few pics of my setup today. A little different than most I've seen here. Obviously it doubles as my gun cleaning and building/repair area. Lucky enough to have a office room in our house that we weren't using for anything important. Used office desk$80. http://i4.photobucket.com/albums/y118/M4-AR/BE109C28-9D77-4F69-8867-55554857C87E-2829-000001F606F269BB.jpg http://i4.photobucket.com/albums/y118/M4-AR/C0EEDAB0-8100-4F28-8532-39FA8BBC035A-2829-000001F60FF57062.jpg Built peg board into the back. http://i4.photobucket.com/albums/y118/M4-AR/0D3D3E88-EFFA-459C-A698-19731E5555DD-2829-000001F61B56F0B0.jpg My spent primer setup. Bike waterbottle cage. http://i4.photobucket.com/albums/y118/M4-AR/61129873-EB86-4307-A361-7F7F8F3AB122-2829-000001FB27A76E7E.jpg slick and cheap setup on the spent primer holder |
|
|
|
NE, USA
|
[#44]
My corner of the basement. Nothing fancy but it works.
|
|
|
|
[#45]
Originally Posted By M4-AR:
Took a few pics of my setup today. A little different than most I've seen here. Obviously it doubles as my gun cleaning and building/repair area. Lucky enough to have a office room in our house that we weren't using for anything important. Used office desk$80. http://i4.photobucket.com/albums/y118/M4-AR/BE109C28-9D77-4F69-8867-55554857C87E-2829-000001F606F269BB.jpg http://i4.photobucket.com/albums/y118/M4-AR/C0EEDAB0-8100-4F28-8532-39FA8BBC035A-2829-000001F60FF57062.jpg Built peg board into the back. http://i4.photobucket.com/albums/y118/M4-AR/0D3D3E88-EFFA-459C-A698-19731E5555DD-2829-000001F61B56F0B0.jpg My spent primer setup. Bike waterbottle cage. http://i4.photobucket.com/albums/y118/M4-AR/61129873-EB86-4307-A361-7F7F8F3AB122-2829-000001FB27A76E7E.jpg I love your setup....I've been scouring craigslist trying to find a similar desk. |
|
|
|
|
[#46]
I love your setup....I've been scouring craigslist trying to find a similar desk.
Thanks. My original plan was a work bench in the garage. But I came across this and figured it was worth a shot. Bonus is that I can stay comfortable in the summer or winter.(central air) and can keep humidity better under control. |
|
|
|
|
[#47]
Originally Posted By M4-AR:
Took a few pics of my setup today. A little different than most I've seen here. Obviously it doubles as my gun cleaning and building/repair area. Lucky enough to have a office room in our house that we weren't using for anything important. Used office desk$80. http://i4.photobucket.com/albums/y118/M4-AR/BE109C28-9D77-4F69-8867-55554857C87E-2829-000001F606F269BB.jpg http://i4.photobucket.com/albums/y118/M4-AR/C0EEDAB0-8100-4F28-8532-39FA8BBC035A-2829-000001F60FF57062.jpg Built peg board into the back. http://i4.photobucket.com/albums/y118/M4-AR/0D3D3E88-EFFA-459C-A698-19731E5555DD-2829-000001F61B56F0B0.jpg My spent primer setup. Bike waterbottle cage. http://i4.photobucket.com/albums/y118/M4-AR/61129873-EB86-4307-A361-7F7F8F3AB122-2829-000001FB27A76E7E.jpg Nice set up, really like the water bottle cage. Mine is just leaned up on the leg supports. Going to add that to mine. |
|
|
|
AL, USA
|
[#48]
This is my bench. I only reload for a few calibers, 9mm, 45 ACP, 38 Spl / 357 Mag, and .223
|
|
|
|
[#49]
I have that same Sams bench and a similar tool chest under the left side.
Mine isn't quite dedicated as its a reloading, cleaning, maintenance and sometimes computer work area. |
|
|
|
|
[#50]
Update to my bench. Getting closer to done. Mounted the cabinet, which really helps to keep everything out of the way and off the work surface. Also finished the LED lighting inside the press so I can see down inside cases (you can kind of see how bright it is inside there in the pic). Loaded up a bunch of different subsonic and supersonic 300 Blackout loads to try this weekend.
Still need to mount my whiteboard and that cool cartridge poster that everyone else always seems to put in their reloading room

|
|
|
|
 Win a FREE Membership!
Sign up for the ARFCOM weekly newsletter and be entered to win a free ARFCOM membership. One new winner* is announced every week!
You will receive an email every Friday morning featuring the latest chatter from the hottest topics, breaking news surrounding legislation, as well as exclusive deals only available to ARFCOM email subscribers.

AR15.COM is the world's largest firearm community and is a gathering place for firearm enthusiasts of all types.
From hunters and military members, to competition shooters and general firearm enthusiasts, we welcome anyone who values and respects the way of the firearm.

Subscribe to our monthly Newsletter to receive firearm news, product discounts from your favorite Industry Partners, and more.
Copyright © 1996-2024 AR15.COM LLC. All Rights Reserved.
Any use of this content without express written consent is prohibited.
AR15.Com reserves the right to overwrite or replace any affiliate, commercial, or monetizable links, posted by users, with our own.