|
[#1]
Quoted: So that's what that is. My Dad had a reel to reel tape recorder that had one of those on it. Vulcan94 Quoted: Quoted: Quoted: What were those "Magic Eye" devices? What/how were they used? It is a visual tuning aid. The closer the green circle comes together the more in tune you are Kind of like this one although there are different types http://i1289.photobucket.com/albums/b519/Edisla/magiceye_zpspumpd2sw.jpg So that's what that is. My Dad had a reel to reel tape recorder that had one of those on it. Vulcan94 My Mom had similar. Not sure what happened to that thing but we still have the reels. |
|
|
|
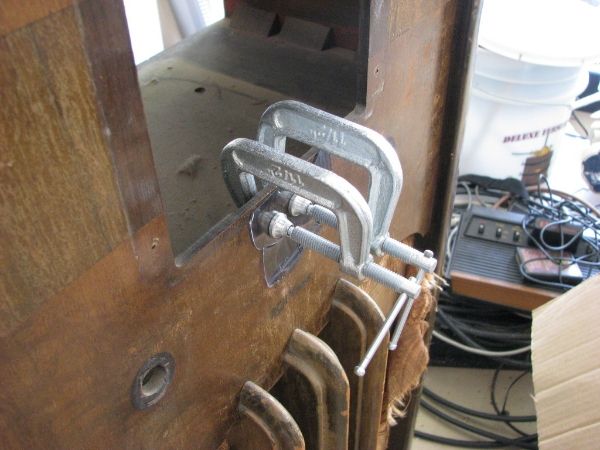
[#2]
Gluing this section back together, front and back.
  |
|
|
|
[#3]
Prices on the I-177 testers have seemed to have dropped a lit bit. You might look into one of those.
|
|
|
|
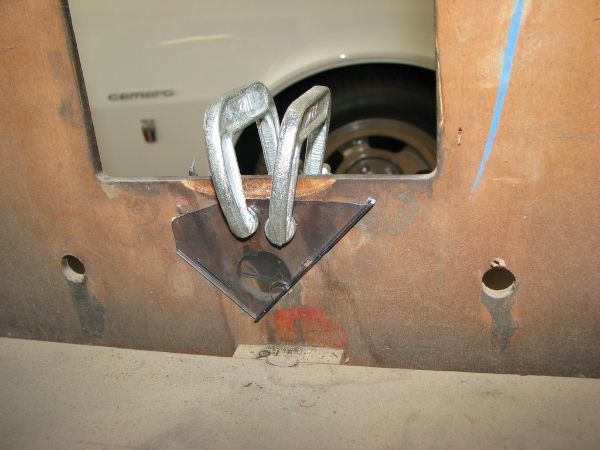
[#4]
Remember this pic?
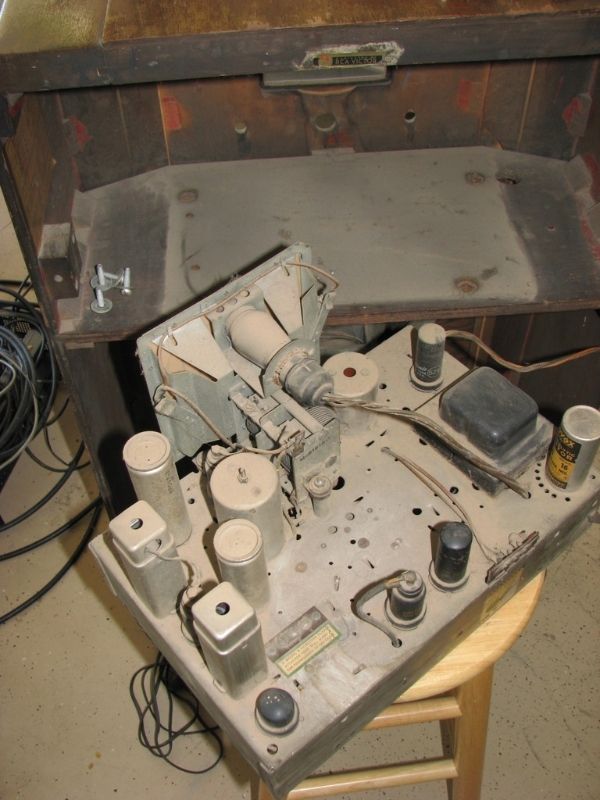 Cleaned that dusty area today and found some writing and there is a staple there where you can see that there must have been some sort of tag at one point. 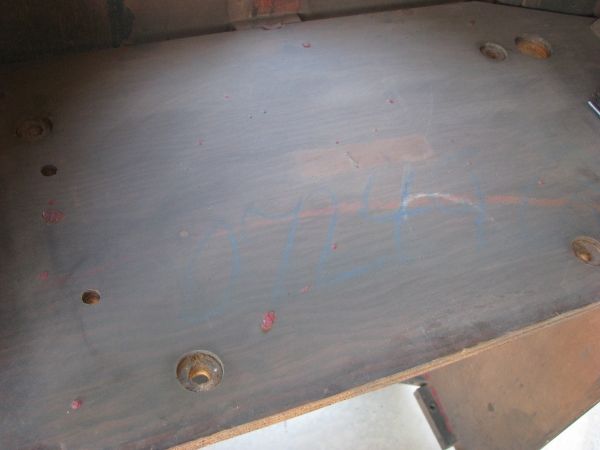 Took the speaker out today to do some cleaning. Just a simple dusting at this point. Before 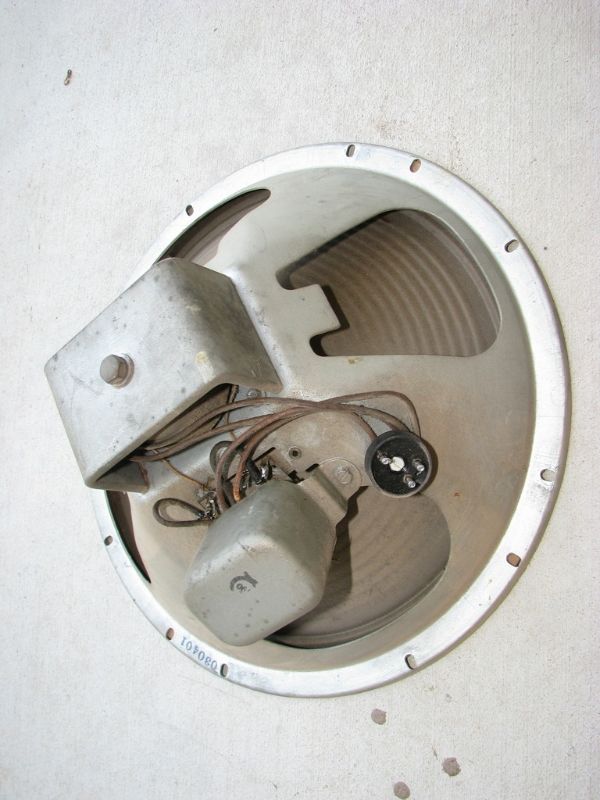 After 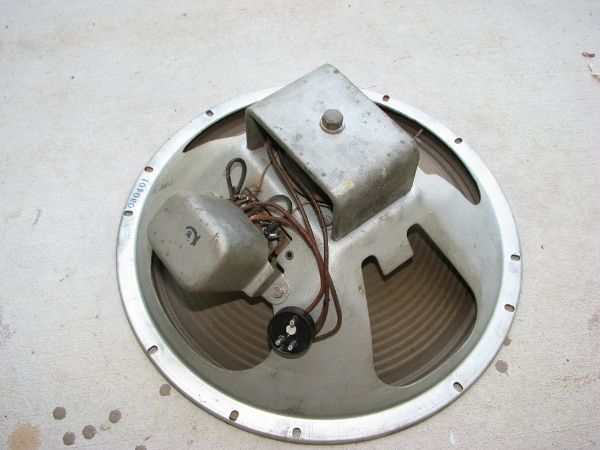 Next to pics are the after shots of these 2 areas I glues. Nice and flat now.  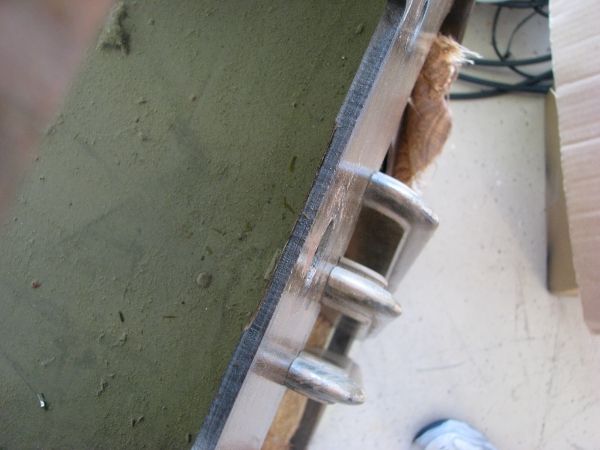 Gluing some more areas. 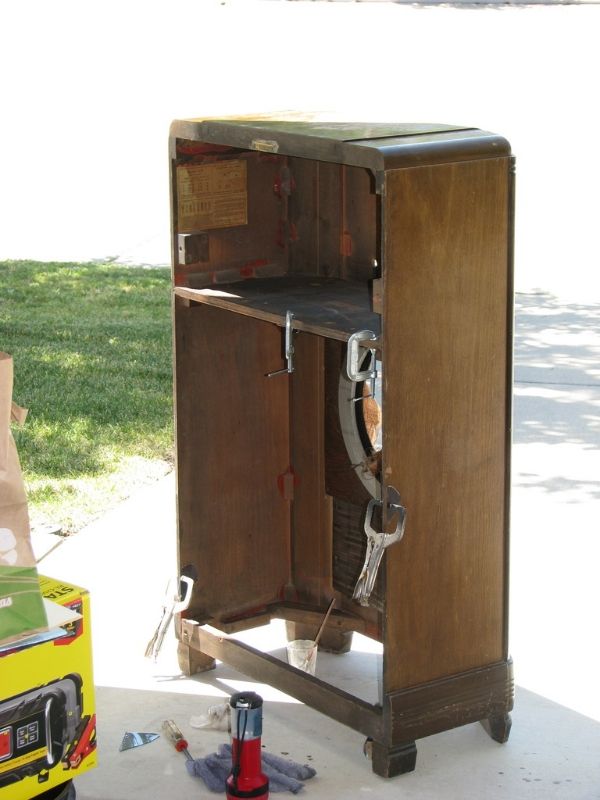 |
|
|
|
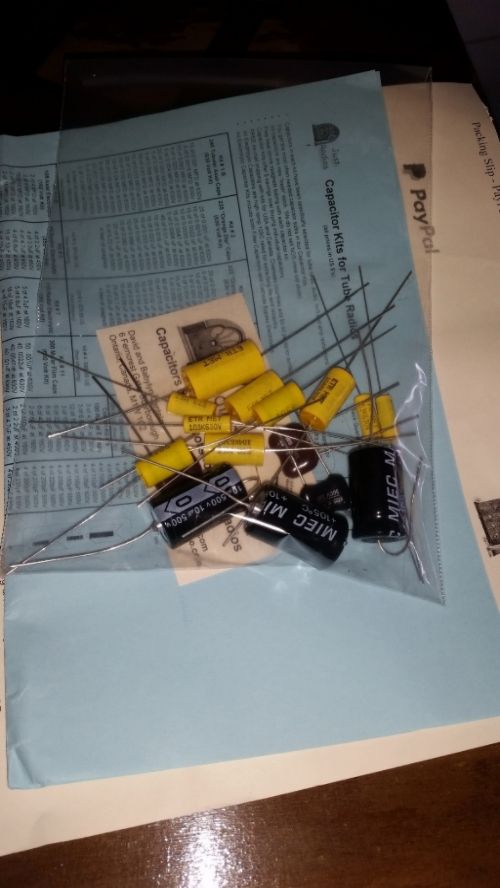
[#5]
PARTS!!!
 |
|
|
|
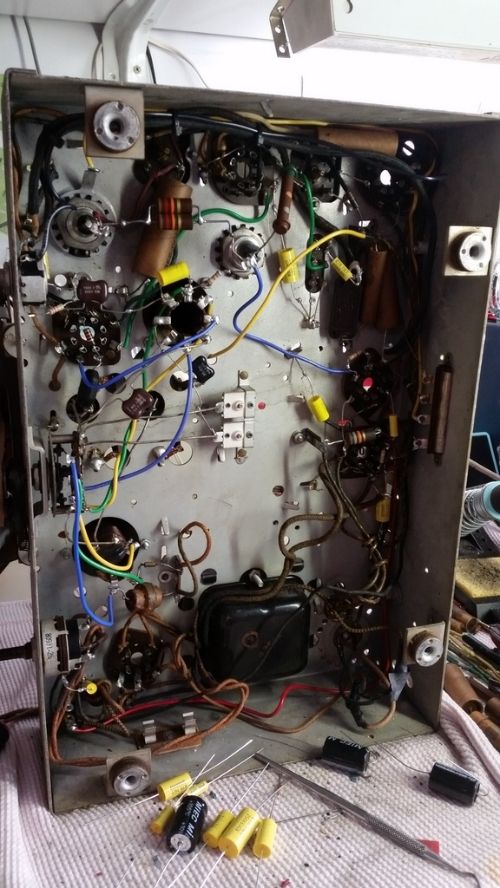
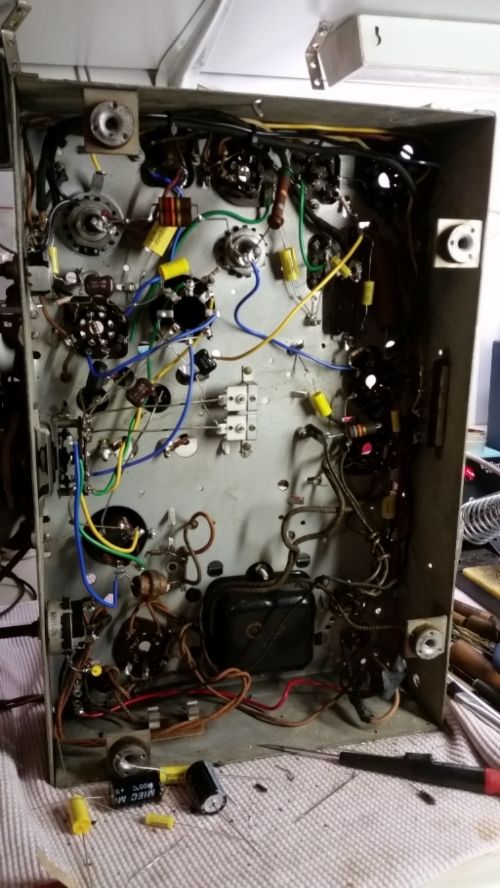
[#6]
Replaced some more caps today. Hope to do some more tomorrow.
 |
|
|
|
[#7]
Very cool and interesting. I will definitely be checking out the progress.
|
|
|
|
[#8]
One of the good things about these old radios is how good they sound. That comes in part (mostly) from the big speaker and big cabinet.
Edisla, have you ever put modern guts in a big cabinet? Guts = tuner, amp and speaker(s). |
|
|
|
[#9]
Quoted:
One of the good things about these old radios is how good they sound. That comes in part (mostly) from the big speaker and big cabinet. Edisla, have you ever put modern guts in a big cabinet? Guts = tuner, amp and speaker(s). I keep seeing some guy on Craigslist who turns console radios into guitar amps. While the amps are hand wired tube rigs that probably sound great, it bugs me that he's killing so many console radios. |
|
|
|
[#10]
Quoted: One of the good things about these old radios is how good they sound. That comes in part (mostly) from the big speaker and big cabinet. Edisla, have you ever put modern guts in a big cabinet? Guts = tuner, amp and speaker(s). No and I don't think I ever will. I don't like the idea. |
|
|
|
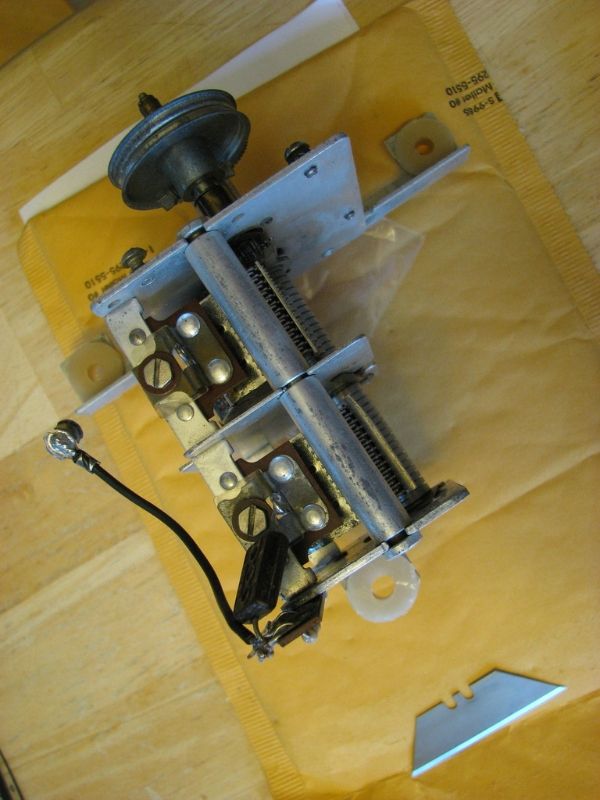
[#11]
Swapped out a few more caps and took a look under the IF cans. IF cans are not all that fun
  Inside the 1st IF can. I wanted to be sure there wasn't any bad wiring in here. All ok so far. 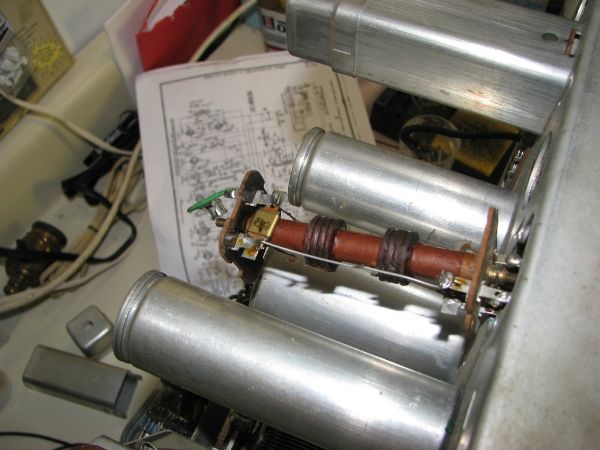 2nd IF had a couple resistors out of tolerance so I changed them out. These things make me nervous w/ that fine wiring in there 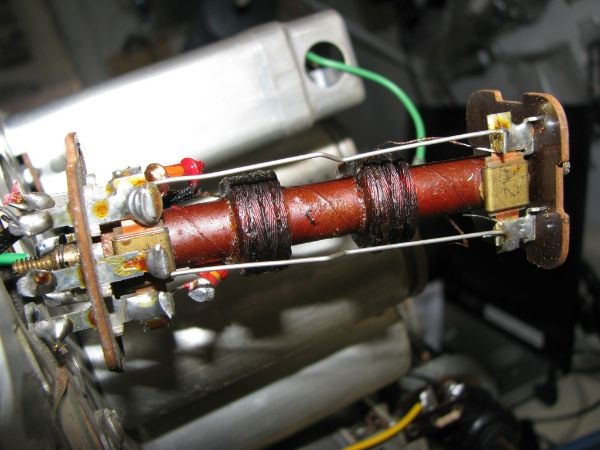 All for now. |
|
|
|
[#12]
Quoted:
No and I don't think I ever will. I don't like the idea. Quoted:
Quoted:
One of the good things about these old radios is how good they sound. That comes in part (mostly) from the big speaker and big cabinet. Edisla, have you ever put modern guts in a big cabinet? Guts = tuner, amp and speaker(s). No and I don't think I ever will. I don't like the idea. I'm sure you're correct. It's just that I tried to find a decent table radio and could not. I started thinking about building one - a nice box for the table top and good guts. |
|
|
|
[#13]
I have made the final connections and am about to slowly bring it up on the variac.
If you don't hear back from me within the hour send for help  ETA - WHOA! Forgot a cap |
|
|
|
[#14]
Quoted: I have made the final connections and am about to slowly bring it up on the variac. If you don't hear back from me within the hour send for help ETA - WHOA! Forgot a cap |
|
|
|
[#15]
Here is the completed underside work minus some heat shrink tubing I'll do when I know everything is working. 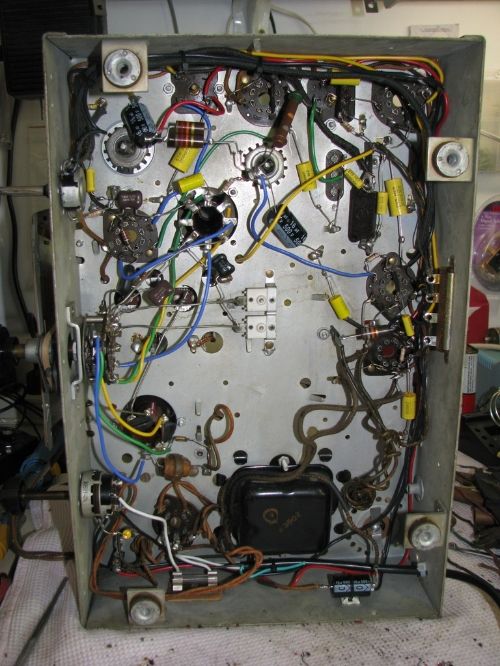 |
|
|
|
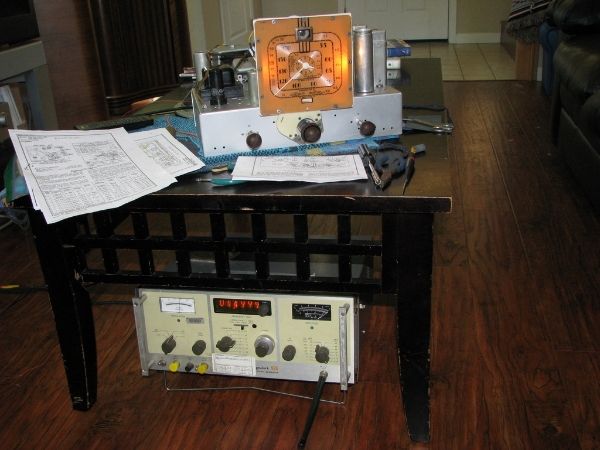
[#16]
IT'S ALIVE!
 The video of power up was getting to long so I did it in segments. The first couple are not to interesting so here are some when things got good 1 https://youtu.be/9zLNfEuZVXE 2 3 4 I'm letting it burn in for a while to see how things go. |
|
|
|
[#17]
Quoted:
IT'S ALIVE!
The video of power up was getting to long so I did it in segments. The first couple are not to interesting so here are some when things got good 1 https://youtu.be/9zLNfEuZVXE 2 https://youtu.be/oYVYTY5-Lb0 3 https://youtu.be/8NUd6LmeV8Y 4 https://youtu.be/BO0tD2ES-GQ I'm letting it burn in for a while to see how things go. That is awesome OP. Thanks |
|
|
|
[#18]
Sounds really good to me!

|
|
|
|
[#19]
Thanks!
So far so good. Magic eye needs some checking into but I'll deal with that later. I am going to enjoy it as is today and then the next step will be to tear it all down so I can service the chassis and get things all spiffed up. This requires pulling the tuning cap off as well as the entire dial assembly. More fun is coming up! |
|
|
|
[#20]
Awesome! I believe it was you who posted a rebuild on here before...if so, you owe me money!
I've been bit by the vintage electronics bug-partially due to that thread and have started buying tools and equipment to work on old radios. I have a couple that I'm going to go through once I understand them more. I've also been hooked on Mr. Carlson's Lab on Youtube. I need a new hobby like a hole in the head, but I guess that's how it goes.
|
|
|
|
[#21]
So now that we know the radio has potential lets unplug it and tear it down so chassis restoration can begin.
I was not going to bring any more radio work into the house but it's effen hot in the garage and will be for a while. Getting ready to start attacking the rust spots. 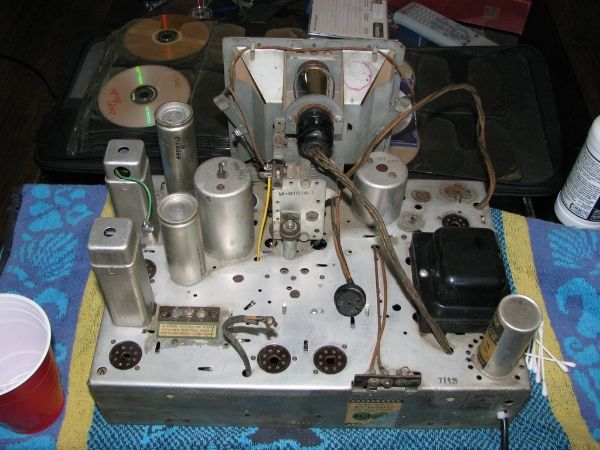 Throwing down some rust removing jelly 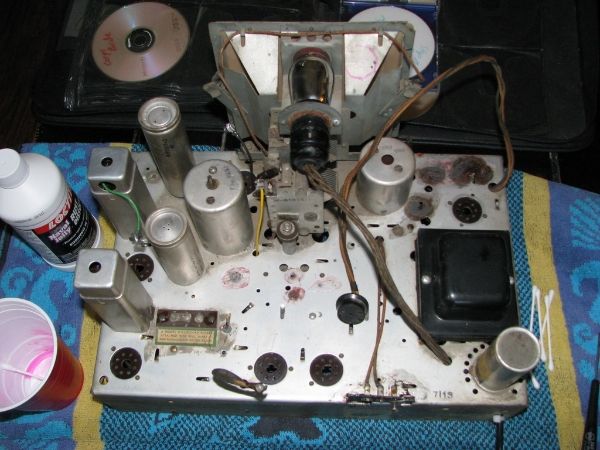 Working the one terminal strip Before 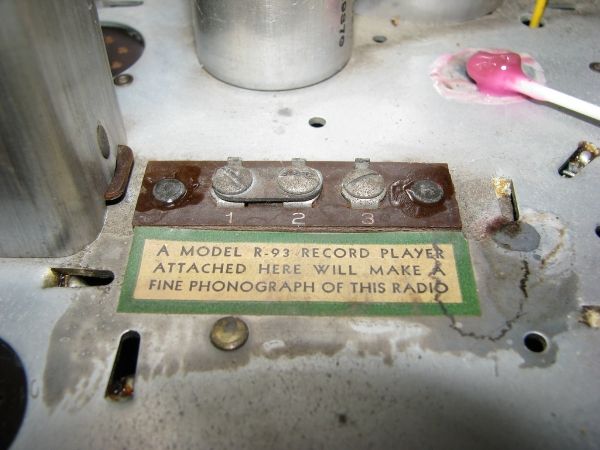 After  I'll most likely be painting the chassis so I will either try and save that sticker or make a new one to put back down later. That is all for now. |
|
|
|
[#22]
Took the dial needles and dial plate off. Needles are down left on top of chassis.
 Close up of the gear drive 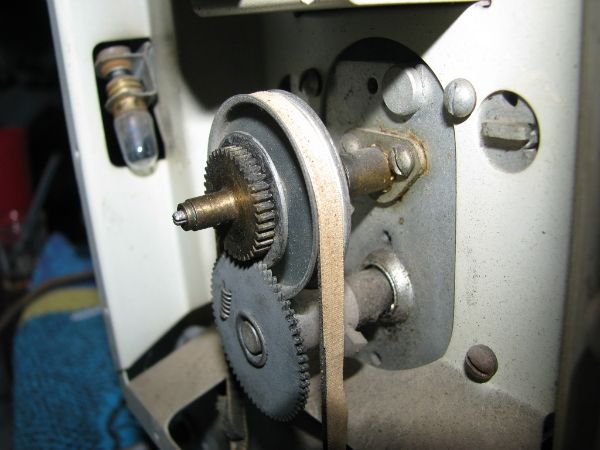 Dial house off 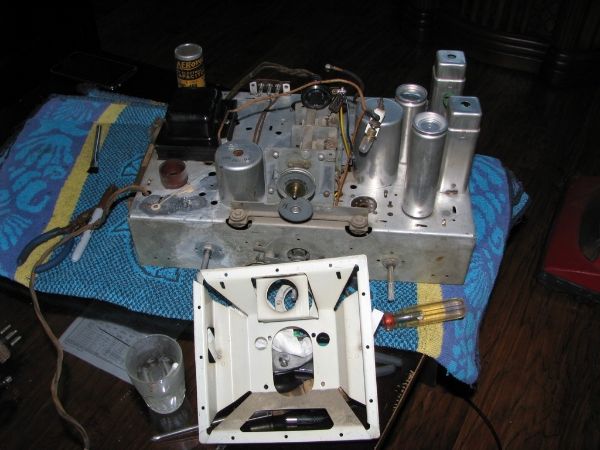 After cleaning. Didn't even notice the inside part is painted off white. I'll be redoing both sides soon. 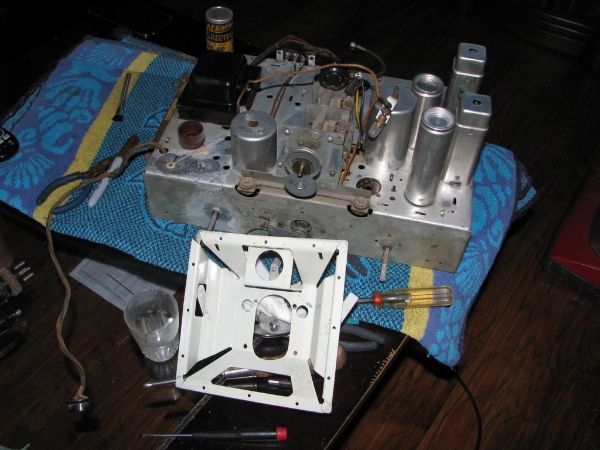 |
|
|
|
[#23]
Got the tuning cap off after about 2 hours of work
My pen iron was not enough so I borrowed a gun iron. Still not enough. Then I tried a torch and WHOA that was a bit much so I went back to the gun. Nothing was working. I decided to go back to the torch on the lowest setting I could get and all was good after like 1 min 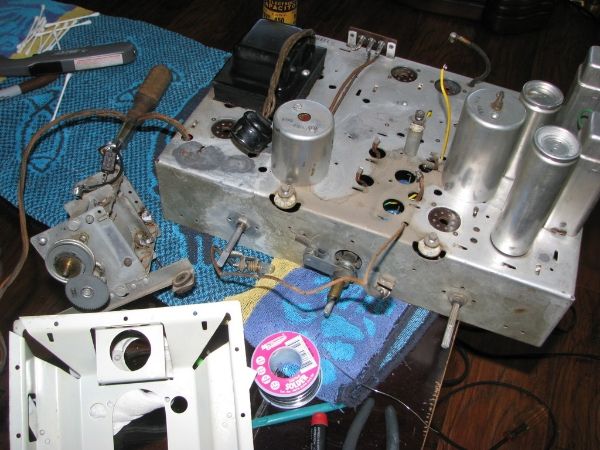 You can see the dust build up under where the cap is located. 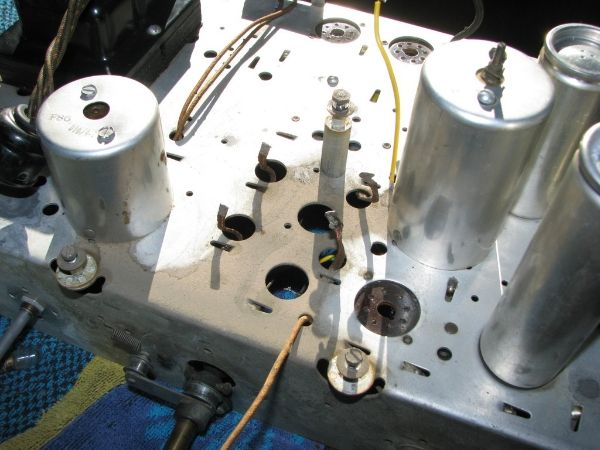 Tuning cap  Stripped the dial support Before painting  After  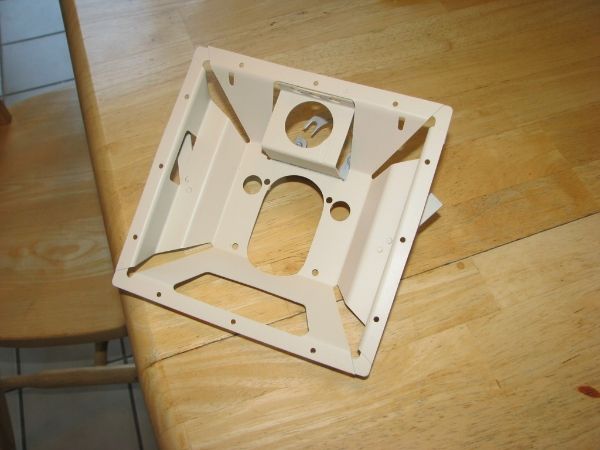 |
|
|
|
[#24]
I'd love to rebuild one of these and put it in my living room.
Every time I see one of these threads, I troll CL for a radio to restore, but I can never find one. :( |
|
|
|
[#25]
Just keep looking.
I've been itching to go to CL but have been trying to keep my addiction under control Tape, tape everywhere! Chassis prep for paint. 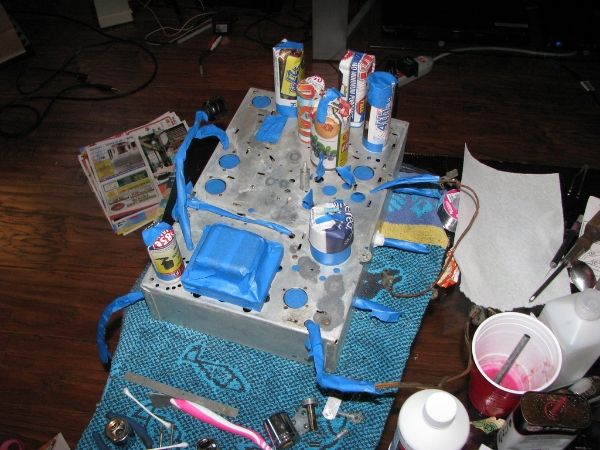 Painted 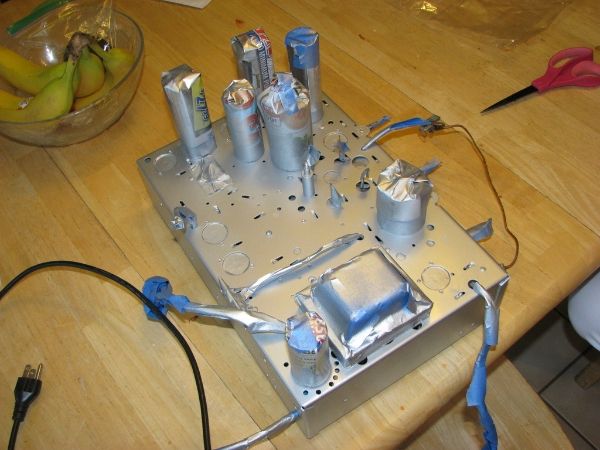 Looking pretty good. The one label there is coming up a bit so I'll have to glue that back down. 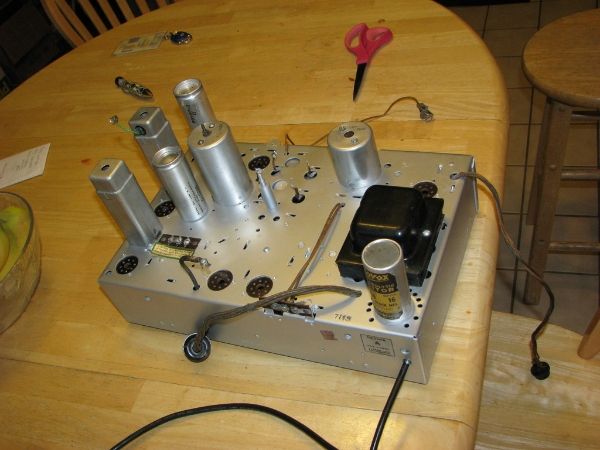 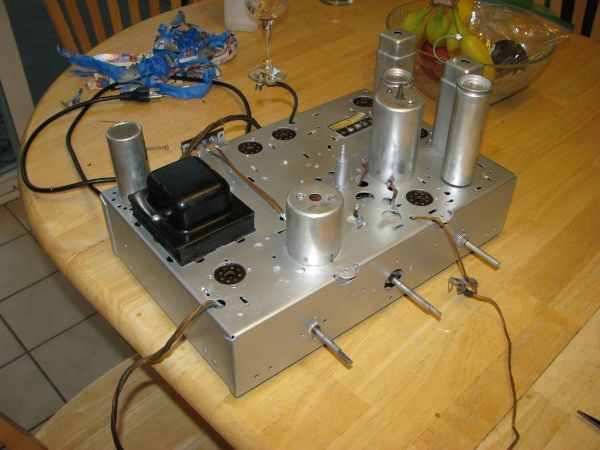 |
|
|
|
[#26]
Quoted:
So now that we know the radio has potential lets unplug it and tear it down so chassis restoration can begin. I was not going to bring any more radio work into the house but it's effen hot in the garage and will be for a while. Getting ready to start attacking the rust spots. http://i1289.photobucket.com/albums/b519/Edisla/IMG_3528_zpstbrkmxh6.jpg Throwing down some rust removing jelly http://i1289.photobucket.com/albums/b519/Edisla/IMG_3529_zpsorrobnfa.jpg Working the one terminal strip Before http://i1289.photobucket.com/albums/b519/Edisla/IMG_3536_zpsva2httri.jpg After http://i1289.photobucket.com/albums/b519/Edisla/IMG_3538_zpsdscdnfqo.jpg I'll most likely be painting the chassis so I will either try and save that sticker or make a new one to put back down later. That is all for now. Would it be possible to use the phonograph input as an auxiliary audio input? |
|
|
|
[#27]
I would think so but you may need to add some more parts. I never actually looked into it to much.
This might help - http://antiqueradios.com/forums/viewtopic.php?t=134197 What I do is I have an AM transmitter I hook my tablet to and put on Pandora. |
|
|
|
[#28]
I noticed that the wiring for the two bulbs was hard and cracked so I needed to replace it.
Here is the wiring for the bulbs 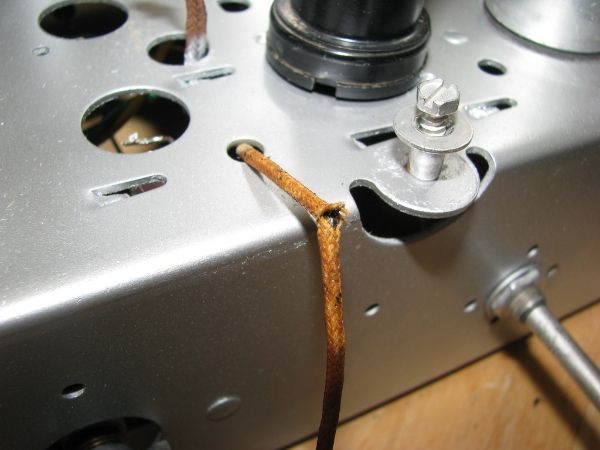 The heat shrink tubing was crusty as well 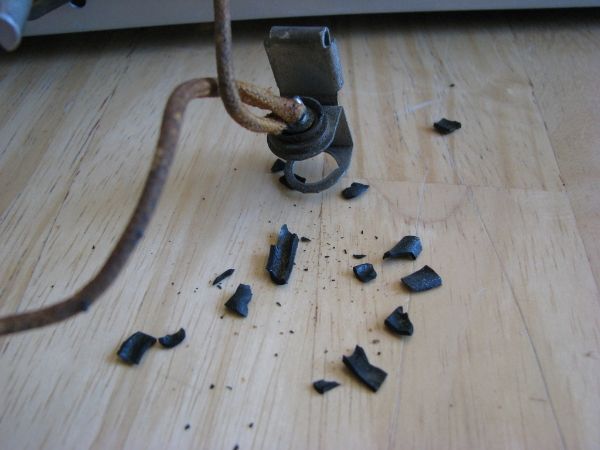 Here are the new wires. The original wiring was one wire but I put two in since I figured it would be easier. I did not shrink the tubing down yet because I found something else I am going to try and fix 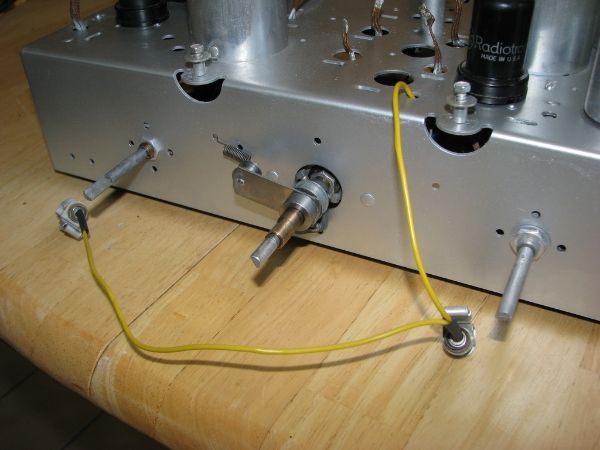 Here is one of the bulb holders. This is the left one that was loose. Now I know why. Look at the crack along the bend.  What I am trying is some JB Weld along the inside and wrapped around to the bend. I then took one of the radios old caps and tied it down slightly to try and get it to be down closer to original tension. I don't expect this to work well but maybe good enough. 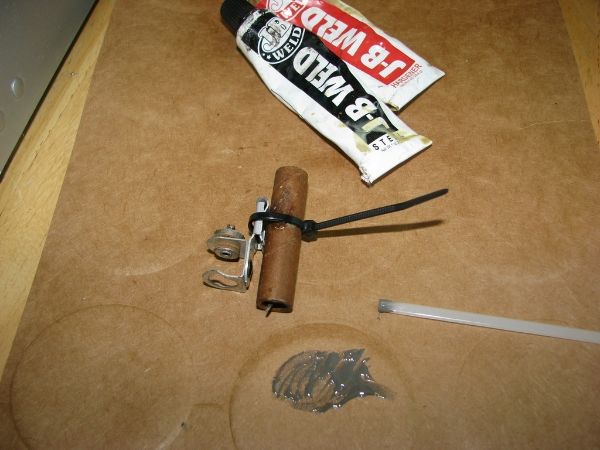 |
|
|
|
[#29]
Time to paint the speaker
Before 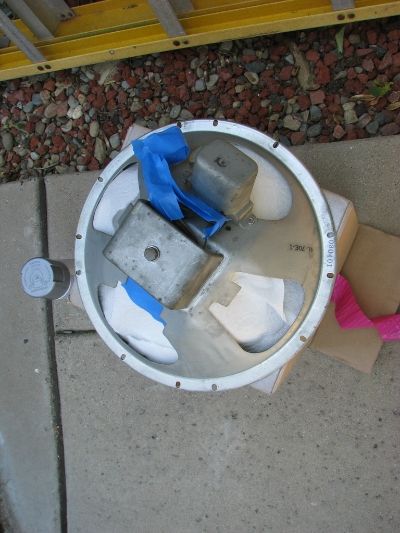 After 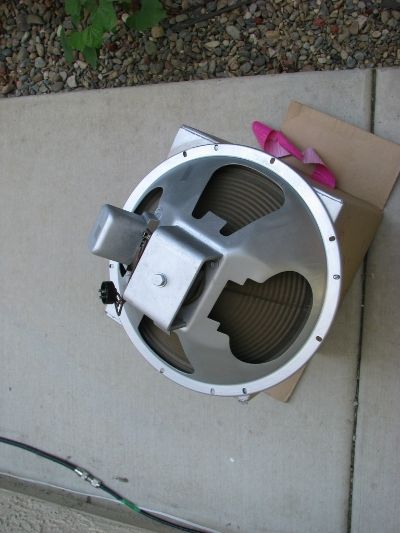 I tapped off the markings so I could retain some originality. 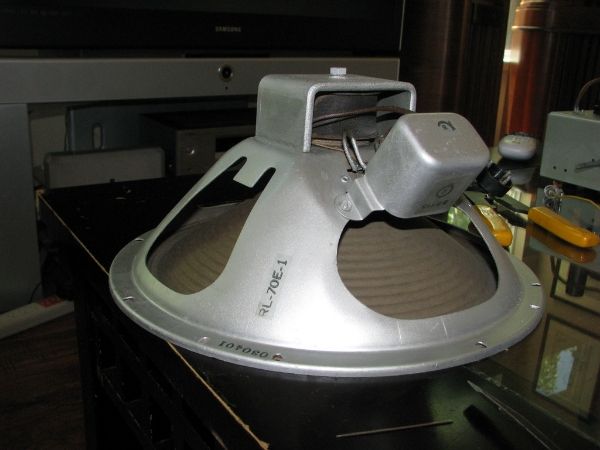 Everything but the cabinet as it is today 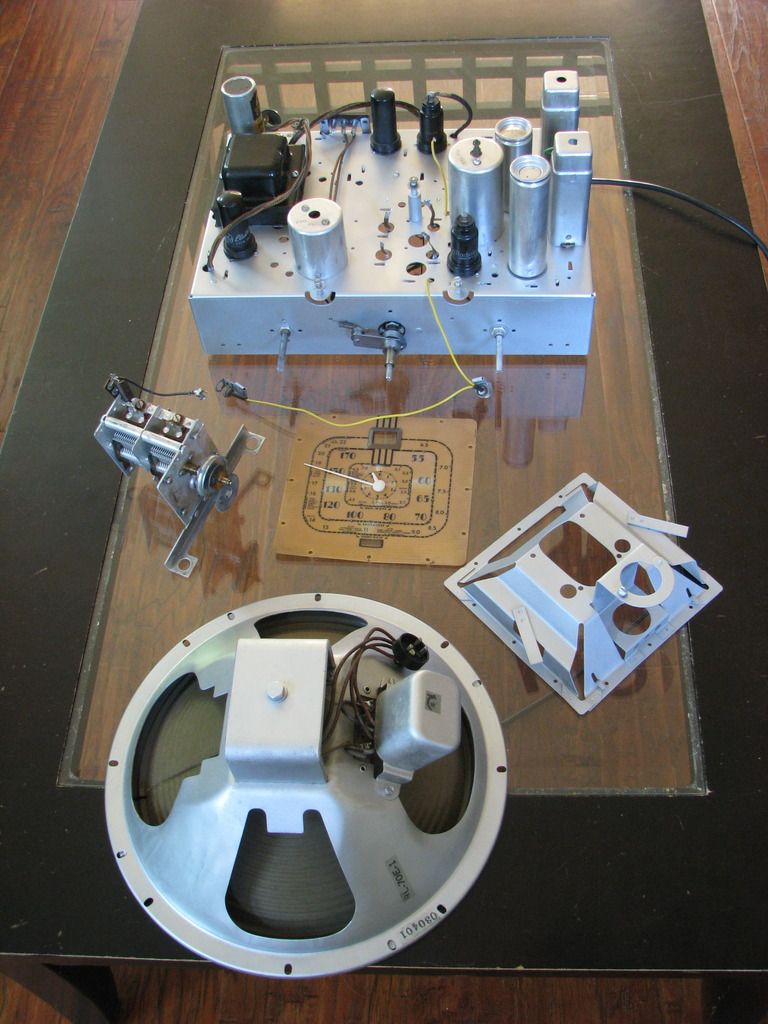 |
|
|
|
[#30]
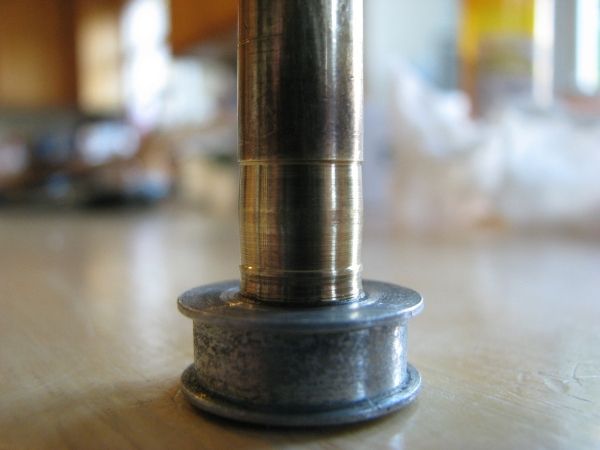
The 3 new grommets came in for the tuning capacitor. 1 of them didn't have a complete groove around the entire grommet so I had to cut it out a bit.
 Close up of one of them. Now I need to get the cap mounted back to the chassis. 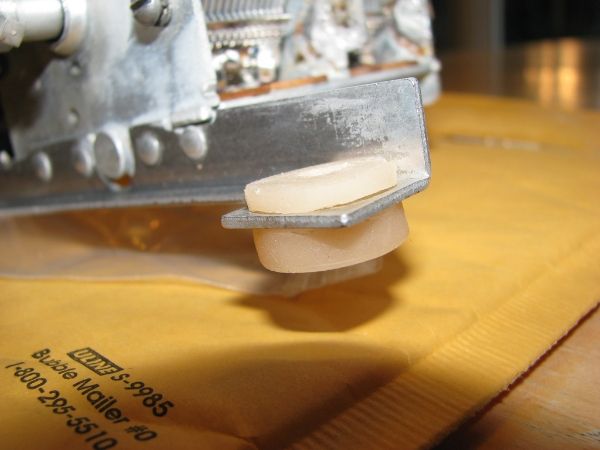 |
|
|
|
[#31]
Looking good man, thanks for the updates.
|
|
|
|
[#32]
Mounted the capacitor back onto the chassis
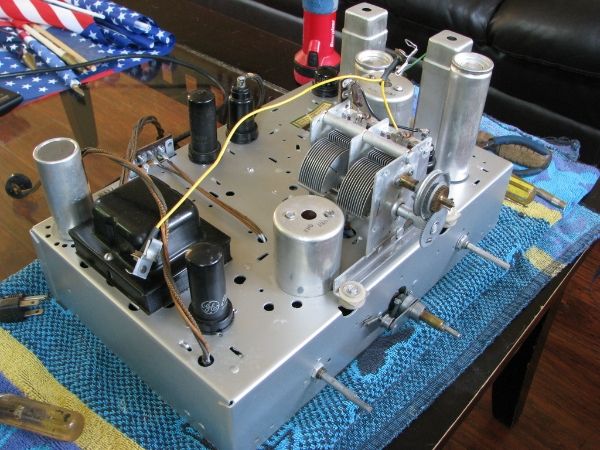 Mounted the dial plate support back onto the chassis New belt for the tuning capacitor has been ordered. 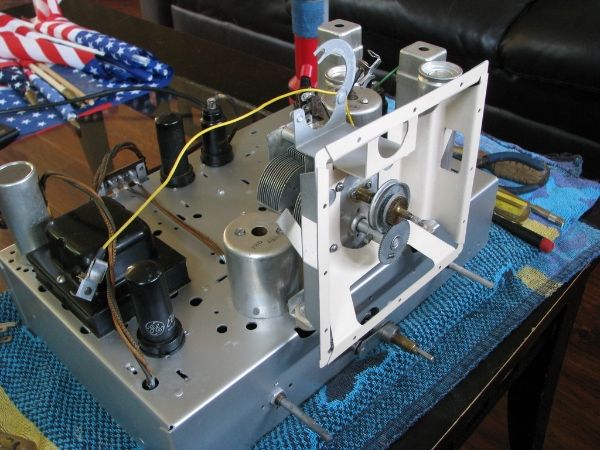 Reinstalled the magic eye and lights. Eye will be getting replaced in the future. 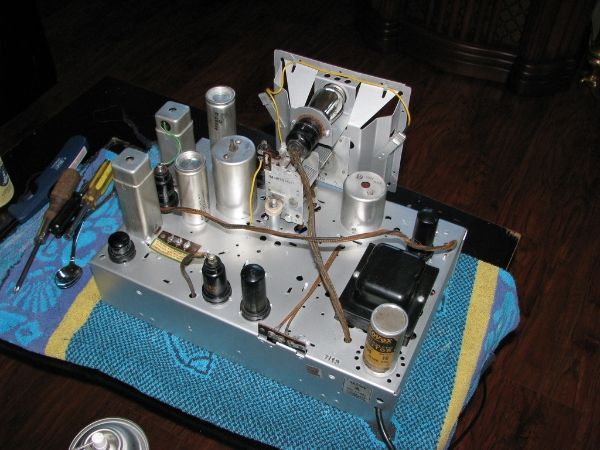 |
|
|
|
[#33]
This is pretty cool!
|
|
|
|
[#34]
Getting ready to pull the speaker and grill cloth supports
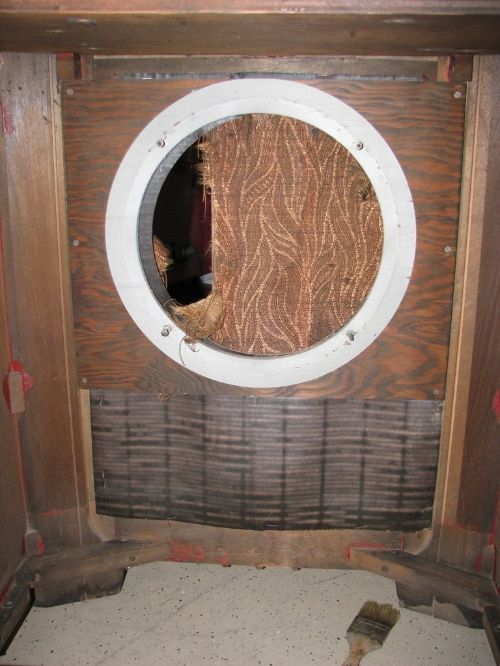 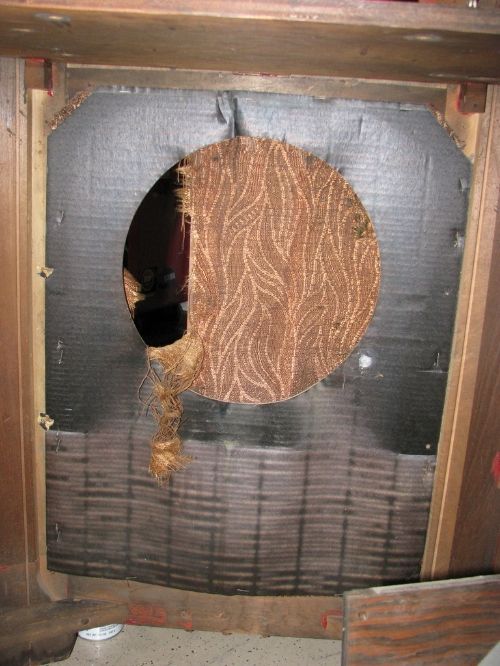 All removed. Those black smudges appear to be hand prints from manufacturing. Not uncommon to find a fingerprint or two somewhere on these things. 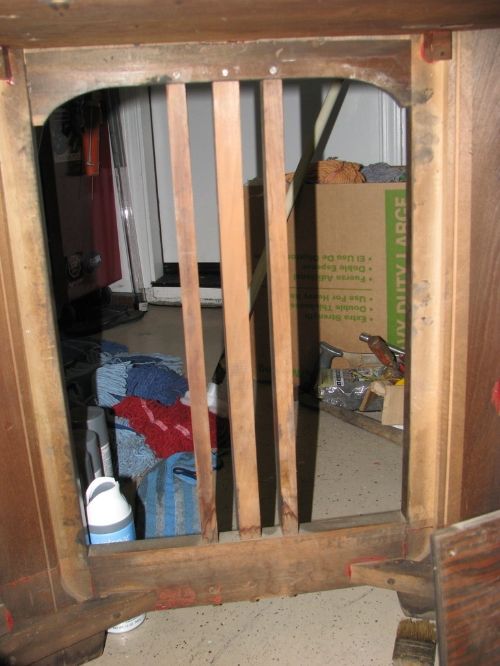 Here is the grill cloth and support or back board. I'll be replacing both. You can see upper left how the cloth should look. Darker and gold. 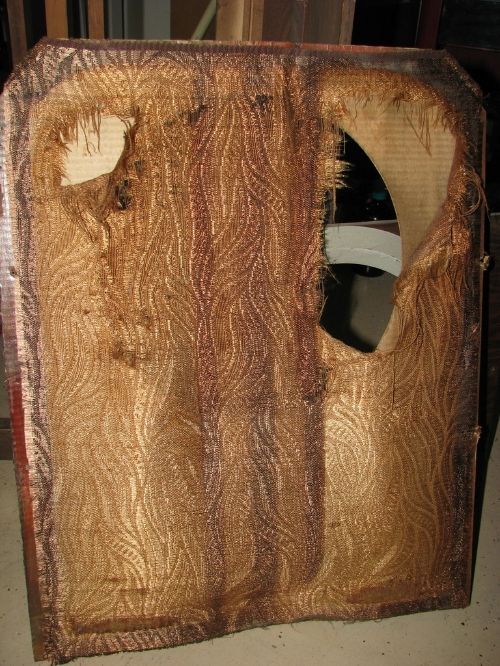 I think this cloth is the best match out there. |
|
|
|
[#35]
Thank you for the updates; I'm really enjoying this thread!
|
|
|
|
[#36]
Quoted: Thank you for the updates; I'm really enjoying this thread! Hey no prob at all. I might slow a bit since it's mostly cabinet stuff now and it takes time to get what I need and get it done to where I am happy. That and my damn sciatica is kicking my butt right now I'm going to lay low for the week and see how I'm doing this next weekend. |
|
|
|
[#37]
Quoted: Hey no prob at all. I might slow a bit since it's mostly cabinet stuff now and it takes time to get what I need and get it done to where I am happy. That and my damn sciatica is kicking my butt right now I'm going to lay low for the week and see how I'm doing this next weekend. Quoted: Quoted: Thank you for the updates; I'm really enjoying this thread! Hey no prob at all. I might slow a bit since it's mostly cabinet stuff now and it takes time to get what I need and get it done to where I am happy. That and my damn sciatica is kicking my butt right now I'm going to lay low for the week and see how I'm doing this next weekend. |
|
|
|
[#38]
I started putting the tuning mechanisms back together and noticed that the belt idler arm was sitting at an angle. Turns out it was a tad worn out.
 Being my cheap assed self I JB Welded it and turned it on my drill press w/ 1000 grit paper. 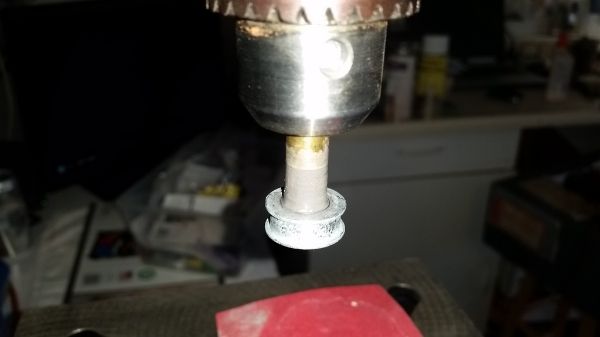 Came up with this where the JB remained in the low spots 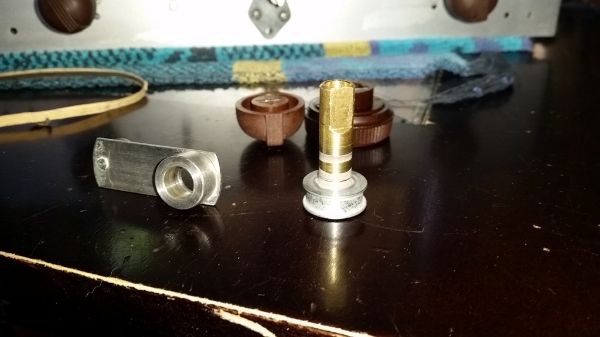 Here is the shaft w/ the idler attached. If you look I had broken a C clamp and again being my cheap ass self I used a star washer and made a clamp out of it instead of buying a new one. 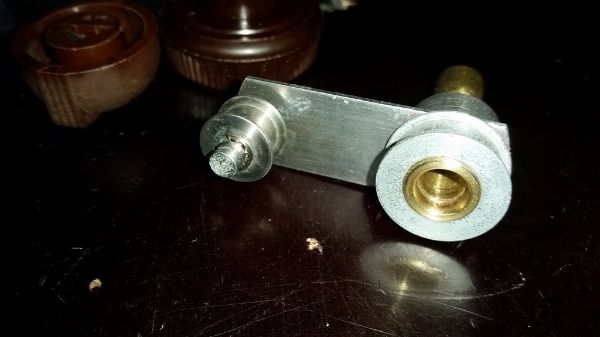 The old dial belt and the new poly belt 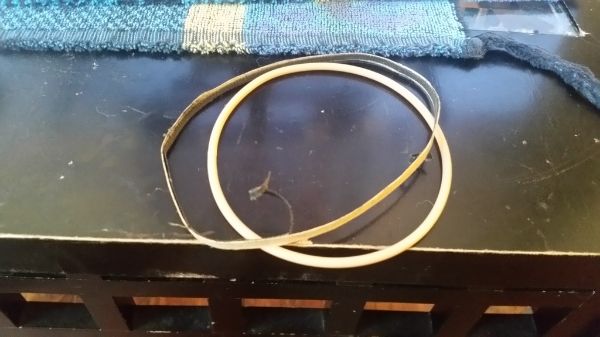 Tuning shaft and new belt in place 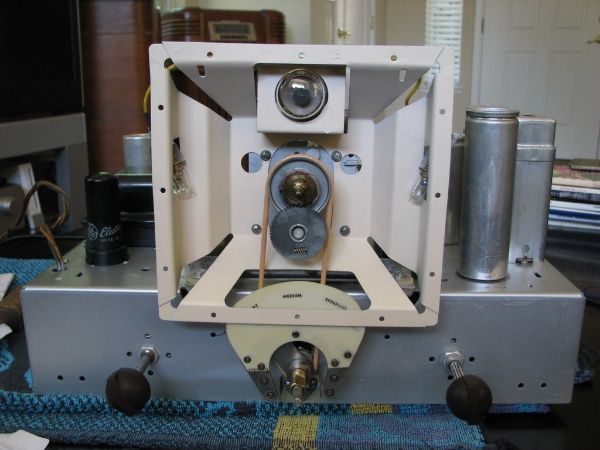 Face and needles in place 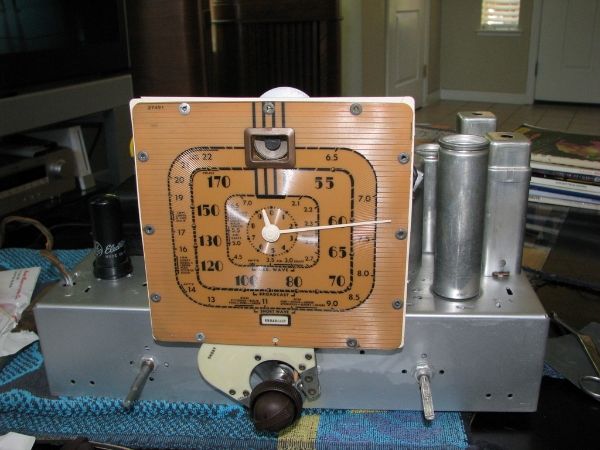 Lit up, a new magic eye will need to be ordered. It's actually working but VERY dim. Funny since that will cost as much as I paid for the radio  |
|
|
|
[#39]
When you say "new" Magic Eye; do you mean an original that works better, or do they still make spare parts for radios that old?
|
|
|
|
[#40]
Quoted: When you say "new" Magic Eye; do you mean an original that works better, or do they still make spare parts for radios that old? I'm not sure if there are NEW eyes out there but there are a lot of NOS like this one but I hear these are real bright - http://www.ebay.com/itm/1PCS-TOYO-6E5-Magic-Eye-Vacuum-Tube-JAPAN-NOS-/151325245645?hash=item233bb000cd:g:QisAAOSw4bVTmDnl I'd like to get a more duller original green looking tube. I'll probably go with the 6E5 instead of the 6G5 that I have here mainly due to cost, I only paid $25 for the radio itself. This one might due - http://www.ebay.com/itm/6E5S-6G5G-6E5G-6E5-MAGIC-EYE-TUBE-NOS-1970s-/201586823287?hash=item2eef82d077:g:sIoAAOSw9VZXPAkM The one thing I hear you run into is that the 6E5 substitute will overlap the green on strong signals. Sites to get new and repro parts for radios - http://radiodaze.com/ , http://www.renovatedradios.com/ I get capacitors from here - http://justradios.com/ I'll probably be getting grill cloth from here again - http://www.richmonddesignsinc.com/grille_cloth_product_page |
|
|
|
[#41]
Worked on the alignment today. I'll wait a bit to see if WWV comes in on the other bands before I call it good enough.
 |
|
|
|
[#42]
Loving this thread, thanks for sharing!
|
|
|
|
[#43]
Quoted:
Loving this thread, thanks for sharing! Me, too, Edisla always has GREAT threads. |
|
|
|
[#44]
Quoted: Me, too, Edisla always has GREAT threads. Quoted: Quoted: Loving this thread, thanks for sharing! Me, too, Edisla always has GREAT threads. |
|
|
|
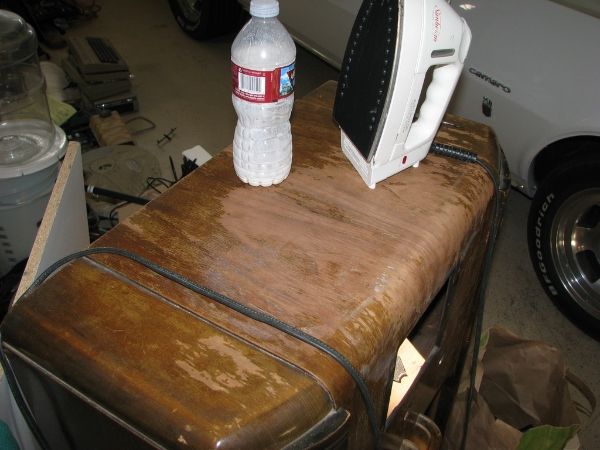
[#45]
An iron? WTF!
 |
|
|
|
[#46]
Attempting to raise some dents out of the wood? |
|
|
|
[#47]
Quoted: Attempting to raise some dents out of the wood? Quoted: Attempting to raise some dents out of the wood? Actually laying down some diluted wood glue into the cracks of buckling veneer. Weigh it down and if that doesn't sit flat iron it out. So far it's working pretty good. I'll keep y'all posted |
|
|
|
[#48]
Ordered up some Medium Brown Walnut paste wood filler. Hoping this makes things easier. The first radios I did up I used Natural color that I had to add coloring to to make it blend. It was a real bitch!
Still trying to figure out a new magic eye. I noted the 6E5's I see have a center key but my socket is solid for the original 6G5. |
|
|
|
[#49]
Keep up the good work man, I'm really enjoying following along.
|
|
|
|
[#50]
Quoted:
Keep up the good work man, I'm really enjoying following along. Wood working, electronics and radios,... what's not to like? Honestly, Edisla's threads are some of the best threads on AR15.com. |
|
|
 Win a FREE Membership!
Sign up for the ARFCOM weekly newsletter and be entered to win a free ARFCOM membership. One new winner* is announced every week!
You will receive an email every Friday morning featuring the latest chatter from the hottest topics, breaking news surrounding legislation, as well as exclusive deals only available to ARFCOM email subscribers.

AR15.COM is the world's largest firearm community and is a gathering place for firearm enthusiasts of all types.
From hunters and military members, to competition shooters and general firearm enthusiasts, we welcome anyone who values and respects the way of the firearm.

Subscribe to our monthly Newsletter to receive firearm news, product discounts from your favorite Industry Partners, and more.
Copyright © 1996-2024 AR15.COM LLC. All Rights Reserved.
Any use of this content without express written consent is prohibited.
AR15.Com reserves the right to overwrite or replace any affiliate, commercial, or monetizable links, posted by users, with our own.


