|
Posted: 7/28/2015 10:23:32 AM EDT
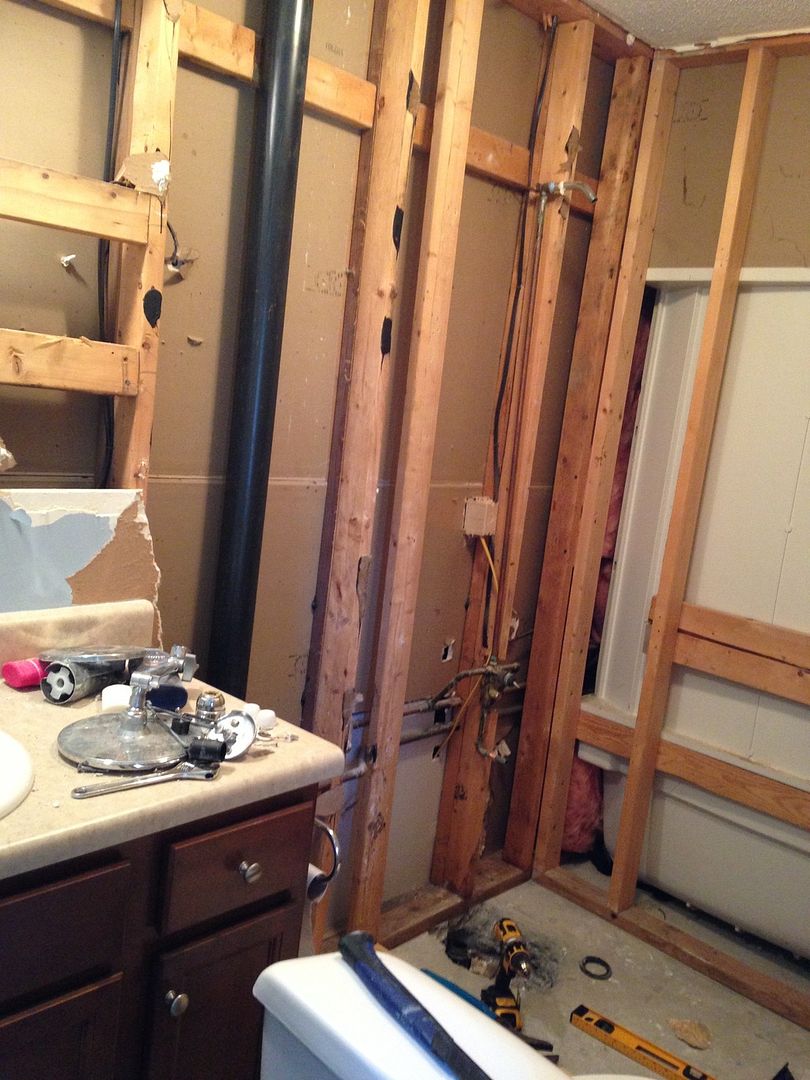
I am wanting to do my master bathroom over. We want to go with tiles on the wall, floor and around the shower. Better counter top and sink and new tub. New molding and door. I dont want to spend alot so i will be doing all the labor myself and learn as i go.
To tile the walls do i need to take the drywall down and put up back board? What do i need to do to tile the floor with ceramic tiles? Do i lay them on the sub floor? backer board? over the laminate ? 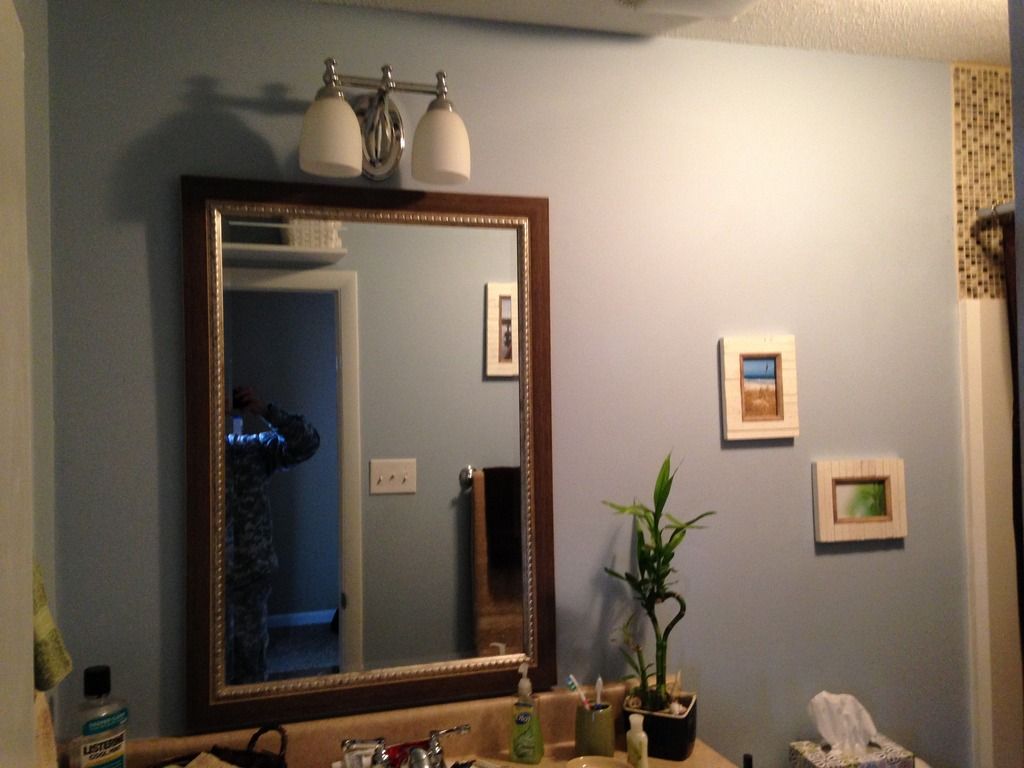
|
|
|
|
[#1]
You can put wall tile directly on the drywall using mastic. Since your drywall is painted, I would scour it a bit first. Floor tile should go on backer board. Tear up the old laminate first.
|
|
|
|
[#2]
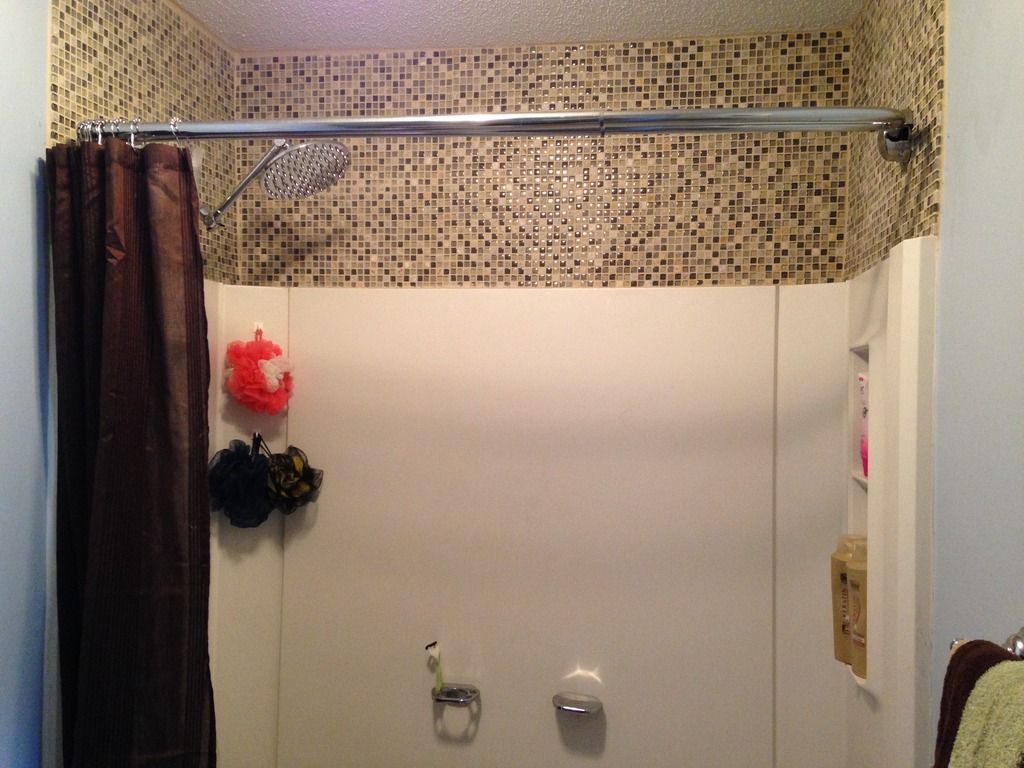
I have that tub/shower contraption. I hate it.
|
|
|
|
[#3]
Quoted:
You can put wall tile directly on the drywall using mastic. Since your drywall is painted, I would scour it a bit first. Floor tile should go on backer board. Tear up the old laminate first. If you are putting tile in the shower, I would not use mastic. I would put RedGard or the equivalent on the walls and then adhere the tile with latex modified thinset. I would put Ditra on the floor and then tile it. |
|
|
|
[#4]
|
|
|
|
[#5]
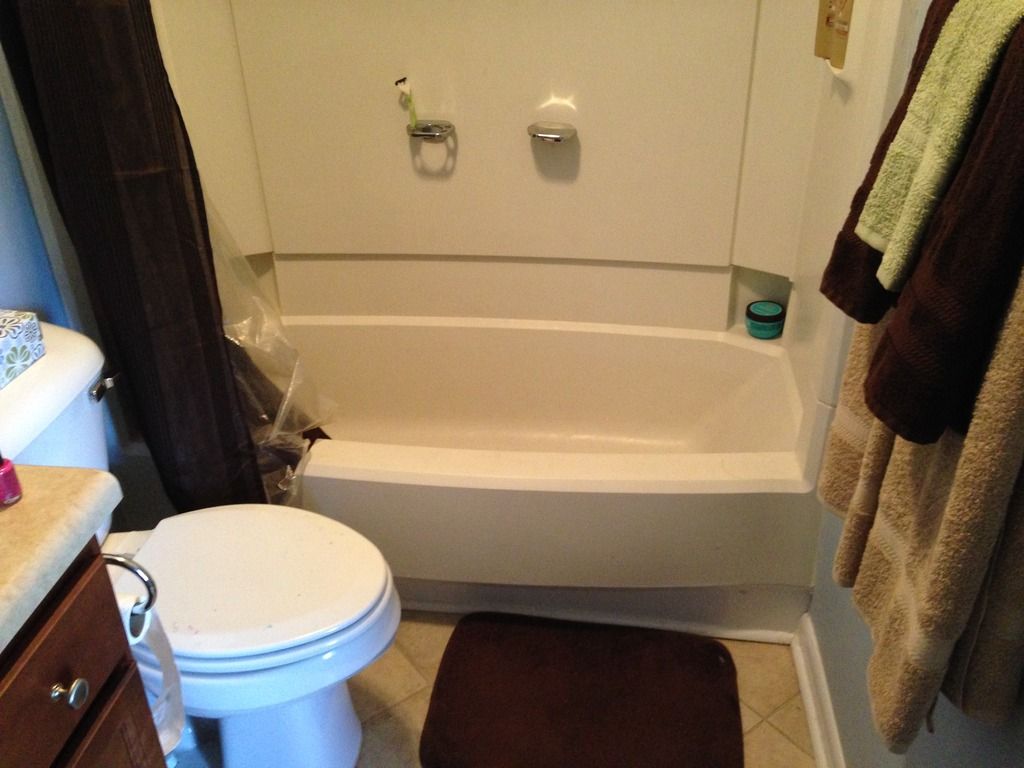
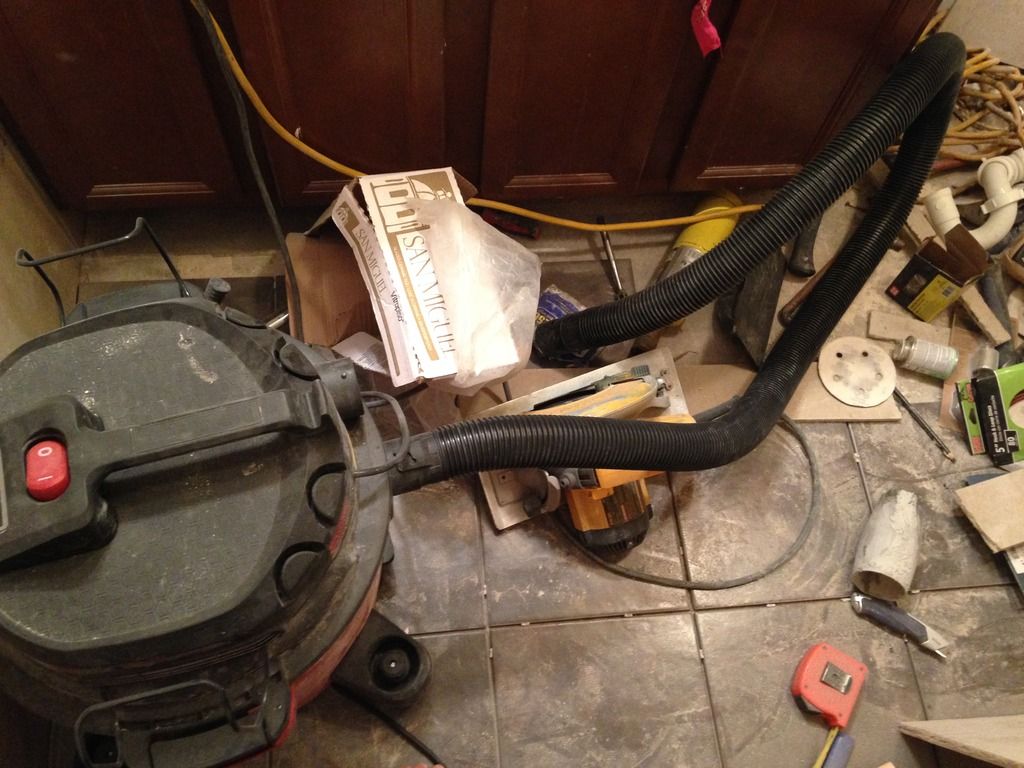
Thanks for the tips guys. I will start ripping everything out sometime this week. Im not sure what i will find behind that shower tub thing. Im wondering what kind of tubs i can fit there. I see no purpose having a tub i cant fit in. im too tall for this tub.
|
|
|
|
[#6]
So i guess the first thing i should do it rip the floor up, shower/tub out, and toilet and vanity out. Take all the trim out and lay the backer board on the floor. Start with the floor and work my way up the walls. The only thing i am unsure about is the tub situation. What do you guys think is behind that insert?
|
|
|
|
[#7]
Start with the shower. Tub or Shower is up to you, take a look into a Kerdi Shower system, If your an engineer you'll like what it has to offer.
|
|
|
|
[#8]
That is pretty cool. Thanks
|
|
|
|
[#9]
Quoted:
You can put wall tile directly on the drywall using mastic. Since your drywall is painted, I would scour it a bit first. Floor tile should go on backer board. Tear up the old laminate first. OP: choose your sources carefully. the above is a recipe for bathroom disaster. for some starting points on setting tile, see http://www.johnbridge.com/vbulletin/ and for examples of what happens when you don't follow good practice, see this zillion page thread http://www.johnbridge.com/vbulletin/showthread.php?t=71950 ar-jedi |
|
|
|
[#10]
Quoted:
If you are putting tile in the shower, I would not use mastic. I would put RedGard or the equivalent on the walls and then adhere the tile with latex modified thinset. I would put Ditra on the floor and then tile it. Quoted:
Quoted:
You can put wall tile directly on the drywall using mastic. Since your drywall is painted, I would scour it a bit first. Floor tile should go on backer board. Tear up the old laminate first. If you are putting tile in the shower, I would not use mastic. I would put RedGard or the equivalent on the walls and then adhere the tile with latex modified thinset. I would put Ditra on the floor and then tile it. thank you. ar-jedi |
|
|
|
[#11]
Quoted:
Start with the shower. Tub or Shower is up to you, take a look into a Kerdi Shower system, If your an engineer you'll like what it has to offer. ^^^ that. ar-jedi |
|
|
|
[#12]
Quoted:
You can put wall tile directly on the drywall using mastic. Since your drywall is painted, I would scour it a bit first. OMG, NO! |
|
|
|
[#13]
Quoted:
You can put wall tile directly on the drywall using mastic. Since your drywall is painted, I would scour it a bit first. Floor tile should go on backer board. Tear up the old laminate first. You're fired |
|
|
|
[#14]
Got it so the drywall will have to go. Do i use backer board?
|
|
|
|
[#15]
Quoted:
Got it so the drywall will have to go. Do i use backer board? for the overall bathroom there is a specific type of drywall available which is commonly called "greenboard". use that for the overall bathroom as it is moisture and mildew resistant. if you can, use the 5/8" thick type greenboard on the ceiling as greenboard is more sag prone than normal sheetrock (gypsum) drywall. greenboard can be used behind where there will be no direct contact with water. for the shower stall there are several types of products which are generically called "concrete backer board" but come in a myriad of different trade names: Hardiboard, Wonderboard, Durarock, Durarock II, and others come to mind. this material is used behind where there will be direct contact with water, such as tiled surfaces in the shower enclosure. your next biggest decision is the shower pan: fiberglass, or DIY-tiled. i implore you to research the DIY-tiled way for a WEEK before starting in on it; in time, most DIY-tiled shower floors leak and then rot the underlying subfloor -- because there are a million and one areas that need detailed attention when putting the tile down. for this reason, you may want to get a fiberglass shower pan (Mustee DURABASE, etc) -- doing so removes 99% of the risk involved with ending up with a watertight shower installation. ar-jedi |
|
|
|
[#16]


|
|
|
|
[#17]
Quoted:
Got it so the drywall will have to go. Do i use backer board? With proper waterproofing you can waterproof the drywall and then tile over it. It will work fine. However, I would still recommend using proper tile backerboard if at all possible. |
|
|
|
[#18]
Minor hijack-
arjedi: Can you post some closeup pics of how you did the window trim? I'm going to be building a house in the near future and plan to do something similar with stained and varnished pine trim. I really like the looks of yours and was planning to do something similar. Thanks. |
|
|
|
[#19]
Quoted:
Minor hijack- arjedi: Can you post some closeup pics of how you did the window trim? I'm going to be building a house in the near future and plan to do something similar with stained and varnished pine trim. I really like the looks of yours and was planning to do something similar. Thanks. the window trim is as straightforward as it gets. if needed, build out (in?) the window/door frame as normal using primed pine; it should end flush with the drywall. the trim is outset on the buildout pine about 3/16". the trim itself is primed 1x4; the lower corners are mitered, and the top is "capped" with about 1/2" overhang on each side. you can have 0" overhang, or a little like i have, or a lot, or you can angle the overhang. -- it simply depends on what look you are going for. this is a 1930's carriage house upstairs, in a very natural setting, so it should look more or less "period correct" when all is said and done. in a different structure, with different (perhaps more contemporary) setting, you would go another way. looking through my big bundle of pictures, i don't really have a good closeup of the trim itself -- but i have a few where the trimwork is captured somewhat. ps if you criticize my choice of beer the quality of my answers will decline markedly... 
pps don't put the handrails on until you move everything upstairs. ar-jedi 


|
|
|
|
[#20]
Quoted:
I have that tub/shower contraption. I hate it. Owens Corning OC-60. Bathtub unit with walls. I used to fix them all the time. I am surprised the floor hasn't cracked yet. That was a common problem for that model. The reason they put them in is a plumber could easily carry the bathtub and wall unit up by himself. Also if it were damaged and need replacement, no walls needed to be ripped out for a new unit. The replacement would go though any standard door. |
|
|
|
[#21]
Quoted:
the window trim is as straightforward as it gets. if needed, build out (in?) the window/door frame as normal using primed pine; it should end flush with the drywall. the trim is outset on the buildout pine about 3/16". the trim itself is primed 1x4; the lower corners are mitered, and the top is "capped" with about 1/2" overhang on each side. you can have 0" overhang, or a little like i have, or a lot, or you can angle the overhang. -- it simply depends on what look you are going for. this is a 1930's carriage house upstairs, in a very natural setting, so it should look more or less "period correct" when all is said and done. in a different structure, with different (perhaps more contemporary) setting, you would go another way. looking through my big bundle of pictures, i don't really have a good closeup of the trim itself -- but i have a few where the trimwork is captured somewhat. ps if you criticize my choice of beer the quality of my answers will decline markedly...
pps don't put the handrails on until you move everything upstairs. ar-jedi http://wopr.losdos.dyndns.org/gallery2/d/36334-1/DSCN8069.JPG http://wopr.losdos.dyndns.org/gallery2/d/36376-1/DSCN8077.JPG http://wopr.losdos.dyndns.org/gallery2/d/36364-1/DSCN8064.JPG http://wopr.losdos.dyndns.org/gallery2/d/36577-1/DSCN8146.JPG http://wopr.losdos.dyndns.org/gallery2/d/36493-1/DSCN8150.JPG http://wopr.losdos.dyndns.org/gallery2/d/34661-1/DSCN7740.JPG http://wopr.losdos.dyndns.org/gallery2/d/34676-1/DSCN7731.JPG http://wopr.losdos.dyndns.org/gallery2/d/37203-1/DSCN8294.JPG http://wopr.losdos.dyndns.org/gallery2/d/37101-1/DSCN8296.JPG Quoted:
Quoted:
Minor hijack- arjedi: Can you post some closeup pics of how you did the window trim? I'm going to be building a house in the near future and plan to do something similar with stained and varnished pine trim. I really like the looks of yours and was planning to do something similar. Thanks. the window trim is as straightforward as it gets. if needed, build out (in?) the window/door frame as normal using primed pine; it should end flush with the drywall. the trim is outset on the buildout pine about 3/16". the trim itself is primed 1x4; the lower corners are mitered, and the top is "capped" with about 1/2" overhang on each side. you can have 0" overhang, or a little like i have, or a lot, or you can angle the overhang. -- it simply depends on what look you are going for. this is a 1930's carriage house upstairs, in a very natural setting, so it should look more or less "period correct" when all is said and done. in a different structure, with different (perhaps more contemporary) setting, you would go another way. looking through my big bundle of pictures, i don't really have a good closeup of the trim itself -- but i have a few where the trimwork is captured somewhat. ps if you criticize my choice of beer the quality of my answers will decline markedly...
pps don't put the handrails on until you move everything upstairs. ar-jedi http://wopr.losdos.dyndns.org/gallery2/d/36334-1/DSCN8069.JPG http://wopr.losdos.dyndns.org/gallery2/d/36376-1/DSCN8077.JPG http://wopr.losdos.dyndns.org/gallery2/d/36364-1/DSCN8064.JPG http://wopr.losdos.dyndns.org/gallery2/d/36577-1/DSCN8146.JPG http://wopr.losdos.dyndns.org/gallery2/d/36493-1/DSCN8150.JPG http://wopr.losdos.dyndns.org/gallery2/d/34661-1/DSCN7740.JPG http://wopr.losdos.dyndns.org/gallery2/d/34676-1/DSCN7731.JPG http://wopr.losdos.dyndns.org/gallery2/d/37203-1/DSCN8294.JPG http://wopr.losdos.dyndns.org/gallery2/d/37101-1/DSCN8296.JPG That's what I wanted. Thanks. |
|
|
|
[#22]
Quoted:
the window trim is as straightforward as it gets. if needed, build out (in?) the window/door frame as normal using primed pine; it should end flush with the drywall. the trim is outset on the buildout pine about 3/16". the trim itself is primed 1x4; the lower corners are mitered, and the top is "capped" with about 1/2" overhang on each side. you can have 0" overhang, or a little like i have, or a lot, or you can angle the overhang. -- it simply depends on what look you are going for. this is a 1930's carriage house upstairs, in a very natural setting, so it should look more or less "period correct" when all is said and done. in a different structure, with different (perhaps more contemporary) setting, you would go another way. looking through my big bundle of pictures, i don't really have a good closeup of the trim itself -- but i have a few where the trimwork is captured somewhat. ps if you criticize my choice of beer the quality of my answers will decline markedly...
pps don't put the handrails on until you move everything upstairs. ar-jedi http://wopr.losdos.dyndns.org/gallery2/d/36334-1/DSCN8069.JPG http://wopr.losdos.dyndns.org/gallery2/d/36376-1/DSCN8077.JPG http://wopr.losdos.dyndns.org/gallery2/d/36364-1/DSCN8064.JPG http://wopr.losdos.dyndns.org/gallery2/d/36577-1/DSCN8146.JPG http://wopr.losdos.dyndns.org/gallery2/d/36493-1/DSCN8150.JPG http://wopr.losdos.dyndns.org/gallery2/d/34661-1/DSCN7740.JPG http://wopr.losdos.dyndns.org/gallery2/d/34676-1/DSCN7731.JPG http://wopr.losdos.dyndns.org/gallery2/d/37203-1/DSCN8294.JPG http://wopr.losdos.dyndns.org/gallery2/d/37101-1/DSCN8296.JPG Quoted:
Quoted:
Minor hijack- arjedi: Can you post some closeup pics of how you did the window trim? I'm going to be building a house in the near future and plan to do something similar with stained and varnished pine trim. I really like the looks of yours and was planning to do something similar. Thanks. the window trim is as straightforward as it gets. if needed, build out (in?) the window/door frame as normal using primed pine; it should end flush with the drywall. the trim is outset on the buildout pine about 3/16". the trim itself is primed 1x4; the lower corners are mitered, and the top is "capped" with about 1/2" overhang on each side. you can have 0" overhang, or a little like i have, or a lot, or you can angle the overhang. -- it simply depends on what look you are going for. this is a 1930's carriage house upstairs, in a very natural setting, so it should look more or less "period correct" when all is said and done. in a different structure, with different (perhaps more contemporary) setting, you would go another way. looking through my big bundle of pictures, i don't really have a good closeup of the trim itself -- but i have a few where the trimwork is captured somewhat. ps if you criticize my choice of beer the quality of my answers will decline markedly...
pps don't put the handrails on until you move everything upstairs. ar-jedi http://wopr.losdos.dyndns.org/gallery2/d/36334-1/DSCN8069.JPG http://wopr.losdos.dyndns.org/gallery2/d/36376-1/DSCN8077.JPG http://wopr.losdos.dyndns.org/gallery2/d/36364-1/DSCN8064.JPG http://wopr.losdos.dyndns.org/gallery2/d/36577-1/DSCN8146.JPG http://wopr.losdos.dyndns.org/gallery2/d/36493-1/DSCN8150.JPG http://wopr.losdos.dyndns.org/gallery2/d/34661-1/DSCN7740.JPG http://wopr.losdos.dyndns.org/gallery2/d/34676-1/DSCN7731.JPG http://wopr.losdos.dyndns.org/gallery2/d/37203-1/DSCN8294.JPG http://wopr.losdos.dyndns.org/gallery2/d/37101-1/DSCN8296.JPG That looks great. The only thing I would recommend would be a different shower base. If you used mortar under the Mustee (flower petal design) base you used it will be fine. I find a lot of those bases crack within 5 to 10 years of normal use. My choice of a base was always Swan. It had a cobblestone appearance and held up much better. |
|
|
|
[#23]
Quoted:
That looks great. The only thing I would recommend would be a different shower base. If you used mortar under the Mustee (flower petal design) base you used it will be fine. I find a lot of those bases crack within 5 to 10 years of normal use. My choice of a base was always Swan. It had a cobblestone appearance and held up much better. i used a mortar slump under the base. it is set well. in fact, until you mentioned it i didn't realize that folks use a plastic shower base *without* setting it in mortar. ar-jedi |
|
|
|
[#24]
Thanks. Those pictures make the vision ten times clearer. I like the look of the shower being all tiles though.
|
|
|
|
[#25]
Quoted:
i used a mortar slump under the base. it is set well. in fact, until you mentioned it i didn't realize that folks use a plastic shower base *without* setting it in mortar. ar-jedi Quoted:
Quoted:
That looks great. The only thing I would recommend would be a different shower base. If you used mortar under the Mustee (flower petal design) base you used it will be fine. I find a lot of those bases crack within 5 to 10 years of normal use. My choice of a base was always Swan. It had a cobblestone appearance and held up much better. i used a mortar slump under the base. it is set well. in fact, until you mentioned it i didn't realize that folks use a plastic shower base *without* setting it in mortar. ar-jedi You are smart. I made a decent living repairing cracks in those. You were smart to use the mortar under it. My customers were mainly people who bought a track home from a builder. Plumbers never did take the time to set them right. |
|
|
|
[#26]
I dont want to go with a pre molded shower pan because i have to make it so my son can easily access the shower from a wheel chair. I think a small curb would be better. With a seat built in.
|
|
|
|
[#27]
Look up curbless shower build
|
|
|
|
[#28]
Just verifying. . . Take the drywall out and put back board up correct?
|
|
|
|
[#29]
Quoted:
Just verifying. . . Take the drywall out and put back board up correct? You can use a cement backer or Kerdi board on the walls. Just keep in mind that cement backer board isn't damp proof so you'll need to use red gaurd, a similar product or kerdi on the walls in the "shower area"... I don't know if your state allows 1.5" drain lines in a shower so you may have to deal with that if you plan to get a permit... My personal opinion is that a 1.5" drain is ok when using the currently allowed mixing valves. If you use two shower mixers then a 2" drain is probably a better option because of the larger free area on the drain grate, or use trough drain. Schluter products are fantastic if you can get the cost within your budget. For professional tile installer it isn't a big deal if they have two thirds of a roll of kerdi remaining after an install because they'll use it on the next project but for a DYI guy the cost can add up. |
|
|
|
[#30]
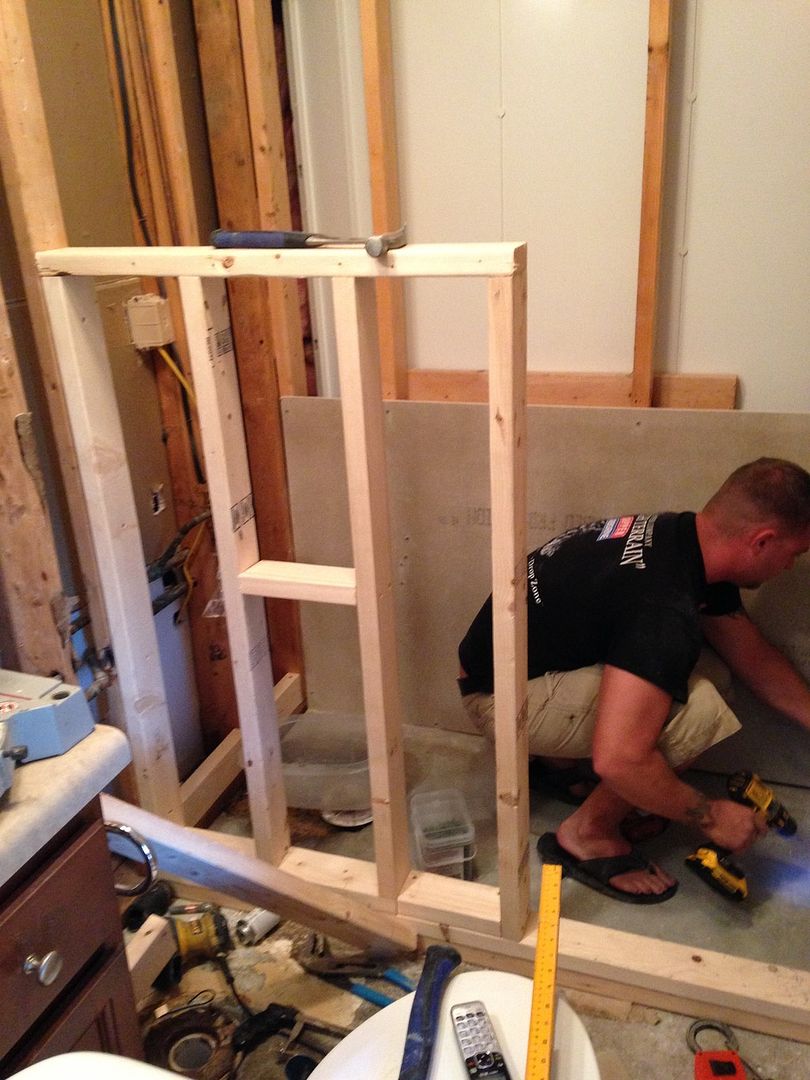
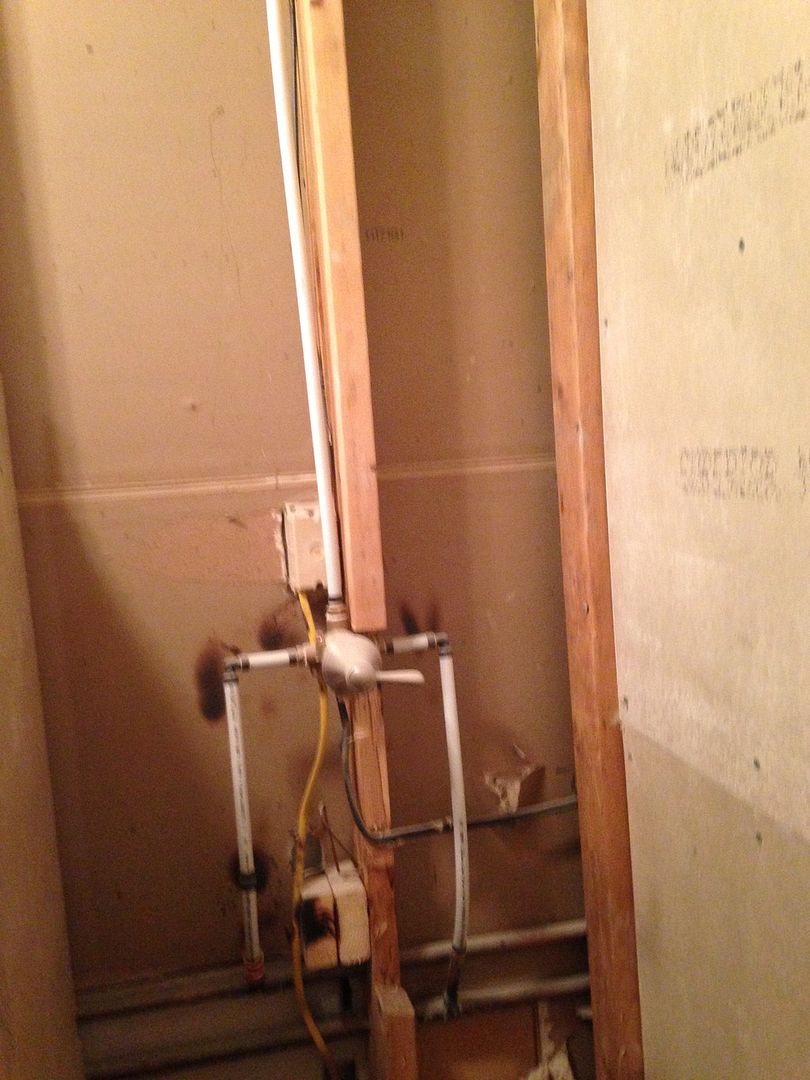
I started yesterday and ripped the entire bathroom out. I'm going to use backboard for all the walls. I framed the shower in and ran into my first issue. I was not being careful and knocked the blend valve off. I am going to cut some pipe and replace the entire thing. Also sloping the bedding mortar isn't as easy as it looks! I will post up pictures soon.
Another question I have is in regards to the ceiling. Do I use green board or backer board? |
|
|
|
[#31]
I would use water resistant drywall on the ceiling in the shower unless you are planning to tile the ceiling.
|
|
|
|
[#32]
Quoted:
You are smart. I made a decent living repairing cracks in those. You were smart to use the mortar under it. My customers were mainly people who bought a track home from a builder. Plumbers never did take the time to set them right. Quoted:
Quoted:
Quoted:
That looks great. The only thing I would recommend would be a different shower base. If you used mortar under the Mustee (flower petal design) base you used it will be fine. I find a lot of those bases crack within 5 to 10 years of normal use. My choice of a base was always Swan. It had a cobblestone appearance and held up much better. i used a mortar slump under the base. it is set well. in fact, until you mentioned it i didn't realize that folks use a plastic shower base *without* setting it in mortar. ar-jedi You are smart. I made a decent living repairing cracks in those. You were smart to use the mortar under it. My customers were mainly people who bought a track home from a builder. Plumbers never did take the time to set them right. Quick clarification please.... Is a 10lb bag of mortar, spread out fairly evenly, enough or do you really load it up under there ? ( Leveling it out either way of course ) |
|
|
|
[#33]
Quoted:
Quick clarification please.... Is a 10lb bag of mortar, spread out fairly evenly, enough or do you really load it up under there ? ( Leveling it out either way of course ) Quoted:
Quoted:
Quoted:
Quoted:
That looks great. The only thing I would recommend would be a different shower base. If you used mortar under the Mustee (flower petal design) base you used it will be fine. I find a lot of those bases crack within 5 to 10 years of normal use. My choice of a base was always Swan. It had a cobblestone appearance and held up much better. i used a mortar slump under the base. it is set well. in fact, until you mentioned it i didn't realize that folks use a plastic shower base *without* setting it in mortar. ar-jedi You are smart. I made a decent living repairing cracks in those. You were smart to use the mortar under it. My customers were mainly people who bought a track home from a builder. Plumbers never did take the time to set them right. Quick clarification please.... Is a 10lb bag of mortar, spread out fairly evenly, enough or do you really load it up under there ? ( Leveling it out either way of course ) Load it up, I use deck mud, 4 parts sand 1 part portland and a little water. You want to be able to ball it up in your hand and it not fall apart, like a well packed snowball. |
|
|
|
[#34]
Thanks for the info.
Thankfully, I'm familiar with the consistency of the mortar and just how sparingly the water needs to be added. 
|
|
|
|
[#35]
Quoted:
I started yesterday and ripped the entire bathroom out. I'm going to use backboard for all the walls. Quoted:
I started yesterday and ripped the entire bathroom out. I'm going to use backboard for all the walls. are you going to tile every wall in the bathroom? if not, i would highly advise against using backerboard everywhere unless you REALLY like buttering rough joints and skim-coating every square inch of the walls and ceiling. backerboard is not smooth like drywall, and you can't just brush or roll latex paint on it and call it a day. moreover, most backerboard does not have an edge bevel for setting tape into, so you are going to be seeing every butt joint seam in the room either sooner or later. finally, backerboard is hella-heavy compared to normal sheetrock or greenboard, and therefore usually comes in smaller size 3 ft x 5 ft panels at 1/2" thickness. just remember, somewhere along the line when doing the walls you are going to have to transition from backerboard to drywall, and hence keeping both the same thickness works best (1/2" and 1/2", for example). drop the greenboard just inside the last tiled area, and you'll have a seamless transition without any telltale artifacts. the shower surround below shows how to do this with the topmost row of tile; it's half on backer and half on greenboard. Quoted:
Another question I have is in regards to the ceiling. Do I use green board or backer board? refer back to http://www.ar15.com/forums/t_1_139/1772597_Bathroom_Remodel_DIY.html&page=1#i54829792 for the overall bathroom there is a specific type of drywall available which is commonly called "greenboard". use that for the overall bathroom as it is moisture and mildew resistant. if you can, use the 5/8" thick type greenboard on the ceiling as greenboard is more sag prone than normal sheetrock (gypsum) drywall. greenboard can be used behind where there will be no direct contact with water. for the shower stall there are several types of products which are generically called "concrete backer board" but come in a myriad of different trade names: Hardiboard, Wonderboard, Durarock, Durarock II, and others come to mind. this material is used behind where there will be direct contact with water, such as tiled surfaces in the shower enclosure. see all the purple stuff below? that's greenboard. USE IT EVERYWHERE but the shower enclosure. (this particular product is called "Purple XP" --> link) see the stuff maked "Durrock Cement Board Next Gen"? that's backerboard. USE IT ONLY in the shower enclosure. ar-jedi
|
|
|
|
[#36]
Quoted:
Quick clarification please.... Is a 10lb bag of mortar, spread out fairly evenly, enough or do you really load it up under there ? ( Leveling it out either way of course ) Quoted:
Quoted:
Quoted:
Quoted:
That looks great. The only thing I would recommend would be a different shower base. If you used mortar under the Mustee (flower petal design) base you used it will be fine. I find a lot of those bases crack within 5 to 10 years of normal use. My choice of a base was always Swan. It had a cobblestone appearance and held up much better. i used a mortar slump under the base. it is set well. in fact, until you mentioned it i didn't realize that folks use a plastic shower base *without* setting it in mortar. ar-jedi You are smart. I made a decent living repairing cracks in those. You were smart to use the mortar under it. My customers were mainly people who bought a track home from a builder. Plumbers never did take the time to set them right. Quick clarification please.... Is a 10lb bag of mortar, spread out fairly evenly, enough or do you really load it up under there ? ( Leveling it out either way of course ) You should be fine with that. Most of the ones I repaired had a lot of squeaking when in use. I mean squeaks that could be heard in the next room. |
|
|
|
[#37]
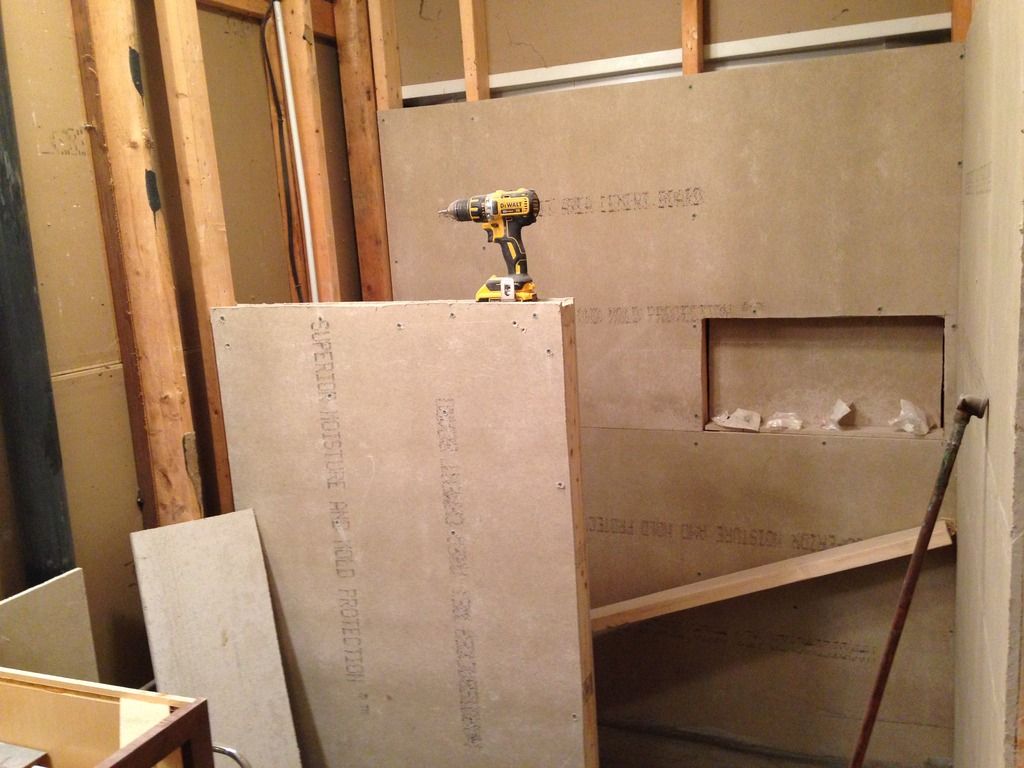
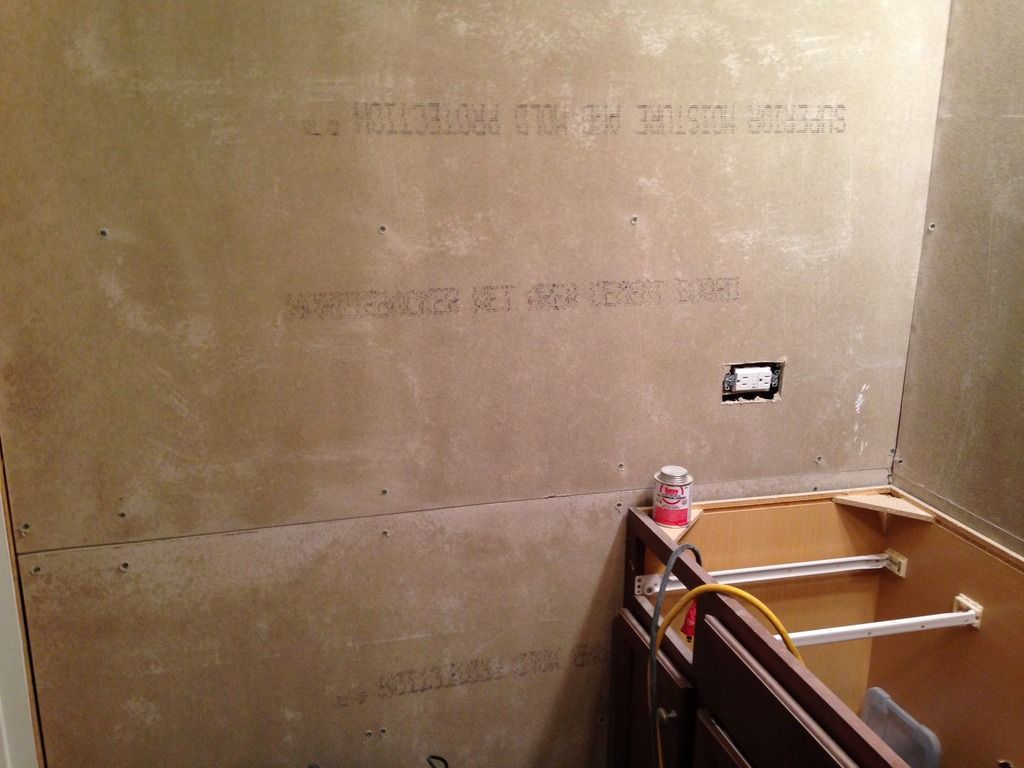
All walls in the bathroom will be tiled. I used cement board on all the walls. I am trying to decide if i want to leave the current ceiling (nothing wrong with it) or do it over just because im already balls deep. The plumbing in the shower really screwed me over. I am on a extremely tight budget and the end goal is to have a kids wheel chair size accessible shower.
|
|
|
|
[#38]
|
|
|
|
[#39]
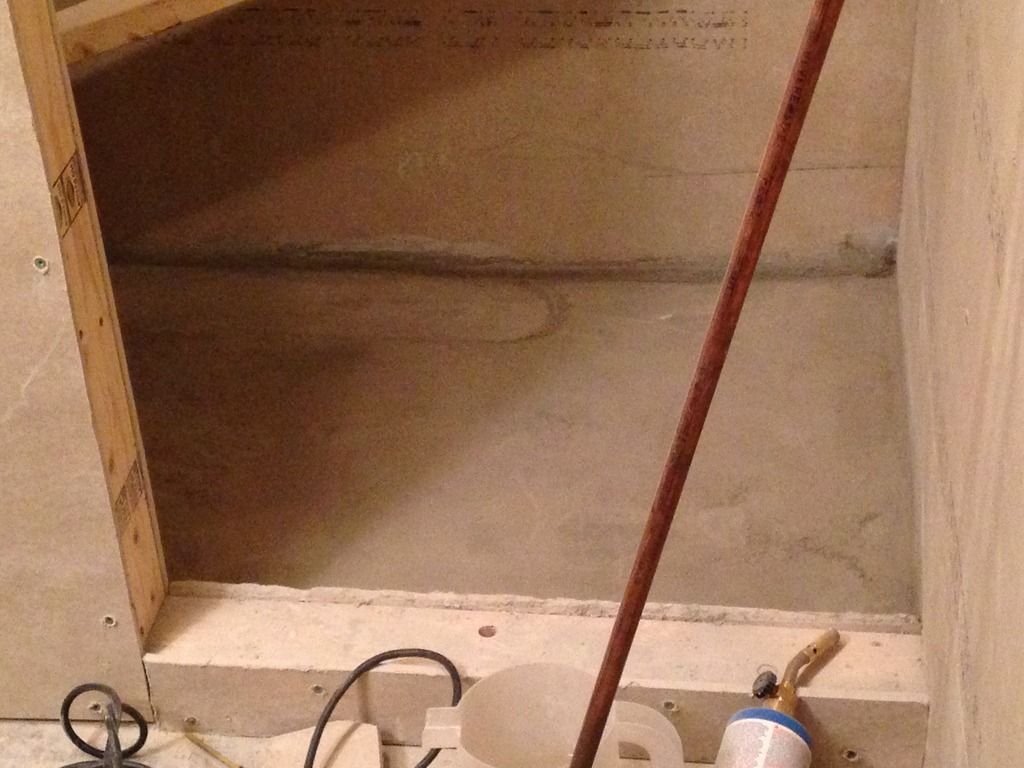
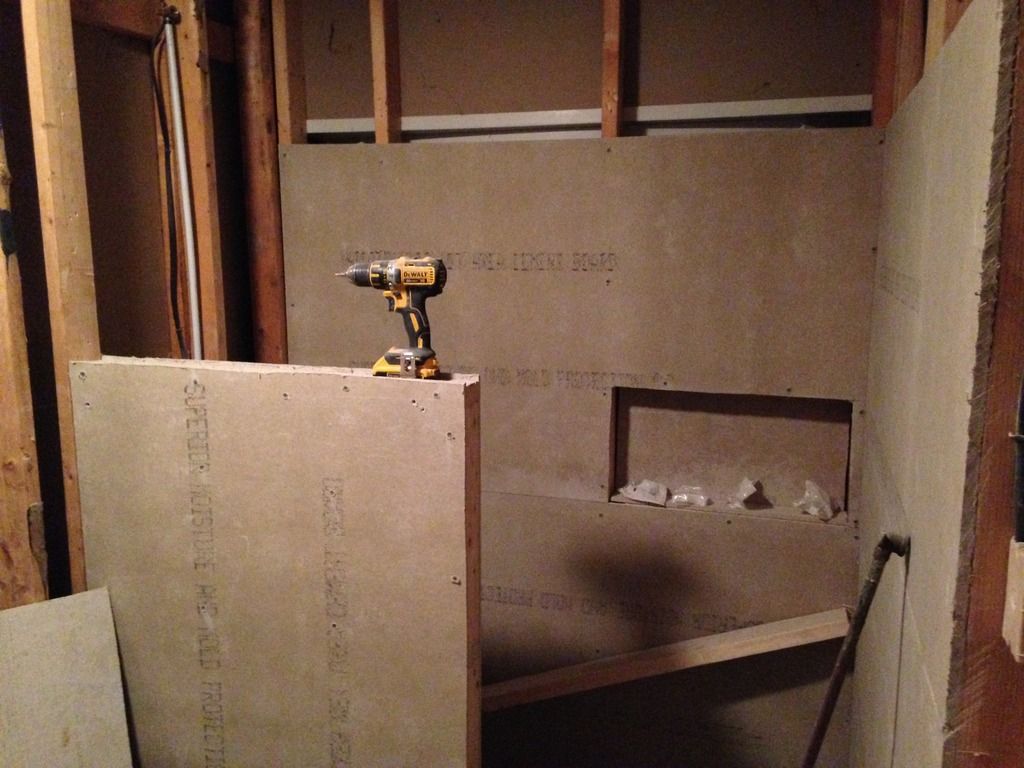
Fuck brother you're in to deep. That is not the way to build a curb, niche or shower for that matter. Stop and do some research. Where is the liner?
|
|
|
|
[#40]
No liner. It's a concrete floor
|
|
|
|
[#41]
This is where I got the information for the Niche
http://www.apartmenttherapy.com/diy-rennovation-project-how-to-build-a-shower-niche-apartment-therapy-tutorials-200386 |
|
|
|
[#42]
I've been building custom showers for years, stop now and figure out the correct way to build them before it cost you even more money down the road or someone in your house gets sick from black mold. The way you're constructing that shower WILL leak and it won't take long.
|
|
|
|
[#43]
Quoted:
This is where I got the information for the Niche http://www.apartmenttherapy.com/diy-rennovation-project-how-to-build-a-shower-niche-apartment-therapy-tutorials-200386 That way is shit as well. |
|
|
|
[#44]
Ok, well besides the niche what is wrong?
I got backer board everywhere, a slopped mortar bed, adjustable drain, and lots of sealant. |
|
|
|
[#45]
Quoted:
^^^ that. ar-jedi Quoted:
Quoted:
Start with the shower. Tub or Shower is up to you, take a look into a Kerdi Shower system, If your an engineer you'll like what it has to offer. ^^^ that. ar-jedi i did a Schluter Kerdi system in my shower when I remodeled it. we LOVE the results although it is VERY expensive... (replaced an acrylic unit with THIS) 


one thing you can't see is that the pre-sloped floor substrate that came with the Kerdi system allowed me to install the shower with a 1.5" lip at the floor. (so i dont have a huge 6" curb to step into) I'll get a picture of it tonight if you're interested, PM me and I'll get your number and text them to you. the KERDI hydrophobic fabric is installed with Thinset directly to the drywall and after taping the corners, it creates a completely waterproof barrier. SO, using the Kerdi system, you CAN go directly over drywall to set your tile. (you also have the added benefit of not needing to construct a rubber waterproof pan at the shower floor) |
|
|
|
[#46]
Needs preslope, liner and mud bed. Backer don't go on until preslope and liner are in, then you do the mud bed.
|
|
|
|
[#47]
Quoted:
Needs preslope, liner and mud bed. Backer don't go on until preslope and liner are in, then you do the mud bed. Quoted:
Needs preslope, liner and mud bed. Backer don't go on until preslope and liner are in, then you do the mud bed. again, the Kerdi system does away with the need to pre-slope a floor or install a traditional pan. KERDI has been around about 25 years, it's a PROVEN system and wasn't tough to install (my first time doing ANY tile, EVER*) *but I am a Commercial Construction professional who has been renovating and remodeling for 25 years Quoted:
Ok, well besides the niche what is wrong? I got backer board everywhere, a slopped mortar bed, adjustable drain, and lots of sealant. the Hardie cement backer you used will also SUCK all the moisture out of your thinset (MUCH more so than Durock type cement backers), actually creating a weaker bond for the tile. (make sure you completely saturate the board before you apply the thinset.. ) |
|
|
|
[#48]
Quoted:
Needs preslope, liner and mud bed. Backer don't go on until preslope and liner are in, then you do the mud bed. What is the preslope? It has the mud bed and I was told I didn't need a liner since the floor was concrete. The mud bed is all angled and slopped toward the drain. When I lay tile does the drain sit on top of below or even with the tile. |
|
|
|
[#49]
Quoted:
again, the Kerdi system does away with the need to pre-slope a floor or install a traditional pan. KERDI has been around about 25 years, it's a PROVEN system and wasn't tough to install (my first time doing ANY tile, EVER*) *but I am a Commercial Construction professional who has been renovating and remodeling for 25 years the Hardie cement backer you used will also SUCK all the moisture out of your thinset (MUCH more so than Durock type cement backers), actually creating a weaker bond for the tile. (make sure you completely saturate the board before you apply the thinset.. ) Quoted:
Quoted:
Needs preslope, liner and mud bed. Backer don't go on until preslope and liner are in, then you do the mud bed. again, the Kerdi system does away with the need to pre-slope a floor or install a traditional pan. KERDI has been around about 25 years, it's a PROVEN system and wasn't tough to install (my first time doing ANY tile, EVER*) *but I am a Commercial Construction professional who has been renovating and remodeling for 25 years Quoted:
Ok, well besides the niche what is wrong? I got backer board everywhere, a slopped mortar bed, adjustable drain, and lots of sealant. the Hardie cement backer you used will also SUCK all the moisture out of your thinset (MUCH more so than Durock type cement backers), actually creating a weaker bond for the tile. (make sure you completely saturate the board before you apply the thinset.. ) Saturate it with what? |
|
|
|
[#50]
Quoted:
Saturate it with what? Quoted:
Quoted:
Quoted:
Needs preslope, liner and mud bed. Backer don't go on until preslope and liner are in, then you do the mud bed. again, the Kerdi system does away with the need to pre-slope a floor or install a traditional pan. KERDI has been around about 25 years, it's a PROVEN system and wasn't tough to install (my first time doing ANY tile, EVER*) *but I am a Commercial Construction professional who has been renovating and remodeling for 25 years Quoted:
Ok, well besides the niche what is wrong? I got backer board everywhere, a slopped mortar bed, adjustable drain, and lots of sealant. the Hardie cement backer you used will also SUCK all the moisture out of your thinset (MUCH more so than Durock type cement backers), actually creating a weaker bond for the tile. (make sure you completely saturate the board before you apply the thinset.. ) Saturate it with what? water.. a 5 gallon bucket and just wash the walls with a sponge (and watch the water disappear almost instantly). the hardie backer products are just not very good at holding water based adhesives.. the board pulls the water out of the adhesive before it really has a chance to properly set. concrete sucks up water. it's what concrete does... (mason's even have to wet concrete blocks with a water hose on a hot day so they will bond with the mortar).. sounds like you might need to spend a couple hours on youtube tonight instead of working on your renovation. everything that ydididothis has said is accurate. although.. maybe you can use the Kerdi system for your floor slope/waterproofing membrane and save most of the work you've already done.. |
|
|
 Win a FREE Membership!
Sign up for the ARFCOM weekly newsletter and be entered to win a free ARFCOM membership. One new winner* is announced every week!
You will receive an email every Friday morning featuring the latest chatter from the hottest topics, breaking news surrounding legislation, as well as exclusive deals only available to ARFCOM email subscribers.

AR15.COM is the world's largest firearm community and is a gathering place for firearm enthusiasts of all types.
From hunters and military members, to competition shooters and general firearm enthusiasts, we welcome anyone who values and respects the way of the firearm.

Subscribe to our monthly Newsletter to receive firearm news, product discounts from your favorite Industry Partners, and more.
Copyright © 1996-2024 AR15.COM LLC. All Rights Reserved.
Any use of this content without express written consent is prohibited.
AR15.Com reserves the right to overwrite or replace any affiliate, commercial, or monetizable links, posted by users, with our own.


