|
[#1]
Never done a Magpul before, but I've done several others. JBlitzen had me do a couple of CAA stocks not too long ago. As long as it fits over the standard buffer tube, it should be simple blind pin operation.
|
|
|
|
[#2]
Just got done doing one....no problems to speak of. I'll try to post some pics tonight when I'm home from work. IM me if you have any questions......or if tomorrow rolls around and I've forgotten to post those pics
The short explanation.... First step for me was to Dremel a small amount of the plastic in order to create a flat surface for the drill. I then drilled 2 holes through the plastic of the CTR and through the lowest portion of the receiver extension. I then secured the stock with two 1/8th inch roll pins and some epoxy (tinted with powdered charcoal). I'll post more later |
|
|
|
[#3]
Awesome man, thanks, looking forward to the pics
|
|
|
|
[#5]
Here's the pics and a little more detail on the process. I'm sure there are lots of ways to fix the stock, this is only how I did mine. If you need any help, let me know. This was my first time through and I'm pretty pleased with the results. Overall it's pretty simple......just take your time and be patient
Here goes..... I began by Dremeling some of the plastic on the CTR. I've highlighted the area I'm referring to in green (1st pic...a stock photo that I've photoshopped). This only served to get some of the rounded portion of the stock flat, in preparation for drilling. I did this on both sides by placing a piece of masking tape from one side of the stock to the other. The tape served as my way of lining up the areas that I wanted to Dremel on both sides. Once the tape was down (and looked pretty even), I made a mark with a silver Sharpie on both sides of the stock using the tape as a guide. You don't have to remove much material. Remove just enough to allow your drill bit a little higher on the plastic. If you skip this step (or don't flatten it enough) the drill bit might drift and you will won't hit the lower portion of the receiver extension high enough. I hope that part made sense  Now you're ready to drill. I used an 1/8th inch drill bit (make sure you use the bits designed for metal). I then drilled into the stock (the red dot in the first photo). Once I broke through the plastic and hit the aluminum in both areas, I stopped and removed the stock. The bit will leave 2 marks on the receiver extension.....go ahead and drill all the way through. I did this portion without one, but a vise might have made things easier. A drill press might also be more accurate, but I made out fine with a cordless drill. Depending on where you pin the stock, you may have to remove additional aluminum from the recessed "trough" area with the six position holes. I was fine for the rear pin, but had to do a little more Dremel work on the forward one. Once you've drilled the holes it's time to place the stock back on and lock it into the original starting position with the friction lock. Make sure the stock hole is lined up properly (there may be some play even with the lever locked). Then grab your drill, insert the bit into the hole that goes through the receiver extension, and drill through the other side of the plastic. Clean up the holes if necessary. It's time to secure with the roll pins. They'll probably need to be cut down so they fit flush or slightly recessed....I used my Dremel to cut mine. Once they're properly fitted for length, drive the 1/8th inch roll/tension pins through with a mallet or better yet, a roll-pin punch. After the pins are flush, mix up your epoxy and finish the job. I tinted mine with powdered charcoal. You could also use powder shaved from pastels if you've got an OD or Dark Earth CTR. After the epoxy dries, I took a Scotch-brite pad and dulled the shiny finish to match the CTR. That's about it. Let me know if you have questions. Good Luck! Pic one with Dremel area (green) and drill area (red) highlighted.... 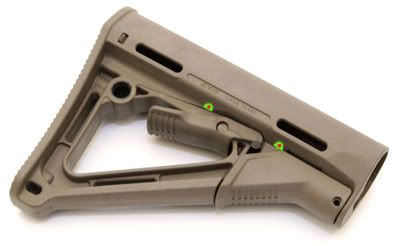 Pic two showing the rear hole in stock and receiver extension (disregard the hole in the friction-lock lever....it was a mistake 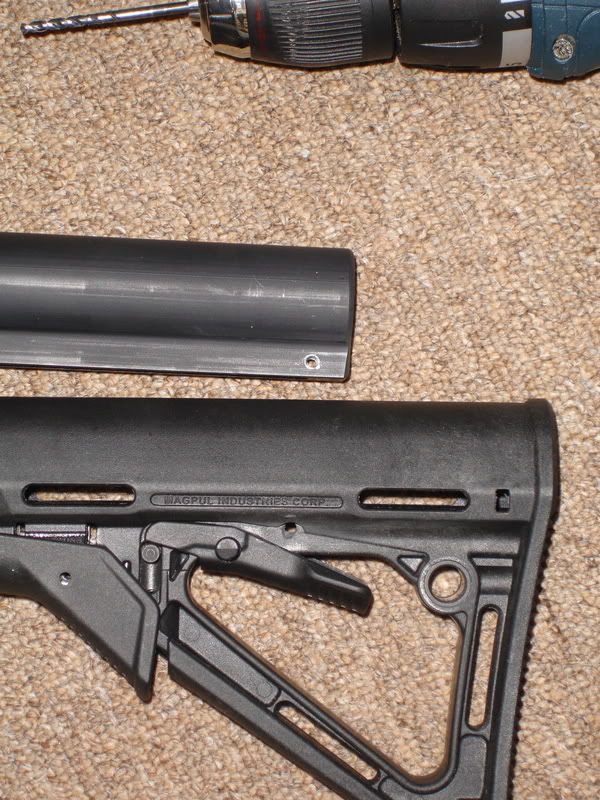 Pic three showing finished stock with tinted epoxy (sorry for the crappy out-of-focus photo). 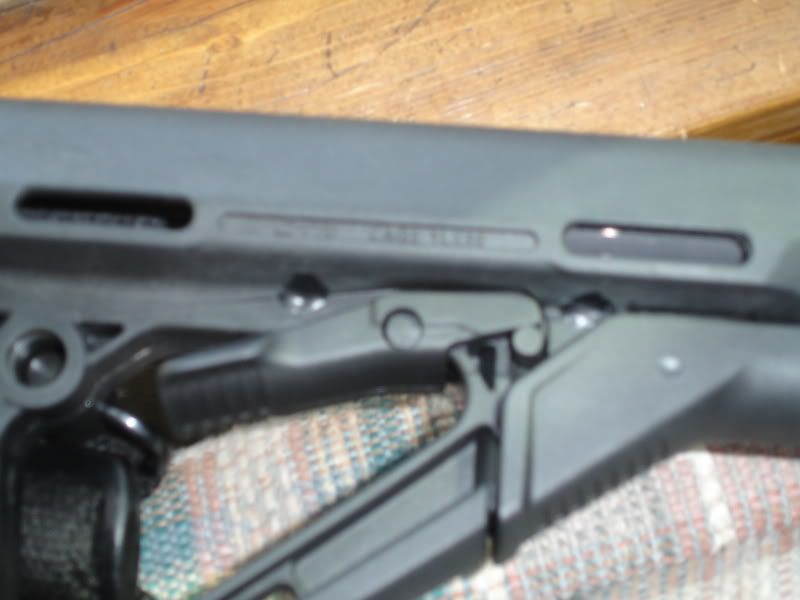 And the whole thing...  |
|
|
|
[#6]
Wow thats perfect, thanks for the pics. Is that a DNTC break on there? If so how do you like it? I was thinking of getting one myself but i need to find the right place that would actually do it for me
|
|
|
|
[#7]
Yes. It's the FSC556. I had Adco pin/weld it for me. I've only put around 60 rounds through but I do like it. It is noticeably different than before the comp. with less muzzle rise and pretty fast follow-ups. I'm kind of curious what the flash will look like in low light...but I haven't had the opportunity to try it out yet. |
|
|
|
 Win a FREE Membership!
Sign up for the ARFCOM weekly newsletter and be entered to win a free ARFCOM membership. One new winner* is announced every week!
You will receive an email every Friday morning featuring the latest chatter from the hottest topics, breaking news surrounding legislation, as well as exclusive deals only available to ARFCOM email subscribers.

AR15.COM is the world's largest firearm community and is a gathering place for firearm enthusiasts of all types.
From hunters and military members, to competition shooters and general firearm enthusiasts, we welcome anyone who values and respects the way of the firearm.

Subscribe to our monthly Newsletter to receive firearm news, product discounts from your favorite Industry Partners, and more.
Copyright © 1996-2024 AR15.COM LLC. All Rights Reserved.
Any use of this content without express written consent is prohibited.
AR15.Com reserves the right to overwrite or replace any affiliate, commercial, or monetizable links, posted by users, with our own.


