|
Posted: 10/13/2010 8:24:50 PM EDT
a month or so ago i posted about a knife making class in san antonio that was being offered through the Southwest School of Art (http://www.swschool.org/). the instructor, James Helm (http://helmforge.blogspot.com/2010/03/hello-everyone.html), comes from a blacksmithing family. in fact, one of the anvils in his shop was his great grandfather's. The class' main focus is to teach the students about basic tool/knife making and forging techniques. we will be making at least 2, possibly 3 projects throughout the course. the first project is to model the instructor's knife and subsequent projects are ones of our own choosing. i will try to post all of the steps of my projects as they come along.
our first project is a knife made out of a piece of truck coil spring. 

and here is a pic of the knife we're supposed to be making. our instructor has made a few of these and they're quite nice utility/EDC knives. 
after we cut our individual pieces off the spring, we lit the homemade gas forges and put our pieces in for the first heat. 

the instructor went first to show us how to straighten the coil and proper hammering techniques. 
then we were sent off on our own to start heating and hammering. here's my piece after the first couple of trips into the forge. i got it mostly straight and started to flaten it. 

once we got it relatively straight and flat, we marked it and cut it down a little bit smaller. better to start out with too much and cut down than not have enough! 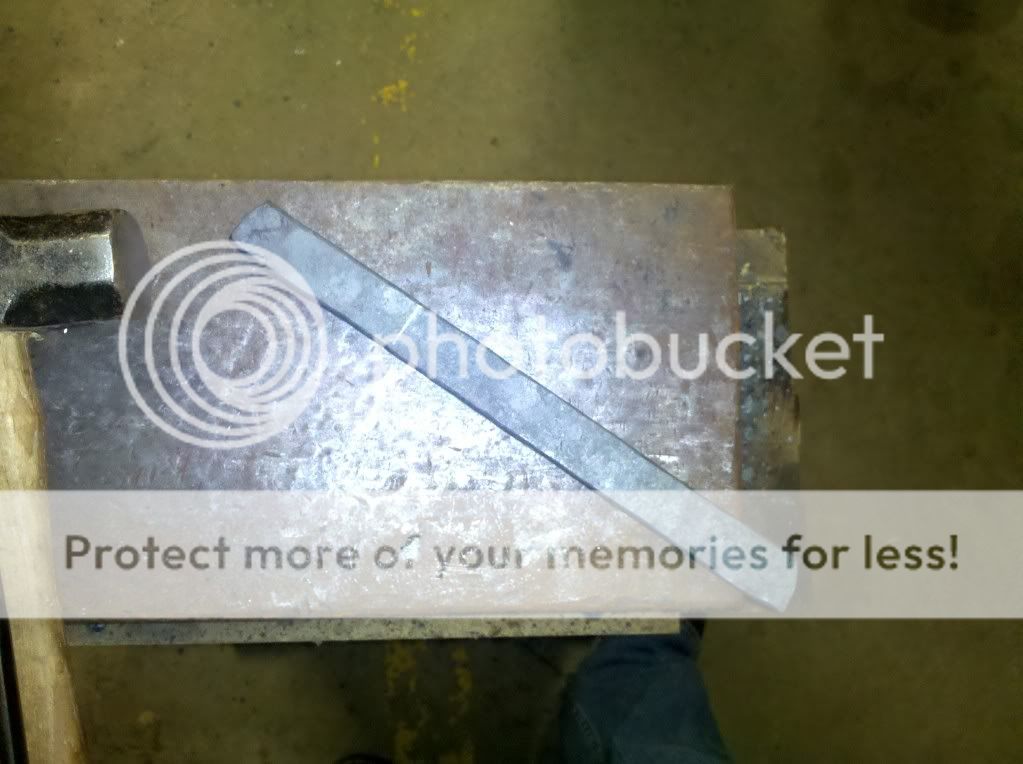
at the end of class for the day we started forming the shape of the blade. in this pic i've got it shaped a little bit. 
i did a couple more heats and started to curve the blade some but i forgot to take a picture of it. i guess y'all will have to wait till next wednesday to see how it's coming along! |
|
|
|
[#1]
That is awesome
|
|
|
|
[#2]
SWEET!!
|
|
|
|
[#3]
Excellent
|
|
|
|
[#4]
Thanks for the heads up in GD. Tagged.
|
|
|
|
[#5]
Quoted:
Thanks for the heads up in GD. Tagged. +1 |
|
|
|
[#6]
Quoted:
That is awesome The two we were using were coffee cans with ceramic insulation. Most of the forge was built by the instructor but I can't remember who made the venturi. I can try and get that info next weekn if you really need it. The forges are small, but they work quite well and heat the metal up fast. |
|
|
|
[#7]
This is not a tag...kick ass more info needed.
|
|
|
|
[#8]
i'm taking a class at my local community college. our intructor is a pretty kick-ass blacksmith, but he doesn't make knives..., so we do our own stuff.
have you looked into making your own forge? a buddy of mine and i were gonna make one, doesn't look to be too difficult to do the coffee-can types you're using. oh, and if you have access to a mig or stick welder in your class, its a trillion times easier to work the metal if you weld a rod to your piece and cut it off later so you don't have to screw around with using tongs |
|
|
|
[#9]
i haven't looked into making my own yet, but i may in the future. initially i thought about making a charcoal forge, but we'll see. the gas one is working out quite well.
novel idea on welding a "handle" onto your piece. not sure i've ever hear of anyone doing that! |
|
|
|
[#10]
like i said, if you do some reading, a propane forge is really not very hard to make. hardest part is finding the materials for the heat refractory elements, and assembling the burner depending how complex you want to go, of course, you can always just buy a burner. coals are harder to find around here (the good stuff, not charcoal), but propane is obviously plentiful.
didn't know the handle idea wasn't well known, everybody in my class does it, it takes me about 10 minutes of work to weld the handle on to where it won't break off during forging, and takes about another 5 minutes to cut the thing with a torch/saw. total work time is 10-15 minutes, but i find i get 2-3 times as much work done when i'm not fumbling with tongs, it lets you really let loose with the hammer |
|
|
|
[#11]
the welding on a handle is pretty well used from stuff ive read. ive never forged a knife so i dont know how well it works, but it seems like it would still get super hot.
|
|
|
|
[#12]
the welding on a handle is pretty well used from stuff ive read. ive never forged a knife so i dont know how well it works, but it seems like it would still get super hot.
|
|
|
|
[#13]
Looks like a lot of fun. Keep us updated on your progress.
|
|
|
|
[#14]
Very cool
|
|
|
|
[#15]
very nice!
|
|
|
|
[#16]
i have class tonight so i should have some more pics up sometime late this evening.
|
|
|
|
[#17]
second day of working steel and i got a lot done!
some of y'all wanted a better pic of the forge. i forgot to get the name of the guy that built the venturi, but i'm sure someone who's handy could look at this pic and build one from scratch. 
this next picture is where i left off when i finished last week. 
i needed to put a little bit more of a curve to the blade so i heated it up one more time and hit it a couple of times. 
the curve is needed so that when you start to actually pound out the blade edge it doesn't curve back too far. here's one while the blade is nice and hot. i'm starting to pound out the edge which is drawing the curve out some. 


you can see as i thin the edge out it's straightening the blade somewhat. 
now it's time to start working on the handle. 


and finally, i used a punch and put a lanyard hole in the end of the handle. 
a couple of times i dropped the blade on the concrete floor and dinged the tip up which required some careful heating and hammering. at one point i had to take the blade over to the bench grinder to do some quick shaping. at the end of class we put the blades in vinegar to knock the scale off so we can start filing next week. hopefully i'll be done with this project next week and i can start on my second knive! enjoy the pics and i'll give y'all some more updates next week! |
|
|
|
[#18]
after our last class the instructor put our knives into a container with vinegar to dissolve the scale off the blade which will make it easier to file. when i showed up this is what it looked like:

the vinegar was full strength (9%) vinegar and it soaked about 24 hours. the faint white lines are some reference lines i drew on just prior to the picture so i knew about how much to take off during stock removal with the belt sander. i needed to take off some around the tip because i forged it too thin. something to remember for next time. here are the pics as it progressed through stock removal: 


once i got it sanded down the way i wanted, i started to file the edge of the blade. 
i then realized that the tip of the blade was too hard and the file wasn't cutting the metal at the tip very fast so i heated the blade up to draw a temper and let it air cool for a few minutes: 
once the blade was cool enough to touch i continued to file until i got the profile of the edge where i wanted it: 

now, it's not the prettiest blade, but i think that it'll make a good skinning knife. i like a smaller blade and a comfortable handle when i'm dressing out deer so this should work out nicely. function over form i guess! at the end of class we did our final heating and quenched it in vegetable oil to harden it. unfortunately i had to rush off to work so i wasn't able to get any good pics of that process. before we started that i was able to get started on my second project. i'm looking to make a smaller EDC type knive so i cut another piece of spring and got to work: 

next week i'll have the handle on my first project and i should be most of the way done with my second project. till then, enjoy! |
|
|
|
[#19]
Great thread. Keep it coming, OP.
|
|
|
|
[#20]
|
|
|
|
[#21]
Thanks guys! Now I need to convince the wife to let me set up a forge in the back yard!
|
|
|
|
[#22]
I made a bunch of burners using reducers and holes drilled on the side. It seems as if they all work about the same no matter the size of reducer or number of holes
 One does whistle a bit though. I will see if I can get a picture tomorrow but my camera has been acting up. One does whistle a bit though. I will see if I can get a picture tomorrow but my camera has been acting up. |
|
|
|
[#23]
i didn't get a whole lot of pics this evening. we went over sharpening techniques and finishing the handles. the two types of handle finishes that we're using are spray-on truck bed liner and cord wrap w/ shellac. on this knife i'm using a spray-on bed liner. this knife is going to be more of a skinning knife so i wanted something tough, durable and no non-sense. after sharpening my knife (i didn't take pics of that because most people on here know how to sharpen knives), i stabbed it into a cardboard box and sprayed on a few layers.

in between layers i started to work on my second project. i didn't have a lot of time left in class to work so i tried to get a lot of hammering in and didn't get but one pic. 
i asked my instructor where here got the venturi for his gas forges. they're made by Larry Zoeller Forge http://zoellerforge.com/ . next week i will have pics of my finished first knife and hopefully i will be most of the way done with my second knife. |
|
|
|
[#24]
Metal working is one of those skills that I have always valued. I am so thankful for the months I got to spend in a forge working iron and other materials. After going into my materials classes (for mechanical engineering) I have learned to much more about the internal workings of materials and those stresses you impart on them by cold and hot working the metals.
Keep the practice going, because after civilization ends, blacksmiths are going to be the pimps of the post apocalyptic world. |
|
|
|
[#25]
ok, so my first knife is finally finshed! before i left class last week i srayed on a few coats of truck bed liner on the handle. when i get some spare time i will probably make a kydex sheath for it.

i was able to get a lot of work done on my second knife. i started drawing the blade out a little bit more than where it was when i left it last week. 
to get an idea of how i wanted the blade shaped in reference to the handle, i shaped the handle some. 
the blade was a little too long so i decided to start doing the stock removal part a little early in the process. 

i had to take the blade back to the forge and straighten it out some more. once it cooled i took it to a pain stripping wheel and knocked off the scale. 
when i get home i'm gonna file the blade to get the bevel where i want it. i tried to do it on a sanding belt, but it wasn't working how i had planned. this last pic is of my two knives side-by-side for comparison. 
that's it for this week! |
|
|
|
[#26]
don't bother with a belt unless you are using a decent/fresh belt. anything else will either take ages, or screw your grind. it took me a few blades before i started to get better with the belt
|
|
|
|
[#27]
Quoted:
don't bother with a belt unless you are using a decent/fresh belt. anything else will either take ages, or screw your grind. it took me a few blades before i started to get better with the belt yeah, it took me about 30 minutes of using the belt before i realized i should stop and just finish it up with a file. if i get the file work done before next class, all i will have to do on that one is heat treat it and sharpen it. not sure what kind of handle i'm going to put on it yet. i thought about micarta or something nice, but i don't think i want to put the time and money into that right now. i might just spray on a few thin coats of truck bed liner for the time being. |
|
|
|
[#28]
Awesome! I will be following this thread.
|
|
|
|
[#29]
thanks! i only have 2 more classes left; next wed and dec 1 but maybe this will inspire more people to take a basic blacksmith/knife making class. once i finish this thread i will probably repost it in GD to get more views. i know that not a lot of people come over to this side of ARFCOM.
|
|
|
|
[#30]
another class with a lot done but not a lot of pictures, sorry. i finished profiling the blade on my second knife with a file a few days ago and came in ready to heat treat. here it is in the forge:

i did 3 quenches and then put it in the oven at 350 degrees for an hour. last week i started work on a third and final knife. there was a small scrap piece of steel laying around that one of us had cut off that i started to work into a small blade. i wasn't sure what i wanted to do with it but my instructor saw that it was a smaller piece and asked if i had ever seen a kiridashi. he showed me one that he made and i went back and researched some different types. here's the one he made off his blog: 
i didn't get a lot of pics because i was working quickly on it, but here it is almost done. it's been heat treated, all i need to do is sharpen it and clean it up: 

there's going to be another class sometime after the first of the year, so if any of y'all are in san antonio area and want to go, feel free to go to the instructor's blog in the OP and shoot him an e-mail! |
|
|
|
[#31]
Sorry everyone, I don't have any new pics yet. The last class was really productive. I completed 2 knives and almost finished a 3rd. A new class will be starting after the first of the year so I'll be able to finish the last knife and I'll probably attempt a tomahawk as my main project.
|
|
|
 Win a FREE Membership!
Sign up for the ARFCOM weekly newsletter and be entered to win a free ARFCOM membership. One new winner* is announced every week!
You will receive an email every Friday morning featuring the latest chatter from the hottest topics, breaking news surrounding legislation, as well as exclusive deals only available to ARFCOM email subscribers.

AR15.COM is the world's largest firearm community and is a gathering place for firearm enthusiasts of all types.
From hunters and military members, to competition shooters and general firearm enthusiasts, we welcome anyone who values and respects the way of the firearm.

Subscribe to our monthly Newsletter to receive firearm news, product discounts from your favorite Industry Partners, and more.
Copyright © 1996-2024 AR15.COM LLC. All Rights Reserved.
Any use of this content without express written consent is prohibited.
AR15.Com reserves the right to overwrite or replace any affiliate, commercial, or monetizable links, posted by users, with our own.


