|
Posted: 10/31/2009 10:00:34 AM EDT
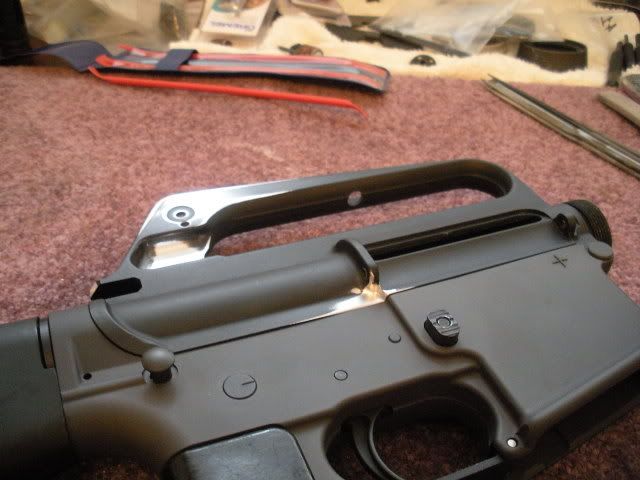
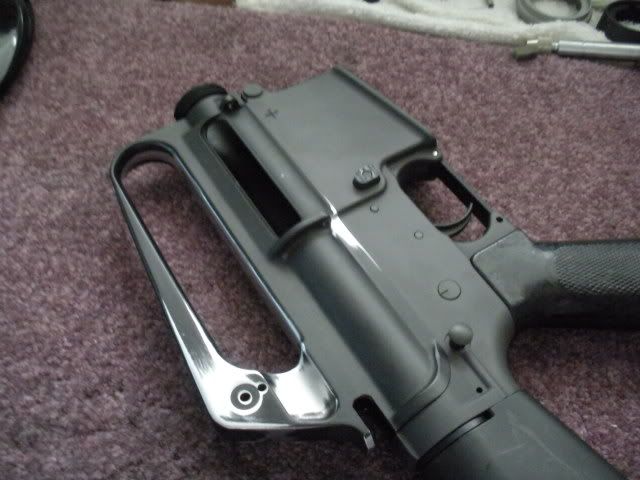
Here are a few shots. Its looking good. Think I'll skip smoothing the forging flash though.

|
|
|
|
[#1]
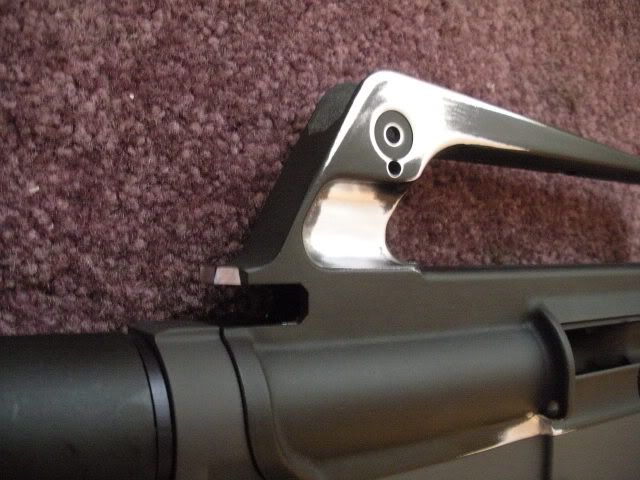
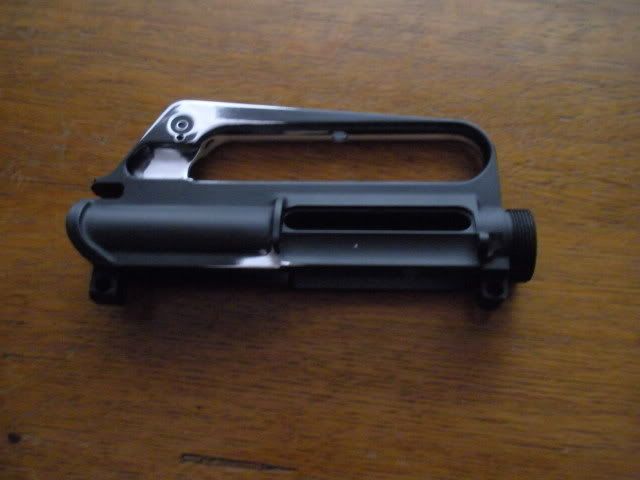
Nice job!! What did you use for the left side below the port door to remove the material?? I'm having alittle trouble getting the right inside radius.
|
|
|
|
[#2]
Quoted:
Nice job!! What did you use for the left side below the port door to remove the material?? I'm having alittle trouble getting the right inside radius. Thanks. I used a #194 high speed cutter in the dremel and a steady hand. I made the cut coming straight down from above with the upper laying on its side. I found some really cool sanding foam at ACE that you can be cut to size and conforms to contours. Perfect for cleaning up the area after milling. |
|
|
|
[#3]
Understanding that the Fulton is cheaper....Would someone think about this type of conversion be better off buying a NoDak "in-the-white" to not have to deal with the hardened surface? or is that not that big deal?
|
|
|
|
[#4]
Quoted:
Understanding that the Fulton is cheaper....Would someone think about this type of conversion be better off buying a NoDak "in-the-white" to not have to deal with the hardened surface? or is that not that big deal? In my case I had the Fulton on hand as it were but sure an NDS in the white would be great also. Hardening of the surface is not an issue in either case. Also with the NDS you'll get the rebated lug whereas I'll have to add that little detail myself. One way or the other its a fun project. |
|
|
|
[#5]
Rebated lug area?
|
|
|
|
[#6]
Quoted:
Rebated lug area? non rebated lug 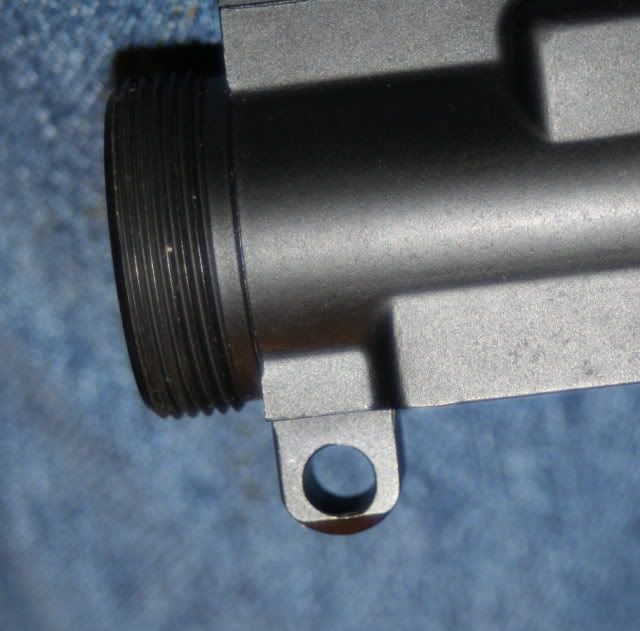
rebated lug 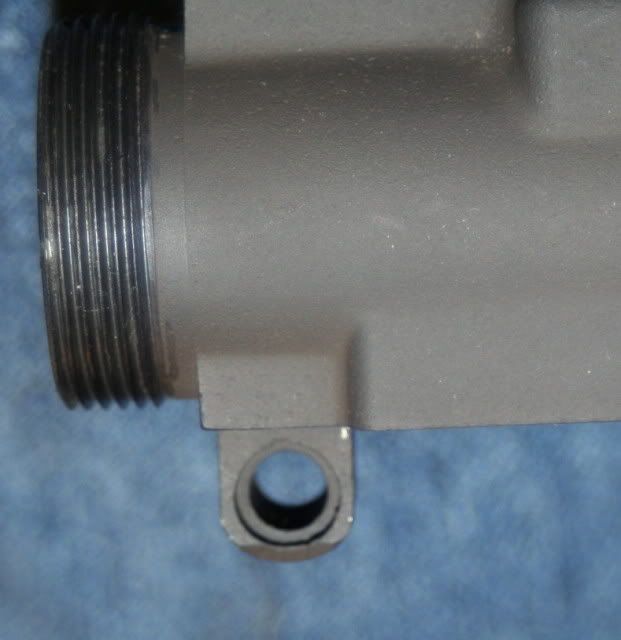
|
|
|
|
[#7]
Looking good, Magnus! but go on and smooth the forging flash. If you don't, you'll probably wish you had eventually.
Even tho' it's the most time consuming part of the operation, it's not that hard to do. On mine I just used a die grinder inside the handle with the finest grit cartridge roll I could find and then finished it up by hand with 150 then 320 wet-or-dry (wet). Mine also had flash on the outside front and rear of the handle. I just wrapped the sandpaper around a flat file for those areas. Also, don't forget to drill the tiny hole for the ejection port spring! |
|
|
|
[#8]
When VAAR was doing my 604 to 601 conversion, I got up the nerve to clean the forging flash up on an A1 upper I had. It was actually easy, I used a large wooden dowel wrapped with 150 grit sandpaper to clean up the front inner part in the big radius, and to the rear inside the carry handle. The rest I used the same 150 grit wrapped around a flat file. I followed it all up with 220 and 400, and it looks good.
GOOD JOB! |
|
|
|
[#9]
IIRC,
The front lug countersink is .080" Good job on the home-brew 601. |
|
|
|
[#10]
Quoted:
IIRC, The front lug countersink is .080" A quick look at a Colt non-FA upper gives me .325" dia x .093" deep rebate...If it was me, I'd just use a "P" drill bit and go down somewhere between your .080" and this Colt .093"... |
|
|
|
[#11]
Ok I removed all the flash and added the spring hole. Hey guys does the hole go all the way through? I went maybe halfway with it. Captures the spring perfectly though.
|
|
|
|
[#12]
Looks great Magnus!
|
|
|
|
[#13]
Quoted:
Quoted:
Nice job!! What did you use for the left side below the port door to remove the material?? I'm having alittle trouble getting the right inside radius. Thanks. I used a #194 high speed cutter in the dremel and a steady hand. I made the cut coming straight down from above with the upper laying on its side. I found some really cool sanding foam at ACE that you can be cut to size and conforms to contours. Perfect for cleaning up the area after milling. Very cool,,thanks for the info!! |
|
|
|
[#14]
Quoted:
Quoted:
Understanding that the Fulton is cheaper....Would someone think about this type of conversion be better off buying a NoDak "in-the-white" to not have to deal with the hardened surface? or is that not that big deal? In my case I had the Fulton on hand as it were but sure an NDS in the white would be great also. Hardening of the surface is not an issue in either case. Also with the NDS you'll get the rebated lug whereas I'll have to add that little detail myself. One way or the other its a fun project. +1 for ^^^..The hardened aluminum ain't all that hard.Dremel bits work just fine as long as you take your time.I've done a few lowers (reprofiling) and am working on 1 upper.. Dremels rule!!! 
|
|
|
|
[#15]
Quoted:
Looks great Magnus! Since it looks like I may try to make my NDS604 into a 601 (or even 602) upper, I must say I am encouraged and inspired by this thread! Maybe, just maybe, I CAN do the work! Seems to be not as bad as I originally thought. Does anyone have more information about the little hole for the ejection port door spring? Location? Size? Thanks! |
|
|
|
[#16]
I was looking at the NDS site and it appears that their 603 and 605 uppers have the engraved sight wheel similar to the 602 uppers? Can someone verify that is correct?
If so I was wondering if it would be easier to get a 605 and attempt to cut down the hump since I have to cut under the ejection port anyway. This would save me having to send the upper out for engraving and then sending it out again to be re-anodized. Or is there another difference between the 602 and 605 uppers that I'm not aware of? |
|
|
|
[#17]
Quoted:
I was looking at the NDS site and it appears that their 603 and 605 uppers have the engraved sight wheel similar to the 602 uppers? Can someone verify that is correct? If so I was wondering if it would be easier to get a 605 and attempt to cut down the hump since I have to cut under the ejection port anyway. This would save me having to send the upper out for engraving and then sending it out again to be re-anodized. Or is there another difference between the 602 and 605 uppers that I'm not aware of? The arrow is raised on NDS uppers. |
|
|
|
[#18]
Quoted:
Does anyone have more information about the little hole for the ejection port door spring? Location? Size? Thanks! Drill the hole for the spring 31.5mm forward of the rear rib, and a little over the crease. The hole goes all the way through the receiver. I just used the smallest end mill I had, it matches the hole in my original 601 upper. 

|
|
|
|
[#19]
Looking very good Sir!
|
|
|
|
[#20]
little over the crease?
|
|
|
|
[#21]
Quoted:
little over the crease? What I did was to install a port door, spring and pin assembly onto the upper. That will give you the exact location fore and aft for the spring capture hole, I thinks its like 1.9" from the forward port door pin boss. Remove the port door assembly and then simply sight through the pin holes and place your drill bit dead center. Piece of cake. I used a small drill bit holder and did it by hand. Again easy peasy. I'm curing the upper in the oven as we speak. Finished product coming very soon. Stay tuned. |
|
|
|
[#22]
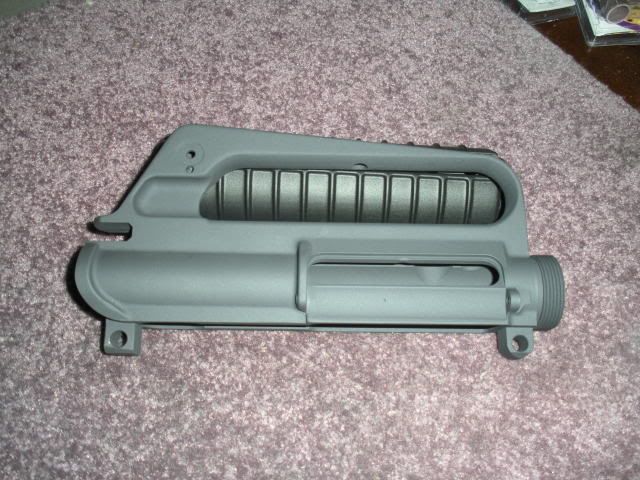
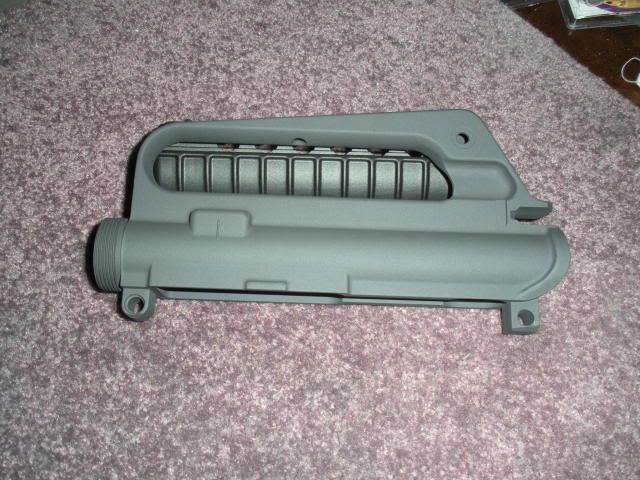
I'm calling this puppy done! Pretty good don't ya think?

|
|
|
|
[#23]
Did you re-ano or paint?
|
|
|
|
[#24]
Quoted:
I'm calling this puppy done! Pretty good don't ya think? Looks great! It looks just like my actual 601 upper. I plan on modifying a similar upper to build a 602...someday. That project just got pushed further into the future a few weeks ago. |
|
|
|
[#25]
Quoted:
Did you re-ano or paint? No time for anodizing. I just started this thing last weekend. I did it in Gun Kote matte gray. Oven cured its pretty tough and if applied properly quite thin. I've experimented with it a bit and I believe a good oil soak will darken it up further getting it even closer to the original 601's patina. Views vary I know but IMO Gun Kote's good stuff. |
|
|
|
[#26]
Quoted:
Quoted:
I'm calling this puppy done! Pretty good don't ya think? Looks great! It looks just like my actual 601 upper. I plan on modifying a similar upper to build a 602...someday. That project just got pushed further into the future a few weeks ago. Thanks Tex. It means a lot coming from you. You'll be climbing back in that saddle in short order I know. All the best buddy. |
|
|
|
[#27]
You guys should be ashamed of yourselves...I read this post and now its 1:30 a.m. and I have turned the sofa upside down looking for change to buy another reciever...retro brd can be abitch.....excellent job on your conversion.. Tim
|
|
|
 Win a FREE Membership!
Sign up for the ARFCOM weekly newsletter and be entered to win a free ARFCOM membership. One new winner* is announced every week!
You will receive an email every Friday morning featuring the latest chatter from the hottest topics, breaking news surrounding legislation, as well as exclusive deals only available to ARFCOM email subscribers.

AR15.COM is the world's largest firearm community and is a gathering place for firearm enthusiasts of all types.
From hunters and military members, to competition shooters and general firearm enthusiasts, we welcome anyone who values and respects the way of the firearm.

Subscribe to our monthly Newsletter to receive firearm news, product discounts from your favorite Industry Partners, and more.
Copyright © 1996-2024 AR15.COM LLC. All Rights Reserved.
Any use of this content without express written consent is prohibited.
AR15.Com reserves the right to overwrite or replace any affiliate, commercial, or monetizable links, posted by users, with our own.


