|
Posted: 2/21/2016 12:30:55 AM EDT
I picked this up at a bankrupcy auction for $50. It's a (near as I can tell) 1920s J.A. Fay and Eagan Model 500 "Lightning" table saw. 16" blade, all cast iron. It weighs 1100 lbs.


I'm not a huge woodworker, but I am a machinist and have a soft spot for old iron. My plan is to pull this down 100%, fix the few issues it has, shot blast the entire thing, paint/powder coat it (haven't decided depends on colors I have on hand) and remachine mating surfaces. It's incredibly intact. The only thing it's missing is a miter gauge. I'll likely fabricate one. This saw is 440 volt 3 phase, 3 HP, 3600 RPM with a direct drive 16" blade. That brings us to the first issue that needs correcting. The motor bearings are shot. 

That was the rear bearing. The front bearing is intact but wobbles like a drunk on a unicycle and I will replace it as well. Second issue. The table angle adjustment has a broken casting. This happened, in my opinion, due to the square head bolts that were ubiquitous of the period and a lack of washers. Too much force in too small an area, eventually cracked the casting. Luckily the broken piece was still bolted to the table, and here I have it clamped up. I will silver solder it together. 

I forgot to take a picture after soldering. I believe I got a good fusion, as it wet in very nicely. After painting I doubt you'll be able to tell it was repaired. If it does not hold for some reason, I will actually weld it, and document that process with photos if it becomes necessity. But silver soldering is easy and I believe sufficient for this part. Here I've got everything stripped down on a pallet to go into the shot blaster. I've decided to just blast everything. Normally for something like this, I would protect machined surfaces, but in this things case, I'm going to just blast it and skim cut machined surfaces because of the galling and drag marks present. I'll also do all the machining after painting so I don't have to mask. 
Picture of the painted trademark. This will be removed during blasting. I took a number of photos because I hope to reproduce it as a decal for the finished restoration. Maybe with the addition "Restored by Kuraki" 

And a couple pictures of things to come in future updates. This was basically all afternoon to just get the machine disassembled and sorted. 

I don't know if I'll actually hand scrape everything, we'll see how my time and patience holds out. I'll likely machine most things rather than scrape. I'll try to update this thread as I make progress. |
|
|
|
[#1]
Awesome saw! Reeks with quality. Probably cost an arm and a leg back in the day. Keep us posted.
Am restoring a 1942 South Bend Heavy 10, piece by piece. And a Bridgeport. Oh, and there is a Sheldon lathe over in the corner, too. Enjoy! Ray |
|
|
|
[#2]
440v and a 16" blade?
Who has 440v and where do you get 16" blades? Pretty cool project. Looking forward to your progress. |
|
|
|
[#3]
It will work on 480 just fine. 14" blades will work.
|
|
|
|
[#4]
I am drooling. Thank you for posting pictures.
|
|
|
|
[#5]
AWESOME!!!
That decal is irreplaceable. Can you mask it off to preserve it. I don't think anyone really uses a miter gage, anymore. Make a sled, instead. |
|
|
|
[#6]
Quoted:
AWESOME!!! That decal is irreplaceable. Can you mask it off to preserve it. I don't think anyone really uses a miter gage, anymore. Make a sled, instead. It's not a decal. It's painted on. If it was in better condition I would make the attempt, but anything I do to mask it will leave a ledge. |
|
|
|
[#7]
More progress today. The shafts in this machine were in cosmetically rough shape. Rust, varnish, and pipe wrench marks.
Top shaft before, bottom shaft after. 
This one controls table height. At some point in it's life some brain surgeon decided the flange and collar below it were good places to latch on with their monkey wrench. Since those diameters really don't do anything, that's a plus, because we can just turn them off in the lathe. 
All better. Still not perfect, but all the burrs have been removed. Most of the scarring I can't do anything about without welding and turning, and since they'll all be hidden anyway, I'm not going through the trouble. 
Fence handle and casting. Only now did I realize this part has been broken and rewelded in the past, with what looks to me like a nickle rod filler. Not a bad repair job. I won't touch it unless it breaks. The handle got the same treatment as the shafts, but I forgot an after pic. 
Lets get this stuff in the blaster. Enough hand work This is a tumble shot blaster. That rubber track runs on rollers and tumbles the parts as they are assaulted by steel shot that's about the size of #9 lead shot.

Here's the bottom of the table after blasting on the table blaster. Same concept as the tumble, but with a rotary table instead of rubber track. I only blasted it face down. 
This is definitely the easy way. Nice, clean parts ready for phosphatizing and paint. 

Here you can see why when people say "they don't make'em like they used to" what they really mean is they don't design them like they used to. Inclusions or porosity like this, especially on a machined surface, would not have passed any standard of quality when I was working in the foundry. This would have been a scrap part. Quality in manufacturing processes are today, far and away better than back then. People just aren't willing to pay what it costs to produce something like this these days. 
This is the solder repair I did yesterday. After blasting you can see I got a pretty good joint. I'm pretty confident this will hold given it's a rather low stress part. 
Main pedestal casting in the table blaster. 
You might be asking yourself, "How the hell does he lift stuff like that?" The answer is of course, through the magic of magnets 
And the pallet of parts kitted up for my paint guys to hang. I know my limitations. I'm not going to paint it myself because I'd like for it to look presentable

Next update should be of painted parts, and then I'll start remachining what needs it. |
|
|
|
[#8]
I like your shop.
|
|
|
|
[#9]
Quoted:
I like your shop. I wish it was mine. I just work there. Government work is one of the perks. |
|
|
|
[#10]
Fantastic! I'm glad a man like you encountered it. Will you sell it to a good home or what? Sadly, good homes are sparse when they need 3-phase.
|
|
|
|
[#11]
Quoted:
Fantastic! I'm glad a man like you encountered it. Will you sell it to a good home or what? Sadly, good homes are sparse when they need 3-phase. I haven't decided. Whatever I do with it, I will likely source a frequency drive so that it can be run on single phase. I'm still questioning whether the motor is actually 440/480 or if it has been rewound to 220/240. I've never seen a 3ph motor with only 3 wires. They've all had 4. We'll see what my electricians say. If they don't know, I'll ask our motor guy. I bought it thinking I could swap a single phase motor into it if need be, but given the design of the motor and case, that's really not feasible. So worst case, a freq drive or phase converter. Either way I'll have it fired up at work when back together. I'd like to keep it but I don't know if I have the room for it. That reminds me. I can have this painted just about any color under the sun. What color do you guys think I should paint it? Right now I'm leaning towards trying to color match the original (which is best seen in the photo of the trademark. Sort of a green/battleship grey). |
|
|
|
[#12]
Tag.
|
|
|
|
[#13]
Fuckin tagged.
|
|
|
|
[#14]
I thought all old equipment was painted "battleship gray" back then.
|
|
|
|
[#15]
Quoted:
I thought all old equipment was painted "battleship gray" back then. Hehe. I think it's lead colored. |
|
|
|
[#16]
Quoted:
Fuckin tagged. |
|
|
|
[#17]
Really impressive so far!
I'd love to have a tumbling blaster like that... What is your secret to getting the shafts/rods/screws so stinking shiny? |
|
|
|
[#18]
Quoted:
Really impressive so far! I'd love to have a tumbling blaster like that... What is your secret to getting the shafts/rods/screws so stinking shiny? Scotch Brite. I use a wire wheel to remove the heaviest scale and rust, then I move to the lathe and using a file knock off any high edges from ridges/gouges, using a file to do this allows me to "follow" the actual diameter and only take off the high points, where if I actually used a single point tool I would likely turn them undersize due to runout. After filing the high points I polish them in the lathe with a red scotch brite pad. Doesn't remove material as fast as emery cloth and leaves a finer surface finish. 
Just like the green one you would use on your dishes but impregnated with a fine abrasive. |
|
|
|
[#19]
Quoted:
Scotch Brite. I use a wire wheel to remove the heaviest scale and rust, then I move to the lathe and using a file knock off any high edges from ridges/gouges, using a file to do this allows me to "follow" the actual diameter and only take off the high points, where if I actually used a single point tool I would likely turn them undersize due to runout. After filing the high points I polish them in the lathe with a red scotch brite pad. Doesn't remove material as fast as emery cloth and leaves a finer surface finish. http://www.highlandwoodworking.com/ProductImages/rustcontrol/196209c.jpg Just like the green one you would use on your dishes but impregnated with a fine abrasive. Quoted:
Quoted:
Really impressive so far! I'd love to have a tumbling blaster like that... What is your secret to getting the shafts/rods/screws so stinking shiny? Scotch Brite. I use a wire wheel to remove the heaviest scale and rust, then I move to the lathe and using a file knock off any high edges from ridges/gouges, using a file to do this allows me to "follow" the actual diameter and only take off the high points, where if I actually used a single point tool I would likely turn them undersize due to runout. After filing the high points I polish them in the lathe with a red scotch brite pad. Doesn't remove material as fast as emery cloth and leaves a finer surface finish. http://www.highlandwoodworking.com/ProductImages/rustcontrol/196209c.jpg Just like the green one you would use on your dishes but impregnated with a fine abrasive. I've used those on various parts of my current project but not with the same shiny results. Maybe a different steel? Do you use them dry? |
|
|
|
[#20]
Quoted:
I've used those on various parts of my current project but not with the same shiny results. Maybe a different steel? Do you use them dry? By hand or spinning in a lathe? You need to spin parts and get some surface speed to get a real shine. Rubbing by hand never seems to do it. Also, they have a light coating of oil and that might be making them shinier in the picture than reality. |
|
|
|
[#21]
Neat, thanks for sharing.
|
|
|
|
[#22]
Based on years old memories, that looks exactly like a saw that my ex-FIL has. Looks great so far.
|
|
|
|
[#23]
Match the original color as close as possible OP.
Old School saw should retain its Old School looks IMHO. |
|
|
|
[#24]
Quoted:
Match the original color as close as possible OP. Old School saw should retain its Old School looks IMHO. That's where I'm going. I have powder available that's almost exact match, and wet paint that's dark grey but no green in it. I think I'm going to go with the dark grey wet paint, so I can use some Dev-Con and fill the porosity in some of the castings. Filler like that doesn't work well with powder because it doesn't carry a charge. |
|
|
|
[#25]
Small update. Went with "iron gray" paint. Came out a bit lighter than I was hoping but it'll do. One note about the first photo, the height/angle carriage. You'll note the porosity in the surface of the one semi-circular cutout. I didn't realize until after this was shot blasted, those semi circles actually have aluminum pads cast into them, and the aluminum is a casting as well. All that porosity was full of grease when I pulled it apart. It won't affect performance but it's sure ugly disassembled.


Forgot that I wanted to do the handles and wheels black for some contrast. I repainted those. Got the fence remachined, squared up and parallel. 

Started reassembling, and I apparently forgot to take a couple photos. I've got the bearings replaced on the motor shaft, and the motor reassembled and mounted on the pedestal. Next I will begin with the height carriage and table angle assembly. I discovered earlier that the bevel gears that drive table height are missing some teeth. The gears are iron. I'm going to attempt a weld repair of those teeth, and then reprofiling. If that doesn't work as I hope, I'll be looking to find new bevel gears. |
|
|
|
[#26]
Tag.
Awesome find and so cool that you care/are interested enough to do this. Thank you for sharing it here. |
|
|
|
[#27]
Quoted:
Tag. Awesome find and so cool that you care/are interested enough to do this. Thank you for sharing it here. If I thought I could make a living rebuilding/restoring old iron equipment I would do it in a heartbeat. I'd also go a lot deeper into a restoration. For example adding oilers or grease zirks and paths where the original designer should have initially. Outside of repairing some obvious deficiencies that made this saw unusable as I found it, I'm really just giving it a facelift. |
|
|
|
[#28]
Quoted:
If I thought I could make a living rebuilding/restoring old iron equipment I would do it in a heartbeat. I'd also go a lot deeper into a restoration. For example adding oilers or grease zirks and paths where the original designer should have initially. Outside of repairing some obvious deficiencies that made this saw unusable as I found it, I'm really just giving it a facelift. Quoted:
Quoted:
Tag. Awesome find and so cool that you care/are interested enough to do this. Thank you for sharing it here. If I thought I could make a living rebuilding/restoring old iron equipment I would do it in a heartbeat. I'd also go a lot deeper into a restoration. For example adding oilers or grease zirks and paths where the original designer should have initially. Outside of repairing some obvious deficiencies that made this saw unusable as I found it, I'm really just giving it a facelift. This is far more than a "face lift". That'd be just a cleaning and repainting. This is a full scale restoration. Great to see more progress pictures and updates on what's been done since. Eagerly awaiting the end. |
|
|
|
[#29]
I don't get much time during the week to work on this or any other projects, so it'll be bursts each weekend. The only reason I got it painted already was we had a gap in the paint line and the guys took the initiative and hung it for me
I've been in contact with a motor guy. It is technically possible to convert the motor itself to single phase. (This is the first time I wished I still worked at a Leeson factory. If I did, I could probably custom make a stator and rotor to fit this motor frame and shaft.) However he also believe that just because it's rated and wound 440/480 doesn't mean it would run on 220/240. It will just draw more amperage. So he believes the best solution to make this run on commonly available 220 single phase, is to add a frequency drive sized appropriately. Those have recently come down in price over the last few years. Basically I need a VFD that's rated for 2x the horsepower of the motor, and the motor will run with 66% of the original rating power. So 220 single phase into a VFD rated for 12hp will run this motor at 2hp and draw 12 amps. Or something like that. He recommended rewinding it anyway, due to the poor insulation used in the original winding. So since I've 480 3 phase at work, I'm going to reassemble the thing as is, to test it out. If everything looks good, then I'll source a VFD and wire the thing to run on 220 single phase. Remaining Task list (as much for me as for you guys )
- Source a new 14" blade - Make new blade spacer stack (the ones on the machine were bandsaw cut  ) Also investigating feasibility of a shaft lock to facilitate blade installation and removal. ) Also investigating feasibility of a shaft lock to facilitate blade installation and removal.
- Scrape or remachine table top - Scrape the box ways and install carriage, adjust gibs for play - Repair or replace bevel gears and install height adjustment assembly - Install angle adjustment assembly on table - Reinstall table - Make a new blade cover for the middle of the table - Install and align fence - Source and install a new cut width gauge strip for setting the fence. The original copper one was destroyed. I have an I think, slick idea for this. We'll see how it works before I share. - Test cuts on 480v - Source and wire VFD - Test cuts on 220v 1ph. - Minor restoration of fingers/needles etc for indicating table height/angle/fence position. |
|
|
|
[#30]
Nice job so far OP!
|
|
|
|
[#31]
Very cool !
|
|
|
|
[#32]
I would love to have an old machine like that in my cabinet shop
|
|
|
|
[#33]
In on this one. Good work so far!
|
|
|
|
[#34]
Cant you just use a static phase converter, my dad has used them one his metal bandsaw, and this ancient oscillating spindle sander. Its just a box with a capacitor to start the motor. Same thing you lose 33 percent power.
|
|
|
|
[#35]
Can't wait to see more updates. I love threads like this.
|
|
|
|
[#36]
Quoted: Can't wait to see more updates. I love threads like this. Add me to this list too. |
|
|
|
[#37]
Quoted:
Cant you just use a static phase converter, my dad has used them one his metal bandsaw, and this ancient oscillating spindle sander. Its just a box with a capacitor to start the motor. Same thing you lose 33 percent power. A VFD is not expensive anymore. You do not have to even use it to vary the speed. They make real 3-phase. |
|
|
|
[#38]
Minor update. I've given up on weld repairing the miter gears that drive the table height adjustment. New ones are $60+ each from Boston gear.
These are only $44. Teach a man to fish and all that. 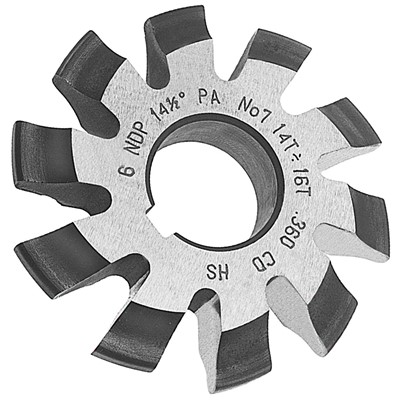
A little bit of 3d modeling: 
I'll see if I can spin them out this weekend. |
|
|
|
[#39]
|
|
|
|
[#40]
Plenty of 16" blades at both locations too! |
|
|
|
[#41]
Quoted: Minor update. I've given up on weld repairing the miter gears that drive the table height adjustment. New ones are $60+ each from Boston gear. These are only $44. Teach a man to fish and all that. https://www.toolmex.com/ecomm_images/items/medium/5-860.jpg A little bit of 3d modeling: http://i68.tinypic.com/69e4x0.jpg I'll see if I can spin them out this weekend. Best thread in a while. |
|
|
|
[#42]
Any progress or updates?
|
|
|
|
[#43]
No, sorry. I've been working 60 hour weeks and using my weekends to get ready for 3 gun.
My gear cutter arrived. That's all I've got right now. |
|
|
|
[#44]
Quoted:
No, sorry. I've been working 60 hour weeks and using my weekends to get ready for 3 gun. My gear cutter arrived. That's all I've got right now. Wut? You have to earn a living? Slacker! J/K |
|
|
|
[#45]
Got into the shop today and test wired the motor to 220 3ph. It fires right up and is smooth as silk with the new bearings. Really happy about that. That means my plans to run on a VFD supplied with normal home 220 single phase should work just fine. Since I can't find time to cut gears, I think I'm going to reassemble with the old gears since they do still work, and cut new ones when I get the time.
|
|
|
|
[#46]
That is awesome, I look forward to the updates. Thanks for saving this ol' piece of history.

|
|
|
|
[#47]
Quoted:
Got into the shop today and test wired the motor to 220 3ph. It fires right up and is smooth as silk with the new bearings. Really happy about that. That means my plans to run on a VFD supplied with normal home 220 single phase should work just fine. Since I can't find time to cut gears, I think I'm going to reassemble with the old gears since they do still work, and cut new ones when I get the time. Just watch the current. It will increase as you start to load the motor down. Low voltage allows it to increase very quickly and can burn out windings. |
|
|
|
[#48]
Quoted:
Just watch the current. It will increase as you start to load the motor down. Low voltage allows it to increase very quickly and can burn out windings. Quoted:
Quoted:
Got into the shop today and test wired the motor to 220 3ph. It fires right up and is smooth as silk with the new bearings. Really happy about that. That means my plans to run on a VFD supplied with normal home 220 single phase should work just fine. Since I can't find time to cut gears, I think I'm going to reassemble with the old gears since they do still work, and cut new ones when I get the time. Just watch the current. It will increase as you start to load the motor down. Low voltage allows it to increase very quickly and can burn out windings. That will show up as heat right? |
|
|
|
[#49]
Updates?
|
|
|
|
[#50]
I've got Friday off for Easter and wife is out of town all morning so I plan to get some work done then.
|
|
|
 Win a FREE Membership!
Sign up for the ARFCOM weekly newsletter and be entered to win a free ARFCOM membership. One new winner* is announced every week!
You will receive an email every Friday morning featuring the latest chatter from the hottest topics, breaking news surrounding legislation, as well as exclusive deals only available to ARFCOM email subscribers.

AR15.COM is the world's largest firearm community and is a gathering place for firearm enthusiasts of all types.
From hunters and military members, to competition shooters and general firearm enthusiasts, we welcome anyone who values and respects the way of the firearm.

Subscribe to our monthly Newsletter to receive firearm news, product discounts from your favorite Industry Partners, and more.
Copyright © 1996-2024 AR15.COM LLC. All Rights Reserved.
Any use of this content without express written consent is prohibited.
AR15.Com reserves the right to overwrite or replace any affiliate, commercial, or monetizable links, posted by users, with our own.


