|
[#1]
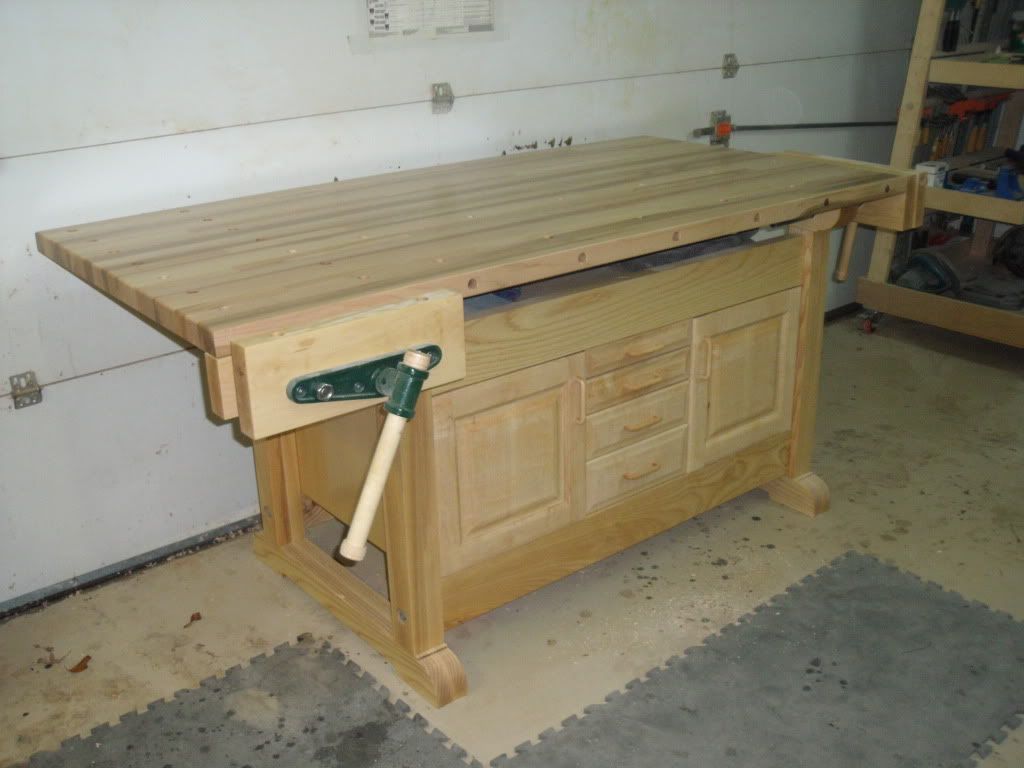
Going to make a version of this today.
Bench |
|
|
|
[#2]
I have .pdf plans for an easy to make workbench as well as plans for this workbench.
The first set of plans I have do not take any serious woodworking skills. The plans for the pictured bench is another story. IM me a good e-mail address and I'd be happy to send you either or both. |
|
|
|
[#3]
if you are mounting a press to that, do not use OSB as your only top piece |
|
|
|
[#4]
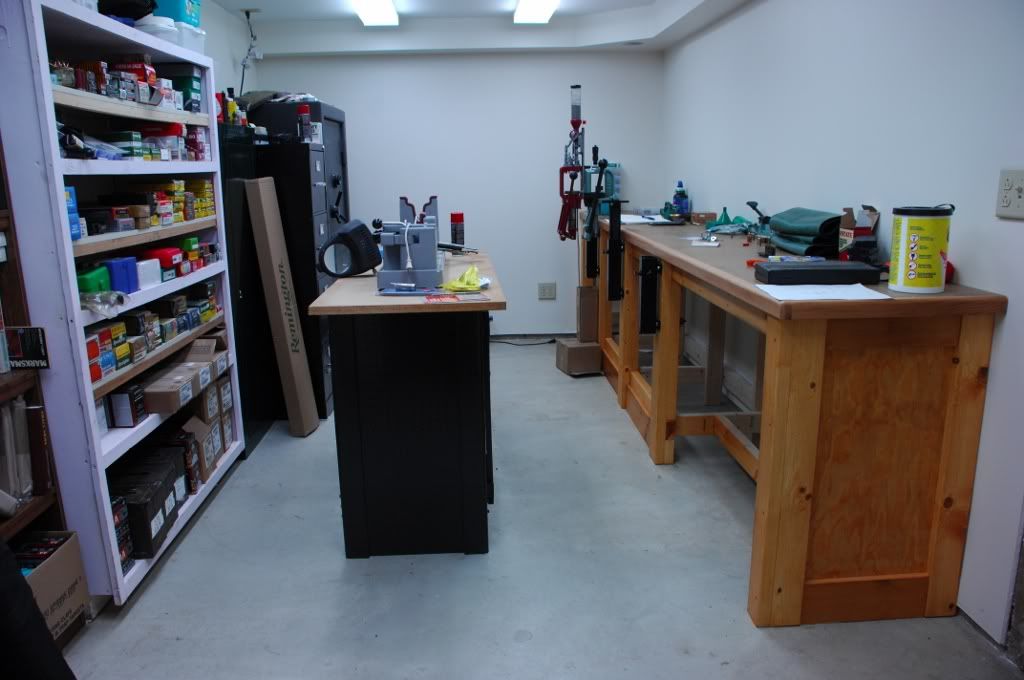
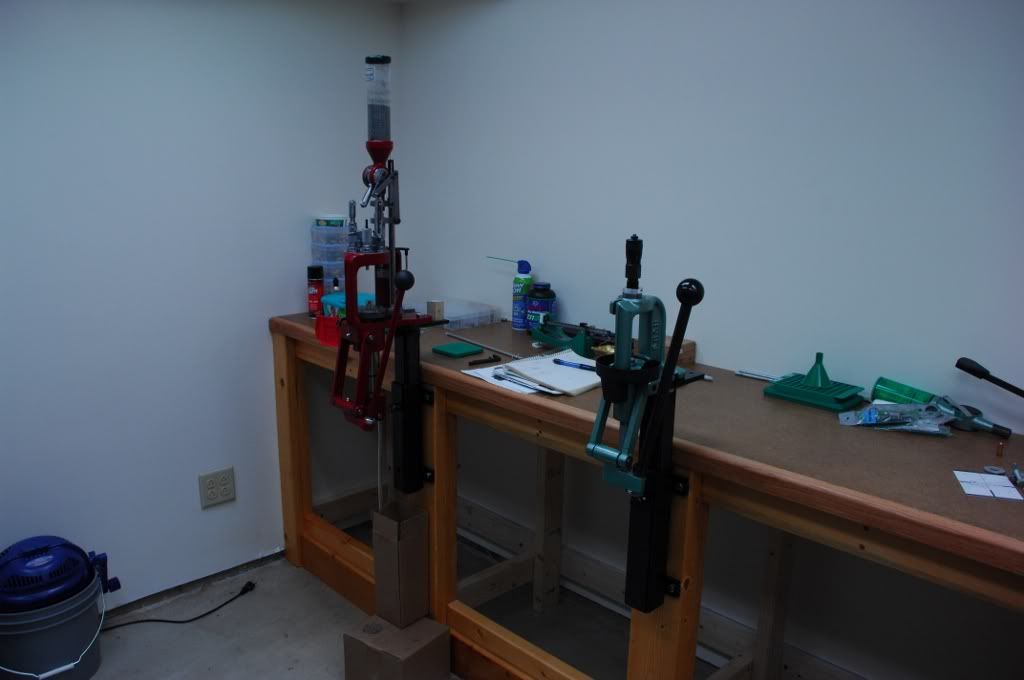
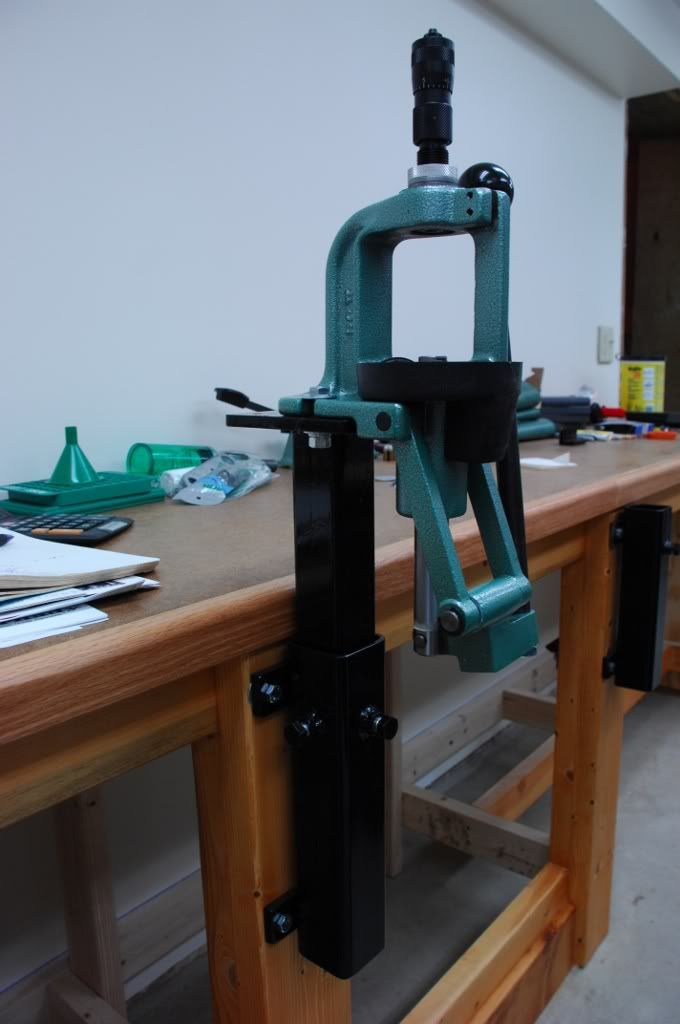
These are the plans I used for my reloading bench. I had to scale down a little bit to fit in the space I had.
http://www.shotgunsportsmagazine.com/downloads/bench_plans.pdf http://i1065.photobucket.com/albums/u383/standingtall2/bench3.jpg |
|
|
|
[#5]
Here's a plan... Buy two of the cheapest under counter cabinets at the Home Center, a solid core door, a 1x1, a few drywall screws and a tube of construction adhesive. Place the under counter cabinets and apply construction adhesive to the top edges. Place the door on top of the cabinets. Cut the 1x1 into 12 inch pieces. Apply construction adhesive to adjacent edges and screw them into the cabinets and door as gussets/cleats. Let dry overnight. Mount your equipment and load. Solid as a rock and plenty of storage.
|
|
|
|
[#6]
I used the plans posted by GWhis. It's a great bench, and fairly easy to construct.
Do a search in the archives for it (I think it's there) |
|
|
|
[#7]
Quoted: These are the plans I used for my reloading bench. I had to scale down a little bit to fit in the space I had. http://www.shotgunsportsmagazine.com/downloads/bench_plans.pdf Same here. Changed it up a bit, but it's a great set of free plans. Hot link: |
|
|
|
[#8]
Quoted:
if you are mounting a press to that, do not use OSB as your only top piece My brother just happened to have the plywood. 3/4", There is also an extra 2X4 that runs underneath that its lag screwed to. Total cost me about $28. This is temporary for my apartment. Till I can get a house in October and build a proper set-up. 
|
|
|
|
[#9]
Quoted:
I used the plans posted by GWhis. It's a great bench, and fairly easy to construct. Do a search in the archives for it (I think it's there) You don't have to search the archives, it's tacked in the Gateway Thread....page 2...8 posts down. or....just click Here. |
|
|
|
[#10]
Damn thanks all!
|
|
|
|
[#11]
When I built my bench I just kinda winged it. I got an 8' foot counter top, a couple 4x4s and 2x4s. When mounting a press you can sandwich the counter top with a couple pieces of 1/4" aluminum diamond plate.

|
|
|
|
[#12]
General tips,
Top of bench should be at least 1 1/2 inches thick. Glue and screw everything together. Build for strength, you want a solid bench not one that wobbles. Plan on lots of shelf's, below top as well as above. Lots of braces. For more ideas, look here; My bench is on pg 6.
|
|
|
|
[#13]
Quoted:
General tips, True unless you build a torsion beam design like in my plans. 3/4" is plenty in that case, since in effect the torsion beam and the top is one...4-1/4" thick where the press stroke torques it! |
|
|
|
[#14]
This thread is relevant to my interests, & was looking for something along these lines for ideas too.
I just got the space for a bench cleared in my spare room at the house, & picked up 2 - 7' 6" long (1" thick x 12" wide) hardwood oak semi trailer flooring boards. I think a 5' long bench would be more than ideal, & I would double up under where the press would be mounted, for a 2" thickness. ETA: Approximately how high is a normal bench? I plan on getting a bar stool type of seat so I can sit while working. |
|
|
|
[#15]
Quoted:
This thread is relevant to my interests, & was looking for something along these lines for ideas too. I just got the space for a bench cleared in my spare room at the house, & picked up 2 - 7' 6" long (1" thick x 12" wide) hardwood oak semi trailer flooring boards. I think a 5' long bench would be more than ideal, & I would double up under where the press would be mounted, for a 2" thickness. ETA: Approximately how high is a normal bench? I plan on getting a bar stool type of seat so I can sit while working. Make it as long as you can. You can never have enough space. Those boards are probably rough as hell. Unless you're gonna sand 'em smooth, glue and screw something smoother on top of them. Use 2x4 stringers going front to back directly under where you'll mount your press, then you can lag bolt it right into them. My bench is 37'' high and I use a bar stool too. Most have adjustable legs for height. |
|
|
|
[#16]
Drawers lots of drawers and storage you will accumulate more than what you can store.

|
|
|
|
[#17]
I built my reloading bench like a deck. Attach a header board (2x4) to the wall with lag bolts through the studs. Build a frame out of 2x4's and use two 2x4's glued and bolted together for each of the front legs. I happen to like 3/4" white formica board (or countertop material) for work benches and reloading benches, but I know that most people like solid wood or plywood. I use the formica board and just re-enforce the area under where the presses will be mounted with solid board (1'2" to 3"4" thick, 1x8 all the way across the front). Add a bottom shelf to tie the legs together for added rigidity while providing extra storage.
|
|
|
|
[#18]
Quoted:
Quoted:
These are the plans I used for my reloading bench. I had to scale down a little bit to fit in the space I had. http://www.shotgunsportsmagazine.com/downloads/bench_plans.pdf Same here. Changed it up a bit, but it's a great set of free plans. Hot link: It's a very SOLID bench. Nothing moves or shakes. I built one two years ago with some minor changes. 1) All dimensions increased to eliminate any excess wood going to scrap (except the 4X4's. Decide on the height before you start). 2) Skipped all the sliding doors. Half of the 1/4" sheet of plywood is fastened as the back of the shelves. The other half is hinged at the top to cover the front. As a work bench for power tools, it's great. |
|
|
|
[#19]
Any pictures? /\
|
|
|
|
[#20]
Quoted: Any pictures? /\ Click on the link I already posted, lots of pics. |
|
|
|
[#21]
I just completed this bench a couple months ago. Actually it isn't done yet, I plan on adding drawers, maybe this winter.
The top is two layers of 3/4" MDF, with 1/4" hardboard on top of that. I sealed the top with clear polyurethane. The pros for MDF is that it is very uniform, hard, and heavy. You do want to protect the edges to keep it from chipping. I wrapped oak trim around and attached it with pocket screws. Like someone else mentioned my bench is built like a deck. Basically two ladder assemblies bolted to the wall on one side with legs on the other. If anyone is interested I have the plans in Google Sketchup, a free CAD program. http://i285.photobucket.com/albums/ll43/Jackpine_Savage/D2X_00021024x680.jpg http://i285.photobucket.com/albums/ll43/Jackpine_Savage/D2X_00041024x680.jpg http://i285.photobucket.com/albums/ll43/Jackpine_Savage/D2X_0007680x1024.jpg |
|
|
|
[#22]
Im thinking about getting a Craftsman workbench, anyone use these for reloading?
|
|
|
|
[#23]
That's a lot like this set of plans which I based my current bench on. The only problem with it is that it is only 48" wide, and I have decided that I need a bigger bench, at least 72" wide... |
|
|
|
[#24]
Quoted:
These are the plans I used for my reloading bench. I had to scale down a little bit to fit in the space I had. http://www.shotgunsportsmagazine.com/downloads/bench_plans.pdf http://i1065.photobucket.com/albums/u383/standingtall2/bench3.jpg Where did you get that light? Does it have a magnifying glass in it? I can't find any type of lamp w/ a arm like that anymore? |
|
|
|
[#25]
Quoted: If you wish an answer, post a link.Im thinking about getting a Craftsman workbench, anyone use these for reloading? Otherwise it's hard to know what bench you mean.
|
|
|
|
[#26]
Quoted:
Quoted:
If you wish an answer, post a link.Im thinking about getting a Craftsman workbench, anyone use these for reloading? Otherwise it's hard to know what bench you mean.
This one or the 8' bench http://www.craftsman.com/craftsman-6%27-workbench-black/p-00910138000P?vName=Storage+%26+Garage&cName=Garage+%26+Work+Area&sName=Work+Benches&prdNo=2&blockNo=2&blockType=L2 ETA: fixed link |
|
|
|
[#27]
Quoted:
That's a lot like this set of plans which I based my current bench on. The only problem with it is that it is only 48" wide, and I have decided that I need a bigger bench, at least 72" wide... I'm stuck in my apartment till Oct. Just started recently reloading so its all I can work with at the moment. (Its in my bedroom.) I'm going to get a house when my lease is up. Then Ill go wider. Much wider. |
|
|
|
[#28]
Quoted: Quoted: Quoted: If you wish an answer, post a link.Im thinking about getting a Craftsman workbench, anyone use these for reloading? Otherwise it's hard to know what bench you mean. This one or the 8' bench http://craftsman.com/productdetails.do?partNumber=00910138000P&fromPage=productResult Your link doesn't work.  |
|
|
|
[#29]
I fixed the link
|
|
|
|
[#30]
Quoted:
I fixed the link You can build something more sturdy for less money. I built mine from plans found here. I modified them a bit for my available space, and materials already on hand, but it turned out excellent. I'm modifying it as my needs develop, but I couldn't be happier. I would recommend going a bit thicker than 3/4" for the work surface. |
|
|
|
[#31]
I've searched every where for work bench plans both on and off line.
No luck finding plans for a table stout enough to support an elephant. Table will be center room, no drawers, no shelf. Legs and table top, that's it. Have settled on sub framing top. Top be one 3/4" sheet plywood, one sheet 3/4 dense particle borad with white laminate. Both boards trimmed to protect and cover edgess. I may cut 1/4 steel plates to bolt directly under each press so bolts can't work inside wood tops. Legs and center beam be 3, 2x4s glued together and planed. Beyond this I'm still thinking. |
|
|
|
[#32]
I designed my own bench on CAD (google sketchup) and it has worked out extremely well. The design is extremely modular which allows it to be transported when I move (military TDY) and I can fit the whole bench in the back of my 4runner.
If you want the plans, I can send the sketchup file which also includes the cutout diagrams for the 4x8's 


|
|
|
|
[#33]
Your sketchup fu is strong...
I am in the process of designing one via skeychup with matal legs and adjustable feet. |
|
|
|
[#34]
Quoted:
Quoted:
Quoted:
These are the plans I used for my reloading bench. I had to scale down a little bit to fit in the space I had. http://www.shotgunsportsmagazine.com/downloads/bench_plans.pdf Same here. Changed it up a bit, but it's a great set of free plans. Hot link: It's a very SOLID bench. Nothing moves or shakes. I built one two years ago with some minor changes. 1) All dimensions increased to eliminate any excess wood going to scrap (except the 4X4's. Decide on the height before you start). 2) Skipped all the sliding doors. Half of the 1/4" sheet of plywood is fastened as the back of the shelves. The other half is hinged at the top to cover the front. As a work bench for power tools, it's great. I also use this bench and also didn't bother with the doors on the shelving unit. I've made two of them. The first stayed at the house when we moved. It was too big to get out of the basement unless I took a chainsaw to it. Lumber and hardware should run $200-$300. It's rock solid and has plenty of storage. |
|
|
|
[#35]
1911smith, it sounds like you are going for something similar to the simplified version of this bench. I just used two legs instead of three, and it doesn't move when full length sizing .50BMG on a center mounted press. Mine just has a smooth top so I can clamp my various oak mounted tools where I need them.
|
|
|
|
[#36]
I've been using Simpson Strong Ties for benches and utility shelving. These things are rock solid and screw together, making it easy to dismantle.
Link |
|
|
|
[#37]
Quoted:
I just completed this bench a couple months ago. Actually it isn't done yet, I plan on adding drawers, maybe this winter. The top is two layers of 3/4" MDF, with 1/4" hardboard on top of that. I sealed the top with clear polyurethane. The pros for MDF is that it is very uniform, hard, and heavy. You do want to protect the edges to keep it from chipping. I wrapped oak trim around and attached it with pocket screws. Like someone else mentioned my bench is built like a deck. Basically two ladder assemblies bolted to the wall on one side with legs on the other. If anyone is interested I have the plans in Google Sketchup, a free CAD program. http://i285.photobucket.com/albums/ll43/Jackpine_Savage/D2X_00021024x680.jpg http://i285.photobucket.com/albums/ll43/Jackpine_Savage/D2X_00041024x680.jpg http://i285.photobucket.com/albums/ll43/Jackpine_Savage/D2X_0007680x1024.jpg Wow! Your gun room rocks. I particularly like the island that allows loading to be compeletely separate from cleaning / smithing. I need to upgrade my cave. |
|
|
|
[#38]
Quoted:
I've searched every where for work bench plans both on and off line. No luck finding plans for a table stout enough to support an elephant. Table will be center room, no drawers, no shelf. Legs and table top, that's it. Have settled on sub framing top. Top be one 3/4" sheet plywood, one sheet 3/4 dense particle borad with white laminate. Both boards trimmed to protect and cover edgess. I may cut 1/4 steel plates to bolt directly under each press so bolts can't work inside wood tops. Legs and center beam be 3, 2x4s glued together and planed. Beyond this I'm still thinking. Look in the "ABC's of Reloading"... Build the bottom part of that bench... Leave the shelving top portion off. You could park a car on top of mine. I intended to anchor it to the wall after I built it for more support, but it hasn't been necessary. The bench hasn't moved even resizing M-2 fired .50bmg brass. |
|
|
|
[#39]
Quoted: Quoted: Quoted: Quoted: These are the plans I used for my reloading bench. I had to scale down a little bit to fit in the space I had. http://www.shotgunsportsmagazine.com/downloads/bench_plans.pdf Same here. Changed it up a bit, but it's a great set of free plans. Hot link: It's a very SOLID bench. Nothing moves or shakes. I built one two years ago with some minor changes. 1) All dimensions increased to eliminate any excess wood going to scrap (except the 4X4's. Decide on the height before you start). 2) Skipped all the sliding doors. Half of the 1/4" sheet of plywood is fastened as the back of the shelves. The other half is hinged at the top to cover the front. As a work bench for power tools, it's great. I also use this bench and also didn't bother with the doors on the shelving unit. I've made two of them. The first stayed at the house when we moved. It was too big to get out of the basement unless I took a chainsaw to it. Lumber and hardware should run $200-$300. It's rock solid and has plenty of storage. I based my bench plans on http://www.shotgunsportsmagazine.com/downloads/bench_plans.pdf but modified it to take advantage of some drawer units that I had lying around. Someday, I will get around to making a shelving unit fro the top. The insert system I used is based on http://www.rifleshootermag.com/2011/01/04/ammunition_benchs_022607/. http://i1133.photobucket.com/albums/m595/gto688/Reloading%20forum/DSCN0630.jpg http://i1133.photobucket.com/albums/m595/gto688/Reloading%20forum/DSCN0626.jpg http://i1133.photobucket.com/albums/m595/gto688/Reloading%20forum/DSCN0627.jpg It's really solid!!! GTO688 |
|
|
|
[#40]
Quoted:
 interesting mounts for the presses themselves |
|
|
|
[#41]
Quoted:
Quoted:
I just completed this bench a couple months ago. Actually it isn't done yet, I plan on adding drawers, maybe this winter. The top is two layers of 3/4" MDF, with 1/4" hardboard on top of that. I sealed the top with clear polyurethane. The pros for MDF is that it is very uniform, hard, and heavy. You do want to protect the edges to keep it from chipping. I wrapped oak trim around and attached it with pocket screws. Like someone else mentioned my bench is built like a deck. Basically two ladder assemblies bolted to the wall on one side with legs on the other. If anyone is interested I have the plans in Google Sketchup, a free CAD program. Wow! Your gun room rocks. I particularly like the island that allows loading to be compeletely separate from cleaning / smithing. I need to upgrade my cave. Thanks. It seems to be working pretty well. I wish the room was a couple feet wider, but it works. A bench that you can walk around is nice for working on rifles. The one in the pics is a Craftsman bench. Short term I think I'm going to build a torsion box top to raise the working surface up about 8", long term I'd like to build one a bit narrower and with more drawers. The press mount I dreamed up. I wanted to be able to adjust the height and swap out presses and a vise. It is rock solid, automotive hitch tubing, 3/8" plate. |
|
|
|
[#42]
Those press mounts are awesome. I want to do something like that once I retire and have a place to do a permanent setup.
Here's the bench my dad and I built in his workshop. It's a full 4x8 size catch table for the table saw, but it's 2 layers thick on top for working and rolls around on locking casters. It weighs around 500-600 lbs with the drawers filled. I've got T-nuts set under the surface so I can mount/dismount the press quickly with a drill and machine screws. Don't mind the TV, it's broken. 
My personal setup is more humble since I move so much. (and don't have it at all right now since I'm in Korea) 
|
|
|
|
[#43]
A lot will depend on your dedicated space...
Remember the sturdier the bench the happier you will be. *My bench is 2x8 length and width, and I build it for standing height. I also have a hi-back tall stool to sit on when I dont want to stand. *My bench top is one sheet of 3/4 ply-wood that I split in half to 2x8 then I glue and screw both pieces together to get a 1 1/2 inch thick table top. *Then the rest is 2x4 construction frame work I glue and screw 2x4 pieces together to get 4x4 legs. When I attach the bench top I leave a inch lip on the front for hang over. *I have one storage shelf on the bottom for bulk storage of items. *Since I use my load bench to also work on my firearms and my fishing reels. I use a Craftsman mechanics roll around tool chest to organize my dies,tools, equipment needed,etc. to hand load. It's very convienent for me keeps things tidy,findable and rolls out of the way. |
|
|
|
[#44]
Quoted:
Quoted:
These are the plans I used for my reloading bench. I had to scale down a little bit to fit in the space I had. http://www.shotgunsportsmagazine.com/downloads/bench_plans.pdf http://i1065.photobucket.com/albums/u383/standingtall2/bench3.jpg Where did you get that light? Does it have a magnifying glass in it? I can't find any type of lamp w/ a arm like that anymore? Check your local office depot. |
|
|
|
[#45]
Quoted:
Where did you get that light? Does it have a magnifying glass in it? I can't find any type of lamp w/ a arm like that anymore? Bought it at Harbor Freight, and yes it has a magnifying glass in it. |
|
|
|
[#46]
Quoted:
Quoted:
These are the plans I used for my reloading bench. I had to scale down a little bit to fit in the space I had. http://www.shotgunsportsmagazine.com/downloads/bench_plans.pdf Same here. Changed it up a bit, but it's a great set of free plans. Hot link: I built this one, less the cabinetry because I wanted to use the table for more than just reloading. Everything is glue and screwed. The one modification I made was to add a 2x4 from front to back in the middle of the table to stiffen the plywood. Not that it needs it, but I didn't want the plywood to ever warp out of the plane. It's rock solid! |
|
|
 Win a FREE Membership!
Sign up for the ARFCOM weekly newsletter and be entered to win a free ARFCOM membership. One new winner* is announced every week!
You will receive an email every Friday morning featuring the latest chatter from the hottest topics, breaking news surrounding legislation, as well as exclusive deals only available to ARFCOM email subscribers.

AR15.COM is the world's largest firearm community and is a gathering place for firearm enthusiasts of all types.
From hunters and military members, to competition shooters and general firearm enthusiasts, we welcome anyone who values and respects the way of the firearm.

Subscribe to our monthly Newsletter to receive firearm news, product discounts from your favorite Industry Partners, and more.
Copyright © 1996-2024 AR15.COM LLC. All Rights Reserved.
Any use of this content without express written consent is prohibited.
AR15.Com reserves the right to overwrite or replace any affiliate, commercial, or monetizable links, posted by users, with our own.


