|
[#1]
Awaiting fixes
|
|
|
|
[#2]
That looks a lot like my table, except that I used two sheets of 3/4" plywood for the top and 4x4 posts for the legs. Mine is screwed to the wall like that one also. I put about three coats of polyurethane on it and sanded it lightly between each coat for a nice smooth and purty finish. 'Bout time for a touch up though.
|
|
|
|
[#3]
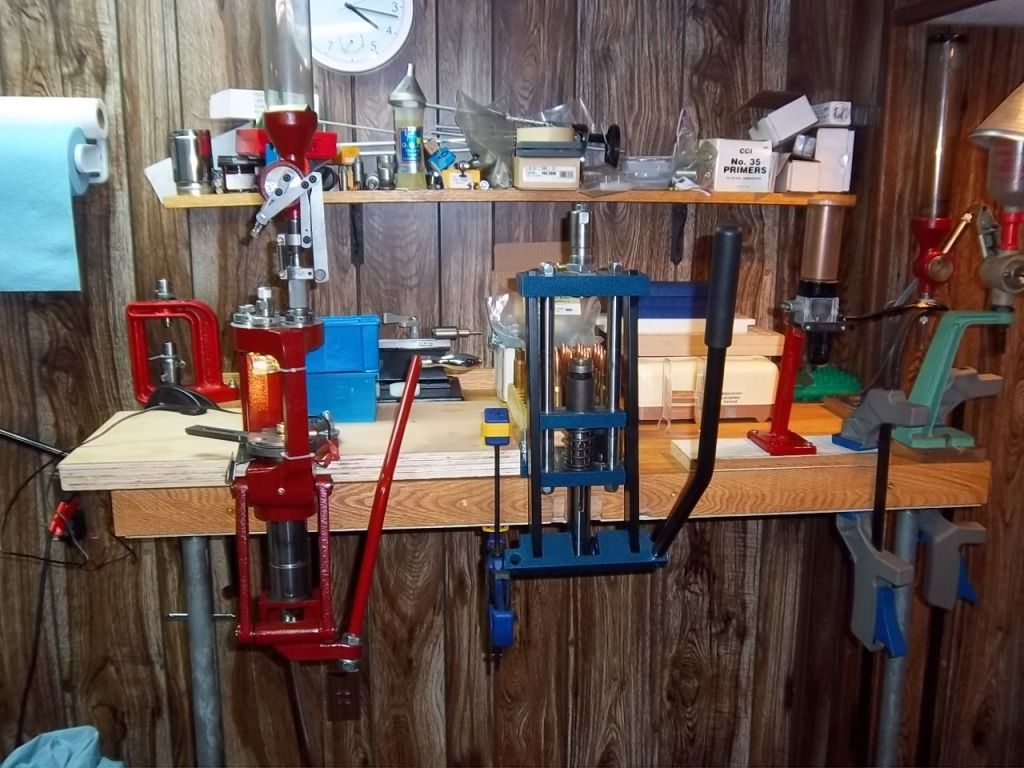
Nice bench, would one or two 2x4 cross supports beneath the plywood top be overkill?
I built a similar 2x4 bench bench "inside" of a long bedroom closet that has folding doors. I can still close them to hide all the stuff I leave lying around. Glad to see I followed similar guidelines as those you suggested. I also added one full-length shelf below the top, and I put another set of legs under the place where I mounted my Redding T7 turret press. |
|
|
|
[#4]
You answered my question about cross beams before I could post it ... thanks.
|
|
|
|
[#5]
...
|
|
|
|
[#6]
Because I was building mine in a closet, I had to use stick-on tiles for my final top finish. Butcher-block looked the best and showed spilled powder the best. And those darn things are a lot thicker, tougher and stickier than I thought. I highly recommend them for tight spots. Very durable and fairly easy to replace.
|
|
|
|
[#7]
Awsome thread GWhis, I set the toggle to keep this thread out of the archives.
Please post this up in the Gateway thread. Well done. eta, forgot to say your bench is beautiful and big. |
|
|
|
[#8]
...
|
|
|
|
[#9]
Thanks for the detailed plans. They might come in useful for me once I get around to building a bigger bench for the garage. I purchased one for inside the office so I can reload during the summer here. I would love a bigger bench and a Dillon 550 for the garage.
|
|
|
|
[#10]
Quoted:
Quoted:
Awsome thread GWhis, I set the toggle to keep this thread out of the archives. Please post this up in the Gateway thread. Well done. eta, forgot to say your bench is beautiful and big. Thanks. I'm afraid I'm almost to the point that I'm out of things to contribute. Of course the well was half empty to begin with. I'm able to give a little extra effort to my friends in the forum right now, because business is slow, thanks to Obama's "change." New building in New Mexico is almost non-existant. Maybe I'll start a gun shop. Generally, I don't want to know whether the well (or the glass) is half full or half empty, I want to know just what the heck is in it. That is most important. |
|
|
|
[#11]
...
|
|
|
|
[#12]
Your contributions don't empty the well, they not only recharge your own well, they add to the wells of everyone you influence with your contributions. Plus, if you're paying attention, every time you reload or shoot adds to your well.
I read a story about a man that would fire any machinist in his shop that wouldn't answer the questions of a new boy or an apprentice. Apparently he wasn't real gentle about the process either. But those days are probably gone in most shops. I expect you have plenty left. |
|
|
|
[#13]
GWhis, first off thanks much for the plans. I can't wait to rip all the old crap out of my reloading room and use your plans to make something so simple and fresh.
Question though. Are the legs of your bench sitting on the floor or are they on top of the foam tiles? |
|
|
|
[#14]
...
|
|
|
|
[#15]
I was thinking about building something like this in a spare bedroom of mine. Would I need to cut out the carpet around the legs so it would be on cement? Or will the weight be enough the push the carpet down?
|
|
|
|
[#16]
...
|
|
|
|
[#17]
|
|
|
|
[#18]
...
|
|
|
|
[#19]
Quoted:
Looks great and you're welcome. Wow, the torsion beam looks pretty stout at half length! bags533's picture amply illustrates the non-existent need for a double-layer-plywood top with a torsion beam. http://i369.photobucket.com/albums/oo134/bags533/3.jpg It was fairly simple to build. It is one stout bench! Haven't put the side legs on it; I'm not sure if it needs them. The only thing I would have done differently is to mark where the hidden screws of the torsion beam are located. This sounds like common sense, but I forgot to do that. Wasn't a problem until I was drilling a hole for the press and hit a screw about four inches down. :I] It was nothing a 1/2" dowel couldn't repair. |
|
|
|
[#20]
Is there any way to modify this plan to be free standing? The wall it would mount to is the concrete exterior wall of my basement. Is doing another torsion beam on the rear with the legs overkill? Can I just slap on L-shaped 2x4s and call it good? I'm using a 32x80 solid core door as the top if that matters.
|
|
|
|
[#21]
...
|
|
|
|
[#22]
I just used these plans to build a reloading bench in my laundry room, had to modify it a little because I had a wall on one side but it is really sturdy! Thanks for posting this and helping everyone
|
|
|
|
[#23]
...
|
|
|
|
[#24]
Quoted:
BTW, a solid core door (typically 1-3/4" thick) is overkill, and is more difficult to screw into the beam and back support, but it'll certainly work! . I disagree. A solid core door is exactly what you want. Sure, a sheet of 3/4 ply is $30 and you can cut it half for a 1.5" thick top. A door slab is gonna run twice the price, but its advantages outway the cost. Strength, a smooth top and ability to resist delaminating are going to last a lifetime. Plywood, especially cdx is nowhere near as smooth as a door core and dont even think you'll sand it. Also, oils and such will only aid in the door cores resilience where they could delam the ply. Look at all the steps taken to build the framework. Predrilling and countersinking screws takes seconds and are parts of carpentry. . You state that the door core is overkill yet there are 3 2x4s glued and screwed together for the front support beam. I guarantee those, alone, would support a 2 ton center load at a 6' wide table. Thats overkill. Save yourself some time, use 1 2x4 in the front and screw a door core to it. It will never sag and you could lag presses into it all day. I have 24' of 26" deep benchtop made out of solid door cores and ill never regret it. I have drill presses, a bench grinder, a lathe, tool boxes full of machining bits all on just 1 9' section and yet to feel vibration. Plus, you can router T-tracks into the solid wood for adjustable stations with positive clamping. |
|
|
|
[#25]
...
|
|
|
|
[#26]
Thanks OP, I gave it a go and am happy!
I did learn one thing though- do not assume anything. Don't assume that the studs are 16" apart, the floor is level, or the walls are plumb 
I did a custom height of 43" for my 6' 5" frame. It's about two inches below my elbows with arms at 90*- feels good! 


Thanks again |
|
|
|
[#27]
...
|
|
|
|
[#28]
You sir, are a life saver! Been trying to figure out how I was going to build my bench, and here's exactly what I want, simple and strong
it to a cinder block wall... |
|
|
|
[#29]
GWhis, if you should find yourself traveling east on I10 I have a project you could give me a hand with! J/k!
Honestly though construction is booming in houston. I've been trying to get a TuffShed built for a couple of months but they keep standing me up. Too bad because I had a slab built and a covered patio enclosed. Oh well, I have a builder coming out this week to give a quote. After I have walls I hope to give your bench plans a go. Thanks for helping us pencil pushers! |
|
|
|
[#30]
...
|
|
|
|
[#31]
Thanks!...again, lol
|
|
|
|
[#32]
Quoted:
Thanks OP, I gave it a go and am happy! I did learn one thing though- do not assume anything. Don't assume that the studs are 16" apart, the floor is level, or the walls are plumb
I did a custom height of 43" for my 6' 5" frame. It's about two inches below my elbows with arms at 90*- feels good! <a href="http://s1301.photobucket.com/user/RINO_Hunter1/media/DSCN7754_zpsb5ba4e5a.jpg.html" target="_blank">http://i1301.photobucket.com/albums/ag110/RINO_Hunter1/DSCN7754_zpsb5ba4e5a.jpg</a> <a href="http://s1301.photobucket.com/user/RINO_Hunter1/media/DSCN7755_zpsd04ebd01.jpg.html" target="_blank">http://i1301.photobucket.com/albums/ag110/RINO_Hunter1/DSCN7755_zpsd04ebd01.jpg</a> <a href="http://s1301.photobucket.com/user/RINO_Hunter1/media/DSCN7756_zpsb5cb2186.jpg.html" target="_blank">http://i1301.photobucket.com/albums/ag110/RINO_Hunter1/DSCN7756_zpsb5cb2186.jpg</a> <a href="http://s1301.photobucket.com/user/RINO_Hunter1/media/DSCN7759_zps89086eb8.jpg.html" target="_blank">http://i1301.photobucket.com/albums/ag110/RINO_Hunter1/DSCN7759_zps89086eb8.jpg</a> <a href="http://s1301.photobucket.com/user/RINO_Hunter1/media/DSCN7758_zps22baea5b.jpg.html" target="_blank">http://i1301.photobucket.com/albums/ag110/RINO_Hunter1/DSCN7758_zps22baea5b.jpg</a> <a href="http://s1301.photobucket.com/user/RINO_Hunter1/media/DSCN7762_zpsd29592e3.jpg.html" target="_blank">http://i1301.photobucket.com/albums/ag110/RINO_Hunter1/DSCN7762_zpsd29592e3.jpg</a> <a href="http://s1301.photobucket.com/user/RINO_Hunter1/media/DSCN7768_zps38f3fdde.jpg.html" target="_blank">http://i1301.photobucket.com/albums/ag110/RINO_Hunter1/DSCN7768_zps38f3fdde.jpg</a> <a href="http://s1301.photobucket.com/user/RINO_Hunter1/media/DSCN7782_zpse98b7492.jpg.html" target="_blank">http://i1301.photobucket.com/albums/ag110/RINO_Hunter1/DSCN7782_zpse98b7492.jpg</a> <a href="http://s1301.photobucket.com/user/RINO_Hunter1/media/DSCN7785_zps3c623073.jpg.html" target="_blank">http://i1301.photobucket.com/albums/ag110/RINO_Hunter1/DSCN7785_zps3c623073.jpg</a> <a href="http://s1301.photobucket.com/user/RINO_Hunter1/media/DSCN7787_zpscbd4c5e7.jpg.html" target="_blank">http://i1301.photobucket.com/albums/ag110/RINO_Hunter1/DSCN7787_zpscbd4c5e7.jpg</a> <a href="http://s1301.photobucket.com/user/RINO_Hunter1/media/DSCN7786_zpsfedd7d4c.jpg.html" target="_blank">http://i1301.photobucket.com/albums/ag110/RINO_Hunter1/DSCN7786_zpsfedd7d4c.jpg</a> Thanks again Looking good, too funny, I'm 6'8" and made mine almost 44". Great minds think alike. |
|
|
|
[#33]
Got mine built
Also cut down on the length by 4", by doing that, I could build the entire frame with on hand lumber and save some $...that was then put toward a $50 sheet of finish grade plywood 
Posted a (terrible) picture in the reloading bench thread, so I reckon I'll post a different one here 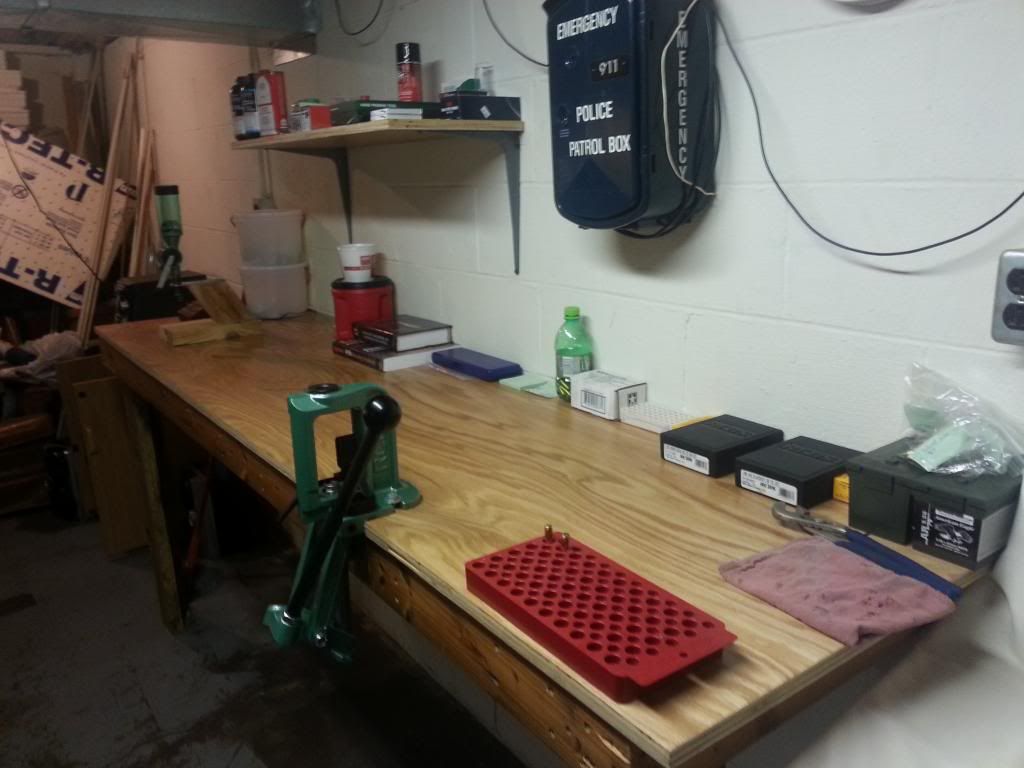 " /> " />
|
|
|
|
[#34]
My godfather was forever getting grief from my godmother for using the dining table for his wood working, I see there are other people using them as well
Now, that first picture with the table on the floor with the top leaning against the wall gives me an idea about having a part of the table that hinges up to reveal a storage area underneath. nothing too big but will hold stuff within the height of the 2x4 framing. I'll have to think on it when I rebuild my table  . .
This is what I was thinking about (sorry I couldn't get it to link directly you'll need to copy and paste) anywho I would place this on probably the left end of the table and wouldn't be as long. I'm also thinking of the inside being a drawer that would move left and right which would give me more space without a bigger door. I don't want to put drawers that pull out as it would not work with the dimensions I have in mind for height and storage under the table. Still thinking on it. http://i1271.photobucket.com/albums/jj633/TRIMDAD/86F0C0A4-7C76-4DCF-ADB7-AC0C002D6A78.jpg http://www.ar15.com/forums/t_1_139/1520165_Workbench_Thread_Please_help_in_anyway_that_you_can_.html&page=2 |
|
|
|
[#35]
...
|
|
|
|
[#36]
Quoted:
My godfather was forever getting grief from my godmother for using the dining table for his wood working, I see there are other people using them as well Now, that first picture with the table on the floor with the top leaning against the wall gives me an idea about having a part of the table that hinges up to reveal a storage area underneath. nothing too big but will hold stuff within the height of the 2x4 framing. I'll have to think on it when I rebuild my table .My stepfather did the same. I remember he gouged up the table on one project. Now it was just a 2" slab pine cheapish table that was on the homely side, now that I look back on it. Shortly after the incident he refinished the dining room hardwood floors and was done sanding early. He picked up the sander and did the table. I still chuckle at that. I'm in a new house and I'll have to build this. My only change is I think I'm going to build some cabinets into the frame for dust free storage. The drawers are probably better for access. Not sure I want to build the drawers though. That'd lead me down the road to buying more tools just to dovetail the drawers. |
|
|
|
[#37]
...
|
|
|
|
[#38]
Quoted:
Thanks OP, I gave it a go and am happy! I did learn one thing though- do not assume anything. Don't assume that the studs are 16" apart, the floor is level, or the walls are plumb
I did a custom height of 43" for my 6' 5" frame. It's about two inches below my elbows with arms at 90*- feels good! <a href="http://s1301.photobucket.com/user/RINO_Hunter1/media/DSCN7754_zpsb5ba4e5a.jpg.html" target="_blank">http://i1301.photobucket.com/albums/ag110/RINO_Hunter1/DSCN7754_zpsb5ba4e5a.jpg</a> <a href="http://s1301.photobucket.com/user/RINO_Hunter1/media/DSCN7755_zpsd04ebd01.jpg.html" target="_blank">http://i1301.photobucket.com/albums/ag110/RINO_Hunter1/DSCN7755_zpsd04ebd01.jpg</a> <a href="http://s1301.photobucket.com/user/RINO_Hunter1/media/DSCN7756_zpsb5cb2186.jpg.html" target="_blank">http://i1301.photobucket.com/albums/ag110/RINO_Hunter1/DSCN7756_zpsb5cb2186.jpg</a> <a href="http://s1301.photobucket.com/user/RINO_Hunter1/media/DSCN7759_zps89086eb8.jpg.html" target="_blank">http://i1301.photobucket.com/albums/ag110/RINO_Hunter1/DSCN7759_zps89086eb8.jpg</a> <a href="http://s1301.photobucket.com/user/RINO_Hunter1/media/DSCN7758_zps22baea5b.jpg.html" target="_blank">http://i1301.photobucket.com/albums/ag110/RINO_Hunter1/DSCN7758_zps22baea5b.jpg</a> <a href="http://s1301.photobucket.com/user/RINO_Hunter1/media/DSCN7762_zpsd29592e3.jpg.html" target="_blank">http://i1301.photobucket.com/albums/ag110/RINO_Hunter1/DSCN7762_zpsd29592e3.jpg</a> <a href="http://s1301.photobucket.com/user/RINO_Hunter1/media/DSCN7768_zps38f3fdde.jpg.html" target="_blank">http://i1301.photobucket.com/albums/ag110/RINO_Hunter1/DSCN7768_zps38f3fdde.jpg</a> <a href="http://s1301.photobucket.com/user/RINO_Hunter1/media/DSCN7782_zpse98b7492.jpg.html" target="_blank">http://i1301.photobucket.com/albums/ag110/RINO_Hunter1/DSCN7782_zpse98b7492.jpg</a> <a href="http://s1301.photobucket.com/user/RINO_Hunter1/media/DSCN7785_zps3c623073.jpg.html" target="_blank">http://i1301.photobucket.com/albums/ag110/RINO_Hunter1/DSCN7785_zps3c623073.jpg</a> <a href="http://s1301.photobucket.com/user/RINO_Hunter1/media/DSCN7787_zpscbd4c5e7.jpg.html" target="_blank">http://i1301.photobucket.com/albums/ag110/RINO_Hunter1/DSCN7787_zpscbd4c5e7.jpg</a> <a href="http://s1301.photobucket.com/user/RINO_Hunter1/media/DSCN7786_zpsfedd7d4c.jpg.html" target="_blank">http://i1301.photobucket.com/albums/ag110/RINO_Hunter1/DSCN7786_zpsfedd7d4c.jpg</a> Thanks again Final picture time! 5 thin coats of clear gloss poly (Birch top) came out very well. Now all I have to do is wait 6 months for components to become available.


|
|
|
|
[#39]
Thanks OP!
I am going to try and build it free standing, With maybe a couple L brackets into the studs to keep it on the wall. I live in a apartment and want it to be moveable. We will see how it turns out. |
|
|
|
[#40]
Cool, I was playing around with their drawer building thing. Not cheap but some nice options.
|
|
|
|
[#41]
Nice bench. I'm going to have to do some figuring and put an order in with Drawer Depot. Thanks for giving that link. It will save me precious time to add drawers to the shorter bench I built on these plans.
|
|
|
|
[#42]
I framed mine similar, but screwed studs 12"oc, covered with 1/2" plywood. The dimensions are 2'x 12' On top of that I installed a prefabricated 1/4" steel benchtop with 6" face fully welded and ground for a square edge, and a 6" backsplash welded 2-12. It is screwed to three walls, with 2x4 legs on each side, with one in the center in between the press through bolts. With all that, it is rock solid. Great post!
|
|
|
|
[#43]
Building a strong and stable bench is not hard - just throw enough material at it and you'll get there. But this design is good engineering in the classic sense of making it strong enough and stiff enough, but also lightweight and inexpensive.
We're currently house shopping and with no PCS in sight, I'll probably look at building something like this as a reloading and cleaning bench, probably with a tile top surface and facing, just to make it look nice and avoid the long term staining and refinish issues that occur with bare wood. Or alternatively with 3/4" hardwood flooring on top of 3/4 ply, where there would be plenty of wood for an occasional belt sanding and refinishing - especially if I have some wood flooring left over… |
|
|
|
[#44]
Be not afraid of working with formica.
Basic tools (roller and cutter/scriber) are less than $20.00. For final finish around the edges, borrow a small router and get a 45 degree formica finishing cutter (~$9.00). You finish the corners with a coarse formica file ($5.00), and a steady hand. Watch out though; laying down formica gets addictive. |
|
|
|
[#45]
Just built a small 2'x2.5' version of this bench to hold my 650 since I ran out of room on another bench. Man, this thing is rock solid. I have absolutely no carpentry skills and was able to assemble it an an evening.
|
|
|
|
[#46]
Quoted:
The easy way: http://images.lowes.com/product/converted/092097/092097243859lg.jpg 1/4" 2-3/4" long Tapcon Screw (Lowes or Home Depot) Needs a 3/16" concrete/masonry drill bit (don't use a hammer drill or it will make too wide a hole....]) But do use an impact screwdriver to drive the screws in. First pre-drill the 2x4 to be fastened with a wood 3/16" bit, 2 holes (1 top and 1 bottom) 16" apart. (locate the holes in solid block areas either in centers between cores or 1" either side of grout joint centers. Mount your masonry bit in a drill, chaulk a level line at 2X4 top location and have a friend hold in place while you "start" holes at each end. Remove the 2X4 and finish drilling the two holes at least 1-1/4" deep. Replace the 2X4 and screw Tapcons in each location. Once fastened tight drill the rest of the holes 2-3/4" deep (counting the depth of the 2X4) and screw the rest of the Tapcons in. This is a much easier job with an impact screw driver, but don't be tempted to use a hammer drill to drill the masonry or you will have loose fasteners. (don't over tighten) You guys are welcome.....always happy to help reloaders......even pencil pushers! Quoted:
Quoted:
You sir, are a life saver! Been trying to figure out how I was going to build my bench, and here's exactly what I want, simple and strong The easy way: http://images.lowes.com/product/converted/092097/092097243859lg.jpg 1/4" 2-3/4" long Tapcon Screw (Lowes or Home Depot) Needs a 3/16" concrete/masonry drill bit (don't use a hammer drill or it will make too wide a hole....]) But do use an impact screwdriver to drive the screws in. First pre-drill the 2x4 to be fastened with a wood 3/16" bit, 2 holes (1 top and 1 bottom) 16" apart. (locate the holes in solid block areas either in centers between cores or 1" either side of grout joint centers. Mount your masonry bit in a drill, chaulk a level line at 2X4 top location and have a friend hold in place while you "start" holes at each end. Remove the 2X4 and finish drilling the two holes at least 1-1/4" deep. Replace the 2X4 and screw Tapcons in each location. Once fastened tight drill the rest of the holes 2-3/4" deep (counting the depth of the 2X4) and screw the rest of the Tapcons in. This is a much easier job with an impact screw driver, but don't be tempted to use a hammer drill to drill the masonry or you will have loose fasteners. (don't over tighten) You guys are welcome.....always happy to help reloaders......even pencil pushers! I'd have to disagree with the part in red and I've installed literally thousands of tapcons. In fact, when installing in extra hard brick or block (or concrete) I will usually ream the holes a little to avoid snapping tapcons. I do prefer the 1/4" version (3/16 bit) over the 3/16" version (5/32" bit) but I stick with the hex head. One trick if you do have a soft material and the Tapcon won't bite is to stick a zip tie into the hole and cut it off flush with the surface before screwing in the Tapcons |
|
|
|
[#47]
We just moved and I figured it was time to build a proper bench given that I have no POS in sight and will probably be here for awhile. I used the torsion beam design with a 3/4" oak deck with oak facing and a tile surface. Tile is a pain to drill (plan on 5 minutes or so per hole with a good quality masonry bit) but it holds up well to chemicals, wear and abuse and it's cheap and easy to replace a tile if needed, and for a small project, tile is inexpensive.
The left over 3/4 ply became two 12"x6 ft shelves and two 12"x2 ft shelves, brass is stored underneath in 5 gallon buckets. 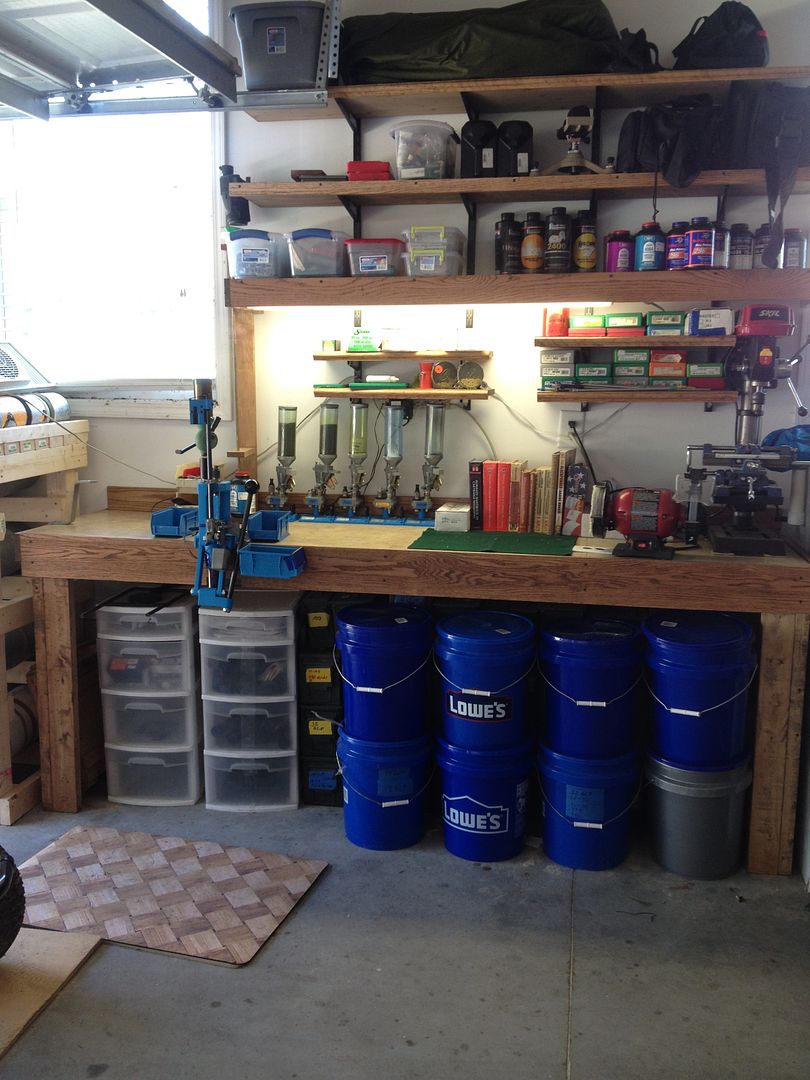
|
|
|
|
[#48]
...
|
|
|
|
[#49]
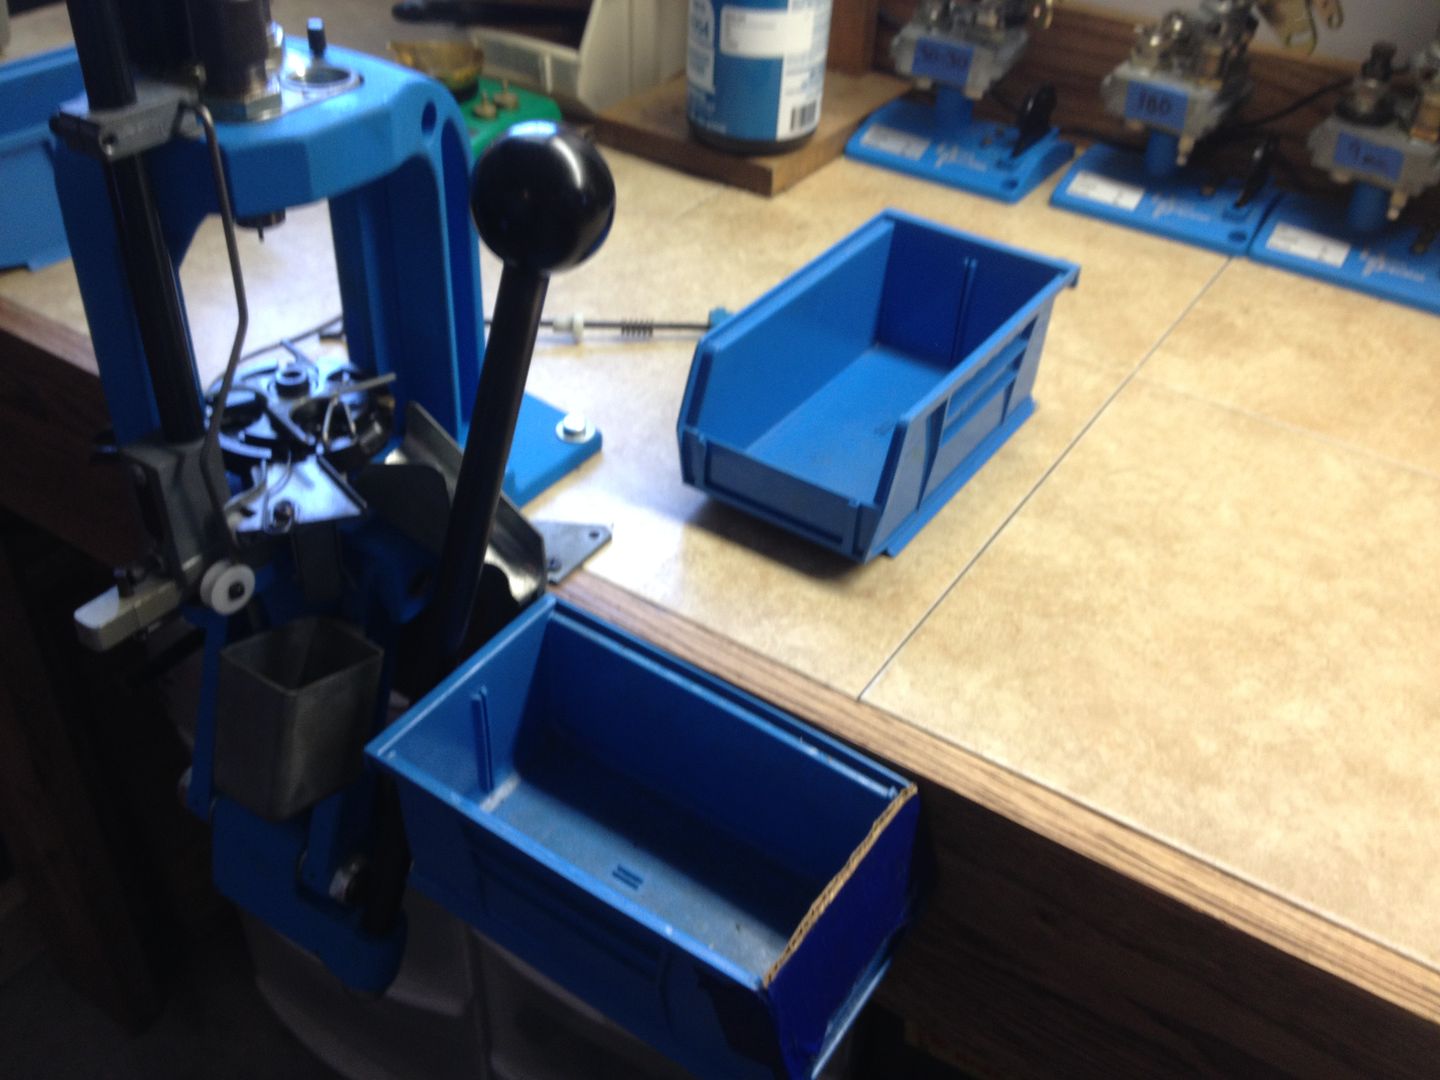
Dakota that is looking good and I like the looks of the tile top. hey one non bench observation I have is you're leaving powder in your dillon measures. You'll have them darken the clear plastic over time or worse, forget what powder is in them. Best practice is to put it back in the original container at the end of the loading session. It takes 15 seconds to remove and upend the measure over the powder bottle/funnel.
Right now I'm using a modified version of this for a basic home handyman workbench so that I can mount my vise and work with my brand new porter cable dovetailing jig. (it was cheaper than the drawers I spec'd out) I'll then build the reloading bench. Even though I have a table saw, circ saw I had my plywood ripped at the big box store on their big sheet cutter. That machine does a nice job. Speaking of which I set my bench height to match my table saw height for when I do rip sheets I can use the edge of my bench for outfeed. This is a great thread. |
|
|
|
[#50]
I load .260 Rem for my son with a Redding turret as well as use two 650`s for 9mm,.45 and .223 all on one bench. It is in my concrete floored shop on the giant "casters" meant to roll a car around on. Works really well as I can move it anywhere /anytime to suit my needs. The stability is good enough for extremely high quality long distance loads. My Sartorius scale along with the Giraud trimmer and annealer and some other equipment are on another bench. All in all I have 24 linear ft. of bench plus storage underneath. Several wall mounted cabinets hold all the powder,bullets and primers in a different area. I`d send pics but with Hughesnet it`s a pain.
|
|
|
 Win a FREE Membership!
Sign up for the ARFCOM weekly newsletter and be entered to win a free ARFCOM membership. One new winner* is announced every week!
You will receive an email every Friday morning featuring the latest chatter from the hottest topics, breaking news surrounding legislation, as well as exclusive deals only available to ARFCOM email subscribers.

AR15.COM is the world's largest firearm community and is a gathering place for firearm enthusiasts of all types.
From hunters and military members, to competition shooters and general firearm enthusiasts, we welcome anyone who values and respects the way of the firearm.

Subscribe to our monthly Newsletter to receive firearm news, product discounts from your favorite Industry Partners, and more.
Copyright © 1996-2024 AR15.COM LLC. All Rights Reserved.
Any use of this content without express written consent is prohibited.
AR15.Com reserves the right to overwrite or replace any affiliate, commercial, or monetizable links, posted by users, with our own.


