OR, USA
|
[#1]
I'm replying to add my experience with a newly purchased GSG-522 (Post-lawsuit remodel).
My first 300-500 rounds the rifle functioned flawlessly. After that, I started to encounter the light firing pin strike issue. I contacted ATI and they told me to clean it thoroughly (which I already do religiously) and I still had problems. I contacted them again letting them know I was comfortable doing a full A=disassembly so I would be comfortable installing new parts if that was necessary and they agreed to send me a new firing pin. While waiting for shipping I found this thread and decided to go ahead and perform the firing pin mod. I cut only three coils off the firing pin spring but may cut off more if testing isn't fruitful. If I remember I will report back with my results. On a side note, I read this while browsing the thread: Update from a GSG email sometime around 4/2/08:
"We have improved during the production/assembling of the first lot a little bit the design of the firing pin. So your new firing pin and all other firing pins we have produced after the change have this improvement." Since that response was sent from GSG over a year and a half ago and their newest GSG-522's are still having the same issues I call bullshit. If you are reading this because you are thinking about buying this rifle, don't do it unless you really want to put the work into it. It's a nice rifle for the price ($315 out the door for me) but you better be handy with some tools because you are going to have to tune it in. |
|
|
NC, USA
|
[Last Edit: swhiteh3]
[#2]
Just picked up my first .22LR MP5 close, a GSG-5. Thanks to Jackal2001 for posting all this info - I have a lot to read and digest!
If anyone can link to a PDF of an owner's manual, and maybe even a full guide to disassembly and re-assembly, I'd appreciate it. (On Edit: I found the instruction manual on the ATI website, and Jackal's takedown guide) |
|
|
USA
|
[#3]
Magazine Fix:
I finally found the solution to keeping the GSG5 from giving misfeeds. See the video here |
|
|
|
[#4]
Originally Posted By SubSonicSnipe: Magazine Fix: I finally found the solution to keeping the GSG5 from giving misfeeds. See the video here thank you! |
|
|
|
KY, USA
|
[#5]
I tried the beveled washer and o-ring, but have a couple of questions/comments. I used a 21/32d 3/8M beveled washer, and picked an o-ring that looked like it would match up. What size o-ring did you use? The washer slid down, and i used the cocking handle tube to seat the washer before inserting the o-ring. After inserting the o-ring, I then cycled the action a few times for final seating. It definitely to the "clang" out of the cocking handle when released. I then noticed something that was a little of a concern. This could be due to the fact I need a larger o-ring, not certain. I peeked down the tube and noticed the o-ring had shifted off the washer. I repositioned the o-ring then pointed the muzzle from 9 o'clock to 12 o'clock. to my disappointment the o-ring fell towards the front of the cocking tube. Again, this could be something as simple as a differnt size o-ring. I do like the idea of what it is supposed to do, vs $15 for the delrin buffer.
|
|
|
KY, USA
|
[#6]
Followup on the washer/buffer. I went back and removed the washer, then put the 522 back together to check the cocking handle location w/o the washer in place. Sure enough, it sits right against the cut out of the tube. Took it apart, re-inserted the washer, using the cocking handle tube to "tap" the washer in place (21/32nd OD beveled 3/8"M washer). Once in place, I put everything back together. Pulled and released the handle 2-3 times. Without the O-ring it sits just far enough back so as to not bang against the tube. Will function check when I get a chance and report.
|
|
|
KY, USA
|
[#7]
I stopped in Autozone, and picked up two bottles of Duplicolor Scratch Fix. For white, I usedTY 01607 Natural White for a Toyota. For red, I used TY01560 Super Red for a Toyota. They have a pen tip which makes it easy to apply in the grooves of the letters. You still need to be watchful for residue, that you'll wipe off. Yes it may cost a little more than two bottles of Testors, but it's auto paint.
|
|
|
NJ, USA
|
[#8]
I preferred using the 1/4x20 expansion nut for the cocking tube buffer. It's a much better fix IMO.
|
|
|
FL, USA
|
[#9]
Hey guys. Long time lurker. Here is a mod that allows you to swivel your GSG5 lower down and remove the bolt carrier like a real MP5.
First you need to remove the magazine safety lever from the trigger pack. Then grind material away from the trigger housing in the rear. 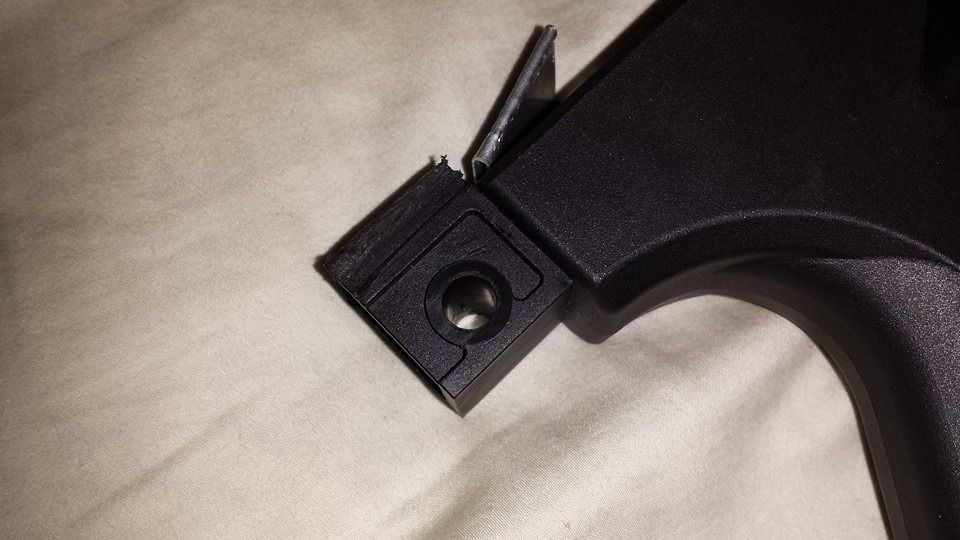
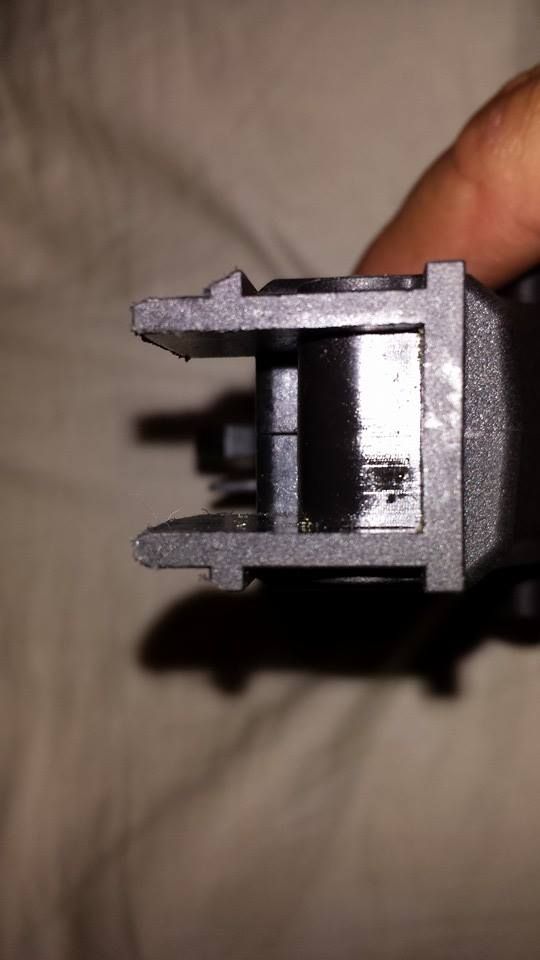
Next, you will have to be creative and fabricate a stop for the bolt housing. This eliminates the block you have to screw in behind the housing. Keep in mind that my idea is merely a prototype, although it does work very well.. I took some sheet aluminum and a pair of tin snips and made this: 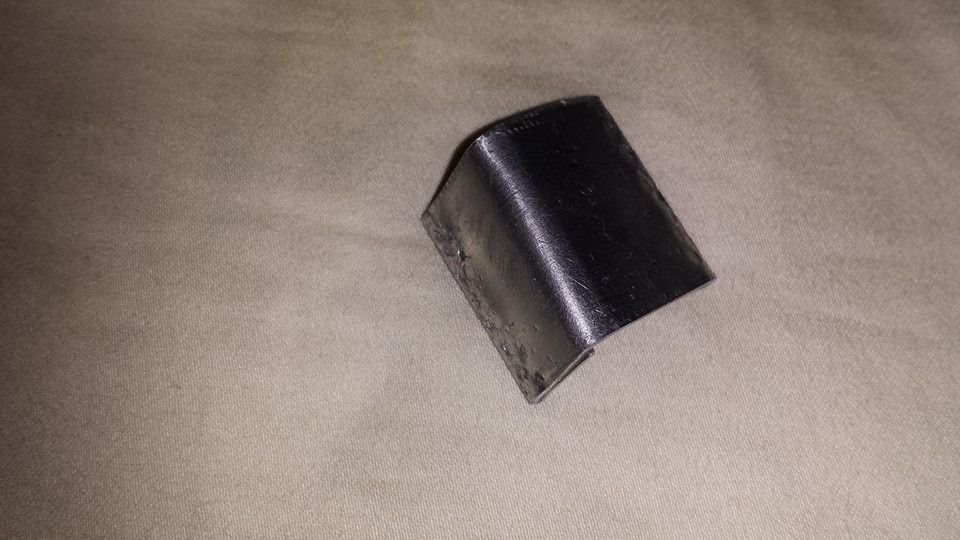
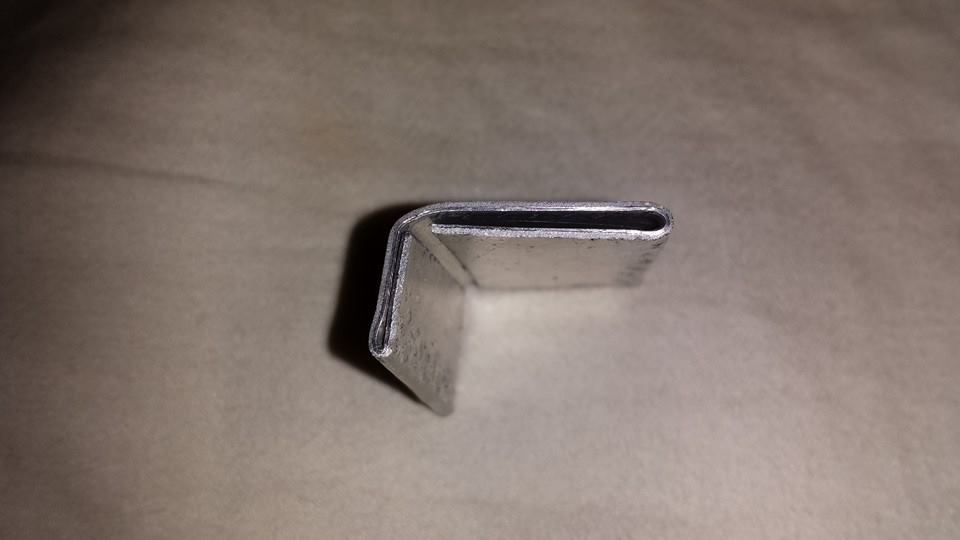
It inserts perfectly into the groove between the trigger pack and trigger pack housing: 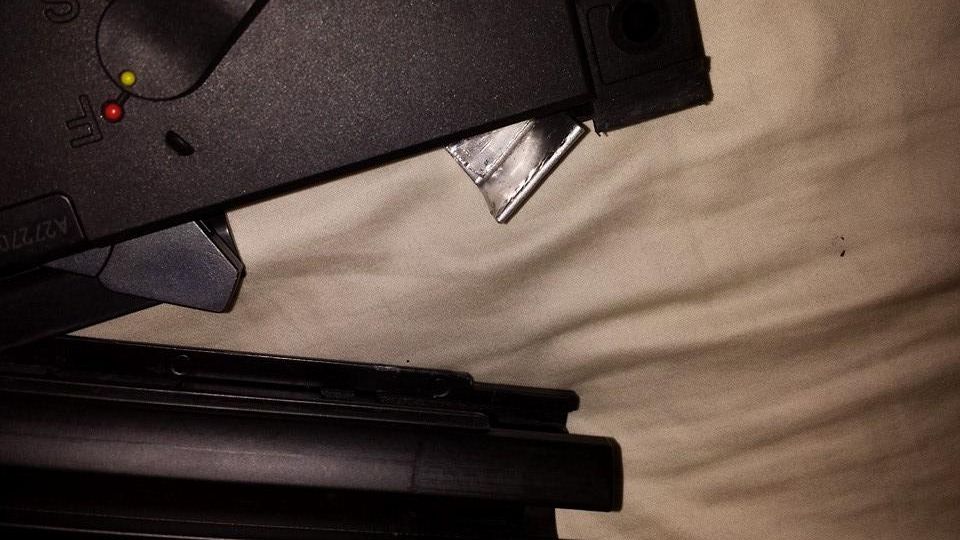
...and with the trigger group swung up into the upper receiver.... 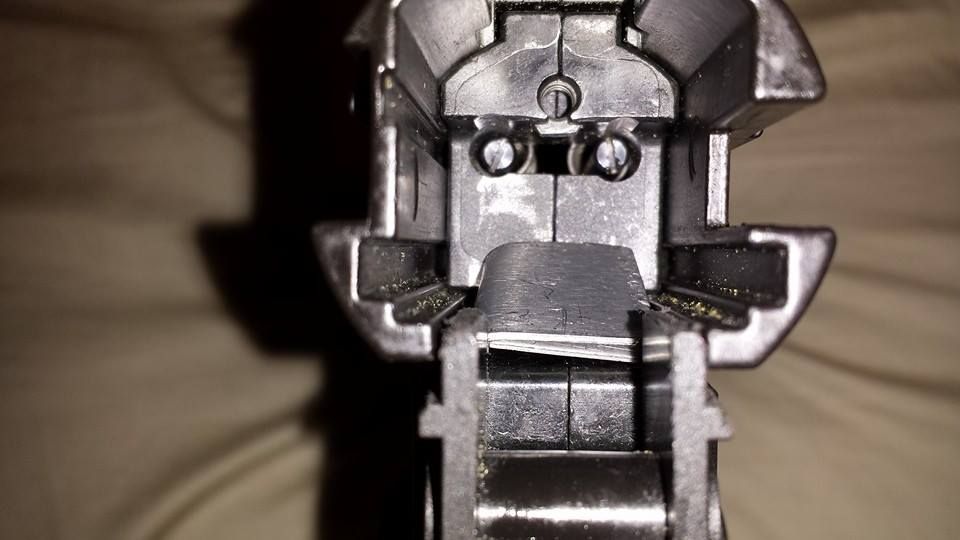
|
|
|
|
[#10]
Interesting idea..
|
|
|
|
FL, USA
|
[Last Edit: Hkmp5k9]
[#11]
a bolt through the trigger pack clamshell would be the ideal solution. That section of the trigger pack is completely hollow, too. So drill a hole, put a nut inside the clamshell and a nut outside.
|
|
|
FL, USA
|
[Last Edit: Hkmp5k9]
[#12]
OK - After I got home from work I took the trigger pack apart, brought the left side of the clamshelll to the hardware store, I got a few bolts and nuts.
Unfortunately I didn't write down any measurements. Honestly, I started with a smaller bolt/nuts but it was about 1/8th inch too small to tightly secure the bolt carrier group.. So I just went up a size and luckily it worked. Perfect. I'm so happy right now. Drilled to exactly the size of the bolt... 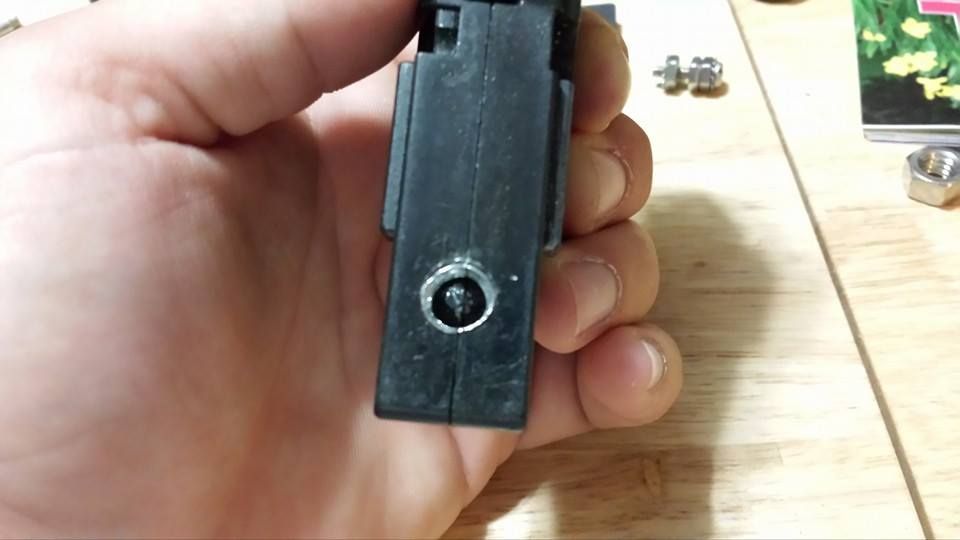
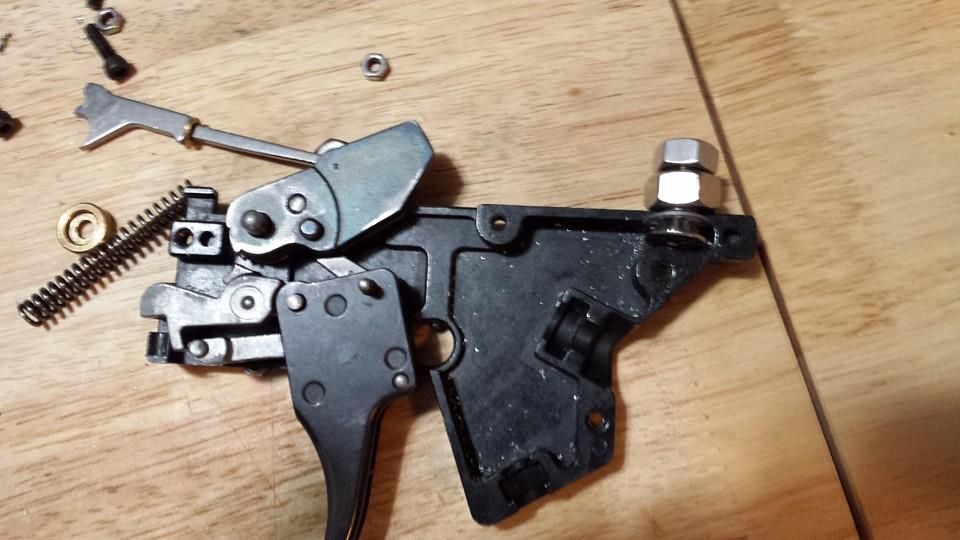
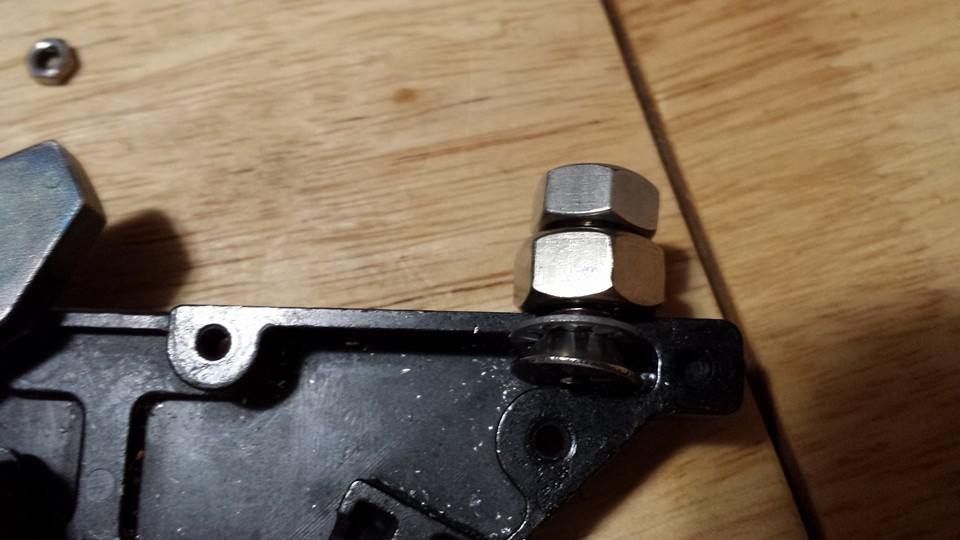
Clean, no? Needs a dome cap nut though... 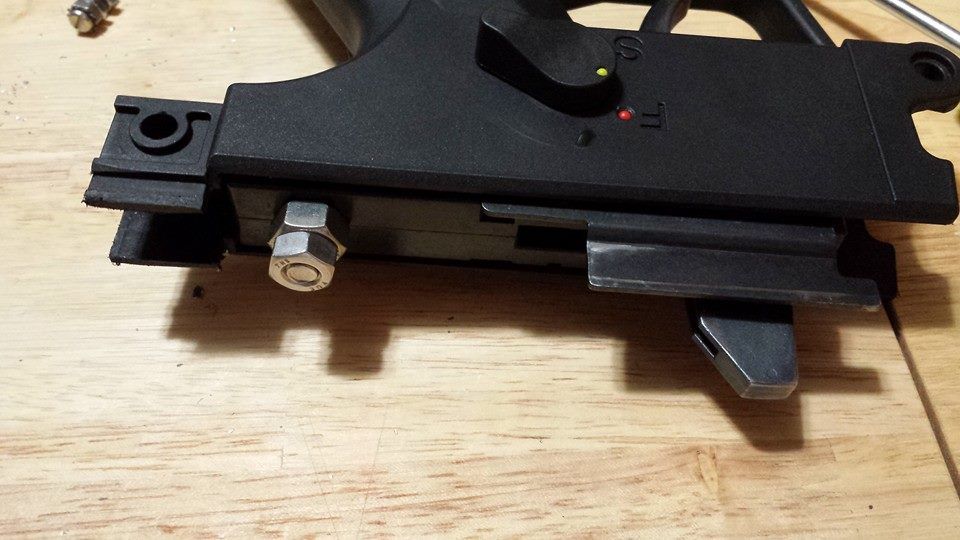
I will go out tomorrow and replace the top nut with a dome cap nut. THE MIDDLE NUT isn't the correct size - it acts as the spacer that closes the gap to make the whole thing fit tight. 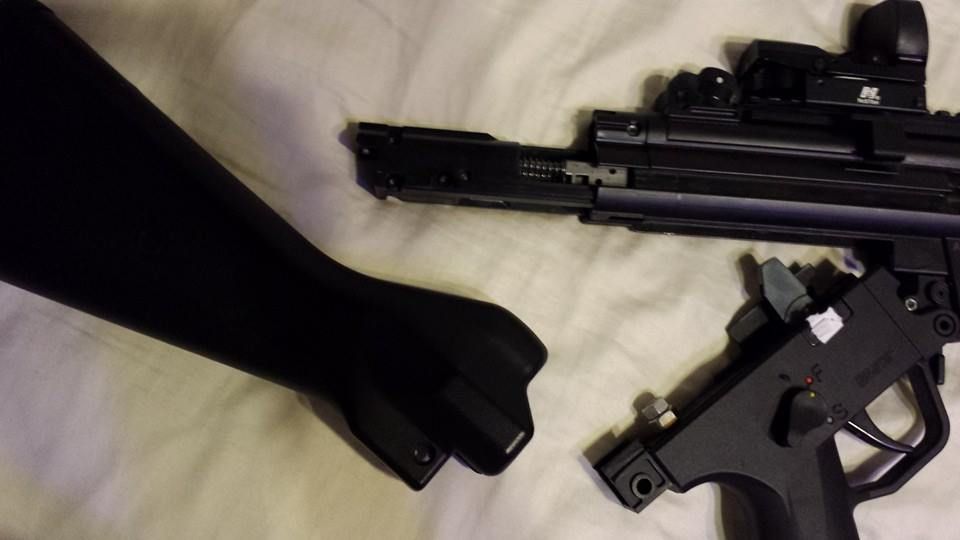
|
|
|
|
[#13]
Was looking around at the store today, figured I had to have something here that would work for the
charging handle buffer and voila! There is one in the pack that fits perfect in the end and cheaper than $15 and shipping. Any auto parts store should have these. Alternate buffers |
|
|
|
NJ, USA
|
[#14]
Excellent Mod idea.... I am going to do same to mine.
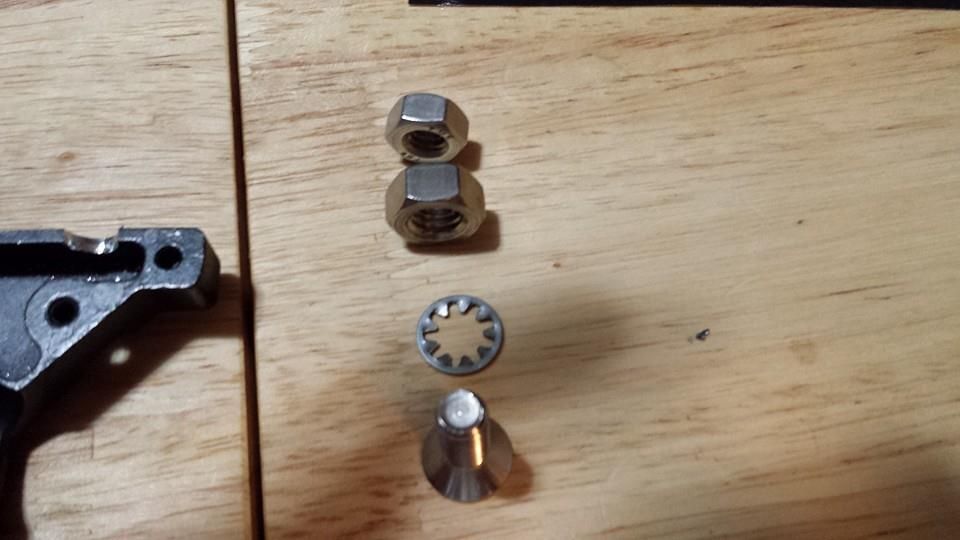
I already installed the pin upgrade, but one of the biggest disappointments to me was that I still needed the allen wrench to remove the bolt carrier. With this mod, I'll be able to strip, clean and reassemble without and tools....awesome! Great "outside the box" thinking and innovation! Just a suggestion: I notice you used standard chrome-moly vanadium nut/bolt combo. I HIGHLY recommend you replace the hardware with "Grade 5" nuts and bolt. It is a much stronger material, available at any hardware store and there's minimal price difference (but to be honest, we're talking about a firearm's Bolt Carrier, so, don't cheap out....the face you save could be your own!) ;-) |
|
|
FL, USA
|
[#15]
Thanks. The BCG sits inside a clamshell as you know, I'm not really worried but if I find the time, I'll upgrade. I need to get the dome cap still anyway, just to make it look better.
The gun runs perfect with this modification, no problems at all. I'm really surprised that this hasn't gotten more attention, it's hands down the best mod to the GSG5 out there. |
|
|
AZ, USA
|
[#16]
I decided to start modifying the GSG-5 again. Been a few years since I messed with it. I found a great buffer for the charging handle. Found it in the plumbing / sink repair section at Home Depot. Cost was less than $2.00 for a 2 pack. I haven't shot my rifle with it yet, but fit was perfect. Check out the pics.
Lee 

|
|
|
IL, USA
|
[#17]
I could kiss you jackal! On accident I stripped the screw slot in the top barrel screw and replaced it with a M3-16 with a M3 nut and it worked like a charm! Replaced every screw on my gun with M3's except for the two Torx ones. I even replaced the three bolt screws (internal on the bolt mech) with 3 M3-6 screws! Thanks again you saved my butt!
|
|
|
TX, USA
|
[Last Edit: svt40]
[#18]
<span style="color: blue;">HK Safety Selector Mod
Shows how to modify a genuine HK selector for use in the GSG. It fires in both E and F and is safe in S when using an Airsoft SEF lower. Figured I'd link to it here in the mod list so it can be found once it fades from the first page. <span style="font-weight: bold;">https://www.ar15.com/forums/t_6_41/458818_GSG5_HK_selector_upgrade_Now_with_PICTURES_.html Obligatory picture so you know what I am on about. Edited because Photobucket sucks ass! 
|
|
|
USA
|
[#19]
I have one of the newer GSG 522's. I was getting 2-3 light primer strikes per mag. Did the firing pin mod and cut the firing pin return spring 5 coils. No light primer strikes anymore!
|
|
|
|
[#20]
I have the late model. Still unfired and like new as I had run down my 22 cache. I know 22LR has become available again, but so have many other items of higher priority.
I am wondering if all the accessory suppliers are out of stock / discontinued by now. I can custom fab metal, and can make a go at 3D printing some plastics... But as a wise man once said, don't try to re-invent the wheel when there is a Goodyear down the street and what you want is allready on sale. |
|
|
|
NY, USA
|
[Last Edit: SocomShooter]
[#21]
First Generation GSG-5 (pre-lawsuit): Is it just me, or is the faux suppressor WAY too small?
I know the buzz has died WAY down on these guns, but just in case there's still a following on here... At the time, I finally found the one part that I needed (without having to make it) to remedy this issue. I've searched the interwebs high and low over recent years but found very little info on people replacing the factory can with something that looks more fitting (ie. bigger in diameter.) A lot of this info took me a while to find/figure out, so I thought I'd drop it in one good place for future use, in case anyone else needs it. *** Factory faux suppressor threads: M16x1.0 *** Factory faux suppressor diameter: roughly 1.18" *** Parts Used: *Fitting Male Pipe 1/2" NPT to Metric M16X1 M16X1.0 Adapter Brass N-#G1 - Brand: Dynapex - Manufacturer Part Number:gbm2p_08zm_m16x10m (purchased through eBay; seller: fittings.space) https://images-na.ssl-images-amazon.com/images/I/41-Irl5KgNL._AC_SX466_.jpg *Solvent Trap Tube: 8" x 1.5" (Allie Express seller: Zeally AutoParts Store) https://ae01.alicdn.com/kf/HTB1Zn.xeoGF3KVjSZFvq6z_nXXaf/1-1-2-X-8-Solvent-Trap-Kit-Overall-length-8-0-05-FOR-9mm-10mm.jpg_q50.jpg *(2) 1.5" end caps (center-punched or 1/2"-28) NOTE: 1/2"-28 slips very snugly over the barrel, even with the threads still in-tact. However, for drilling/tapping, I would start with a center-punched cap. ***Ultimately, I ended up (slightly) boring out the 1/2"-28 end until I was comfortable the barrel was free-floating Tools Used: *1/2"NPT tap *45/64" drill bit (correct size for 1/2"NPT tap) *Drill press After all the work is done, the new can will be just a touch short (.22".) I used o-rings to make up this space and get it to fit perfectly. It looks infinitely better than stock, though; HUGE improvement. Happy shooting, guys - stay safe. |
|
|
|
[#22]
Thank you for keeping this thread alive!
I've got the SD version, and bought it specifically because of the 'too small' looking tube as you mentioned. Post some pics of your finished project! |
|
|
|
OR, USA
|
[#23]
WOW GUYS! I am also very late but love this gun and do not want it to die off EVER!!! I have been deeply invested in researching all forums about the GSG 5 and GSG 522. I have taken a lot of the practical mods, upgrades, and problem-solving, and condensed them into a short paper. Here is what I have so far. Please let me know if there are any issues with accessing, also give insight for other mods, or correct the information in my paper!
https://docs.google.com/document/d/1BnMlg8PC2oeBnpGqA4o2AfV-jkvwj-bo11ETOreefAk/edit |
|
|
|
[#24]
Originally Posted By 522lovesKilibreaux: WOW GUYS! I am also very late but love this gun and do not want it to die off EVER!!! I have been deeply invested in researching all forums about the GSG 5 and GSG 522. I have taken a lot of the practical mods, upgrades, and problem-solving, and condensed them into a short paper. Here is what I have so far. Please let me know if there are any issues with accessing, also give insight for other mods, or correct the information in my paper! https://docs.google.com/document/d/1BnMlg8PC2oeBnpGqA4o2AfV-jkvwj-bo11ETOreefAk/edit You certainly spent some effort on it. It is very nice compilation of mods. |
|
|
|
OR, USA
|
[#25]
What do you guys think? Are there any questions I might be able to answer? I am running my own testing of ammo reliability and hope to be updating the information in the paper soon!
|
|
|
CO, USA
|
[#26]
[This might be my first post here...yay me!] This is great, thanks for spending the time to put together!
How do I insert pics? I have so many to share.... LONG time follower and fan of the GSG-5s, matter of fact, my very first firearm was a GSG-522 back around 2012 when they came out. At the time, I didn't know there was a Gen 1, down the rabbit hole I went and found and converted to the GSG-5 with the conversion kit, ALMOST perfect, minus the upper receiver still having those hash marks right around the Magwell. Over the years I've become a bit of a GSG-5 addict if you will, I had to collect them all (I did grow up on Pokémon after all  ). GSG-5SD, GSG-5p, GSG-5PK ). GSG-5SD, GSG-5p, GSG-5PKI then went after the big brother version...AP5 and AP5p, couldn't be happier! Just one left to complete the collection...I need a real SD, one day  I have amassed some spare parts and knowledge over the years too, so if anyone needs help or has questions feel free to throw them on here! Let's keep the community going! |
|
|
|
[#27]
I have a thread asking about the compatibility of the HK MP5 end cap with a swivel. I'm trying to find a GSG-5 end cap that has a swivel on the end or the ability to add one. Xtremegibs was nice enough to email me a picture. I figured I would include it here in case others were interested.
Anyways, the picture and info from Xtremegibs: Left is an mp5 SB Tactical brace, right is a GSG end cap, notice it's recessed in while the Mp5 rails come all the way out to the end. I imagine you can dremel it down a bit to match the GSG one if needed, depending on how badly you want to :) |
|
|
|
 Win a FREE Membership!
Sign up for the ARFCOM weekly newsletter and be entered to win a free ARFCOM membership. One new winner* is announced every week!
You will receive an email every Friday morning featuring the latest chatter from the hottest topics, breaking news surrounding legislation, as well as exclusive deals only available to ARFCOM email subscribers.

AR15.COM is the world's largest firearm community and is a gathering place for firearm enthusiasts of all types.
From hunters and military members, to competition shooters and general firearm enthusiasts, we welcome anyone who values and respects the way of the firearm.

Subscribe to our monthly Newsletter to receive firearm news, product discounts from your favorite Industry Partners, and more.
Copyright © 1996-2024 AR15.COM LLC. All Rights Reserved.
Any use of this content without express written consent is prohibited.
AR15.Com reserves the right to overwrite or replace any affiliate, commercial, or monetizable links, posted by users, with our own.


