|
[#1]
|
|
|
|
|
[#2]
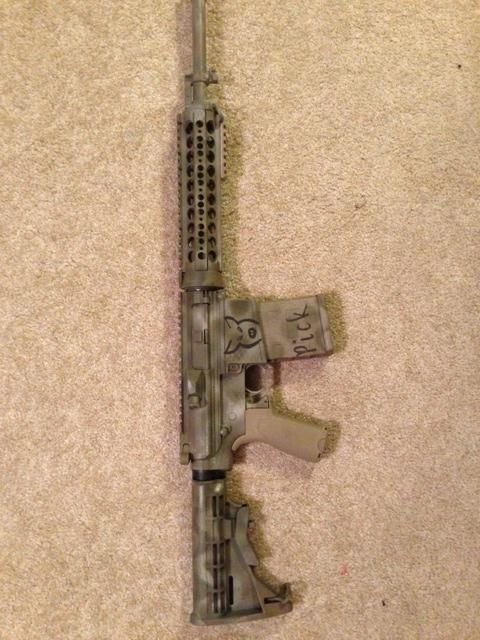
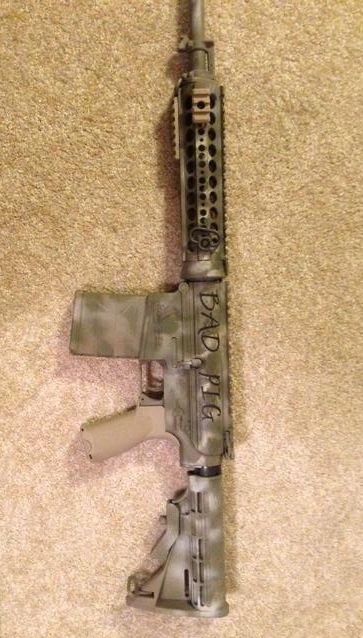
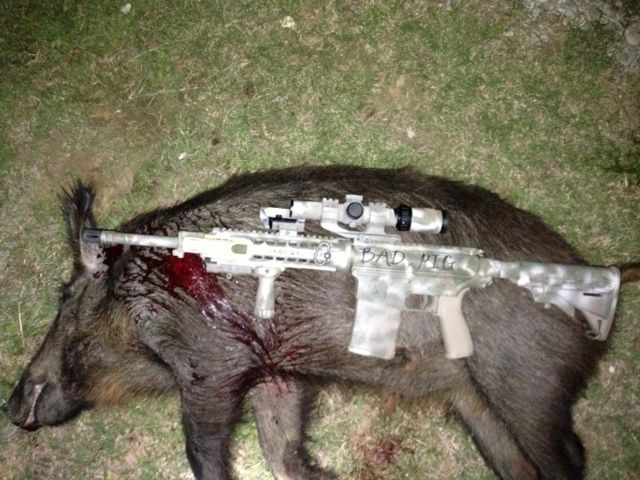
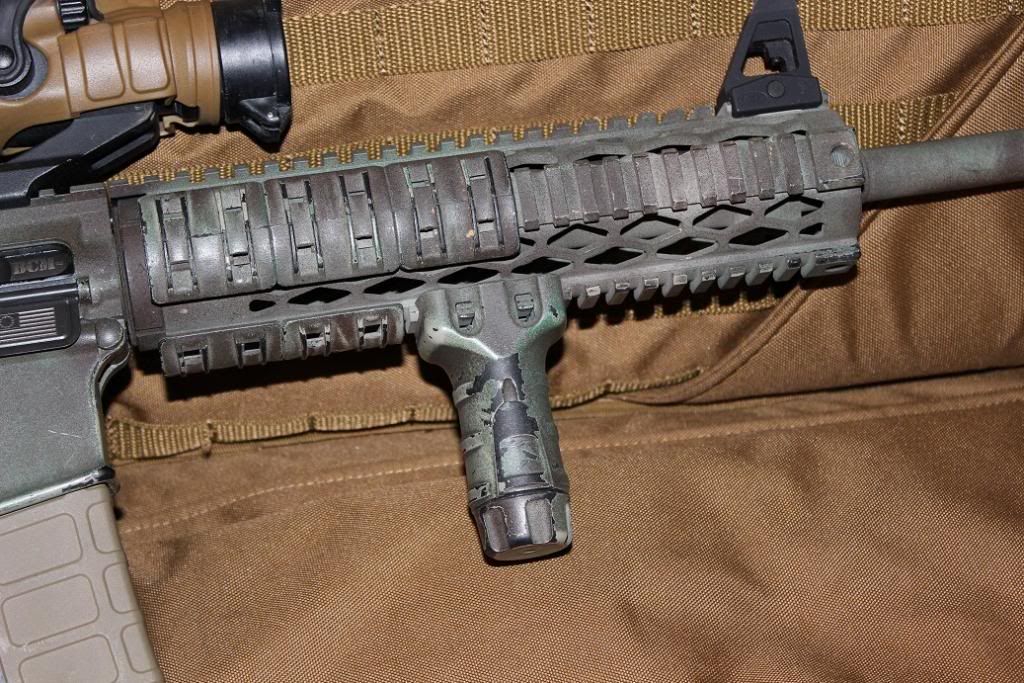
Getting ready to do my first rattle can build and i was wondering...are you guys who have completed weapons just spraying over the take down pins, safety selector etc? If so how do you stop the paint from painting them shut and in the case of the selector do you move it after doing one coat and then do another so there is no "shadow" left?
|
|
|
|
FL, USA
|
[#3]
Originally Posted By Aeneas2020:
Getting ready to do my first rattle can build and i was wondering...are you guys who have completed weapons just spraying over the take down pins, safety selector etc? If so how do you stop the paint from painting them shut and in the case of the selector do you move it after doing one coat and then do another so there is no "shadow" left? No it won't paint it shut just spray over everything , and yes after the first coat just switch the selector switch . |
|
|
|
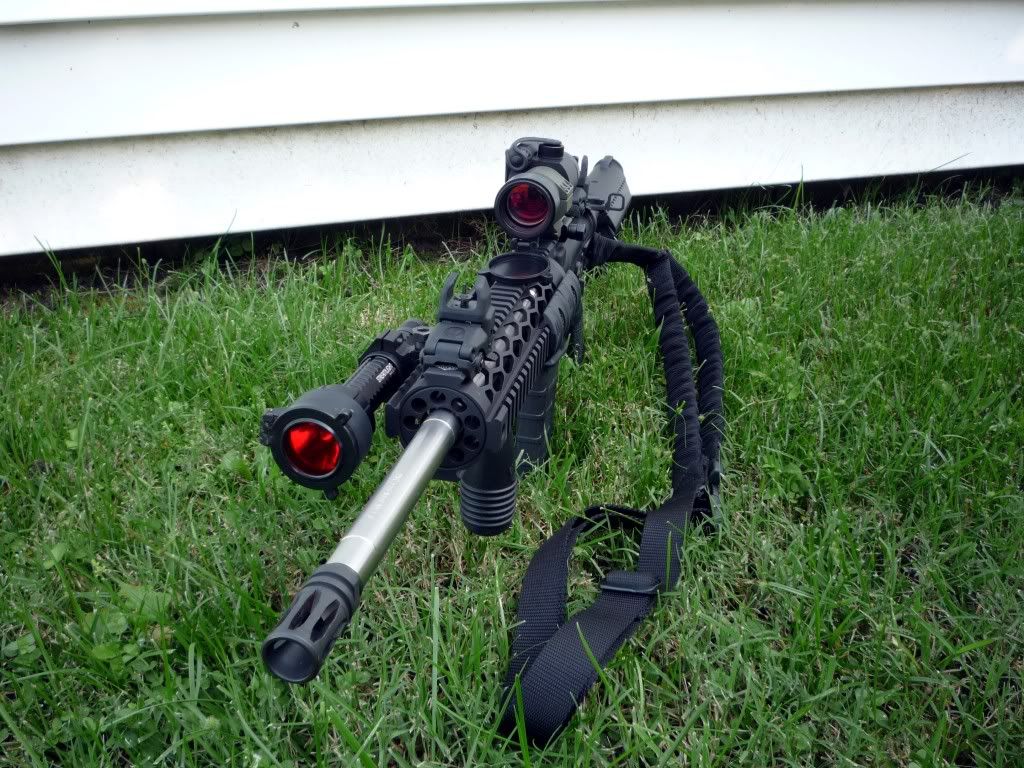
[#4]
Originally Posted By Aeneas2020:
Getting ready to do my first rattle can build and i was wondering...are you guys who have completed weapons just spraying over the take down pins, safety selector etc? If so how do you stop the paint from painting them shut and in the case of the selector do you move it after doing one coat and then do another so there is no "shadow" left? Multiple light coats rather than one thick coat will prevent the paint from "pooling" in crevices and therefore causing parts to stick. I don't worry about not getting under the selector lever, and all my painted lowers have the "shadow" minus whatever managed to spray underneath them. Once again, multiple light passes will be much more successful than just laying on the nozzle and letting lots of paint drip, bleed, and creep into the "insides." I've painted multiple lowers like this fully assembled, and have never had any problems with the selector or pins. ~Augee |
|
|
|
|
[#5]
Originally Posted By Augee:
Multiple light coats rather than one thick coat will prevent the paint from "pooling" in crevices and therefore causing parts to stick. I don't worry about not getting under the selector lever, and all my painted lowers have the "shadow" minus whatever managed to spray underneath them. Once again, multiple light passes will be much more successful than just laying on the nozzle and letting lots of paint drip, bleed, and creep into the "insides." I've painted multiple lowers like this fully assembled, and have never had any problems with the selector or pins. ~Augee Originally Posted By Augee:
Originally Posted By Aeneas2020:
Getting ready to do my first rattle can build and i was wondering...are you guys who have completed weapons just spraying over the take down pins, safety selector etc? If so how do you stop the paint from painting them shut and in the case of the selector do you move it after doing one coat and then do another so there is no "shadow" left? Multiple light coats rather than one thick coat will prevent the paint from "pooling" in crevices and therefore causing parts to stick. I don't worry about not getting under the selector lever, and all my painted lowers have the "shadow" minus whatever managed to spray underneath them. Once again, multiple light passes will be much more successful than just laying on the nozzle and letting lots of paint drip, bleed, and creep into the "insides." I've painted multiple lowers like this fully assembled, and have never had any problems with the selector or pins. ~Augee What type of prep work you do? Schotch brute to "rough up" the surface? |
|
|
|
|
[Last Edit: Augee]
[#6]
Originally Posted By wpeschel:
What type of prep work you do? Schotch brute to "rough up" the surface? Originally Posted By wpeschel:
Originally Posted By Augee:
Originally Posted By Aeneas2020:
Getting ready to do my first rattle can build and i was wondering...are you guys who have completed weapons just spraying over the take down pins, safety selector etc? If so how do you stop the paint from painting them shut and in the case of the selector do you move it after doing one coat and then do another so there is no "shadow" left? Multiple light coats rather than one thick coat will prevent the paint from "pooling" in crevices and therefore causing parts to stick. I don't worry about not getting under the selector lever, and all my painted lowers have the "shadow" minus whatever managed to spray underneath them. Once again, multiple light passes will be much more successful than just laying on the nozzle and letting lots of paint drip, bleed, and creep into the "insides." I've painted multiple lowers like this fully assembled, and have never had any problems with the selector or pins. ~Augee What type of prep work you do? Schotch brute to "rough up" the surface? Uhm... usually I brush most of the cat hair off of it... 
No, seriously, I basically don't do much prep work, besides making sure the exterior is relatively free of debris and oil, which usually involves a rag wipe down, and maybe a shaving brush. Besides that, I put masking tape over the S/N and flash suppressor (don't feel like finding out what happens to paint on the inside of a suppressor...) and any optics lenses and/or markings that I don't want painted, and stuff the magazine well with toilet paper. Then again, none of my painted rifles are even going to runners up in a beauty contest, though the "beat to crap" look appeals to some (myself included). I do a decent amount of artwork unrelated to rifles, including airbrushing, so I know surface prep, ect., and I've considered doing a "serious" refinish job on a rifle just to see what I could do, but when push comes to shove, I'm too lazy and cheap to spend more money on degreaser and more time in surface prep than it cost for the Krylon and the time to paint the rifle. Rattle can - no surface prep: 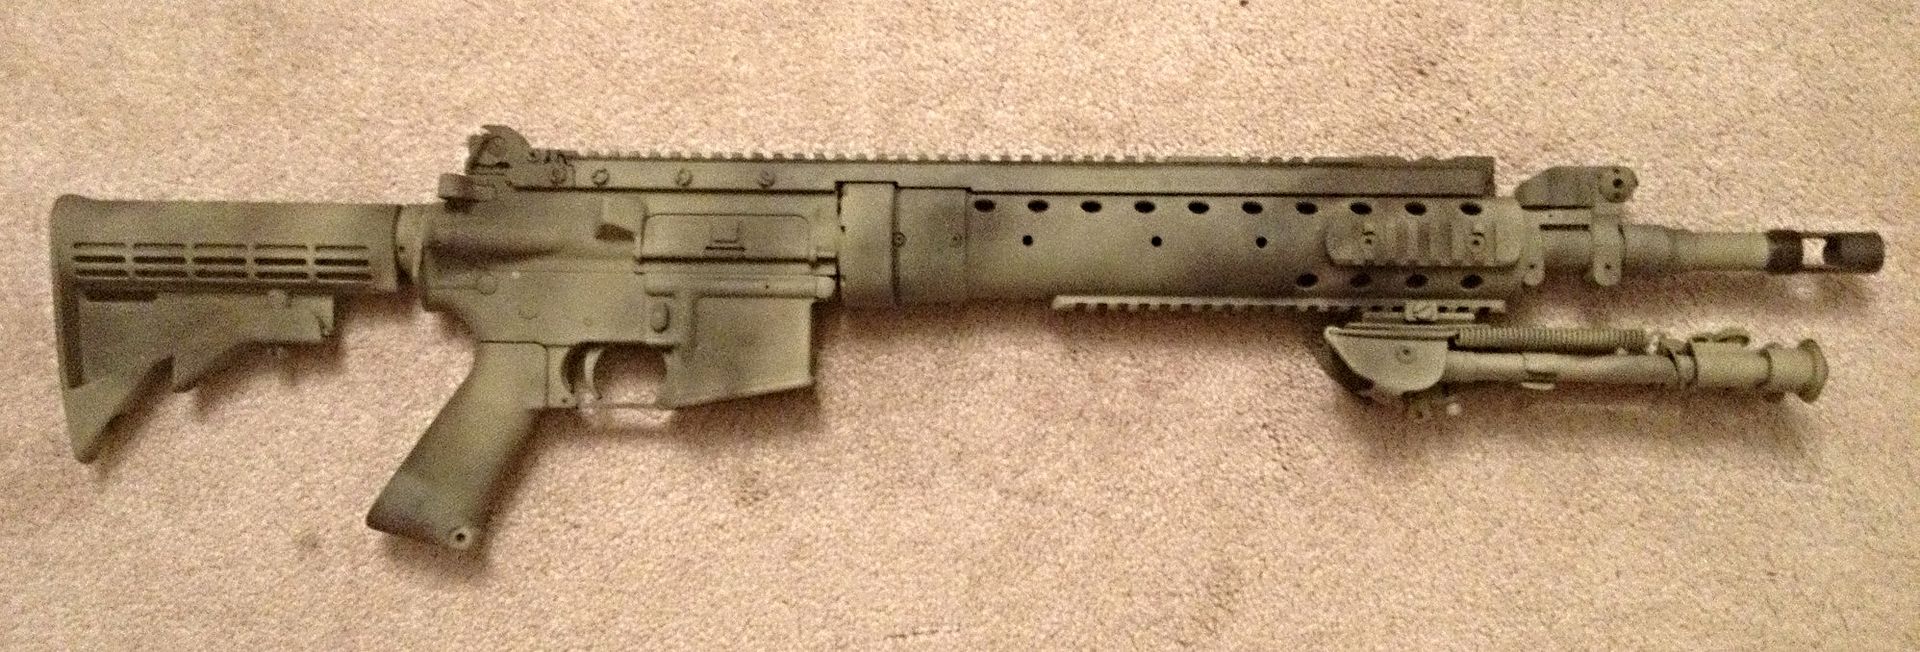
Non-firearm related airbrush work... "just because."
(yes, it's painted on a wrinkled bedsheet.) ~Augee |
|
|
|
|
[Last Edit: jukeboxx13]
[#7]
Originally Posted By Augee: Multiple light coats rather than one thick coat will prevent the paint from "pooling" in crevices and therefore causing parts to stick. I don't worry about not getting under the selector lever, and all my painted lowers have the "shadow" minus whatever managed to spray underneath them. Once again, multiple light passes will be much more successful than just laying on the nozzle and letting lots of paint drip, bleed, and creep into the "insides." I've painted multiple lowers like this fully assembled, and have never had any problems with the selector or pins. ~Augee Originally Posted By Augee: Originally Posted By Aeneas2020: Getting ready to do my first rattle can build and i was wondering...are you guys who have completed weapons just spraying over the take down pins, safety selector etc? If so how do you stop the paint from painting them shut and in the case of the selector do you move it after doing one coat and then do another so there is no "shadow" left? Multiple light coats rather than one thick coat will prevent the paint from "pooling" in crevices and therefore causing parts to stick. I don't worry about not getting under the selector lever, and all my painted lowers have the "shadow" minus whatever managed to spray underneath them. Once again, multiple light passes will be much more successful than just laying on the nozzle and letting lots of paint drip, bleed, and creep into the "insides." I've painted multiple lowers like this fully assembled, and have never had any problems with the selector or pins. ~Augee I also start off farther away from the gun with the rattle can then come in closer if I want to.
|
|
|
|
|
[#8]
thanks for the advice guys
|
|
|
|
WV, USA
|
[#9]


|
|
|
|
[Last Edit: VA-gunnut]
[#10]
Edited...VA-gunnut
|
|
|
|
VA, USA
|
[#11]
Before:
Painted several thousands rounds ago: 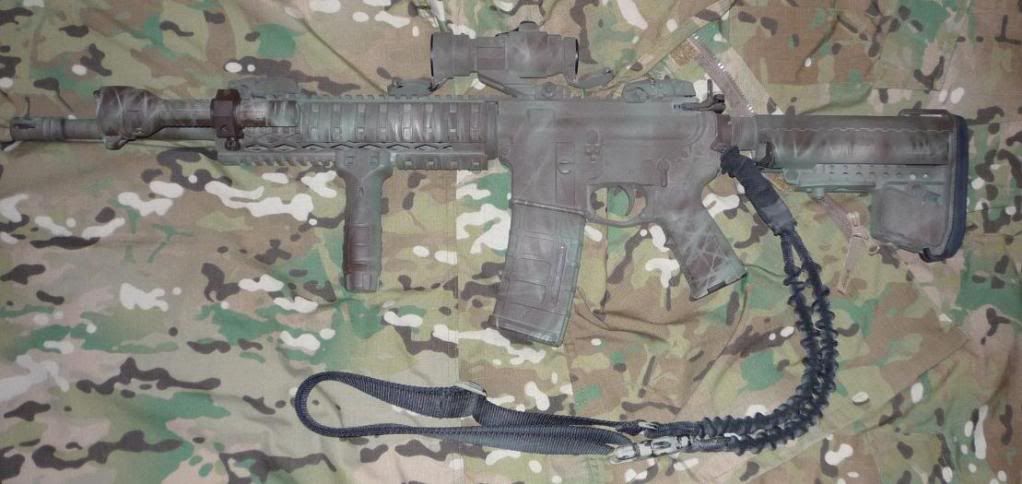
Now: 

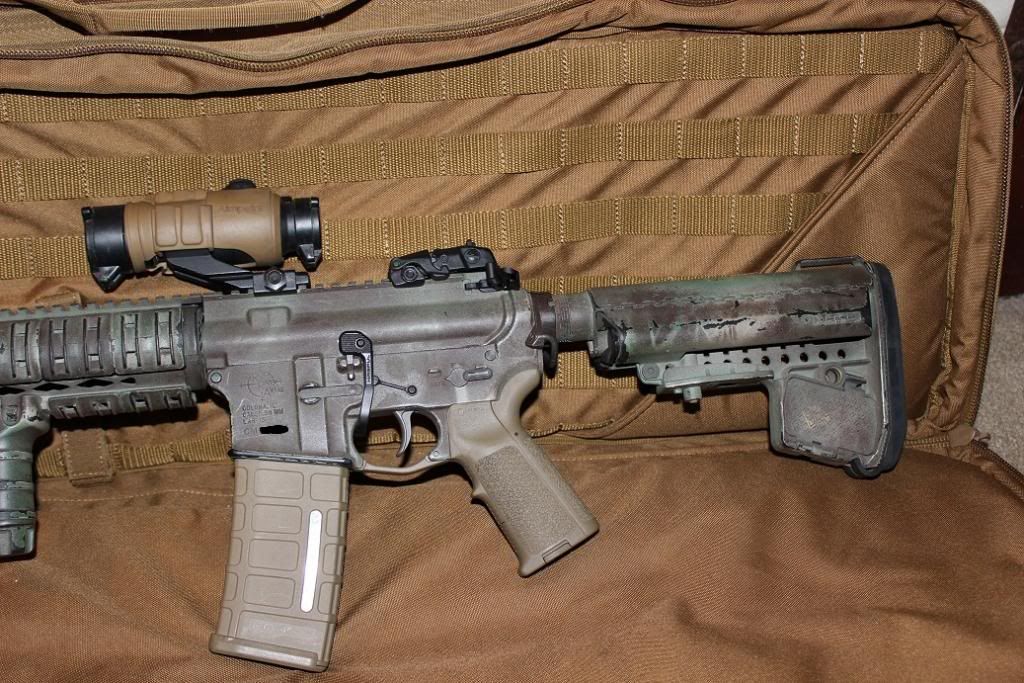
I think when the final lower comes in for the Grendel I am going to do Cerakote on that one. |
|
|
|
[Last Edit: Devin007]
[#12]
Very nice. Greg3 is pretty good with a rattle can. If I ever get anything that I want a paint job done on, he's who's gonna do it. ColtMatch556 also rattle canned one of his bolt guns, which turned out awesome. I'll see if I can get permission to post some pics of his work.
(Placeholder for pics) |
|
|
|
|
[Last Edit: MallNinjaSK]
[#13]
_____
|
|
|
|
|
[Last Edit: Dopple]
[#14]
Hmm.. Lemme find a pic of the bkue one indid for my wife....
 |
|
|
|
|
[#15]
Aervoe - I can't remember the exact colors off-hand but if someone really wants to know I'll dig them out.
How it was-  How it is-  |
|
|
|
|
[#16]
It ain't pretty, but it works.


|
|
|
|
|
[#17]
Originally Posted By dtux:
Aervoe - I can't remember the exact colors off-hand but if someone really wants to know I'll dig them out. How it was- http://farm3.staticflickr.com/2845/9727433713_87c90e5c5e_c.jpg How it is- http://farm6.staticflickr.com/5500/9929100696_5b3a4508d7_c.jpg What color is the solid finish? Got any pictures of it compared to unpainted Magpul FDE? Nice! |
|
|
|
VA, USA
|
[#18]
Here's a rattle can job using Aervoe, combination of Pinestraw and mesh bag techniques. The first pic made me think Aervoe's earth red would be a bit over the top, but out in the wild, it's perfect.
Just after painting: 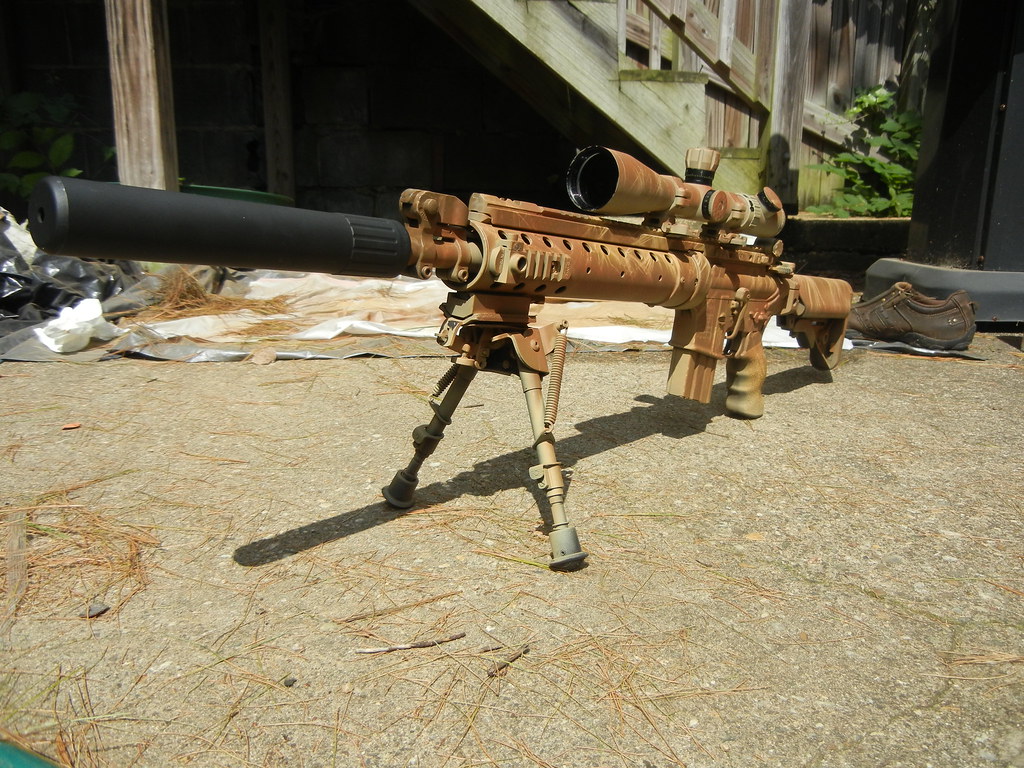
Out in western Tx pasture: 
Now we play spot the SPR  : :

|
|
|
|
[Last Edit: dtux]
[#19]
Originally Posted By olds442tyguy: What color is the solid finish? Got any pictures of it compared to unpainted Magpul FDE? Nice! Originally Posted By olds442tyguy: Originally Posted By dtux: Aervoe - I can't remember the exact colors off-hand but if someone really wants to know I'll dig them out. How it was- http://farm3.staticflickr.com/2845/9727433713_87c90e5c5e_c.jpg How it is- http://farm6.staticflickr.com/5500/9929100696_5b3a4508d7_c.jpg What color is the solid finish? Got any pictures of it compared to unpainted Magpul FDE? Nice! It's Aervoe Earth Brown. I'll try digging up something in FDE I haven't sprayed yet but I'll tell you, they aren't even close. ETA - It turns out the only piece of Magpul FDE I have that's unpainted is the front portion of an old MIAD Here's a quick cell picture to compare-  |
|
|
|
|
[#20]
Originally Posted By MallNinjaSK: http://i41.tinypic.com/29erupw.jpg http://i41.tinypic.com/2cicmt5.jpg  |
|
|
|
|
[#21]
Originally Posted By lancecriminal86: Here's a rattle can job using Aervoe, combination of Pinestraw and mesh bag techniques. The first pic made me think Aervoe's earth red would be a bit over the top, but out in the wild, it's perfect. Just after painting: http://farm4.staticflickr.com/3737/9584900087_172b10df30_b.jpg Out in western Tx pasture: http://farm3.staticflickr.com/2886/11660377884_f441e5af40_o.jpg Now we play spot the SPR :http://farm8.staticflickr.com/7351/11660802606_2525f868e0_o.jpg |
|
|
|
|
[#22]
Originally Posted By jukeboxx13: VEry nice, but you better have some camos on too. Originally Posted By jukeboxx13: Originally Posted By lancecriminal86: Here's a rattle can job using Aervoe, combination of Pinestraw and mesh bag techniques. The first pic made me think Aervoe's earth red would be a bit over the top, but out in the wild, it's perfect. Just after painting: http://farm4.staticflickr.com/3737/9584900087_172b10df30_b.jpg Out in western Tx pasture: http://farm3.staticflickr.com/2886/11660377884_f441e5af40_o.jpg Now we play spot the SPR :http://farm8.staticflickr.com/7351/11660802606_2525f868e0_o.jpg You don't see him behind the rifle?  |
|
|
|
|
[#23]
Originally Posted By dtux:
You don't see him behind the rifle?
That's damn good camo. All I see of him is his shoe!
Originally Posted By dtux:
Originally Posted By jukeboxx13:
Originally Posted By lancecriminal86:
Here's a rattle can job using Aervoe, combination of Pinestraw and mesh bag techniques. The first pic made me think Aervoe's earth red would be a bit over the top, but out in the wild, it's perfect. Just after painting: http://farm4.staticflickr.com/3737/9584900087_172b10df30_b.jpg Out in western Tx pasture: http://farm3.staticflickr.com/2886/11660377884_f441e5af40_o.jpg Now we play spot the SPR :
http://farm8.staticflickr.com/7351/11660802606_2525f868e0_o.jpg You don't see him behind the rifle?
That's damn good camo. All I see of him is his shoe!
|
|
|
|
KS, USA
|
[#24]
My frankenbuild. I used Rustoleum and Aervoe paints. If I were to do it again,I would have a bit more contrast between the colors.

|
|
|
|
[Last Edit: MallNinjaSK]
[#25]
Originally Posted By jukeboxx13: I love it. Originally Posted By jukeboxx13: Originally Posted By MallNinjaSK: http://i41.tinypic.com/29erupw.jpg http://i41.tinypic.com/2cicmt5.jpg +++++ |
|
|
|
UT, USA
|
[Last Edit: soreknees]
[#26]

Still have parts to add, but it will be done soon. Semi-Refinishing/Build Thread Rifle: PSA Blem Upper and lower MI SSG12 Rail PSA CHF 16" M4A1 Profile Magpul K2 PSA HPT/MP/Shot peened BCG Magpul CTR Soon: T-1 Micro Rainier Raptor Magpul RVG BADASS 45 Short Throw ALG ACG |
|
|
|
[#27]
Tagged for later.
|
|
|
|
|
[Last Edit: jukeboxx13]
[#28]
Originally Posted By MallNinjaSK: Originally Posted By MallNinjaSK: Originally Posted By jukeboxx13: Originally Posted By MallNinjaSK: http://i41.tinypic.com/29erupw.jpg http://i41.tinypic.com/2cicmt5.jpg was inspired by your concrete scheme ETA : After shooting and hunting with my AR the paint is starting to turn into a combo of khaki and grey which I like. |
|
|
|
|
[#29]
Originally Posted By KNDAKGEAR: My frankenbuild. I used Rustoleum and Aervoe paints. If I were to do it again,I would have a bit more contrast between the colors. http://i87.photobucket.com/albums/k140/CDALY05/IMG_7859_zps66caaa02.jpg |
|
|
|
|
[#30]
Originally Posted By olds442tyguy: Originally Posted By olds442tyguy: Originally Posted By dtux: Originally Posted By jukeboxx13: Originally Posted By lancecriminal86: Here's a rattle can job using Aervoe, combination of Pinestraw and mesh bag techniques. The first pic made me think Aervoe's earth red would be a bit over the top, but out in the wild, it's perfect. Just after painting: http://farm4.staticflickr.com/3737/9584900087_172b10df30_b.jpg Out in western Tx pasture: http://farm3.staticflickr.com/2886/11660377884_f441e5af40_o.jpg Now we play spot the SPR :http://farm8.staticflickr.com/7351/11660802606_2525f868e0_o.jpg You don't see him behind the rifle? That's damn good camo. All I see of him is his shoe! |
|
|
|
VA, USA
|
[#31]
Originally Posted By jukeboxx13:
Seriously I don't see anything not even the rifle. Lol Originally Posted By jukeboxx13:
Originally Posted By olds442tyguy:
Originally Posted By dtux:
Originally Posted By jukeboxx13:
Originally Posted By lancecriminal86:
Here's a rattle can job using Aervoe, combination of Pinestraw and mesh bag techniques. The first pic made me think Aervoe's earth red would be a bit over the top, but out in the wild, it's perfect. Just after painting: http://farm4.staticflickr.com/3737/9584900087_172b10df30_b.jpg Out in western Tx pasture: http://farm3.staticflickr.com/2886/11660377884_f441e5af40_o.jpg Now we play spot the SPR :
http://farm8.staticflickr.com/7351/11660802606_2525f868e0_o.jpg You don't see him behind the rifle?
That's damn good camo. All I see of him is his shoe!
I think these comments are the highest compliment I could ask for! Rattlecanning seems to hinge on color selection and really looking at where you intend to use it. Greens seem to be a PITA to match IMO, so I stayed away from them. Seemed to work for me. There is still cedar and yucca out there but you wouldn't really be setting up in them anyways. |
|
|
|
[#32]

|
|
|
|
|
[Last Edit: ar556223]
[#33]
Here is one I rattlecan painted, posted before in pine straw thread
 </a>" /> </a>" />
|
|
|
|
|
[#34]
That stock looks great with that MK18 set up. |
|
|
|
|
[#35]
Originally Posted By jukeboxx13:
That stock looks great with that MK18 set up. Originally Posted By jukeboxx13:
Thanks! I like it a lot so far. |
|
|
|
|
[#36]
Another from today in somewhat better light:

|
|
|
|
|
[Last Edit: SigfanUSAF]
[#37]
|
|
|
|
VA, USA
|
[#38]
Originally Posted By SigfanUSAF: My 3-color desert M4 SOPMOD Block 1.5 PR clone using Krylon camo colors: http://i297.photobucket.com/albums/mm227/DaveC1980/Mobile%20Uploads/6E43E3D6-0D01-45A1-8BAD-9E647421C264.jpg http://i297.photobucket.com/albums/mm227/DaveC1980/Mobile%20Uploads/90413765-AE54-4861-BE82-5B2C54BCAD48.jpg http://i297.photobucket.com/albums/mm227/DaveC1980/Mobile%20Uploads/12E08DBE-112F-4837-A6F7-3CBD46F7C7B5.jpg |
|
|
|
[#39]


|
|
|
|
FL, USA
|
[#40]
I know it's not an AR, but I thought it looked pretty damn cool. My sons "AR"...lol

|
|
|
|
[#41]
Originally Posted By Firemandan26:
I know it's not an AR, but I thought it looked pretty damn cool. My sons "AR"...lol https://scontent-b.xx.fbcdn.net/hphotos-prn2/1549524_10201317952263023_856295473_n.jpg Seems like a fun way to test your krylon skills. |
|
|
|
|
[#42]
Originally Posted By DevilPig:
Seems like a fun way to test your krylon skills. Originally Posted By DevilPig:
Originally Posted By Firemandan26:
I know it's not an AR, but I thought it looked pretty damn cool. My sons "AR"...lol https://scontent-b.xx.fbcdn.net/hphotos-prn2/1549524_10201317952263023_856295473_n.jpg Seems like a fun way to test your krylon skills. no kidding I thought it was a archangel kit. Looks good. |
|
|
|
|
[#43]
Originally Posted By DevilPig:
Seems like a fun way to test your krylon skills. Originally Posted By DevilPig:
Originally Posted By Firemandan26:
I know it's not an AR, but I thought it looked pretty damn cool. My sons "AR"...lol https://scontent-b.xx.fbcdn.net/hphotos-prn2/1549524_10201317952263023_856295473_n.jpg Seems like a fun way to test your krylon skills. After a while you start testing patterns on stuff, and then all the flashlights in your house (even the ones in the kitchen) are camo'ed. |
|
|
|
|
[#44]
Originally Posted By mean_sartin:
After a while you start testing patterns on stuff, and then all the flashlights in your house (even the ones in the kitchen) are camo'ed. Originally Posted By mean_sartin:
Originally Posted By DevilPig:
Originally Posted By Firemandan26:
I know it's not an AR, but I thought it looked pretty damn cool. My sons "AR"...lol https://scontent-b.xx.fbcdn.net/hphotos-prn2/1549524_10201317952263023_856295473_n.jpg Seems like a fun way to test your krylon skills. After a while you start testing patterns on stuff, and then all the flashlights in your house (even the ones in the kitchen) are camo'ed. I've got shovels, cinderblocks, boards, etc. all covered in different patterns |
|
|
|
|
[#45]
|
|
|
|
FL, USA
|
[#46]
Originally Posted By DevilPig:
Seems like a fun way to test your krylon skills. Originally Posted By DevilPig:
Originally Posted By Firemandan26:
I know it's not an AR, but I thought it looked pretty damn cool. My sons "AR"...lol https://scontent-b.xx.fbcdn.net/hphotos-prn2/1549524_10201317952263023_856295473_n.jpg Seems like a fun way to test your krylon skills. Def good practice. Just finished my AR today. Did a Kryptek kinda black/white/grey. Turned out rocking. Thanks for the comments. Check for the pics below. |
|
|
FL, USA
|
[#47]
I did a Kryptek style in white dura-coat than a little flat black and a nice matte clear. All shakers though. Hope you guys like it.
BEFORE: 
DRYING: 
FINISHED! 
|
|
|
|
[#48]
This one is getting reassembled differently soon, here's how it's set up right now.
|
|
|
|
KY, USA
|
[#49]
Originally Posted By Firemandan26:
I did a Kryptek style in white dura-coat than a little flat black and a nice matte clear. All shakers though. Hope you guys like it. BEFORE: https://scontent-a-mia.xx.fbcdn.net/hphotos-prn1/q81/s720x720/1512791_10201330939547697_397073797_n.jpg DRYING: https://scontent-a-mia.xx.fbcdn.net/hphotos-frc3/1545219_10201330938427669_1234391915_n.jpg FINISHED! https://scontent-a-mia.xx.fbcdn.net/hphotos-ash3/t1/1601544_10201330937027634_1454101838_n.jpg Impressive work! Great job with your stencils. |
|
|
|
[#50]
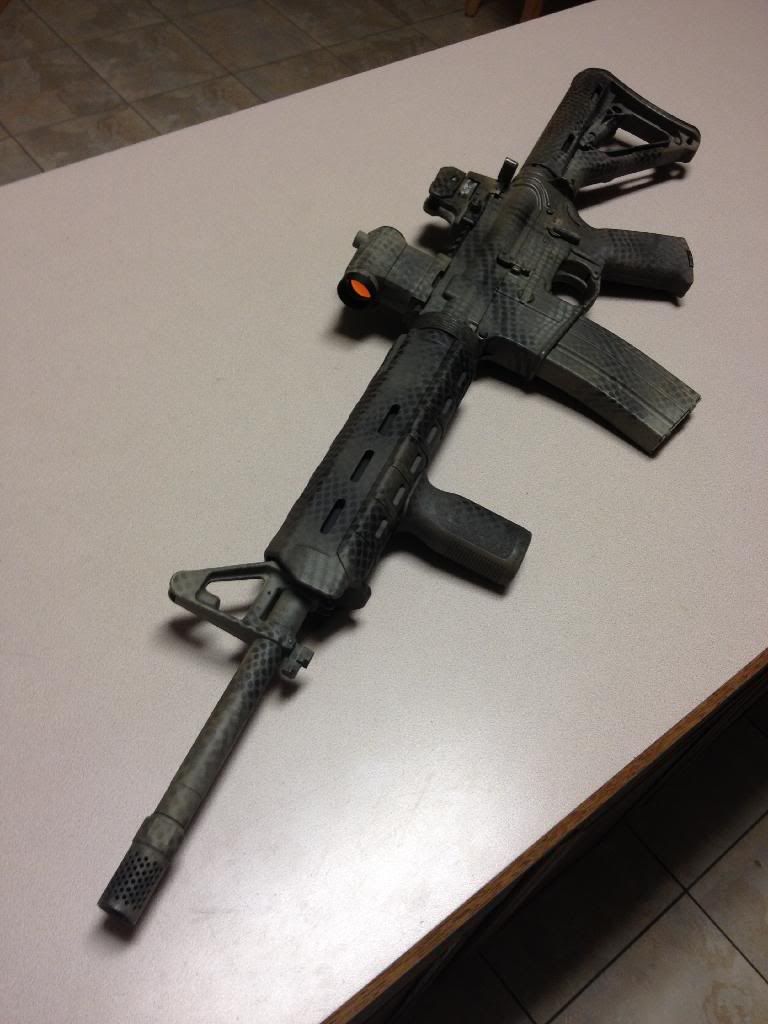
Just finished up my first ever krylon attempt... I was nervous as hell! lol
Might lay some pine needles, and dust over it... Or leave it as is, not sure yet

|
|
|
|
 Win a FREE Membership!
Sign up for the ARFCOM weekly newsletter and be entered to win a free ARFCOM membership. One new winner* is announced every week!
You will receive an email every Friday morning featuring the latest chatter from the hottest topics, breaking news surrounding legislation, as well as exclusive deals only available to ARFCOM email subscribers.

AR15.COM is the world's largest firearm community and is a gathering place for firearm enthusiasts of all types.
From hunters and military members, to competition shooters and general firearm enthusiasts, we welcome anyone who values and respects the way of the firearm.

Subscribe to our monthly Newsletter to receive firearm news, product discounts from your favorite Industry Partners, and more.
Copyright © 1996-2024 AR15.COM LLC. All Rights Reserved.
Any use of this content without express written consent is prohibited.
AR15.Com reserves the right to overwrite or replace any affiliate, commercial, or monetizable links, posted by users, with our own.


