NC, USA
|
Posted: 12/7/2008 11:17:39 AM EDT
[Last Edit: AEnemaBay]
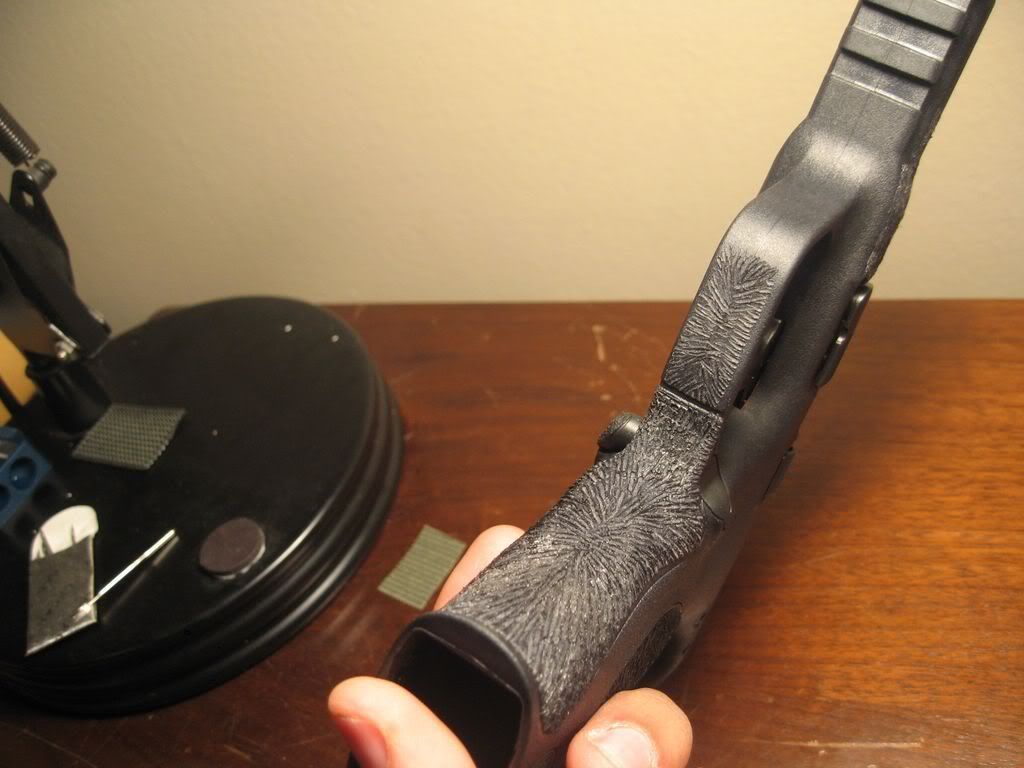
So you want one of your polymer pistols stippled, eh? Or maybe a synthetic stock, or a handguard? Well if you’re like me you don’t want to spend upwards of $150 for a polymer heat stippling job, so I’m going to show you how to do it for about $15! First of all you’re going to need some materials.
You’ll need the following (everything is available at Lowes Hardware): Weller 25 watt soldering iron (I use the SP23L model) An assortment of 10-24 x 1/2" BRASS machine screws (screws that are already flat on top are best) A Dremel with cutoff wheel A needle file Masking tape A polymer victim 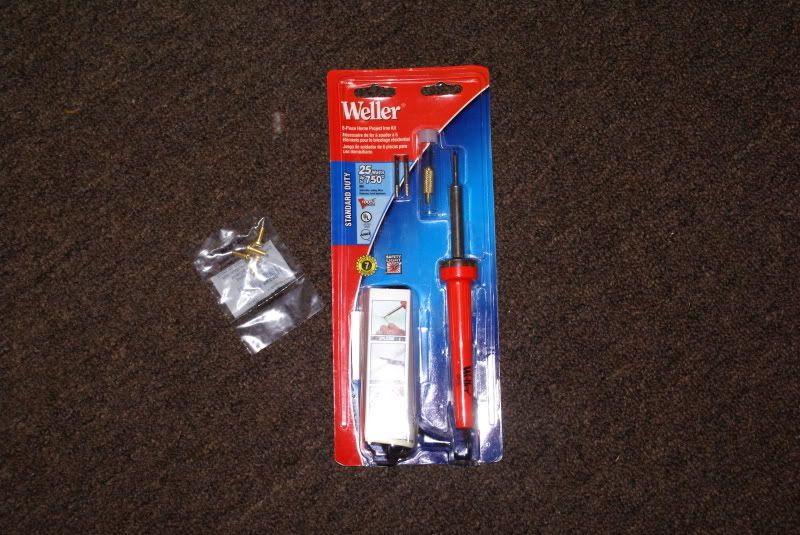
Next we'll have to checker the top of one of our brass machine screws. To do this I simply used the existing Philips slots in the screw as my starting lines. I then took my Dremel with cutoff wheel and began to checker my brass screw. IT DOESN'T HAVE TO BE PERFECT! I personally use an assortment of screws that range from very deep checkering to very shallow checkering. This, of course, creates either very aggressive stippling or not so aggressive stippling. I also use the tips that come with the Weller soldering iron kit for fine points and edges. Once you have done both your vertical and horizontal lines on your screw, break out your needle file and carefully point the tops of the pyramids to gain a more uniform pattern. Or don't if you want a crazy pattern. After you're done thread it into the soldering iron. 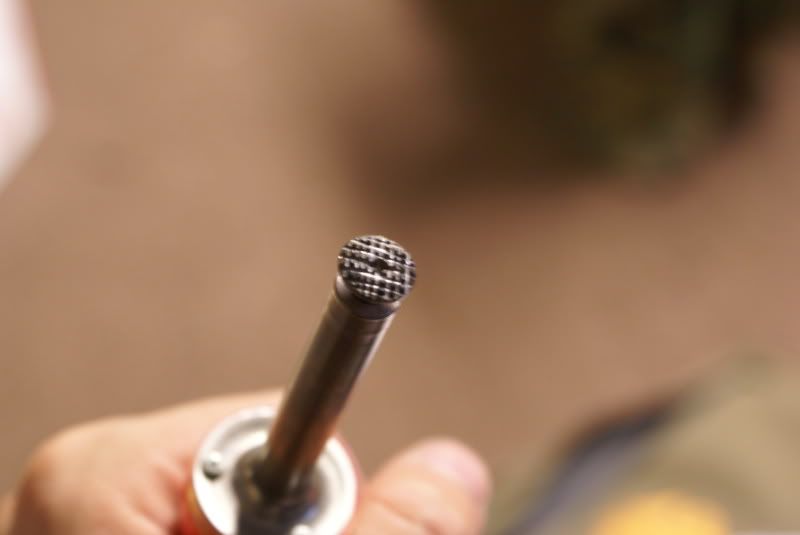
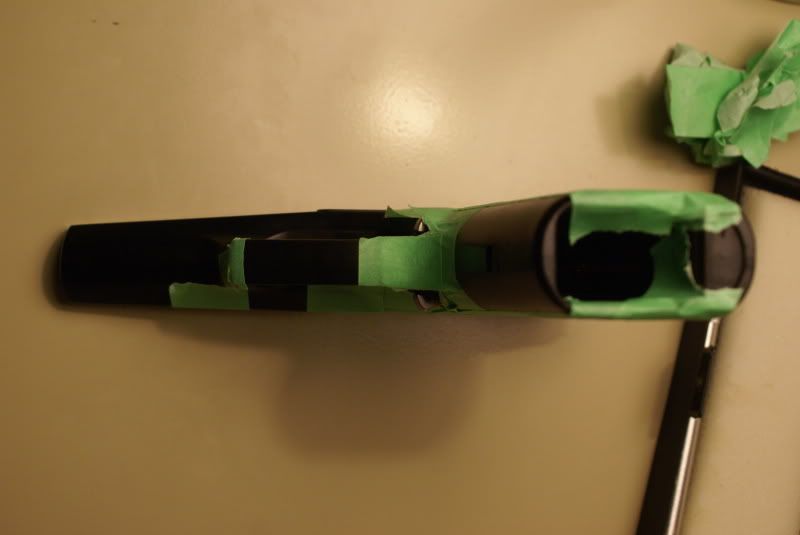
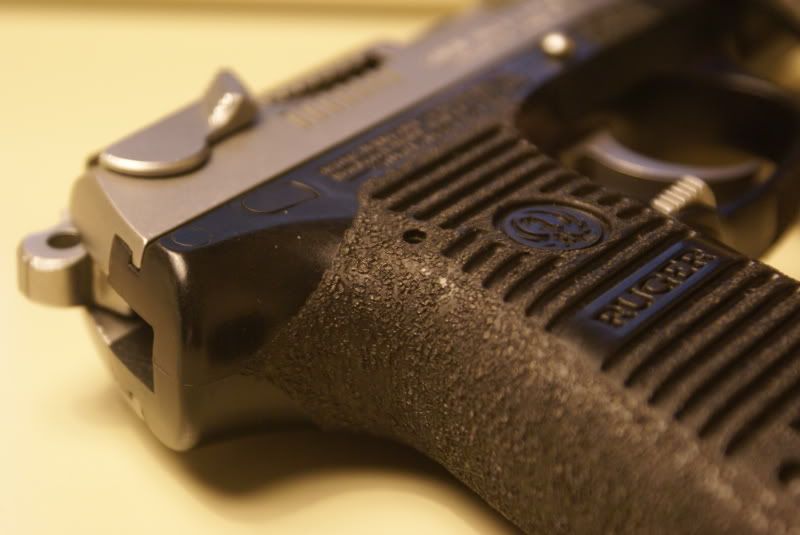
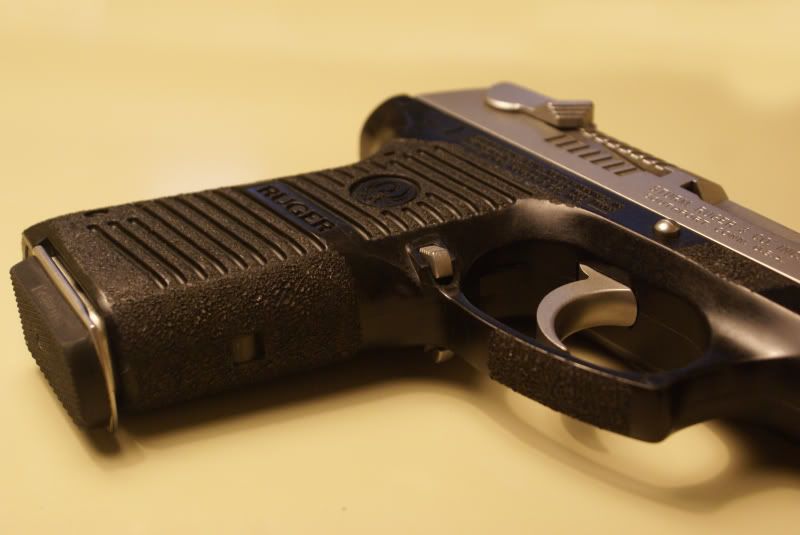
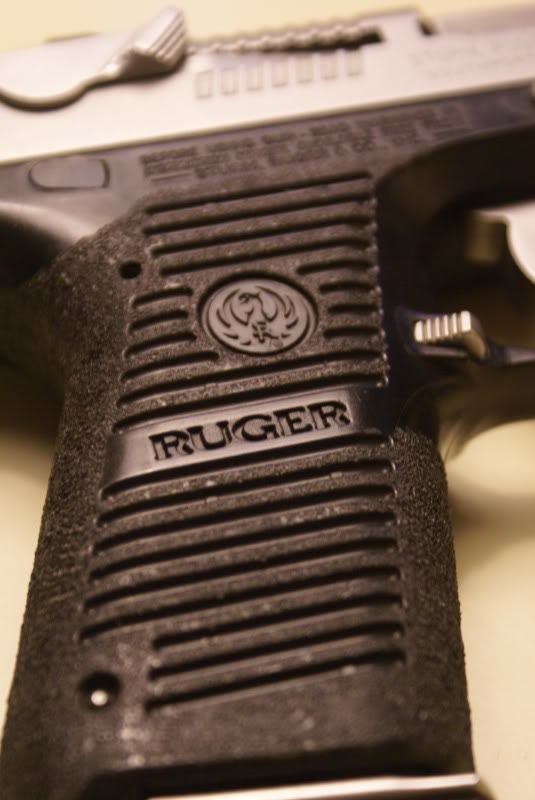
Now, take your victim and begin mapping out where you want it stippled with your masking tape. Take your time here and make sure everything is where you want it in the design that you want it. It would be a PITA to remove the stippling once it's been applied. Our victim for this tutorial is my first generation Ruger P95DC. 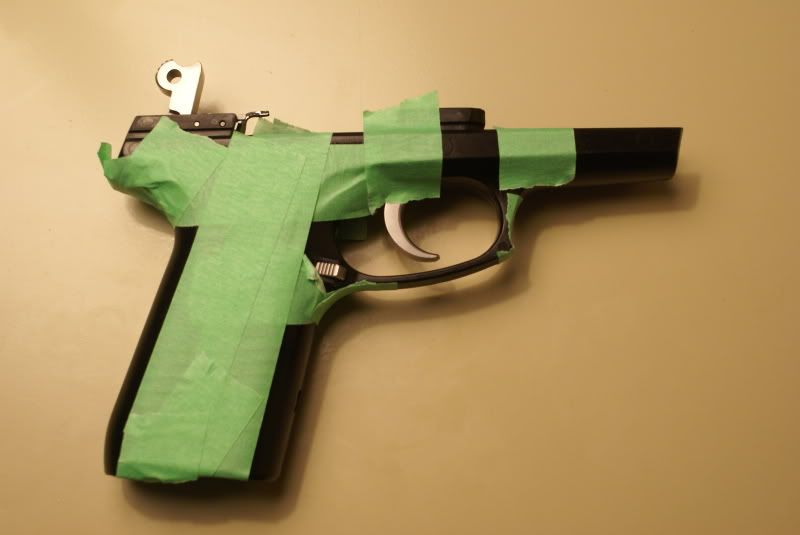
Now with the soldering iron all heated up you can start stippling. If you're still unsure of your abilities I'd suggest practicing on some scrap pistol grips and the like. Take your time and get used to the pattern that your particular screw makes. Twist the iron as you go to change up the direction and blend the dots together. Occasionally check your screw head for melted polymer sticking to the checkering. If this occurs just take a brass brush and brush it out of the screw. That's it, it's that simple! You just saved yourself $150! Now if you want a deeper more uniform pattern you can use a soldering tip that you slightly round off. This will give you a "golf ball" like pattern. Here is our victim after only 25 minutes of work. 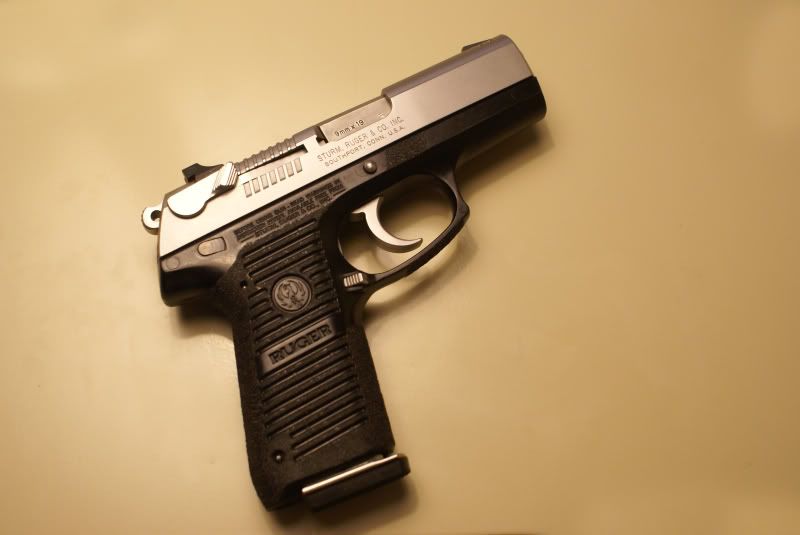
I hope this tutorial helps you all. If you have any questions don't hesitate to ask! |
|
|
|
[#1]
It looks almost factory . Great job !
|
|
|
|
|
[#2]
Well, it's better than Dusty's abomination.
|
|
|
|
MO, USA
|
[#3]
Wow that looks great!
|
|
|
|
[#4]
works for other things too

|
|
|
|
NC, USA
|
[#5]
Originally Posted By Colt45guy:
works for other things too http://i172.photobucket.com/albums/w19/Colt45guy/pics/shooter008.jpg HAHA! |
|
|
|
[#6]
Fantastic job! Thanks for the insight on this..
|
|
|
|
TX, USA
|
[#7]
+1 thanks a bunch.
|
|
|
|
[#8]
should have dremeled off the ruger and grooves
|
|
|
|
NC, USA
|
[#9]
Originally Posted By wesmerc:
should have dremeled off the ruger and grooves I like the Ruger and grooves. 
|
|
|
MD, USA
|
[#10]
that is totally awesome. i find that you can also buy a extra med sized flat head screw driver, use a dremel to cut it off from the handle and then insert that into the iron. then you can get really neat flat burns... not to hijack but
like this: 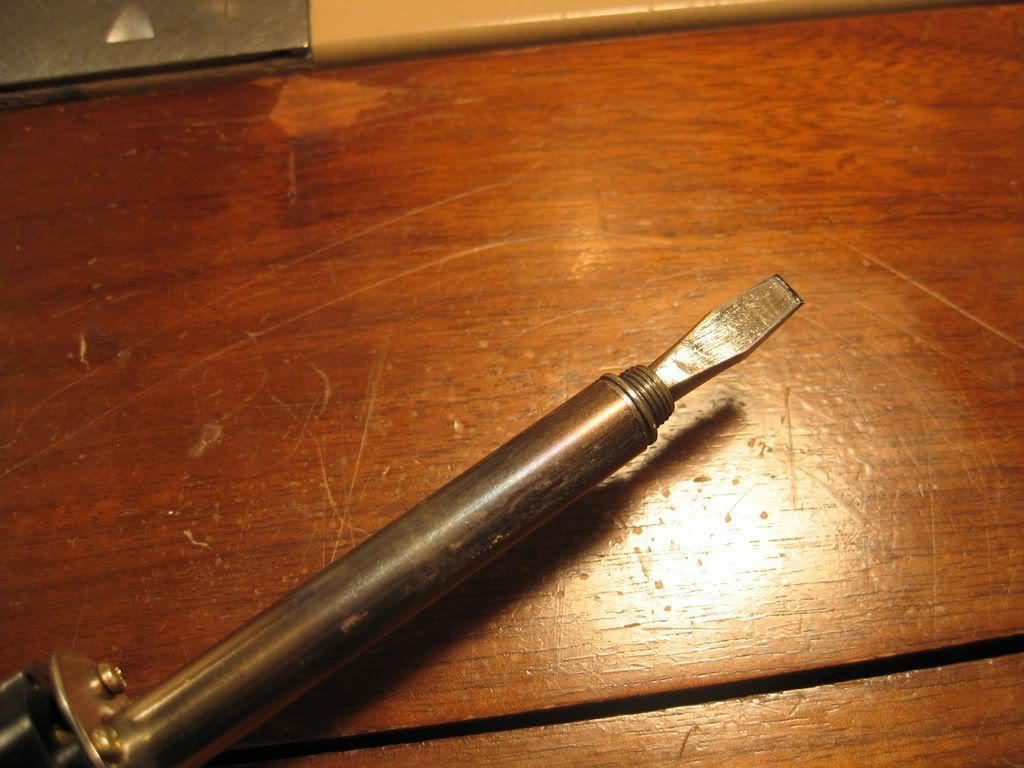

|
|
|
NC, USA
|
[#11]
Originally Posted By BREAKER1021:
that is totally awesome. i find that you can also buy a extra med sized flat head screw driver, use a dremel to cut it off from the handle and then insert that into the iron. then you can get really neat flat burns... not to hijack but like this: http://img.photobucket.com/albums/v203/HAL_5555/Guns%20and%20Knives/Pistolas/picture334.jpg http://img.photobucket.com/albums/v203/HAL_5555/Guns%20and%20Knives/Pistolas/picture328.jpg http://img.photobucket.com/albums/v203/HAL_5555/Guns%20and%20Knives/Pistolas/picture330.jpg Oh man that is sweet! I'm definitely going to have to give that a try! If anyone else has different examples please post them! |
|
|
VA, USA
|
[Last Edit: JRX35]
[#12]
Originally Posted By BREAKER1021:
A true artist! Beautiful - congrats. |
|
|
CT, USA
|
[#13]
OH SNAP! "excellent work" to both of you. I never knew it was that easy. Thanks for posting and mods for tacking.
|
|
|
AZ, USA
|
[#14]
This is impressive!!!!
|
|
|
WA, USA
|
[#15]
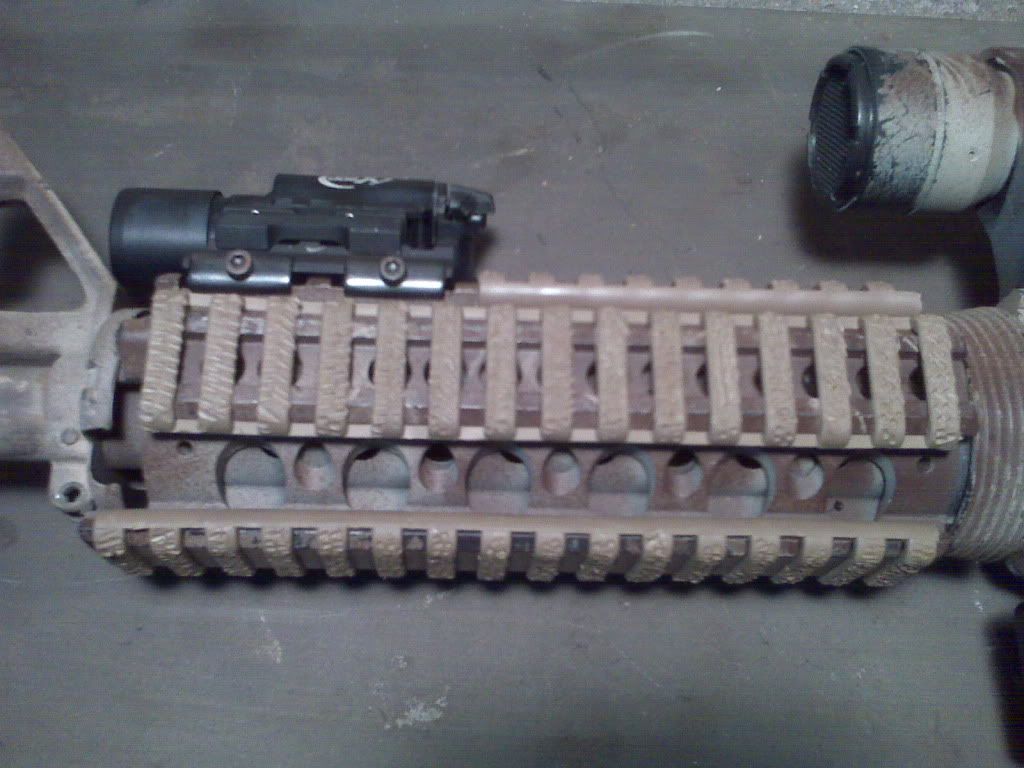
Here are a couple submissions. I finally figured out a use for all those stock A2 grips that never get used from LPK's. Great practice material!
This one, installed on my Remington 870, took no more than 15 minutes to do, that includes reshaping and stippling: 
Also notice my custom JPoint mount made out of 6061 billet aluminum. It's pretty big so I'm not sure if it will stay attached or not... 
#2 resides on a 9mm AR. Took about 35 minutes with reshaping and all. Pretty rough and not super comfortable without gloves but she sure stays in your hand!! 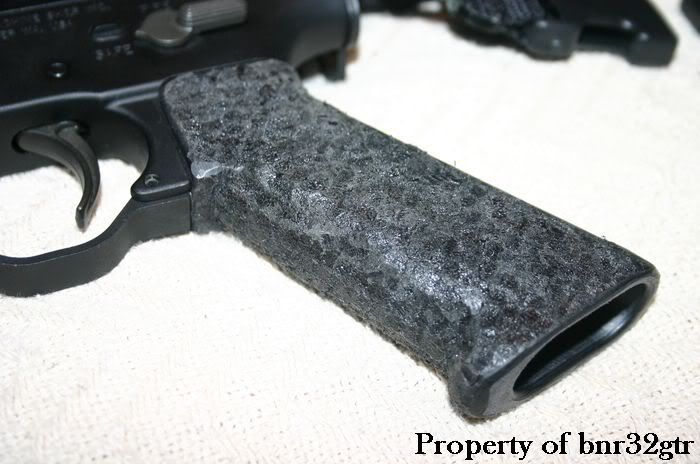
#3 and #4 are early ones I've done and have some Marine Tex on the front and back to help with shaping. 
|
|
|
|
[#16]


G19 |
|
|
|
MO, USA
|
[#17]
Originally Posted By skebe:
http://files.getdropbox.com/u/9870/G19/DSC01242.JPG http://files.getdropbox.com/u/9870/G19/DSC01243.JPG G19 Nice! I bet that feels better in the hand. Also, I sent my P95 to Ruger because my trigger bar was really worn and it's a part that I just can't order. The technician said that when he opened the box he thought that it was a newer production P95 until he picked it up. He said that I did a great job on it. |
|
|
|
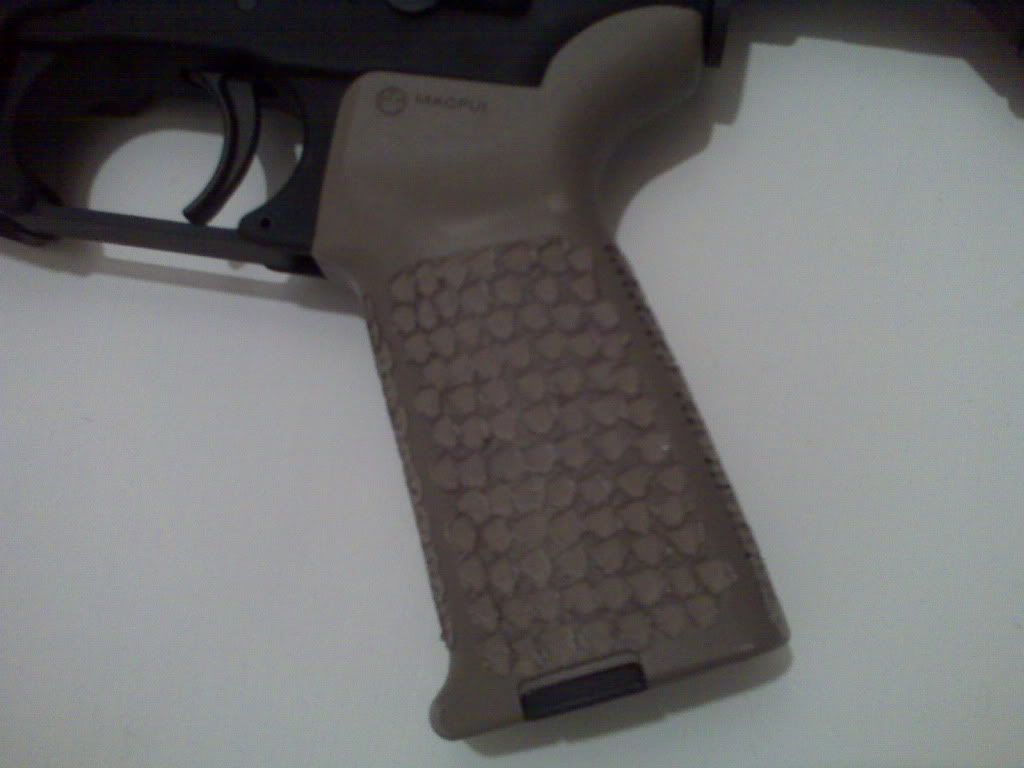
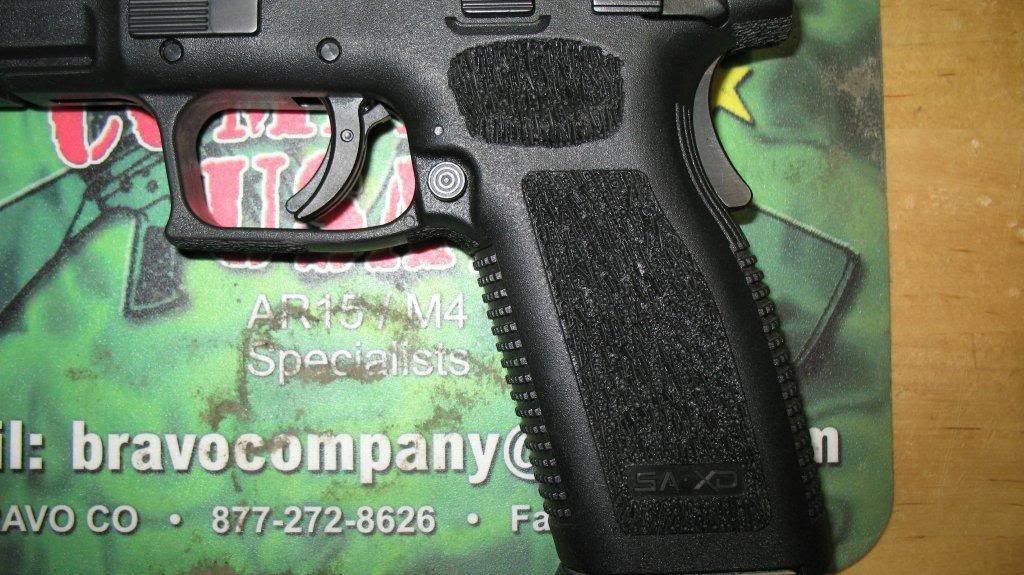
[#18]
Nice write up. I decided to try a little on my PMags and XTM panels...
|
|
|
|
MO, USA
|
[#19]
Originally Posted By JonLSU:
Nice write up. I decided to try a little on my PMags and XTM panels... http://i28.photobucket.com/albums/c229/jwhit37/001-3.jpg Great job! Keep 'em coming guys! |
|
|
WV, USA
|
[#20]
Couple of different projects...
|
|
|
|
[#21]
I totally dig it! You all should keep posting your projects.
|
|
|
|
|
[#22]


|
|
|
|
|
[#23]
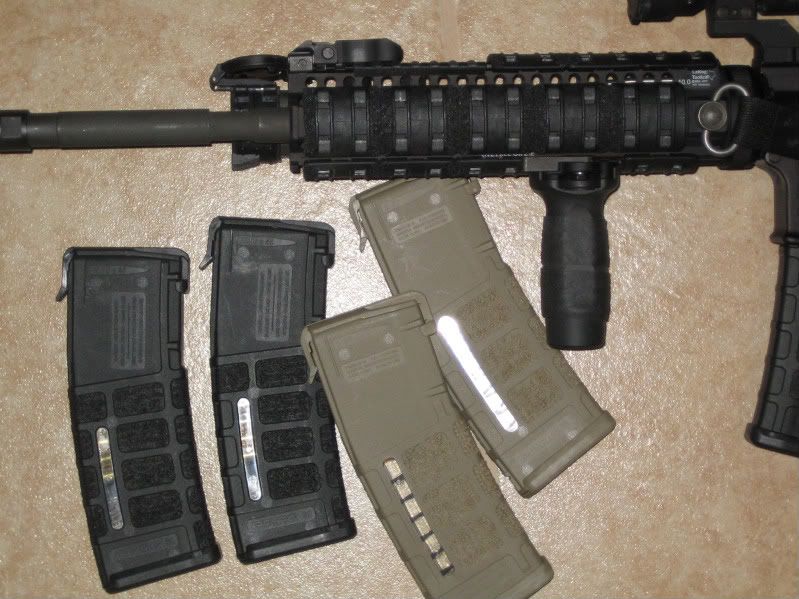
Did some more pMags, black and FDE.


The FDE shows more mistakes like dark spots. The black looks the best. Both are very grippy. |
|
|
|
USA
|
[#24]

Did my first test panel last night using the AEnemaBay method. Very effective...I want to stipple everything I see now. I'm thinking of doing my mouse and XBOX controller after I finish my rails. The panels are much less slippery even when wet or greasy. Using AEnemaBay's method you get a random texture that is much closer to the pattern on Magpul’s MIAD grip than if you simply use a soldering iron to poke holes. This method doesn’t deform the rail and takes much less time since you are covering a larger area than when you use the straight forward soldering iron technique. Thanks for the tutorial. |
|
|
|
[#25]


|
|
|
|
|
[#26]
OK, I'll join in this is fun stuff


|
|
|
|
TX, USA
|
[#27]
Hmmm, I think this thread is going to cost me alot of time... looking for a first victim now.
Someone needs to machine little punches for this. Magpul logos, scull & crossbones, BFLs, FBO, gadsden snakes, etc. |
|
|
|
[Last Edit: AEnemaBay]
[#28]
Originally Posted By mPisi:
Hmmm, I think this thread is going to cost me alot of time... looking for a first victim now. Someone needs to machine little punches for this. Magpul logos, scull & crossbones, BFLs, FBO, gadsden snakes, etc. I've been experimenting with this already. Update coming soon. |
|
|
|
|
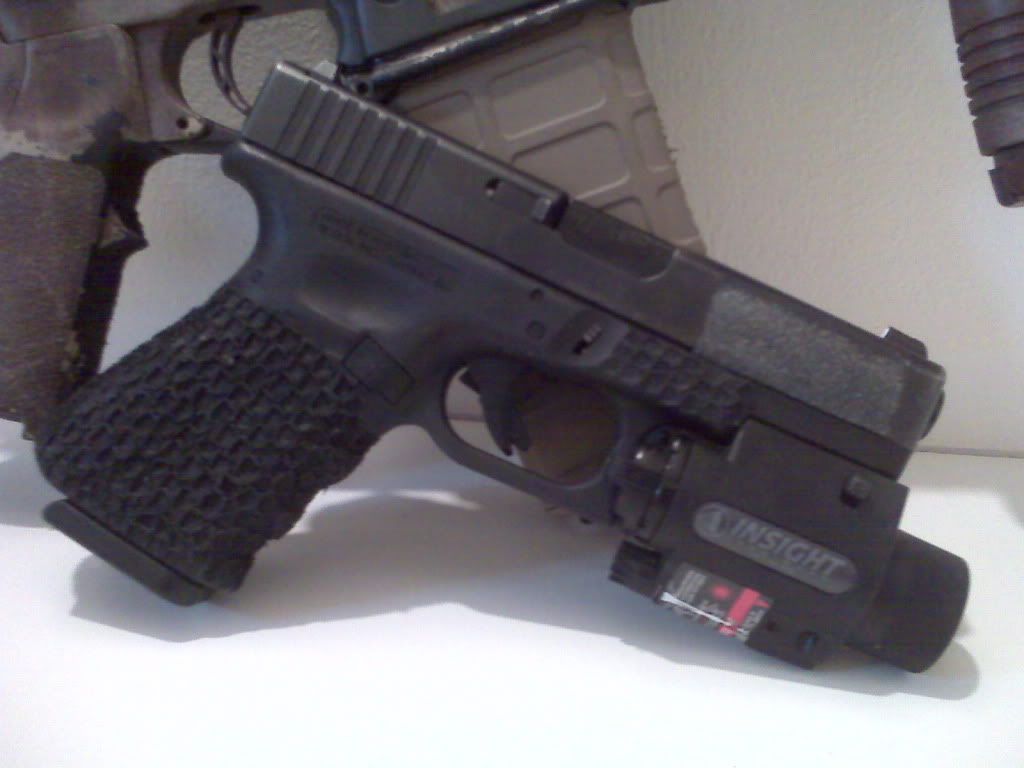
[#29]
Just installed steel sights, sandblasted the worn parkerizing off the Glock slide and my home grown stipple job.
Tennifer should still be intact and it shouldn't rust. I was gonna have it hard chromed, but I think this is even better. 


|
|
|
|
IN, USA
|
[#30]
I made a couple of magpul stippling punches by taking the anvil out of a small rifle primer, hammering it flat, and then bending it to shape, its small and a total pain in the ass to make, but it looks just like the magpul "M". I tack welded it to a shaft to use on a soldering iron, but it would probably be easier to have a jeweler make one if you are dead set on having a real one.
|
|
|
|
[#31]
Tag for more info.
BTW what do you mean you made a Magpul stipple punches? |
|
|
|
|
[#32]
Thought I'd give it a try on some pmags. A little time consuming, but worth the effort.

|
|
|
|
|
[#33]
Originally Posted By SecretSquirell:
Thought I'd give it a try on some pmags. A little time consuming, but worth the effort. http://img718.imageshack.us/img718/3839/cimg0998.jpg Was that pattern made by the dremel brass screw? Just wondering if you could post the photo of your soldering tip. |
|
|
|
|
[#34]
Originally Posted By Ryo:
Originally Posted By SecretSquirell:
Thought I'd give it a try on some pmags. A little time consuming, but worth the effort. http://img718.imageshack.us/img718/3839/cimg0998.jpg Was that pattern made by the dremel brass screw? Just wondering if you could post the photo of your soldering tip. I just used the small pointed tip that came with the soldering iron. You'll damn near go blind and your hands will hurt by the time you get one done. Just take your time. |
|
|
|
|
[#35]
That's a lot of pot holes with just the point. Good job.
|
|
|
|
USA
|
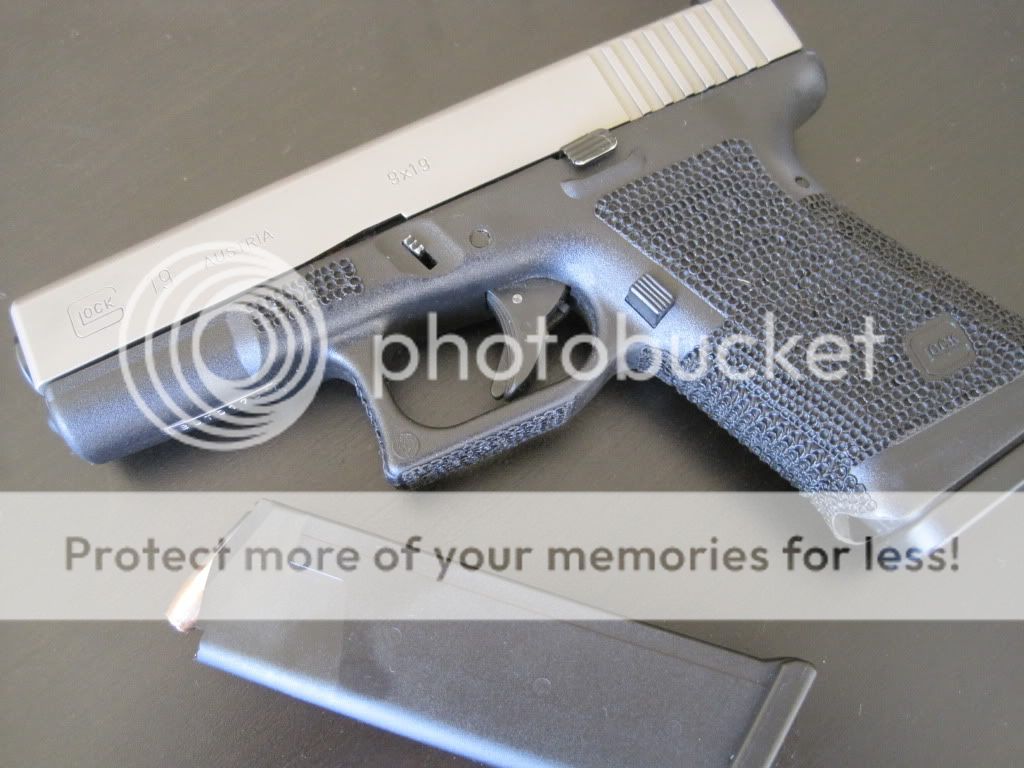
[#36]
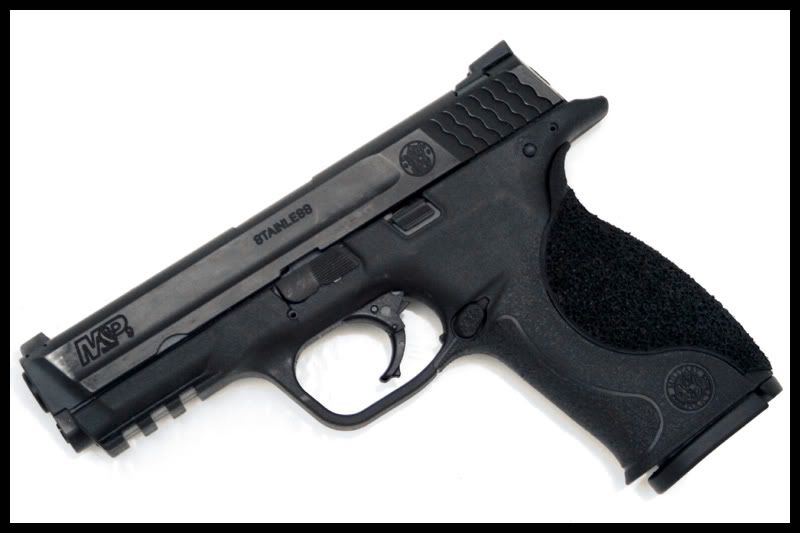
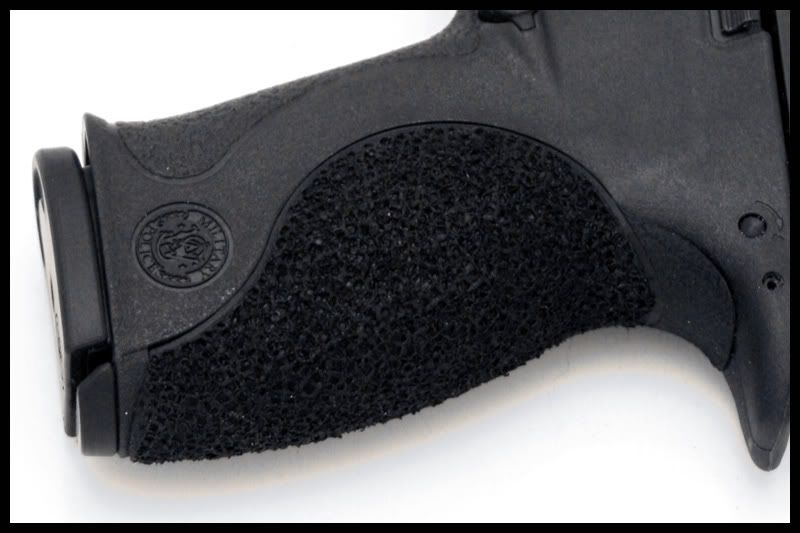
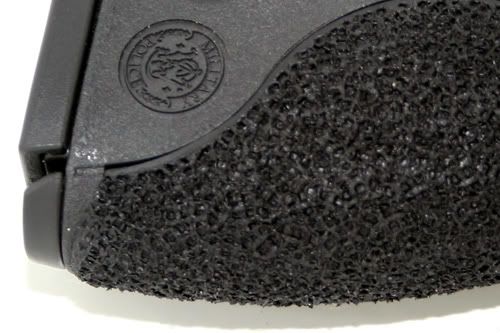
I did my Glock, too.
Quite easy, if you ask me. 
|
|
|
|
[#37]
Hey guys, here is an alternative to permanent stippling that I tried. I think it works pretty well and if I don't like it or if I need to sell that gun I just cut it off.
http://www.ar15.com/forums/topic.html?b=5&f=4&t=90410 |
|
|
|
|
[Last Edit: topgunpilot20]
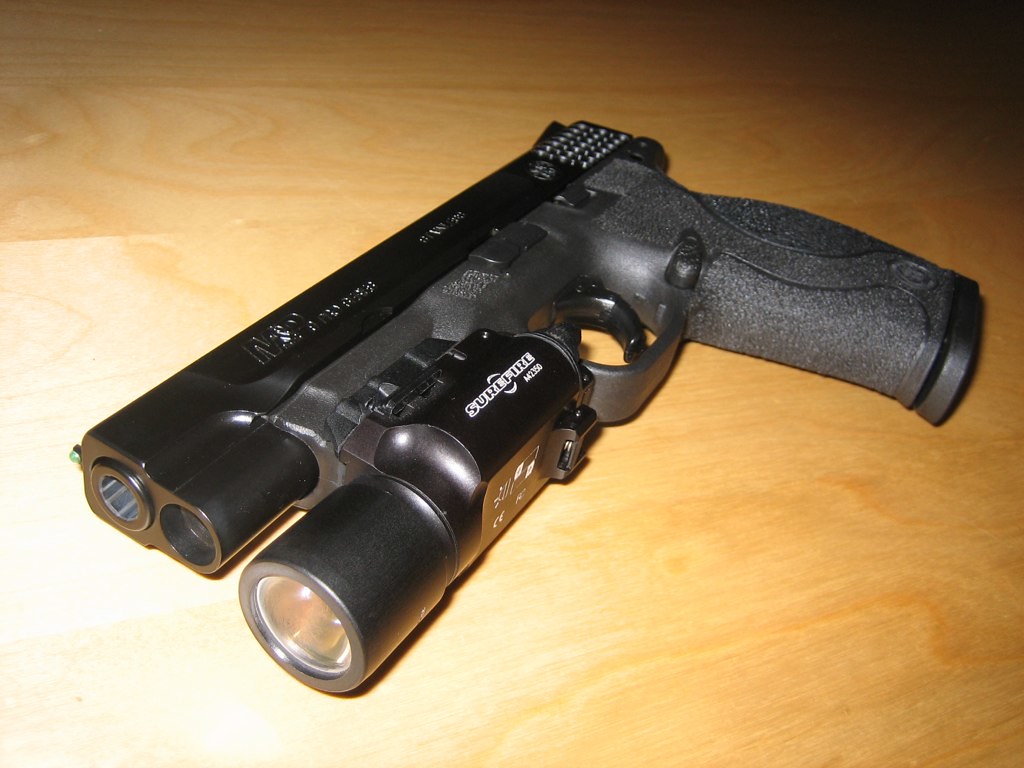
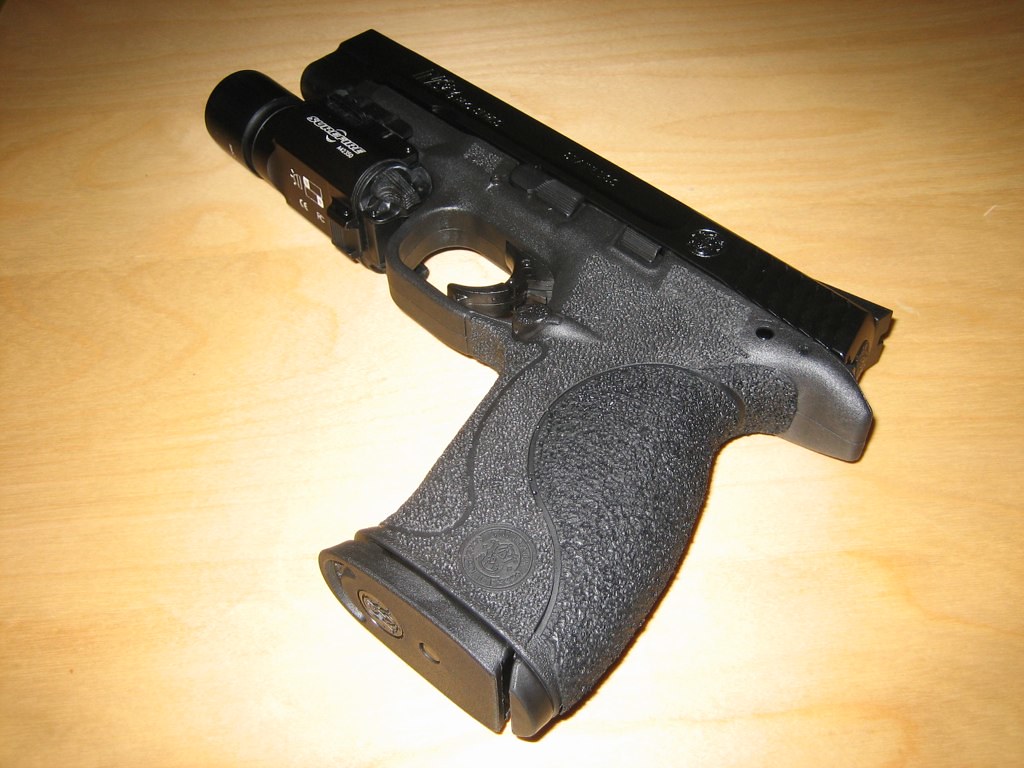
[#38]
Good tutorial. I've tried the golf ball type stippling with the included tips, but I like the OP's method better. Much grippier:
   I'm working up to the whole frame. Also did some KAC rail panels that turned out just like Devilock's. The golf ball pattern did not make a big difference on the rail panels, but the OP's method sure does. ETA: Finished the front strap stippling: 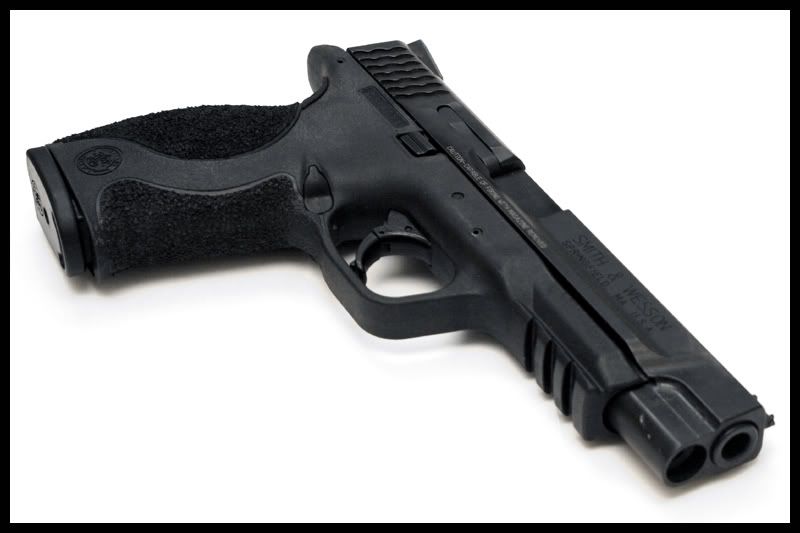  |
|
|
|
|
[Last Edit: TCBA_Joe]
[#39]
I did some KAC panels last week.
Here are some mock-ups. 
I'll try to take a pic of them on the rifle tonight. ETA: 

|
|
|
|
|
[#40]
Originally Posted By TCBA_Joe: I did some KAC panels last week. Here are some mock-ups. http://inlinethumb64.webshots.com/46207/2775247250058660536S600x600Q85.jpg I'll try to take a pic of them on the rifle tonight. ETA: http://inlinethumb15.webshots.com/22094/2376791720058660536S600x600Q85.jpg http://inlinethumb18.webshots.com/43473/2002508780058660536S600x600Q85.jpg How did you get rid of the ribs? |
|
|
|
|
[#41]
tag
|
|
|
|
|
[#42]
Originally Posted By topgunpilot20:
Originally Posted By TCBA_Joe:
I did some KAC panels last week. Here are some mock-ups. http://inlinethumb64.webshots.com/46207/2775247250058660536S600x600Q85.jpg I'll try to take a pic of them on the rifle tonight. ETA: http://inlinethumb15.webshots.com/22094/2376791720058660536S600x600Q85.jpg http://inlinethumb18.webshots.com/43473/2002508780058660536S600x600Q85.jpg How did you get rid of the ribs? Dremel with a sanding bit. It'll come out looking pretty rough, but once you stipple it, it looks good. It was a lot more work than the ribbed ones, and you get little pieces of plastic everywhere, but when it's done it can look great. 
|
|
|
|
CA, USA
|
[#43]
Originally Posted By TCBA_Joe:
I did some KAC panels last week. Here are some mock-ups. http://inlinethumb64.webshots.com/46207/2775247250058660536S600x600Q85.jpg I'll try to take a pic of them on the rifle tonight. ETA: http://inlinethumb15.webshots.com/22094/2376791720058660536S600x600Q85.jpg http://inlinethumb18.webshots.com/43473/2002508780058660536S600x600Q85.jpg I'd love to see what the stippling tip you used looks like. Did you file / dremel a screw or nail head like the first poster? |
|
|
|
[#44]
That's Titleist's rifles. He sent out for stimpling. Forgot who.
For my stimpling I just used a flat head on the soldering iron and poked holes.. quick tapping method. Came out way better than I would have expected. |
|
|
|
ID, USA
|
[#45]
Here's my contribution.
I started with golf balls, and then used a small flat blade tip to "cut" the golf balls in half. The golf ball dimples really don't add much at all, but this pattern is grippy, but not too rough. It also looks pretty cool IMO. I also tried other patterns on an old AR grip, but this one is the easiest for me to control. 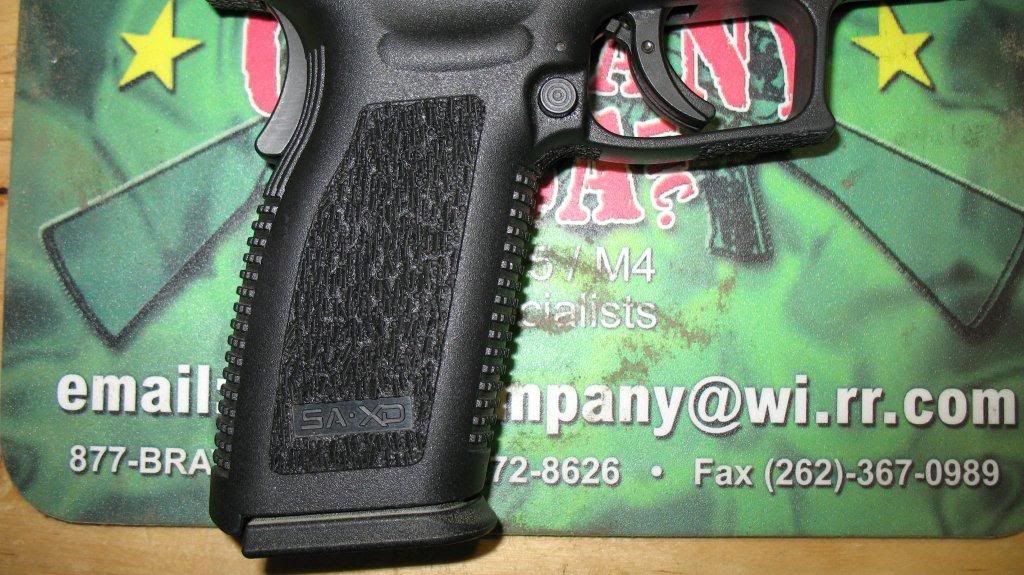


|
|
|
|
[Last Edit: AEnemaBay]
[#46]
Originally Posted By magnum_99: Here's my contribution. I started with golf balls, and then used a small flat blade tip to "cut" the golf balls in half. The golf ball dimples really don't add much at all, but this pattern is grippy, but not too rough. It also looks pretty cool IMO. I also tried other patterns on an old AR grip, but this one is the easiest for me to control. http://i133.photobucket.com/albums/q59/magnum_99/stipple2.jpg http://i133.photobucket.com/albums/q59/magnum_99/stipple.jpg http://i133.photobucket.com/albums/q59/magnum_99/stipple4.jpg http://i133.photobucket.com/albums/q59/magnum_99/stipple3.jpg Damn, that's some nice looking tree bark pattern you got there! |
|
|
|
ID, USA
|
[#47]
Originally Posted By AEnemaBay:
Originally Posted By magnum_99:
Here's my contribution. I started with golf balls, and then used a small flat blade tip to "cut" the golf balls in half. The golf ball dimples really don't add much at all, but this pattern is grippy, but not too rough. It also looks pretty cool IMO. I also tried other patterns on an old AR grip, but this one is the easiest for me to control. http://i133.photobucket.com/albums/q59/magnum_99/stipple2.jpg http://i133.photobucket.com/albums/q59/magnum_99/stipple.jpg http://i133.photobucket.com/albums/q59/magnum_99/stipple4.jpg http://i133.photobucket.com/albums/q59/magnum_99/stipple3.jpg Damn, that's some nice looking tree bark pattern you got there! Thanks. I'm pretty happy with it. I made sure to mask everything off, and only messed up once or twice on the edges, but was able to fix it with a little creative melting. I want to try some different patterns too. |
|
|
|
[#48]
Originally Posted By uscmCorps:
Originally Posted By TCBA_Joe:
I did some KAC panels last week. Here are some mock-ups. http://inlinethumb64.webshots.com/46207/2775247250058660536S600x600Q85.jpg I'll try to take a pic of them on the rifle tonight. ETA: http://inlinethumb15.webshots.com/22094/2376791720058660536S600x600Q85.jpg http://inlinethumb18.webshots.com/43473/2002508780058660536S600x600Q85.jpg I'd love to see what the stippling tip you used looks like. Did you file / dremel a screw or nail head like the first poster? Yeah, I tried to do what the OP did. I can't take pictures though, I'm away from my stippling stuff for a few months. I took a barss philips head screw and cut a checkerboard into it. I then used a triangle file from a hobby file kit to sharpen it out. Then just went to town on the panels and kept going over it until it looked right. |
|
|
|
|
[#49]
Does anyone carry a stippled gun concealed? I'm thinking of doing the checker board screw method but I'm worried about the stippling snagging my cover garment and causing printing.
|
|
|
|
|
[#50]
Here's my effort. I used the little pointy tip on the soldering iron and took a little over an hour total. After a range trip to try it out I'll see if I'll stay put or go a little more aggressive.
|
|
|
|
 Win a FREE Membership!
Sign up for the ARFCOM weekly newsletter and be entered to win a free ARFCOM membership. One new winner* is announced every week!
You will receive an email every Friday morning featuring the latest chatter from the hottest topics, breaking news surrounding legislation, as well as exclusive deals only available to ARFCOM email subscribers.

AR15.COM is the world's largest firearm community and is a gathering place for firearm enthusiasts of all types.
From hunters and military members, to competition shooters and general firearm enthusiasts, we welcome anyone who values and respects the way of the firearm.

Subscribe to our monthly Newsletter to receive firearm news, product discounts from your favorite Industry Partners, and more.
Copyright © 1996-2024 AR15.COM LLC. All Rights Reserved.
Any use of this content without express written consent is prohibited.
AR15.Com reserves the right to overwrite or replace any affiliate, commercial, or monetizable links, posted by users, with our own.


