|
[#1]
Quoted:
Ah... This is not as easy as Boris made it look.  Quoted:
 I bought a 10 pour kit, used 5 worth and sending 5 back. I'll stick with my 80%'s Ah... This is not as easy as Boris made it look. Yea, I gave it a college try and then some IMO. The best one I have actually doesn't have any voids in the 3 rear vent holes. But all around those three holes there are massive voids. That was my 4th pour. I didn't even put the pistol grip bolt in just as a test on that one. It also has a big void in the bolt catch area on the mag side. Total bummer because I had high hopes for this kit. |
|
|
|
[#2]
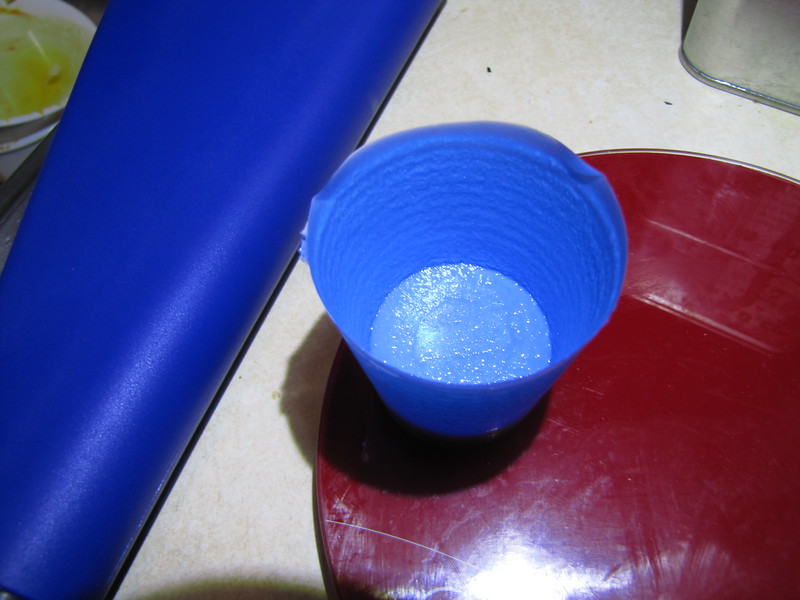
I still think humidity or just age is affecting the resin. I finally got my Cav Arms stock in and I was going to use the dregs of my first pour kit to color match. It's been open since mid January. The resin foamed up like Great Stuff. My first pour was the best one and they went downhill from there as far as air bubbles go. If I could find a way to seal around the thread plug I'd try a vacuum pump.
|
|
|
|
[#3]
I'm thinking a small vacuum chamber is the real answer, but that's adding a lot of time & expense.
|
|
|
|
[#4]
I opened up a new set of resin. The first pour was nearly bubble free but the color was way off. The next pour had some minor bubbles and the color was a lot closer. (This camera makes the furniture look darker than it really is.)
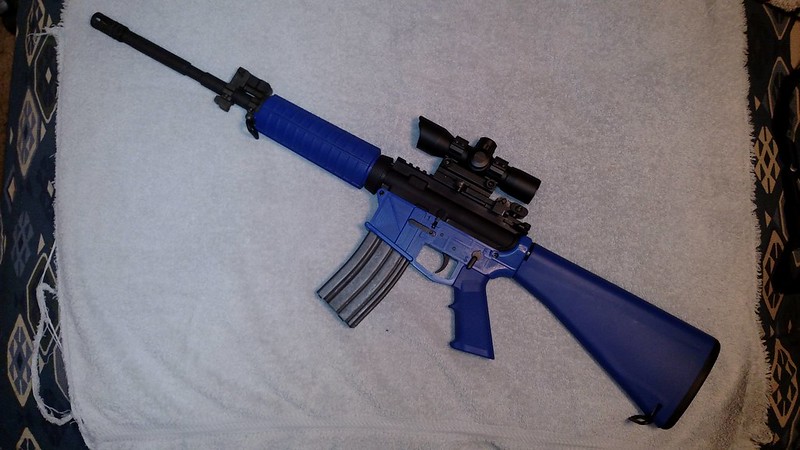
Tonight I talked a friend through making a pour in safety orange for his "survival gun". It's been about a week after I opened this batch and his had a few more bubbles but still not too bad. |
|
|
|
[#5]
Quoted:
I opened up a new set of resin. The first pour was nearly bubble free but the color was way off. The next pour had some minor bubbles and the color was a lot closer. (This camera makes the furniture look darker than it really is.) https://c2.staticflickr.com/2/1602/25883776191_4f3b19fa28_c.jpg Tonight I talked a friend through making a pour in safety orange for his "survival gun". It's been about a week after I opened this batch and his had a few more bubbles but still not too bad. You live in Florida. My guess is that humidity is your worst enemy down there. Here in the upper atmosphere (minutes from the continental divide) my average daily humidity is only ten percent at best. Temperatures are a bit cooler for me, though. I have found that not only do I have to pre-warm the resin, but also warming the mold helps keep things flowing during the pour. |
|
|
|
[#6]
During summer (from mid April to mid October) we have what I call the 90/90's. Over 90 degrees during the day and over 90% at night.
During these pours we had just had a cold front move through so once the rain cleared up it dipped a bit below 50%. Desert like conditions. |
|
|
|
[#7]
I had an oddity pop up with the plastic lower. I had bought 3 lower kits from Bayou Gun Runner and the magazine latch wouldn't hold if you gave the magazine a pretty good pull and wiggle. I tried a spare latch a friend had laying around and it worked fine in the plastic lower. When I tried the other two bayou latches in the plastic lower they wouldn't hold either. I took the latches out of my two metal lower ARs and swapped in the bayou parts and they worked fine. I tried the latches I took out of my metal lowers in the plastic lower and they worked fine. Del-Ton and CMMG.
|
|
|
|
[#8]
Test fire is tomorrow.
This gun will get more orange when the CavMfg furniture gets here. |
|
|
|
[#9]
false you cannot sell them legally
|
|
|
|
[#10]
Quoted:
false you cannot sell them legally Sure you can. You can't legally make them to sell w/o the proper licences, but it's no different from any other gun if you decide to sell one later. |
|
|
|
[#11]
Quoted:
Test fire is tomorrow. This gun will get more orange when the CavMfg furniture gets here. I already got a Cav Mfg set in Orange and one on Purple. After Marvyn's experience with it working better with "fresh" resin I plan to cast my first 5 as quickly as possible together, I plan to do the Orange and Purple first then a couple of other colors and probably a black one for my dedicated .22LR upper. Haven't decided on the other colors... maybe a light desert tan and an OD... My 2nd 5 pour resin I will have to think more about what colors I want... What was your color formula for the orange and the purple ones you did previously? |
|
|
|
[#12]
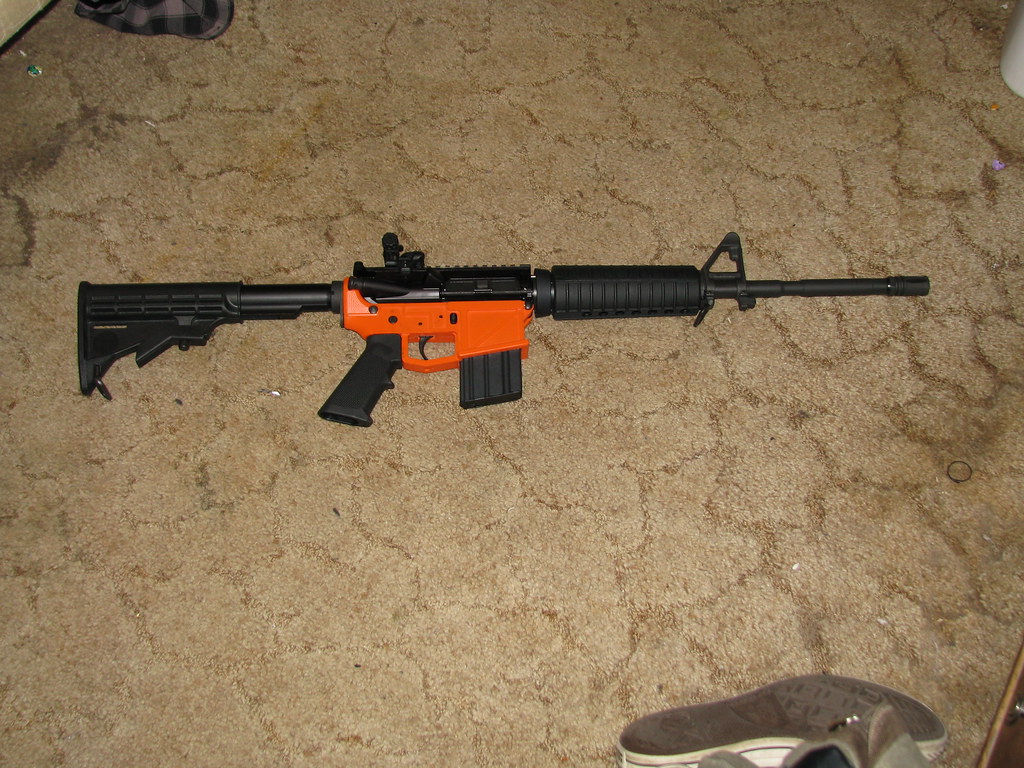
Survival Sarah's first shots.
Safety orange is 8 orange 5 yellow. The purple formula is 4 drops purple, 1 drop red, 1-1/2 drops black. |
|
|
|
[#13]
Quoted:
Test fire is tomorrow. https://c2.staticflickr.com/2/1667/26368432556_9bf181f5fa_b.jpg This gun will get more orange when the CavMfg furniture gets here. That orange looks good. And I also found a site for the dye a lot cheaper than AR15mold charges for them. $30 from Pen State Industries verses $75 from AR15mold.com. Have verified and it is the same dye. |
|
|
|
[#14]
Quoted:
Survival Sarah's first shots. Safety orange is 8 orange 5 yellow. The purple formula is 4 drops purple, 1 drop red, 1-1/2 drops black. Excellent! Thanks! |
|
|
|
[#15]
Any development on optional resins? has anyone tried the Task 21?
|
|
|
|
[#16]
 " /> " />
 " /> " />
|
|
|
|
[#17]
I have done 8 pours with this kit so far with different levels of success. Right now I have 2 built into rifles and 3 ready to be built. Three (out of those 8) had "problems" with bubble voids and improper demold, but they were my fault. I failed to work the bubbles out and capped the mold 2 soon. One I broke the front pivot pin ear by not driving out the mold pin then forcing the lower out. I have had fails with this kit, but only because I was doing things wrong. I have come up with and added some "mods" that help my lowers over all strength.
1) Wing-nut Mod. I take a wing-nut that fits the pistol grip bolt, grind down the round sides of it and screw it onto the bolt. That way there is a bit of matching metal thread in the pistol grip area. 2) Auto-Body mesh Mod. I use metal mesh (the type for use in Bondo car body repair) as another option 2 using fiberglass cloth. Use this for the magwell walls, around the Buffer Tube threads and in the trigger guard. 3) Rear TakeDown pin Mod. Use some very stiff wire and wrap one loop around the rear takedown pin area (make sure your detent pin can make it past and touchdown on the molds rear take down pin). These Mods have worked for me, but may not be for everyone. Test them at your own risk. I have done these mold lowers both with and without the above mods. So far (600+ rounds thru one and 480-ish rounds thru the other) I have had no problems at all. Both lowers were run with a Mid-length DI 1\8 twist upper and only XM193 (55grain) or XM855 (62grain Green Tip). I have also run a few mags (on each) with my ARAK21 upper, but this is not a fair test because the buffer is not used on that upper (self contained long stroke piston upper). The "fails" that I made were given the hammer treatment and recycled properly (made sure to break them into at least 5-6 bits before putting them into the recycle). One of my "fails" I took out 2 the range and shot. Even after taking several rounds to and thru the mag well, it still fit a mag just fine. On that lower, one good shot took out the buffer tube ring (which is of no surprise). Is this Mold set-up perfect? No but it is close. Is the Mold set-up better then going with an 80% lower (metal not poly)? For me that's a yes. The drill press and I never got along and only come up with one working lower. But this may not be true for all of you. As for me, I will continue to make lowers (for myself) with this kit. Not all will be built into ARs (rifle or pistol), but it is always nice to have spare on hand......just incase. At the end of the day when all the math is done, these lowers are more cost friendly then standard stripped lowers (for me). |
|
|
|
[#18]
Marv has suffered our first failure with the Freedom-15 lower.


I don't think this from the stress of firing. I think this is from the mold maker putting the rear holes so they're too tight on the upper and you have to hammer the take-down pin in and out. The good news is the thread spacer method of capturing the buffer retainer worked flawlessly. A rifle receiver extension won't screw in far enough to capture the buffer retainer, so we cut a thin slice out of a commercial carbine extension that we weren't using to bridge the gap between the retainer and the front of the buffer tube. 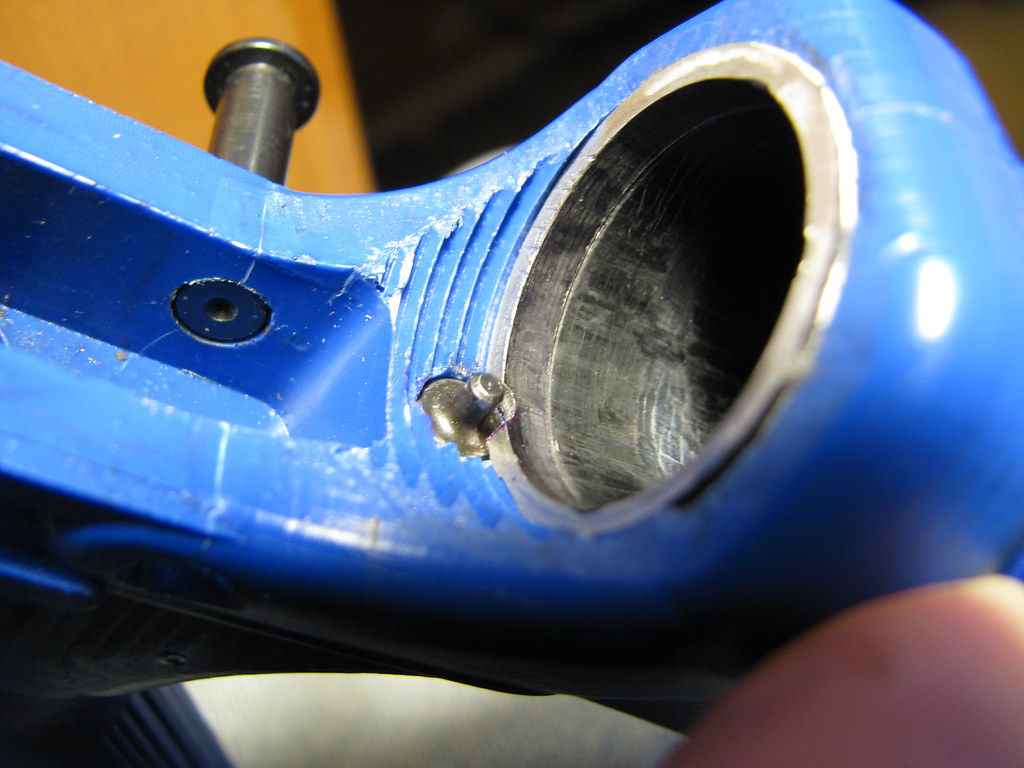
As you can see from combining these three shots is the crack is almost all the way through and the stock is about to come off. Update: With a "moderate" amount of force, Marv finished it off. 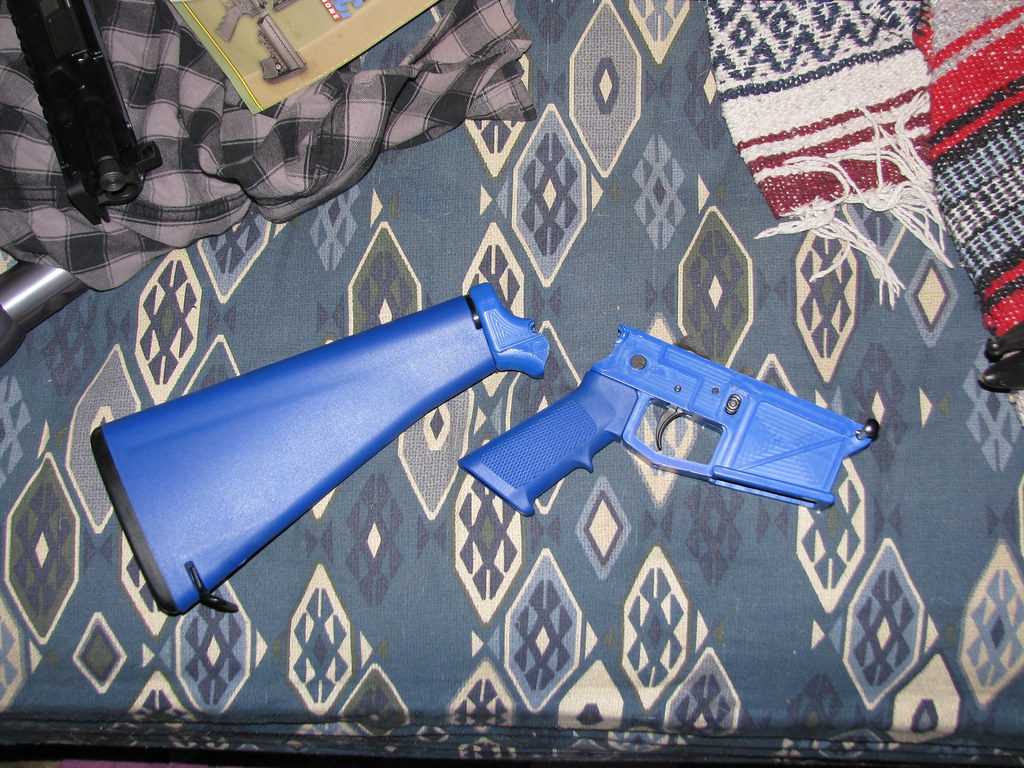
Even though we regarded this as a near perfect pour, there's no escaping the bubbles and voids, which we also don't think contributed to the cracking shown above. |
|
|
|
[#19]
Have y'all tried reinforcing any areas with fiberglass? And wonder if some of the air bubbles on the inside are from the polymer curing and nothing can be done to stop it. I have seen those on a lot that have been stress tested and stuff like that.
|
|
|
|
[#20]
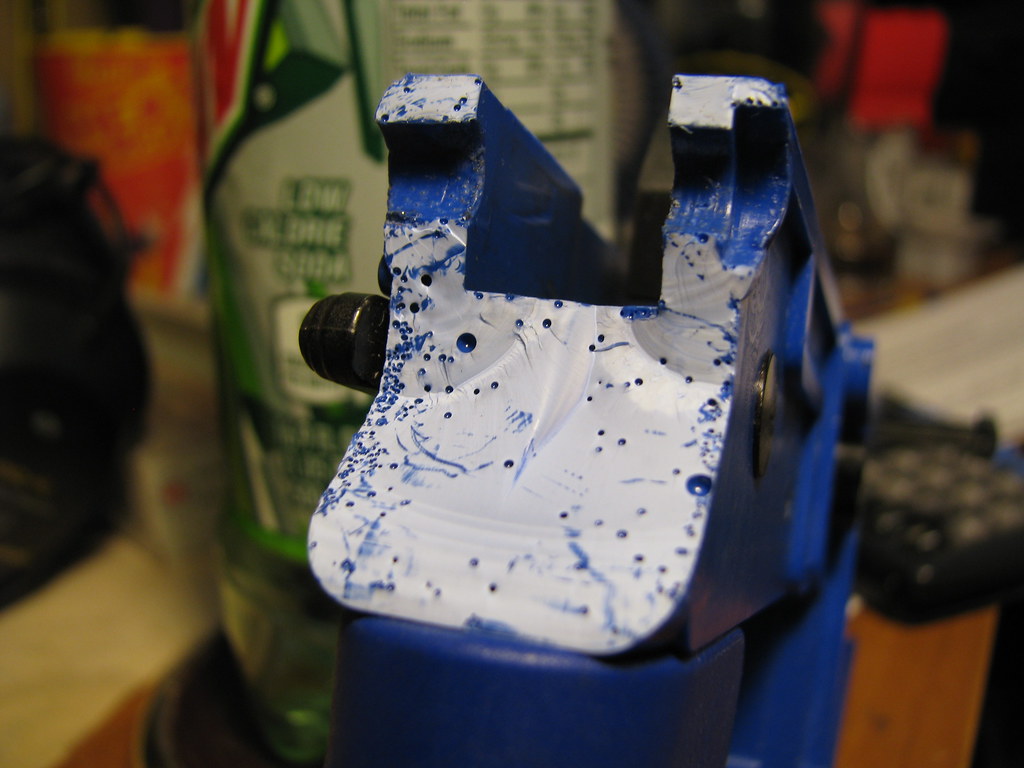
No reinforcing with anything, just as the kit came from them.
We think we've got a handle on the too damned tight problem. We took some 100 grit and smoothed out the whole top of the lower, then took about 2-3 thousandths where the pointer is pointing. 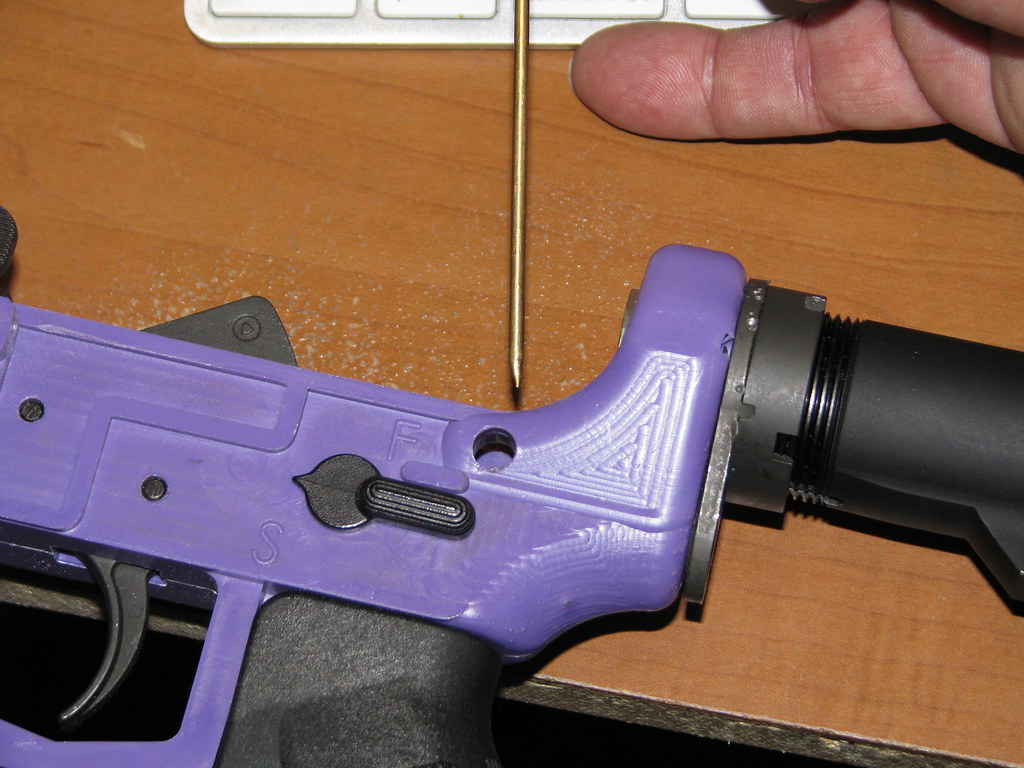
It went from needing a light tapping with the hammer and punch to being just a press in. |
|
|
|
[#21]
Quoted:
No reinforcing with anything, just as the kit came from them. We think we've got a handle on the too damned tight problem. We took some 100 grit and smoothed out the whole top of the lower, then took about 2-3 thousandths where the pointer is pointing. https://c2.staticflickr.com/2/1513/26134274254_2c93437cc7_b.jpg It went from needing a light tapping with the hammer and punch to being just a press in. So is the issue to much up top or the take down holes to tight? Or combo of both? I am very interested in this kit and will eventually get one just for the hell of it. A lot of the torture tests I have see it holds just almost as good as aluminum and in some instances better. Just drop test is heavy loads on buffer is where it is the weakest. Also for dyes check out what I posted above for a place that is a shit load cheaper for the exact same dyes almost half as much. Although that purple came out good. |
|
|
|
[#22]
Quoted:
So is the issue to much up top or the take down holes to tight? Or combo of both? I am very interested in this kit and will eventually get one just for the hell of it. A lot of the torture tests I have see it holds just almost as good as aluminum and in some instances better. Just drop test is heavy loads on buffer is where it is the weakest. Also for dyes check out what I posted above for a place that is a shit load cheaper for the exact same dyes almost half as much. Although that purple came out good. Quoted:
Quoted:
No reinforcing with anything, just as the kit came from them. We think we've got a handle on the too damned tight problem. We took some 100 grit and smoothed out the whole top of the lower, then took about 2-3 thousandths where the pointer is pointing. https://c2.staticflickr.com/2/1513/26134274254_2c93437cc7_b.jpg It went from needing a light tapping with the hammer and punch to being just a press in. So is the issue to much up top or the take down holes to tight? Or combo of both? I am very interested in this kit and will eventually get one just for the hell of it. A lot of the torture tests I have see it holds just almost as good as aluminum and in some instances better. Just drop test is heavy loads on buffer is where it is the weakest. Also for dyes check out what I posted above for a place that is a shit load cheaper for the exact same dyes almost half as much. Although that purple came out good. The pins are loose in their holes without an upper on them. When you remove material from the top of the lower, you get a better mating of the pins to the rear lug. |
|
|
|
[#23]
The pins are loose in their holes without an upper on them. When you remove material from the top of the lower, you get a better mating of the pins to the rear lug. Ok so to much on the top of the lower. Which I can see leads to the stress on the pin area. |
|
|
 Win a FREE Membership!
Sign up for the ARFCOM weekly newsletter and be entered to win a free ARFCOM membership. One new winner* is announced every week!
You will receive an email every Friday morning featuring the latest chatter from the hottest topics, breaking news surrounding legislation, as well as exclusive deals only available to ARFCOM email subscribers.

AR15.COM is the world's largest firearm community and is a gathering place for firearm enthusiasts of all types.
From hunters and military members, to competition shooters and general firearm enthusiasts, we welcome anyone who values and respects the way of the firearm.

Subscribe to our monthly Newsletter to receive firearm news, product discounts from your favorite Industry Partners, and more.
Copyright © 1996-2024 AR15.COM LLC. All Rights Reserved.
Any use of this content without express written consent is prohibited.
AR15.Com reserves the right to overwrite or replace any affiliate, commercial, or monetizable links, posted by users, with our own.


