|
Posted: 3/28/2014 6:56:38 AM EDT
I made my first three 80% lowers back in 1999 with a drill press and hand tools. Since then I've completed both aluminum and polymer lowers. I wanted to try something different and get into the .308 AR so I purchased a DMPS pattern 80% lower from 80 Percent Arms along with a matching jig.
This is my third jig and by far my favorite. It’s designed to allow someone with nothing more than a $100 portable router to finish this upper. I used a mini-mill so that meant I didn’t have to use the upper aluminum plate which acts as platform to rest the router on as it moves round inside the various pockets that need to be milled. The feature I like the most of this jig is that there’s a spacer plate that is slightly recessed from the template plate that sits on top. This allows the mill’s cutting piece to engage the upper without the chance of cutting into the jig. Another feature I like is that the jig is tall enough to allow the jig to rest flat on the mill’s top surface. Another jig I have allows the trigger assembly to hang below meaning I have to support the jig above the table with 1-2-3 blocks. The only thing I dislike about this jig are that the horizontal screws are smaller than the ¼” screws that I'm used to. I use the provided screws are strong enough to hold the lower tight, I just like the beefier ones in my other jig better. The lower was finished to standard 80% completion requiring the trigger pocket to be milled and six holes to be drilled on the sides – the four trigger pins and the two safety holes and to have the trigger hole cut through the bottom of the trigger control pocket. The quality of the lower was good with no rough edges nor blemishes in the finish. A DMPS 20 round magazine dropped from the mag well without issue. The jig parts. Left top and bottom are the left and right side plates. Center top to bottom - the 3/8" drill bit template, trigger and rear shelf template, the main front trigger pocket template, and the spacer. Right - the top plate for use with a hand router. 
The jig parts stacked in order. Bottom to top - the left and right sides, the template spacer, one of the trigger pocket spacers, and on top the router platform. 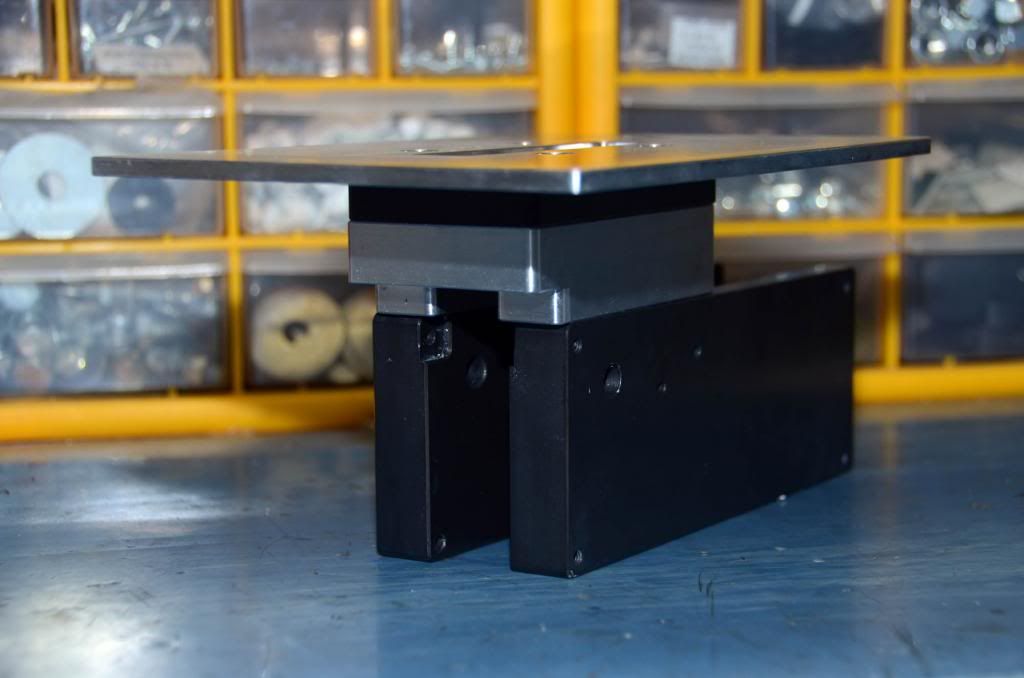
One of the two built-in depth gauges. 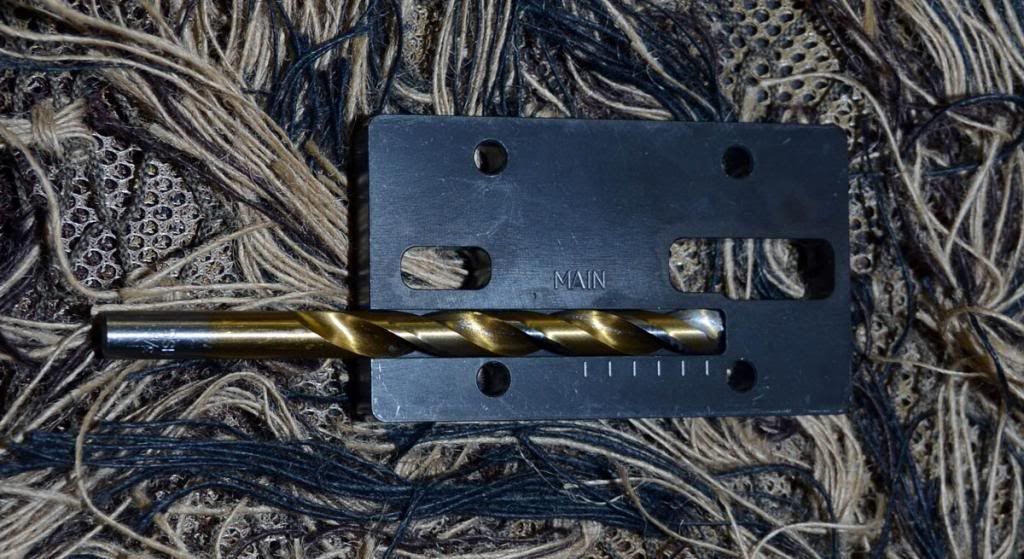
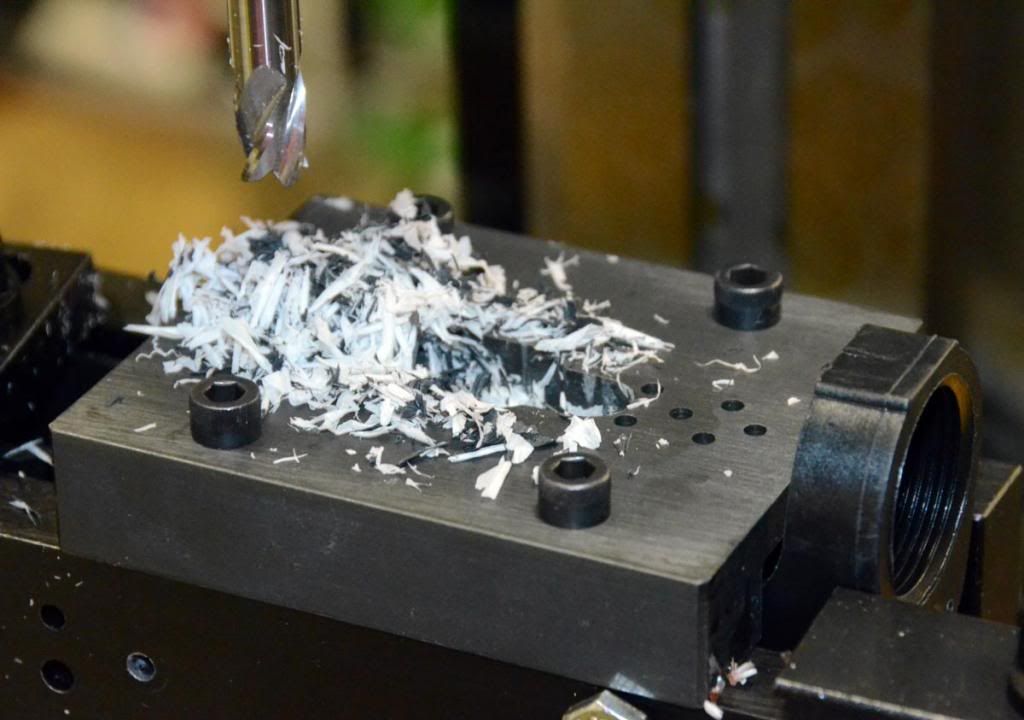
I put the blue tape on the 80% lower to protect it from scuff marks from the mill chips. 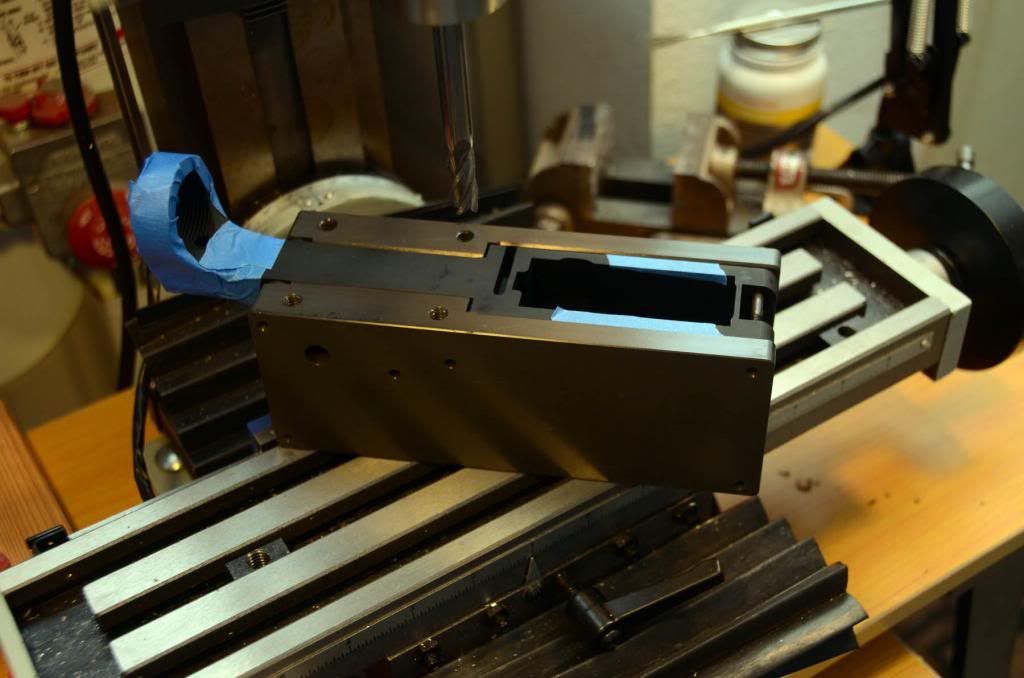
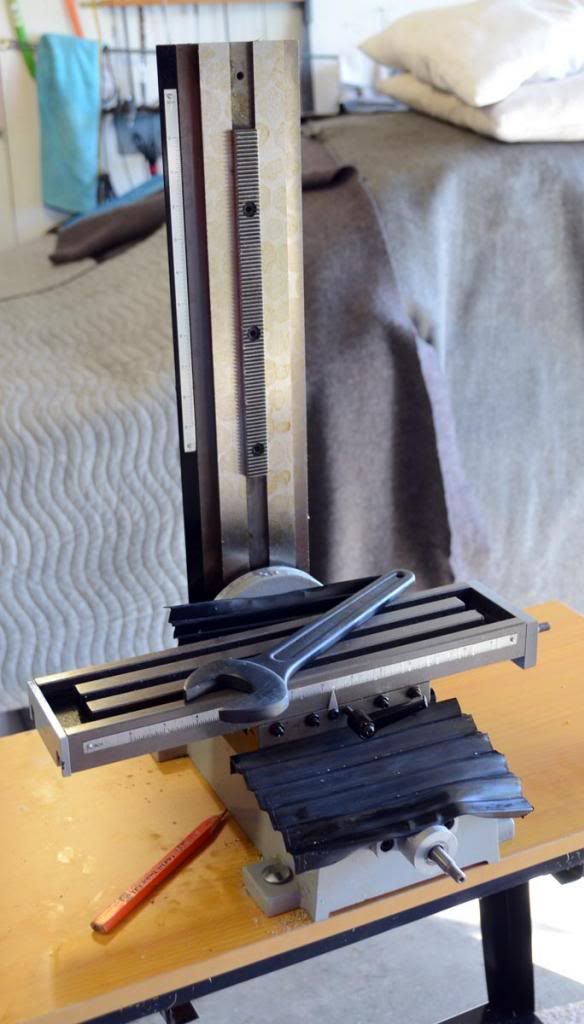
The mill has been modified with digital read out’s (DRO) on all three axis but for this project only the Y depth gauge is needed. 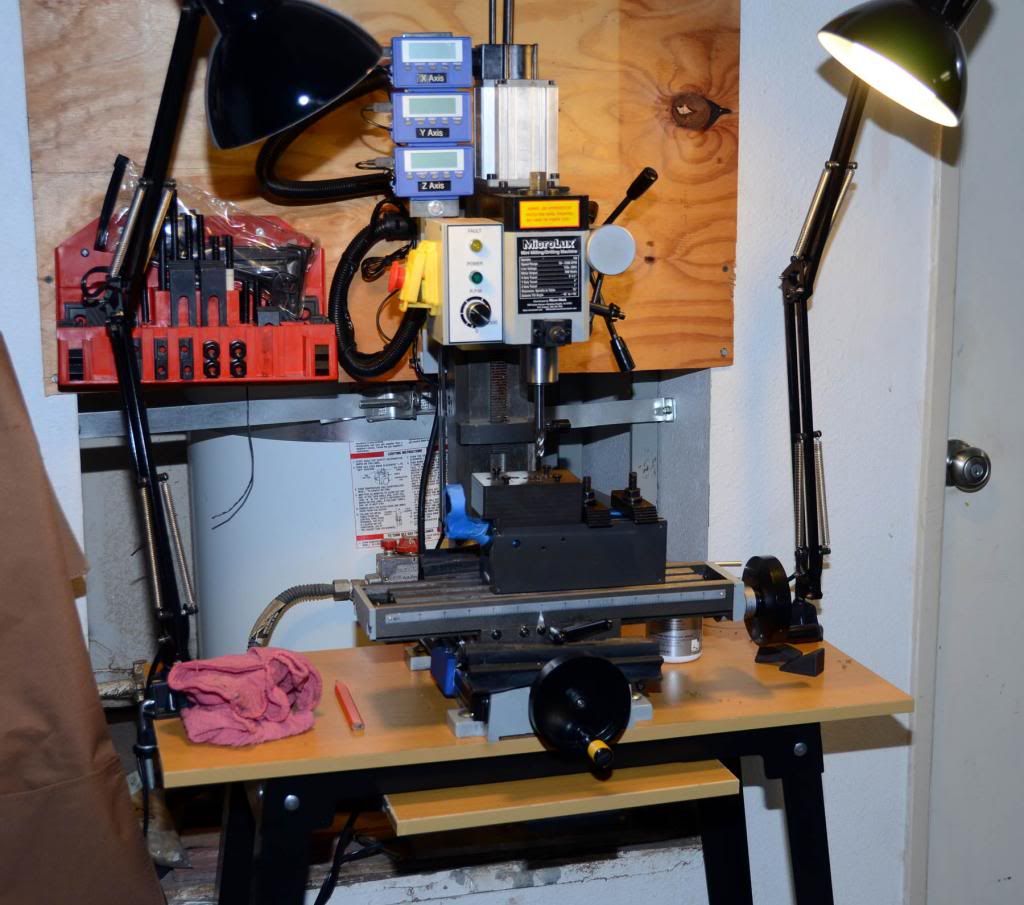
3/8" Hole Template's results. When using a hand router to mill out the trigger pocket the drill bit template allows for removal of about 50% of the aluminum using a hand drill. Even with the mini-mill I completed this step as using a drill bit removes lots of material meaning less chip making using the end mill. There is a groove in the front and rear of the template spacer leaving a place for the chips to pour out. The template has been removed to show the holes cut by the bit into the lower receiver for the front main portion of the trigger control pocket. 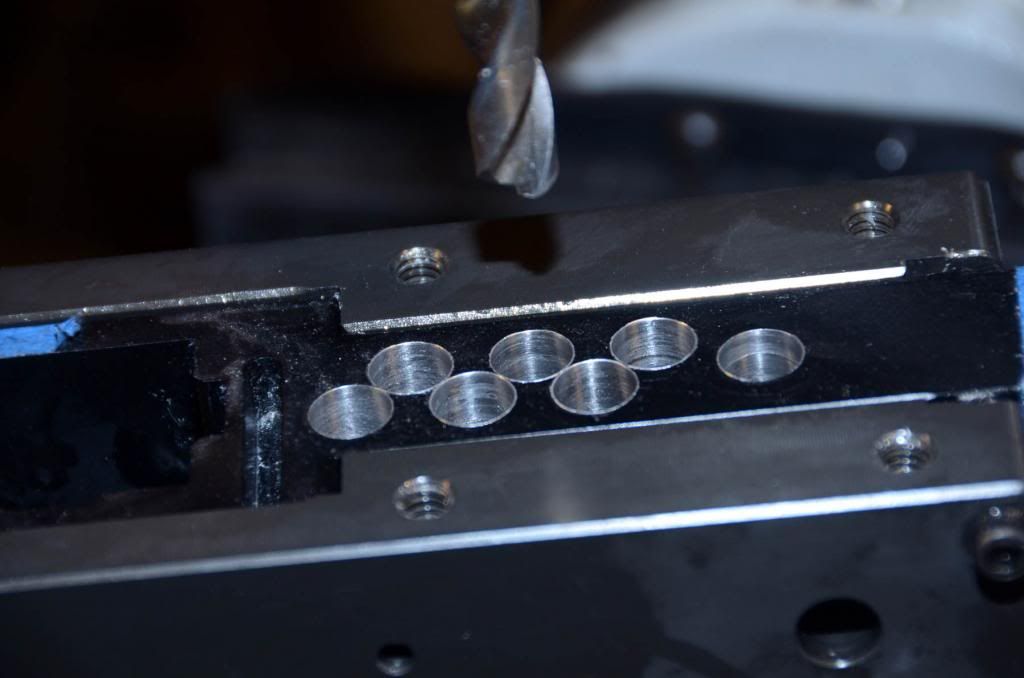
Making Chips. I use a chip brush and shop vac to pull out the chips. I use cutting oil to prolong the life of the end mill making 0.2" passes clockwise around the templates with a 3/8" end mill. As I get close to the end depth I come within 0.025" and then make a last finishing pass. You do NOT want to cut too deep! 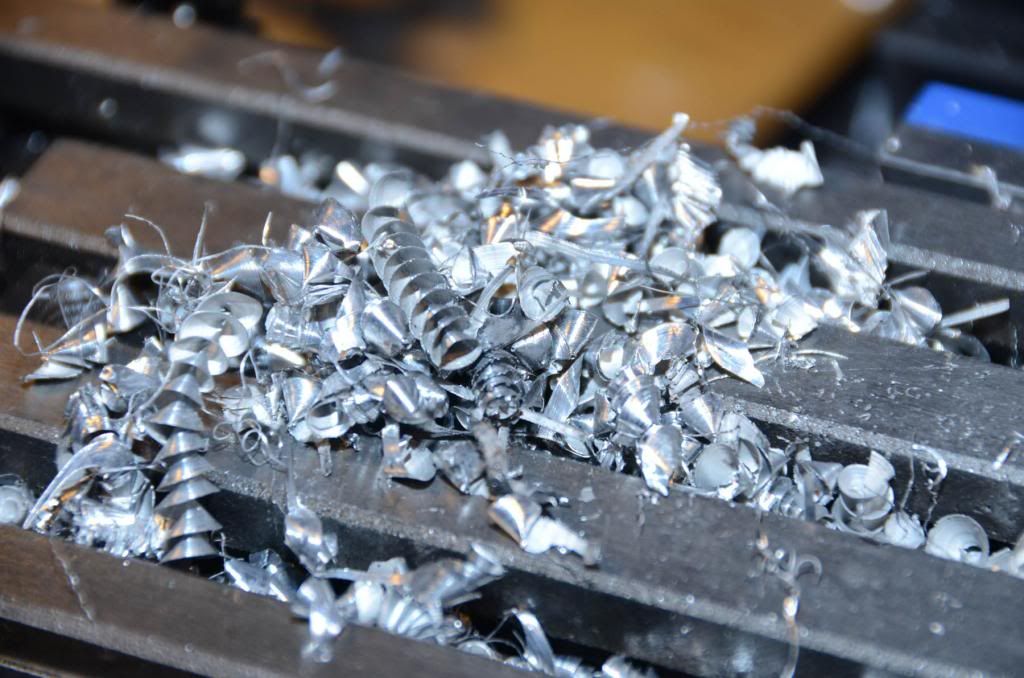
Another feature unique to the 80 Percent Arms jig are the built in depth gauges in the opposite pocket template. This allows someone to very accurately set the depth without expensive gauges or a DRO. The trigger pocket has two levels that it needs to be milled to – 1.249” and 0.630” so there’s two templates. With the template spacer recessed from the size of the pocket template it’s easy to run the end mill around in the template without fear of damaging the jig. 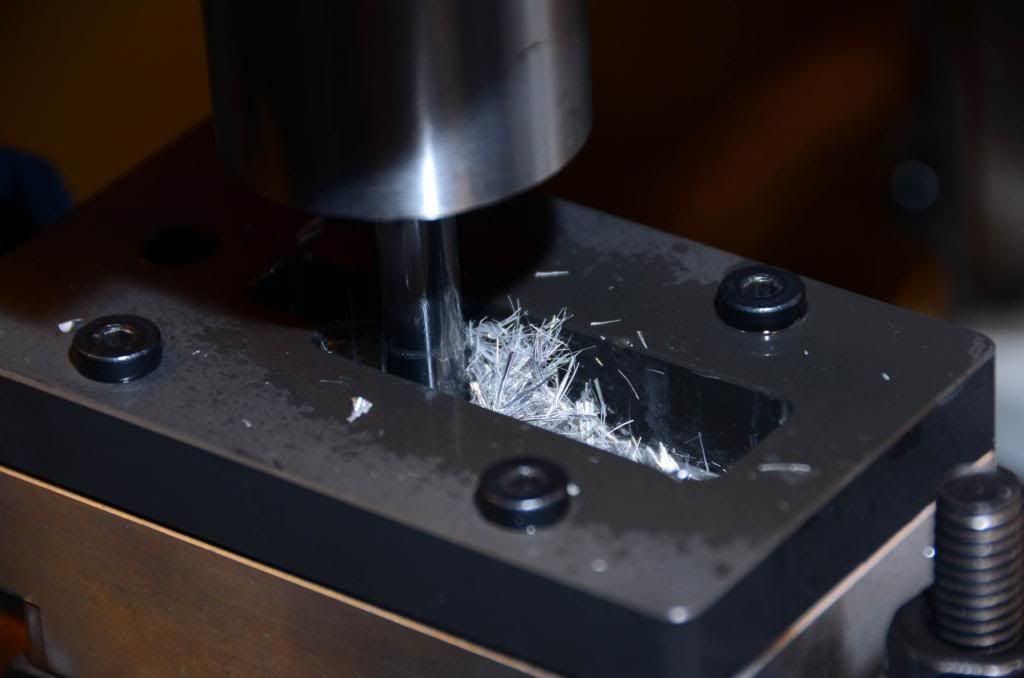
Front Pocket Done. Here’s the spacer and template removed showing the front pocket cut down to 1.249”. 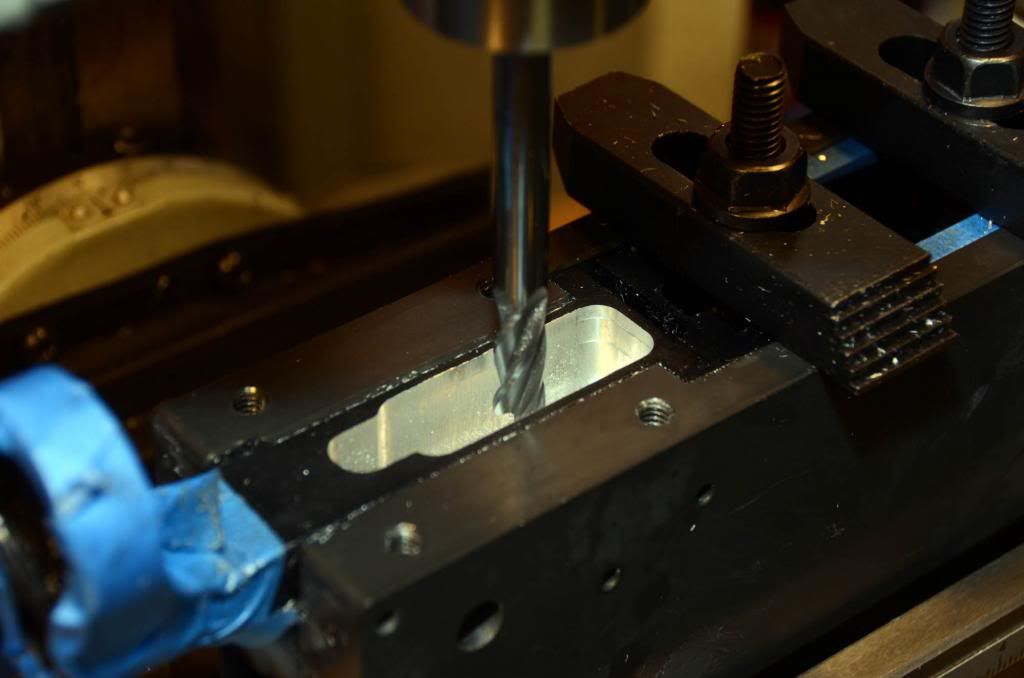
Rear Pocket Template. The rear pocket is milled to only 0.630” and a separate pocket template is provided. 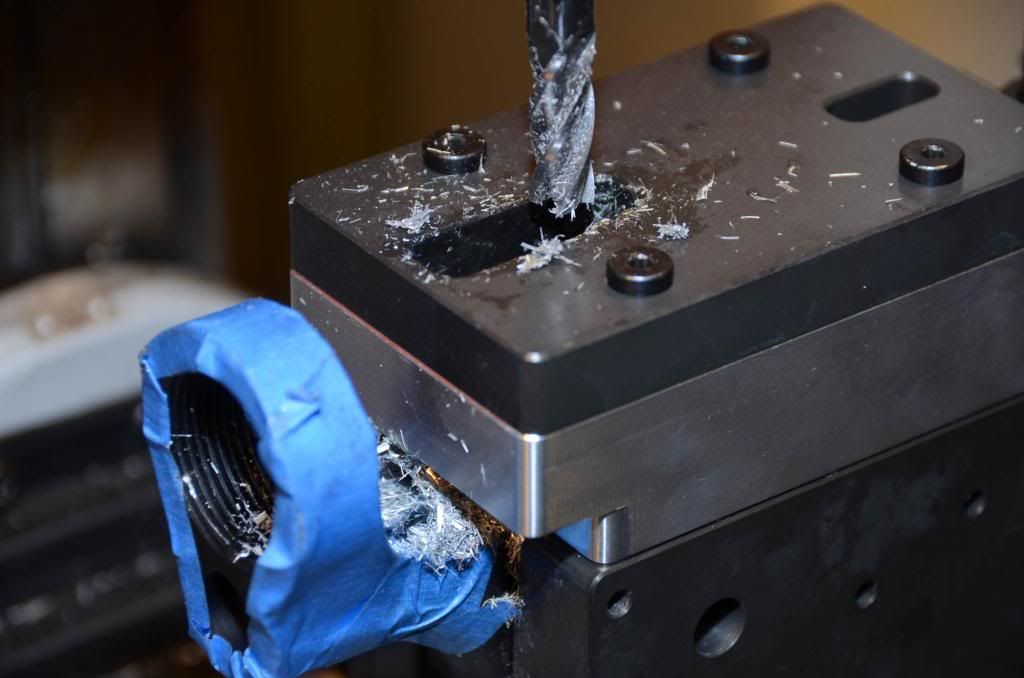
Trigger Template. The opposite of the rear pocket template serves as the trigger hole template. This template is held in place with just two shorter screws without the need for the spacer as the cutting surface is well below the jig’s surface. 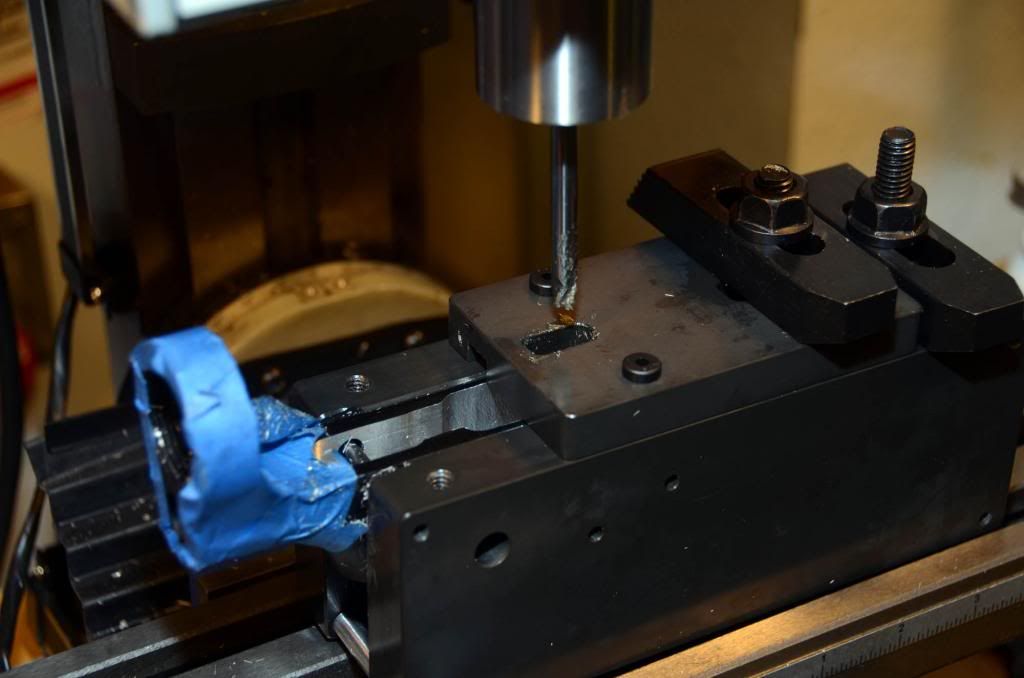 ] ]
Front and rear pockets done. The round hole in the bottom is the pistol grip screw hole. 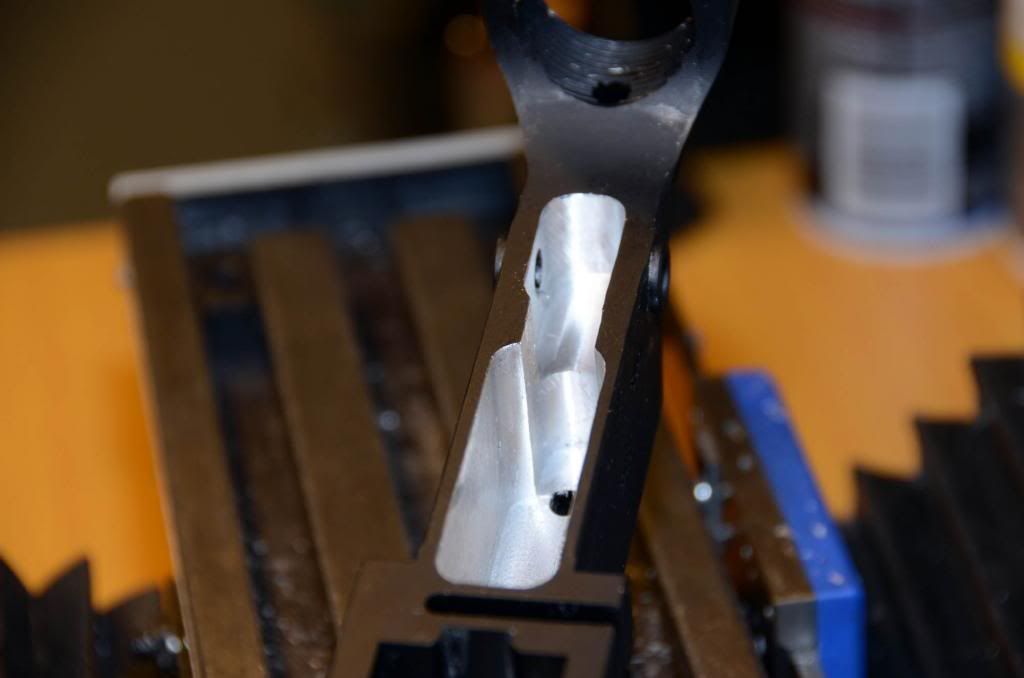
Trigger and safety holes use the jig mounted sideways. A quick use of a couple of drill bits and you’re done. I use an edge debur tool to run around the top of the trigger pocket and around the outside of each fire control hole. 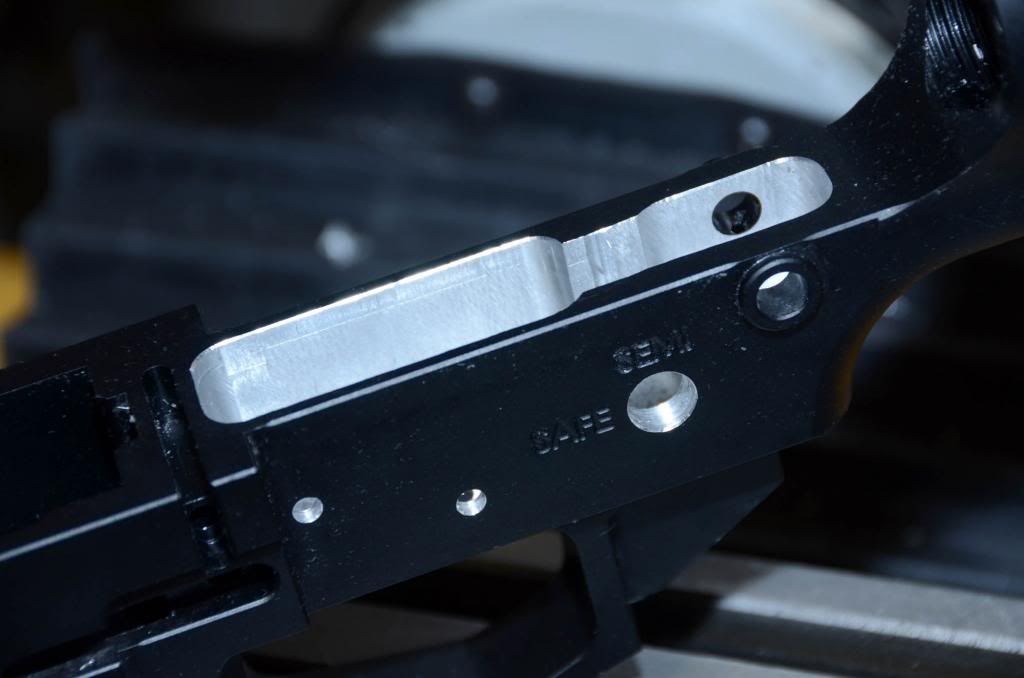
I’m still waiting on the lower competition kit and I’m busy shopping for an upper and furniture. Using this jig with the mill made finishing the .308 lower easy. Looking at the intended use with a hand router someone should be able to use a very inexpensive hand tool to do the same work normally performed with an expensive mini-mill. I would advise someone using a hand router to buy a quality cutting bit and make small passes as shown in the instructions using the depth gauges included on the back of the pocket templates. Total tool time was under an hour. 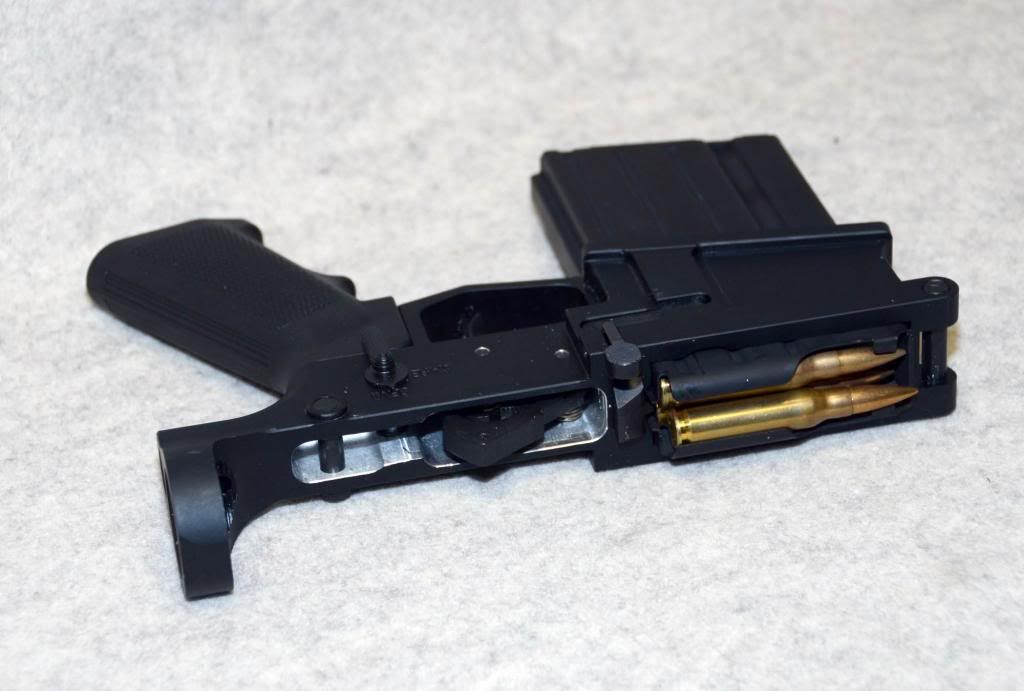
http://www.80percentarms.com/ The billet 80% lower receivers are $129.95 in 6061-T6 anodized black and are currently on backorder. The 80% .307 Easy Jig (tm) are $159.99 and are also on backorder at this time. |
|
|
|
[#1]
Very nice review. I have been using a very rudimentary home made drill press and a Dremel Moto Tool to do 80% lowers. I saw the 80% arms showing the use of a small router. So I picked up the 1 1/4 horsepower Makita refurbed for $75. I just completed two polymer lowers for practice. I like the use of the router. The EZ jig is not available so I am using the jig I have. It works.
I have not attempted a 308 lower yet. Is the fire control group pocket the same as for a regular AR? It appears to be. Are the trigger group items interchangeable for the two? |
|
|
|
[#2]
Quoted:
Very nice review. I have been using a very rudimentary home made drill press and a Dremel Moto Tool to do 80% lowers. I saw the 80% arms showing the use of a small router. So I picked up the 1 1/4 horsepower Makita refurbed for $75. I just completed two polymer lowers for practice. I like the use of the router. The EZ jig is not available so I am using the jig I have. It works. Quoted:
Very nice review. I have been using a very rudimentary home made drill press and a Dremel Moto Tool to do 80% lowers. I saw the 80% arms showing the use of a small router. So I picked up the 1 1/4 horsepower Makita refurbed for $75. I just completed two polymer lowers for practice. I like the use of the router. The EZ jig is not available so I am using the jig I have. It works. The Easy Jigs are backordered. If I recall correctly I ordered mine back in November of last year and it arrived this week. They were having a pre-production sale so I knew that it would take awhile before I had my hands on the products. Well worth the wait and I'm very impressed at this point. I have not attempted a 308 lower yet. Is the fire control group pocket the same as for a regular AR? It appears to be. Are the trigger group items interchangeable for the two? This is my first AR-10/LAR-25. The lower completion parts kits are different SKU's and the .308 is a few dollars more. The take-down and pivot pin areas are different so I'm assuming the pins are different too. The magazine release is the same as the Bullet Button I'll use to use my normal magazines is a fit. The pistol grip mount is the same. Once I get my .308 LPK I'll put the thing together. Someone else will likely know what the differences, if any, there are between the two designs. |
|
|
|
[#3]
Great review. Tell us about your mill.
Thanks |
|
|
|
[#4]
Quoted:
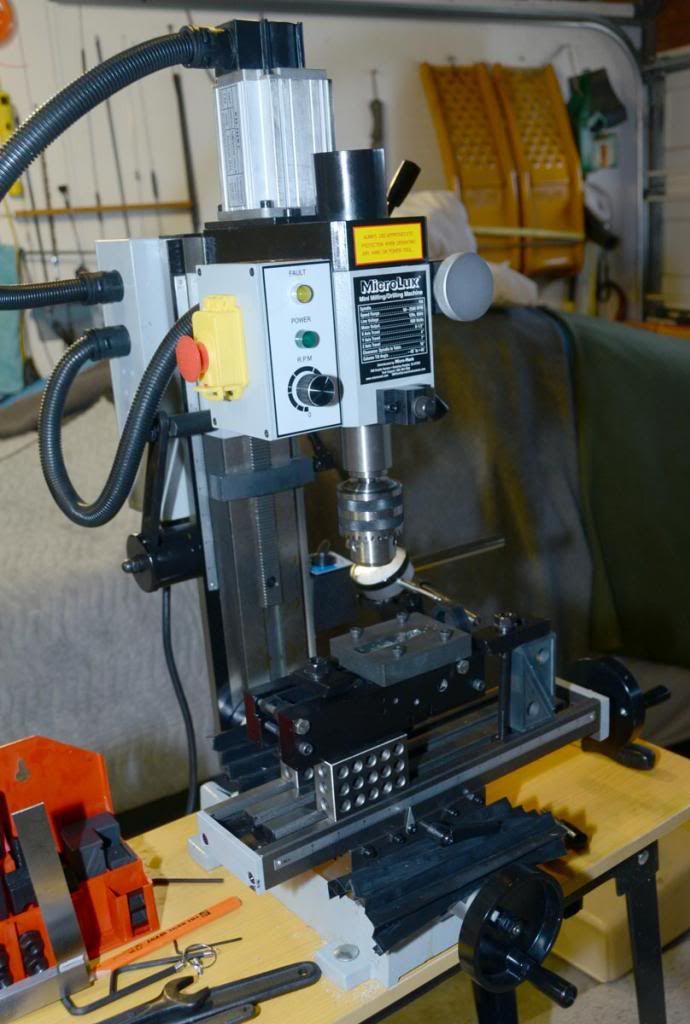
Great review. Tell us about your mill. Thanks That's a Sieg X2 Mini-Mill sold by Micro-Mark now $792. I bought mine for 20% off on Black Friday. It comes with 0.050" per turn screws which saves on math. It has the common R-8 spindles and a brushless DC motor. I bought a collet set and the required end mill cutting bits. I put the precision stainless steel digital readouts on it but if you're only going to finish lowers using a jig you only need the Z axis to measure plunge depth. I also swapped out the torsion bar counter weight for a pneumatic one. http://www.micromark.com/microlux-high-precision-heavy-duty-r8-miniature-milling-machine,9616.html Within 2 and have hours of it arriving I was making chips. 
(evil polymer ghost EP Lower - can't be seen on X-rays AND has no serial number!!!) |
|
|
|
[#5]
Quoted:
I have not attempted a 308 lower yet. Is the fire control group pocket the same as for a regular AR? It appears to be. Are the trigger group items interchangeable for the two? The part kit I ordered yesterday ... arrived today. The parts for the trigger were the same - pins, springs, disconnector, trigger and hammer all the same. The pivot and takedown pins were different and installed differently. The front pivot pin goes straight in from the front thru a hole drilled in the loop that holds the pin in place. The rear takedown pin in held in place with a detent and spring that go north-n-south and are held in place with the pistol grip rather than the normal AR-15 east-n-west and held in place with the shoulder stock assembly. The magazine release is held in place with a small hex screw vice a roll pin. Now the hard part comes ... what kind of upper do I want ... what am I going to do with this lower? Since I only have a few of the 20-round magazines I think I'll go with a feature full rifle with "attachable" magazines (using a bullet button) to meet CA's unConstitutional feel-good do-nothing laws. I'll replace the trigger with a Geissele Automatics' and safety selector to a BAD ASS.
|
|
|
|
[#6]
Order a 16" carbine DMPS upper which arrived today. Very good fit - the top to bottom was a perfect match. The front pivot pin was very tight with the "ears" of the lower a very tight fit to the tab of the upper. Nothing upsetting, only noticeable.
So until I break out the Krylon here's the current state of the rifle. I need to do something about the front sight as the lower mounting rail didn't match the BUIS that I had "in stock" in my box-o-parts. I'm debating on the higher front sight or higher gas block - opinions welcomed. 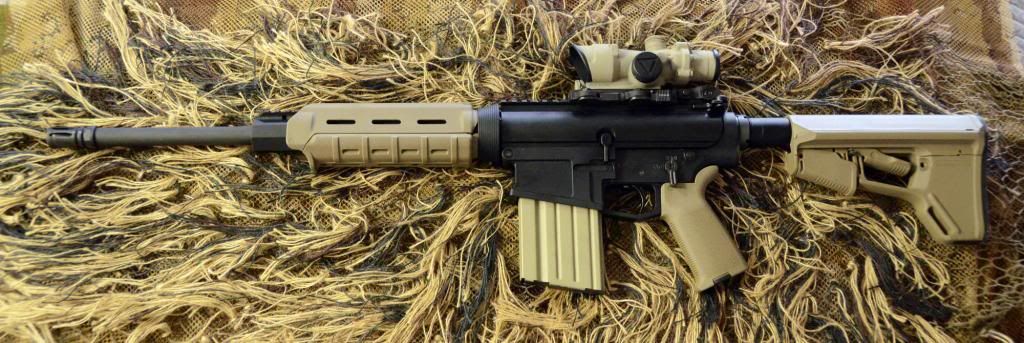
Swapped out the trigger for a Geissele SSA-E but not the safety yet. I love the clean look of not having a serial number. I got a Rainier Arms Raptor but I'm suspicious as the "wings" are the same size. I know this is a problem in the .223 but I'm not sure about the .308 - opinions welcomed. I have emailed Rainier and I'm awaiting their reply. 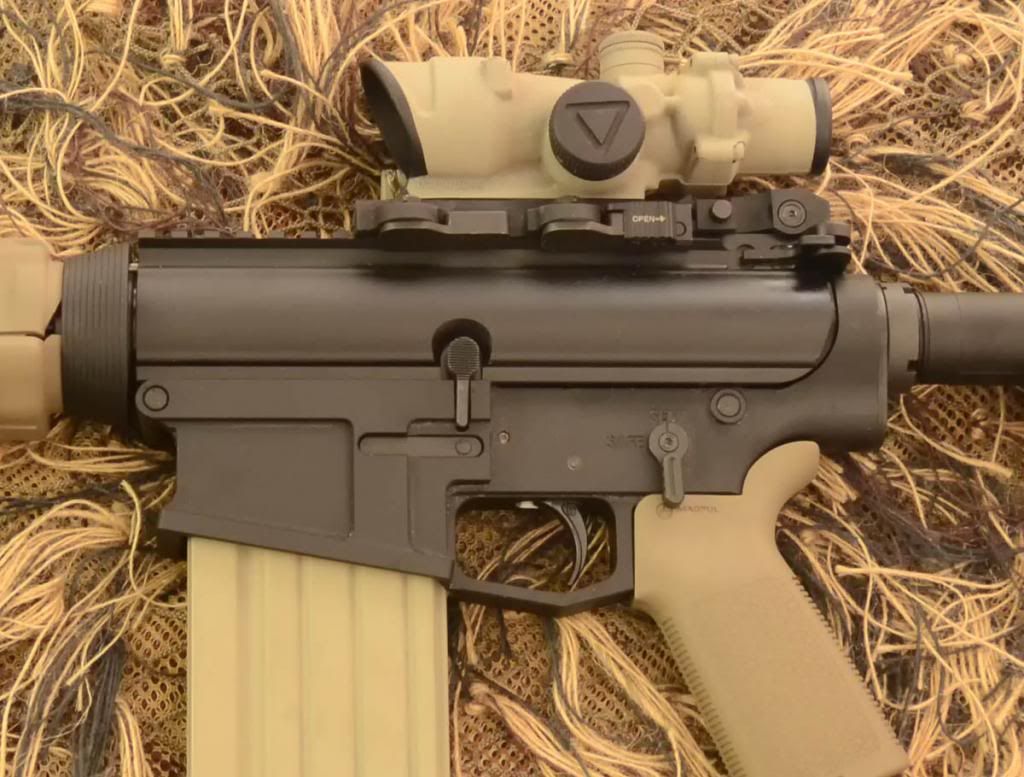
I'll swap out the flash suppressor with something more aggressive and put an Impact Arms QD mount in the handguard. |
|
|
|
[#7]
Nice job.
If you have DROs, why bother with a jig? Milling out the trigger well is simple work, and so is drilling/reaming the trigger pins. |
|
|
|
[#8]
Quoted:
Nice job. If you have DROs, why bother with a jig? Milling out the trigger well is simple work, and so is drilling/reaming the trigger pins. I suppose I could mill out my own brackets/jig to hold the lower into place so that it doesn't wiggle a 0.0001 worth of an inch ... but that would take a bunch of effort between the measurements and trial and error. It's makes more cents to my checkbook just to buy the jig - even if I don't use the template on top. Using the template it's almost impossible to make a mistake that would ruin a lower I waited four months to get. 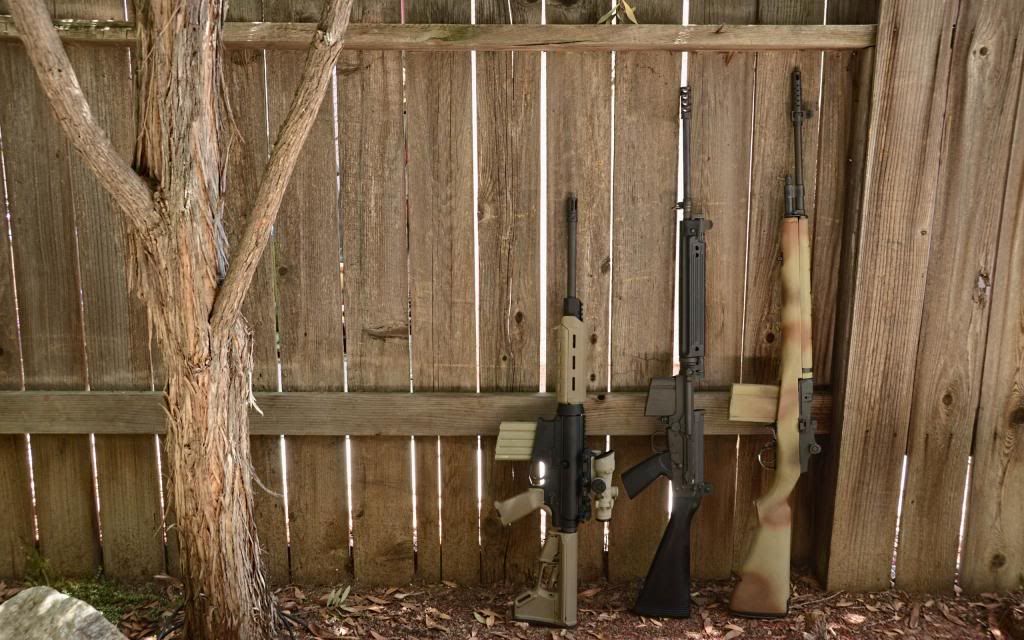
|
|
|
 Win a FREE Membership!
Sign up for the ARFCOM weekly newsletter and be entered to win a free ARFCOM membership. One new winner* is announced every week!
You will receive an email every Friday morning featuring the latest chatter from the hottest topics, breaking news surrounding legislation, as well as exclusive deals only available to ARFCOM email subscribers.

AR15.COM is the world's largest firearm community and is a gathering place for firearm enthusiasts of all types.
From hunters and military members, to competition shooters and general firearm enthusiasts, we welcome anyone who values and respects the way of the firearm.

Subscribe to our monthly Newsletter to receive firearm news, product discounts from your favorite Industry Partners, and more.
Copyright © 1996-2024 AR15.COM LLC. All Rights Reserved.
Any use of this content without express written consent is prohibited.
AR15.Com reserves the right to overwrite or replace any affiliate, commercial, or monetizable links, posted by users, with our own.


