|
[#1]
Quoted:
I should have used a release agent on the emblem. It stuck and broke apart. I think I make try to clean it up as best I can and continue through the process. I'm sure I will make other mistakes along the way at least I can see what the final product will look like. Been there done that, release agent is your friend!!! You may be able to clean the cast up with some release agent on a Q-tip. When pouring the mold pour slow and from far away as mentioned and it will reduce bubbles however when you start pouring parts I found that it was very hard to 'avoid the voids'. Since they rise until the material hardens you will inevitably get them on the top edges. Also avoid vigorous stirring as it will induce very small bubbles and can create a foam color line. You can significantly increase the quality of your parts and molds by vacuum boiling before pouring, the initial cost of the chamber and AC vacuum hurt but if you intend to make more than a couple the parts will look much less homemade. Here's a photo of a mold bound part, only got release agent on the inside of the part. The yellow circles are showing voids, the inside of the bubbles set smooth and reflected the flash. 
This is a photo of a part that was vigorously mixed, first color then hardener which caused a bubble line the length of the part shown by the yellow arrows. 
|
|
|
|
[#2]
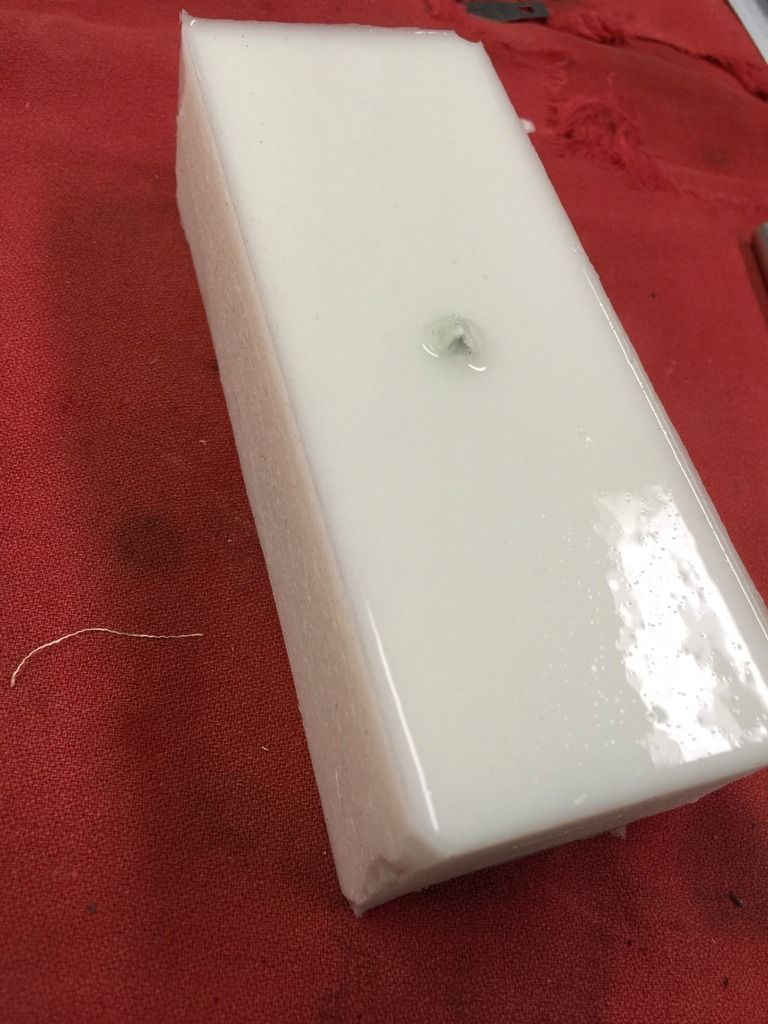
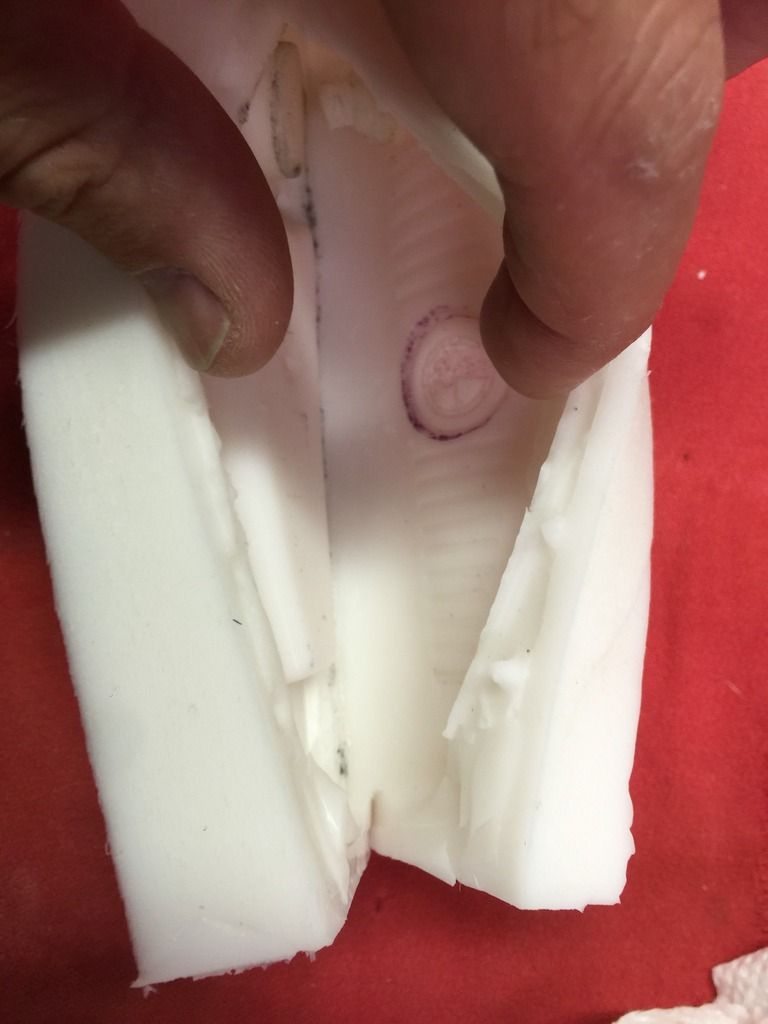
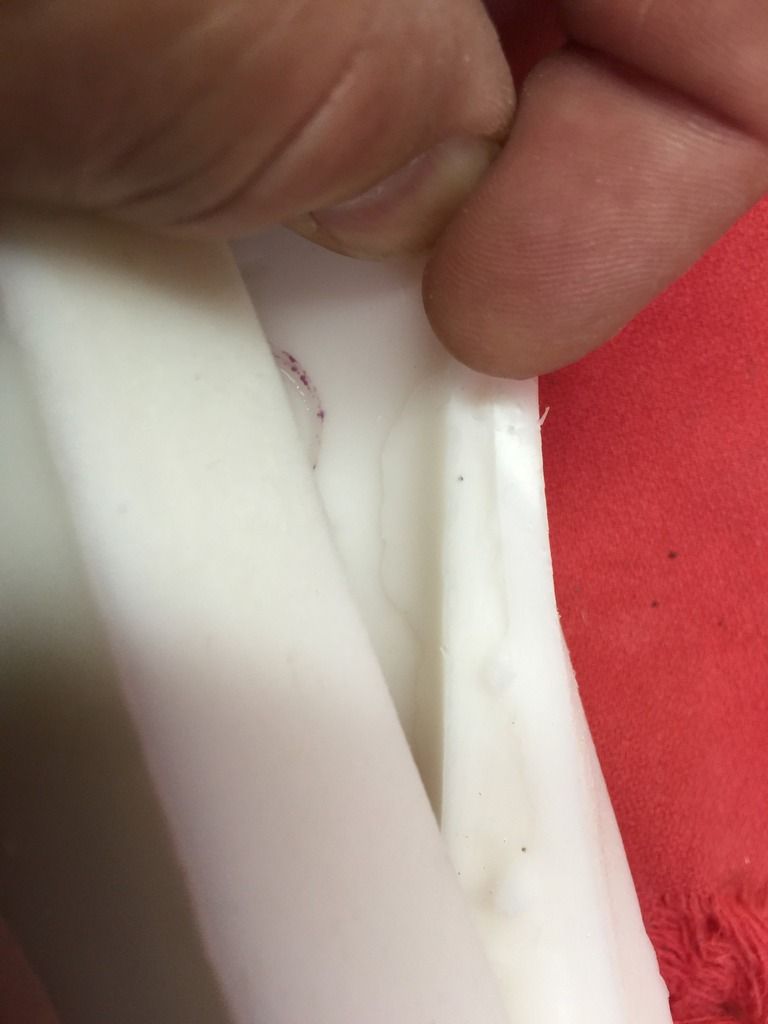
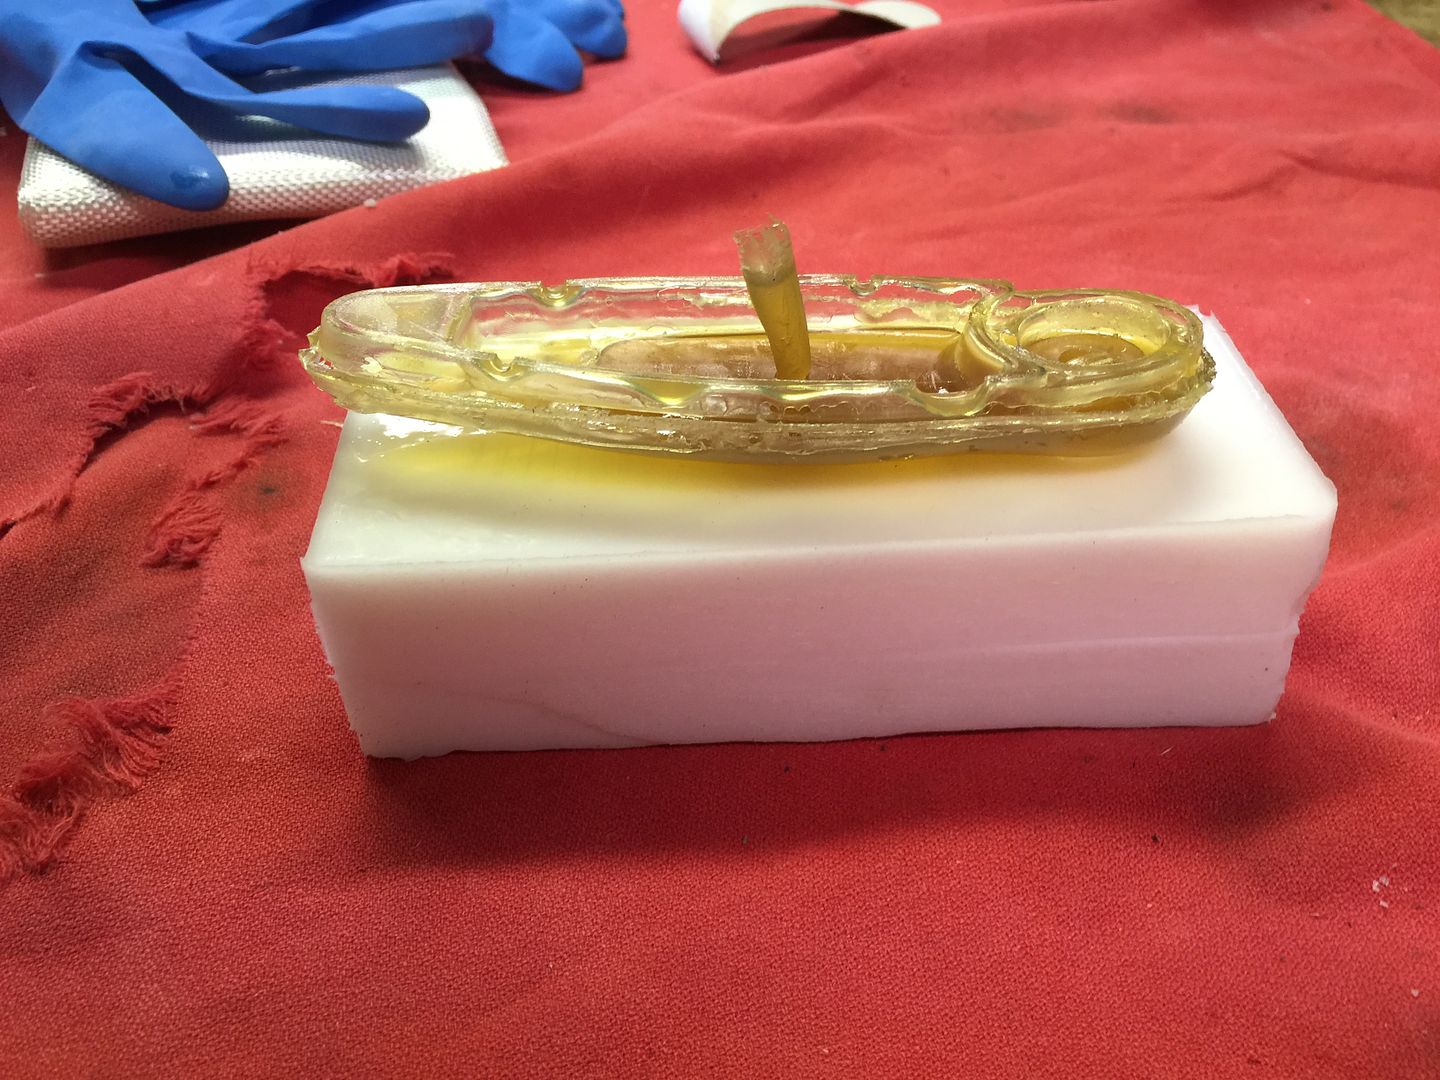
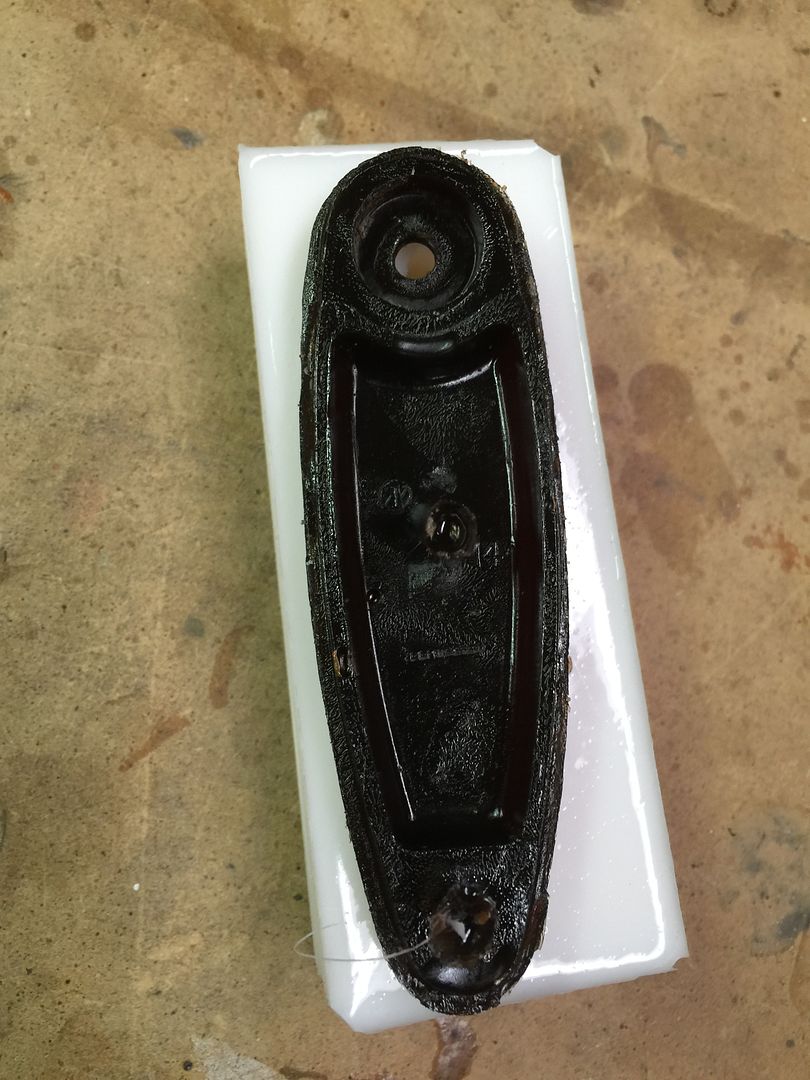
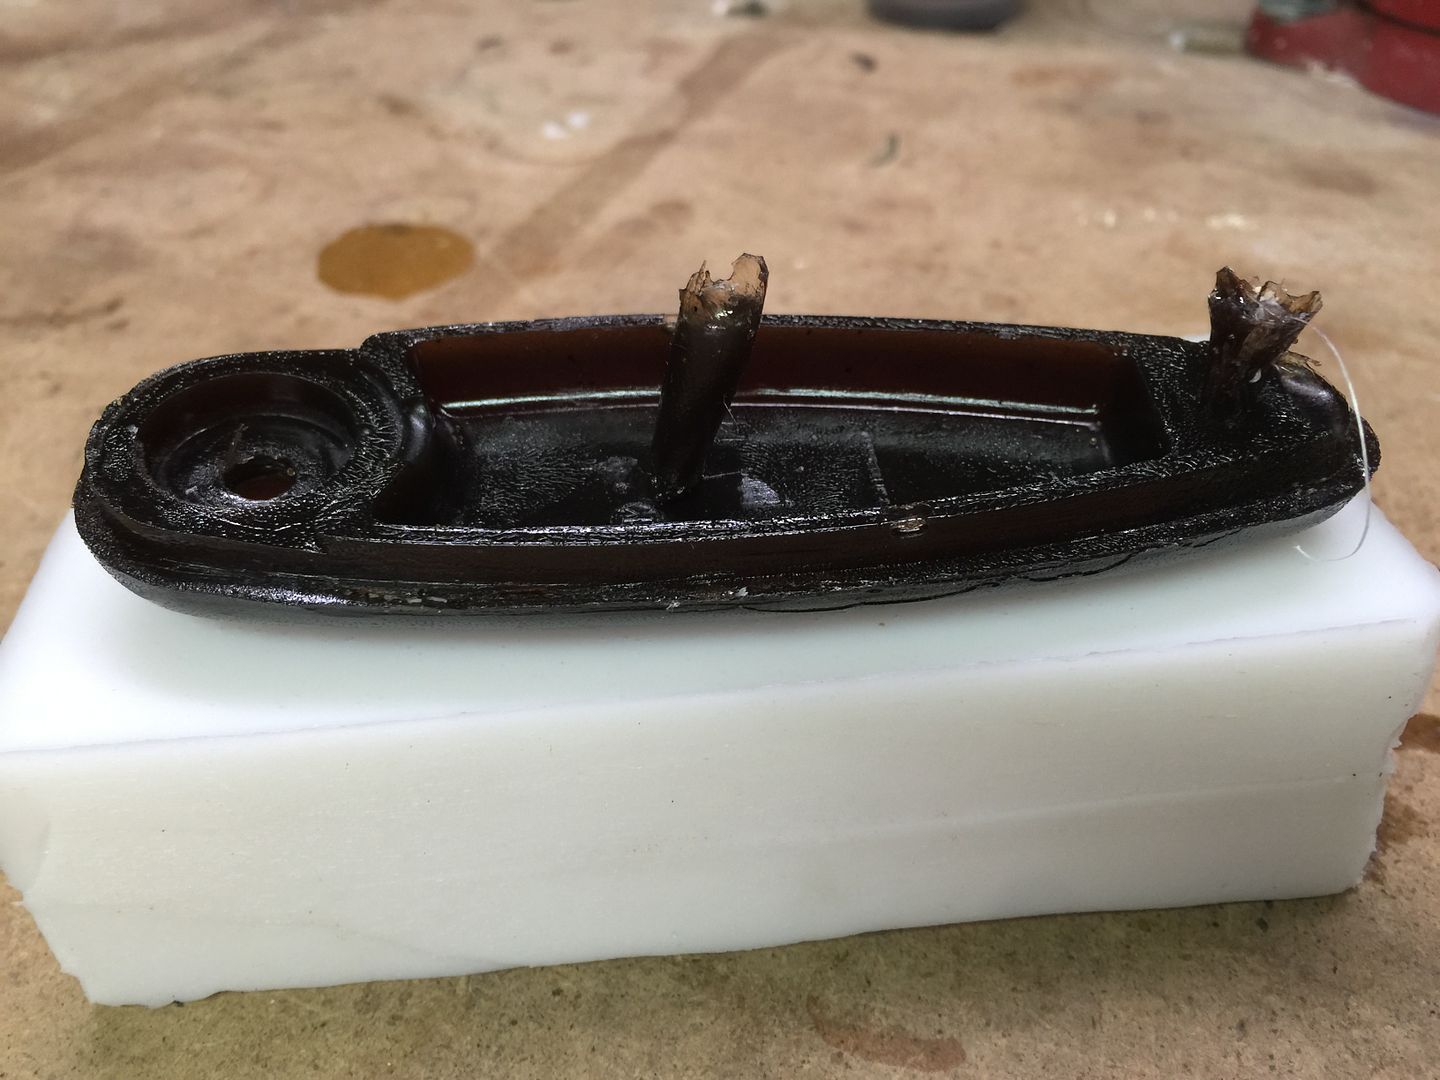
The release agent did not do anything with the two halves. I had to cut them apart until I could pull them apart enough to get the model out. I did get excited when I cut the model out though. It actually looked like it may have turned out good. Then under closer inspection, I could see that in a couple of spots that the silicone had started to seep down behind the model. This left small lumps on the mold surface. I had hoped that the release agent would have allowed me to peel these off, but they seem to be melted in. I may try to cut them away, but more then likely I will ruin the mold. If you look closely at the third picture you will see what I mean. I am going to pour a butt plate out of it no matter what just for the experience.
|
|
|
|
[#3]
Are you getting your stuff from smooth-on? What did you use for a release agent?
|
|
|
|
[#4]
I'm using hobby store supplies, which I'm sure is part of the issue.
|
|
|
|
[#5]
I found that it is very important when casting the part that it not be released until the cast is complete that will avoid seepage, however modeling clay can be used as an added measure if you are pouring a replacement half. In the past I used release agent Synlube 531 which is basically MEK and dissolved paraffin, when brushing it on allowing it to dissolve some of the clay and brushing it all surfaces helped ensure clean part separation. I also like to use engineered wood like shelves to build my boxes because it is cheap, flat, pretty heavy, not affected by solvents, and its easily relieved when the part has a center parting line. Finally I found that letting the cast bind to the box and designing the mold as such prevented the mold from being deformed which can occur with just the slightest outside pressure, just its own weight with a void in the middle will have some sag..
If there is a mistake to be made I made it and invented some new ones I'm sure, I made a pile of burned parts before getting a process down and made some nice pieces. Is your final part going to be rubber or solid? |
|
|
|
[#6]
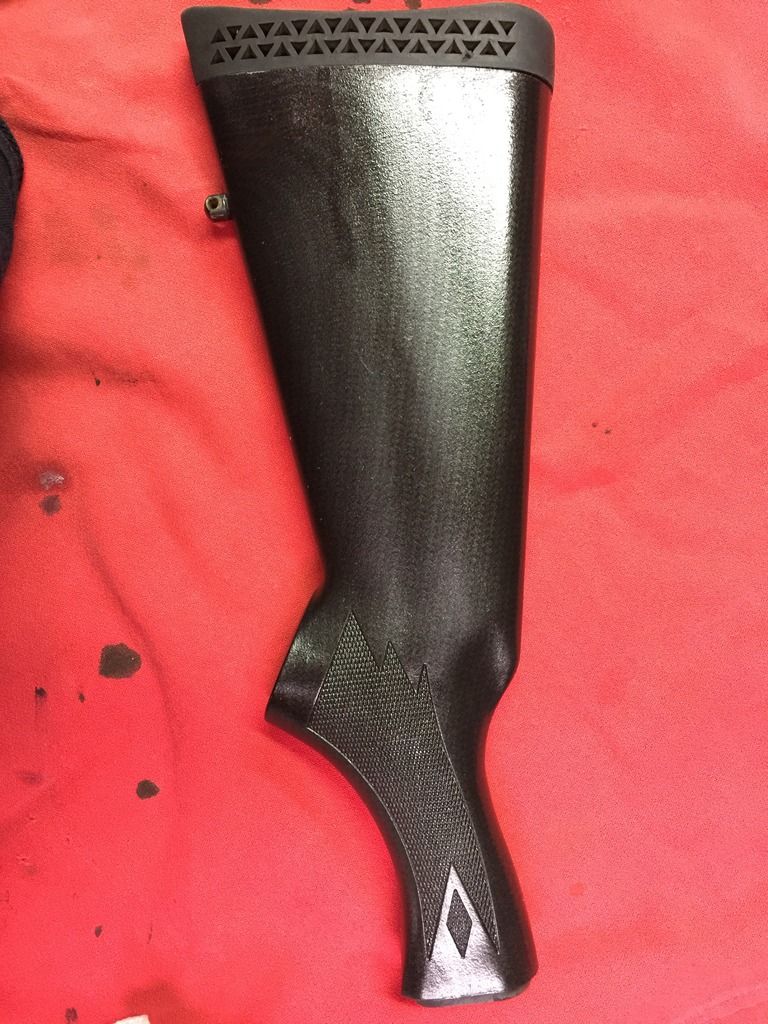
Solid fiber glass rosin with mat strips in it. I believe that is what the originals were.
|
|
|
|
[#7]
Tagging in for the goodness
|
|
|
|
[#8]
Been on vacation, but stopped home for a couple days. I decided to give the flaws a heavy dose of friction. I rubbed the edges hard and little by little the over spill came off. When I get back home I will clean up any smaller spots I might have missed and try a pour.
|
|
|
|
[#9]
Looking forward to new pics.
|
|
|
|
[#10]
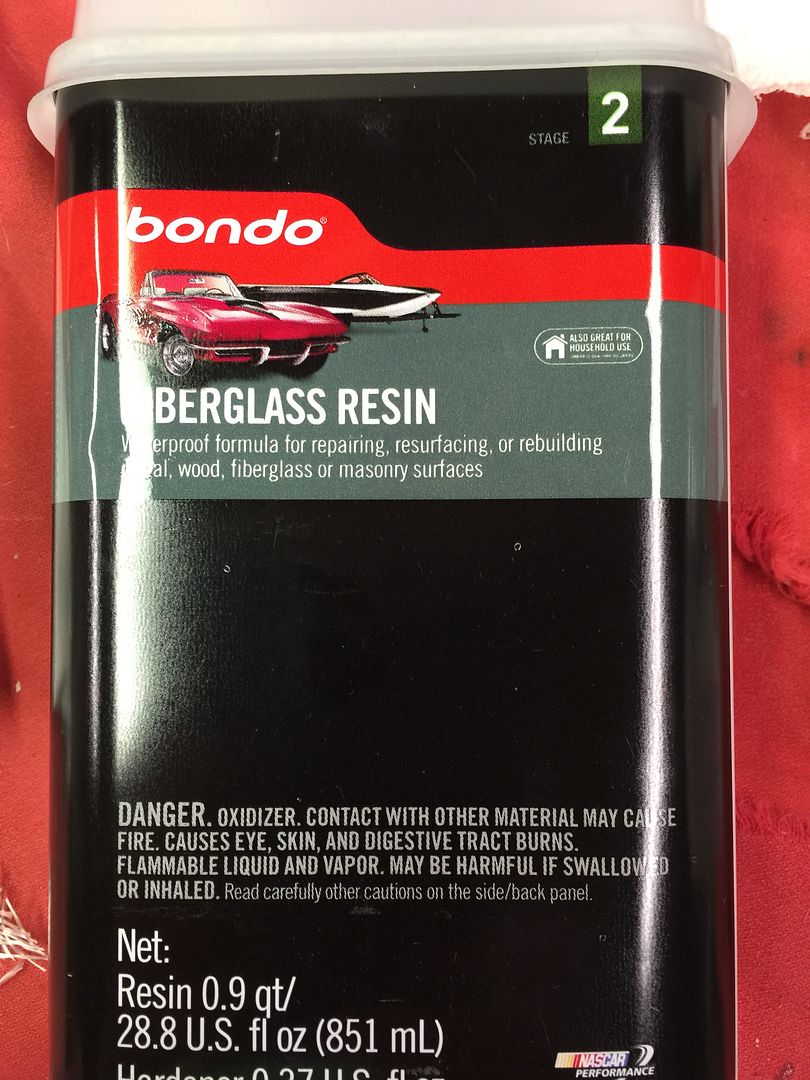
Ok, first attempt at some type of casting. Remember, I have never done anything like this before, so no clue how it will turn out...
I just bought a fiberglass automotive repair kit. I cut the mat up into small pieces and mixed per the instructions. I place the glass in the mold and sealed it. Then I poured, stopped and flipped the mold in all directions, poured some more and repeated till full. At that point, I placed the mold on a filling air compressor to get bubbles out and added more till it was full. I'll open the mold tomorrow and see what I end up with. 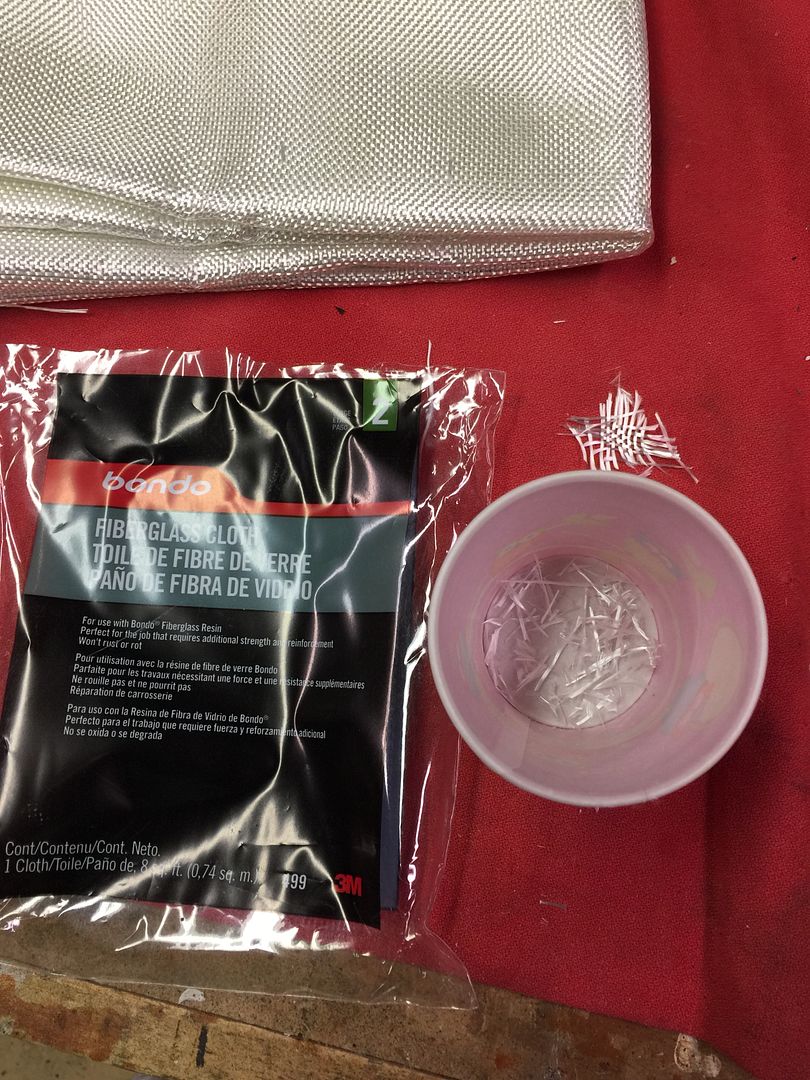

|
|
|
|
[#11]
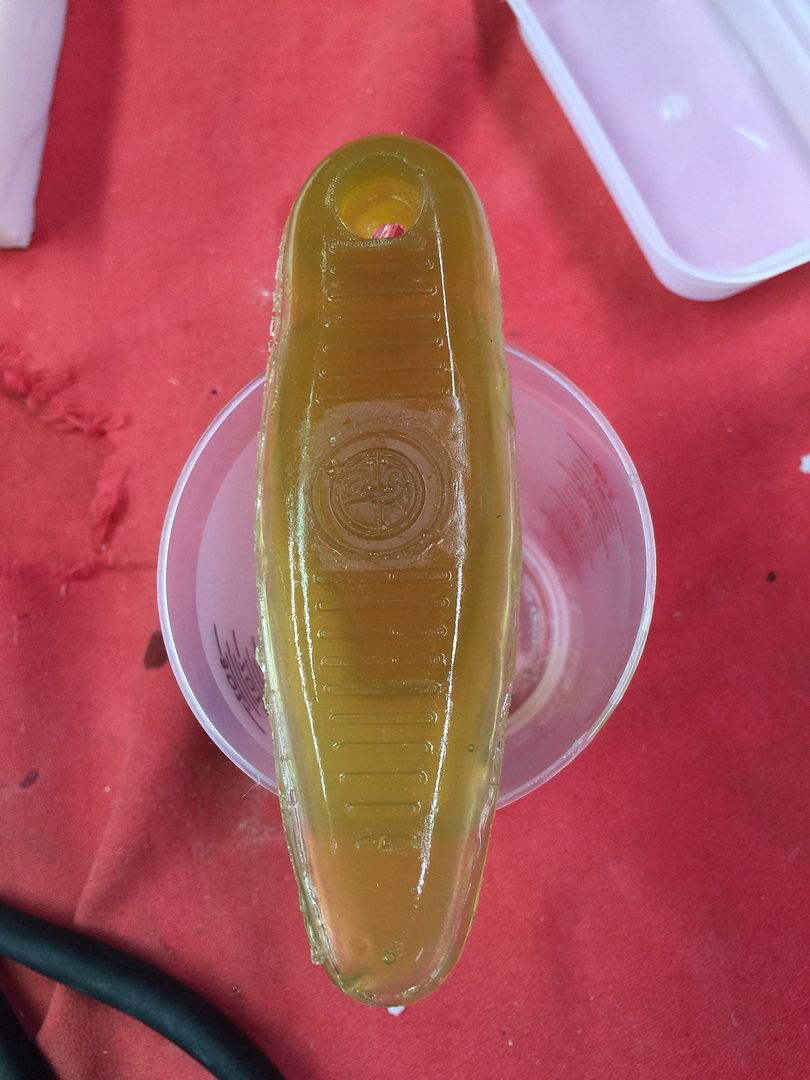
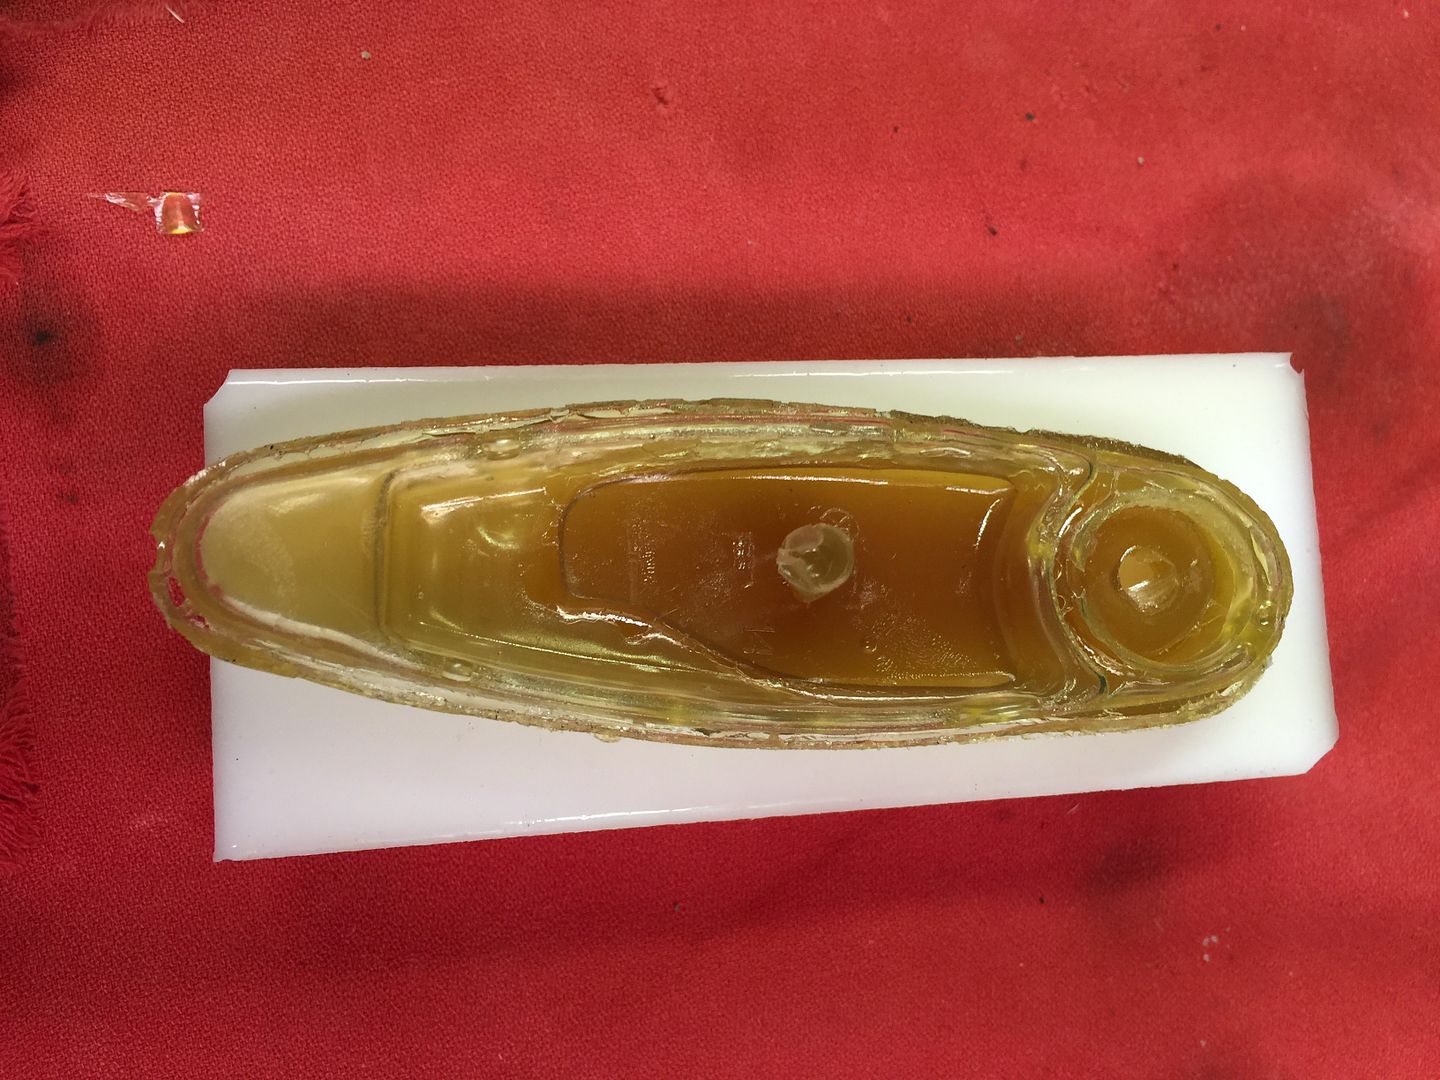
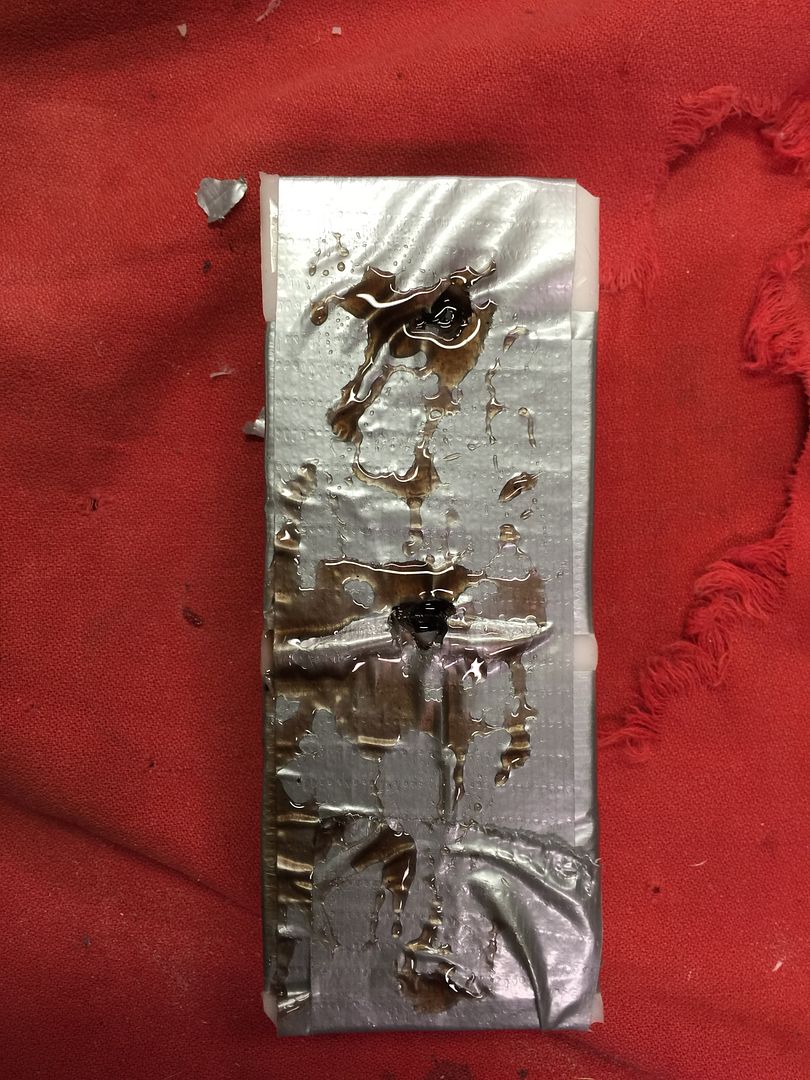
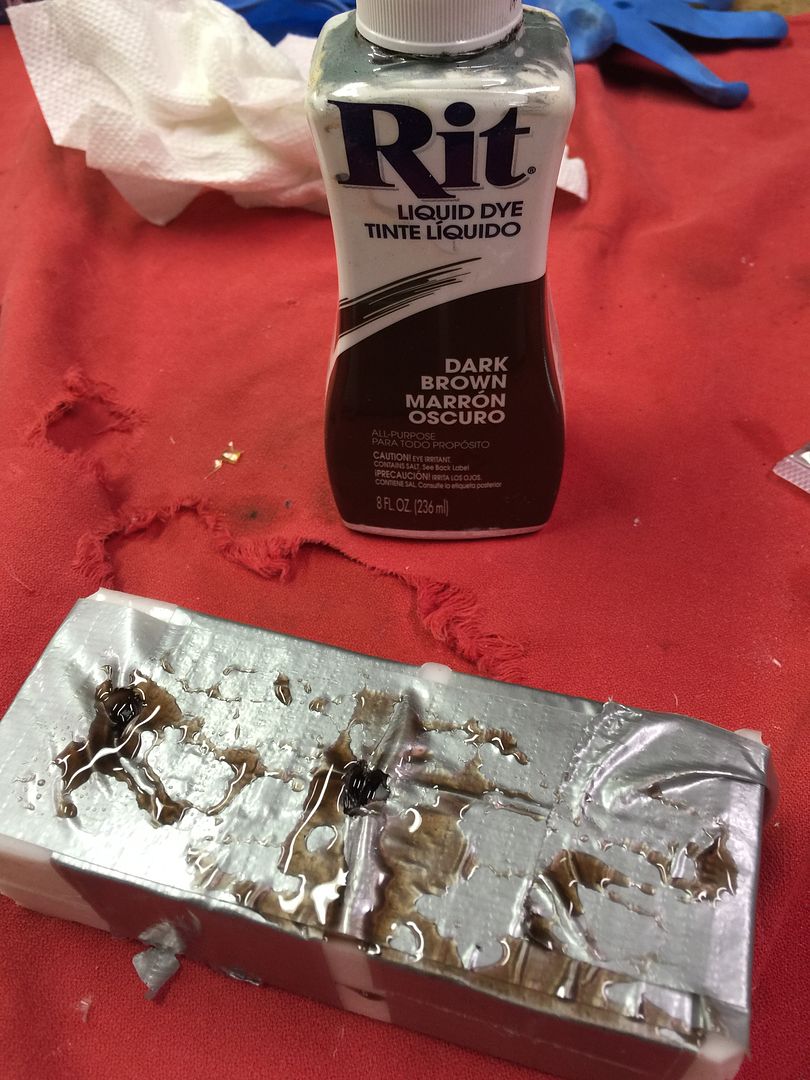
Well, I pull the first cast early. I knew there was some type of problem because it only took part of the volume I measured for it. When I pulled it out, there was a lot of air in the top half of the cast. I am suprized at how well the emblem looks though. The color is too honey tone as well, but the full shape is there. To try to fix the problems, I cut another hole in the highest point of the mold. I used this as an air bleading vent. I also tried mixing in a touch of dark brown dye to see what will happen. In a couple of hours I should have a better idea if I am heading in the right direction.
|
|
|
|
[#12]
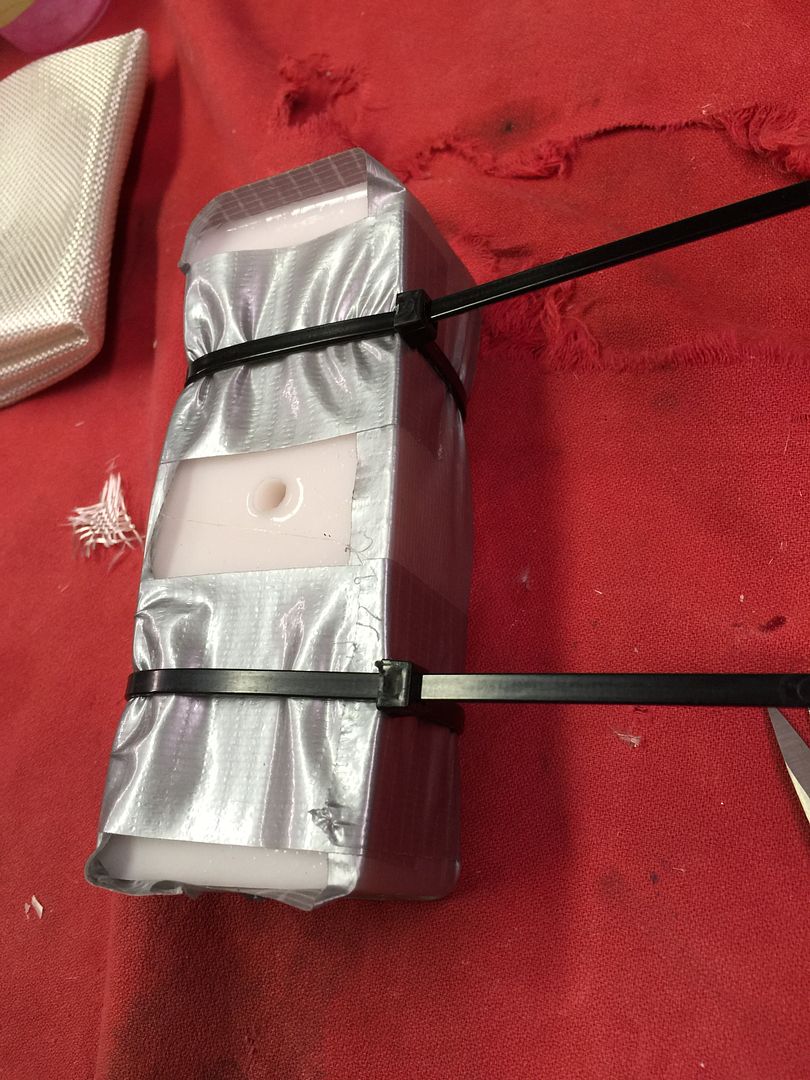
Try pouring the material into the outside half of the mold, tilt the mold around to coat the inside and to release any big bubbles, then drop the inside half of the mold on top. Once you have a complete part weigh it and when you pour the next measure about 10% more, also cut a small gate to allow excess to escape. You can see how on the first attempt the zip ties deformed the mold and resulting part.
|
|
|
|
[#13]
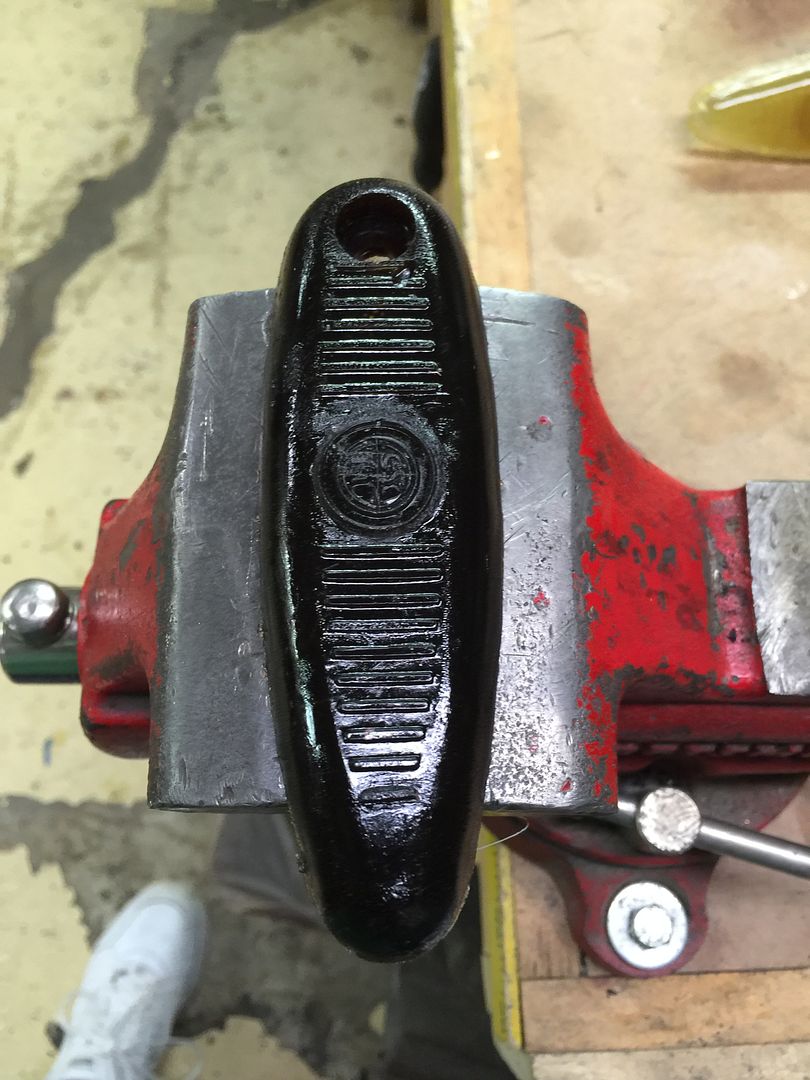
Agree on the zip ties, I did not use them on the second attempt. Attempt two turned out much better. In the pictures it is still tacky, but is a complete cast. It is a little darker then I want, but it should give me something to learn finishing on. I figure a light sanding and a buff when it is fully cured. Then next one I will put more glass in and just a drop of brown dye.
|
|
|
|
[#14]
Looking good!! I'm interested to see what it cleans up like!
|
|
|
|
[#15]
Yea, I think this is going to work. I spent 15 minutes wet sanding with some 400 grit sand paper. All the casting flaws came right off. I did not use a perfect butt pad for the mold and the cast has all the same flaws (some dry rot marks) as the original (as expected). I then took some time to sand the original flaws out of the cast. It worked well, but does decrease the overall size. Either a better butt to mold or some reshaping of the stock to better mate to this casting will be required. I then buffed it quickly with white rouge to see what I missed. I will need to spend more time on the area around the emblem on the final cast if I use the current mold. Now the bad... The color is just too dark for me on this one. I need more translucency in color for what I'm looking for. There are also a couple of air bubble flaws that I believe I know how to fix. First picture is after the quick wet sand, then the second is after a polish. I also have thought about shooting it with clear to see what result I get. The last one is to show how I removed a little size and fit on the modified prototype stock. It is just loosely laying in place, so it is not as bad a lip as it looks. I think I will try another cast at this point and see if I can get it a little closer to what I'm looking for.

|
|
|
|
[#16]
Wow! Looks great. You've come a long way. Keep going and don't rush things.
|
|
|
|
[#17]
I ordered two different hydro dip patterns to experiment with on the stock and hand guard. I've never tried anything like that, but it is another chance to learn and play. No updates on the butt as I have not a chance to pour a new one.
|
|
|
|
[#18]
Quoted:
Couple of items in the works on this. First the branding stamp came. Very surprised at how well it turned out. I experimented with it free hand on a scarp butt plate I had. It worked pretty good. It made the rubber very dull, which would not be an issue if I paint it or make a mold. I buffed the spot to see what would happen and as expected it removed some of the detail. I also cut a couple of the fins off the scrap butt to epoxy on to the model to extend them in the same way as the prototype. Next is to get the courage up to burn it into the stock I made. Then I will try to make a mold. http://i1302.photobucket.com/albums/ag132/58Bisc/guns/4E58FFBA-03D3-43D4-B36F-6F361C959E87_zpsvalpf7hx.jpg http://i1302.photobucket.com/albums/ag132/58Bisc/guns/86419160-BB13-45D4-AB84-E2098A5E1A53_zpsho0gpuo5.jpg Where did you order the branding stamp, and how expensive was it (if you don't mind me asking)? |
|
|
|
[#19]
Quoted:
Where did you order the branding stamp, and how expensive was it (if you don't mind me asking)? Quoted:
Quoted:
Couple of items in the works on this. First the branding stamp came. Very surprised at how well it turned out. I experimented with it free hand on a scarp butt plate I had. It worked pretty good. It made the rubber very dull, which would not be an issue if I paint it or make a mold. I buffed the spot to see what would happen and as expected it removed some of the detail. I also cut a couple of the fins off the scrap butt to epoxy on to the model to extend them in the same way as the prototype. Next is to get the courage up to burn it into the stock I made. Then I will try to make a mold. http://i1302.photobucket.com/albums/ag132/58Bisc/guns/4E58FFBA-03D3-43D4-B36F-6F361C959E87_zpsvalpf7hx.jpg http://i1302.photobucket.com/albums/ag132/58Bisc/guns/86419160-BB13-45D4-AB84-E2098A5E1A53_zpsho0gpuo5.jpg Where did you order the branding stamp, and how expensive was it (if you don't mind me asking)? It is a "custom" wax stamp off of eBay. They are around $20 shipped out of China. Took a week or two to get the instructions on exactly what I wanted right,then get it made and shipped. I used the stright on picture we had and sized and cropped it to scale for them to use as a pattern. When I got it, I add an 6 inch piece of threaded rod between the handle and stamp so I could heat it up to brand. In the end, I used it as a stamp in the mold maker, so that step was not really needed. |
|
|
|
[#20]
You my good sir are awesome! I like it. I can probably dig up another pad or two in good condition if you need.
|
|
|
|
[#21]
Quoted:
You my good sir are awesome! I like it. I can probably dig up another pad or two in good condition if you need. Thanks, I'll let you know. I'm going to build one out with what I have and see where I need additional work. I've been studying the hydro dip. I have a hydro manufacturing company trying to match the base coat and tinted clear fo me. Their pattern is very close the the correct weave. I ordered a udipit kit of just a base carbin fiber to learn and play with while I wait. Might try it on some M4 stocks I have. I figured I'd keep the thread going just as a reason to keep working on it. |
|
|
|
[#22]
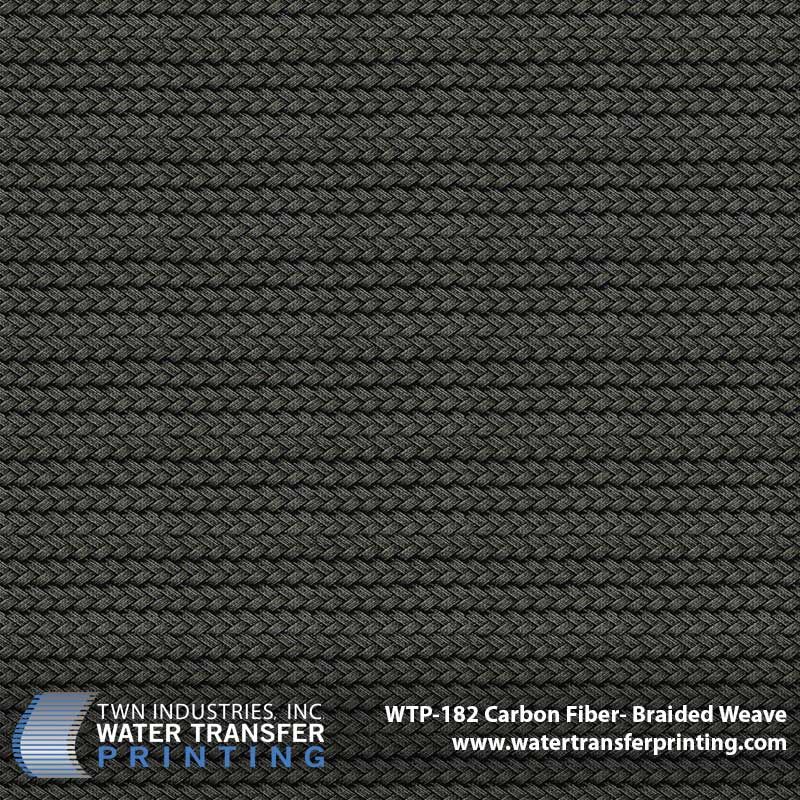
The practice wrap should be here by Monday. It is just modern carbon fiber pattern, but it will let me play with the base coat color and clear finish. I'm going to start on an old set of synthetic 870 stocks I have laying around. I have WPT-182 carbon fiber braided weave on order for the final attempt and hopefully the finished product.
I poured a couple more butts, the second one from the left was a very good one. It has a flaw of the glass cloth in the emblem. I just another one that is still in the mold. I used wine colored dye on this one. I want to see if it is closer in color then the dark brown. 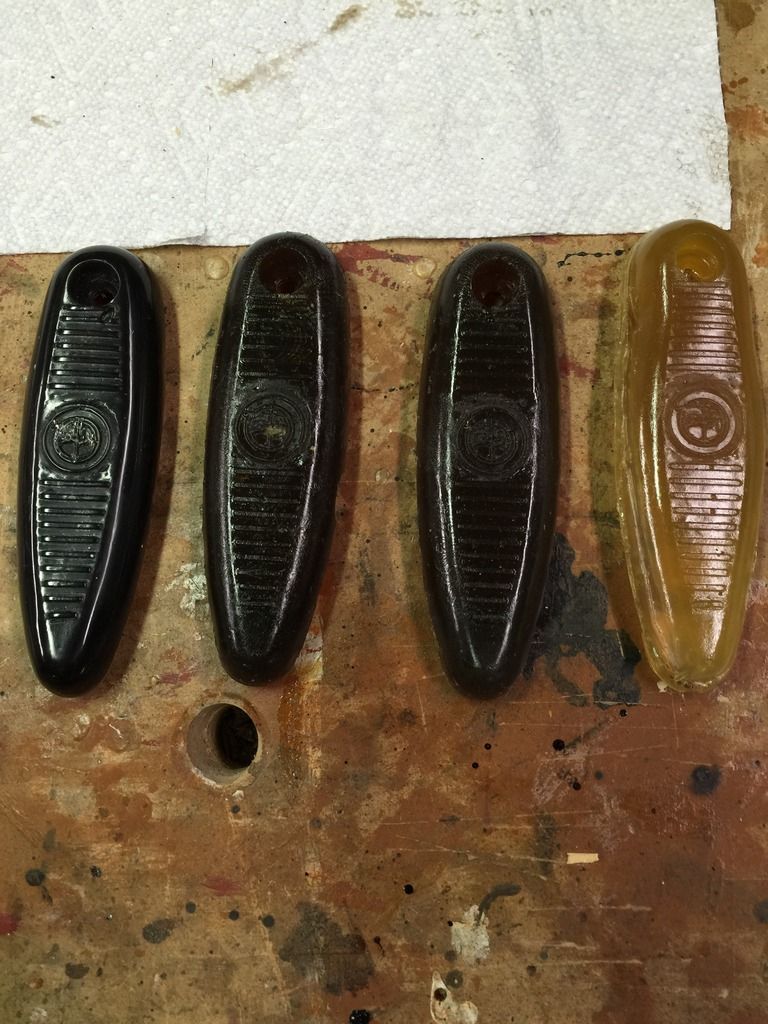
|
|
|
|
[#23]
|
|
|
|
[#24]
I don't think I am ready to tackle making real carbon fiber. I think the originals were more rosin and mat then true carbon fiber. I would not know where to even start with making a stock.
Pulled the wine color cast and it had the same issue with the emblem. I have been loading the mold up with glass mat and it is blocking the rosin from filling in the fine details. I'll have to pour in some rosin before I add the mat next time. |
|
|
|
[#25]
Carbon black is a pigment you mix with resins to get a uniform black color
|
|
|
|
[#26]
Quoted:
I don't think I am ready to tackle making real carbon fiber. I think the originals were more rosin and mat then true carbon fiber. I would not know where to even start with making a stock. Pulled the wine color cast and it had the same issue with the emblem. I have been loading the mold up with glass mat and it is blocking the rosin from filling in the fine details. I'll have to pour in some rosin before I add the mat next time. Pour half the resin, tamp in the glass, pour in the rest and then closed the mold, otherwise without a vacuum you won't be able to avoid voids. |
|
|
|
[#27]
So I've given the practice hydro dip my first try. It is just a basic carbon fiber pattern for now. I must admit it is not as easy as it looks. I intend to keep practicing until I get it right. I did no prep on the old stock set other then clean, prime and paint them before dipping. I made every rookie mistake you can on the dipping.
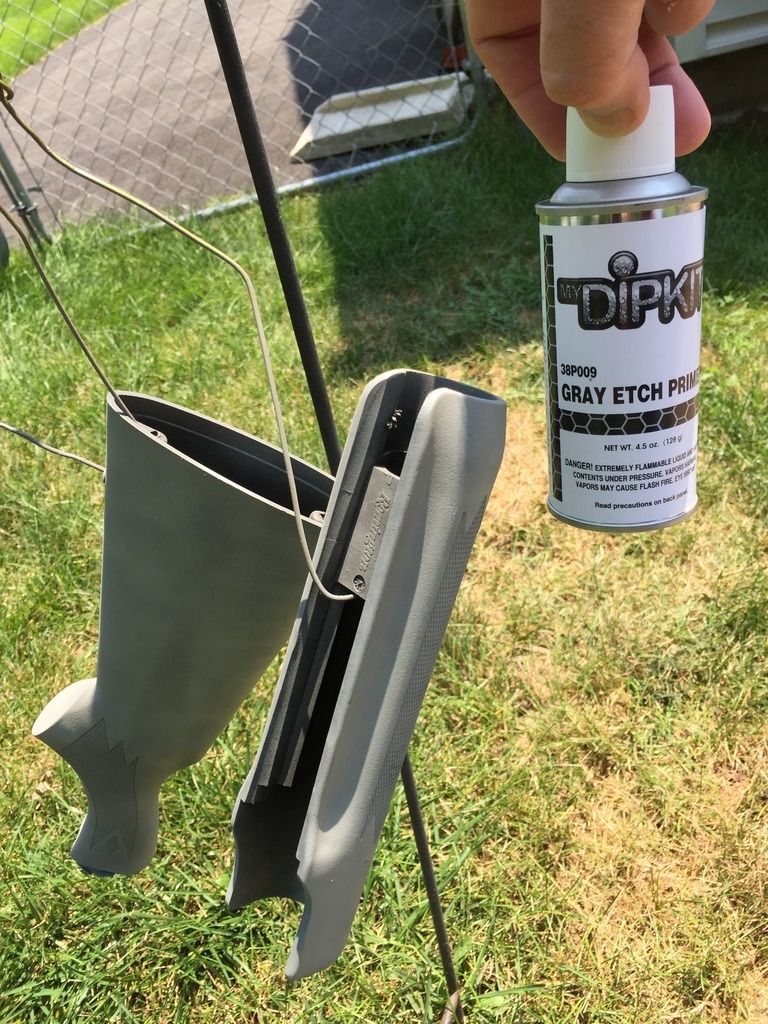

This is an updated shot of the prototype stock completed and primed. It is ready for a dip, but I'm not... 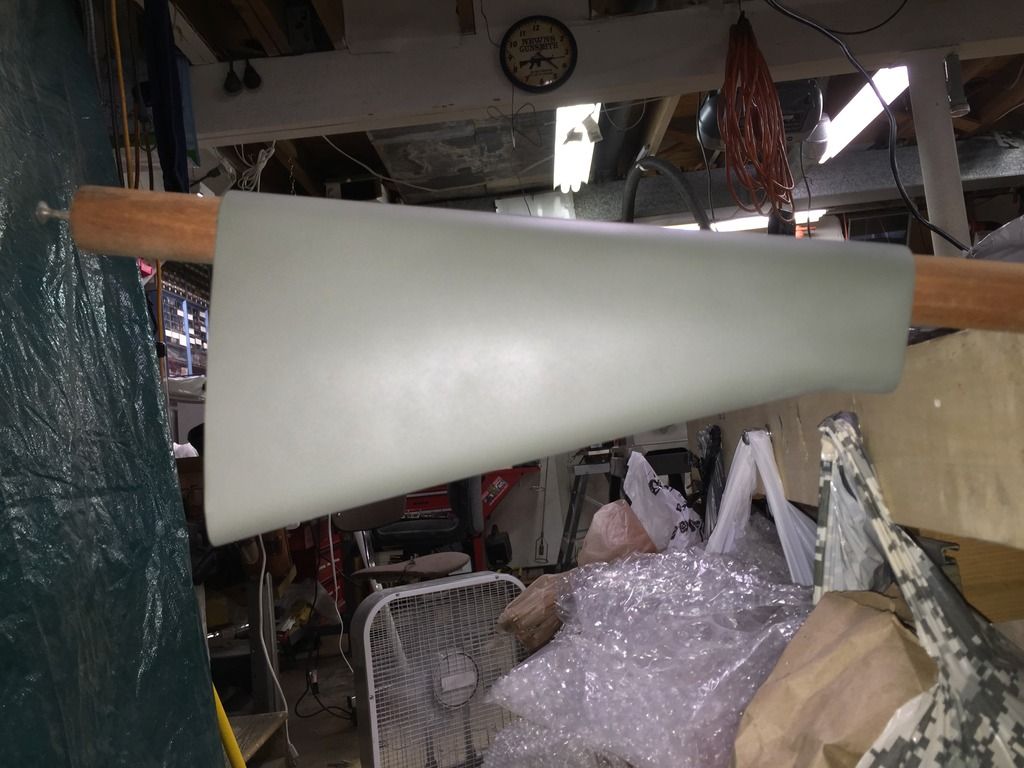
|
|
|
|
[#28]
Lookin good.
|
|
|
|
[#29]
This is the pattern I am going to use on the prototype stock. I already bought it and I don't want to waste it while I learn. At some point I will teat it with the base coat I have, which BTW is a color match of a brown type A. The WTP-182 pattern in real life seems a little smaller then we need, but I will get a better sense of scale after I try it. I also think I may have to tint the clear when I am done to get the right tone.
|
|
|
|
[#30]
I have tried and tried to find a weave compatible with the AR10 and proto AR15 stocks, all have been either too small or too big, I'm still looking...
ETA - PS Are we sure the fabric is carbon and not glass? |
|
|
|
[#31]
I don't think CFRP was around back then.
|
|
|
|
[#32]
Quoted:
I have tried and tried to find a weave compatible with the AR10 and proto AR15 stocks, all have been either too small or too big, I'm still looking... ETA - PS Are we sure the fabric is carbon and not glass? Looks like early stocks were fiberglass. Info found here: http://www.ar15.com/forums/t_3_123/241681_0Colt_s_USGI_M16_series_variation_guide_edition_IV.html |
|
|
|
[#33]
Prototype are not type A, but I do believe the prototype stocks were glass braid in rosin. Just no way to get that look in wrap. I thought about a custom run, but the cost is nuts. That is why I am trying brown stock color match base, Braid carbon fiber wrap with a tinted clear top coat. Trying to get the look of the color close. Problem is I have an engineers eye, not an artists eye...
|
|
|
|
[#34]
Quoted:
Prototype are not type A, but I do believe the prototype stocks were glass braid in rosin. Just no way to get that look in wrap. I thought about a custom run, but the cost is nuts. That is why I am trying brown stock color match base, Braid carbon fiber wrap with a tinted clear top coat. Trying to get the look of the color close. Problem is I have an engineers eye, not an artists eye... I just thought the info would be somewhat helpful. Myself, I would have the slightest clue let alone knowledge on the stocks. My retro likes are limited to carbines. I am learning a lot of all around info on these older rifles while hanging out in here. Other threads, my post would have elicited some seriously harsh responses for lacking supreme knowledge You need my wife's eye. First time staining wood was her attempt to match oak stair treads to match our Brazilian Cherry flooring I laid. Hit it on the first try with the stain she thought would make the match. Other than grain, you can't tell the two apart. |
|
|
|
[#35]
Quoted:
I just thought the info would be somewhat helpful. Myself, I would have the slightest clue let alone knowledge on the stocks. My retro likes are limited to carbines. I am learning a lot of all around info on these older rifles while hanging out in here. Other threads, my post would have elicited some seriously harsh responses for lacking supreme knowledge You need my wife's eye. First time staining wood was her attempt to match oak stair treads to match our Brazilian Cherry flooring I laid. Hit it on the first try with the stain she thought would make the match. Other than grain, you can't tell the two apart. Quoted:
Quoted:
Prototype are not type A, but I do believe the prototype stocks were glass braid in rosin. Just no way to get that look in wrap. I thought about a custom run, but the cost is nuts. That is why I am trying brown stock color match base, Braid carbon fiber wrap with a tinted clear top coat. Trying to get the look of the color close. Problem is I have an engineers eye, not an artists eye... I just thought the info would be somewhat helpful. Myself, I would have the slightest clue let alone knowledge on the stocks. My retro likes are limited to carbines. I am learning a lot of all around info on these older rifles while hanging out in here. Other threads, my post would have elicited some seriously harsh responses for lacking supreme knowledge You need my wife's eye. First time staining wood was her attempt to match oak stair treads to match our Brazilian Cherry flooring I laid. Hit it on the first try with the stain she thought would make the match. Other than grain, you can't tell the two apart. I was hoping my reply did not come off harsh sounding, as it was not intended that way. I came here a few years ago with zero knowledge of AR's of any type and the retro hive has taught me well. I always attempt to return the favor. |
|
|
|
[#36]
Quoted:
I was hoping my reply did not come off harsh sounding, as it was not intended that way. I came here a few years ago with zero knowledge of AR's of any type and the retro hive has taught me well. I always attempt to return the favor. Quoted:
Quoted:
Quoted:
Prototype are not type A, but I do believe the prototype stocks were glass braid in rosin. Just no way to get that look in wrap. I thought about a custom run, but the cost is nuts. That is why I am trying brown stock color match base, Braid carbon fiber wrap with a tinted clear top coat. Trying to get the look of the color close. Problem is I have an engineers eye, not an artists eye... I just thought the info would be somewhat helpful. Myself, I would have the slightest clue let alone knowledge on the stocks. My retro likes are limited to carbines. I am learning a lot of all around info on these older rifles while hanging out in here. Other threads, my post would have elicited some seriously harsh responses for lacking supreme knowledge You need my wife's eye. First time staining wood was her attempt to match oak stair treads to match our Brazilian Cherry flooring I laid. Hit it on the first try with the stain she thought would make the match. Other than grain, you can't tell the two apart. I was hoping my reply did not come off harsh sounding, as it was not intended that way. I came here a few years ago with zero knowledge of AR's of any type and the retro hive has taught me well. I always attempt to return the favor. No, not at all. This group is a pretty damn good group to hang out with. |
|
|
|
[#37]
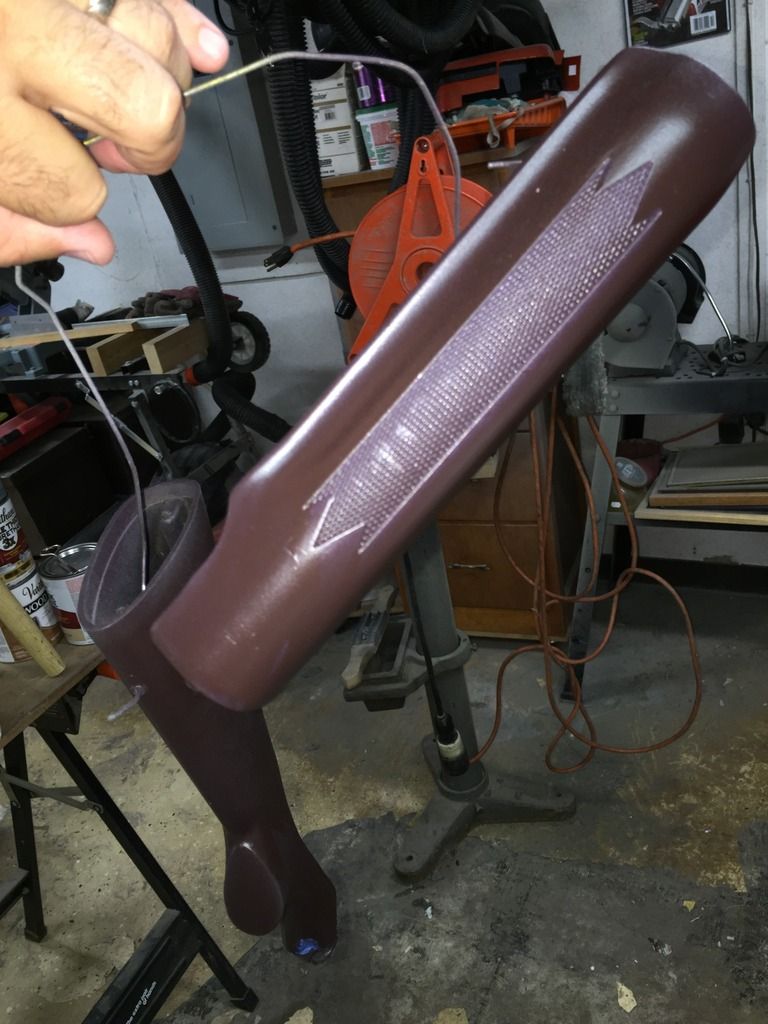
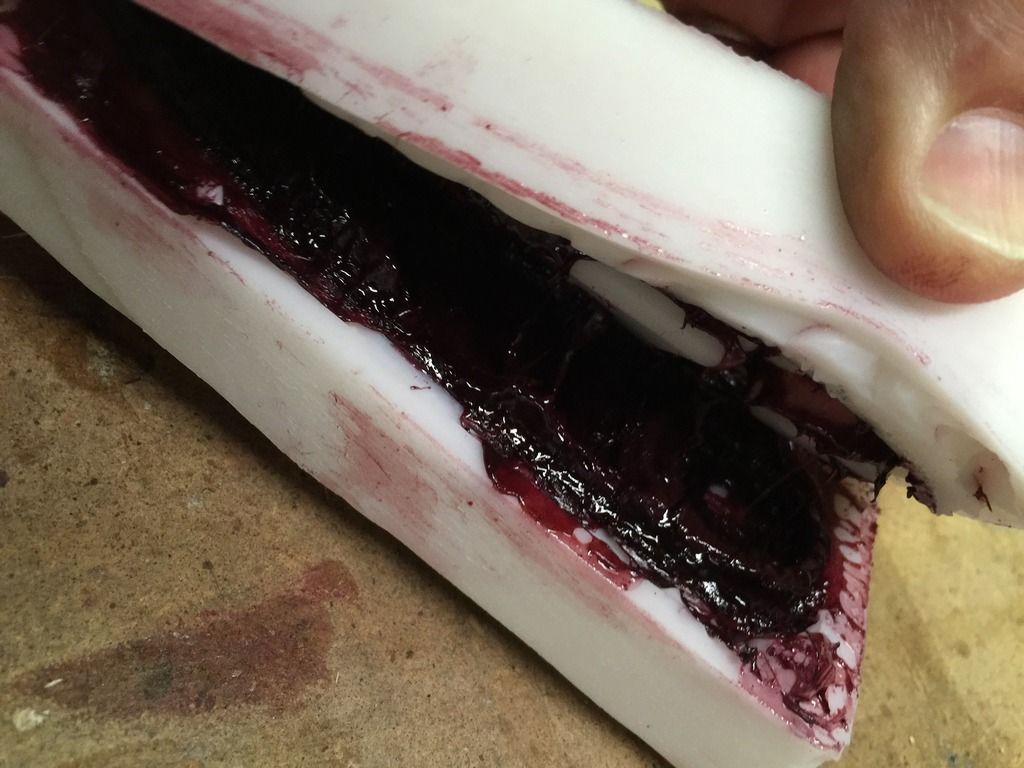
I'm having fun showing you guys all my screw ups. This one was adding too much dye. I was trying to get the color a very dark red/brown. The extra dye threw the whole mix off and it stayed gooey like taffy. It is going to be a big pain to get the mold clean after this mess... I spent a ton of time getting all the air bubbles out and I used a lot of glass mat. I was thrilled with the results... Until a week later it still had not hardened.
|
|
|
|
[#38]
|
|
|
|
[#39]
Use some black in the brown it will darken it up and help use less dye.
|
|
|
|
[#40]
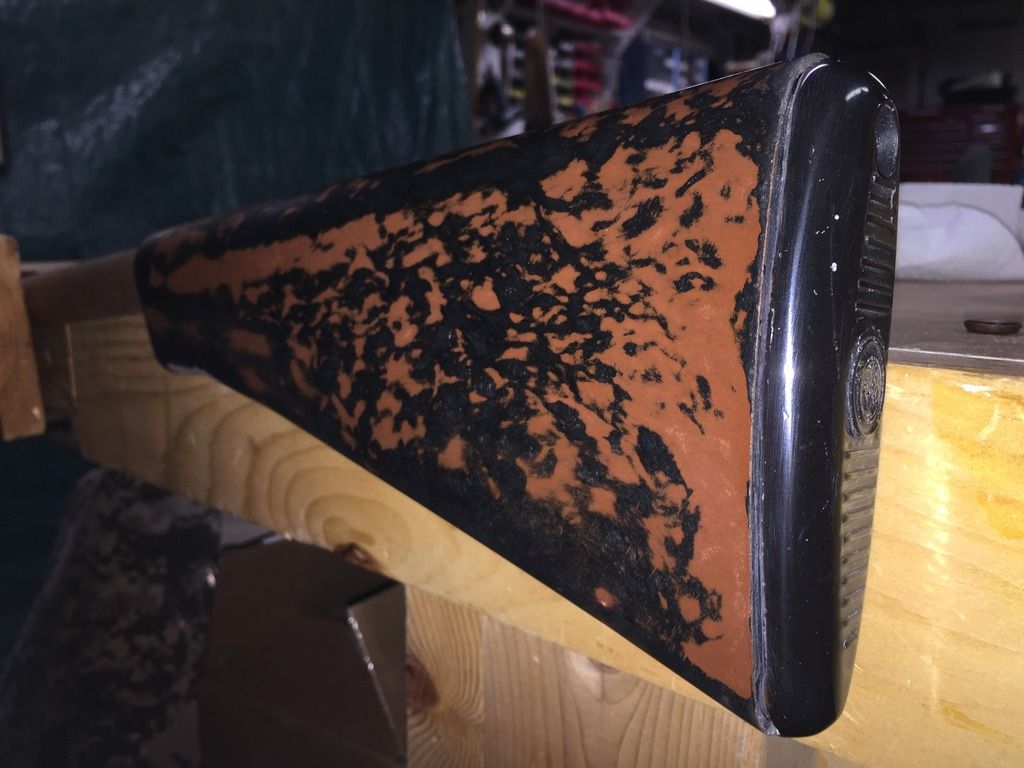
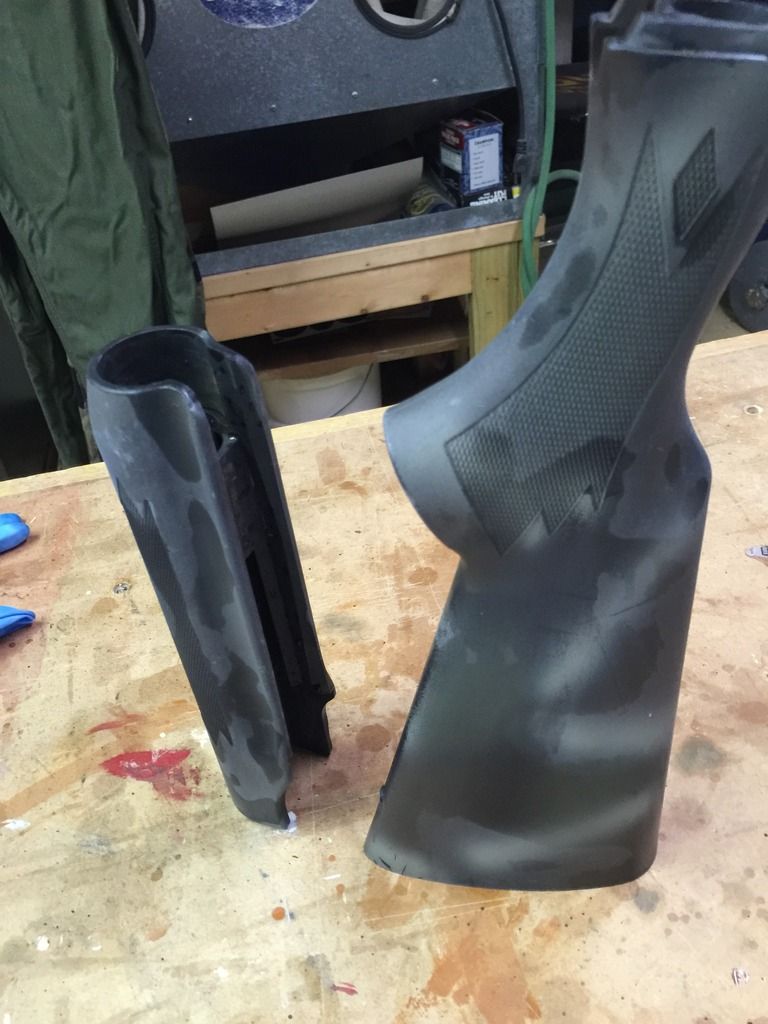
On a happier note... The stock and hand guard are ready for finished painting before dipping. I have to decide what base coat I want to use. Now I need more practice trying to get the dipping down. No question it would just be easier to pay someone, but where is the fun in that.
|
|
|
|
[#41]
That's reall an awesome brown and black worn look, you should just clear coat it and finish the gun in that style.
|
|
|
|
[#42]
Any updates? I am very interested in how it's turning out.
|
|
|
|
[#43]
Quoted: Any updates? I am very interested in how it's turning out. |
|
|
|
[#44]
I got the mold cleaned out and it is still very usable. Some of it finally hardened enough to come out in one piece. I created a water tub set up to do a better job on the dip. I'm kind of stumped on what base coat color to use. I was not impressed with the brown stock color match under coat. May try black base with the tinted brown clear. I have a couple of other projects going on at the same time and I have been working on them. I will get back to this one soon.
|
|
|
|
[#45]
Quoted: I got the mold cleaned out and it is still very usable. Some of it finally hardened enough to come out in one piece. I created a water tub set up to do a better job on the dip. I'm kind of stumped on what base coat color to use. I was not impressed with the brown stock color match under coat. May try black base with the tinted brown clear. I have a couple of other projects going on at the same time and I have been working on them. I will get back to this one soon. Matt |
|
|
|
[#46]
Just keeping the thread alive. Been busy with other builds, but I am get ready to get back to it. I was able to see and take pictures of prototype serial number two. I saw and took pictures of number three earlier this year. Number two has a darker in color butt plate then number three. I have one that I already made that looks to be about right in color. I'm going to see if I can get a better, cleaner pull in that darker color.
|
|
|
|
[#47]
I just had to add this link in my thread. It has complete prototype fire control group pictures.
http://www.ar15.com/forums/t_3_123/705274_.html&page=1&sr=0 |
|
|
|
[#48]
No new work on the stocks, but I picked up two original Armalite waffle magazines.
|
|
|
|
[#49]
Quoted:
No new work on the stocks, but I picked up two original Armalite waffle magazines. As soon as they come I will post pictures. You work about as quick as I do on my projects |
|
|
|
[#50]
I may be doing something very similar except mine will be a Stoner 63 butt pad, whatever they look like.

Keep up the good work. |
|
|
 Win a FREE Membership!
Sign up for the ARFCOM weekly newsletter and be entered to win a free ARFCOM membership. One new winner* is announced every week!
You will receive an email every Friday morning featuring the latest chatter from the hottest topics, breaking news surrounding legislation, as well as exclusive deals only available to ARFCOM email subscribers.

AR15.COM is the world's largest firearm community and is a gathering place for firearm enthusiasts of all types.
From hunters and military members, to competition shooters and general firearm enthusiasts, we welcome anyone who values and respects the way of the firearm.

Subscribe to our monthly Newsletter to receive firearm news, product discounts from your favorite Industry Partners, and more.
Copyright © 1996-2024 AR15.COM LLC. All Rights Reserved.
Any use of this content without express written consent is prohibited.
AR15.Com reserves the right to overwrite or replace any affiliate, commercial, or monetizable links, posted by users, with our own.


