|
[#1]
Quoted:
I'm copying this!!! Awesome! I'll have to figure out what Mat bored is... ETA...What was the total cost of each supplies? I see the replicas are $20 before shipping.... Quoted:
Quoted:
I bought some sweet full size replicas of Constitution, Declaration of Independance, and BoR off Amazon for $19, bought some frames from Michaels, and some Mat board and framed all three. Turned out pretty good. Amazon replicas ETA-Pix of framed docs. Sorry they are not better but the frames are 24x30 and rather large and trying to use an iphone and keep the glare to a minimum was not easy. The documents are printed on fake parchment and have been yellowed. They came in a tube and smelled of vinegar. They could have come out better if I had an way to mount the full document without the mat. Not bad for less that $150 for all three. Thinking about buying some of these docs as gifts. http://<a href=http://i299.photobucket.com/albums/mm281/fishstixphotos/image-9.jpg</a>" /> http://<a href=http://i299.photobucket.com/albums/mm281/fishstixphotos/image-10.jpg</a>" /> http://<a href=http://i299.photobucket.com/albums/mm281/fishstixphotos/image-7.jpg</a>" /> http://<a href=http://i299.photobucket.com/albums/mm281/fishstixphotos/image-6.jpg</a>" /> I'm copying this!!! Awesome! I'll have to figure out what Mat bored is... ETA...What was the total cost of each supplies? I see the replicas are $20 before shipping.... The 3 documents were $20, the three frames were bought at Michaels $100 (Buy one get one 1/2 off and a 40% coupon for the 3rd-they were $60 each before discount). The mat board is $8 each x 3. Total cost $144 |
|
|
|
[#2]
Quoted:
The 3 documents were $20, the three frames were bought at Michaels $100 (Buy one get one 1/2 off and a 40% coupon for the 3rd-they were $60 each before discount). The mat board is $8 each x 3. Total cost $144 Quoted:
Quoted:
Quoted:
I bought some sweet full size replicas of Constitution, Declaration of Independance, and BoR off Amazon for $19, bought some frames from Michaels, and some Mat board and framed all three. Turned out pretty good. Amazon replicas ETA-Pix of framed docs. Sorry they are not better but the frames are 24x30 and rather large and trying to use an iphone and keep the glare to a minimum was not easy. The documents are printed on fake parchment and have been yellowed. They came in a tube and smelled of vinegar. They could have come out better if I had an way to mount the full document without the mat. Not bad for less that $150 for all three. Thinking about buying some of these docs as gifts. http://<a href=http://i299.photobucket.com/albums/mm281/fishstixphotos/image-9.jpg</a>" /> http://<a href=http://i299.photobucket.com/albums/mm281/fishstixphotos/image-10.jpg</a>" /> http://<a href=http://i299.photobucket.com/albums/mm281/fishstixphotos/image-7.jpg</a>" /> http://<a href=http://i299.photobucket.com/albums/mm281/fishstixphotos/image-6.jpg</a>" /> I'm copying this!!! Awesome! I'll have to figure out what Mat bored is... ETA...What was the total cost of each supplies? I see the replicas are $20 before shipping.... The 3 documents were $20, the three frames were bought at Michaels $100 (Buy one get one 1/2 off and a 40% coupon for the 3rd-they were $60 each before discount). The mat board is $8 each x 3. Total cost $144 Thank you sir! |
|
|
|
[#3]
changed a lighting fixture in the kitchen
|
|
|
|
[#4]
Replaced the timing belt and water pump on my wife's Highlander. Took about 5 hrs total. Bought an Aisin timing belt kit from Rock Auto.
|
|
|
|
[#5]
Built Norm's New Yankee Workshop Assembly Table.
Good to get back in the shop making saw dust. |
|
|
|
[#6]
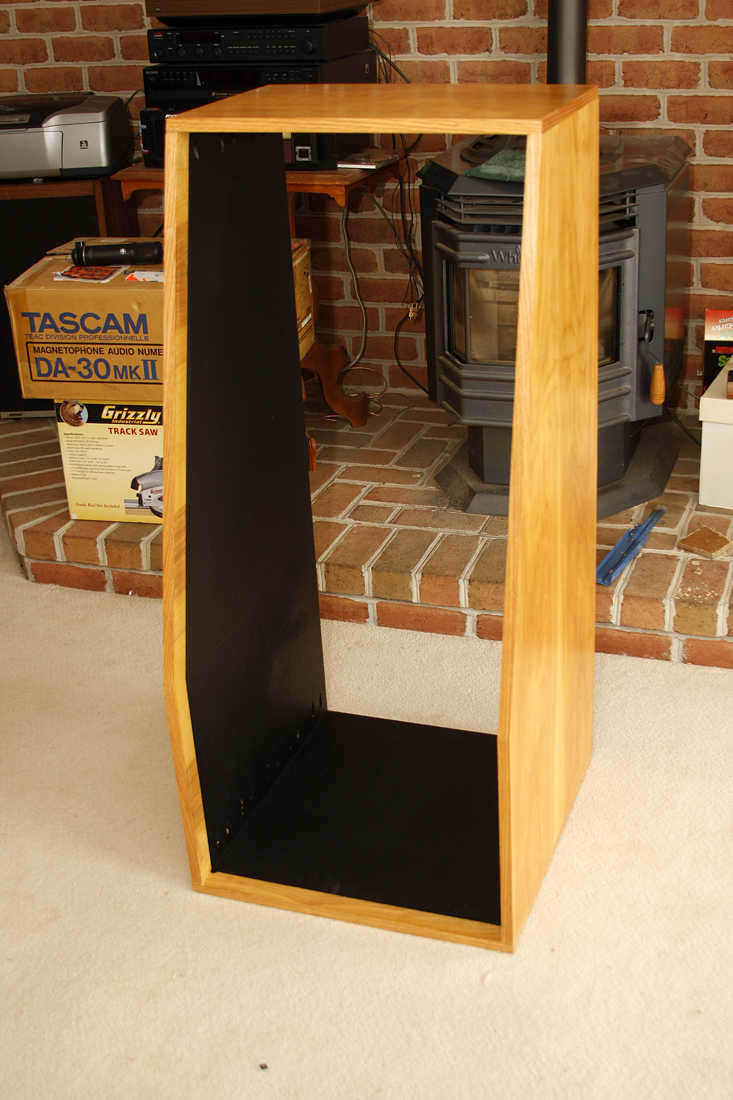
I put the finishing touches on an audio eqpt rack I'm building for the theater at my kids' school. Just waiting for the rack rails to get here and she'll be done.
|
|
|
|
[#7]
Pored concrete for out buffet table. It's dyed with quickrete charcoal color.

|
|
|
|
[#8]
Quoted:
Pored concrete for out buffet table. It's dyed with quickrete charcoal color. <a href="http://s530.photobucket.com/user/fireshaun/media/image_zps046bd4e2.jpg.html" target="_blank">http://i530.photobucket.com/albums/dd343/fireshaun/image_zps046bd4e2.jpg</a> Can't wait to see how that turns out, I've thought about doing a similar project. |
|
|
|
[#9]
Made a shelf to get the gas cans of the floor for the French cleat system I'm trying out. Also mounted the backpack blower to it as well. Very strong.

|
|
|
|
[#10]
Quoted:
Made a shelf to get the gas cans of the floor for the French cleat system I'm trying out. Also mounted the backpack blower to it as well. Very strong. <a href="http://s530.photobucket.com/user/fireshaun/media/image_zps8d06be67.jpg.html" target="_blank">http://i530.photobucket.com/albums/dd343/fireshaun/image_zps8d06be67.jpg</a> I like the gas can rack may try that. Made a rack for bathroom stuff .. old medicine cabinet was awful ugly 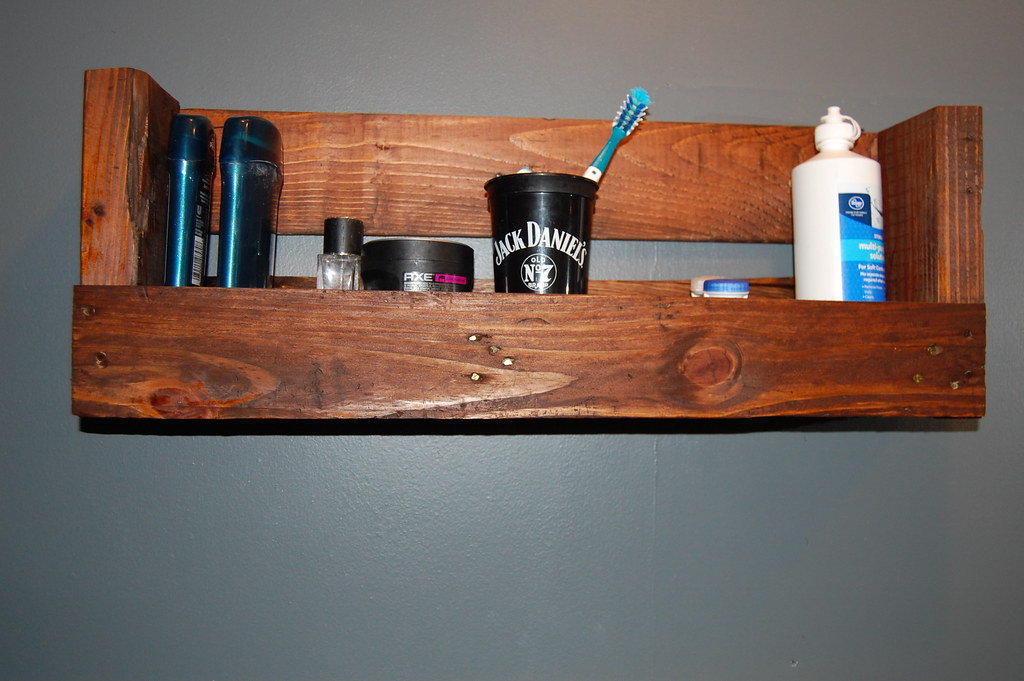
DSC_1524 by jamiehstanley, on Flickr Used some old 5.56 brass to make hangers for towel or wash cloth 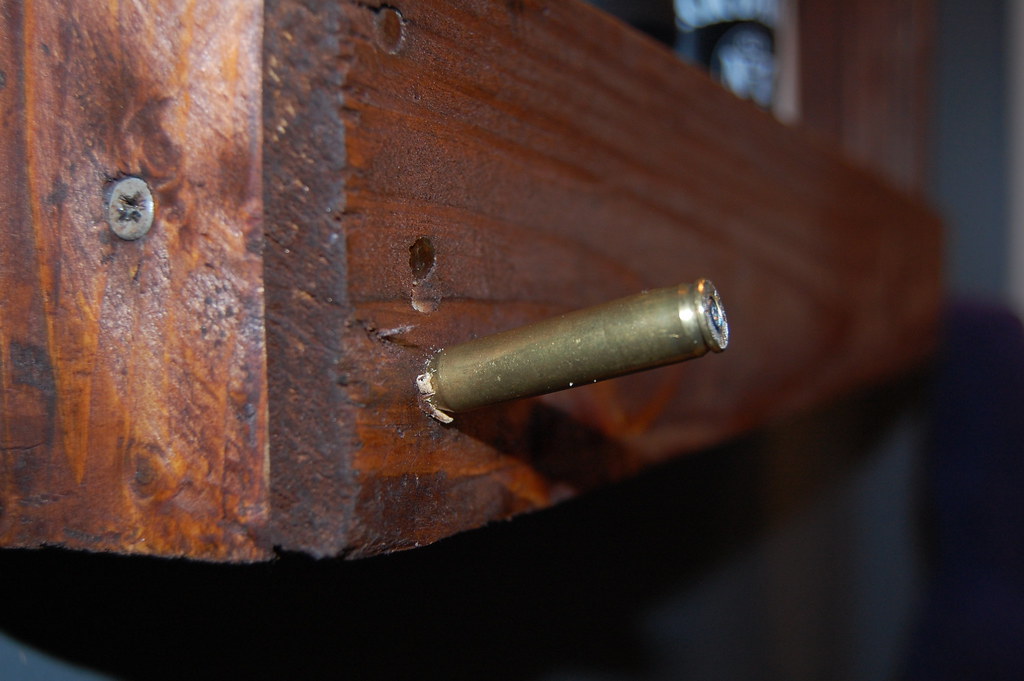
DSC_1557 by jamiehstanley, on Flickr 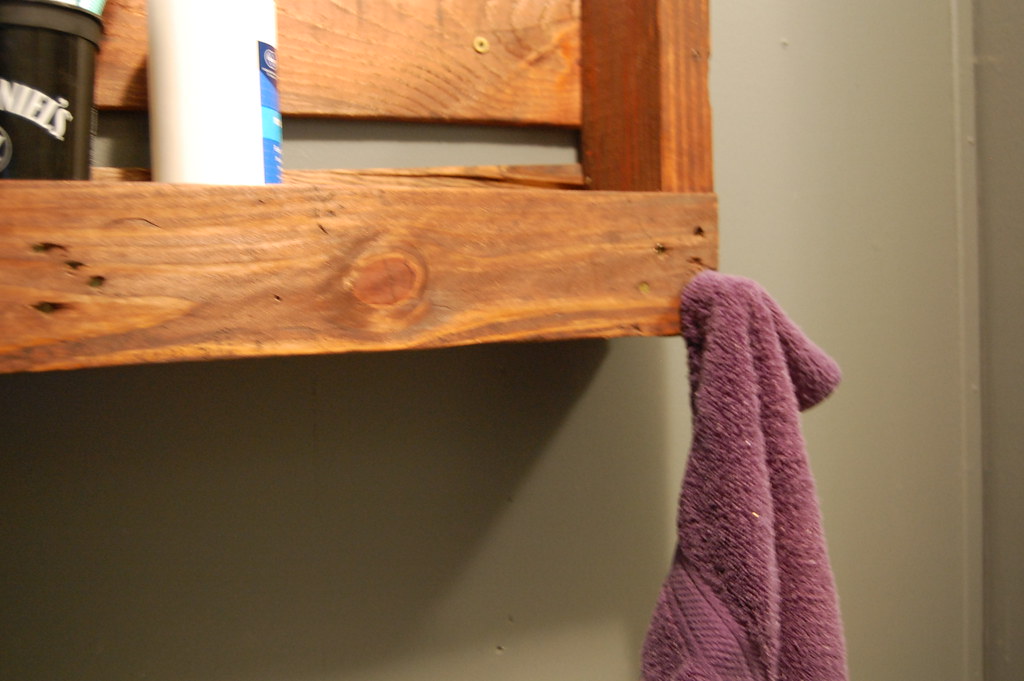
DSC_1542 by jamiehstanley, on Flickr Took some 308 brass and make some key hangers since I was on a role 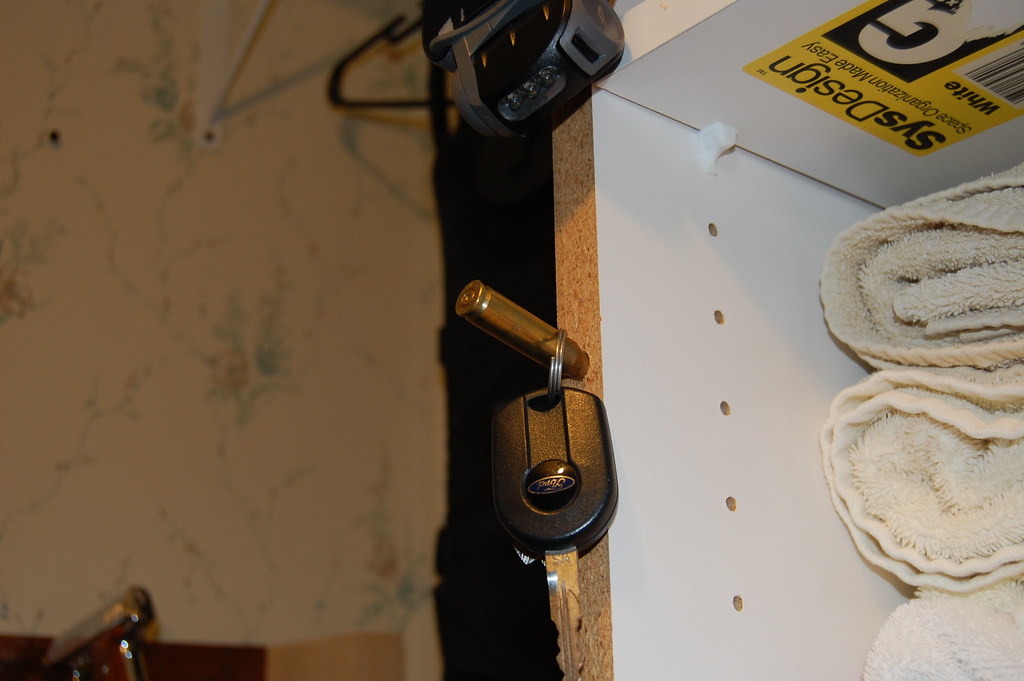
DSC_1548 by jamiehstanley, on Flickr 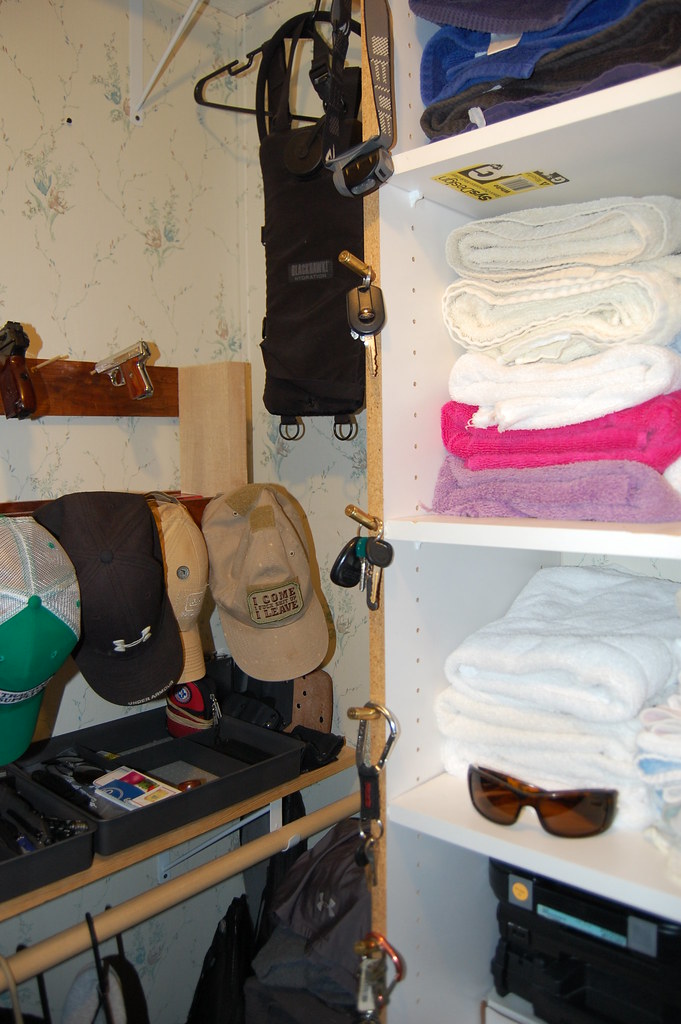
DSC_1549 by jamiehstanley, on Flickr And a gun rack with a shelf .. went a lil over kill with it.. so doubling as a hat rack too. Used dowel rods. One of the smaller dowel rods that was holding 1911-22 wasn't happy and broke 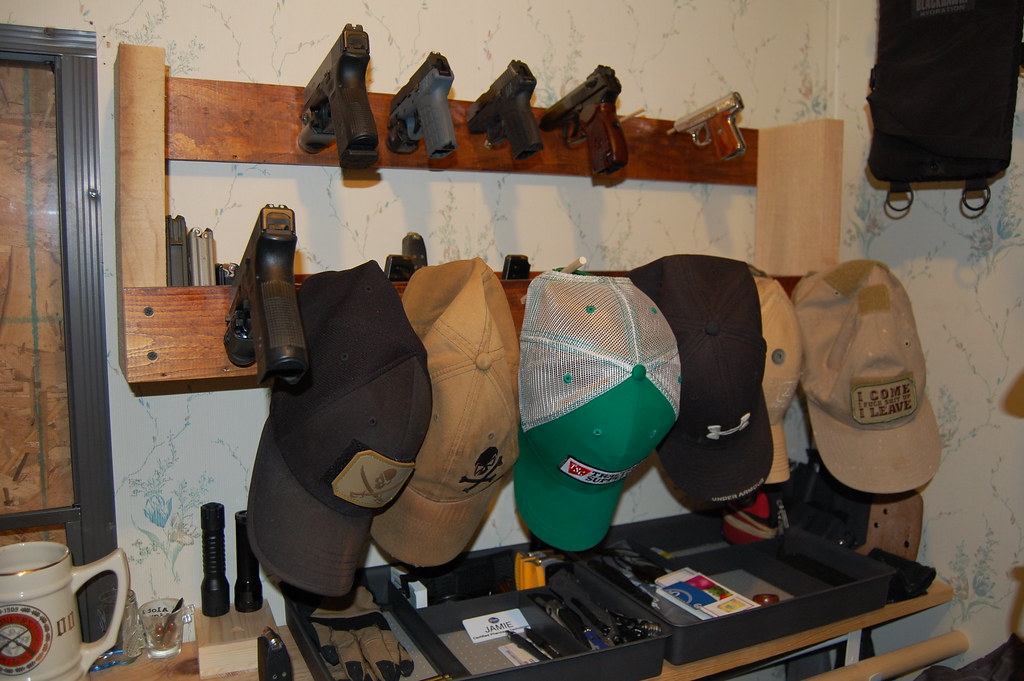
DSC_1547 by jamiehstanley, on Flickr |
|
|
|
[#11]
|
|
|
|
[#12]
Quoted:
First time doing a big project on new house. Took me a little over a week to complete. Wainscoting is a pain in the butt. <a href="http://s343.photobucket.com/user/white99stang/media/Mobile%20Uploads/2014-03/DB72864E-B89A-4ECA-B3A3-D18B9CA5B5C1_zpsxsvdc3un.jpg.html" target="_blank">http://i343.photobucket.com/albums/o463/white99stang/Mobile%20Uploads/2014-03/DB72864E-B89A-4ECA-B3A3-D18B9CA5B5C1_zpsxsvdc3un.jpg</a> <a href="http://s343.photobucket.com/user/white99stang/media/Mobile%20Uploads/2014-03/42D26D58-8B60-4722-B602-0C5015E711DE_zps8dsbmi7n.jpg.html" target="_blank">http://i343.photobucket.com/albums/o463/white99stang/Mobile%20Uploads/2014-03/42D26D58-8B60-4722-B602-0C5015E711DE_zps8dsbmi7n.jpg</a> <a href="http://s343.photobucket.com/user/white99stang/media/Mobile%20Uploads/2014-03/662F516B-81D2-4AD9-9765-BA6A1EBD6C50_zpsbjmlylf8.jpg.html" target="_blank">http://i343.photobucket.com/albums/o463/white99stang/Mobile%20Uploads/2014-03/662F516B-81D2-4AD9-9765-BA6A1EBD6C50_zpsbjmlylf8.jpg</a> That's really, really nice!!!! Awesome work! |
|
|
|
[#13]
Quoted:
First time doing a big project on new house. Took me a little over a week to complete. Wainscoting is a pain in the butt. <a href="http://s343.photobucket.com/user/white99stang/media/Mobile%20Uploads/2014-03/DB72864E-B89A-4ECA-B3A3-D18B9CA5B5C1_zpsxsvdc3un.jpg.html" target="_blank">http://i343.photobucket.com/albums/o463/white99stang/Mobile%20Uploads/2014-03/DB72864E-B89A-4ECA-B3A3-D18B9CA5B5C1_zpsxsvdc3un.jpg</a> <a href="http://s343.photobucket.com/user/white99stang/media/Mobile%20Uploads/2014-03/42D26D58-8B60-4722-B602-0C5015E711DE_zps8dsbmi7n.jpg.html" target="_blank">http://i343.photobucket.com/albums/o463/white99stang/Mobile%20Uploads/2014-03/42D26D58-8B60-4722-B602-0C5015E711DE_zps8dsbmi7n.jpg</a> <a href="http://s343.photobucket.com/user/white99stang/media/Mobile%20Uploads/2014-03/662F516B-81D2-4AD9-9765-BA6A1EBD6C50_zpsbjmlylf8.jpg.html" target="_blank">http://i343.photobucket.com/albums/o463/white99stang/Mobile%20Uploads/2014-03/662F516B-81D2-4AD9-9765-BA6A1EBD6C50_zpsbjmlylf8.jpg</a> <a href="http://s343.photobucket.com/user/white99stang/media/Mobile%20Uploads/2014-03/47C4C8F1-FDC2-492F-80B6-50BD68A53A43_zpsd2idv2il.jpg.html" target="_blank">http://i343.photobucket.com/albums/o463/white99stang/Mobile%20Uploads/2014-03/47C4C8F1-FDC2-492F-80B6-50BD68A53A43_zpsd2idv2il.jpg</a> <a href="http://s343.photobucket.com/user/white99stang/media/Mobile%20Uploads/2014-03/56F7F7E8-9344-43B9-BF5C-0D60E1A98457_zpsprt4psbe.jpg.html" target="_blank">http://i343.photobucket.com/albums/o463/white99stang/Mobile%20Uploads/2014-03/56F7F7E8-9344-43B9-BF5C-0D60E1A98457_zpsprt4psbe.jpg</a> <a href="http://s343.photobucket.com/user/white99stang/media/Mobile%20Uploads/2014-03/12660720-53A0-4C7F-9436-5B5280C32686_zpszvk2exwk.jpg.html" target="_blank">http://i343.photobucket.com/albums/o463/white99stang/Mobile%20Uploads/2014-03/12660720-53A0-4C7F-9436-5B5280C32686_zpszvk2exwk.jpg</a> <a href="http://s343.photobucket.com/user/white99stang/media/Mobile%20Uploads/2014-03/C3315D52-71CC-4699-8A77-A9CD0335A3D6_zps2infanxe.jpg.html" target="_blank">http://i343.photobucket.com/albums/o463/white99stang/Mobile%20Uploads/2014-03/C3315D52-71CC-4699-8A77-A9CD0335A3D6_zps2infanxe.jpg</a> That looks really nice! That's a lot to do in a week. Tough to tell from the photos, did you put in panels, or use the chair rail, base and molding to define the panel areas, but use the wall itself as the panel fields? |
|
|
|
[#14]
Just used chair rail and base cap for the picture frame molding. We had it done in the dining room from the builders and wife wanted it done the entire downstairs so wanted to keep it the same as the dining room. The only other project ive done is backsplash you see in the background of the one pic. This was my first project using any type of molding. The only thing i've done is build a reloading bench so this was a very big learning experience but did it with no help except my 3 year old helping paint a few sections.
|
|
|
|
[#15]
Quoted:
Just used chair rail and base cap for the picture frame molding. We had it done in the dining room from the builders and wife wanted it done the entire downstairs so wanted to keep it the same as the dining room. The only other project ive done is backsplash you see in the background of the one pic. This was my first project using any type of molding. The only thing i've done is build a reloading bench so this was a very big learning experience but did it with no help except my 3 year old helping paint a few sections. The backsplash is nice too. I hate tiling (grouting). As I'm sure you discovered, the hardest part of wainscoating like that is dividing up the wall space so it looks correct. Each wall is different, but the oevrall look has to look consistent. Again, nice job. |
|
|
|
[#16]
I added some more brush to my burn pile. Also got the 10x8 metal shed taken apart. No more eye sore in the back yard now.
|
|
|
|
[#17]
Quoted:
Can't wait to see how that turns out, I've thought about doing a similar project. Quoted:
Quoted:
Pored concrete for out buffet table. It's dyed with quickrete charcoal color. <a href="http://s530.photobucket.com/user/fireshaun/media/image_zps046bd4e2.jpg.html" target="_blank">http://i530.photobucket.com/albums/dd343/fireshaun/image_zps046bd4e2.jpg</a> Can't wait to see how that turns out, I've thought about doing a similar project. Didn't turn out to bad, for a first time using concrete! Still needs to be sanded and sealed. Corner chipped some when I took it out of the mold. Gonna leave it inside for a few days to harden some more in the warmth. 

|
|
|
|
[#18]
Quoted:
Didn't turn out to bad, for a first time using concrete! Still needs to be sanded and sealed. Corner chipped some when I took it out of the mold. Gonna leave it inside for a few days to harden some more in the warmth. <a href="http://s530.photobucket.com/user/fireshaun/media/image_zps899d091e.jpg.html" target="_blank">http://i530.photobucket.com/albums/dd343/fireshaun/image_zps899d091e.jpg</a> <a href="http://s530.photobucket.com/user/fireshaun/media/image_zpscdde3cfe.jpg.html" target="_blank">http://i530.photobucket.com/albums/dd343/fireshaun/image_zpscdde3cfe.jpg</a> Quoted:
Quoted:
Quoted:
Pored concrete for out buffet table. It's dyed with quickrete charcoal color. <a href="http://s530.photobucket.com/user/fireshaun/media/image_zps046bd4e2.jpg.html" target="_blank">http://i530.photobucket.com/albums/dd343/fireshaun/image_zps046bd4e2.jpg</a> Can't wait to see how that turns out, I've thought about doing a similar project. Didn't turn out to bad, for a first time using concrete! Still needs to be sanded and sealed. Corner chipped some when I took it out of the mold. Gonna leave it inside for a few days to harden some more in the warmth. <a href="http://s530.photobucket.com/user/fireshaun/media/image_zps899d091e.jpg.html" target="_blank">http://i530.photobucket.com/albums/dd343/fireshaun/image_zps899d091e.jpg</a> <a href="http://s530.photobucket.com/user/fireshaun/media/image_zpscdde3cfe.jpg.html" target="_blank">http://i530.photobucket.com/albums/dd343/fireshaun/image_zpscdde3cfe.jpg</a> Looks good man. How long till you can sand? |
|
|
|
[#19]
I could sand now, but want to wait since it cured in 40 degree weather. Gonna do it Monday.
ETA: top is smooth with 3 bug holes, sides have a ton. Gonna leave them and give it an industrial look because of the chip and I'm being lazy. |
|
|
|
[#20]
This thread is full of win and is motivation to me! Thanks guys! I'm about to do some tile work and a kitchen reno within the next year so will keep this thread updated.
|
|
|
|
[#21]
Yesterday I cleaned my gutters after noticing a water fall in front of my dinning area window. An hour later and they were all cleaned out and my hands were numb from the cold water.
|
|
|
|
[#22]
Finishing up air sealing my attic.
|
|
|
|
[#23]
I moved a few gallons of water out from my back yard. If you live in Missouri or looked at the weather radar for the past 3 hours you know it rained like no tomorrow. I am trying to figure out how to prevent the water from entering my garage and keep it away from my house for the future. I have a few low spots and high spots that I need to figure out. I have a patio in back that has cracked and settled causing water that runs down my back yard to go straight for my house. The wooden retaining wall probably has another 1-2 years before it falls in.
|
|
|
|
[#24]
We put insulation in the attic over our garage. We learned an important home-ownership lesson: we shouldn't bother with taking large trash to the landfill, we should climb a ladder with it and put it in the attic!
 |
|
|
|
[#25]
Today was a good day. I made another double bench with table for my SIL. I put a shelf on this one under the table so she could stash Garden tools.
Home Depot had a sale on Mulch, 5 bags for $10 so I spread 30 bags in the back garden. Picked up two 55gal blue barrels (free) for rain catchment and made the base for them. Going to rip some fence pickets and make a "sleeve" to go over them to look like wine barrels. Just need to find some cheap strapping material or I'll have to use pipe straps. 

|
|
|
|
[#26]
Space between garage and fence was overgrown, cleared all of that out. Cleaned up the yard from all the trash that has blown in over the winter. Paid for insulation (couldn't pick it up as I was with the wife and kids in her car). This will be to finish the addition the previous owners started.
Felt good to get outside again. |
|
|
|
[#27]
Quoted: We put insulation in the attic over our garage. We learned an important home-ownership lesson: we shouldn't bother with taking large trash to the landfill, we should climb a ladder with it and put it in the attic! Who ever lived in your house must have lived in mine too. I found sears magazines from 1980 in bags |
|
|
|
[#28]
Painted up our pantry closet. I was surprised just how much paint and how much time the smallest "room" in the house took.
It's done now, and the wife is happy that she can carry on organizing. |
|
|
|
[#29]
Nothing this week been sick, last week was siding, soffit, trim, and prep for stone work. Luckily I had a couple of my guy's over to help with this, we do this for a living so it's hard to get guy's to come out and work on my shit on the weekends.
|
|
|
|
[#30]
Quoted: Who ever lived in your house must have lived in mine too. I found sears magazines from 1980 in bags Quoted: Quoted: We put insulation in the attic over our garage. We learned an important home-ownership lesson: we shouldn't bother with taking large trash to the landfill, we should climb a ladder with it and put it in the attic! Who ever lived in your house must have lived in mine too. I found sears magazines from 1980 in bags Ours wasn't anything that interesting, except for the beautiful avocado-green range hood. Why the hell would you lift that sucker up a ladder?! |
|
|
|
[#31]
Quoted:
Nothing this week been sick, last week was siding, soffit, trim, and prep for stone work. Luckily I had a couple of my guy's over to help with this, we do this for a living so it's hard to get guy's to come out and work on my shit on the weekends. Been laying tile in my own kitchen today. Never pay any mind to doing it for a customer. Pain in the ass when its your house with stuff scattered everywhere. My stove in sitting in the living room and my refrigerator is plugged up in the hallway.  Phone has rang all day, need to finish this shit up and move on to a paying job. Phone has rang all day, need to finish this shit up and move on to a paying job. |
|
|
|
[#32]
Had to stain some more trim and panels for the wet bar we are putting in. Paid the plumber though to move the water and install the valves, I suck at plumbing, especially copper.
I have all the pictures thus far saved for a separate thread for the project, just trying to decide if I want it to be one of those threads that gets added to or dump everything in all at one time... |
|
|
|
[#33]
Nest thermostat - purchased and installed.
|
|
|
|
[#34]
Quoted:
Nest thermostat - purchased and installed. That thing has paid for itself in 5months. |
|
|
|
[#35]
Quoted:
That thing has paid for itself in 5months. Quoted:
Quoted:
Nest thermostat - purchased and installed. That thing has paid for itself in 5months. You know, I had this old POS thermostat in the house when I bought it. The wires attached directly to the unit. I've had trouble on and off for the last 6 months or so, and each time I had to mess with the thermostat the wires would come undone and I'd have to reattach. Came home yesterday to a house that was 93* with the emergency heat running. One of the wires had come off/out on its own and the emergency heat had been running - who knows how long. Had been eyeing a Nest for awhile, and just decided to bite the bullet. |
|
|
|
[#36]
Quoted:
Been laying tile in my own kitchen today. Never pay any mind to doing it for a customer. Pain in the ass when its your house with stuff scattered everywhere. My stove in sitting in the living room and my refrigerator is plugged up in the hallway. Phone has rang all day, need to finish this shit up and move on to a paying job. Quoted:
Quoted:
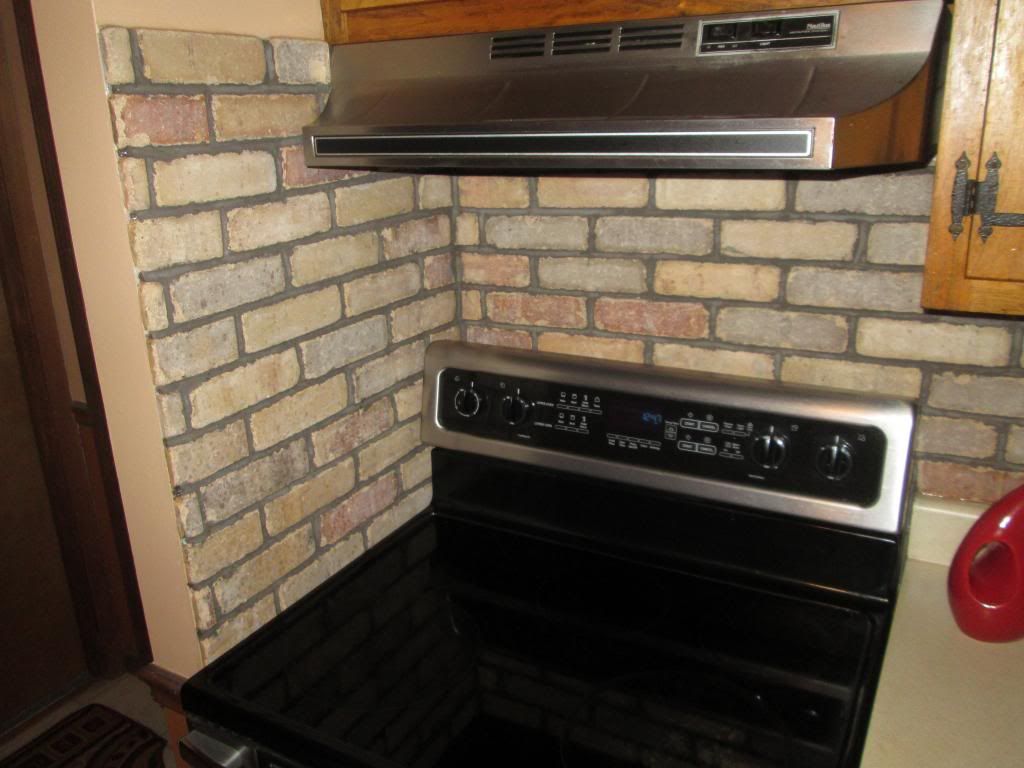
Nothing this week been sick, last week was siding, soffit, trim, and prep for stone work. Luckily I had a couple of my guy's over to help with this, we do this for a living so it's hard to get guy's to come out and work on my shit on the weekends. Been laying tile in my own kitchen today. Never pay any mind to doing it for a customer. Pain in the ass when its your house with stuff scattered everywhere. My stove in sitting in the living room and my refrigerator is plugged up in the hallway. Phone has rang all day, need to finish this shit up and move on to a paying job. Well its done. Sure will feel good to go start a paying job on Monday. Brick Web thin brick backsplash. Actually did this with scraps left over from my last 6 backsplash jobs. This stuff is becoming wildly popular and I'm the only contractor in the area working with it. Pain in the ass to lay, pain in the ass to grout. Actually you can't grout it, have to "point" with a trowel and then "strike: with a jointer.
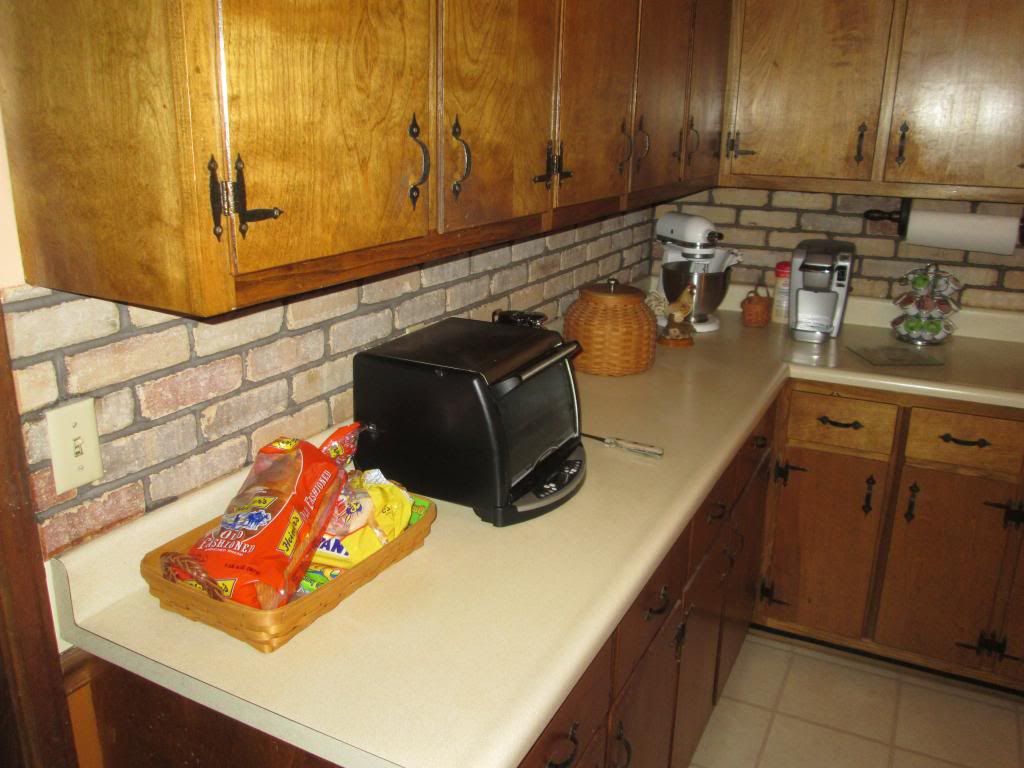
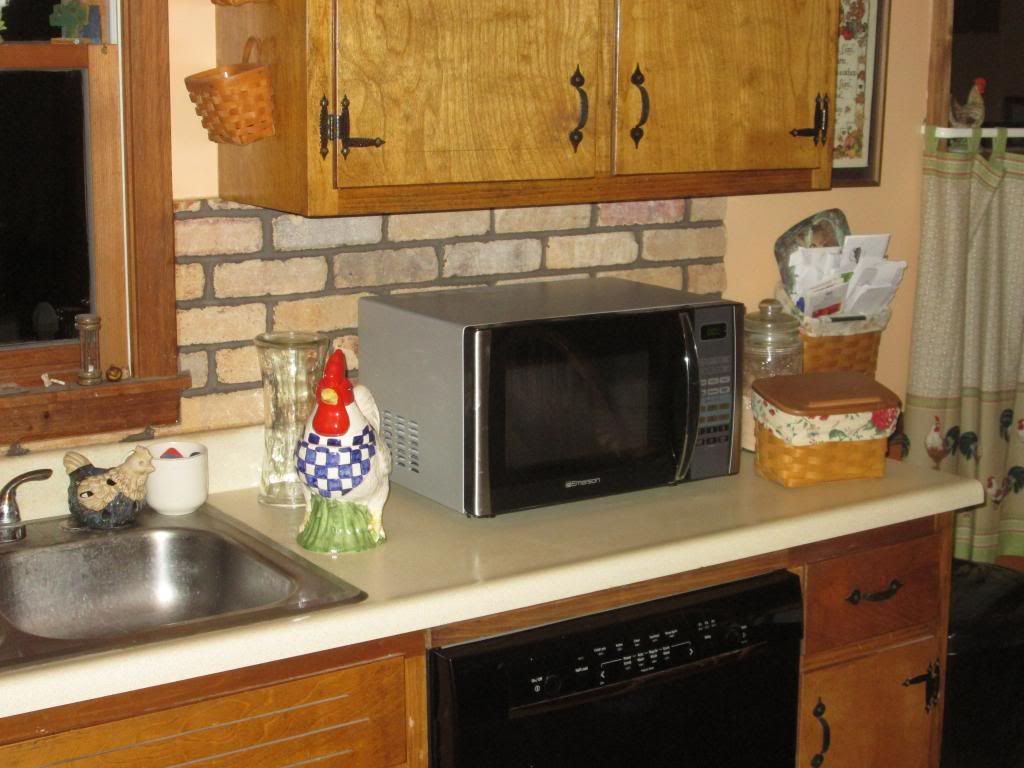
Decided to tackle the floor in the master bath while I had all my tile tools in the house. Found out the room was 1 3/8" out of square. Not a huge deal unless you are laying large format tile where it will be highly noticeable around the perimeter and in the grout lines. That was fun, Employed highly guarded and hard learned trade secrets to correct the problem. 
And I am officially DONE working on my own house for a while. Its been said that a carpenters house will fall down around him while he builds mansions for his customers. I understand where that saying came from.
|
|
|
|
[#37]
Got the crawl space of my addition cleared out of trash and leaves. Plastic laid out, insulation installed and secured. I didn't get a chance to reinstall the block I had to remove in order to get in there. I was running out of light and didn't want to play with mortar in the dark.
I was planning on finishing up Sunday but sadly we got hit with monsoon style rains and now snow. |
|
|
|
[#38]
Quoted:
You know, I had this old POS thermostat in the house when I bought it. The wires attached directly to the unit. I've had trouble on and off for the last 6 months or so, and each time I had to mess with the thermostat the wires would come undone and I'd have to reattach. Came home yesterday to a house that was 93* with the emergency heat running. One of the wires had come off/out on its own and the emergency heat had been running - who knows how long. Had been eyeing a Nest for awhile, and just decided to bite the bullet. Quoted:
Quoted:
Quoted:
Nest thermostat - purchased and installed. That thing has paid for itself in 5months. You know, I had this old POS thermostat in the house when I bought it. The wires attached directly to the unit. I've had trouble on and off for the last 6 months or so, and each time I had to mess with the thermostat the wires would come undone and I'd have to reattach. Came home yesterday to a house that was 93* with the emergency heat running. One of the wires had come off/out on its own and the emergency heat had been running - who knows how long. Had been eyeing a Nest for awhile, and just decided to bite the bullet. What's the big deal about a Nest thermostat over a regular one and how does it pay for itself? I've heard of them but don't know squat about them. Thanks |
|
|
|
[#39]
I worked in my wife’s craft room. I split a length of 4” PVC pipe and attached it to a wall to hold her many rolls of ribbon.
|
|
|
|
[#40]
Quoted: What's the big deal about a Nest thermostat over a regular one and how does it pay for itself? I've heard of them but don't know squat about them. Thanks Quoted: Quoted: Quoted: Quoted: Nest thermostat - purchased and installed. That thing has paid for itself in 5months. You know, I had this old POS thermostat in the house when I bought it. The wires attached directly to the unit. I've had trouble on and off for the last 6 months or so, and each time I had to mess with the thermostat the wires would come undone and I'd have to reattach. Came home yesterday to a house that was 93* with the emergency heat running. One of the wires had come off/out on its own and the emergency heat had been running - who knows how long. Had been eyeing a Nest for awhile, and just decided to bite the bullet. What's the big deal about a Nest thermostat over a regular one and how does it pay for itself? I've heard of them but don't know squat about them. Thanks Google bought Nest I'm sure they have some interesting things planned for it |
|
|
|
[#41]
Today we trimmed all the bushes, laid 30 pieces of sod, repotted a huge plumeria, reseeded some herbs that didn't sprout, weeded, and hand-watered all the flower beds. Now I'm making pizza, jalapeno cornbread, and chicken salad.
ETA: it was only 30 pieces of sod because my 2-door Civic only holds about 40 pieces and we had to buy potting soil also. More sod is on the agenda for next weekend! |
|
|
|
[#42]
I did nothing around the house today, I went shooting!
Tomorrow I'll clean the yard and plant some tulips. |
|
|
|
[#43]
This is my friend's purchase at Lowes.
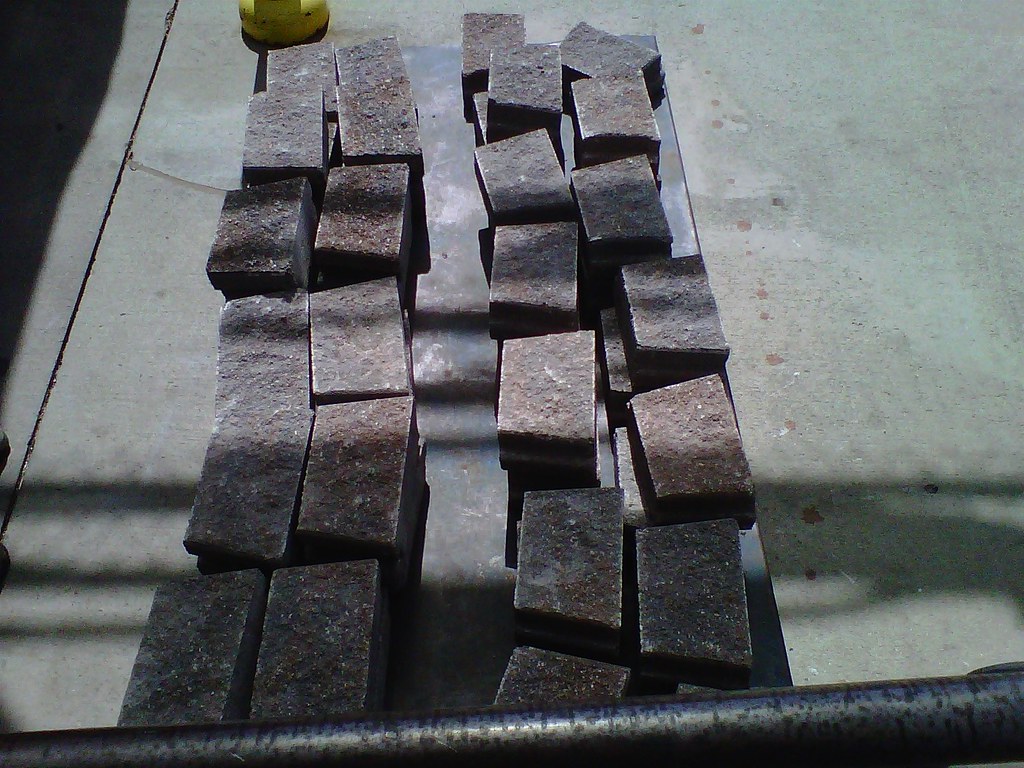
There are 48 of the Insignia stones at $0.98 each in that photo. This is now his fire pit. 
This is my fire pit. 
This is my fire pit being used. There are many like it, but this one is mine. 
|
|
|
|
[#44]
Friday I picked up the rest of the twigs/ brush/burn logs I had in my yard. Took about 4 hours and two trips to a burn pile out at my parent's house. Back yard looks a lot better now. I just need to finish cleaning up the old burn pit the renter's had here before I bought the house.
|
|
|
|
[#45]
I feel like I can finally post in this thread!
Been turning a family member's basement into a "mother in law" apartment, and I worked on that today. The major projects were adding a kitchen and the floors. I will have some pics later when my girlfriend sends them to me. Today I managed to primeand paint half the kitchen walls, so that the cabinets can go up tomorrow. Tomorrow I may also help finish up the electrical in the kitchen. The rest of the space will be painted by next Tuesday when the floor is going in. It has been a fun project. I am getting good at this painting thing. |
|
|
|
[#46]
I finally bit the bullet and replaced the driver side valve cover gasket on my pathfinder. Discovered the bolts holding it on were finger tight. And when I finally got it off the gasket was as hard as plastic. Took me about 15 minutes to get the gasket off. Got everything thrown back together and it fire right up. Will have to get under the rig and clean up the oil that was seeping out and see if it fixed the oil leak. Need to get it fixed before I replace my driveway.
|
|
|
|
[#47]
Been on vacation this week got a few things done minus the normal mowing, weed eating, pressure washed the house, porches and side walks, and of coarse turkey hunting. I did few lil projects
Built a couple dif style pallet shelves bad picture tho 
Planted a lil aloe vera plant in a rock on the entertainment center under tv 
Flower bed got a redo.. built up the center section re planted a summer tree in the pot. Of coarse mulch and some new flowers 
Made a tiki torch 

|
|
|
|
[#48]
Eight more feet of 2x framing to allow insulation in an exterior basement wall.
When you have done it long enough you learn to use a double bottom plate and single top plate. The bottom sub-plate is fastened down with Tapcons and isolated from below grade concrete or pressure treated. then you frame up wall sections. Use a small drywall panel lifter (about a foot long with a lip on one end) to raise the framing sections on top of the sub plate. Leave a little bit of clearance to the ceiling or framing. I use 1.5 inch blue painters tape to mark every stud location on the foundation, then go back and measure every spot for height. I use a piece of 1x cut a few inches short and measure the difference. Old places rarely seem to be level. If is has a definite slop you can adjust stud heights, but if it is random just use the shortest & knock of 1/4 inch and call it done. The finished wall will had the slight gap. I usually bend up 3 in x 7 in 'mending plates' to make corner brackets to fasten the top plate to the foundation (2 inch on one side, 5 on the other). Trim length if needed. A small bending brake is your friend. Ignore the aluminum ones. they flex to much to be useful. Enlarge the holes on one side for 1/4 inch Tapcons (hex head) and on the other side for washer head wood screws about 1 to 1.25 inches long (about #8s).. You have to go back if you use a Tapcon driver kit and finish tightening every fastener. After you stand a wall section up, align the bottom outer edge with the sub-plate and nail off once at each end. Then plumb the wall and fasten the top plate using a metal bracket. Go back and nail off at least once per stud bay on the bottom. A metal bracket about every 3 to 4 feet is fine. You need pressure treated within about 18 inches of grade unless you hold the studs off the wall by about 1/2 inch. You can cut them down or use 2x3 since it is not a weight bearing wall. Watch electric box depth and conductor fill rules with thinner walls. Watch wire clearance for bored holes. You may have to use 4x4 boxes and plaster rings. Use the nail/screw protection plates as needed (edge of hole less than 1.25 inches from face of stud IIRC). 3/8 inch holes for 14/2 or 14/3 wire, 3/4 inch for #12. |
|
|
|
[#49]
I loaded a wheelbarrow full of "dirt" from the "dirt" area in front of my house between my sidewalk. I quickly discovered it is comprised of 90% rock, 9% sand, and 1% actual dirt(percentages may or not be influenced by disgust over the discovery of crappy dirt). So I said fu*k this and left my wheelbarrow behind my house full until I can get a dump trailer/dump truck to haul this crap off. I have about 2 cubic yards to get rid of, then replace it with top soil.
|
|
|
|
[#50]
Changed the doorknobs and deadbolts.
|
|
|
 Win a FREE Membership!
Sign up for the ARFCOM weekly newsletter and be entered to win a free ARFCOM membership. One new winner* is announced every week!
You will receive an email every Friday morning featuring the latest chatter from the hottest topics, breaking news surrounding legislation, as well as exclusive deals only available to ARFCOM email subscribers.

AR15.COM is the world's largest firearm community and is a gathering place for firearm enthusiasts of all types.
From hunters and military members, to competition shooters and general firearm enthusiasts, we welcome anyone who values and respects the way of the firearm.

Subscribe to our monthly Newsletter to receive firearm news, product discounts from your favorite Industry Partners, and more.
Copyright © 1996-2024 AR15.COM LLC. All Rights Reserved.
Any use of this content without express written consent is prohibited.
AR15.Com reserves the right to overwrite or replace any affiliate, commercial, or monetizable links, posted by users, with our own.


