|
Posted: 7/14/2011 4:44:23 PM EDT
I posted pictures of my box build previously, far from done at the time but it was functional. Due to the size of the tuner I had I decided to omit the battery and put those in a separate box for the time being. I used a rack for my box giving me the ability to pull the rack out for air flow, and ease of service. I sold the Icom tuner and picked up an SGC 239. Freeing up the room to add the battery, and then I started to think how I could do things better...........
Here is the old version 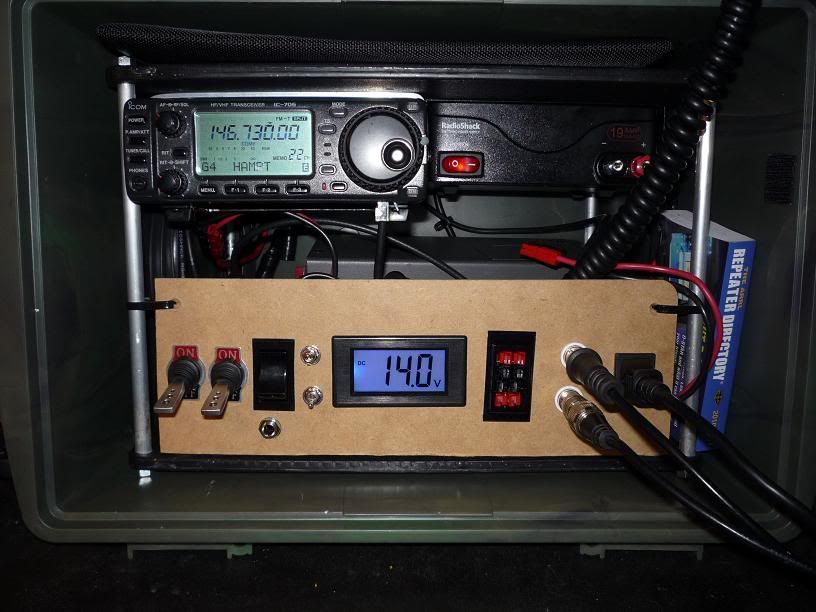
So I decided to lower the rack and mount the radio on the top, doing this would free up space on the sides to better mount the radio and power supply in a more uniform fashion. It also allowed me to mount additional items under the rack, and if I remove the rack from the box the speaker is no longer blocked. I added my 17ah SLA batter where the tuner once was. Since I am running the Icom 706, the max power on 2 meter is 10 watts. Lowering the rack allowed me to mount one of my 2 meter amplifiers under the radio. It is an RF Concepts 2-30 amp, rated for 2 watts in 30 out. This amplifier produces about 50 watts on the power supply and around 40 on battery power. I was going to order a custom machined switch panel for the box since I was unable to find aluminum plates that fit my specifications. Today I went to my buddy's work to fix the A/C on his van, they have a shop that installs windows and doors. He found me a piece of aluminum that was 1/16 of an inch thick, and was formed at a 90 degree angle. The large size is 3 1/4 in, the short size about 1 inch, powder coated tan. Perfect for the switch panel! So I spent the last couple of hours cutting, drilling and filing. I am using the cigarette lighter adapter for the amplifier at the moment, I ran out of power poles to tie it into the radio power wires. So of course I had to place a large order with powerwerx and get replenished! Here is the Version 2.0 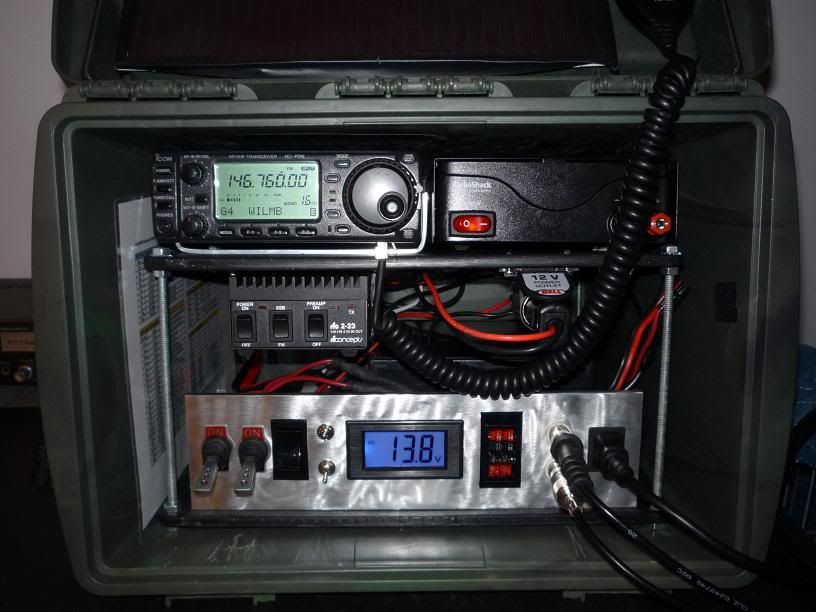
I am still not done, I should receive my Icom to SGC interface tomorrow and will mount it up. I need to get a battery tender and mount in it, and build a mount for the battery. I am going to make a small panel to mount under the power supply, it will have a 4 prong mic connector that will be used for the tuner control and power line, and a panel mount jack for a strait key. The small reciprocating saw I used to cut the holes in the panel tore the powder coating up really bad. I decided to take the paint off with a whiz wheel a and debate if I was going to paint it. It created a swirl look on the aluminium and gave it sort of an industrial look, I decided I would leave it like that. Here is my portable antenna. 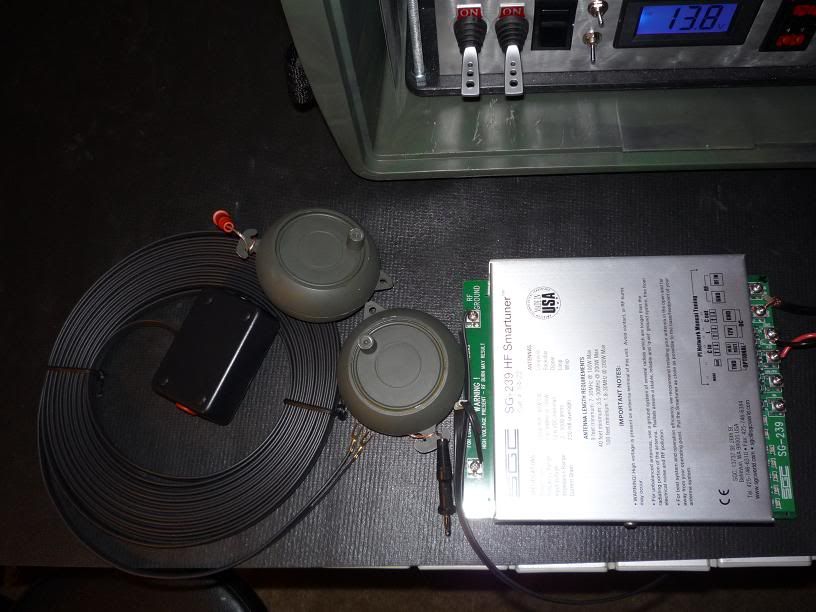
I have the line reels wound with 51 feet each of 22 gauge wire, i also have 28 feet of 300 ohm twinlead. I have a Pelican 1200 on the way to mount the SGC 239 in. I will use an N connector bulkhead for the Input and a 4 Prong Mic connector for the control and power wire for the tuner. The output will be Binding post/Banana plugs, this will allow me to feed the antenna in a doublet configuration, making a portable G5RV, or I can plug the reels into the pelican case to run any number of antenna configurations using a random wire and counterpoise. Of course they will be water proofed and test for integrity. The pelican 1200 should have enough room to store the portable antenna when not in use. I will post updated pictures when I get the SGC box mounted and wired up. I also used my additional 17 AH batter to make a Auxiliary power station/Jump Box from a plastic ammo can and a bunch of stuff in my parts junk drawer. I am waiting on the Powerpoles to get here and I will post pictures of that as well. It will serve as a multi purpose power station and will have some very cool powerpole accessories in it! Let me know what you think |
|
|
|
[#1]
I give this an 8 / 10.
-1 for not having power poles on hand 
-1 for not being ORANGE 
|
|
|
|
[#2]
Quoted:
I give this an 8 / 10. -1 for not having power poles on hand
-1 for not being ORANGE Thanks, I deserve that! I will make it up when I post the pictures of my power station! I got some Jumbo powerpoles |
|
|
|
[#3]
|
|
|
|
[#4]
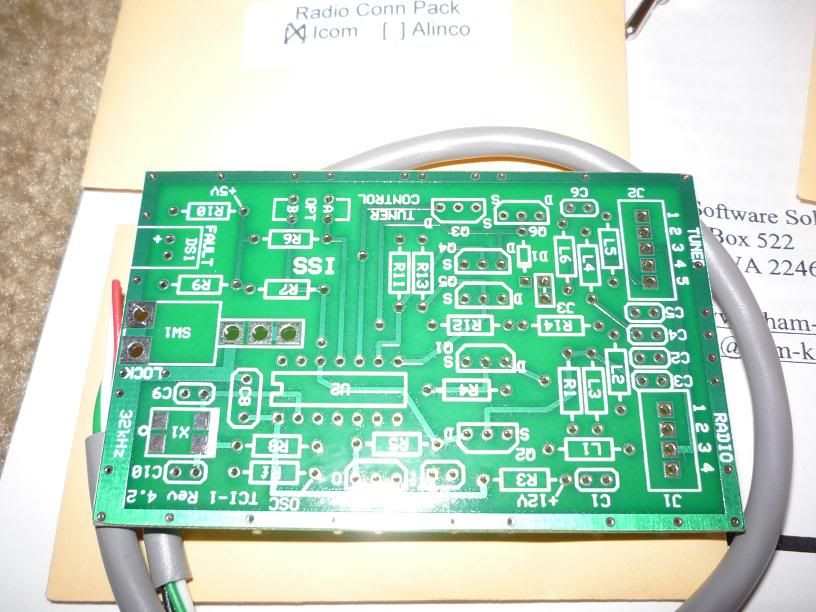
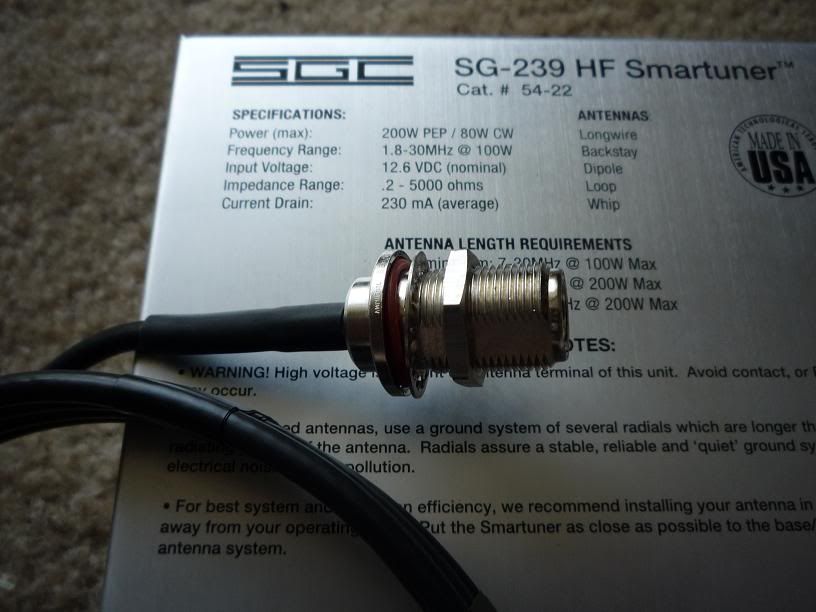
Received the tuner control interface yesterday. Thanks to one of the ARFCOMers here that told me about the Icom/SGC tuner interface controllers from http://www.ham-kits.com/mainframe.htm. The interface allows the Icom radio to control the SGC tuner through the radio just like the Icom AH3/AH4 tuner. It powers the tuner and interface from the radio, and also has a hold switch that allows you to lock the current tune in, that way a changing antenna environment with varying SWR will not go into tune mode in the middle of the QSO.
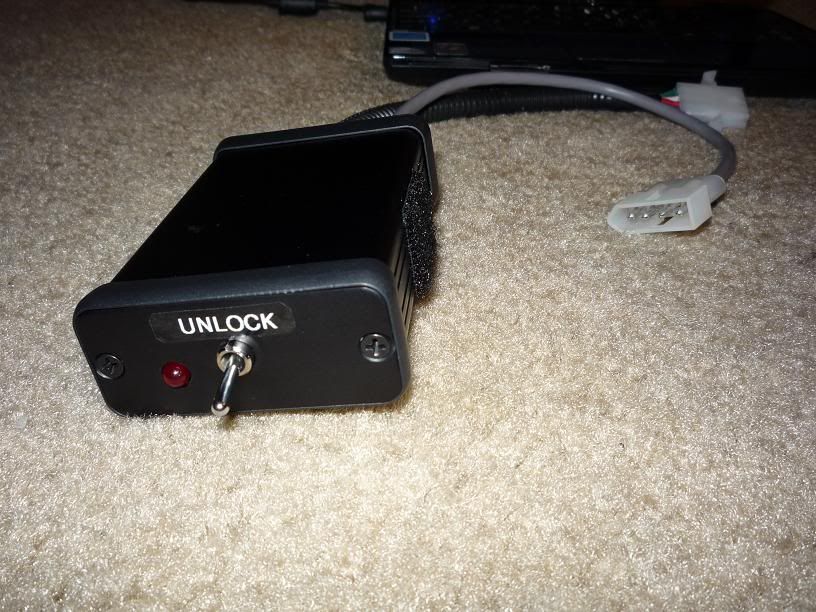
It also has a Fault LED telling you if the tuner was unable to tune, or if it is in bypass mode. It is a very nice kit, and this is what it looks like fresh out of the package. 
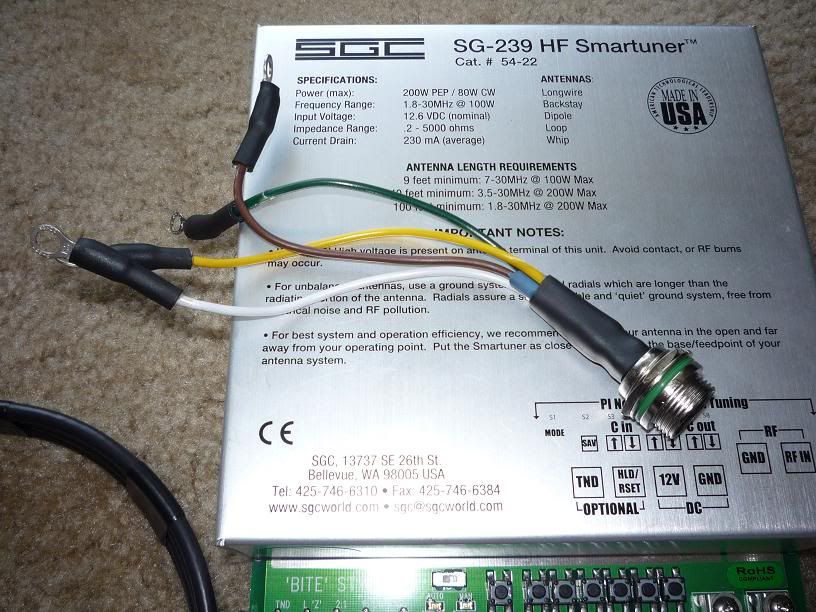
Got done soldering the board together this morning, and got the wires for the output to the tuner wired up with a molex connector. Here is the board soldered and the kit assembled. 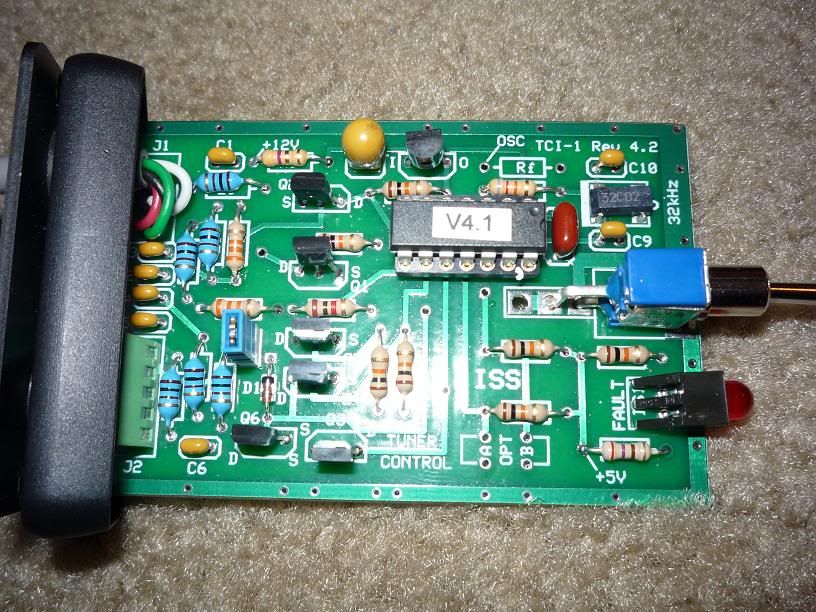
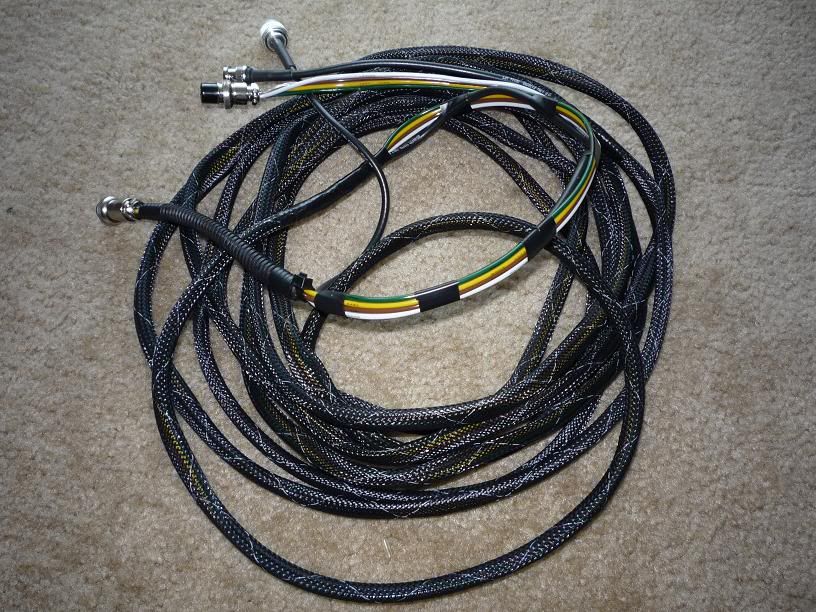
I cut another plate for the box, this will have the microphone connector that will lock into the box just above the BNC connectors. The cable i used to run to the tuner box is 4 wire ribbon cable that is used for trailer wiring. I will be using a 25 foot run of it, heat shrink to the RG-58 coax cable. It will run to the Pelican 1200 case containing the SGC tuner. I plan on using some braided wire sleeve in OD green to cover the coax and ribbon cable. Here is the Panel and the wiring I will be using. 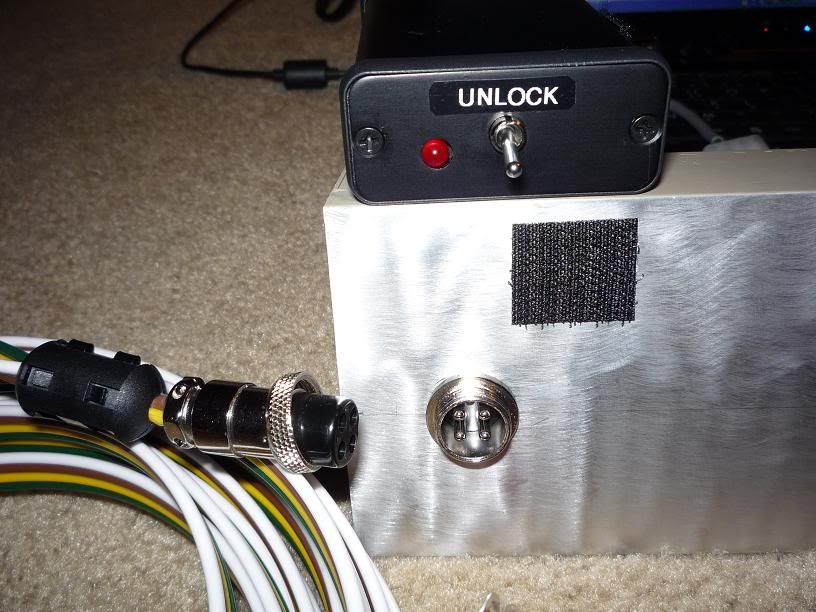
I hooked the ribbon cable directly the the tuner and tested it out tonight, the interface works great! One push of the tuner button on the radio it switches to CW mode and sends a tone, the tuner relays lock in the correct setting and switches back to the SSB mode. The Icom radio also has a setting that will enables the tuning the first time the PTT button is pressed when you switch bands or change frequency more than 1%. I will update when the tuner box shows up and the panel is mounted in. |
|
|
|
[#5]
I like the way you set this up. You're right about the "swirl" look on the aluminum. It looks good.
BTW, what radio are you running in there? I can tell its an Icom. That's about it, though. |
|
|
|
[#6]
Quoted:
Here is the Version 2.0 http://i938.photobucket.com/albums/ad224/stanprophet/P1010161.jpg http://i938.photobucket.com/albums/ad224/stanprophet/P1010162.jpg Let me know what you think That looks great, stanprophet09. Nice job! PS: I think I've seen those antenna reels somewhere. |
|
|
|
[#7]
best current thread in the ham radio forum. nice construction work. ar-jedi |
|
|
|
[#8]
Quoted:
I like the way you set this up. You're right about the "swirl" look on the aluminum. It looks good. BTW, what radio are you running in there? I can tell its an Icom. That's about it, though. Running an Icom 706 |
|
|
|
[#9]
Quoted:
Quoted:
Here is the Version 2.0 http://i938.photobucket.com/albums/ad224/stanprophet/P1010161.jpg http://i938.photobucket.com/albums/ad224/stanprophet/P1010162.jpg Let me know what you think That looks great, stanprophet09. Nice job! PS: I think I've seen those antenna reels somewhere. I did something a little different today, I ran across some 18awg bare copper stranded wire at home depot. 500 foot roll for 29 bucks! So I rewound the spools with the bare copper wire. The idea is I can reel some of the wire in on higher bands, the wire on the reel will not matter since it is effectively shorted. This will give me the ability to run it as a multi band doublet, or if the tuner ever crapped out, or I want to run 6 meter I just reel the antenna out and adjust for SWR. I have been trying to keep some redundancy on some of this. Of course that is hard with the radio, but with the 2 meter amp I can use the HX-370 if needed. For the breakers I can substitute ATC fuses. I have ran into that Murphy several times while in less than favorable situations, I hope this time I can give him the finger! Now I have to run off and play....... Got 398 feet of wire left to make some antenna's with |
|
|
|
[#10]
Today I got the second panel mounted, I had to take the cig lighter adapter out to make room, but that is ok I have a different one that I will put some power poles on. I cut the panel shorter to make room for the Signallink USB that will be coming in another week. I added some of adapters I had laying around that will allow me to connect a CW Key, a CI-V cable for rig control and I will have a USB "B" panel mount coming in to connect into the signal link. It will allow all the connection connected through the panel.
I mounted the tuner controller to the side of the amplifier using Velcro, I will need to come up with a different mounting solution, once it gets hot the adhesive is likely to come off. I was going to mount it to the right of amplifier, but needed to make room for the signal link. According to the specs I should have enough room, I have exactly 3.75" between the amplifier and the right side upper panel. I also cut the aluminum tuber down to fit over the all-thread that I am using for rack standoffs, I originally used the tubing but did not get around to cutting it down and installing it. I was also able to make a hold down for the battery out of 1" aluminum straps bent to fit over the battery and held down with bolts through the bottom rack. Here is the updated photo 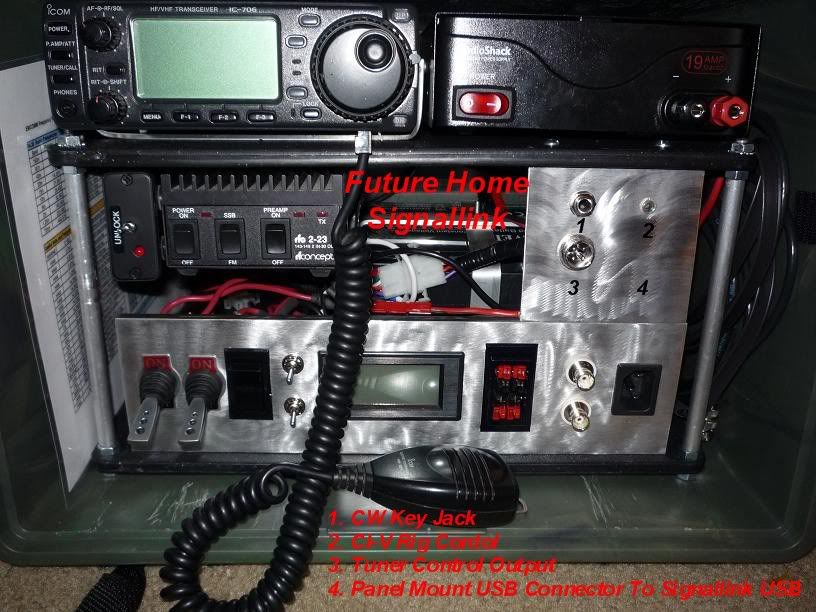
|
|
|
|
[#11]
VERY nice work!
|
|
|
|
[#12]
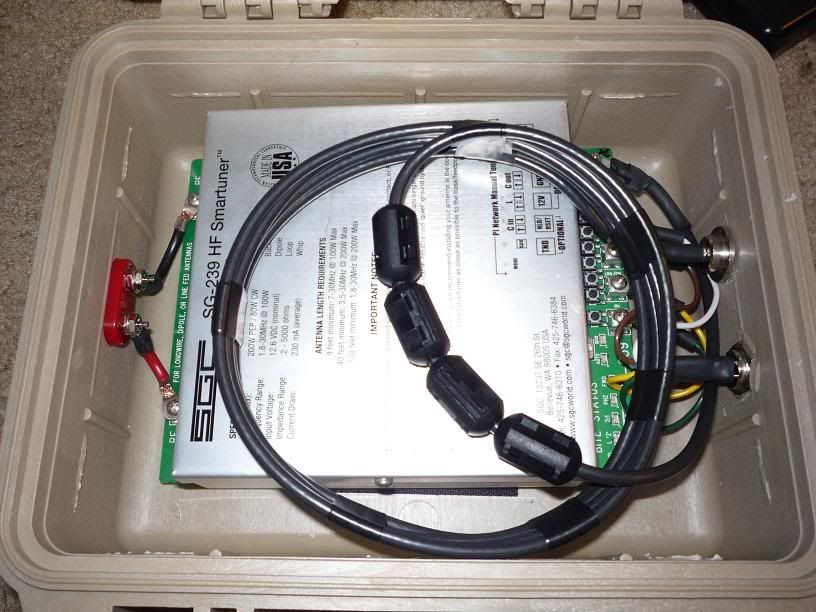
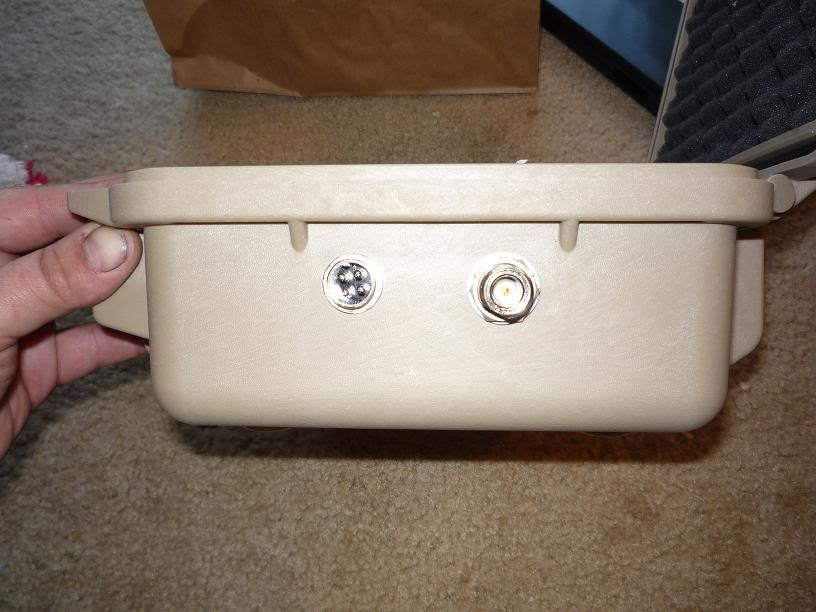
Ok today the pelican case came in! I made a run to the local electronics store to get some supplies to put this thing together. I still need to weather seal the Mic plug and the binding post. The N bulkhead connector has an O-Ring seal. I used adhesive Velcro to secure the tuner to the bottom of the pelican case. I need to get some desiccant to add to the case, it gets a little humid here.
Here is some of the pictures, let me tell you it felt wrong to pull that pelican case out of the box and drill holes in it! 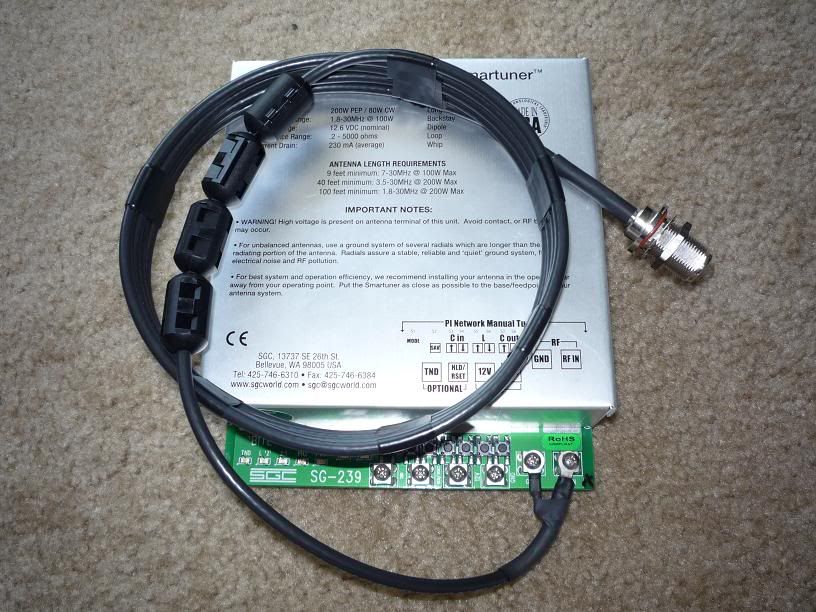

And here is the entire rig testing the new cables and tuner box. 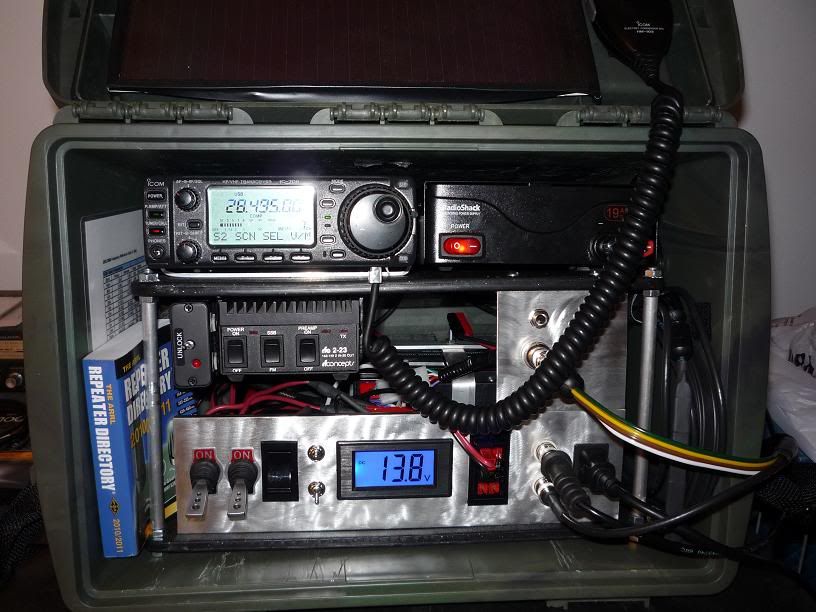
The only thing I have left to do now is add the Signalink USB, the panel mount USB port, and the battery tender JR and I can call the EMCOMM box complete, just in time for hurricane season! Just hope I do not have to use it. I will be taking this thing up into the mountains this weekend to run QRP on batteries and get a practical equipment shakedown. |
|
|
|
[#13]
Quoted:
The only thing I have left to do now... yeah –– everyone says that at this stage.
ar-jedi |
|
|
|
[#14]
|
|
|
|
[#15]
Quoted:
Quoted:
The only thing I have left to do now... yeah –– everyone says that at this stage.
ar-jedi But I am truly almost done, the box is a little heavier now but my pockets are lighter. It is amazing how much this project will nickel and dime you to death, all the little things add up. The good thing is my portable antenna fits into the pelican case, so it is still a grab and go kit. The pelican case and Coax cable will go into a nice back pack with some some provisions and my IFAK. |
|
|
|
[#16]
Here is my auxiliary power station/Jump box
I am in the automotive industry, we commonly use commercial jump boxes. These jump boxes never seem to last very long, and I usually pull the AGM batteries out of them and use a float charger to recover the batteries. I have 2 17-18ah batteries, and one 7.5 ah that I have recovered from jump boxes that would no longer work. The common failure point is the chargers that come with these boxes, they use cheap chi com wall wart charges that tend to fail or overcharge the battery. My jump box had the battery charger go bad, and someone at work dropped the box and broke it. People just have no respect for other people's stuff and it is tough to lock up a box while it is charging. So the idea I got was to recycle the parts from my current jump box, use my trickle/float charger externally since it was a batter charger, and add a powerpole panel so the box can be used as a backup power source for my radios. Here is the box I put together, 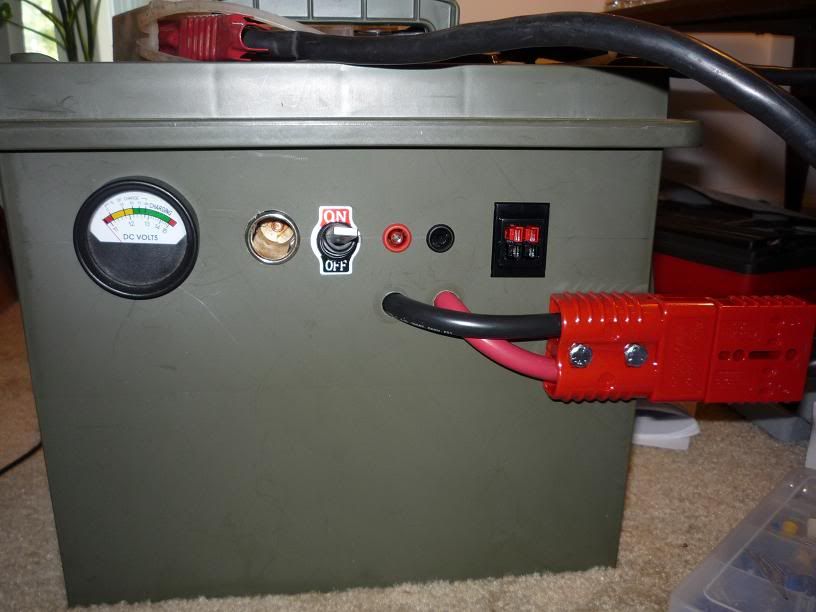
The box is a plastic "Ammo can" from Northern Tools, it contains a 18ah battery, I installed the volt gauge from my jump box and used a spare switch to control the gauge. The cigarette lighter socket was also recycled from the jump box, it give me the ability to use my memory saver for vehicles, it plugs into the diagnostic port of the vehicle and powers the computers memory. I added some banana plug jacks out of my junk box and added the power pole outlet to charge the main battery and to power the radio's when using it as a backup power station. As you can see in the power pole goodness I added a set of 175 amp power poles that go to the battery clamps, this allows me to take the clamps off for using the power station, and it allows me to lock the clamps in my tool box so the jerks at work cannot use the box while I am not there. I have to say I love these power poles, I am usually a cheap bastard, and the first time I saw the "poles" I thought they were a little pricey, but comparing them to the molex connectors they are actually quite cheaper and much better option. |
|
|
|
[#17]
Watch the trickle charger you use for the agm battery. Most trickle chargers are set up for standard wet cell batteries and usually always overcharge the agm style. The battery buddy ones are set up to auto sense wet/gel/agm and do a nice job.
|
|
|
|
[#18]
Quoted: (trimmed)
I have to say I love these power poles, I am usually a cheap bastard, and the first time I saw the "poles" I thought they were a little pricey, but comparing them to the molex connectors they are actually quite cheaper and much better option. First, great looking and well thought out battery box. Various connections, etc, just what is needed! Yeah, Powerpoles are the schiznitz! |
|
|
 Win a FREE Membership!
Sign up for the ARFCOM weekly newsletter and be entered to win a free ARFCOM membership. One new winner* is announced every week!
You will receive an email every Friday morning featuring the latest chatter from the hottest topics, breaking news surrounding legislation, as well as exclusive deals only available to ARFCOM email subscribers.

AR15.COM is the world's largest firearm community and is a gathering place for firearm enthusiasts of all types.
From hunters and military members, to competition shooters and general firearm enthusiasts, we welcome anyone who values and respects the way of the firearm.

Subscribe to our monthly Newsletter to receive firearm news, product discounts from your favorite Industry Partners, and more.
Copyright © 1996-2024 AR15.COM LLC. All Rights Reserved.
Any use of this content without express written consent is prohibited.
AR15.Com reserves the right to overwrite or replace any affiliate, commercial, or monetizable links, posted by users, with our own.


