|
Posted: 10/25/2014 2:00:55 AM EDT
Here's how we mount a Coleman propane single burner stove in tiny and mini kitchen counters, in the Stealth Trailer and Container, respectively.
The trailer system has been in use since 2003 and the container install more than a few years. My SO is happy with the installs and is careful with any flammables that might get too close. She has a baking soda box, a big Halon extinguisher under the sink, and a dry chem hanging by the sliding door. Here's how you can implement 'extreme' functionality in a small space. Container kitchen counter and sink. All the water comes from the little goose-neck faucet [filtered from a 40 gallon tank thru a carbon block and ceramic 10" cartridge filters], the big faucet isn't connected and is primarily to fool the Sheeple and make them feel good about how we live here. [After all, the American Sheeples' favorite pastime is Fooling Themselfs and we don't want to miss an opportunity in helping them along] 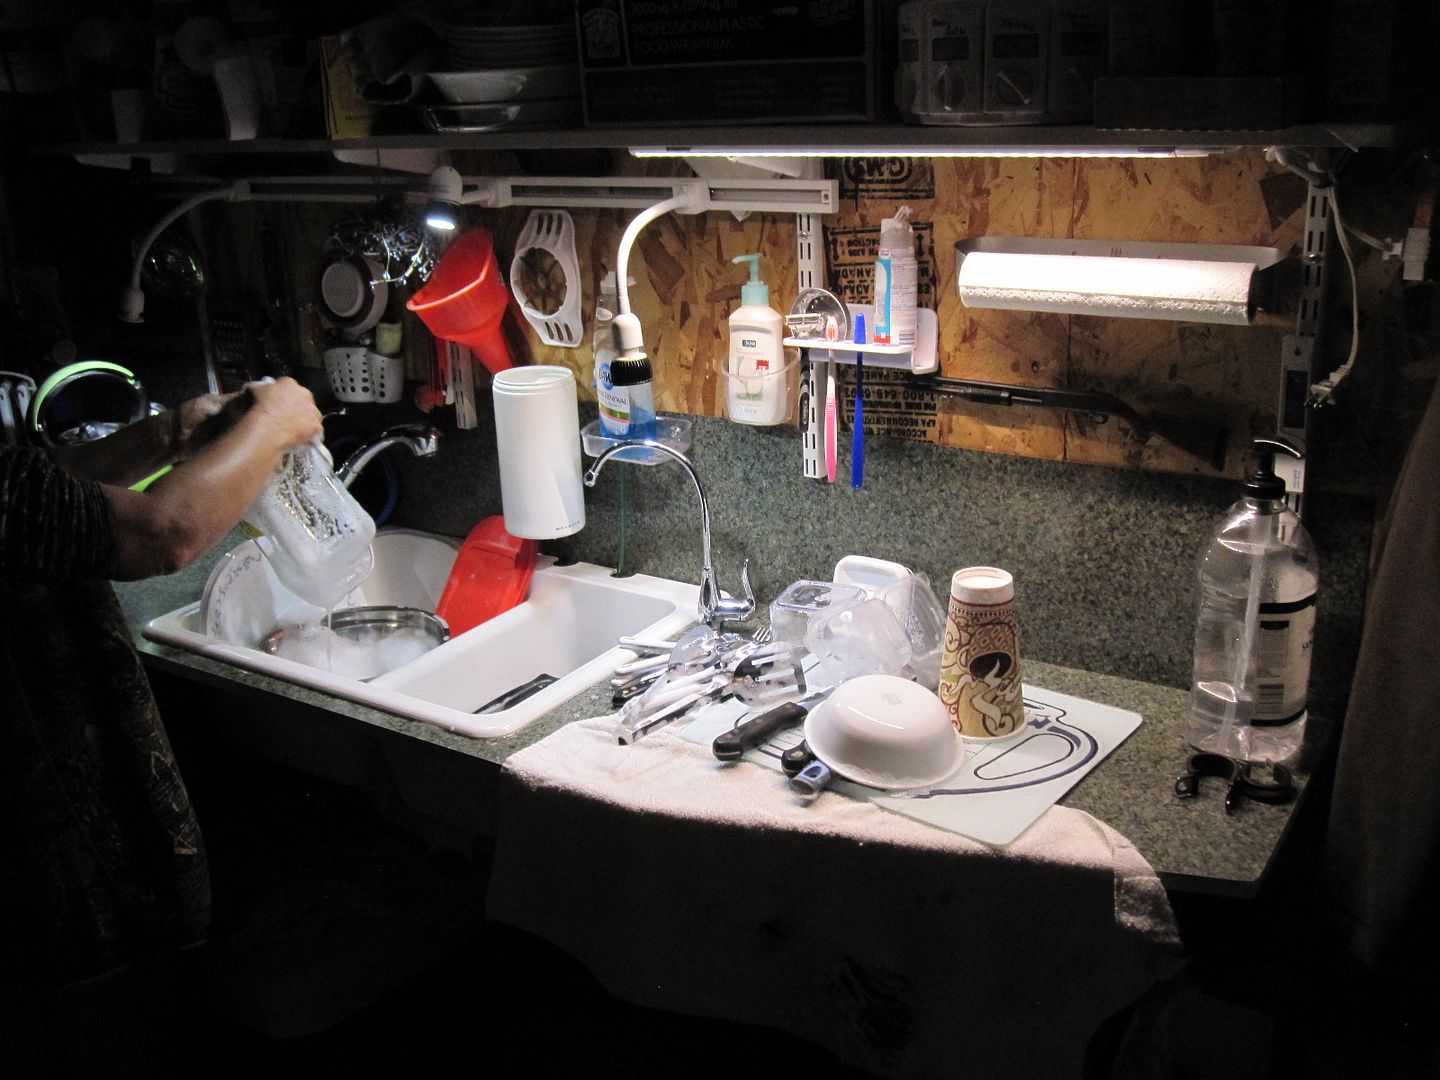
The kitchen counter is actually VERY bright, some of the lights were off and the cam flash wasn't working for some reason. You can see 3 LED track lights that I've written abt before, they are pretty nice and bright. But--- when my SO saw me mount some newer LED strip lights on my lab bench, well, she had to have them too. I must say they really make a difference. You can see one strip under the shelf on the right and when I came to the container the other day I was shocked [no pun intended] to see she had mounted and wired a second one that isn't shown, under the shelf to the left of the first. It goes without saying that space is a PREMIUM in a shipping container. There are 3 shelves above the kitchen counter, the upper two being wider and high enough not to bump my head. The top one is a wire shelf, the lower two are solid. Both upper ones are larger, 12", a lot of storage in a small space. 2 lower ones are 6 feet long [to leave room for the microwave] and the upper one is 8 feet long. In fact the container has a LOT of wire shelves, sitting and counting the lineal feet, there's abt 4 6' shelves directly above my 'computer desk', that are 6 feet long, 2 10 foot x 12 inch shelves on either side of the bed [just pissed off my SO when I turned on the light back there to look ---she's going to sleep after a hard day, she busted a drainage pipe inspection vertical when she drove the excavator about 100 feet before realizing that the blade was down and dragging, not the first time, and I figgered, well, let her fix it, maybe she will remember to raise the blade before moving, not like this hasn't happened before] 
So that's 40 friggin feet of storage on both sides of the bed! Plus the little bathroom has a lot of storage, this is almost like being on the moon lander, except maybe more cool since we live here a lot. Plus the view is prolly better... The kitchen sink is an RV sink. Stove components: I paid careful attention to heat and potential fire issues. Not shown clearly is aluminum flashing [Home Depot] behind the stove assembly and on the bottom of the shelf above that holds the microwave. The plate is aluminum and abt 12 x 12 inches. I used al channel pop riveted to the plate to space it above the Formica counter top. You can see some channel used to snug the Formica to the plywood in one of the pix. 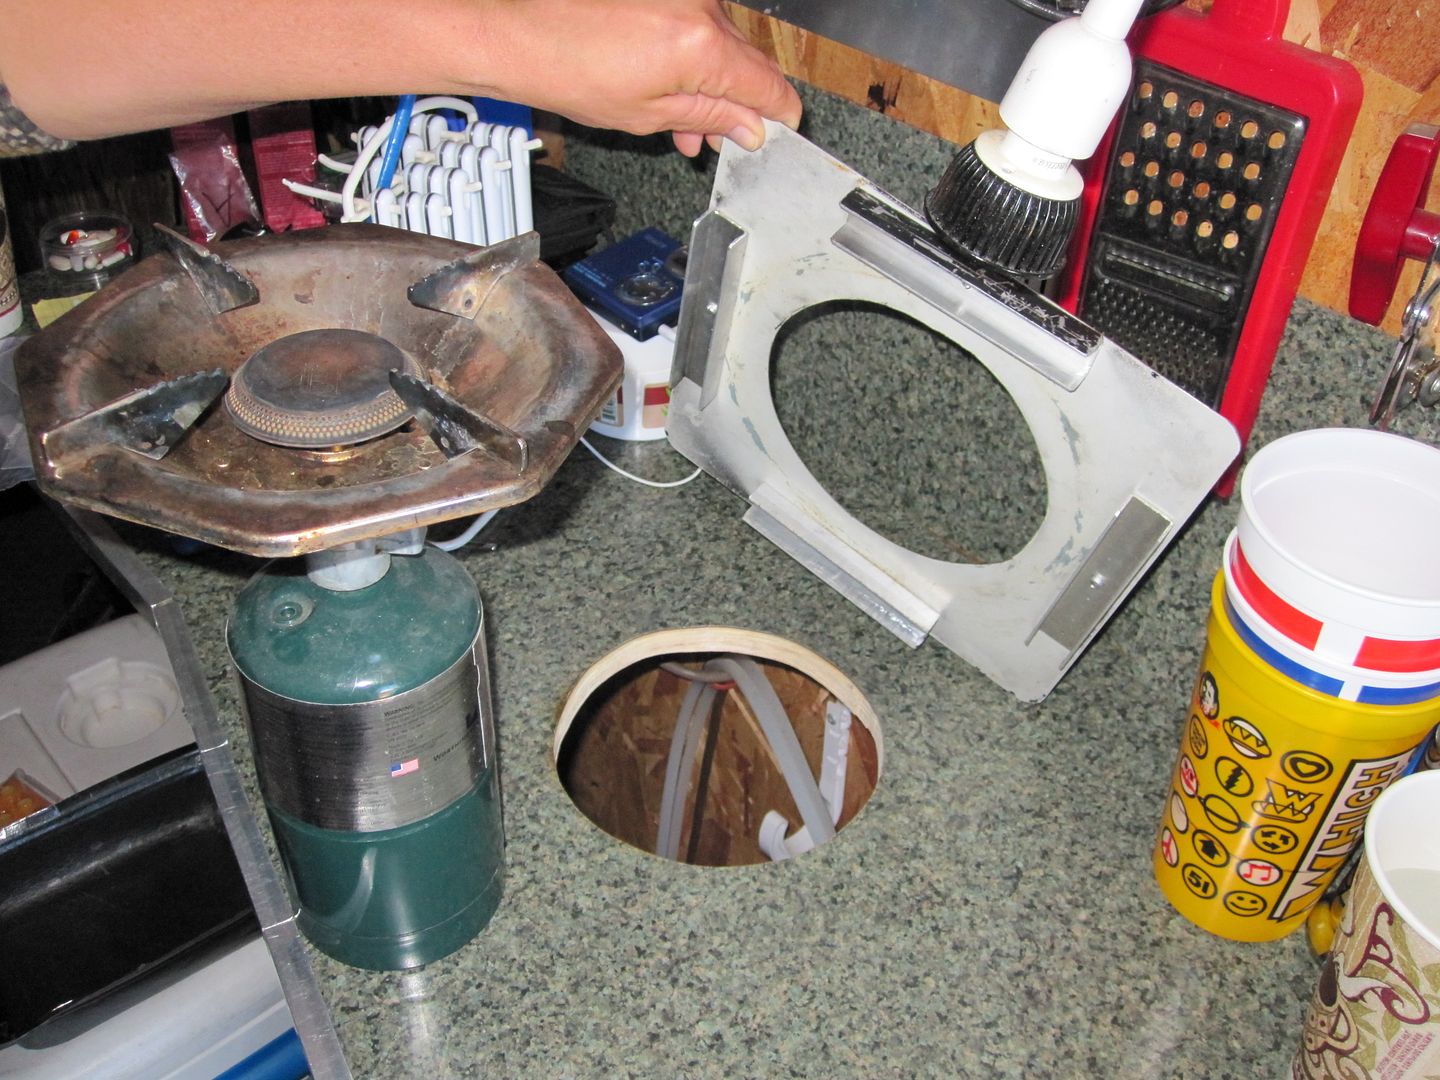
The tea kettle resting in its favorite place... 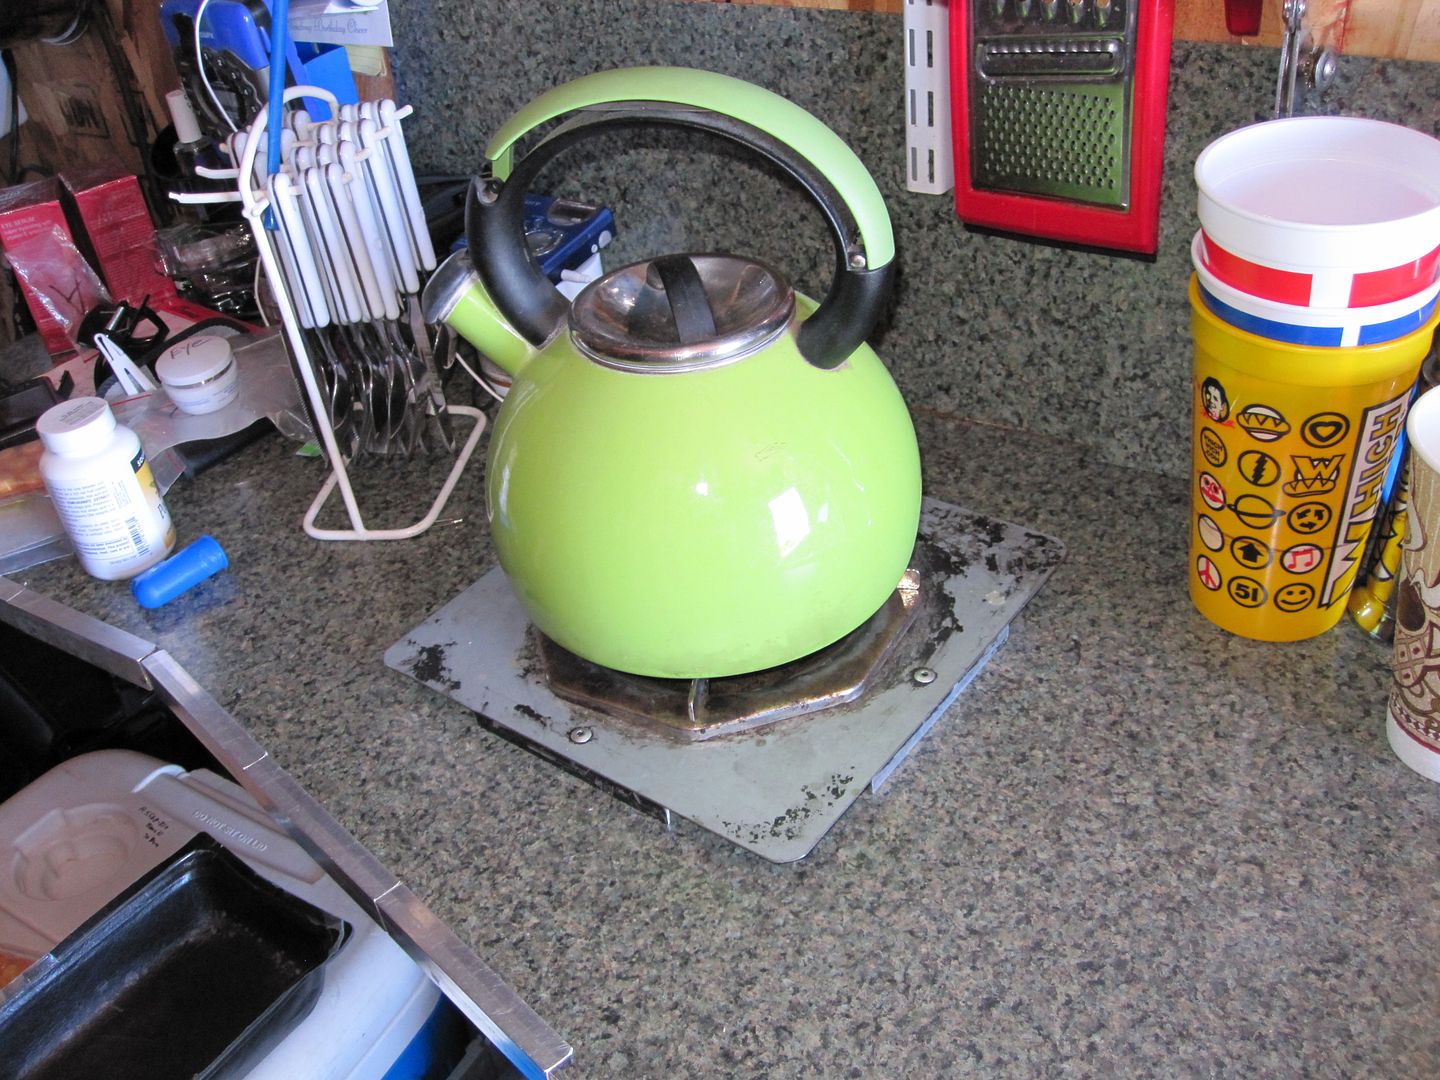
These Coleman stoves have gotten a LOT of use over the years and I think I had to replace one. We keep a spare stove in the trailer and near the container. They cost abt $20 and are a good choice. The stove position is directly across from the accordion door into the bathroom and there's a Fantastic Vent in the outside wall of the bathroom, above the 2' x 3' shower. So when she burns the stove she runs the fan. Careful engineering and layout planning for this worked out very well... 
You can see the ice chest in the first picture, she brings ice from the solar powered freezer in the barn everyday to keep it cool. When she needs hot water, she heats it in the tea kettle, sometimes to wash dishes, other times to bathe if we don't use the Maury tank less heater. Our Reverse Osmosis system is under the counter, to the right of the sink and if you look carefully in the first picture, there's a 1/4" green plastic tube coming up from a hole at the rear of the counter top and it goes thru an Adel clamp and is attached to a John Guest valve. When she needs RO water for drinking to fill my 2 gallon jar from W-M on the computer desk, she takes the jar, puts it in the sink [in case we forget to turn the RO off ] and pulls the valve and green hose up and sticks it in the jar and fills it up. There's a toggle control valve to turn on the RO system at the edge of the sink now, and it is much more convenient than having to get under the sink and operate a John Guest valve there. The RO "Bypass Water" isn't wasted, it's recycled back into the 40 gallon water tank in a non-freeze area. Finally, the bed is abt a King size and there's an ATV winch on the roof of the container with the cable passing 90 degrees thru a water-proof 'bushing' assembly into the container at the back center of the bed. The bed is cantilevered on strong -yet compact- channels bolted thru the paneling and insulation via support spacers and to the container rear structure. So--- with the press of a button, the bed can be raised to the ceiling and there's a table on a Harbor Freight hydraulic table that can be raised with some foot presses to working height for whatever need arises. |
|
|
|
[#1]
169 views and no luv for teh EXPY
No worries chap I'll still friend you on SF You have an attractive setup. I'd have left the rig with just the little faucet and told folks that I was using space saving components to lower my carbon footprint 
I am still looking into micro camp kitchens...have not come up with a cohesive idea to do a project yet, but I burn a few brain calories on it every few days. |
|
|
|
[#2]
Thanks PA22, I can always count on some luv from you...
I already had the big faucet and just installed it cause it looked coolish... I need to do a "Witch firestarter for my trunk bag" and I'd plolly get a LOT of reads... But I'm not a elephant...
Or howabout -my MIL jumped in my car an skeered me an I bladed 45 an fergot to draw. Did I do OK... That should be good for 8700 reads As far as developing a kitchin, you just need to start building one and let it flow from there. I could never have conceived this without ackshully doing it by the seat of my pants over a period of time. It doesn't matter what you do... As long as you GET STARTED |
|
|
|
[#3]
^ Building a kitchen, or anything, many of us can suffer from paralysis by analysis. If you are in a converted utility trailer or conex, lay out the dishpan, drying area, faucet, food prep area, leave space for the fridge or cooler like you did, put the shelf up above, and have some lights. Use inexpensive but functional materials, see how it goes and change it if need be.
Excellent idea with the single burner. My mil has a dual burner propane coleman stove in her cottage, just gets set out of the way when not being used. Would you be willing to share a few pictures of the bed/workshop setup? Any more news on the bears? |
|
|
|
[#4]
Nice set up.
|
|
|
|
[#5]
Quoted:
^ Building a kitchen, or anything, many of us can suffer from paralysis by analysis. I call that "The Decision Trap", that I found raised it's ugly head particularly at the final design stages of products. If you are in a converted utility trailer or conex, lay out the dishpan, drying area, faucet, food prep area, leave space for the fridge or cooler like you did, put the shelf up above, and have some lights. Use inexpensive but functional materials, see how it goes and change it if need be. That's the way to do it, driven mostly by necessity and and need to "Git Er Dun" Excellent idea with the single burner. My mil has a dual burner propane coleman stove in her cottage, just gets set out of the way when not being used. The container inside is about 7' 9" wide and 19' 6" deep and you have to make use of every bit of space, efficiently. That's a big part of the fun of doing it and living in one. Would you be willing to share a few pictures of the bed/workshop setup? I'll see what my SO will upload for me to post. Any more news on the bears? I'll try to update that topic... |
|
|
|
[#6]
Quoted:
Thanks PA22, I can always count on some luv from you... I already had the big faucet and just installed it cause it looked coolish... I need to do a "Witch firestarter for my trunk bag" and I'd plolly get a LOT of reads... But I'm not a elephant...
Or howabout -my MIL jumped in my car an skeered me an I bladed 45 an fergot to draw. Did I do OK... That should be good for 8700 reads As far as developing a kitchin, you just need to start building one and let it flow from there. I could never have conceived this without ackshully doing it by the seat of my pants over a period of time. It doesn't matter what you do... As long as you GET STARTED Busted Nah rearry Teh coleman stove is gittin er done for now. I am just looking forward to be free of the coleman suitcase. |
|
|
|
[#7]
OK, more questions on container living:
Ventilation? Insulation? Heating needs? Cooling Needs? You described the water source, I think I recall a solar water heater that a bear munched on once. Capacity? Other lighting / power / accessories inside? Did you make the countertop? It looks like 3/4 ply with laminate on top rather than particleboard core factory laminated stuff. Also curious as to the whole compound layout ... you mention a barn in a couple other posts ... what made you not wall off a corner of the barn to live in? Was the shipping container there first? Other buildings or structures? Interesting stuff, and I appreciate you sharing. |
|
|
|
[#8]
Quoted:
OK, more questions on container living: Ventilation? Sliding doors and fantastic vent. Insulation? Sort of complex the way we did it... In the ceiling, filled in the corrugations with 1/2 inch or 3/4 pink foam and aluminum tape, then Astro shiny bubble stuff on that, and then 2" pink insulation final, and it is exposed. Drilled and sealed ---for a sparse population--- of stainless 1/4" bolts in a logical pattern to retain the 2" pink foam sheets. Side walls, sort of the same with OSB exposed. Heating needs? 18,000 BTU RV propane furnace. We burn ~ 75 gallons a year, we're not here a lot in the peak cold and the inside of the container is maintained at ~43F We have data link and can monitor and look at most things. Temps are monitored in the solar tank water, in the solar box, ambient outside and in the container. Each time the furnace runs an email is sent with a lot of data. Cooling Needs? We're in the mtns, and really don't worry abt it. You described the water source, I think I recall a solar water heater that a bear munched on once. Capacity? Solar heater has maintained the 125 gallons of water above freezing all winter for I think 3 years now since we built it. This water is for toilet rinsing and shower, only. Not processed or filtered. Utility water we haul. We have 40 gallons stored that won't freeze no matter what. It also feeds an RO system and that is used exclusivity for drinking. Other lighting / power / accessories inside? 750 watts of solar panels, Outback charge controller, Xantrex inverter, lots of network equipment, sufficient LED lighting, bug zapper All in all as comfortable and convenient as a reasonable person could want. Did you make the countertop? It looks like 3/4 ply with laminate on top rather than particleboard core factory laminated stuff. Yes, used good plywood, 3/4 looking at it, glued the Formica to it with contact cement, contoured the edge for best traffic flow consideration, with saber saw, finished with belt sander and laminate trimmer. Also curious as to the whole compound layout ... you mention a barn in a couple other posts ... what made you not wall off a corner of the barn to live in? Was the shipping container there first? Other buildings or structures? Barn came after the container, it was never considered in the beginning. Interesting stuff, and I appreciate you sharing. |
|
|
|
[#9]
When you refill the 1lb cylinders do you ever mess with the purge valve to try and get any air out of them? Is that a waste of time and energy in most cases?
Wish my coleman stove like yours would go a bit LOWER at times. Is there any way to modify it to do that or is it 'what it is' as far as the lowest heat setting? Thanks for any further advice here... |
|
|
|
[#10]
Quoted:
When you refill the 1lb cylinders do you ever mess with the purge valve to try and get any air out of them? Is that a waste of time and energy in most cases? Wish my coleman stove like yours would go a bit LOWER at times. Is there any way to modify it to do that or is it 'what it is' as far as the lowest heat setting? Thanks for any further advice here... My SO has talked abt filling 1# cylinders and has the fitting to do it, and we got the certifications to refill propane tanks from the local propane distributor for some study, classroom and $$$. So she ought to be able to understand the physics -but I doubt it I prefer she doesn't do it, altho it's her call.
Batman, I think, is the resident expert and there has been a lot of discussion abt it. Maybe he could offer more info... I've never tried to reduce the output of the stove, I think maybe changing the orifice if that's possible would do it. ETA Re the purge valve, once the cylinders have been filled at the factory, and used til empty, there shouldn't be any air getting into the cylinder anyhow. Just the residual propane at near atmospheric pressure. |
|
|
|
[#11]
Quoted:
My SO has talked abt filling 1# cylinders and has the fitting to do it, and we got the certifications to refill propane tanks from the local propane distributor for some study, classroom and $$$. So she ought to be able to understand the physics -but I doubt it I prefer she doesn't do it, altho it's her call.
Batman, I think, is the resident expert and there has been a lot of discussion abt it. Maybe he could offer more info... I've never tried to reduce the output of the stove, I think maybe changing the orifice if that's possible would do it. ETA Re the purge valve, once the cylinders have been filled at the factory, and used til empty, there shouldn't be any air getting into the cylinder anyhow. Just the residual propane at near atmospheric pressure. Quoted:
Quoted:
When you refill the 1lb cylinders do you ever mess with the purge valve to try and get any air out of them? Is that a waste of time and energy in most cases? Wish my coleman stove like yours would go a bit LOWER at times. Is there any way to modify it to do that or is it 'what it is' as far as the lowest heat setting? Thanks for any further advice here... My SO has talked abt filling 1# cylinders and has the fitting to do it, and we got the certifications to refill propane tanks from the local propane distributor for some study, classroom and $$$. So she ought to be able to understand the physics -but I doubt it I prefer she doesn't do it, altho it's her call.
Batman, I think, is the resident expert and there has been a lot of discussion abt it. Maybe he could offer more info... I've never tried to reduce the output of the stove, I think maybe changing the orifice if that's possible would do it. ETA Re the purge valve, once the cylinders have been filled at the factory, and used til empty, there shouldn't be any air getting into the cylinder anyhow. Just the residual propane at near atmospheric pressure. Always appreciate your advice and your time here EXPY. |
|
|
|
[#12]
We added a Laser kero/diesel vented heater under and right of the sink and it has been working well.
We have been using an RV [Atwood Everest Star 12,000 or18,000 BTU] propane furnace for about 6 or so years with good results but it is loud and we have to transport the 120 gallon tank to get it filled. Weight of the tank is about 700 pounds I'm guessing, and we fill it once a year in the summer. The laser heater is far quieter and has an energy saving mode that keeps it lit and heating at the lowest setting and the heater's microprocessor ignores the thermostat setting to some degree... It stays fired at the lowest of 3 burn settings and avoids the need to run the 300 watt igniter periodically to restart the furnace. At ~30F outside, during the night the furnace barely uses fuel at this setting and almost keeps the container too warm. The manual has fuel consumption data at the 3 settings. The lowest setting is very little. The kero heater avoids the hot-cold-hot-cold annoying cycle of the RV propane heater. We use the RV propane heater when we aren't there to maintain abt a 40F inside temp and unplug the kero vented heater. |
|
|
|
[#13]
I like it. Cool setup. Very practical, no muss no fuss
|
|
|
 Win a FREE Membership!
Sign up for the ARFCOM weekly newsletter and be entered to win a free ARFCOM membership. One new winner* is announced every week!
You will receive an email every Friday morning featuring the latest chatter from the hottest topics, breaking news surrounding legislation, as well as exclusive deals only available to ARFCOM email subscribers.

AR15.COM is the world's largest firearm community and is a gathering place for firearm enthusiasts of all types.
From hunters and military members, to competition shooters and general firearm enthusiasts, we welcome anyone who values and respects the way of the firearm.

Subscribe to our monthly Newsletter to receive firearm news, product discounts from your favorite Industry Partners, and more.
Copyright © 1996-2024 AR15.COM LLC. All Rights Reserved.
Any use of this content without express written consent is prohibited.
AR15.Com reserves the right to overwrite or replace any affiliate, commercial, or monetizable links, posted by users, with our own.


