|
[#1]
Interesting video.
Design corrections to large builds. |
|
|
|
[#2]
WOW.
Printers in one room in this video. Uploaded on Mar 30, 2011 and this is all without retract... im still amazed on a daily basis about its quality at this speed.. also you can see the four printbed layouts we now use. and the new times on the right.. if you look/count properly you can see: - total printtime of all four beds (+1 large gear) = around 25hours.. - we have 8 working mendels now (and two working UP's) so . you can do the math... - in theory we can print on our 8 mendels a full mendel plastic set incl extruder now every 3hours and 7mins. or: - we can print 7,7 mendels plastic sets incl extruder daily.. (if we do 24/7... what we do alot lately..). so our production time will soon drop very fast and we might have next day shipping on complete machines incl plastics in a few weeks... :) and yes, im drinking coffee at 1am as you can see... |
|
|
|
[#3]
Interesting
Making Microchips at home. Not Guilty BTW. Jeri Ellsworth is a self taught engineer. She has 400+ Youtube videos. Wiki page http://en.wikipedia.org/wiki/Jeri_Ellsworth BTW you pinball wizards out there. She owns 90 pinball machines. One could dedicate a whole topic to her. |
|
|
|
[#4]
One fast pick and place robot.
Hope your not doing drugs. |
|
|
|
[#5]
Quoted:
very much so instrestued in a 3 d printer I would like to know some questions 1 bottom line what is the cost for a printer ready to go 2 what is the best printer out there for the cost 3 anyone use a 3 d scanner You must get a heated table if you want to print ABS. You need an 8 inch/200mm or larger build area to print an AR lower. The Cube models require proprietary (very expensive) material. I would not get anything cheaper than an $800 Solid Doodle-3. And that is better than many more expensive printers. The best printer designed to be easy to use is probably the Up! or MakerBot-2X but the Up is a small print area and the Makerbot-2X is $2800. It is hard to say what is best because there are several being marketed but not shipping yet, so it depends how they turn out. I saw this very rigid looking and high speed model for only $999 that looks more professional than the Mendel Max (which is $1400 in kit form). It is not shipping just yet, but they say four weeks. It looks like it smokes anything else out there that is under $3000: http://www.matter-replicator.com/forum/viewtopic.php?f=8&t=10 |
|
|
|
[#6]
Put a knife on it and have it play the "finger" game. 
|
|
|
|
[#7]
|
|
|
|
[#8]
Quoted: Imaging two hands.Put a knife on it and have it play the "finger" game.  |
|
|
|
[#9]
|
|
|
|
[#10]
I'm saving my money so when Costco has them ill bite. Might be a while tho
|
|
|
|
[#11]
|
|
|
|
[#12]
The thought I had was similar. But instead of melting out the PLA or ABS directly, you use the 3D printer to make a master mold. Then use silicone rubber (flexible) mold making material as a die for copies. Then you can cast meltable (cheap) wax into the silicone rubber for as many copies as you want for traditional lost wax investment casting.
|
|
|
|
[#13]
Quoted: The thought I had was similar. But instead of melting out the PLA or ABS directly, you use the 3D printer to make a master mold. Then use silicone rubber (flexible) mold making material as a die for copies. Then you can cast meltable (cheap) wax into the silicone rubber for as many copies as you want for traditional lost wax investment casting. I posted this on page 5 Garen Phillips Here he makes a blower tube for a vehicle. 3D Printing |
|
|
|
[#14]
Found out more about the uxtrusions for my Mendelmax
They were the normal 10 series as I thought Even smaller Google Mendelmax 1.5 Bill of Material(BOM) https://docs.google.com/spreadsheet/ccc?key=0Ao-fptzJAVfGdDdnd3htckhZUVdWUTdvRnJQUEJrMUE&hl=en_US#gid=0 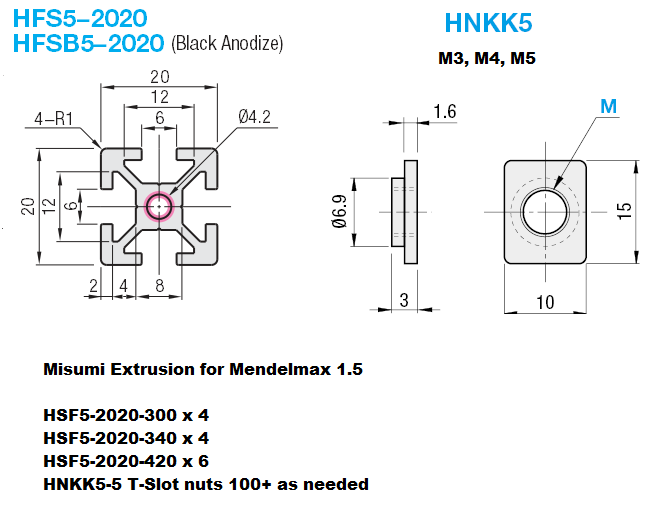 |
|
|
|
[#15]
Quoted:
Found out more about the uxtrusions for my Mendelmax They were the normal 10 series as I thought Even smaller Google Mendelmax 1.5 Bill of Material(BOM) https://docs.google.com/spreadsheet/ccc?key=0Ao-fptzJAVfGdDdnd3htckhZUVdWUTdvRnJQUEJrMUE&hl=en_US#gid=0 http://i2.photobucket.com/albums/y22/TractorDre/AR15/Mrndelmax%201%205/Mendelmax15extinfo_zps28816fe9.png they sent the wrong size? |
|
|
|
[#16]
Quoted: Yep.Quoted: Found out more about the uxtrusions for my Mendelmax They were the normal 10 series as I thought Even smaller Google Mendelmax 1.5 Bill of Material(BOM) https://docs.google.com/spreadsheet/ccc?key=0Ao-fptzJAVfGdDdnd3htckhZUVdWUTdvRnJQUEJrMUE&hl=en_US#gid=0 http://i2.photobucket.com/albums/y22/TractorDre/AR15/Mrndelmax%201%205/Mendelmax15extinfo_zps28816fe9.png they sent the wrong size? Joined Misumi USA tonight to order direct. Only way to get the right ones. At the price they want.( 100 for $19.95 plus shipping)(closed weekends) I ordered 2 SETS OF 100. Don't know what they will charge for shipping until Monday. Have to call their 800 # Monday to pay over the phone. The button heads just arrived in Nashua. I wont get them until Monday. Those will be easy to change out with the SHCS that come with the kit. I ordered in M5 x 8, 10, 20. Also the wider heads wont need washers and will prevent cracking. But on the other hand it wont be a waste. I can use them on the CNC |
|
|
|
[#17]
OH so they sent too small of slot inserts? that sucks..
Misumi was pretty fast to ship. |
|
|
|
[#18]
Quoted: OH so they sent too small of slot inserts? that sucks.. Misumi was pretty fast to ship. No. The parts are too big. Sent to me by a dealer. I'm dealing direct with Misumi this time. Button heads arrived today, They look great on the sides of the printer. I have used up most of the t-nuts figuring in on the AC/switch covers and E-stop cover. and the 32 t-nuts for reinforcement. Without them the base easily twist while picking it up. Pre-assembly showed what I thought would happen. If you think about it, the Prusa and Mendels (ones with threaded rods and the acrylic/wood sides are a lot tougher. This Mendelmax assy depends on the plastic corners to hold it together.. I might take it apart again to pre drill through the side to use a long screw on the corners to properly join the corners together, I'm going to need another jig or modify this one from the 10 series. |
|
|
|
[#19]
Here I have more info for those dealing with the same Misumi extrusion.
   |
|
|
|
[#20]
Sorry in advance for the quality of the pictures. The compact florescence lights in the room effects the camera.
Here are the difference between the socket head cap screws and the button head cap screws. Before 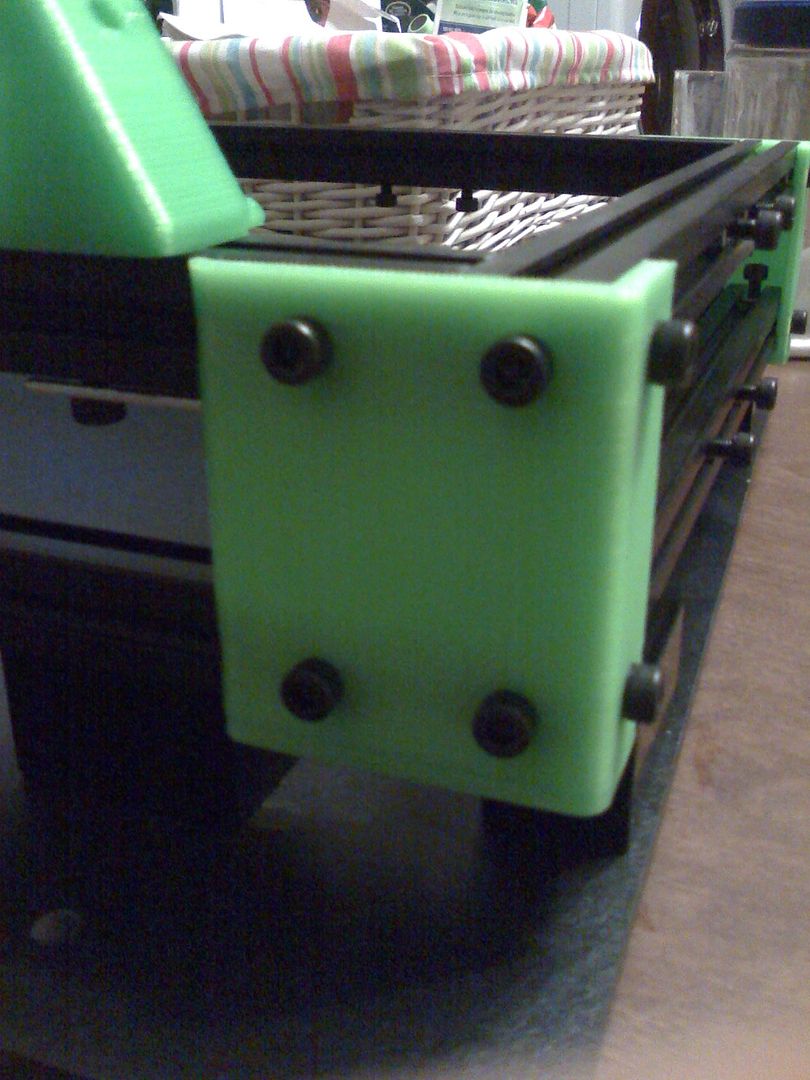 After. 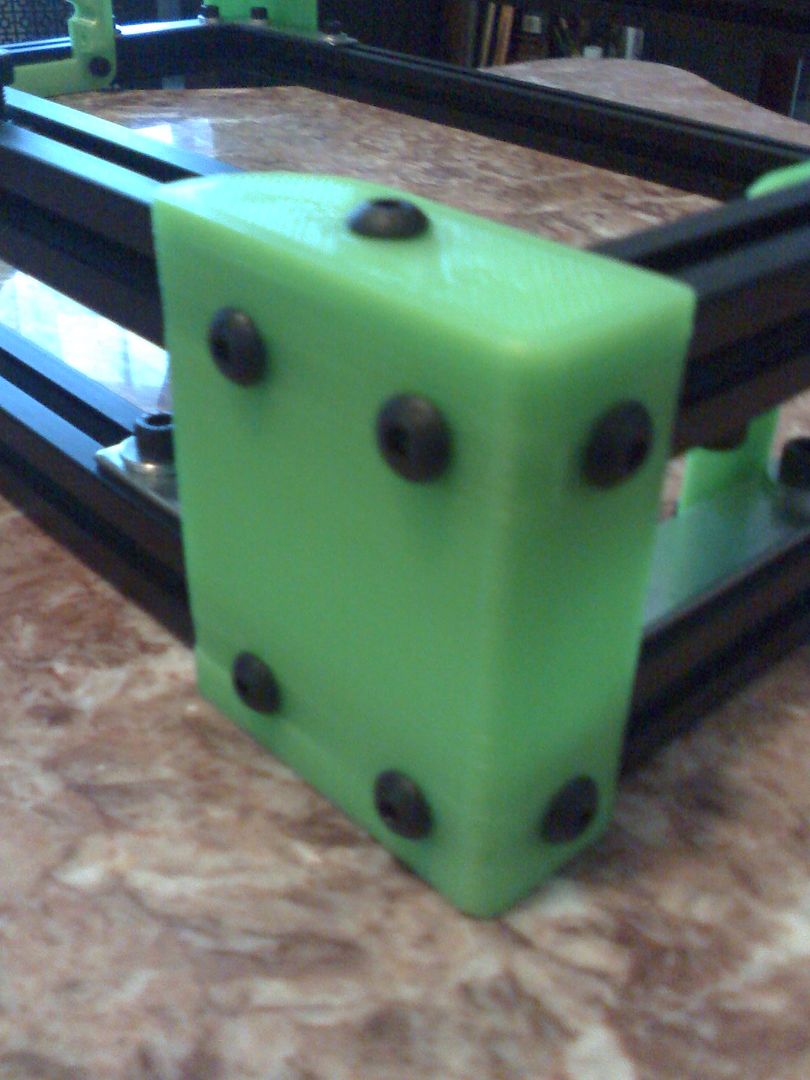 These are the braces installed in one corner otherwise only the ABS corner supports the sides. The side extrusion is only held in by one screw at each end. Without a screw running through the end extrusion to screw into the side extrusion, these braces are needed. 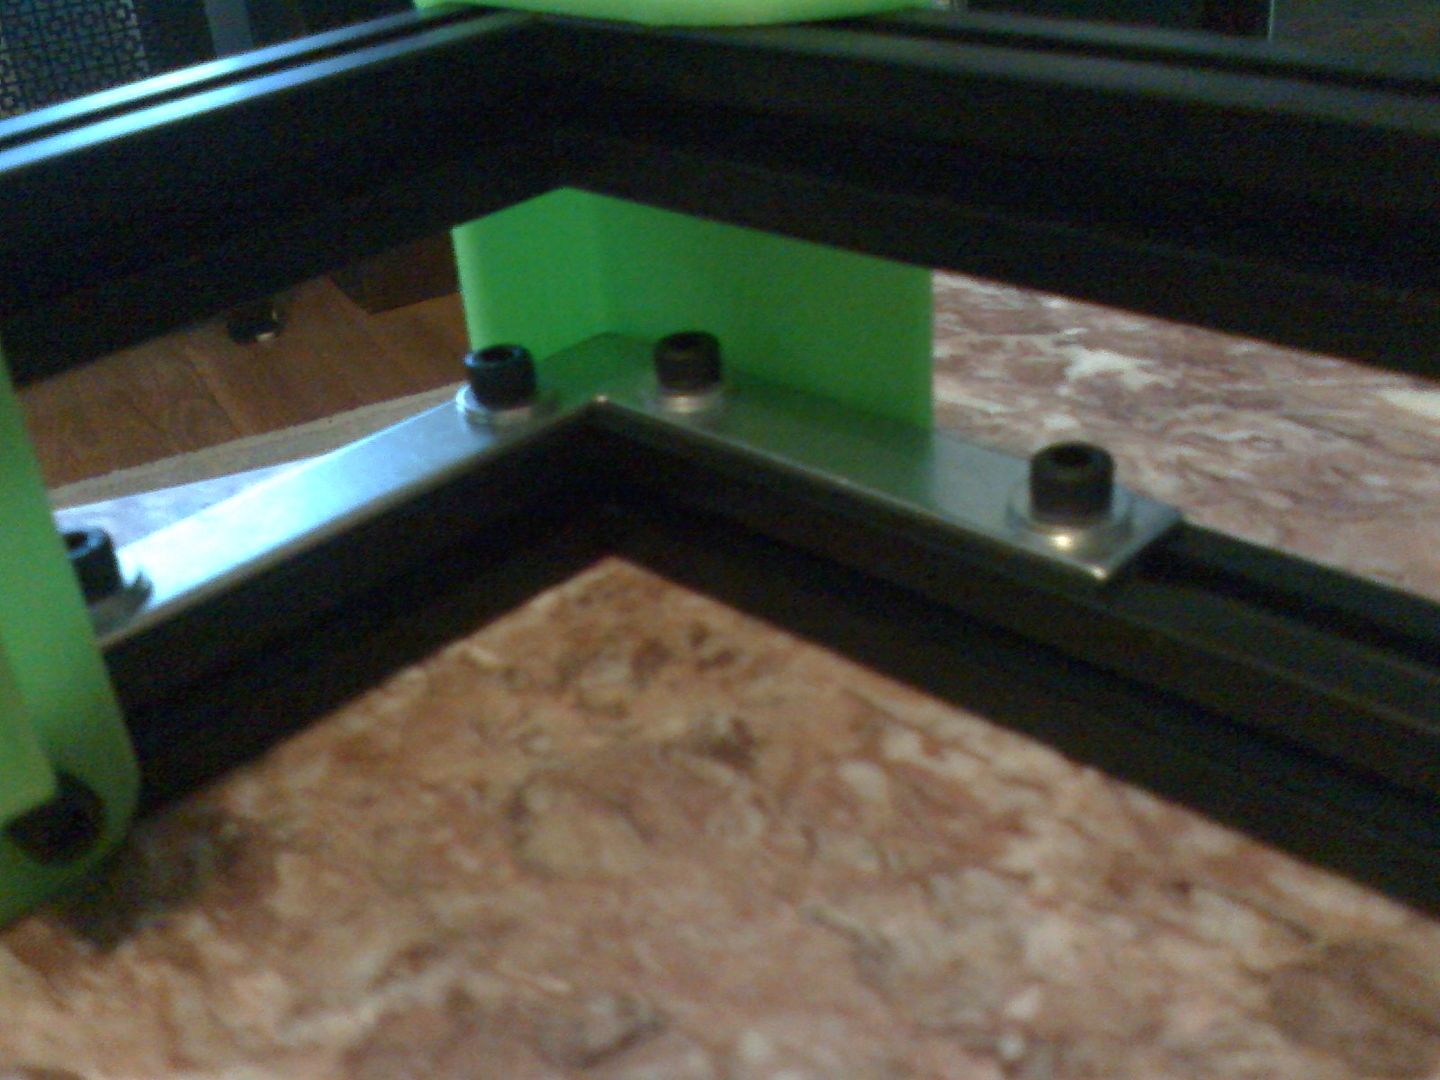 The corners support both the upper and the lower set extrusions. The only thing keeping everything together is plastic and small screws. If this were ever dropped. I can just imagine the damage and alignment issues. This kit did not come with instructions, so I am using the Trinity labs and some other Mendelmax instructions for assembly. They all have through holes to join the extrusions toghether. This kit has none at all. Don't know how the upper vertex is to go together with out them. Otherwise I'll have to drill them. Waiting for an answer from the seller. It is advertised as having been drilled and tapped. |
|
|
|
[#21]
wish i didnt click on this thread
|
|
|
|
[#22]
Quoted: wish i didnt click on this thread They sell them in your neck of the woods. |
|
|
|
[#23]
Watching Iron Man again.
Is he 3D printing his suit? |
|
|
|
[#24]
Verified the extrusion in my kit to the pictures of the extrusion only kit.
Yep. He left out the holes. The seller answered me but avoided the fact that the holes are missing. Said he sent me a drawings of where the parts go. Not!! 5 people received the kits in the same week. I wonder if the others figured it out yet? I'm taking it apart again. I'll drill out the extrusions tomorrow. I haven't received the missing parts yet. |
|
|
|
[#25]
Quoted:
Watching Iron Man again. Is he 3D printing his suit? "I've got the Bridgeport working on that." Can't remember if that's in part 1 or part 2. |
|
|
|
[#26]
Quoted: Quoted: Watching Iron Man again. Is he 3D printing his suit? "I've got the Bridgeport working on that." Can't remember if that's in part 1 or part 2. In part one he had the suit made in less than half a day on site at home by his home computer. Part 2 I cant remember In the Avengers it made the new proto type suit in over a day |
|
|
|
[#27]
Got my extrusions, leadscrews, belts, etc today.
All looks good so far. Question: What accomplishes anti-backlash in the Z-axis? The kit didn't come with AB nuts. They appear to fit pretty snugly, but they'll eventually wear. Is it just not an issue because of gravity? |
|
|
|
[#28]
[span style='font-weight: bold;']What accomplishes anti-backlash in the Z-axis? The kit didn't come with AB nuts. They appear to fit pretty snugly, but they'll eventually wear. Is it just not an issue because of gravity?
Gravity. |
|
|
|
[#29]
BPS = Bad Picture Syndrome
Again.OK. I went nuts and drilled and tapped. I took the 4 side extrusions and and tapped out the ends with a M5 tap. Then I added a M5x10 BHCS 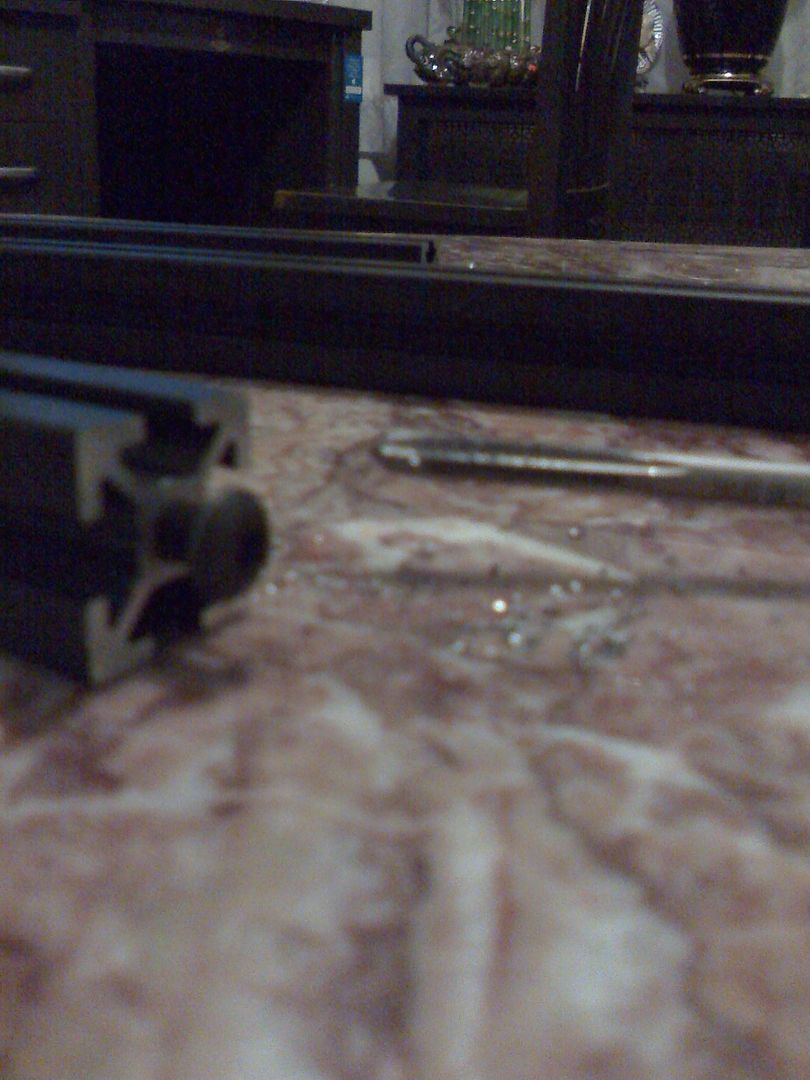 Then I took the 4 short extrusiona and drilled a hole through the extrusions to access the Button Head screws. The same way it should be but wasn't done on my extrusions, on the top of the two gantry rails. These are the 4 Extrusion used in pairs front and rear. 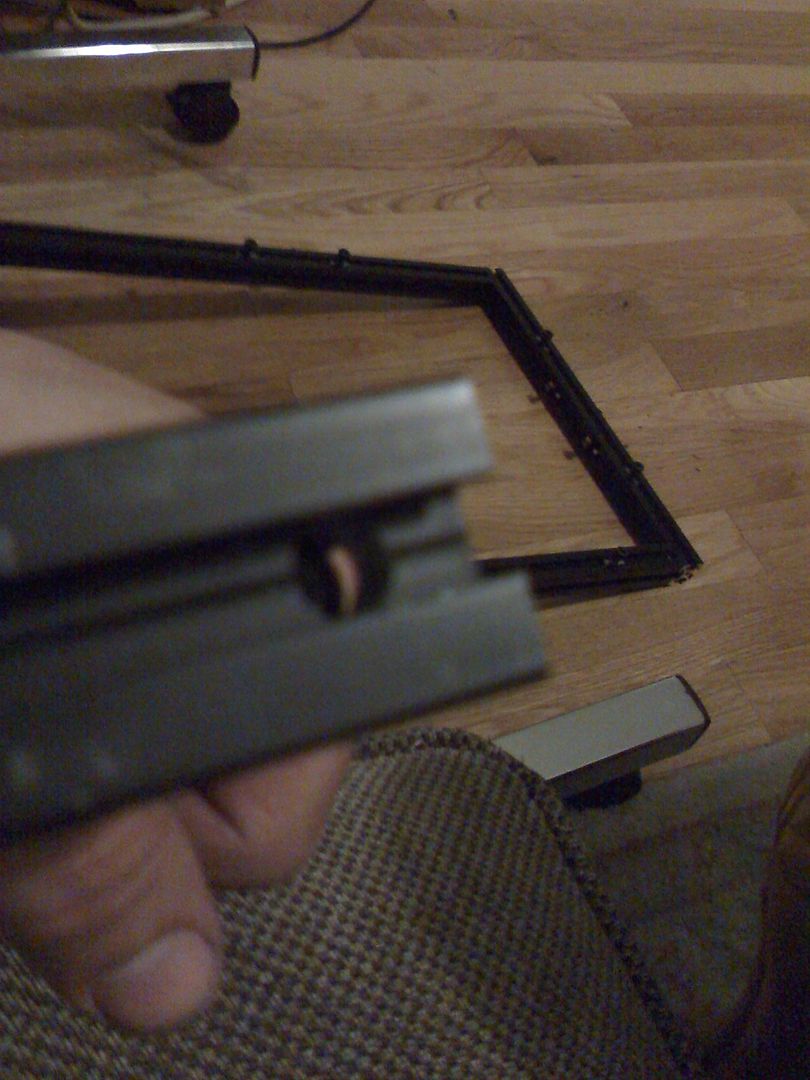 These are the top and bottom sets assembled and flat for the base vertex assy. These are only held together by 4 M5x10 BHCS. They are very strong and hopefully wont need any further bracing. Under the instruction just finally sent by the seller(made by one of his customers) you are depending on side screws to hold everything together. I had already assembled it that way by using an old manual online and it was more of a disaster. The joints flex and pull apart. 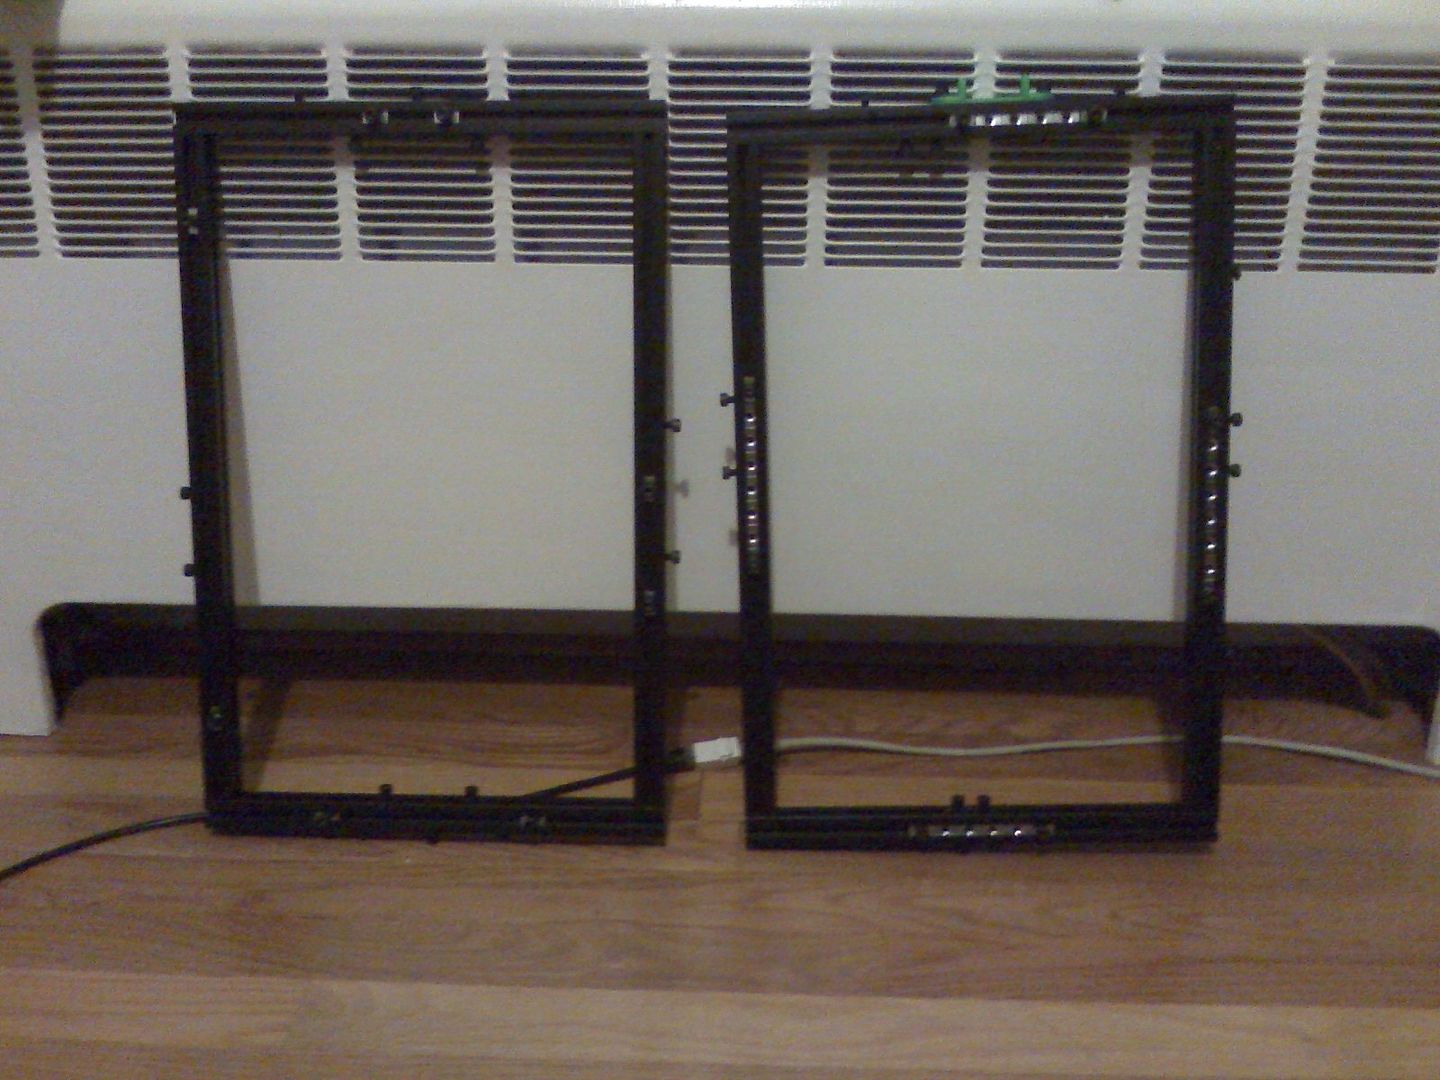 Remember the previous corner braces in the earlier post. I don't need them any more. These two assemblies actually sit flat on my surface plate. I attached two or the corners from the kit loosely to the top assy upside down then stacked the bottom extrusion set. Then I added the last two corners and kept all the screw loose. I pressed the top extrusion set down for each corners then tighten the screws for the top rails one corner at a time. ( BTW. I found that this stone coffee table was almost as flat as my 12x18 inch surface plate but much larger. It's not .0001 tolerance but since the rails sat almost as flat it was close enough.)I then checked the to make sure that the corners were not sitting on excess plastic. But I had already cleaned it off earlier. I then flipped the base over and repeated the same pattern but kept them lightly snug but not fully tighten. This way I am not digging into the plastic. I then placed my 6x6 surface plate on the table and turned the dial incator around so that I could check the bottom rail. I checked for highest and lowest. Since I had already been through this before I had already made adjustments in the (marked)corners. Ones both rails were equal distance apart, I then Tighten all the screws. The distance between opposite corners. On the outside of the plastic corners are 22 1/8 and the rails are 21 3/4. Top side. 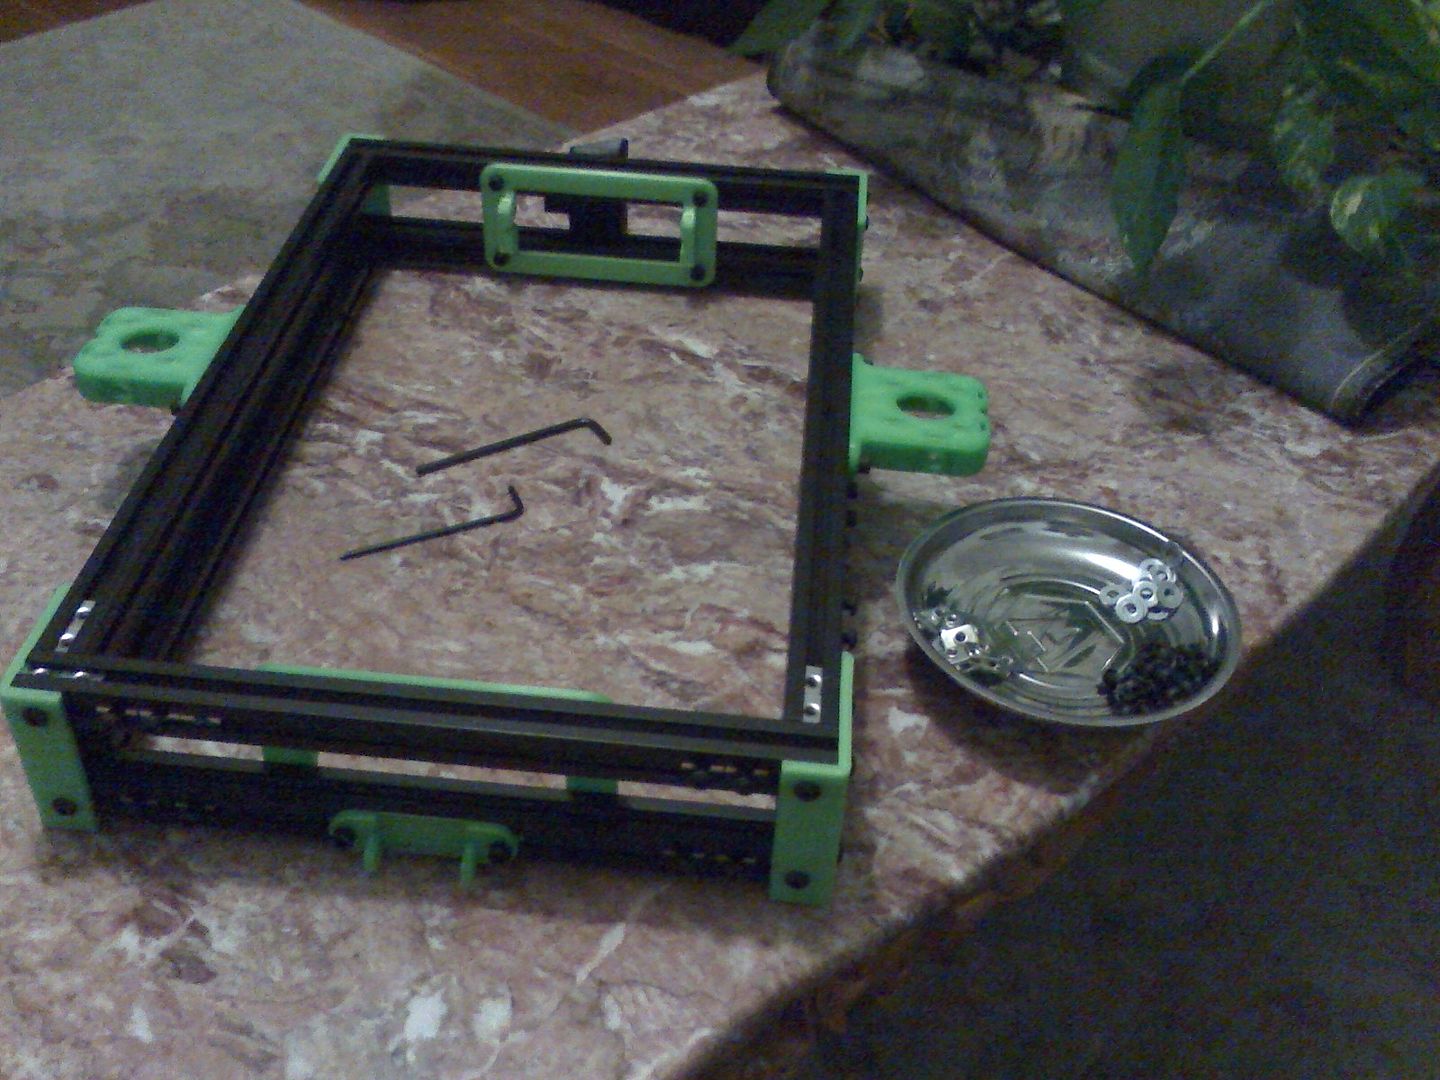 Bottom side. 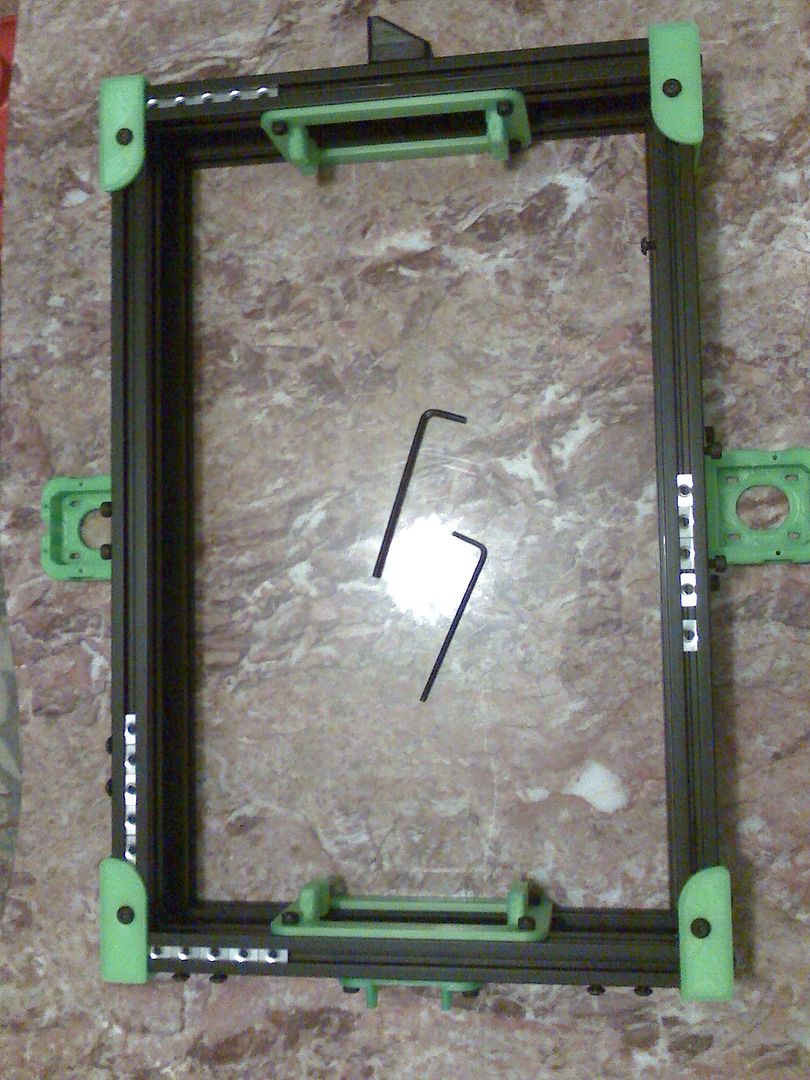 All those t-nuts on the bottom side are for the feet/isolators that are mounted to the board that I have in the earlier photos. The rest are for the E-stop switch cover and switch plates. I trying to find out if the Ramp set controls a light tree. |
|
|
|
[#30]
Quoted: Got my extrusions, leadscrews, belts, etc today. All looks good so far. Question: What accomplishes anti-backlash in the Z-axis? The kit didn't come with AB nuts. They appear to fit pretty snugly, but they'll eventually wear. Is it just not an issue because of gravity? I didn't get that far yet, but in more complex system I used metal shims that were for the lead screws. These ranged from .001 to .025 in thickness. These went between the the stop on the lead screw shaft seat to the bearing. Other backlash came from the balls inside the Thomson ball bearing assy. These were usaully do to not enough balls or wrong size to the threads. Some of the adjustable bearings only had to be compressed, but be careful since these tend to bind of compressed too much at one end. |
|
|
|
[#31]
Just ordered some M5x12 FHCS screws for mounting the feet/isolators on.
I could have purchased them locally but I would have to take time off from work to get them. I don't need them right away, and Ebay is cheaper. My t-nuts from Misumi should be here soon. I wont need them till later for the upper vertex. Kind of used up a few t-nuts for the base and plates. |
|
|
|
[#32]
Ok. So... bottom line: can I get set up with one of these things with a decent sized print envelope for less than $1k? And if so, where do I order it?
I really, REALLY want one and I've got some extra cash right now, but the Mendelmax 2 full kit I've been looking at is $1.5k and I can't even find a price for the Deltamaker I was eyeballing. |
|
|
|
[#33]
Quoted: Ok. So... bottom line: can I get set up with one of these things with a decent sized print envelope for less than $1k? And if so, where do I order it? I really, REALLY want one and I've got some extra cash right now, but the Mendelmax 2 full kit I've been looking at is $1.5k and I can't even find a price for the Deltamaker I was eyeballing. Well for this size foot print its advertise below $1k but then the charge $150 to 200 for shipping. Make sure it has free shipping or less than $1100. The next size down are less than $1000 shipped. If you are thinking of doing a AR lower. Forget it. Makibox has a small desk top model for $200 to $400 http://makibox.com/products Specs:
Kit contains:
Notes:
ETA Mendelmax 1.5 go up to $1600 unassembled. Some dealers sell it complete and tested for $1600. Some of them go for $2300 assembled and tested. |
|
|
|
[#34]
1600 bucks, really?
Geez. Mine's going to end up costing me about 900 bucks when all is said and done. |
|
|
|
[#35]
Quoted:
Mendelmax 1.5 go up to $1600 unassembled. Some dealers sell it complete and tested for $1600. Some of them go for $2300 assembled and tested. So much for that idea. |
|
|
|
[#36]
Just noticed that Makibox is selling an Extruder/Winder kit for $150
No pics. 10 to 12 weeks lead time. http://makibox.com/details/product/ramen_kit Note. Growing pains trying to keep up. Lead time. Big changes. New stuff. Google has a Makibox group. https://groups.google.com/forum/#!forum/makibox New leadership for online activity. Nice details for the chess set. Video showed problems on the inside of that red artsy thing. I think its a re-scaling problem since those are usually bigger. Also speed problem(too fast) on corners inside Also they be selling Filament at about $10 per pound but a long lead time.  What the hell is that little dragon octopus face thingy? |
|
|
|
[#37]
Quoted: 1600 bucks, really? Geez. Mine's going to end up costing me about 900 bucks when all is said and done. OK. I admit. I went overboard.  I have parts for almost 1.5 machines |
|
|
|
[#38]
Quoted:
Quoted:
1600 bucks, really? Geez. Mine's going to end up costing me about 900 bucks when all is said and done. OK. I admit. I went overboard.
I have parts for almost 1.5 machines Wow, I was out around 800 total including a 5lb spool of filament, with $100 of that just for the hotend. It'd have been a little less, but ordering extra parts to replace incorrect ones wasted some money. Mine's older and doesn't have some of the latest fancy things like delrin z-axis bushings, a fancier Y axis system, and other stuff which might have made it cheaper. I would have gone that way if it was available at the time. Finally, my parts arrived, and I fixed it. It was apparently a manufacturing defect with the Budaschnozzles that shipped in that timeframe last year where they had left a small gap during construction. Works fine for ABS but causes the stiffer PLA to jam. The replacement parts got it working with PLA with no problems. Here is my calibration cube printing. The loud mechanical noises that don't match up to the printer movement are my DLSR's autofocus. Next time I film a print I'll use a tripod and set it to manual focus. |
|
|
|
[#39]
Quoted: Quoted: Quoted: 1600 bucks, really? Geez. Mine's going to end up costing me about 900 bucks when all is said and done. OK. I admit. I went overboard. I have parts for almost 1.5 machines Wow, I was out around 800 total including a 5lb spool of filament, with $100 of that just for the hotend. It'd have been a little less, but ordering extra parts to replace incorrect ones wasted some money. Mine's older and doesn't have some of the latest fancy things like delrin z-axis bushings, a fancier Y axis system, and other stuff which might have made it cheaper. I would have gone that way if it was available at the time. Finally, my parts arrived, and I fixed it. It was apparently a manufacturing defect with the Budaschnozzles that shipped in that timeframe last year where they had left a small gap during construction. Works fine for ABS but causes the stiffer PLA to jam. The replacement parts got it working with PLA with no problems. Here is my calibration cube printing. The loud mechanical noises that don't match up to the printer movement are my DLSR's autofocus. Next time I film a print I'll use a tripod and set it to manual focus. Cool. Silly question. When you assembled the Y-axis and assembled the the clamps for the shafts. Were the M5x12 too short for the assembly? These are the clamps I'm talking about. The longest M5 screw in the kit are 9 M5x12 SHCS they are too short 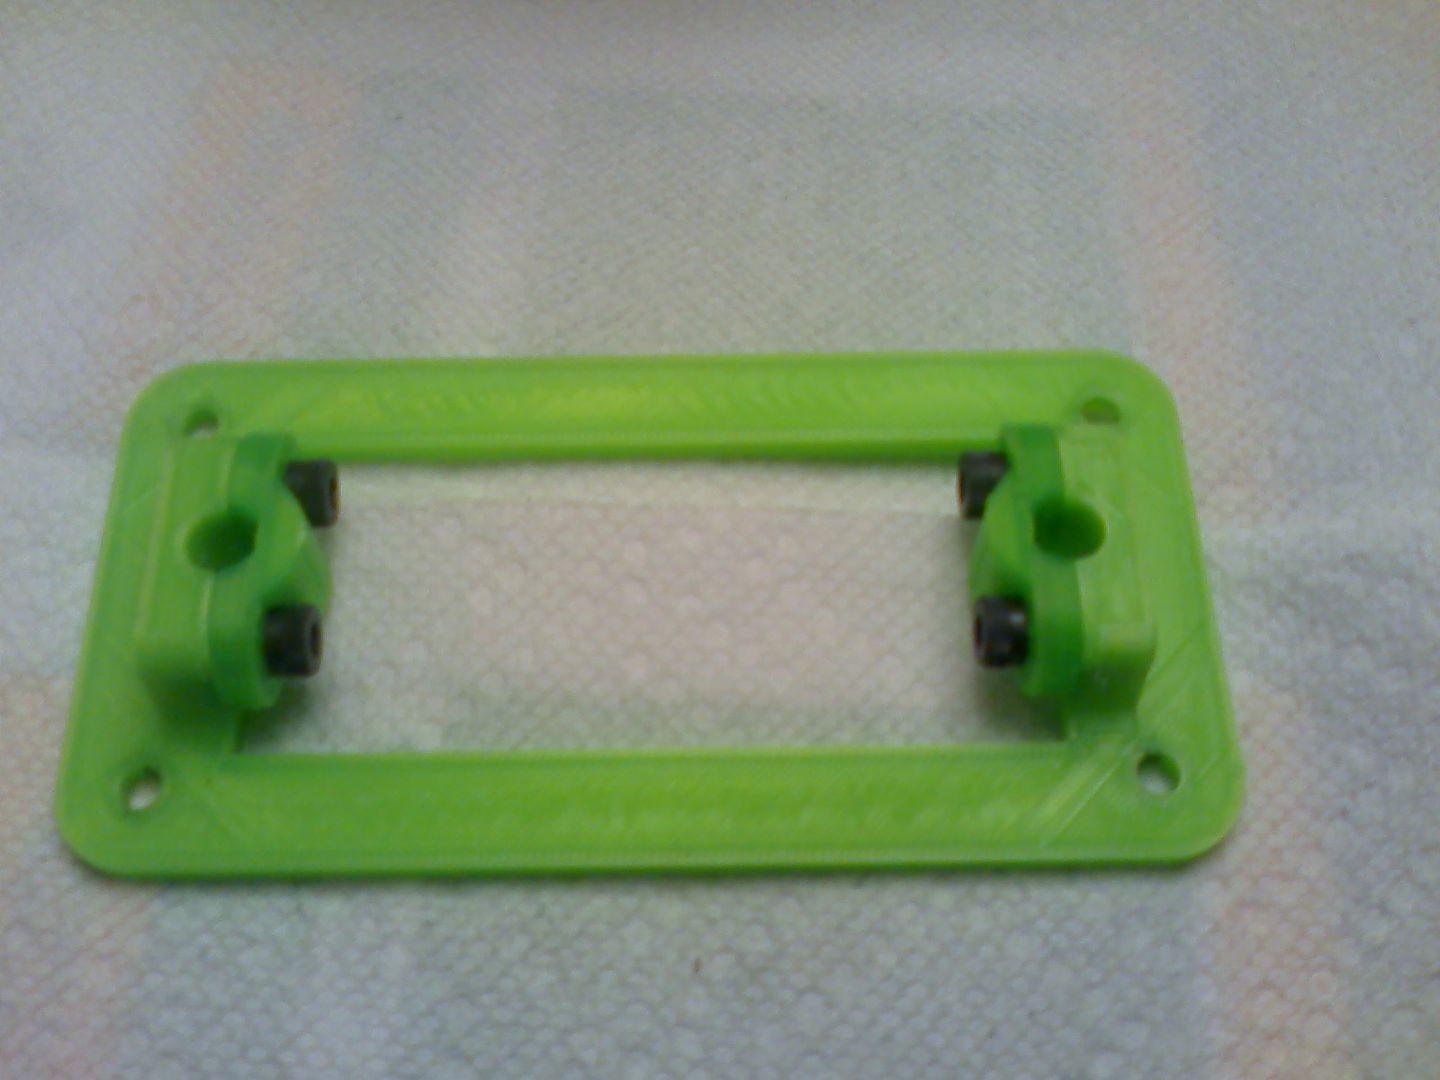 The screws grab about 1 turn of the nuts. Anything less and it falls out. With the shaft, you cant touch the nut at all.  I will have to get a M5x20 to be sure of enough room to fit and hold the shafts.  I'm getting quite a collection of metric screws |
|
|
|
[#40]
Quoted:
Quoted:
Quoted:
Quoted:
1600 bucks, really? Geez. Mine's going to end up costing me about 900 bucks when all is said and done. OK. I admit. I went overboard.
I have parts for almost 1.5 machines Wow, I was out around 800 total including a 5lb spool of filament, with $100 of that just for the hotend. It'd have been a little less, but ordering extra parts to replace incorrect ones wasted some money. Mine's older and doesn't have some of the latest fancy things like delrin z-axis bushings, a fancier Y axis system, and other stuff which might have made it cheaper. I would have gone that way if it was available at the time. Finally, my parts arrived, and I fixed it. It was apparently a manufacturing defect with the Budaschnozzles that shipped in that timeframe last year where they had left a small gap during construction. Works fine for ABS but causes the stiffer PLA to jam. The replacement parts got it working with PLA with no problems. Here is my calibration cube printing. The loud mechanical noises that don't match up to the printer movement are my DLSR's autofocus. Next time I film a print I'll use a tripod and set it to manual focus. Cool. Silly question. When you assembled the Y-axis and assembled the the clamps for the shafts. Were the M5x12 too short for the assembly? These are the clamps I'm talking about. The longest M5 screw in the kit are 9 M5x12 SHCS they are too short http://i2.photobucket.com/albums/y22/TractorDre/AR15/Mrndelmax%201%205/05-01-13_2136_zps44d09641.jpg The screws grab about 1 turn of the nuts. Anything less and it falls out. With the shaft, you cant touch the nut at all. http://i2.photobucket.com/albums/y22/TractorDre/AR15/Mrndelmax%201%205/05-01-13_2138_zps6b18db37.jpg I will have to get a M5x20 to be sure of enough room to fit and hold the shafts. http://i2.photobucket.com/albums/y22/TractorDre/AR15/Mrndelmax%201%205/05-01-13_2139_zpsd0dd77ef.jpg I'm getting quite a collection of metric screws
I have a different y axis setup, as I have two separate rod holders on each side. But I did have times where screws were too short or long. I'm sure I used the wrong ones in the wrong places, but trips to the hardware store usually solved my problems. Although for metric screws in US store it's four units for the same price it'd be for 20 units online. But no wait in the store.
I'm thinking of printing the parts and building a rostock delta style printer as a second printer. If I start down that path, I'll be ordering 100 packs of several sizes of M5, M4, M3 hardware, so I don't have that issue. I'd probably just get long ones, as cutting these small screws is easy if needed. I tried to find a nice metric assortment on amazon just to keep on hand, but nothing is out there with the longer lengths required. |
|
|
|
[#41]
Quoted: Quoted: I have a different y axis setup, as I have two separate rod holders on each side. But I did have times where screws were too short or long. I'm sure I used the wrong ones in the wrong places, but trips to the hardware store usually solved my problems. Although for metric screws in US store it's four units for the same price it'd be for 20 units online. But no wait in the store.I'm thinking of printing the parts and building a rostock delta style printer as a second printer. If I start down that path, I'll be ordering 100 packs of several sizes of M5, M4, M3 hardware, so I don't have that issue. I'd probably just get long ones, as cutting these small screws is easy if needed. I tried to find a nice metric assortment on amazon just to keep on hand, but nothing is out there with the longer lengths required. If you are ordering extrusions for your new printer. Do yourself a favor. You might want to check the prices at Misumi USA. You will have to register to the the prices or order the catalog. I could have ordered all the extrusion for this kit for less than $50. Then drilled and tapped the holes needed. Oh wait a minute. I bought a Mech kit and still had to drill and tap my holes. Also I could have ordered the 2080 for the sides(also comes in smooth outer side and combination 202 and 2040 for the front and rear for a few dollars more. That would give extra height in the base to hide the electrical parts. Also give it more strength in the corners, and you wont need the weak plastic corners. You can print out a decorative corner later on. If I were to build a second Mendelmax style printer it would be an 18x24 base. This would be to print short to longer dual parts using two heads. The height factor would also be greatly increased. But I'm still interested in a Makibox as my next machine for portability. I was already asked of what would be involved for a an 18 by 32 or 24x36. (Wheels have been turning, and the screws aren't really that lose. For small production ideas.)I think the big drawback would be the heated bed. But on a 18" wide model you could double up the pads length wise. You would need to insulate the gap to the edge of the glass to keep the heat in. Unless they have bigger pads out there. The wider with would allow for extra spacing of dual heads. The other thing is the ramp board would have to be rated for a larger X, Y and Z motors. |
|
|
|
[#42]
My wife is going to log into my account and get me permabanned thanks to threads like this. Between the "build your own night vision thread", "hey, look I built this 1911 with common hand tools" thread, and now this... I could have gotten her those new kitchen counter tops.
|
|
|
|
[#43]
Quoted:
Quoted:
Quoted:
If you are ordering extrusions for your new printer. Do yourself a favor. You might want to check the prices at Misumi USA. You will have to register to the the prices or order the catalog. I could have ordered all the extrusion for this kit for less than $50. Then drilled and tapped the holes needed. Oh wait a minute. I bought a Mech kit and still had to drill and tap my holes.
Also I could have ordered the 2080 for the sides(also comes in smooth outer side and combination 202 and 2040 for the front and rear for a few dollars more. That would give extra height in the base to hide the electrical parts. Also give it more strength in the corners, and you wont need the weak plastic corners. You can print out a decorative corner later on. If I were to build a second Mendelmax style printer it would be an 18x24 base. This would be to print short to longer dual parts using two heads. The height factor would also be greatly increased. But I'm still interested in a Makibox as my next machine for portability. I was already asked of what would be involved for a an 18 by 32 or 24x36. (Wheels have been turning, and the screws aren't really that lose. For small production ideas.)I think the big drawback would be the heated bed. But on a 18" wide model you could double up the pads length wise. You would need to insulate the gap to the edge of the glass to keep the heat in. Unless they have bigger pads out there. The wider with would allow for extra spacing of dual heads. The other thing is the ramp board would have to be rated for a larger X, Y and Z motors. As far as the bed, that is one of the huge benefits of the delta style printers. The bed doesn't move, so putting 4 beds together is even easier. And no need for a huge y-axis motor to be able to move it. Plus the print speed increase would be of great benefit for large items. And I like the setup better than screws for a z-axis. If I do it, I'll stick to belts for the three towers, as I don't like the new fishing line variants they seem to be making. The only benefit of the line seems to be saving on the cost vs belts. For prints 18x32 or larger, you'll be stuck with PLA unless you enclose it to make a heated chamber. Some people have enclosed with insulated panels, raised the internal temp to 70c, and had good results with ABS. The best would be raising the enclosure to the bed temperature, but you'd need all metal parts, since the ABS printer parts would lose strength at that temp. |
|
|
|
[#44]
Question....
Could you replace the drivers that are plugged directly into the driver pins on the ramps board with a cable to some more powerful/higher amp-rated drivers? Prior to this project, my only experience with motion control motor drivers was fully enclosed driver boards. Nice aluminum housing, dip switches, screw down posts for the wires kind of thing. |
|
|
|
[#45]
I found this:
http://forums.reprap.org/read.php?13,158192,158192 Also Also. To help with previous question on heat. Here is an idea for side shields.  |
|
|
|
[#46]
Cool!
Decent micro-stepping options, too. Has anyone done a test to figure out what the max usable (and reliable!) step generation bandwidth for a ramps board is, tho? For comparison, your typical el cheapo linuxCNC box on old hardware will do maybe 15khz to 25khz. Which, divided among 3 motors leaves you with the choice of high speed or decent precision/smoothness... but not both at the same time. With these more powerful driver/motor combinations, I'm wondering if the ramps might even make a cost-effective hardware step generation alternative for something like a small CNC woodworking mill. |
|
|
|
[#47]
|
|
|
|
[#48]
When you stretch the pulse width from the ramps board with hardware like a capacitor like that guy was doing, do you also inherently sacrifice some of your max step generation frequency? Or am I not visualizing this properly?
eta: Ah, there's an article in the description. Reading...
|
|
|
|
[#49]
I have built a reprap recently. I have decided to get it working and calibrated with PLA first before I move on to ABS. I am having trouble with my X axis and backlash. I have a new T2.5 belt and pulleys coming.
My question is how do you print some of the items off defcad? I am using repiter and when I load the item I can see it but I have to scale the item because it starts out super small. Whats the deal? |
|
|
|
[#50]
I toured this place on Wednesday this week. It is pretty amazing what they can do with the high end toys.
http://www.padtinc.com/ (Can't hotlink from my Surface.) http://www.padtinc.com/services/rapid-prototyping/index.html |
|
|
 Win a FREE Membership!
Sign up for the ARFCOM weekly newsletter and be entered to win a free ARFCOM membership. One new winner* is announced every week!
You will receive an email every Friday morning featuring the latest chatter from the hottest topics, breaking news surrounding legislation, as well as exclusive deals only available to ARFCOM email subscribers.

AR15.COM is the world's largest firearm community and is a gathering place for firearm enthusiasts of all types.
From hunters and military members, to competition shooters and general firearm enthusiasts, we welcome anyone who values and respects the way of the firearm.

Subscribe to our monthly Newsletter to receive firearm news, product discounts from your favorite Industry Partners, and more.
Copyright © 1996-2024 AR15.COM LLC. All Rights Reserved.
Any use of this content without express written consent is prohibited.
AR15.Com reserves the right to overwrite or replace any affiliate, commercial, or monetizable links, posted by users, with our own.


