|
[#1]
I love mine:
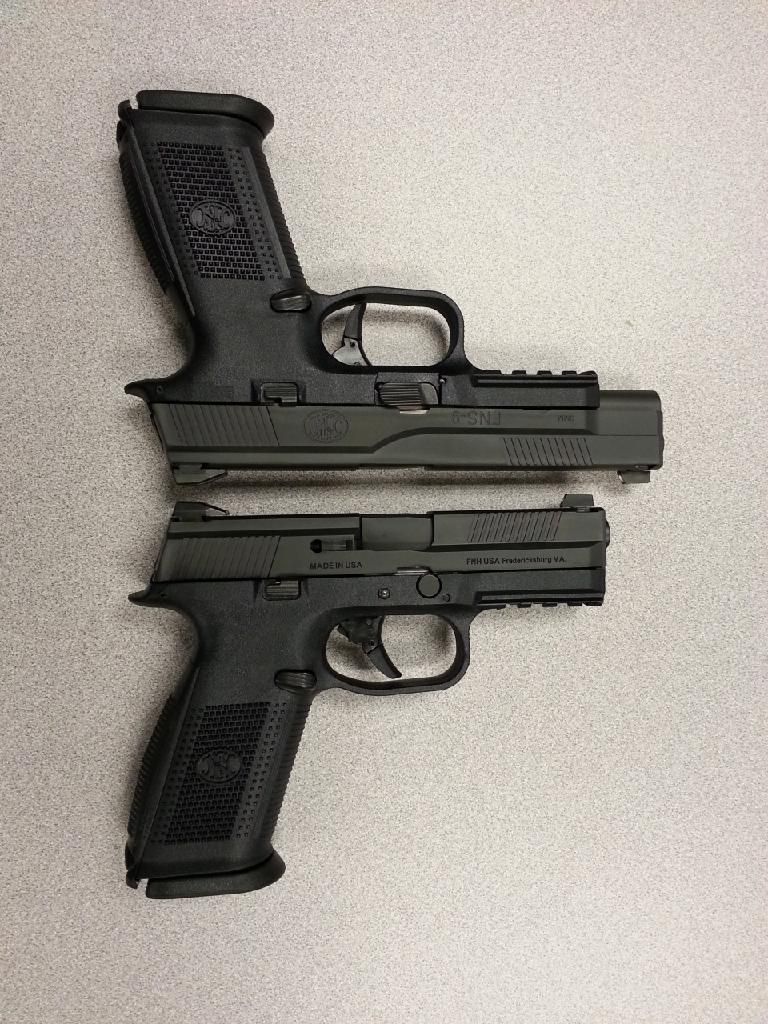 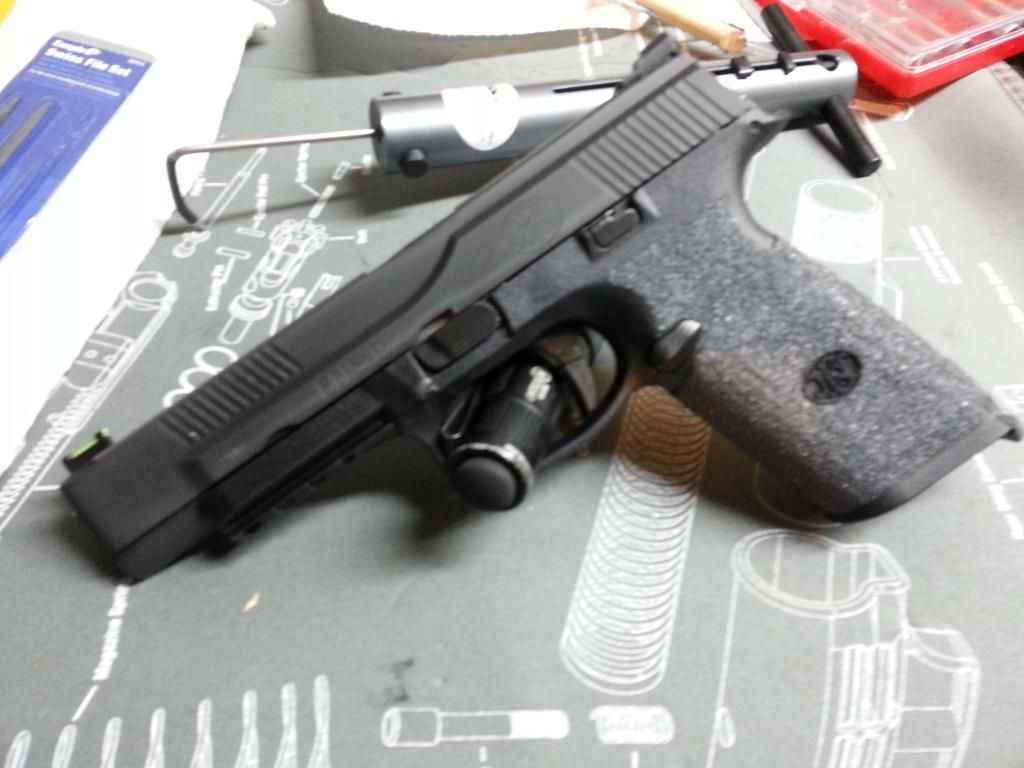 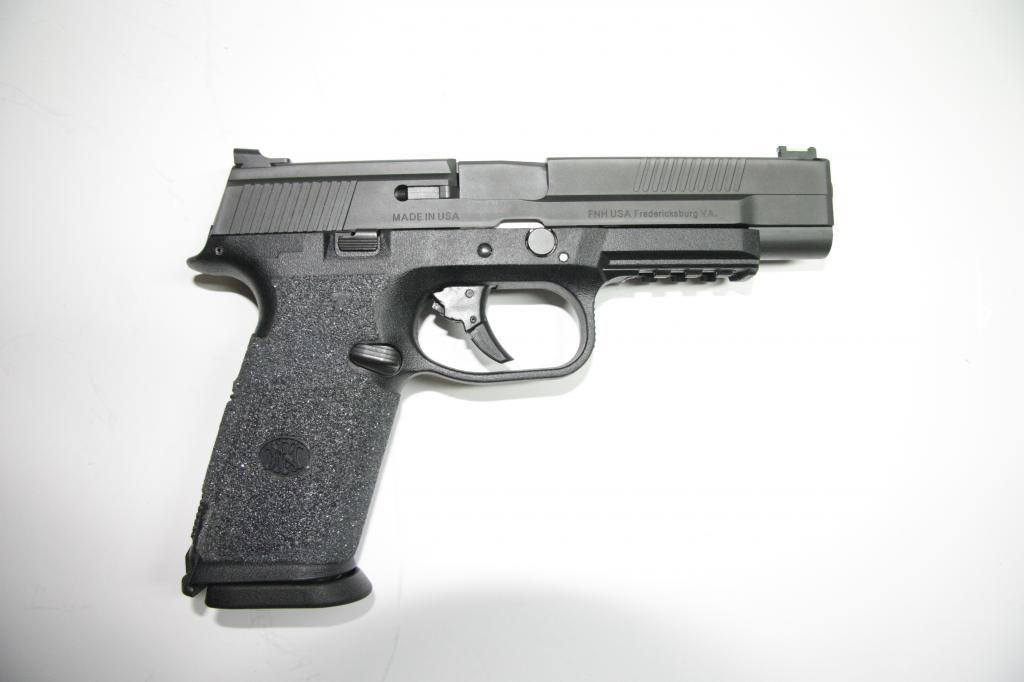 They fit in good with the rest of the "family": 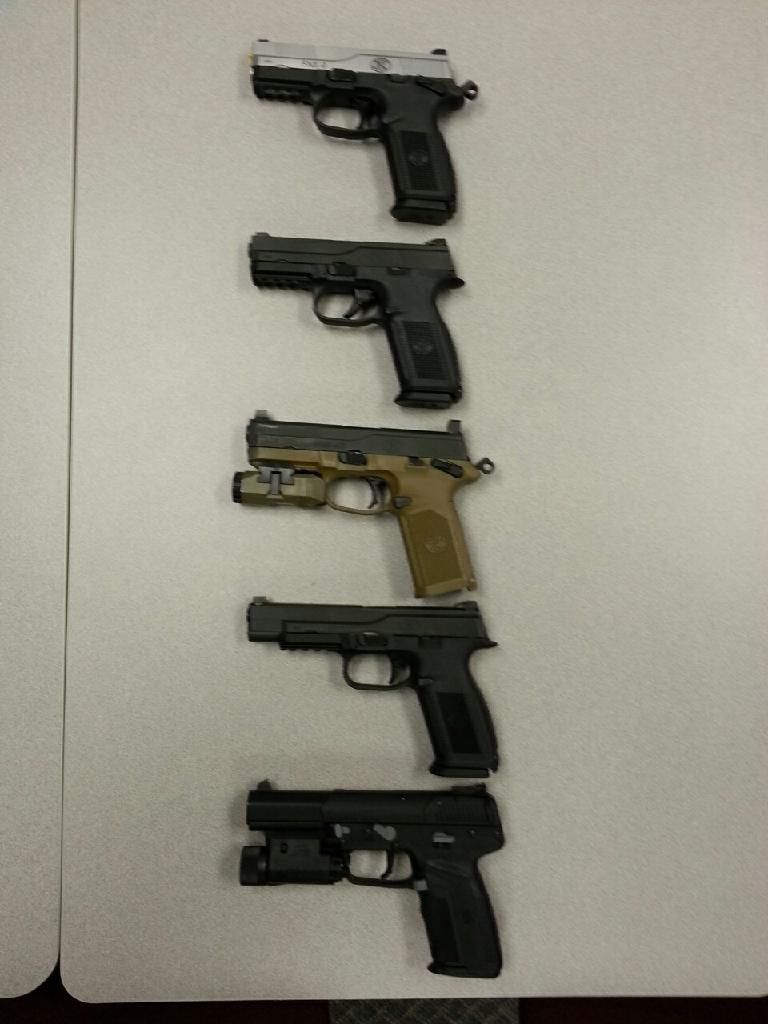 |
|
|
|
[#2]
It's what a Gen 4 Glock should have been. I love everything about mine but the trigger. If someone would make a good aftermarket trigger for it, it would be perfect. Seriously, the trigger in my FNS is worse than any other FN pistol I own. It's not terrible, but it's not great in relation to my other ones so I notice it more than I should.
|
|
|
|
[#3]
Quoted: It's what a Gen 4 Glock should have been. I love everything about mine but the trigger. If someone would make a good aftermarket trigger for it, it would be perfect. Seriously, the trigger in my FNS is worse than any other FN pistol I own. It's not terrible, but it's not great in relation to my other ones so I notice it more than I should. The main points to smooth out are the inside of the striker where the long spring goes. There tends to be a burr/ridge at the very end that rubs on the spring during trigger take up, that creates the clunky feel. Also, while you are there, smooth out the striker safety block and the part of the fire control group that pushes it up.
The trigger bars also benefit from being polished, but that requires a bit of dis-assembly. |
|
|
|
[#4]
|
|
|
|
[#5]
Bobapunk thats quite a sweet collection you have! This is my first FNH.
|
|
|
|
[#6]
I have a FNX
FN makes damn fine guns |
|
|
|
[#7]
Bob thanks for the trigger job post. This week is the week for a smoother FNS LS trigger job, I will post after work is done. Overall the gun is rock solid and very close to a tack driver. But a smoother trigger will go a long way to making this a top shelf handgun. Let the polish compound fly!!!! |
|
|
|
[#8]
I did a little review when the FNS9 first came out
http://vdmsr.blogspot.com/2012/10/fns-9-repost.html Admittedly I did not put that many rounds through the gun and I was comparing it to a G19. It has some good features but more bad than good for my liking. |
|
|
|
[#9]
Quoted:
Bob thanks for the trigger job post. This week is the week for a smoother FNS LS trigger job, I will post after work is done. Overall the gun is rock solid and very close to a tack driver. But a smoother trigger will go a long way to making this a top shelf handgun. Let the polish compound fly!!!! Quoted:
Bob thanks for the trigger job post. This week is the week for a smoother FNS LS trigger job, I will post after work is done. Overall the gun is rock solid and very close to a tack driver. But a smoother trigger will go a long way to making this a top shelf handgun. Let the polish compound fly!!!! I haven't fired mine yet, but upon dry firing, the trigger does feel a bit gritty. I'd like to try this, but that is a lot of parts... I've built many AR's, but never have I tried disassembling/reassembling any of my handguns. |
|
|
|
[#10]
I would really like an fns 40. Handled 2 recently at 2 different shops. Triggers where night and day. One beautiful and one horrible. I want one without the thumb safety but I'm afraid to order it and not be able to return it if I don't like the trigger. The on I tried with the bad trigger had a lot of drag and and very gritty let off. The one with the good trigger felt almost like a glock 34 or 35.
|
|
|
|
[#11]
Well Finally got to the range last sunday and I love it. I took the FNS and HK P30 which I also just purchased a few months back. I shot the FNS a little more accurately and consistently, I found the trigger to be very predictable and didnt really encounter any grittiness. However I did clean it prior to its first shooting especially the striker assymbly. The sights on the P30 are better then the FNS but otherwise they were pretty equal on everything else. I have a feeling once I get a better feel for the single action trigger on the P30 I may be more accurate with that gun. All in all I love the FNS, felt great in the hand and Im glad I bought one.
|
|
|
|
[#12]
Quoted: I haven't fired mine yet, but upon dry firing, the trigger does feel a bit gritty. I'd like to try this, but that is a lot of parts... I've built many AR's, but never have I tried disassembling/reassembling any of my handguns. Quoted: Quoted: Bob thanks for the trigger job post. This week is the week for a smoother FNS LS trigger job, I will post after work is done. Overall the gun is rock solid and very close to a tack driver. But a smoother trigger will go a long way to making this a top shelf handgun. Let the polish compound fly!!!! I haven't fired mine yet, but upon dry firing, the trigger does feel a bit gritty. I'd like to try this, but that is a lot of parts... I've built many AR's, but never have I tried disassembling/reassembling any of my handguns. You can do a lot of improvement without gutting the frame. Take the striker out. Use a small pick to check the inside of the striker (where the spring rides). Many of these have a small burr right at the opening that drags on the striker spring during the trigger take up. If yours has a burr / ridge there, use a small round file to remove it. Then, polish the channel with some Flitz or similar. I found using a small cotton bore cleaner chucked into a drill worked pretty well for this. If yours does not have a burr, you can still polish the channel.
While you have the striker out, smooth out the striker block with some 300-600 grit sand paper (I used 320 and then 600) and hit that with some Flitz as well. Next, find the point on the FCM that pushes up on the striker block and do the same sandpaper + polish to it. Clean everything up good, oil, and reassemble. That should make a world of difference to your trigger without doing a full disassembly. |
|
|
|
[#13]
Quoted: Bob thanks for the trigger job post. This week is the week for a smoother FNS LS trigger job, I will post after work is done. Overall the gun is rock solid and very close to a tack driver. But a smoother trigger will go a long way to making this a top shelf handgun. Let the polish compound fly!!!! Quoted: Bob thanks for the trigger job post. This week is the week for a smoother FNS LS trigger job, I will post after work is done. Overall the gun is rock solid and very close to a tack driver. But a smoother trigger will go a long way to making this a top shelf handgun. Let the polish compound fly!!!! How did it turn out for you? |
|
|
|
[#14]
Quoted: Bobapunk thats quite a sweet collection you have! This is my first FNH. I started with the FsN and they multiplied from there. I had a SCAR16s that I sold, and now I have a PS90 too...
|
|
|
|
[#15]
Quoted:
You can do a lot of improvement without gutting the frame. Take the striker out. Use a small pick to check the inside of the striker (where the spring rides). Many of these have a small burr right at the opening that drags on the striker spring during the trigger take up. If yours has a burr / ridge there, use a small round file to remove it. Then, polish the channel with some Flitz or similar. I found using a small cotton bore cleaner chucked into a drill worked pretty well for this. If yours does not have a burr, you can still polish the channel. While you have the striker out, smooth out the striker block with some 300-600 grit sand paper (I used 320 and then 600) and hit that with some Flitz as well. Next, find the point on the FCM that pushes up on the striker block and do the same sandpaper + polish to it. Clean everything up good, oil, and reassemble. That should make a world of difference to your trigger without doing a full disassembly. Thanks for the advice! |
|
|
|
[#16]
Quoted:
How did it turn out for you? Quoted:
Quoted:
Bob thanks for the trigger job post. This week is the week for a smoother FNS LS trigger job, I will post after work is done. Overall the gun is rock solid and very close to a tack driver. But a smoother trigger will go a long way to making this a top shelf handgun. Let the polish compound fly!!!! How did it turn out for you? Well due to some extra range time this week I have not gotten to the trigger job yet. But this weekend looks clear and I have read your polish steps twice. I have done too many Glock .25cent polish jobs so this looks like it just may take a little more time. No bid deal for the improvement will be so worth the time and effort. Standby for an update. |
|
|
|
[#17]
Quoted: Well due to some extra range time this week I have not gotten to the trigger job yet. But this weekend looks clear and I have read your polish steps twice. I have done too many Glock .25cent polish jobs so this looks like it just may take a little more time. No bid deal for the improvement will be so worth the time and effort. Standby for an update. Quoted: Quoted: Quoted: Bob thanks for the trigger job post. This week is the week for a smoother FNS LS trigger job, I will post after work is done. Overall the gun is rock solid and very close to a tack driver. But a smoother trigger will go a long way to making this a top shelf handgun. Let the polish compound fly!!!! How did it turn out for you? Well due to some extra range time this week I have not gotten to the trigger job yet. But this weekend looks clear and I have read your polish steps twice. I have done too many Glock .25cent polish jobs so this looks like it just may take a little more time. No bid deal for the improvement will be so worth the time and effort. Standby for an update. Just to the upper stuff first (striker spring channel, striker safety block, and the nub that disengages the striker safety block when the trigger is pressed. You can also dress up the contact surfaces that release the striker. That can all be done without removing the fire control assembly. If you are happy with the results you get, great! If not, you can remove the FC assembly and work on the trigger bars. If you need any more help/info, let me know!
|
|
|
|
[#18]
Quoted:
Just to the upper stuff first (striker spring channel, striker safety block, and the nub that disengages the striker safety block when the trigger is pressed. You can also dress up the contact surfaces that release the striker. That can all be done without removing the fire control assembly. If you are happy with the results you get, great! If not, you can remove the FC assembly and work on the trigger bars. If you need any more help/info, let me know! Quoted:
Quoted:
Quoted:
Quoted:
Bob thanks for the trigger job post. This week is the week for a smoother FNS LS trigger job, I will post after work is done. Overall the gun is rock solid and very close to a tack driver. But a smoother trigger will go a long way to making this a top shelf handgun. Let the polish compound fly!!!! How did it turn out for you? Well due to some extra range time this week I have not gotten to the trigger job yet. But this weekend looks clear and I have read your polish steps twice. I have done too many Glock .25cent polish jobs so this looks like it just may take a little more time. No bid deal for the improvement will be so worth the time and effort. Standby for an update. Just to the upper stuff first (striker spring channel, striker safety block, and the nub that disengages the striker safety block when the trigger is pressed. You can also dress up the contact surfaces that release the striker. That can all be done without removing the fire control assembly. If you are happy with the results you get, great! If not, you can remove the FC assembly and work on the trigger bars. If you need any more help/info, let me know! Ok Bob, I just finished a 95% upper cleaning. I could not figure out how to remove the erector. So I left it installed. I was starting to break down the lower but had a little trouble removing the small locking block pin (forward of the two pins). Did you just drive it out left to right side? The larger trigger pin which is held in place by the bent spring leaf worked out fine left to right. In the mean time I will do as you suggest and clean/polish up the upper parts and see how the trigger feels after. Back to the workbench I go. |
|
|
|
[#19]
Quoted: Ok Bob, I just finished a 95% upper cleaning. I could not figure out how to remove the erector. So I left it installed. I was starting to break down the lower but had a little trouble removing the small locking block pin (forward of the two pins). Did you just drive it out left to right side? The larger trigger pin which is held in place by the bent spring leaf worked out fine left to right. In the mean time I will do as you suggest and clean/polish up the upper parts and see how the trigger feels after. Back to the workbench I go. Quoted: Quoted: Quoted: Quoted: How did it turn out for you? Well due to some extra range time this week I have not gotten to the trigger job yet. But this weekend looks clear and I have read your polish steps twice. I have done too many Glock .25cent polish jobs so this looks like it just may take a little more time. No bid deal for the improvement will be so worth the time and effort. Standby for an update. Just to the upper stuff first (striker spring channel, striker safety block, and the nub that disengages the striker safety block when the trigger is pressed. You can also dress up the contact surfaces that release the striker. That can all be done without removing the fire control assembly. If you are happy with the results you get, great! If not, you can remove the FC assembly and work on the trigger bars. If you need any more help/info, let me know! Ok Bob, I just finished a 95% upper cleaning. I could not figure out how to remove the erector. So I left it installed. I was starting to break down the lower but had a little trouble removing the small locking block pin (forward of the two pins). Did you just drive it out left to right side? The larger trigger pin which is held in place by the bent spring leaf worked out fine left to right. In the mean time I will do as you suggest and clean/polish up the upper parts and see how the trigger feels after. Back to the workbench I go. There is probably no good reason to remove the extractor when doing a trigger job, but I used a small flat screw driver to hold back the plunger while fishing the extractor out. That is one of the harder things to remove for sure. The small pin you are talking about is in there pretty tight. Just use a pin punch and light rapid tap with a hammer, it will come out. |
|
|
|
[#20]
Well the polishing cloth is worn out and the polishing compound is all over the place (just kidding). But the .50cents FNS trigger job is done. There is a real improvement in the smoothness of the travel in the trigger. The trigger feel is now clean with a clean/smooth break at reset point for follow up shoots. All the roughness is gone the feel is clean from start to break. I have just done about 20+ dry trigger pulls and really look forward to going live tomorrow night.
The parts I spent the most time on was the Striker safety block including the surface that engages the firing pin. Sanded (600 grit), then polished clean all over. And sanded the channel that it ride in, After these parts were cleaned I applied a light coat of grease. I sanded the few rough spots in the upper channel the firing pin rides in. On the firing pin I sanded the surface that comes in contact with the striker safety block. My firing pin had some very noticeable milling marks in that location. Plus there are two points on the firing pin that ride the walls of the channel. Here I very lightly (600 grit) sanded them smooth. But I did not go over board here for I did not want to effect the firing pin head to opening alignment. Then it was a matter of reassemble and oil contact points. Once I get a few hundred rounds down range I will update and or tear the lower apart and clean it up there. But for now I am a happy FNS 9L smooth trigger owner |
|
|
|
[#21]
Quoted: Well the polishing cloth is worn out and the polishing compound is all over the place (just kidding). But the .50cents FNS trigger job is done. There is a real improvement in the smoothness of the travel in the trigger. The trigger feel is now clean with a clean/smooth break at reset point for follow up shoots. All the roughness is gone the feel is clean from start to break. I have just done about 20+ dry trigger pulls and really look forward to going live tomorrow night. The parts I spent the most time on was the Striker safety block including the surface that engages the firing pin. Sanded (600 grit), then polished clean all over. And sanded the channel that it ride in, After these parts were cleaned I applied a light coat of grease. I sanded the few rough spots in the upper channel the firing pin rides in. On the firing pin I sanded the surface that comes in contact with the striker safety block. My firing pin had some very noticeable milling marks in that location. Plus there are two points on the firing pin that ride the walls of the channel. Here I very lightly (600 grit) sanded them smooth. But I did not go over board here for I did not want to effect the firing pin head to opening alignment. Then it was a matter of reassemble and oil contact points. Once I get a few hundred rounds down range I will update and or tear the lower apart and clean it up there. But for now I am a happy FNS 9L smooth trigger owner Cool!
You have given me a few spots to check out on my FNS's the next time I break them down. You should be careful with lubricating the striker/striker channel. I have not heard this with the FNS, but the XD/XDM/XDS line can suffer from light strikes if oil/grease is in the striker channel. I would recommend using a dry lube such as Hornady One Shot Tap HD dry lube to reduce or eliminate the possibility of dirty lubricant impeding the movement of the striker. I use Froglube on my FNS long, and the Hornady product on my 4". I have had no light strike issues with either. |
|
|
|
[#22]
Quoted:
Cool! You have given me a few spots to check out on my FNS's the next time I break them down. You should be careful with lubricating the striker/striker channel. I have not heard this with the FNS, but the XD/XDM/XDS line can suffer from light strikes if oil/grease is in the striker channel. I would recommend using a dry lube such as Hornady One Shot Tap HD dry lube to reduce or eliminate the possibility of dirty lubricant impeding the movement of the striker. I use Froglube on my FNS long, and the Hornady product on my 4". I have had no light strike issues with either. Quoted:
Quoted:
Well the polishing cloth is worn out and the polishing compound is all over the place (just kidding). But the .50cents FNS trigger job is done. There is a real improvement in the smoothness of the travel in the trigger. The trigger feel is now clean with a clean/smooth break at reset point for follow up shoots. All the roughness is gone the feel is clean from start to break. I have just done about 20+ dry trigger pulls and really look forward to going live tomorrow night. The parts I spent the most time on was the Striker safety block including the surface that engages the firing pin. Sanded (600 grit), then polished clean all over. And sanded the channel that it ride in, After these parts were cleaned I applied a light coat of grease. I sanded the few rough spots in the upper channel the firing pin rides in. On the firing pin I sanded the surface that comes in contact with the striker safety block. My firing pin had some very noticeable milling marks in that location. Plus there are two points on the firing pin that ride the walls of the channel. Here I very lightly (600 grit) sanded them smooth. But I did not go over board here for I did not want to effect the firing pin head to opening alignment. Then it was a matter of reassemble and oil contact points. Once I get a few hundred rounds down range I will update and or tear the lower apart and clean it up there. But for now I am a happy FNS 9L smooth trigger owner Cool! You have given me a few spots to check out on my FNS's the next time I break them down. You should be careful with lubricating the striker/striker channel. I have not heard this with the FNS, but the XD/XDM/XDS line can suffer from light strikes if oil/grease is in the striker channel. I would recommend using a dry lube such as Hornady One Shot Tap HD dry lube to reduce or eliminate the possibility of dirty lubricant impeding the movement of the striker. I use Froglube on my FNS long, and the Hornady product on my 4". I have had no light strike issues with either. Bob just so we are on the same page I wanted to add a few details. "The parts I spent the most time on was the Striker safety block including the surface that engages the firing pin. Sanded (600 grit), then polished clean all over. And sanded the channel that it ride in, After these parts were cleaned I applied a light coat of grease." I sanded and polished the striker (safety) block. Then with a small wood dowel and some 600 grit paper I cleaned up the pocket the striker (safety) block and spring ride in the upper. This is the only location I applied a small amount of Mil-comm TW25B synthetic grease. I will keep an eye on that area now. The firing pin was just oiled then wiped clean and no lubricant was applied into the channel the firing pin rides in the upper slide. |
|
|
|
[#23]
I got mine in a Glock trade in program. $100 and a beat up gen two 17 got me a new one in the box. It's easily my all time favorite. It's what Glock should have been.
|
|
|
|
[#24]
Quoted: Bob just so we are on the same page I wanted to add a few details. "The parts I spent the most time on was the Striker safety block including the surface that engages the firing pin. Sanded (600 grit), then polished clean all over. And sanded the channel that it ride in, After these parts were cleaned I applied a light coat of grease." I sanded and polished the striker (safety) block. Then with a small wood dowel and some 600 grit paper I cleaned up the pocket the striker (safety) block and spring ride in the upper. This is the only location I applied a small amount of Mil-comm TW25B synthetic grease. I will keep an eye on that area now. The firing pin was just oiled then wiped clean and no lubricant was applied into the channel the firing pin rides in the upper slide. Quoted: Quoted: Quoted: Well the polishing cloth is worn out and the polishing compound is all over the place (just kidding). But the .50cents FNS trigger job is done. There is a real improvement in the smoothness of the travel in the trigger. The trigger feel is now clean with a clean/smooth break at reset point for follow up shoots. All the roughness is gone the feel is clean from start to break. I have just done about 20+ dry trigger pulls and really look forward to going live tomorrow night. The parts I spent the most time on was the Striker safety block including the surface that engages the firing pin. Sanded (600 grit), then polished clean all over. And sanded the channel that it ride in, After these parts were cleaned I applied a light coat of grease. I sanded the few rough spots in the upper channel the firing pin rides in. On the firing pin I sanded the surface that comes in contact with the striker safety block. My firing pin had some very noticeable milling marks in that location. Plus there are two points on the firing pin that ride the walls of the channel. Here I very lightly (600 grit) sanded them smooth. But I did not go over board here for I did not want to effect the firing pin head to opening alignment. Then it was a matter of reassemble and oil contact points. Once I get a few hundred rounds down range I will update and or tear the lower apart and clean it up there. But for now I am a happy FNS 9L smooth trigger owner Cool! You have given me a few spots to check out on my FNS's the next time I break them down. You should be careful with lubricating the striker/striker channel. I have not heard this with the FNS, but the XD/XDM/XDS line can suffer from light strikes if oil/grease is in the striker channel. I would recommend using a dry lube such as Hornady One Shot Tap HD dry lube to reduce or eliminate the possibility of dirty lubricant impeding the movement of the striker. I use Froglube on my FNS long, and the Hornady product on my 4". I have had no light strike issues with either. Bob just so we are on the same page I wanted to add a few details. "The parts I spent the most time on was the Striker safety block including the surface that engages the firing pin. Sanded (600 grit), then polished clean all over. And sanded the channel that it ride in, After these parts were cleaned I applied a light coat of grease." I sanded and polished the striker (safety) block. Then with a small wood dowel and some 600 grit paper I cleaned up the pocket the striker (safety) block and spring ride in the upper. This is the only location I applied a small amount of Mil-comm TW25B synthetic grease. I will keep an eye on that area now. The firing pin was just oiled then wiped clean and no lubricant was applied into the channel the firing pin rides in the upper slide. I don't think you will have any problems. But if light primer strikes occur, you have an idea of where to start looking. I think as long as you pull the striker and wipe it down ever 500 rounds or so, you won't have any issues.
|
|
|
 Win a FREE Membership!
Sign up for the ARFCOM weekly newsletter and be entered to win a free ARFCOM membership. One new winner* is announced every week!
You will receive an email every Friday morning featuring the latest chatter from the hottest topics, breaking news surrounding legislation, as well as exclusive deals only available to ARFCOM email subscribers.

AR15.COM is the world's largest firearm community and is a gathering place for firearm enthusiasts of all types.
From hunters and military members, to competition shooters and general firearm enthusiasts, we welcome anyone who values and respects the way of the firearm.

Subscribe to our monthly Newsletter to receive firearm news, product discounts from your favorite Industry Partners, and more.
Copyright © 1996-2024 AR15.COM LLC. All Rights Reserved.
Any use of this content without express written consent is prohibited.
AR15.Com reserves the right to overwrite or replace any affiliate, commercial, or monetizable links, posted by users, with our own.


