|
Posted: 8/17/2005 9:45:36 PM EDT
I guess Martha Stewart picked up a few new ideas for this upcoming holiday season
 extremecraft.blogspot.com/2005/08/diy-shotgun-shell-lights.html 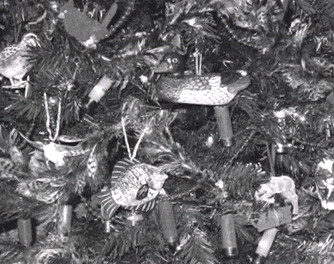 Shotgun Shell Christmas Lights We've all seen these in the various sporting good catalogs and specialty stores. And they're always at a very high dollar price, so most people just get one or two strings as a gift or novelty to put up in the office. Now, with a little cooperation from your favorite duck, goose, pheasant and/or turkey hunter, you can have enough for the entire house. MATERIALS: * Cleaned, dried shotgun shell hulls (one per light) * String of clear Christmas lights long enough to use all your hulls (test the string first to make sure all the lights work) * Multi-tool or small pair of pliers DIRECTIONS: Preparation: 1. The first step is to make sure your hulls are clean and dry. You can clean them in a number of ways, including one at a time by hand. The best way is to put the hulls into a pillowcase, secure it, and put them into the washing machine. If you can stand the racket, you can also put them in the dryer on low heat, but it's probably not worth it unless you're going out for dinner. An alternative method of cleaning the hulls is to put them into the dishwasher. Using only the top rack, put one hull over each prong. Don't use the bottom rack because the water pressure from below will send them all over the dishwasher. Not fun! 2. Using a silver cleaning cloth, brass cleaner, or a wire sanding brush, polish the metal end on each one until it's shiny. Assembling the Lights: 3. If you're lucky enough to have access to a re-loader, then 90% of your work is already done. Just "re-load" the hulls without anything in them. 4. If however, you're like me and don't have access to one, then you'll have to close up the tops by hand. To do this, use the multi-tool or pliers to squeeze the crimps back into the top of thy hull. Once you have them pretty much back in shape, you can turn the hull upside down on a cutting board and push it the rest of the way in. 5. Carefully take the tip of the multi-tool (or heck, a pencil will also work) and push the top crimping down inside the hull just enough to slip over the light bulb on the string of lights. Repeat this until you have a hull over each of the lights. 6. To replace a bulb, push the plastic crimping down just a bit more until you can pull the light out of the hull. |
|
|
|
[#1]
Them thar lights sure be purdy...Maybe Santa will brung me sum wid my Budweiser
|
|
|
 Win a FREE Membership!
Sign up for the ARFCOM weekly newsletter and be entered to win a free ARFCOM membership. One new winner* is announced every week!
You will receive an email every Friday morning featuring the latest chatter from the hottest topics, breaking news surrounding legislation, as well as exclusive deals only available to ARFCOM email subscribers.

AR15.COM is the world's largest firearm community and is a gathering place for firearm enthusiasts of all types.
From hunters and military members, to competition shooters and general firearm enthusiasts, we welcome anyone who values and respects the way of the firearm.

Subscribe to our monthly Newsletter to receive firearm news, product discounts from your favorite Industry Partners, and more.
Copyright © 1996-2024 AR15.COM LLC. All Rights Reserved.
Any use of this content without express written consent is prohibited.
AR15.Com reserves the right to overwrite or replace any affiliate, commercial, or monetizable links, posted by users, with our own.


