IA, USA
|
Posted: 6/22/2012 11:17:50 PM EDT
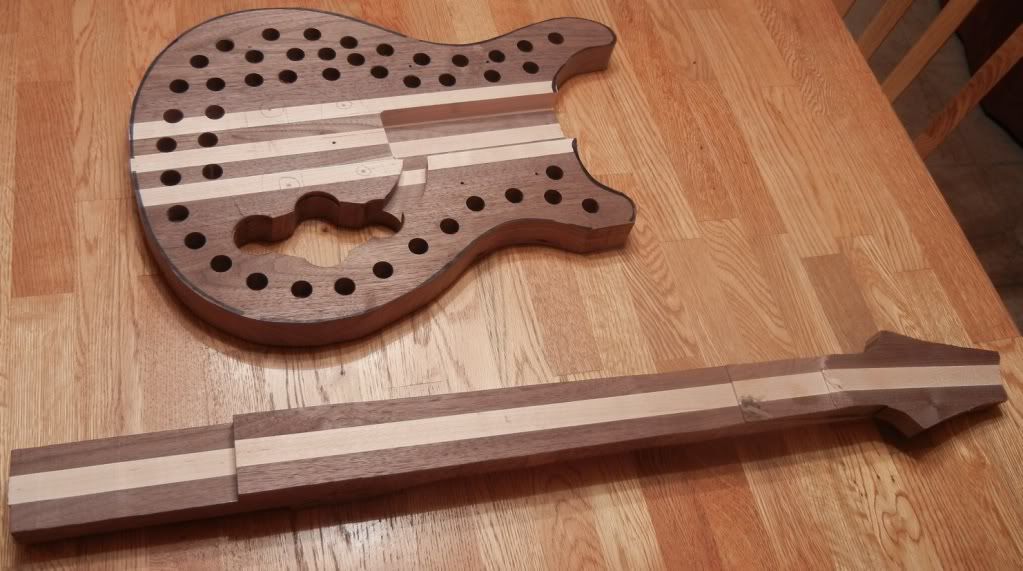
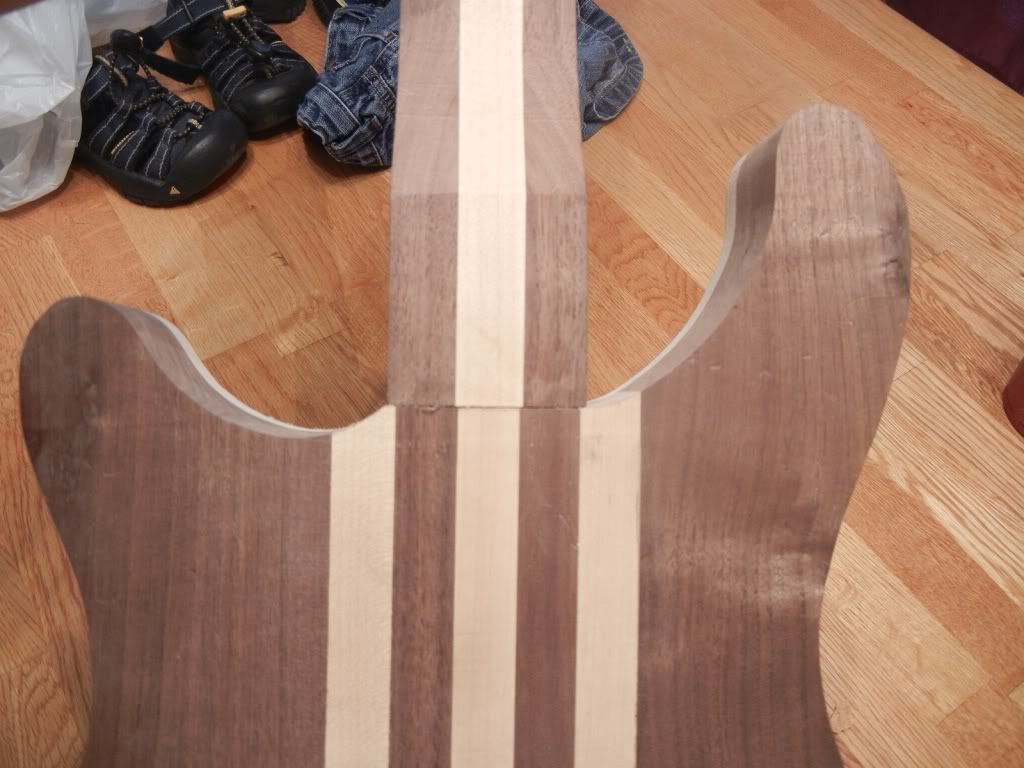
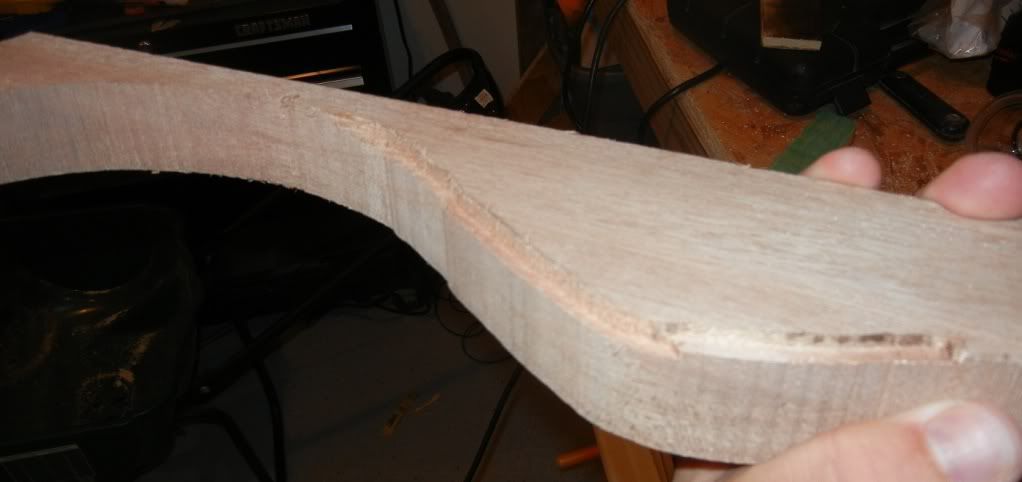
for those who might be interested, I'm trying my hand at more of the guitar this time. I'm building most of the neck this time as well. contouring the neck profile could be interesting. I'm using walnut, maple, and figured aspen on this one with gold hardware and cream binding. I will have more tools to buy to finish the build so that will keep it going a bit more slowly.
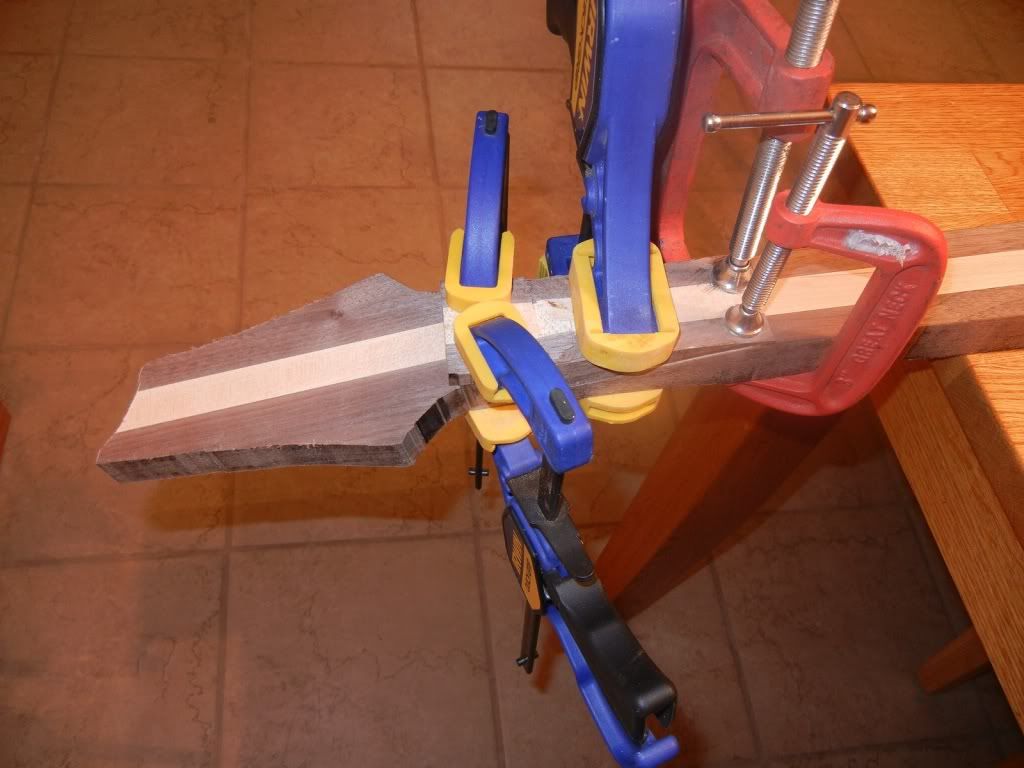
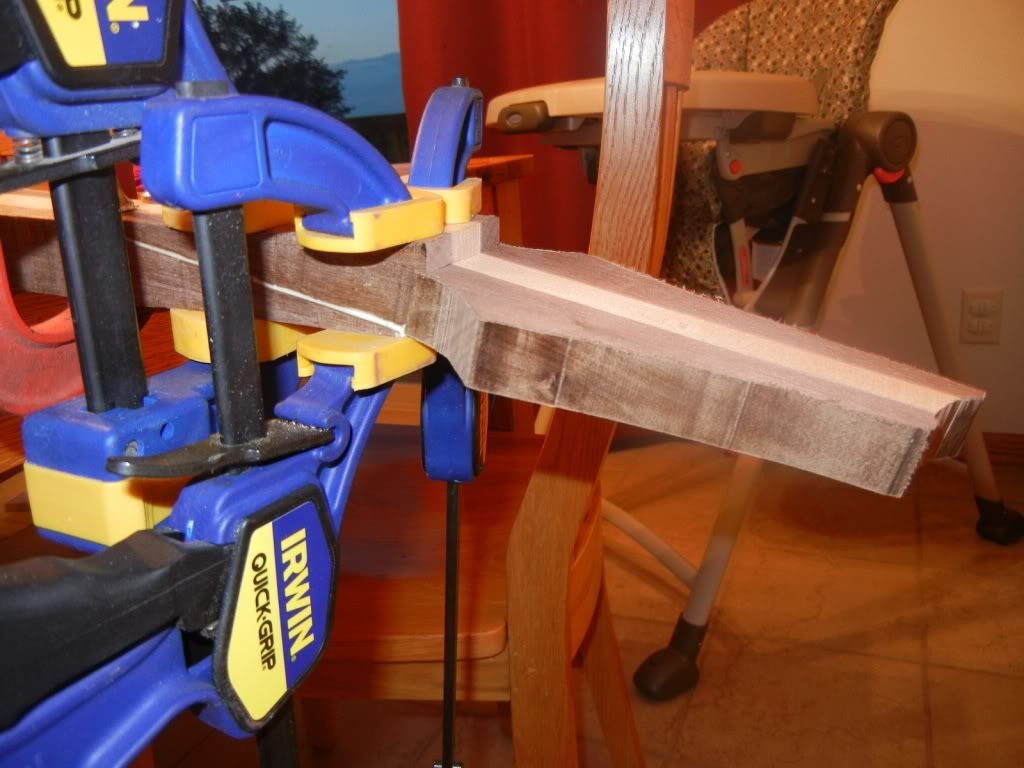
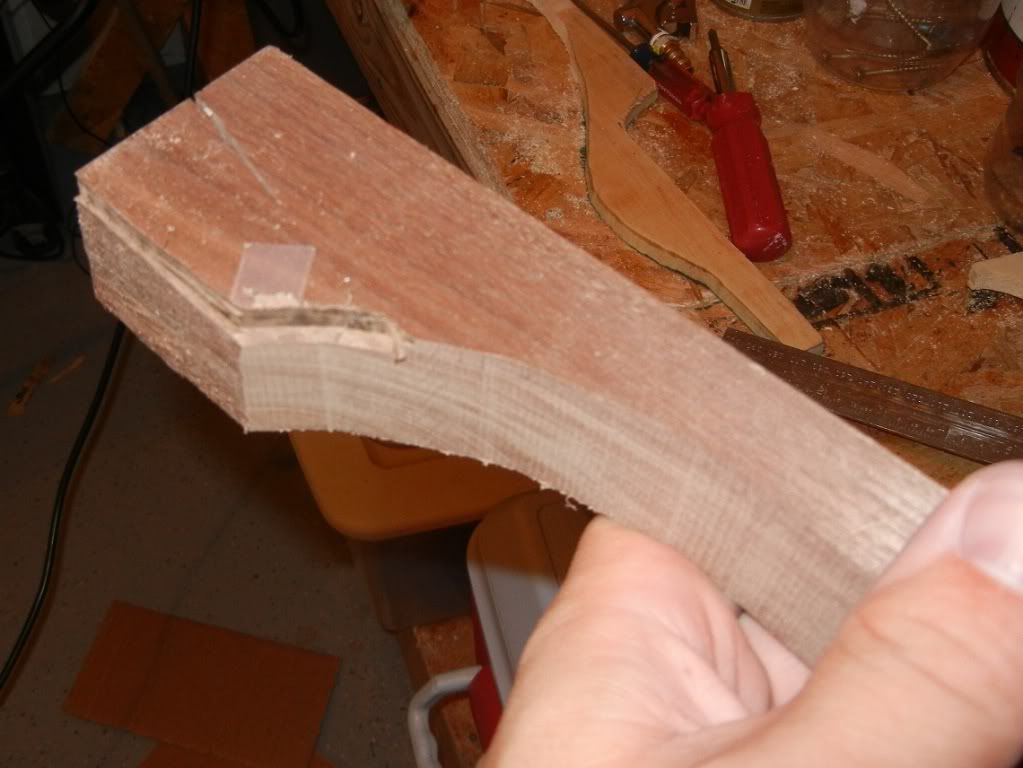
So the back of the body is cut to rough shape and the neck pocket is done. Also glued the headstock on. Got a 10 degree headstock angle on there. I'm planning on a 24 fret PRS scale from stewmac so I'll be trying my hand at fretting as well. I do need to find a rabbet bit set for my router so that I can cut out the binding groove around the body. 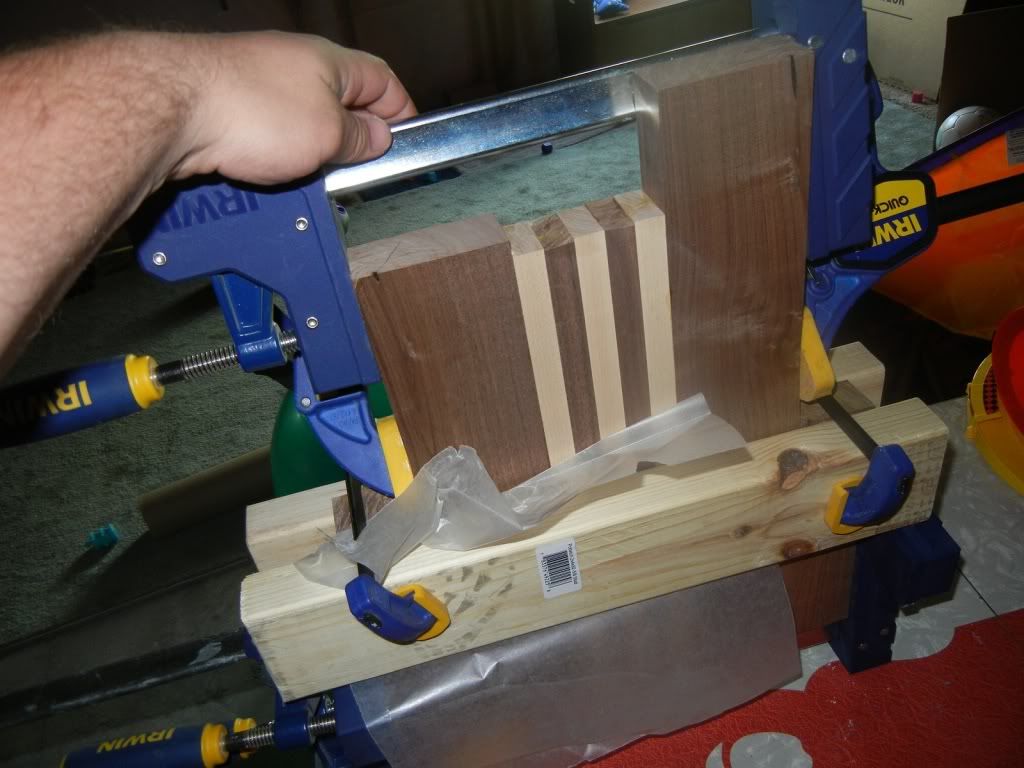

|
|
|
|
[#1]
Tag for awesomeness.
I've built up from parts/restored a few, but have neither the tools or knowledge to do it from scratch. |
|
|
|
IA, USA
|
[#2]
I actually modeled it in solidworks (3d modeling package I use at work) and that helps quite a bit in getting the tricky dimensions)
Here's the 3d rendering: 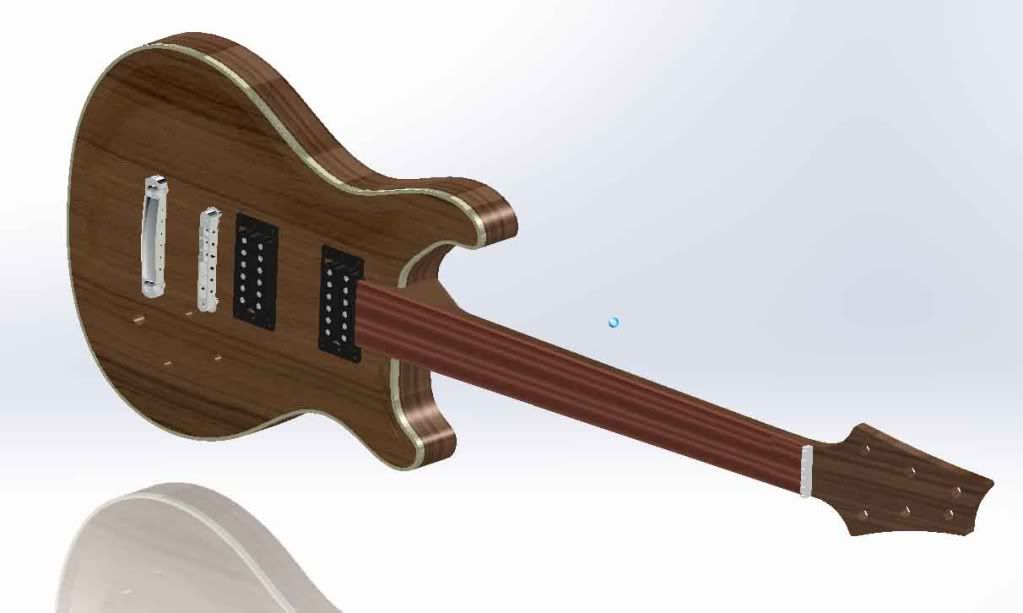
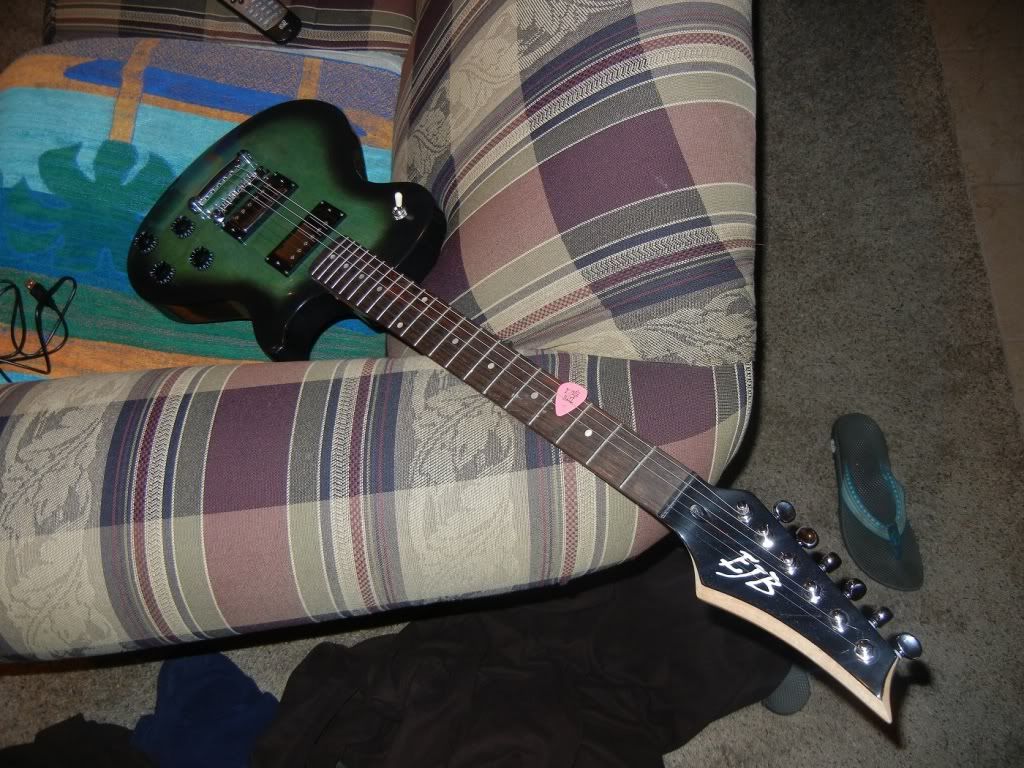
and a video: http://s927.photobucket.com/albums/ad119/machgt/guitar/Guitar%20build%20number%202/?action=view¤t=SetneckPRSguitar.mp4 Here's a picture of my first guitar build: 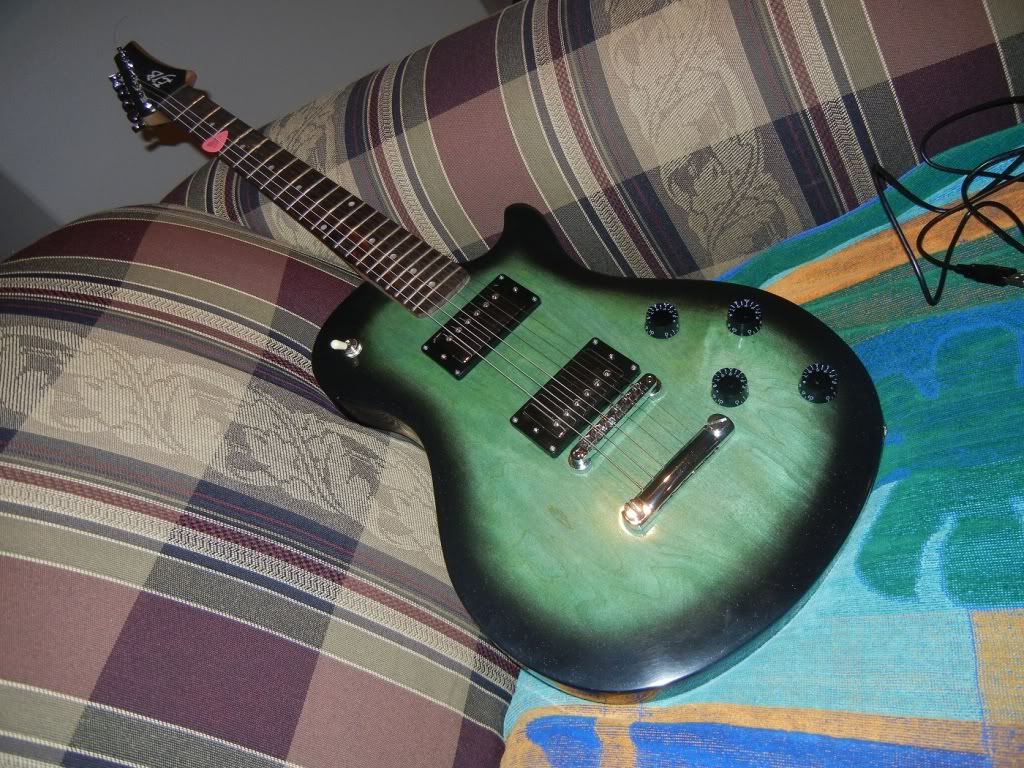
and how it sounds: http://youtu.be/h6JRiWdkJkw |
|
|
|
[#3]
The binding rabbet bit set you're looking for is sold at stewart-macdonald. www.stewmac.com
If you were going for a neck thru body look, why not just make it neck thru body? It actually is easier to build in some respects, as you don't even have to worry about making a neck joint of any kind. My first build was a neck thru. It remains awesome to this day, and I built it in 1987. Neck shaping is actually pretty easy. Have a straightedge handy so you keep the lines of the neck contours straight, but as for the rest, shape by feel and use a single overhead incandescent bulb to generate good light and shadows, using the shadows across the neck profile to check for bumps and dips. A lot of people miss this detail, but the truss rod should NOT be straight when it's installed. It needs to have some bend in it in order for it to work efficiently. The center of the truss rod should be 1/8 to 3/16" farther away from the fingerboard than it is at the ends. Seen in a cutaway, the slot gets deeper toward the middle and the rod is held in position by the covering piece, which is clamped in under pressure and will follow the curve of the rod. Tightening down a dead straight truss rod won't change the neck bow to any appreciable degree. It's gotta have some bend so it has something to push against in order to move the neck around. CJ |
|
|
|
IA, USA
|
[#4]
That's just how I put it together in solidworks, figured I'd do a glued in neck with a deep joint. Not really trying to go for the neck through body look, just a nice laminated board look.
thanks for the tip on the truss rod! |
|
|
IA, USA
|
[#5]
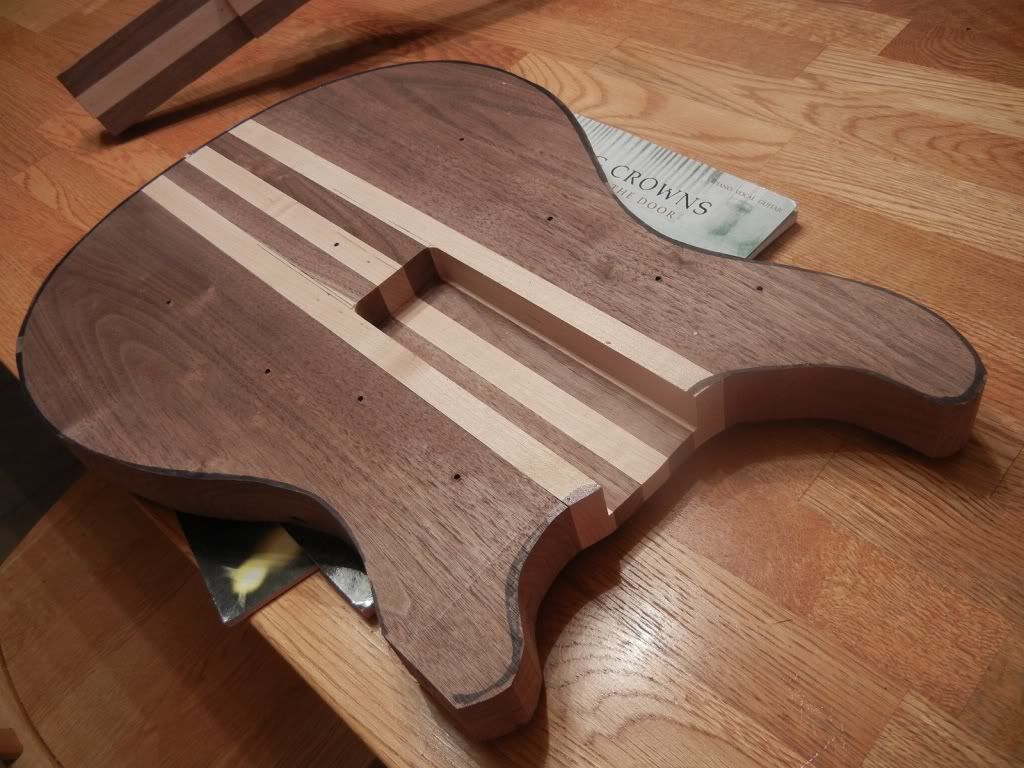
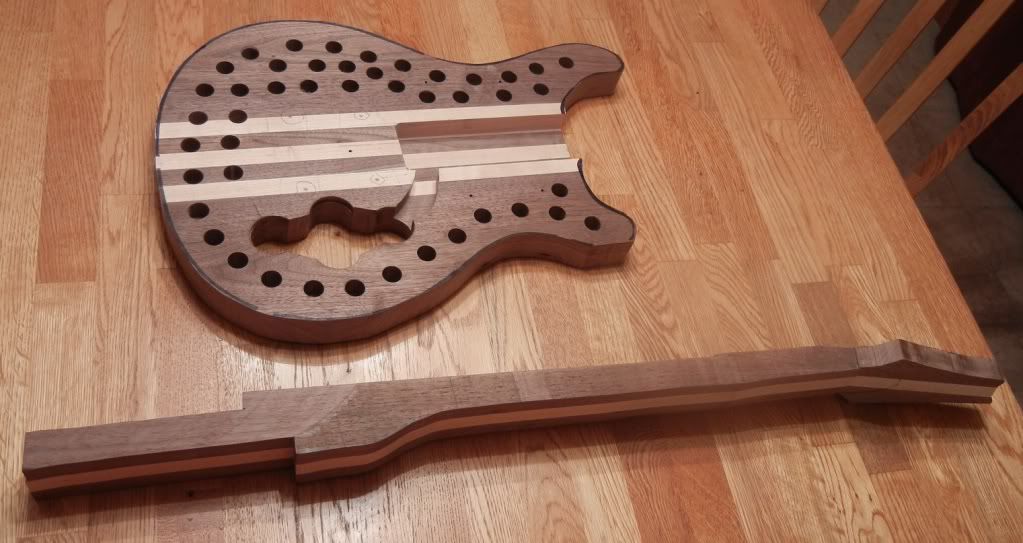
here are the parts with the clamps off, control pocket cut and lightening holes drilled. also drilled a hole along the axis of the neck under the bridge for a piezo bridge wire.

|
|
|
|
[#6]
Nice work.
Have you seen or used the kits from Grizzly? I've often thought about getting an acoustical kit and giving it a try. |
|
|
|
|
[#7]
|
|
|
|
IA, USA
|
[#8]
I originally thought about doing a kit guitar but haven't gone that route yet. maybe if I can pick up a blem kit from guitarfetish.com for cheap enough I might try for an xplorer or offset V
|
|
|
|
[#9]
Thanks. You got me off my butt and I've resumed work on two builds I started much earlier this year.
|
|
|
|
IA, USA
|
[#10]
nice!
I finished puting my 2 router setups together. One is a basic router table and the other is an upright mount where the router is above the workpiece on an adjustable height slide and I move the workpiece under it. I used that to finish up most of the neck joint and it is a nice fit, just a minimal amount of play in it, should be about right to give me what I need for aligning the neck to the body. Now I can glue the cap on :) |
|
|
|
[Last Edit: cmjohnson]
[#11]
I had a local machine shop create a custom set of CNC plexiglas routing templates, for both the neck tenon and the neck mortise.
They include CNC scribed centerlines down the full length of each of them. Since they were programmed and cut and scribed in a single operation, I can rely on them for absolute accuracy. I don't do the neck mortise routing until after the top is on the body, and align the centerline of the routing template to the center seam of the top. Anything I can do to ensure that everything is perfectly lined up is worth doing. In your case, be really careful to ensure that your neck lines up perfectly on center with the center seam of the top. Measure ten times, pray after each measurement, then cut, and fit it up extremely carefully. CJ |
|
|
|
IA, USA
|
[#12]
I believe that my neck joint is straight. There is just enough play in it though (maybe 1/4" at the headstock) to get everything lined up. The nice thing about the laminated body that way is that it is easy to measure up the centerline :)
glued the cap on tonight. then I can trim that out once I take the clamps off :) |
|
|
IA, USA
|
[#13]
nice thing about drawing it up in solidworks is that I can print out templates in 1:1 scale
|
|
|
IA, USA
|
[#14]
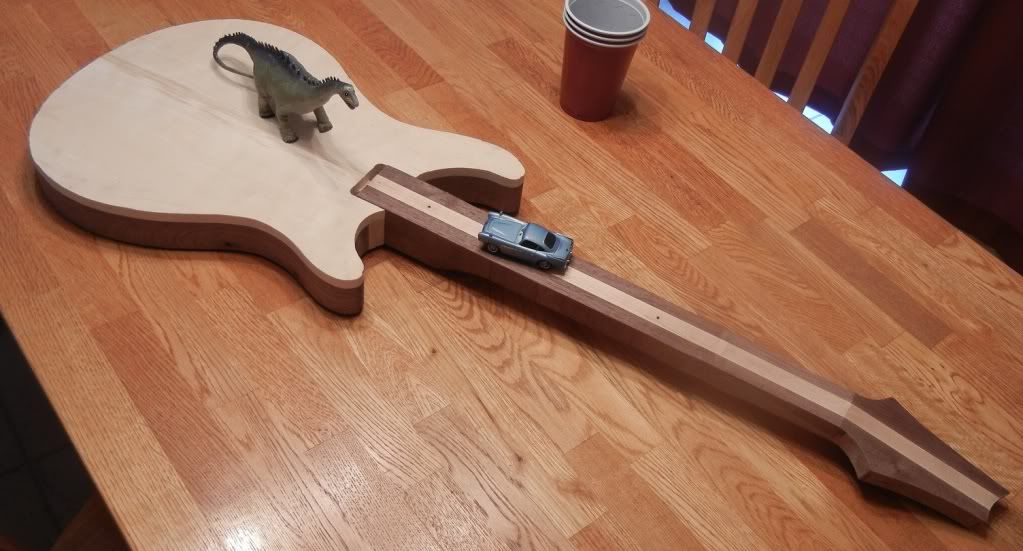
here is the cap glued on.... I put some water on it to bring out the figure some but I'll have to get it to really pop with the stain.
|
|
|
|
[#15]
I think you need to know about this outfit:
http://www.northridgehardwoods.com/SolidBodyTops.htm For what is actually a fairly reasonable price, you can get PRS "10 top" quality level top sets from this company. |
|
|
|
|
[#16]
Tag for interesting info.
|
|
|
|
|
[#17]
A good friend of mine has been doing DIYs for years now, and works for one of the smaller builders in KY. I'll ask him if he's got photos of all his work. They're beautiful guitars for sure.
|
|
|
|
|
[#18]
Awesome thread. Ive always wanted to build a guitar similiar inshape to the rickenbacker Lemmy plays.
|
|
|
|
IA, USA
|
[#19]
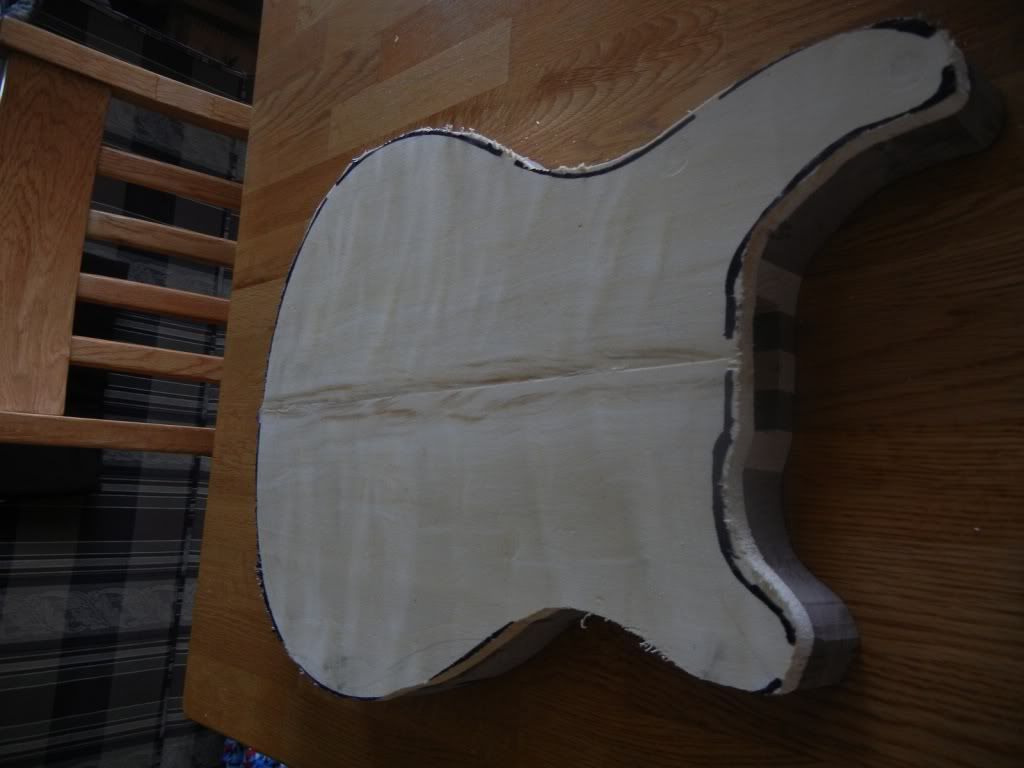
borrowed an oscillating spindle sander today so I'll have the body outline done soon :)
I cut the glue out of the neck pocket and the neck fits the joint very well. My future build plans include a red cedar (rustic knotty) explorer with diamond plate pick guard... I'm thinking that would be sweet and I think cedar would make a good guitar wood |
|
|
IA, USA
|
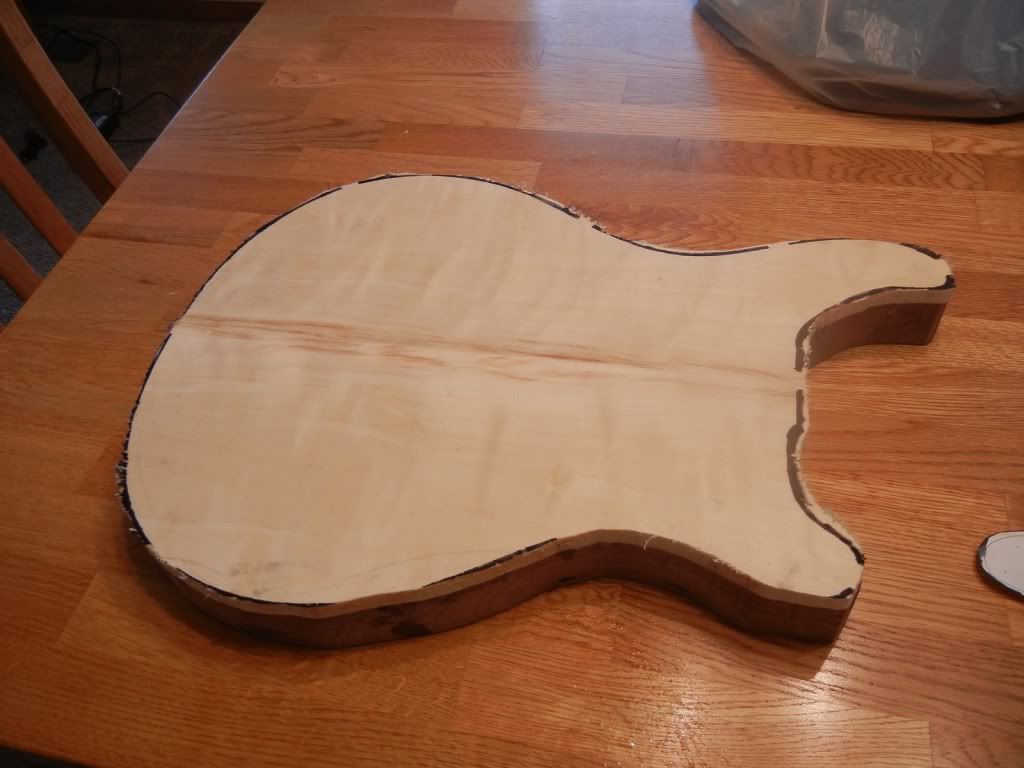
[#20]
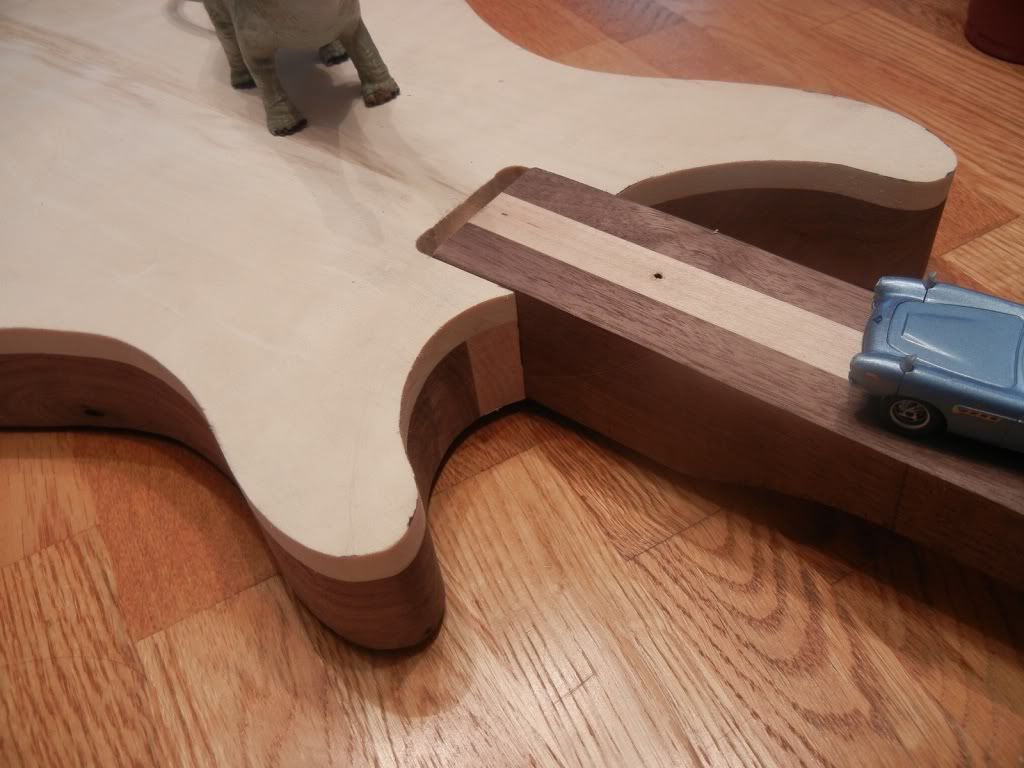
borrowed the oscillating spindle sander from work and got the outline a bit more finished, cut out a notch for the neck in the top cap (it will get opened up into a pickup cavity once I get the neck finished and know my clearances) It is a nice tight fit!
NOw if only my friend at work hadn't planed the maple pieces in the guitar body.. then the center stripe would match the neck 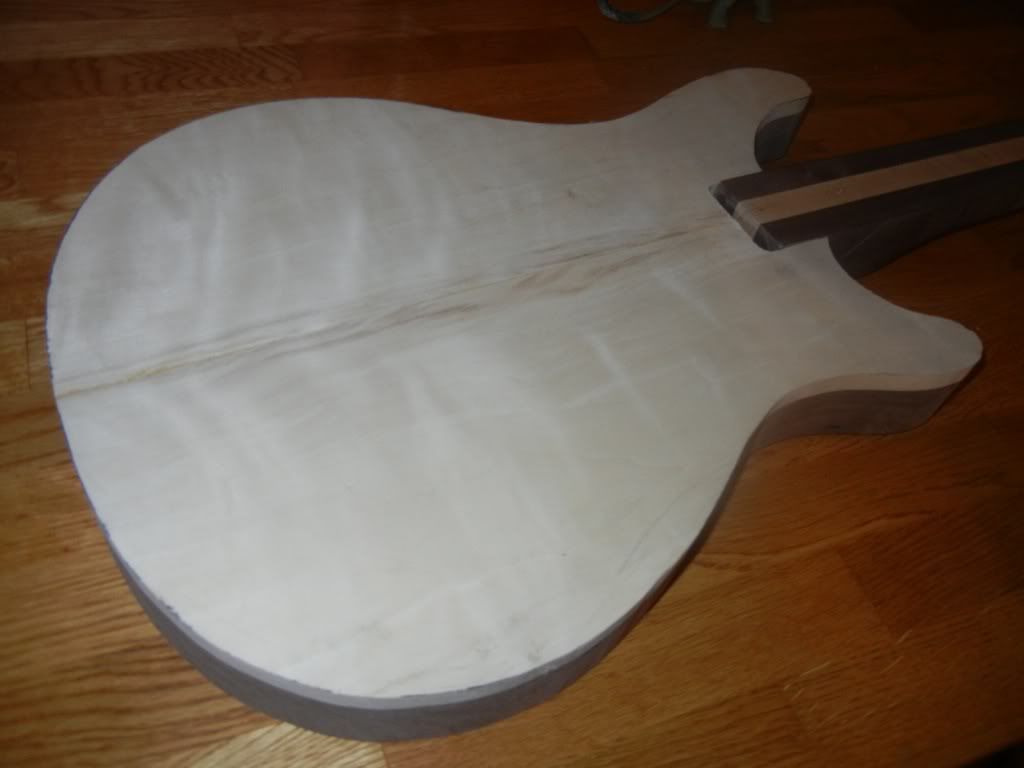

|
|
|
IA, USA
|
[#21]
think I'm going to build a dremel attachment to cut out the binding slot.
http://www.stewmac.com/shop/Tools/Tools_for_Binding/Binding_Router_Guide.html won't look quite as spiffy though |
|
|
|
[#22]
If you're doing it PRS style, why not do it with natural binding? It's simpler and looks great. Plus it's just one less chance of having a machine thrash your work to death.
|
|
|
|
IA, USA
|
[#23]
what is natural binding?
I want to still protect the edges on the aspen top as it is a softer wood |
|
|
|
[#24]
Right. Aspen top. Interesting choice, and definitely a softer wood.
I'm so used to seeing and using maple tops that I always expect a maple top. My use of experimental woods (woods not typically used in guitar construction) is limited to the use of exotics for the neck, such as Brazilian Rosewood, Indian Rosewood, Pernambuco, and Ipe. Some of which can be hideously expensive and make me very nervous about making a mistake that would scrap a neck. |
|
|
|
IA, USA
|
[#25]
yeah, that has me a tad nervous but I'll use a bit of wood hardener and aspen is similar to poplar. I'm going to use some wood hardener on it to make sure the bridge is good and secure. I'm curious to see how it ends up sounding with the walnut main body.
|
|
|
|
[#26]
If I know anything about people who build guitars, it's that they never build just one.
For your next build, if you haven't already done so, use more commonly used traditional woods and see how the results come out. I'm generally partial to African mahogany if I can't get Honduran mahogany, with a heavily flamed or quilted maple top, and a good resonant piece of mahogany for the neck, with an Indian rosewood or Ebony fingerboard. They're all well known as good tonewoods. Aspen and walnut are not really common in guitar building. They're not as resonant as the above named woods. My current obsession is in finding the neck wood that has the longest, and highest pitch, tap tones possible. I believe that those two parameters determine sustain and evenness of note-to-note response, more than any other factors. CJ |
|
|
|
IA, USA
|
[#27]
I built my first guitar from a mahogany back and maple cap but with a bolt on maple neck in a LP clone.
I do really like the way it sounds and it will be interesting to see how this one compares. there's not much on the net about aspen but Ed Roman is a big fan of walnut in his guitars. the aspen on the walnut actually does have a nice resonance to it when I tap on it. |
|
|
IA, USA
|
[#28]
I"m thinking a future build will involve a neck through design with red cedar for wings with an explorer shape and an aluminum tread plate pick guard......
|
|
|
|
[#29]
Are you looking for flashy looks or a guitar that has tone?
If tone is what you seek, metal pickguards work against you. I'm firmly set on my belief that the best performing solidbody electric guitars share certain specific characteristics: 1: They are made of highly resonant woods with high natural tap tones. The higher the better. 2: Their bodies are symmetrical down the lengthwise axis, or nearly so. I base this on the theory of constructive and destructive interference of waves, as visualized in a wave tank, which is an experiment you may have performed or seen performed in a high school science class. Odd, highly asymmetrically shaped bodies will cause undesirable inteference patterns, creating nodes and nulls that move around the body as the frequency of the played note changes, resulting in uneven note to note and string to string response. The effect is lessened if the neck itself is made of a wood that is resonant at a high pitch. I specifically choose my neck blanks by the tap tone. It has caused me to reject a lot of beautiful mahogany because the tap tone is too low even though it's very clear and long lasting. To use that mahogany will result in a neck that has dead spots (wolf tones) in it. For this reason, the Flying V is my favorite design from a performance perspective. It's totally symmetrical and the way it behaves when looked at as a wave tank of v shape is commendable. The nodal and modal points stay pretty much the same at any frequency. Those nodes and modes don't move around much at all. The result is that most any note will sustain as long as any other that's close to it. An SG is also really good due to its nearly symmetrical body. A single cutaway like a Les Paul is good, but a DC Standard is better. And, truth be told, the Explorer shape leaves much to be desired. Looks cool, peforms badly. 3: Use the dryest, most seasoned woods you can get. If the wood is cool to the touch on a warm day, it's got too much moisture in it and needs to go into a hotter, lower humidity environment until its moisture content gets low enough, around 6 percent or less. Eventually any guitar maker will buy a moisture meter. |
|
|
|
IA, USA
|
[#30]
I tend to be a bit of a tinkerer ;)
the advice is much appreciated |
|
|
|
[#31]
Tinkering is good! Les Paul was a tinkerer. Llloyd Loar was a tinkerer. Paul Reed Smith is a tinkerer. They have all done great things to advance the
state of the art of the guitar, in their own times. I always encourage people to try something new and different, but think it out before you commit it to wood. Once I had an idea that didn't pan out very well. I "retired" that guitar with a bandsaw as there was no point in keeping it alive. It did not represent the quality of workmanship, design, and execution that I demand of myself. CJ |
|
|
|
|
[Last Edit: Covertness]
[#32]
|
|
|
|
|
[#33]
I've been busy on my own new build over the last few days. I put seven hours into milling out the cavities on it over the weekend.
But this isn't my thread to take over. If I start a new thread on that build, I'll just link to it. CJ |
|
|
|
IA, USA
|
[#34]
Excellent CM!
feel free to link up your build, I'm curious to see I bought some minwax wood hardener today and tried some out on the scrap aspen pieces that I have and it really popped the figure :) I'll have to see what it looks like once it is fully cured but I might try it with a bit of amber or dilute walnut dye mixed in. definitely going to have to test it on some scrap pieces! |
|
|
AZ, USA
|
[#35]
Originally Posted By MachGT:
Here's the 3d rendering: http://i927.photobucket.com/albums/ad119/machgt/guitar/Guitar%20build%20number%202/PRS-solidworks-rendering.jpg http://youtu.be/h6JRiWdkJkw That looks sweet as hell. A fixed bridge PRS without the wraparound junk? Win |
|
|
|
[#36]
http://www.prsforums.com/forums/index.php?showtopic=21821
This kind of became my blog for all things related to guitar construction. Only the last couple of pages reflect my current build. You may not be able to access the content without registering. It's a really good forum, though, and if you're at all into good guitars it's worth taking a minute to register for free. CJ |
|
|
|
IA, USA
|
[#37]
I'll have to set up an account there...
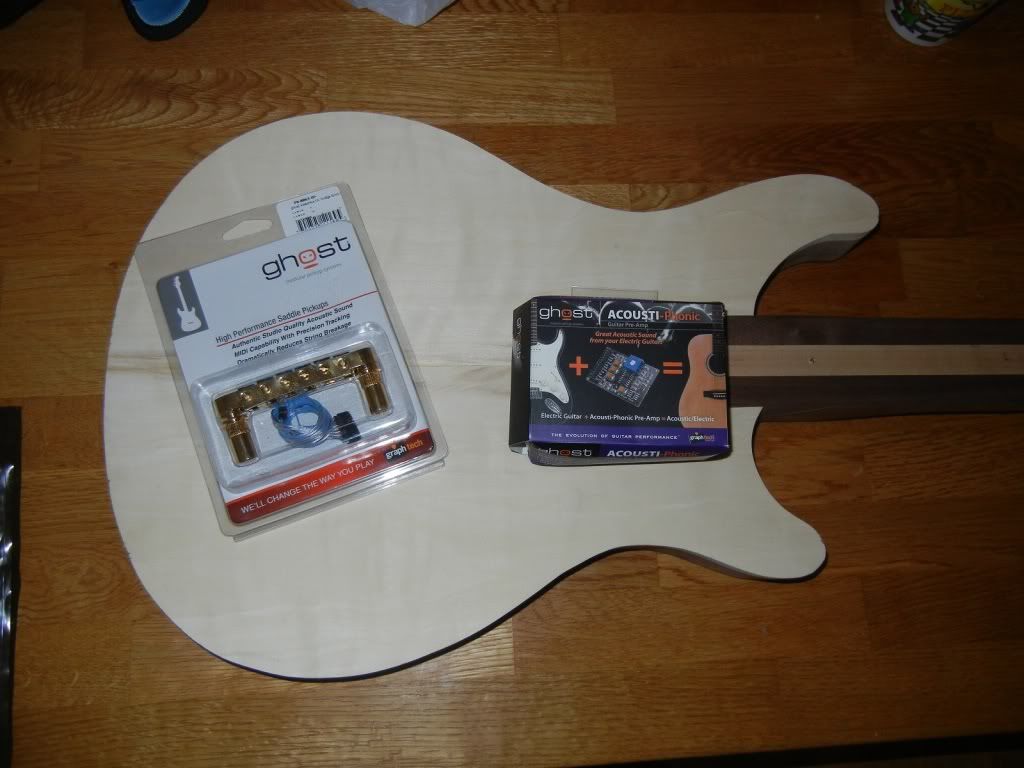
got some new hardware today.. yay brown truck! I'll be able to play it to sound like an acoustic :) 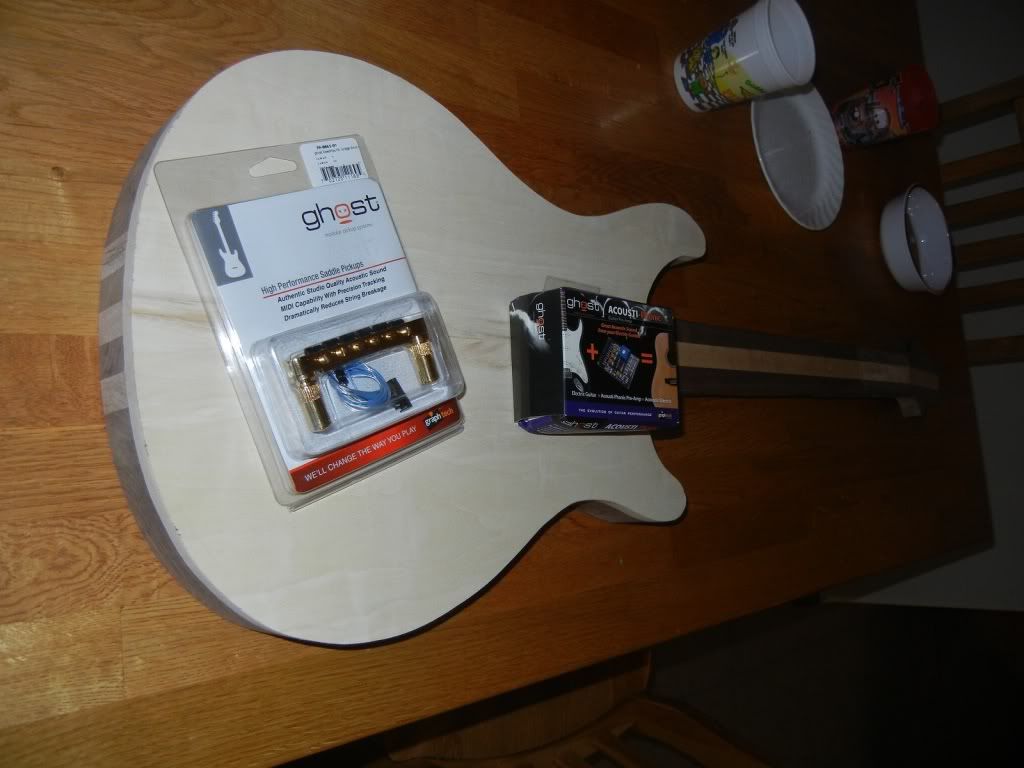
|
|
|
IA, USA
|
[Last Edit: MachGT]
[#38]
how do you cut out those recessed areas for the knobs?
and how lightfast is that Fiebing's leather dye? the price on that stuff is much more attractive then some of the rockler stuff |
|
|
IA, USA
|
[#39]
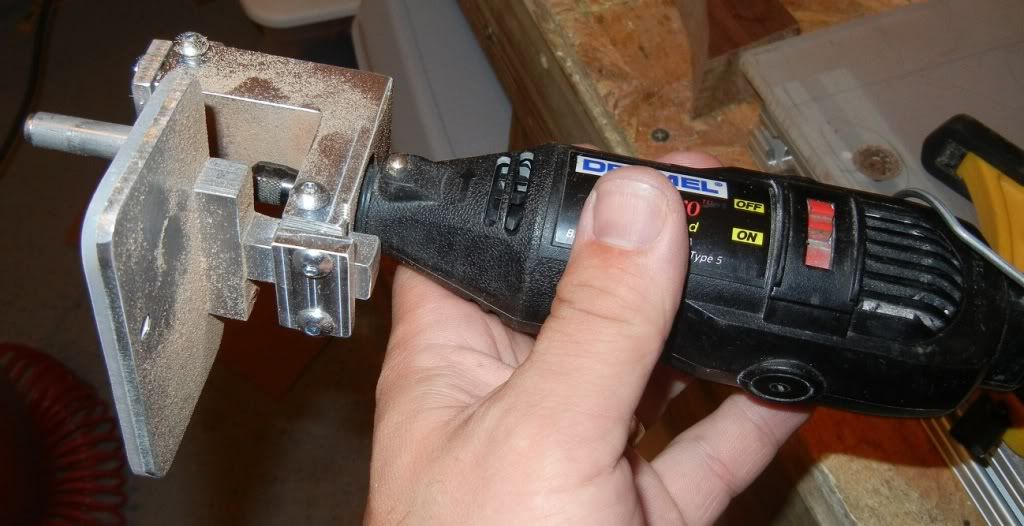
I made an attachment for my dremel!
I need to tweek it a bit as the threaded hole is a bit out of straight but otherwise I think it will work well. I'll have to make a lot of shallow passes at it. The nice thing is that if I don't have it at the right angle, it just makes a more shallow cut so that I can fix it with another pass at the right angle. 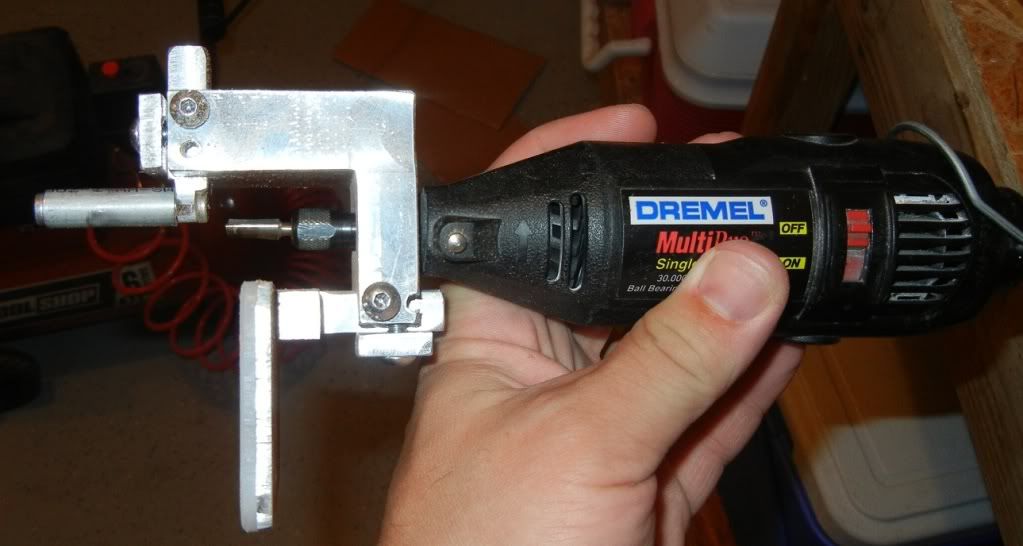
|
|
|
|
[Last Edit: cmjohnson]
[#40]
To cut the depressions around the knobs, I spent money on custom ground milling cutters which I run in my milling machine.
I have two of them, one ground to a 3 inch radius for the volume and tone controls, and the other is ground to a 2 inch radius for the toggle switch. They're made from custom ground 2 inch and 1.5 inch end mills. They're simply used as drills, stopping at the appropriate depth. Dead simple. But only if you have a vertical milling machine. This is probably a method that isn't going to do you a lot of good. You might want to try using a circle routing attachment on a router, and set the cutter to deeper cuts near the center of the guide hole. Use a ball nose cutter to help the transitions stay fairly smooth and easy to sand out. As for the lightfastness of the Fiebing's dyes, I'm trying to find that out, myself. I KNOW that some dyes used by PRS (mostly but not always Fiebing's dyes) are proving to not last very well particularly in sunlight. But others are very lightfast. Problem is, I don't know which are which yet. The PRS color "Eriza Verde) (A very bright green) is known to be fade-prone. Some of their blue shades also are known to fade. I just learned, via experiment and test, that an industrial water jet cutter is a fantastic tool for slicing a fingerboard blank off of a neck of rare and hideously expensive exotic woods. This allows me to get a blank, make a neck out of it, and get at least one free fingerboard for just the cost of getting the water jet job done. Very nice if you're working with some form of rosewood or other exotic...or even maple. The neck for my current build is almost ready to assemble. (Fingerboard needs to be glued on...I start carving the neck after that.) I've also begun carving the top. Rough carving took about 15 minutes, now the detailed carving starts and that'll take a bit longer. |
|
|
|
|
[#41]
http://www.offsetguitars.com/forums/viewtopic.php?f=8&t=32912
If you need inspiration, check out this link describing a Jazzmaster the guy built from scratch. Amazing project. Stay safe |
|
|
|
|
[Last Edit: cmjohnson]
[#42]
Every guitar I make is scratch built. I always start with lumber and get VERY busy.
I even machine out my own hardware for some guitars. I take "I built it" to the extreme. My archtop has just one thing on it that isn't made by me, and that's the tuning machines. 100 percent of the rest is hand made by me for that guitar. It's immeasurably more fun to make your own from scratch (assuming you're ready to do that) than it is to assemble a guitar from pre-made parts. But if you aren't ready to make your own from scratch yet, trying to build one from scratch will be at least challenging and possibly very frustrating. It's definitely a learned skill.  I just got done carving out the top on this one tonight. I figure I have maybe two hours total time invested in carving the top from flat to this point. Just a few days ago it looked like this:  |
|
|
|
IA, USA
|
[Last Edit: MachGT]
[#43]
I made the body from scratch on my first guitar, I'm doing a bit more from scratch on this one but not all of the wood. I'll buy a fretboard from stewmac but the rest of the neck is to be made from scratch.
I'll use a router stand that I made which holds the router vertically with the cutter facing down to do the rough carving on both the body and some of the neck. I'm essentially building a bunch of my jigs for this guitar build Thanks for the tips CM! I'm planning to do some lighter colors on the dye other then the burst. I'm thinking dark brown wash coat then sand down, then amber stain, and then a mix of the amber and brown for the burst, maybe in a couple of stages. |
|
|
|
[#44]
Originally Posted By sparkyCG:
http://www.offsetguitars.com/forums/viewtopic.php?f=8&t=32912 If you need inspiration, check out this link describing a Jazzmaster the guy built from scratch. Amazing project. To be sure, there are some dudes on that forum doing absolutely crazy custom work. Folks who work neck magic from scratch really impress me. |
|
|
|
|
[#45]
Necks are easy, too.
patience and you must pay attention to the details. I'm always more concerned about getting the neck mortise in the body just right. To me, THAT is the single most critical part and if you don't have a plan, it will be the most difficult part as well. CJ |
|
|
|
IA, USA
|
[#46]
Yeah, I think you could do a good job building a guitar with the following tools
Router Jig saw Drill Other tools make things much easier such as joiner plane drill press die grinder Of course, simple tops keep the tool requirements down, the carved top requires a bit more of you. I would absolutely love to have a mill and lathe in the garage but I am at least able to use the ones at work after hours and that helps. |
|
|
|
[#47]
Add a 4" class angle grinder, a few sanding/grinding discs, and a random orbital sander and you have all you need to carve
out tops, belly cuts, etc. quickly and efficiently. Even without the chainsaw disc that I use as stage 1 of the carving, these tools will work fast. CJ |
|
|
|
IA, USA
|
[#48]
yeah, thought about that one after the post.
I'm going to try using my vertical mount router setup to rough cut out the top carving on this one. |
|
|
|
[#49]
Some people like that approach, some people don't.
I personally don't like it, having tried it. I just start by scribing the line at the rim of the top where I want the carving to stop. I then round over to near that edge using my first carving tool, and then once I get close to that line, I start migrating inward toward the middle of the top, and down into the top toward my target thickness. The closer I get, the finer the sanding grit I use. I spend a LOT of time just running my hands over the surfaces and feeling for things that aren't as I want them. I also make extensive use of shadow lighting to reveal subtleties in the contours. This works best when you have a single small but bright overhead light bulb. Turn off all other lights in the room. Use shadows cast across the top as a way to see the high and low spots. It works extremely well. PRS uses this method. All their top sanders have spotlights on their benches so they can use shadows to gauge the quality of the top carve. CJ |
|
|
|
IA, USA
|
[#50]
Originally Posted By cmjohnson:
Some people like that approach, some people don't. I personally don't like it, having tried it. I just start by scribing the line at the rim of the top where I want the carving to stop. I then round over to near that edge using my first carving tool, and then once I get close to that line, I start migrating inward toward the middle of the top, and down into the top toward my target thickness. The closer I get, the finer the sanding grit I use. I spend a LOT of time just running my hands over the surfaces and feeling for things that aren't as I want them. I also make extensive use of shadow lighting to reveal subtleties in the contours. This works best when you have a single small but bright overhead light bulb. Turn off all other lights in the room. Use shadows cast across the top as a way to see the high and low spots. It works extremely well. PRS uses this method. All their top sanders have spotlights on their benches so they can use shadows to gauge the quality of the top carve. CJ I did something similar on the last one. I rough cut out with a router and then used a 4" rough sanding pad on a borrowed angle grinder. I'd use feel to find high spots and then mark those with a pencil to bring them down. when I got it closer to the final profile I'd use shadows like you suggest. |
|
|

AR15.COM is the world's largest firearm community and is a gathering place for firearm enthusiasts of all types.
From hunters and military members, to competition shooters and general firearm enthusiasts, we welcome anyone who values and respects the way of the firearm.

Subscribe to our monthly Newsletter to receive firearm news, product discounts from your favorite Industry Partners, and more.
Copyright © 1996-2024 AR15.COM LLC. All Rights Reserved.
Any use of this content without express written consent is prohibited.
AR15.Com reserves the right to overwrite or replace any affiliate, commercial, or monetizable links, posted by users, with our own.


