|
[#1]
Originally Posted By hkx3: Need some help: Im moving into the interior of mine now, and starting to look at the smaller details. What is the purpose of the plywood thats cut and screwed down over the center tunnel? On mine its obviously a precision cut piece (actually 2) and they are green. They are rotting at the edges, and Id like to either remove and discard them, or replace them. Didnt know the reason they are there to start with |
|
|
|
|
[#2]
Originally Posted By hkx3:
Need some help: Im moving into the interior of mine now, and starting to look at the smaller details. What is the purpose of the plywood thats cut and screwed down over the center tunnel? On mine its obviously a precision cut piece (actually 2) and they are green. They are rotting at the edges, and Id like to either remove and discard them, or replace them. Didnt know the reason they are there to start with Deaden's some of the sound and provides some additional heat insulation for the passengers. Occasionally you'll see tie-down rings on them for gear. It's redwood plywood and is usually better to just cut and paint yourself than to try and find one and ship it. |
|
|
|
|
[#3]
I was down to a quarter tank of diesel so I filled up and added 16 oz of Diesel Clean to the truck today. After adding the fresh diesel and the diesel clean, the engine seems to have more power and run stronger! I drove it for about twenty minutes and everything (except the headlight) seems to be working properly.
|
|
|
|
|
[#4]
Originally Posted By EagleArmsHBAR:
I was down to a quarter tank of diesel so I filled up and added 16 oz of Diesel Clean to the truck today. After adding the fresh diesel and the diesel clean, the engine seems to have more power and run stronger! I drove it for about twenty minutes and everything (except the headlight) seems to be working properly. Good to hear! I had a feeling some fresh fuel would give your truck some pick-me-up. I lucked out on a whole bunch of winter blend (white bottle) Diesel Kleen a couple weeks ago. Was in Walmart picking up some coolant and gear lube for the truck and noticed it on their markdown rack in the auto section since I guess they were clearing out winter rated products. Price tag on the rack said $7 per jug, half price it normally is. Grabbed 4 of the 7 they had. Got up to the counter and it rang up at $4.50 each! Also scored 4 Purolator oil filters that my zero turn uses for $0.75 each from the markdown rack! Today I was out getting some of the last of the rear end work taken care of. Some weather was moving in and I was, yet again, out of Grade 8 bolts so I wrapped up without everything 100% done. Didn't feel like running to the hardware store so I called it quits. Finished installing the last 3 bumper bolts. Got started on the tow hitch and it appears that the civilian hitch will work perfectly with the electric rear winch setup! 
The only issue I can see is that since the hitch tube is about 2" tall it looks like it hangs down enough it will get in the way of the winch cable, especially pulling at upward angles. Thankfully the hitch tubing is rounded square so it shouldn't be too rough on the cable. May check into seeing if I can find some sort of roller to mount on the bottom of the hitch or have my fab shop weld a 1/2-3/4 section of a round tube to the bottom of the hitch. When I do get a winch for the rear, I'll probably also replace the steel cable with synthetic since that should slide over the surface a bit easier too. I got 2 of the 4 hitch's bumper bolts installed but need some more 1-1/2" 1/2" bolts for that. Also found I will need to drill the outer/body brackets to bolt the hitch brackets to them. More 1-1/2" 1/2" bolts for those. Braces then run from the hitch forward to the frame where it bolts to brackets that mount to the rear, lower suspension a-arm mounts. That is not going to be fun to install... The only other thing I need to check is that the winch I'm planning on using will fit okay. The plan is to install a Harbor Freight Badlands 12k in the back to match the front. I've already got the one for the front so I'll just use that one to check fitment. If for some reason it's too large, I'll just go to a 9k but I'm pretty sure it will work. I already had my local metal fab shop modify both front and rear plates from the military 4"x9" winch mounting pattern to the much more common 4"x10". The rear winch plate doesn't have the extra reinforcement the front does so I also had them add some to it while they were making the other modifications. I'll get some side by side pics before I actually mount any winches up. So here's how the hitch looks on the truck. 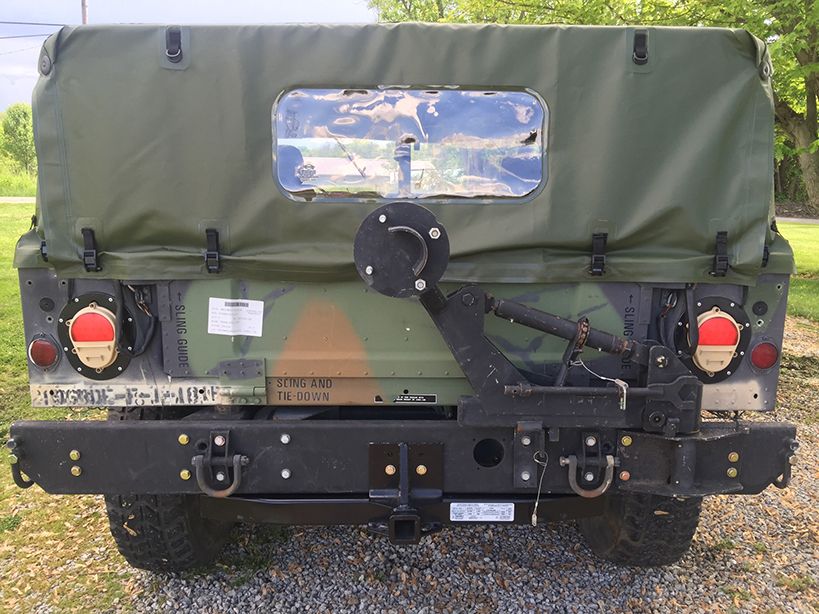
Horizontal tab on the left is what the brace bolts to that bolts to the frame. Vertical tab on the right is what bolts to the outer/body bracket via an L shaped bracket. 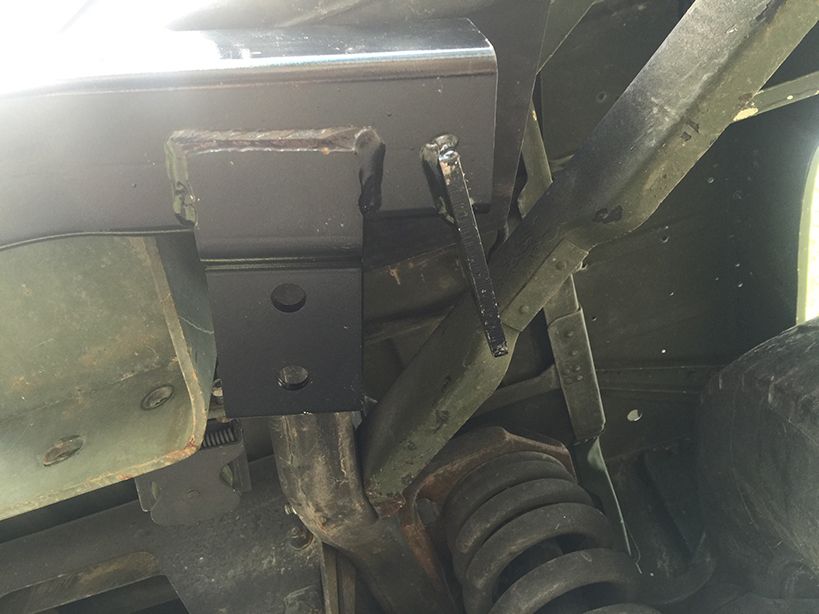
Looking backwards with the winch plate removed. The roller fairlead mount is in between the inner brackets. The mount is not a perfect fit for the new 4"x10" pattern since it is designed for the 4"x9" so it will have to be "field formed" to work with it when the winch gets bolted in. 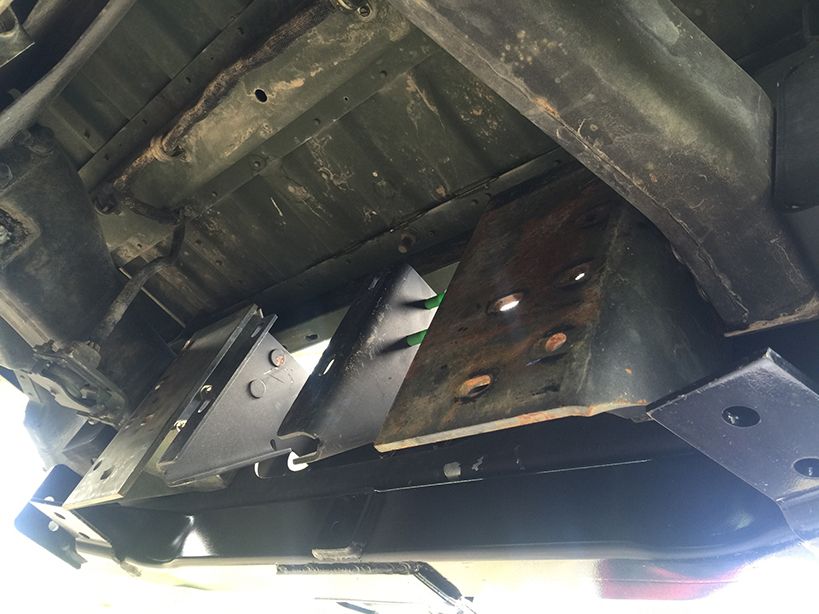
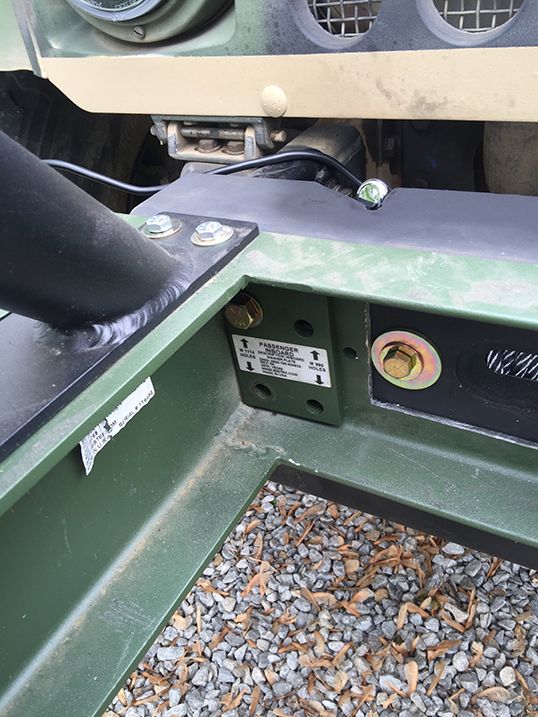
Temporarily bolted one of the braces on to get an idea how it fit up. 
Winch plate back in with the roller fairlead mount in place. That angled part is where the fairlead bolts up. I think it is 4"x9" (I need to double check) as well. Hopefully when I massage the part that bolts to the winch plate, I can get a 10" fairlead on there. If not, I'll have to just hunt down a 9" wide one instead. You can see the hitch tube on the right and how it hangs down into the cable's potential path. 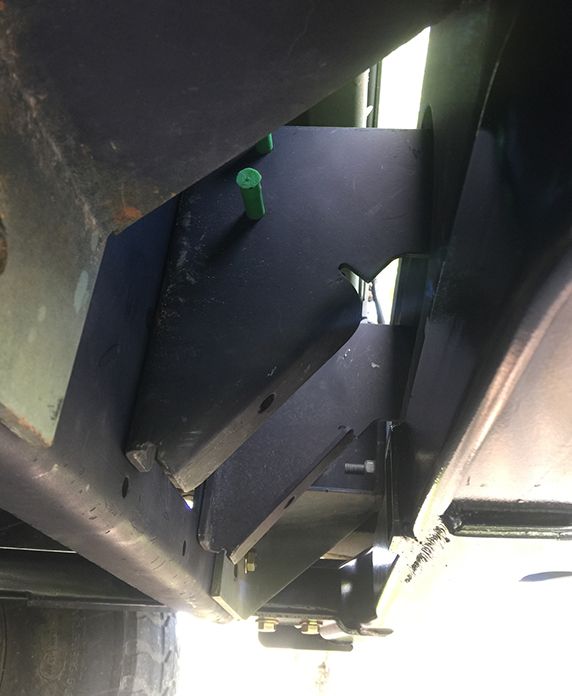
A whole lot of steel back there! Woe unto any plastic econobox that rear ends me. 
|
|
|
|
|
[#5]
Ryan looks good. Now that you are almost done with he outside are you going to start on the inside next?
|
|
|
|
|
[#6]
Just found out today that my brake lights don't work.
|
|
|
|
|
[#7]
Originally Posted By EagleArmsHBAR:
Just found out today that my brake lights don't work. Check the ground at the switch and at each light. Might also have a bad switch. Clean all of the grounds really well as sometimes they get painted over. |
|
|
|
|
[Last Edit: EagleArmsHBAR]
[#8]
Originally Posted By jake-cutter: Check the ground at the switch and at each light. Might also have a bad switch. Clean all of the grounds really well as sometimes they get painted over. Originally Posted By jake-cutter: Originally Posted By EagleArmsHBAR: Just found out today that my brake lights don't work. Check the ground at the switch and at each light. Might also have a bad switch. Clean all of the grounds really well as sometimes they get painted over. |
|
|
|
OH, USA
|
[#9]
Originally Posted By EagleArmsHBAR:
It appears that the brakes work, but only if I mash on them real hard. Is there a step by step on how to adjust the brake light sensitivity? Originally Posted By EagleArmsHBAR:
Originally Posted By jake-cutter:
Originally Posted By EagleArmsHBAR:
Just found out today that my brake lights don't work. Check the ground at the switch and at each light. Might also have a bad switch. Clean all of the grounds really well as sometimes they get painted over. Two nuts on the brake switch. Loosen, adjust rearward, tighten. 90% I've driven are adjusted too far in. |
|
|
|
[#10]
Originally Posted By hkx3: Two nuts on the brake switch. Loosen, adjust rearward, tighten. 90% I've driven are adjusted too far in. Originally Posted By hkx3: Originally Posted By EagleArmsHBAR: Originally Posted By jake-cutter: Originally Posted By EagleArmsHBAR: Just found out today that my brake lights don't work. Check the ground at the switch and at each light. Might also have a bad switch. Clean all of the grounds really well as sometimes they get painted over. Two nuts on the brake switch. Loosen, adjust rearward, tighten. 90% I've driven are adjusted too far in. |
|
|
|
|
[#11]
Originally Posted By EagleArmsHBAR:
It appears that the brake lights work, but only if I mash on them real hard. Is there a step by step on how to adjust the brake light sensitivity? Originally Posted By EagleArmsHBAR:
Originally Posted By jake-cutter:
Originally Posted By EagleArmsHBAR:
Just found out today that my brake lights don't work. Check the ground at the switch and at each light. Might also have a bad switch. Clean all of the grounds really well as sometimes they get painted over. There is a lever type brake switch under the dash attached above the pedal: that's where you adjust it. |
|
|
|
|
[#12]
Originally Posted By jake-cutter:
Ryan looks good. Now that you are almost done with he outside are you going to start on the inside next? Originally Posted By jake-cutter:
Ryan looks good. Now that you are almost done with he outside are you going to start on the inside next? That's the plan! Still have a bit of outside work though apparently... Got the front winch plate mounted up and found that while the Ibis Tek bumper mostly bolts up correctly there are a couple holes that don't align and, the passenger side of the bumper's winch opening against the plate covers a winch mounting hole and part of the cable opening. Considering how much force the front winch could see I certainly want all bolts properly attached. More modifications... Just haven't decided if I'm going to try tackling it or have my fab shop do it. 
Originally Posted By hkx3:
Originally Posted By EagleArmsHBAR:
Originally Posted By jake-cutter:
Originally Posted By EagleArmsHBAR:
Just found out today that my brake lights don't work. Check the ground at the switch and at each light. Might also have a bad switch. Clean all of the grounds really well as sometimes they get painted over. Two nuts on the brake switch. Loosen, adjust rearward, tighten. 90% I've driven are adjusted too far in. This is almost exactly how mine are. Just haven't gotten around to adjusting the switch. |
|
|
|
|
[Last Edit: EagleArmsHBAR]
[#13]
Originally Posted By fp1201: There is a lever type brake switch under the dash attached above the pedal: that's where you adjust it. Originally Posted By fp1201: Originally Posted By EagleArmsHBAR: Originally Posted By jake-cutter: Originally Posted By EagleArmsHBAR: Just found out today that my brake lights don't work. Check the ground at the switch and at each light. Might also have a bad switch. Clean all of the grounds really well as sometimes they get painted over. There is a lever type brake switch under the dash attached above the pedal: that's where you adjust it. |
|
|
|
OH, USA
|
[#15]
Originally Posted By EagleArmsHBAR:
SF97 arrived today! 
<a href="http://s247.photobucket.com/user/dab969/media/Mobile%20Uploads/image_zpsc45l2qht.jpeg.html" target="_blank">http://i247.photobucket.com/albums/gg141/dab969/Mobile%20Uploads/image_zpsc45l2qht.jpeg</a> The bad news is that I have two busted grease boots and I am not sure how much trouble it will be to replace them. Here are the busted boots. Any experience replacing these? <a href="http://s247.photobucket.com/user/dab969/media/Mobile%20Uploads/image_zpshwtuwdrj.jpeg.html" target="_blank">http://i247.photobucket.com/albums/gg141/dab969/Mobile%20Uploads/image_zpshwtuwdrj.jpeg</a> <a href="http://s247.photobucket.com/user/dab969/media/Mobile%20Uploads/image_zpszfms3nii.jpeg.html" target="_blank">http://i247.photobucket.com/albums/gg141/dab969/Mobile%20Uploads/image_zpszfms3nii.jpeg</a> The boots are busted from either A) Being old, and / or overgreased, Id replace the whole joint if I had it apart to fix the boot B) A previous tear down resulted in the boot being torn by a pickle fork. Id replace the whole joint if I had it apart to fix the boot. For me, Id run the things until they get play in them (assuming they dont already). If you arent bombing mud holes or running super dusty rock trails, Id bet they last longer than you think. Keep grease in there to flush out the trash, and use them up. Ive had older 4x4 stuff that had a few leaking boots and I pumped grease in them until I either had to fix the joint or sold the truck |
|
|
OH, USA
|
[#16]
As for liscense plate mounting, I used a 1" wide strip of aluminum 3/16" thick. I cut and angled them 90 degrees
Used rivets (aluminum) into the bottom of the right quarter (under tail light) and attached plate. Offset them far enough to allow a small LED to light the plate at night. |
|
|
|
[#17]
Originally Posted By EagleArmsHBAR:
SF97 arrived today!
<a href="http://s247.photobucket.com/user/dab969/media/Mobile%20Uploads/image_zpsc45l2qht.jpeg.html" target="_blank">http://i247.photobucket.com/albums/gg141/dab969/Mobile%20Uploads/image_zpsc45l2qht.jpeg</a> First, I just want to officially say I hate you. Second, for your plate, what I'm planning on doing with mine is mounting it on the left in the location where the H1s have theirs. I'm going to drill the bumper and use some metal standoffs to get the plate to clear the bolts. No way am I spending the ridiculous amount of money for the factory mount. You can find the metal standoffs at Home Depot or Lowes in the hardware department in one of their drawers. Come in all sorts of sizes. 
|
|
|
|
|
[#18]
Originally Posted By Ryan_Ruck: First, I just want to officially say I hate you. Originally Posted By Ryan_Ruck: Originally Posted By EagleArmsHBAR: SF97 arrived today! <a href="http://s247.photobucket.com/user/dab969/media/Mobile%20Uploads/image_zpsc45l2qht.jpeg.html" target="_blank">http://i247.photobucket.com/albums/gg141/dab969/Mobile%20Uploads/image_zpsc45l2qht.jpeg</a> First, I just want to officially say I hate you. |
|
|
|
|
[#19]
Originally Posted By EagleArmsHBAR:
Originally Posted By EagleArmsHBAR:
Originally Posted By Ryan_Ruck:
First, I just want to officially say I hate you. 
It's a chilly night up north. The hate keeps me warm. Seriously though, I've seen those. Wish we had a cool plate option like that here. Maybe I'll get a Superman plate.

I'll probably get a POW-MIA plate though. 
|
|
|
|
|
[Last Edit: EagleArmsHBAR]
[#20]
Originally Posted By Ryan_Ruck: http://i.imgur.com/nyzbM1i.gif It's a chilly night up north. The hate keeps me warm. Seriously though, I've seen those. Wish we had a cool plate option like that here. Maybe I'll get a Superman plate. http://wcmh.images.worldnow.com/images/23646333_BG1.gif I'll probably get a POW-MIA plate though. http://www.wlwt.com/image/view/-/27473874/highRes/1/-/maxh/480/maxw/640/-/9snbuvz/-/Ohio-POW-MIA-plate--poor--jpg.jpg Originally Posted By Ryan_Ruck: Originally Posted By EagleArmsHBAR: Originally Posted By Ryan_Ruck: First, I just want to officially say I hate you. http://i.imgur.com/nyzbM1i.gif It's a chilly night up north. The hate keeps me warm. Seriously though, I've seen those. Wish we had a cool plate option like that here. Maybe I'll get a Superman plate. http://wcmh.images.worldnow.com/images/23646333_BG1.gif I'll probably get a POW-MIA plate though. http://www.wlwt.com/image/view/-/27473874/highRes/1/-/maxh/480/maxw/640/-/9snbuvz/-/Ohio-POW-MIA-plate--poor--jpg.jpg |
|
|
|
|
[Last Edit: fp1201]
[#21]
The Ball joints are "bolt in" and easily enough to replace as is the tie rod end.
Do not confuse the newer, heavier Ball Joints with what you have in there now; the difference is the bolt size going from 5/16" to 3/8" HOWEVER you could use them if you drill out the control arm. (I modified a truck used for snow plowing to the heavier joints & springs) While it's not "right" so long as there isn't any end play, you could continue to run it, just grease it more often and especially after operating in wet conditions. If you run into trouble with part numbers, send me a message/e-mail and I'll look them up. BTW: I'll look and see what the Air Force trucks use: they have licenses plates, Army doesn't. |
|
|
|
|
[#22]
The link below to the g503 forum has some ideas of where to mount the license plate. I am planning on making a bracket to attach mine to where the mud flaps mount.
Link to g503 |
|
|
|
|
[#23]
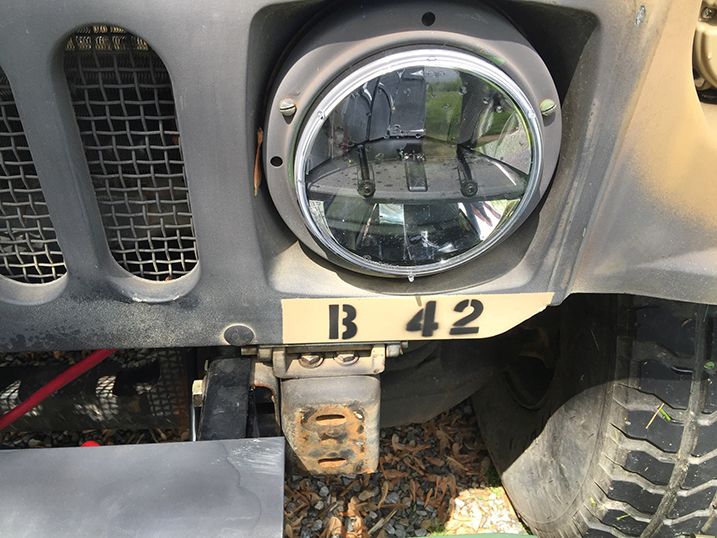
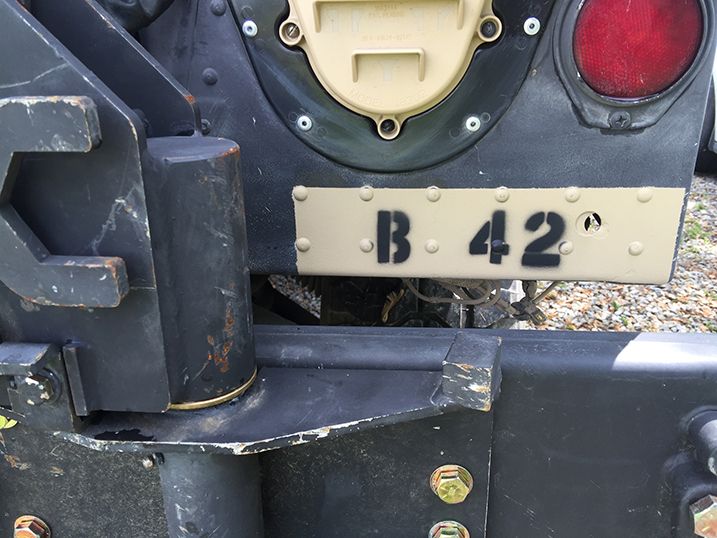
The other day, I did some more scrubbing to uncover some more of the old unit markings and clean things up so I could repaint the area until the truck is ready for the new CARC paint.
It looks like it used to belong to the 196th Infantry Brigade before going to the TNANG. 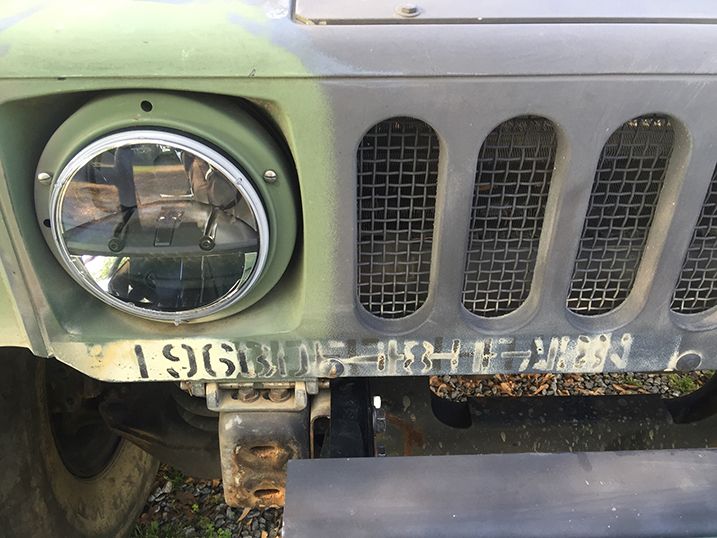
The rear is a bit more clear. Also, my new reverse lights! Mounted to the antenna mounts but not wired up. 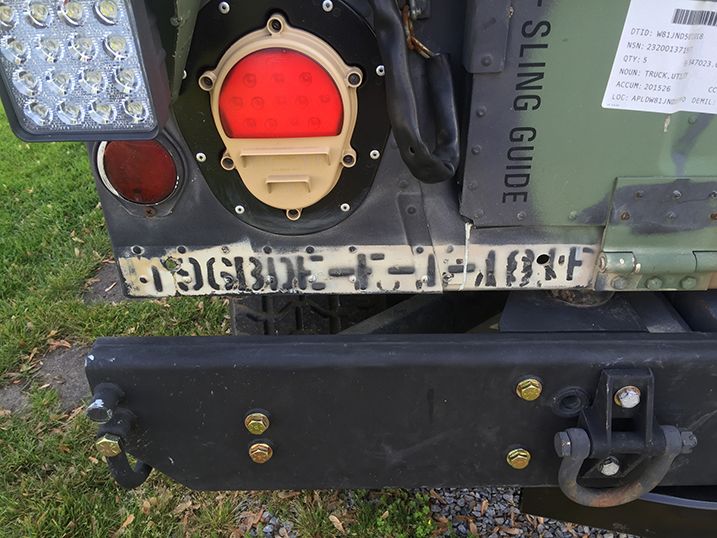
But the biggest update is that I finally got the front winch and Ibis Tek bumper fully mounted and then got the winch and dual voltage alternator completely wired up! 
There were definitely a number of challenges I ran into. The first was the winch plate needed modified from the original 9"x4" to the much more common 10"x4". Local shop performed the modifications needed and added reinforcement. Front plate. The pic was crappy so I had to tweak it so you could see the details: 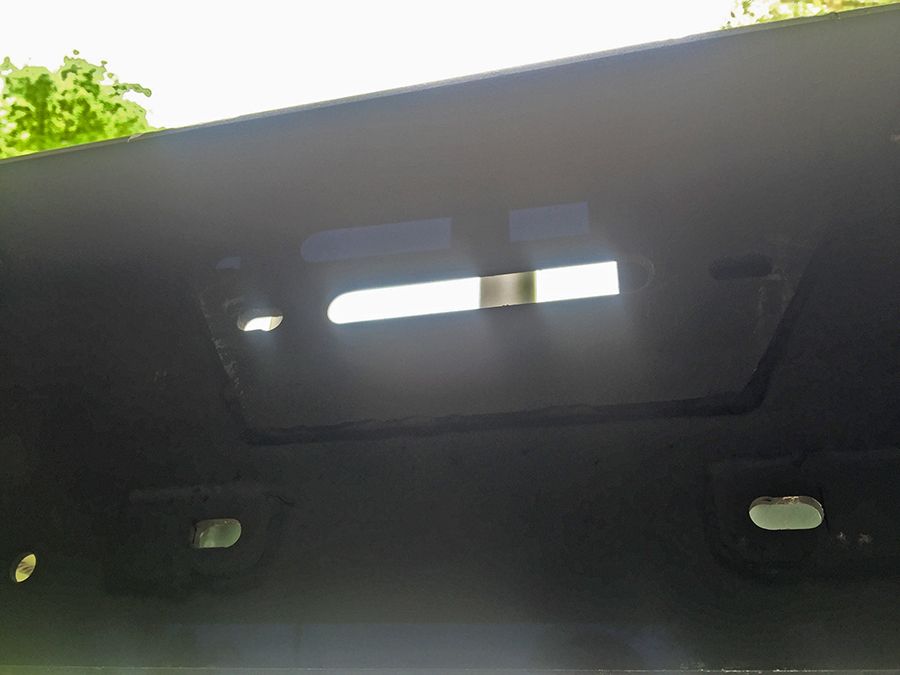
Rear plate. This plate had no reinforcements so I had the shop add some when they modified the holes. 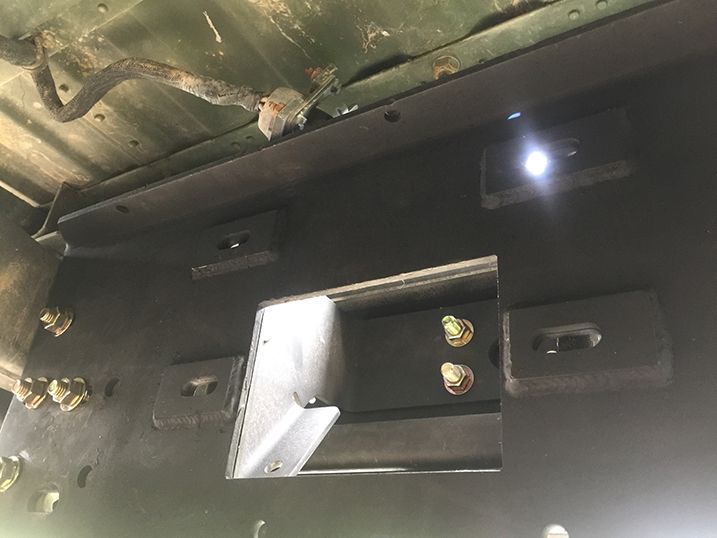
The next issue I ran into is that while the Ibis Tek outboard M1114 mounting holes lined up, the inboard ones did not. The M990 holes were not used because they are designed to be mounted right against the frame via an included bracket, not the frame extensions. Also, the winch opening on the bumper partially blocked the winch opening on the plate and one of the winch mounting holes. I'm guessing the bumper is made for use with a different winch plate. As I posted recently, I wanted as many of the mounting bolts used as possible for strength. Decided I'd tackle the modifications myself. Correcting the inboard hole mounting issues, I used some rasp file bits for my drill I picked up from Harbor Freight to basically make the elongated passenger side holes into Ts and elongate the round driver's side holes down and outwards. With the bumper mounted, I gave each of the holes a quick shot of paint to indicate where the holes needed to be. Did the same from the backside so I could see on the bumper where the winch mounting hole was getting blocked. Elongating the holes took a bit since low speed was the name of the game and I was going through two layers of steel but the bits worked really well! Just made sure to keep it lubed with cutting oil. I forgot to snap some pics of the end result as this wore me out. Here's the inboard plates now mounted up: 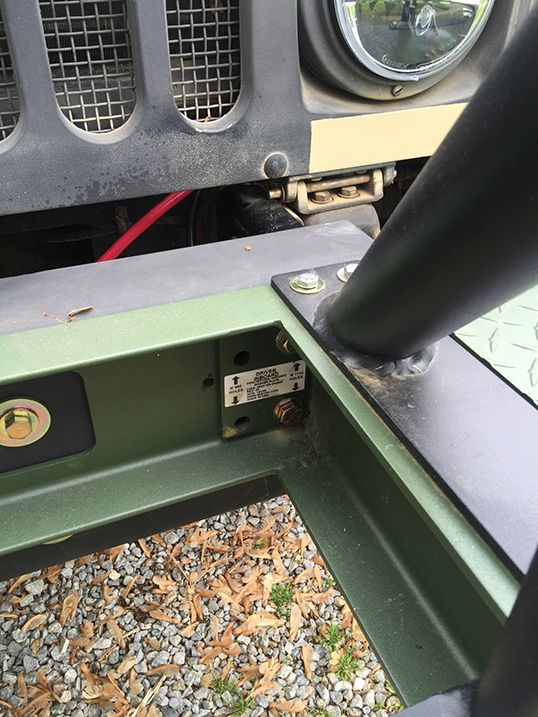
I then trimmed the opening to accomodate the winch mounting hole and cable opening: 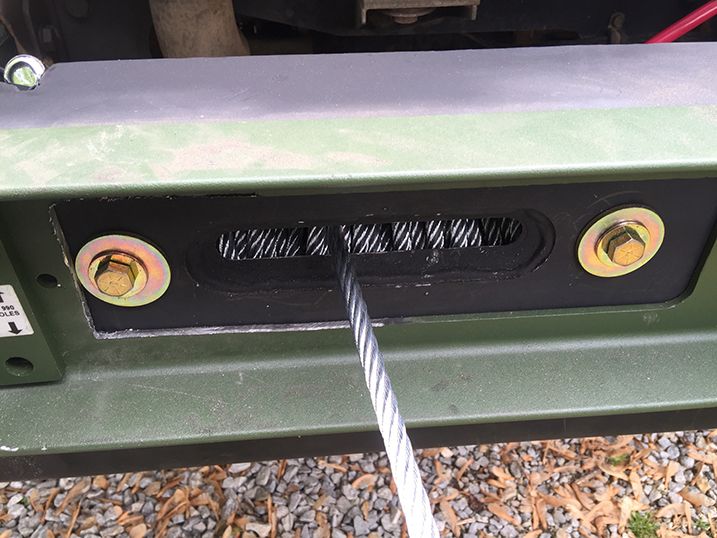
The Ibis Tek is aluminum so I'm not too worried about getting the trimmed edge painted up. I'll probably do that when I get the CARC so it matches the 383 Green. Once I had the bumper fully bolted up it was time to get the winch in! Long before I started this, I knew the winch would need reclocked from a feet down to a feet forward position and, need clocked so that the clutch lever could be used. Did some searching and found this short and sweet writeup on reclocking the Badlands 12k winch. Easy peasy! One other thing I did was ditch the mounting hardware that came with the winch as it was all metric and only Grade 8.8 (comparable to Grade 5 SAE). Ended up picking up some Grade 8 7/16" x 1-1/4" bolts that fit through the factory holes on the winch perfectly. Also, the Grade 8 7/16" nuts fit into the winch feet perfectly where the old metric square nuts were supposed to go. 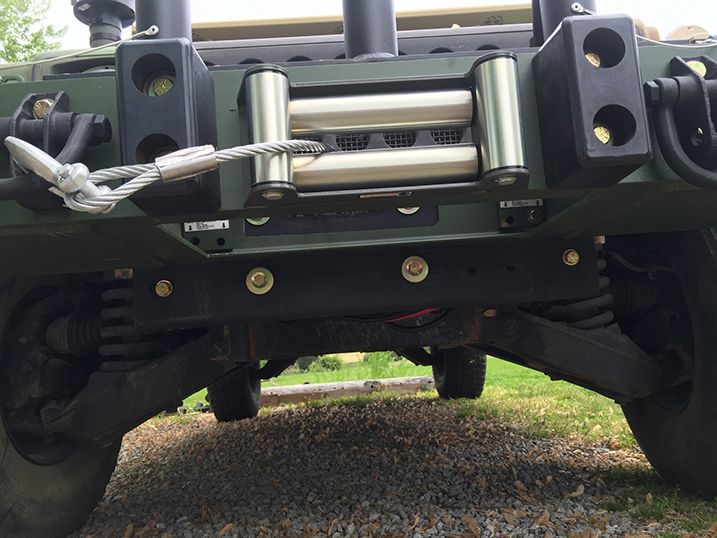
As you can see, I've got some big Grade 8 washers under the smaller ones. Ended up having to do this because the 1-1/4" bolts were a hair long. I could have drilled the winch feet deeper to clearance the bolts but I thought the extra large footprint of the washers would be beneficial for distributing load. With all of that, I started jacking the winch up into the opening and quickly ran into another issue. If you look at the pic above of the passenger side, inboard mount for the Ibis Tek, it is missing a bolt. I had to remove that because the winch feet are too low to get the clutch side to clear it. I wanted all 10 bolts for strength but I suppose 9 will have to do. Once the winch was fully bolted into place there was, no surprise, yet another problem. The only spot I could clock the clutch lever to where it was both accessible and usable could not fully engage because of the winch plate. Ended up making a cut into the top of the plate to allow the lever to fully engage. The cut is a little sloppy but I was running out of gas. Put a quick spray of flat black on it to prevent it from rusting. I'll clean it up more when I take the bumper off for painting. 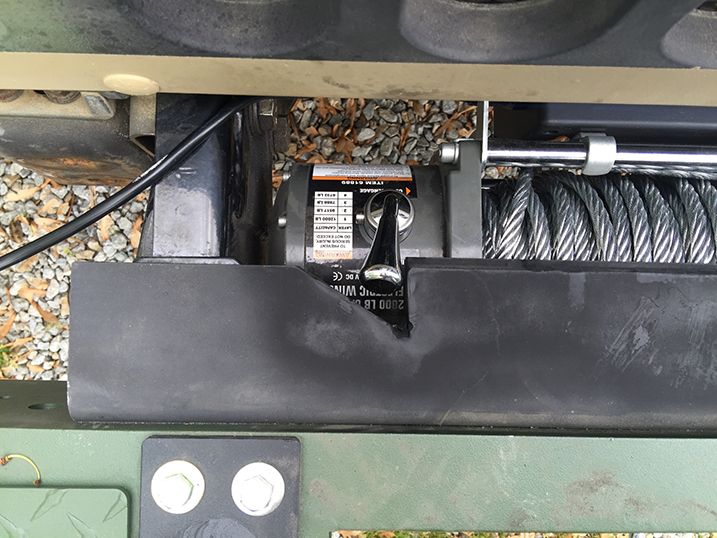
Finally! Got all the hard stuff done! Hooking up the controller box to the winch was pretty easy. The included winch wiring is long enough to reach a battery mounted under the hood but is no where near long enough to reach the battery box in the cab. So, I decided the best solution would be to wire it to the ground point and the 14v output on the alternator. The wires were a perfect length for that! From there I ran a 10' length of 4 AWG from the 14v output on the alternator to the rear battery like it should have been to provide the needed 14v charging to the rear battery. I do think that I'm going to step up the 4 AWG to 0 AWG but the 4 AWG is what I had handy. 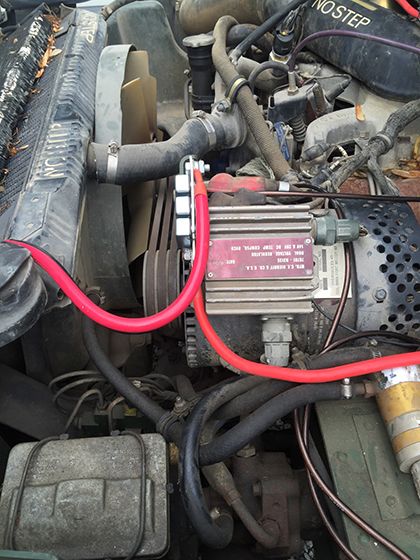
The wire on the left goes to the winch. Wire on the right goes to the rear battery. The silver boxes on the front of the regulator are a circuit breaker for the winch that is included with it. You can also spot part of my 8 AWG auxiliary grounding harness that is almost done! The winch runs perfect! Didn't really put it through its paces but I hooked it to a tree and pulled my truck on flat ground no problem. Winch didn't even sound like it had a load on it. A couple other small things I decided I'm going to do since I got everything wrapped up... Going to get the under winch skid plate or have one fabbed up since I really don't like the wires being that exposed and, going to enclose the center section on the bumper. Not sure why the center section is left open in the first place but I'm going to put a plate on the underside and a hinged diamond plate top like the two side compartments. It being open just messes with my OCD. The rear winch looks like it will be a lot easier when I pick one up for there. I don't have any alignment issues to worry about with the bumper and hopefully no clearance issues. |
|
|
|
|
[#24]
Somewhat related question. Myself and my fire dept recently got our GSA paperwork done. Got to tour the depot. GSA is basically what state agencies get to pick through before stuff goes to auction where you guys are getting your vehicles. It was eye opening. Everything had a gov paid price tag and the. what we would have to pay. I saw patrol boats, NVGs by the case M1 Abrams bore sights Hummer doors and tops as well as engines, trailers for the 2 q/2 ton and 5 ton. M4 kits , anything you could think of.
We went looking for a humvee for our fire dept at the GSA depot. Ended up getting a 926 5 Ton instead |
|
|
|
|
[#25]
Originally Posted By EagleArmsHBAR:
Just found out today that my brake lights don't work. none of my lights work... blinkers, headlights, brake lights, etc im hoping its just a fuse for the electrical to that or something. hell the horn does not even work. but the body and mechanical are in great shape engine was rebuilt as well. which makes me feel better as it has 50K miles on it |
|
|
|
|
[Last Edit: Ryan_Ruck]
[#26]
Originally Posted By lafmedic1:
Somewhat related question. Myself and my fire dept recently got our GSA paperwork done. Got to tour the depot. GSA is basically what state agencies get to pick through before stuff goes to auction where you guys are getting your vehicles. It was eye opening. Everything had a gov paid price tag and the. what we would have to pay. I saw patrol boats, NVGs by the case M1 Abrams bore sights Hummer doors and tops as well as engines, trailers for the 2 q/2 ton and 5 ton. M4 kits , anything you could think of. Originally Posted By lafmedic1:
Somewhat related question. Myself and my fire dept recently got our GSA paperwork done. Got to tour the depot. GSA is basically what state agencies get to pick through before stuff goes to auction where you guys are getting your vehicles. It was eye opening. Everything had a gov paid price tag and the. what we would have to pay. I saw patrol boats, NVGs by the case M1 Abrams bore sights Hummer doors and tops as well as engines, trailers for the 2 q/2 ton and 5 ton. M4 kits , anything you could think of. 
Originally Posted By lafmedic1:
We went looking for a humvee for our fire dept at the GSA depot. Ended up getting a 926 5 Ton instead Steel Soldiers has a very extensive Paint and Bodywork sub-forum you might want to check out. Spotted this thread on taking off the CARC near the top when I was getting the sub-forum link. Once you've got it down to the metal or primer, you should be able to paint with the automotive paint of your choice. I'm guessing you're wanting red for the canvas to match the body? Maybe try the Behr Premium or Marquee we've been discussing. I've heard the tops take it well and that's what I'm going to use on my truck's tops and doors. Someone who knows better might have a different/better option though... Originally Posted By par0thead151:
none of my lights work... blinkers, headlights, brake lights, etc im hoping its just a fuse for the electrical to that or something. hell the horn does not even work. but the body and mechanical are in great shape engine was rebuilt as well. which makes me feel better as it has 50K miles on it Start with page 495 of TM 9-2320-280-20-1 and a multimeter. Check for voltage on Pin F on the master lighting switch's cannon plug. That's power into the switch. Follow the flow chart from there. All of those, including the horn, run through the master light switch. If you've got voltage on Pin F at your light switch and nothing works in "Stop Light" or "Service Drive", get a new switch here and see if it takes care of it. Remember: Disconnect the batteries when disconnecting/connecting electrical components to be on the safe side but especially when dealing with the PCB/EESS! The TMs are a wealth of information and have almost everything you could want. The problem is usually finding it! Also, clean any and all grounds you come across and coat with dielectric grease. Apply dielectric grease to all plugs you take off too. And lastly, get the auxiliary grounding harness made or purchased and installed! |
|
|
|
|
[Last Edit: lafmedic1]
[#27]
Thank you very much. Yes. we will be going back to the depot. Also found out they basically are a Sears Catalog for us as they will order anything we want. I saw about 70 Light bars like the hummer had a few pages back
https://flic.kr/p/GPGqk3 https://flic.kr/p/GXYcTn |
|
|
|
|
[Last Edit: Ryan_Ruck]
[#28]
Originally Posted By lafmedic1:
Thank you very much. Yes. we will be going back to the depot. Also found out they basically are a Sears Catalog for us as they will order anything we want. I saw about 70 Light bars like the hummer had a few pages back https://flic.kr/p/GPGqk3 https://flic.kr/p/GXYcTn https://flic.kr/p/GXYcTn https://flic.kr/p/GPGqk3 Good looking truck! One of those M900 series 5 tons is next on the list. I just don't have anywhere to keep it and don't want to deal with relocating something that big when I move in a couple years. The 66" light bar fits well on the windshield frames of the M800 series 5 tons. Supposed to work well with the M900s too. If I were you though, since they can order you items, have them get you an MRAP Eyecon 360 Lighting Kit (NSN 6220-01-586-3096). It includes a 44" front light bar, 44" side bars, a 24" rear light bar, 2 remote controlled spot lights, all the controls, and hardware to install it. It's an extensive kit: 
You'll have to have the included brackets modified or new ones fabbed up. I picked one up for my HMMWV. YouTube video of the kit on an FMTV of some sort: Wouldn't be hard to do the same with the M926 you've got. I'd imagine light like that could be pretty useful at an incident scene! |
|
|
|
|
[#29]
Awesome. We already have rigid quad lights from our 2 1/2. (R.I.P. Ill miss the noise and left calf pain from shifting) But the go lights are nice. We really have no use for the IR lights but the rep said people have been replacing them with emergency lights. Wow that set up is amazing. Its either Paint , Trailer or lights due to budget. Im going over to pressure wash it tomorrow. Anyone want pics of anything in particular? And ill try and get pics of the sister departments hummer they just painted
|
|
|
|
|
[#30]
Originally Posted By lafmedic1:
Awesome. We already have rigid quad lights from our 2 1/2. (R.I.P. Ill miss the noise and left calf pain from shifting) But the go lights are nice. We really have no use for the IR lights but the rep said people have been replacing them with emergency lights. Wow that set up is amazing. Its either Paint , Trailer or lights due to budget. Im going over to pressure wash it tomorrow. Anyone want pics of anything in particular? And ill try and get pics of the sister departments hummer they just painted Feel free to share any and all pics! |
|
|
|
|
[#31]
Just picked up an interesting bit of kit for my truck earlier.
It's a complete MRAP dome lighting kit (NSN 2590-01-579-4922). Supposed to be a turn key kit with 6 LED dome lights and has all of the wiring to install it. (Seller's pic, not mine.) 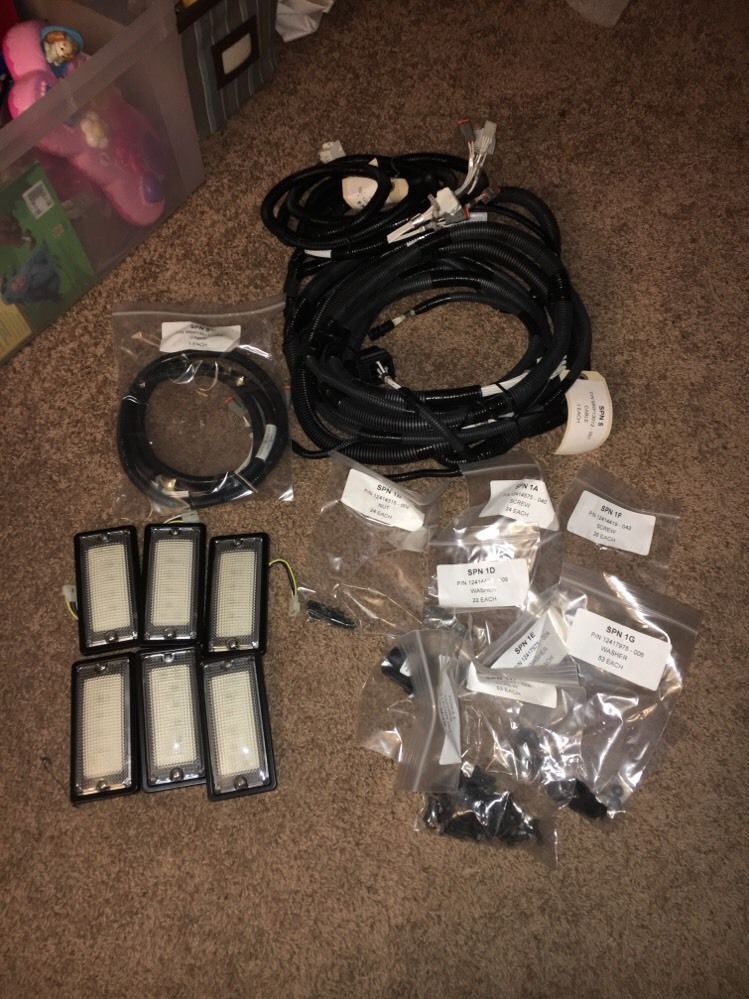
Got it for $145 shipped. Will be nice to light up the inside! |
|
|
|
|
[#32]
Originally Posted By Ryan_Ruck: Just picked up an interesting bit of kit for my truck earlier. It's a complete MRAP dome lighting kit (NSN 2590-01-579-4922). Supposed to be a turn key kit with 6 LED dome lights and has all of the wiring to install it. (Seller's pic, not mine.) http://i217.photobucket.com/albums/cc40/ryaneruck/HMMWV/s-l1600mm_zpsavzeq0vb.jpg Got it for $145 shipped. Will be nice to light up the inside! |
|
|
|
|
[#33]
For those that have done the airlift bumper, how hard was it to remove the two bolts with the body mounts? I can't get mine to budge. |
|
|
|
|
[Last Edit: Ryan_Ruck]
[#34]
Originally Posted By jake-cutter:
For those that have done the airlift bumper, how hard was it to remove the two bolts with the body mounts? I can't get mine to budge. I used an impact driver with mine and they came out super easy. No penetrating oil or anything. |
|
|
|
OH, USA
|
[#35]
Took the 998 out yesterday for some offroading. It rained hard for hours, and as the day went on, I had less and less luck making the hills/sidehills.
Ended the day by ripping the fuel drain plug out of the tank, losing a 3/4 full tank of fuel as I sped across the last of the ride to try to get to the trailer. What a mess. That plug is in a very bad place. Very vulnerable. |
|
|
IN, USA
|
[#36]
For anyone wanting almost new wheels, There is this scrapyard in Bedford, IN that sells a complete wheel for $200 OBO a piece. He also sells them on Ebay and has very fair freight prices. I'm not sure what the rules are about posting ebay links, so just search for "Humvee Run Flat Tires". He can meet you on weekends for local pickup
 " /> " />
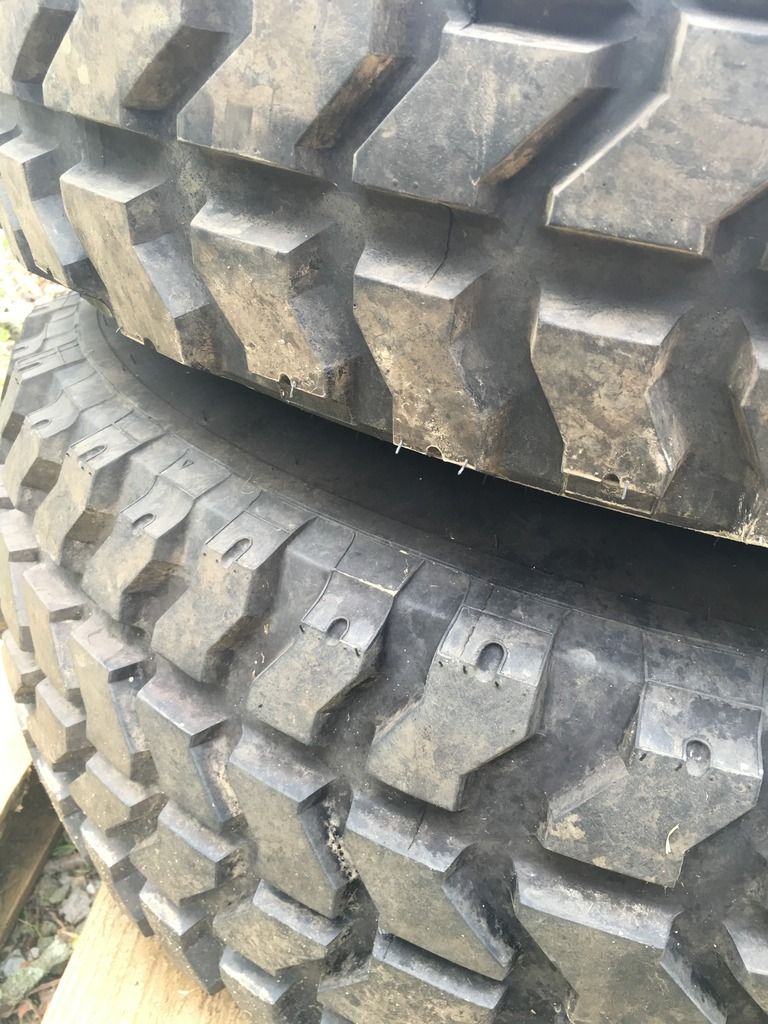 " /> " />
Sorry for not being around for a while. sort of sucks looking at all the eye candy posts when I'm stuck in the holding pattern. This is our workhorse on the farm. at least I get to spend some time driving her around sometimes. M915A2 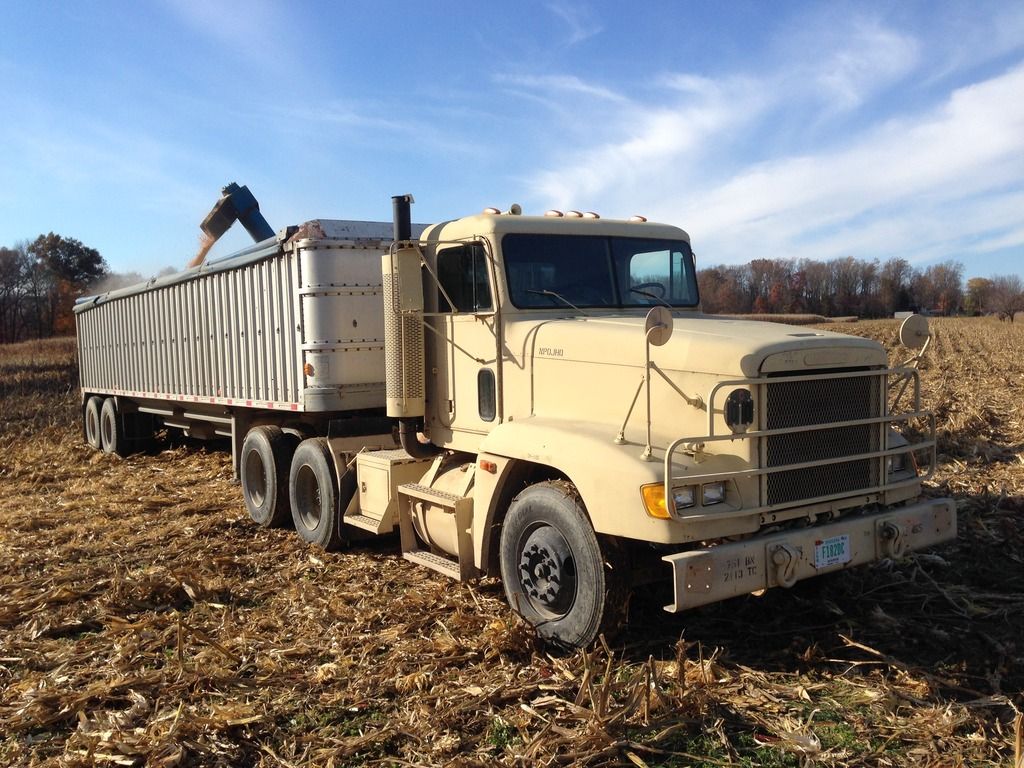 " /> " />
|
|
|
|
[#37]
Originally Posted By hkx3:
Took the 998 out yesterday for some offroading. It rained hard for hours, and as the day went on, I had less and less luck making the hills/sidehills. Ended the day by ripping the fuel drain plug out of the tank, losing a 3/4 full tank of fuel as I sped across the last of the ride to try to get to the trailer. What a mess. That plug is in a very bad place. Very vulnerable. Pretty coincidental you should post this as I just read a topic on SS about a good replacement for it that looks like it will lock into place better. Advance Auto has these. |
|
|
|
OH, USA
|
[#38]
Originally Posted By Ryan_Ruck:
Pretty coincidental you should post this as I just read a topic on SS about a good replacement for it that looks like it will lock into place better. Advance Auto has these. Originally Posted By Ryan_Ruck:
Originally Posted By hkx3:
Took the 998 out yesterday for some offroading. It rained hard for hours, and as the day went on, I had less and less luck making the hills/sidehills. Ended the day by ripping the fuel drain plug out of the tank, losing a 3/4 full tank of fuel as I sped across the last of the ride to try to get to the trailer. What a mess. That plug is in a very bad place. Very vulnerable. Pretty coincidental you should post this as I just read a topic on SS about a good replacement for it that looks like it will lock into place better. Advance Auto has these. After the environmental aspect, combined with the financial loss (lost almost a full tank), combined with the mess (I was soaked in diesel from the waist up, and tops of my legs), combined with the inconvenience of losing the rest of the day's ride: I am now welding and installing a skid plate for that area. I may puncture the tank, but I will never pull that plug out on an obstacle again. Such a dumb, dumb design. |
|
|
|
[Last Edit: Ryan_Ruck]
[#39]
As I posted in my winch install post, I cleaned up the area for the unit markings until I repaint the truck.
I ordered a set of brass, reusable 1.5" tall, interlocking stencils that matched the height and font of the original markings from Zoro and they came in yesterday. Figured I'd give them a try redoing the old unit markings and I'm glad I did. 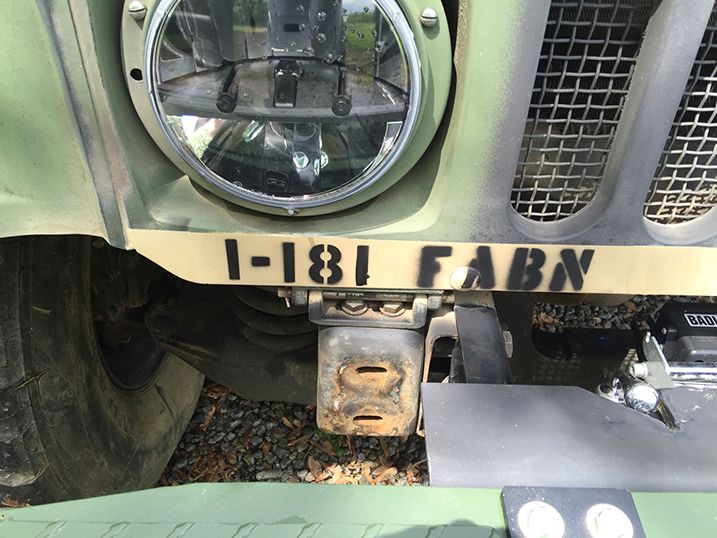
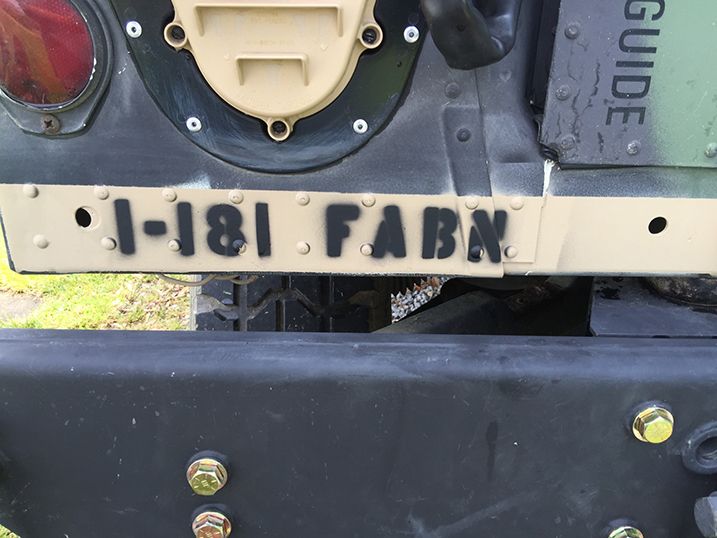
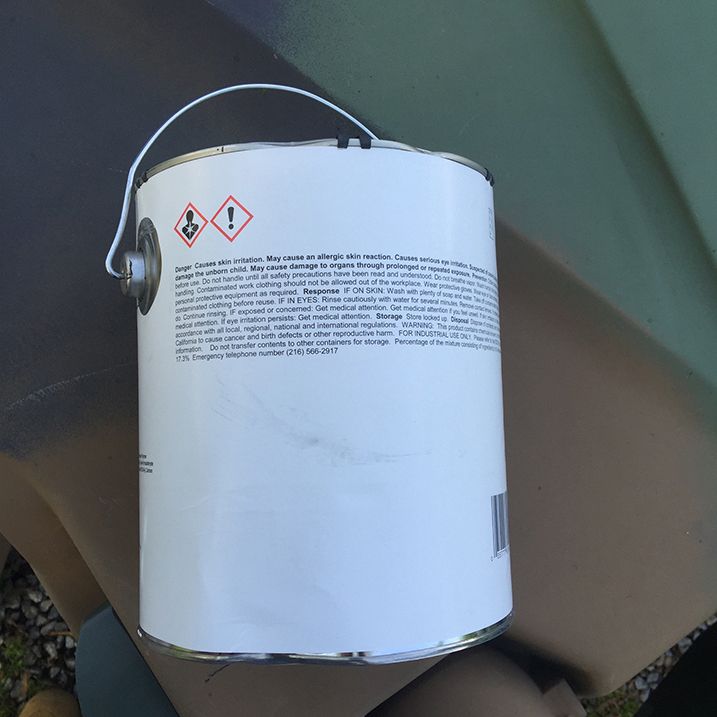
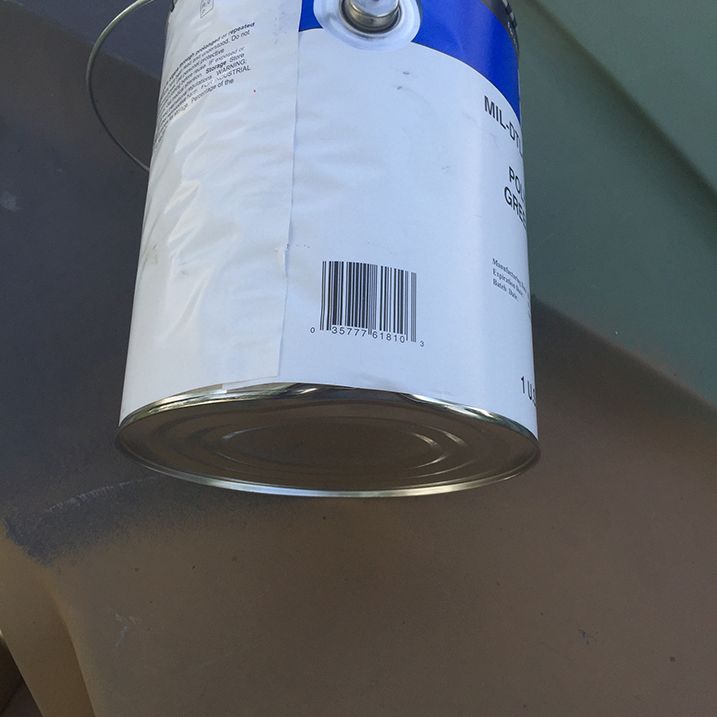
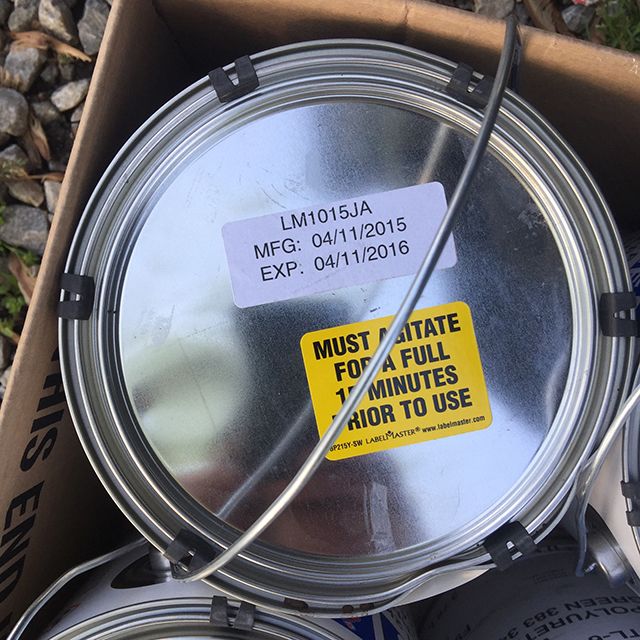
I know since it's a military vehicle it doesn't need to be perfect but I'd just like the characters a little better defined and, the rivets and bolts make that tough to do with brass. I think what I'm going to do is use the brass stencils to cut the characters out on contact paper, apply the contact paper as a mask and then spray. And today I picked up my Sherwin Williams CARC! Ended up being $426 with tax for 2 gallons of 383 Green, 1 gallon of 383 Brown, 1 gallon of Black, and 2 gallons of catalyst. 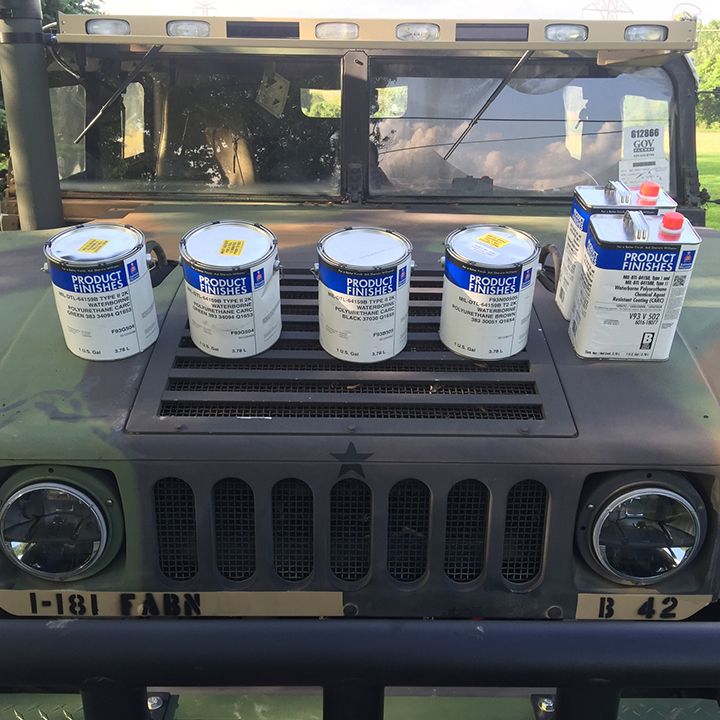
An interesting bit to this is that I didn't end up picking it up from my local Sherwin Williams store but rather their local distribution center/store. Supposedly my local store is not allowed to sell military coatings per regulation (they didn't specify) but I was able to buy it no problem from this other location. In fact, they said if I had had an account on record they could have shipped it to me. 
One thing I'm not totally thrilled with is the shape the cans are in which I didn't notice until I got them home and took them out of the box. All but one look like they were used in a soccer match, one of which I'm amazed is still holding paint. Also, one of them is "expired" (yeah, I know this stuff doesn't really expire when it says). Kind of feel like since I was just an average Joe off the street buying them they gave me the crap ones they had kicking around. Oh well, so long as it works... 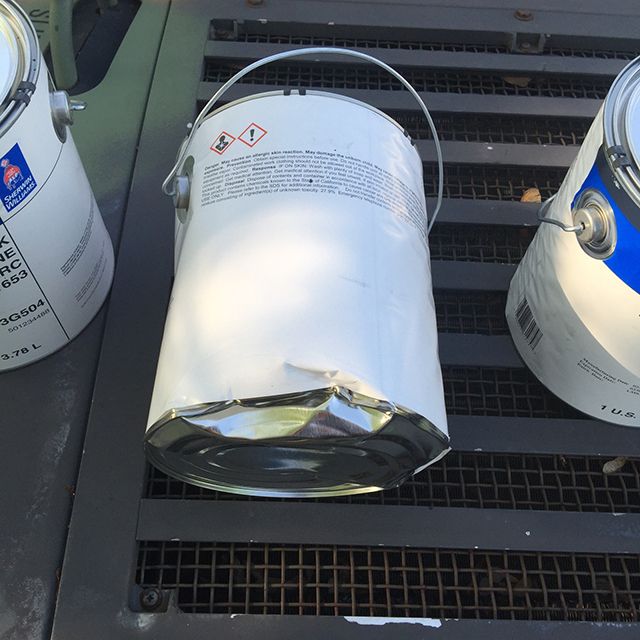
Also received the MRAP dome light kit I bought. Interestingly it did not include an instruction sheet of any sort like almost every other parts kit I've bought for my truck. It only had a packing list. Don't know if it got removed or what. So I'm going to have to try and hunt the instructions down or go through and figure out the pinout on the plugs myself. The lights and where they go on the harness is pretty apparent but everything else is a bit unknown. The kit is NSN 2590-01-579-4922, Part #: MRP22360. If anyone has the documentation on it, it would be appreciated! |
|
|
|
|
[Last Edit: EagleArmsHBAR]
[#40]
Good luck with the paint! I'm interested to see how it works out, but it looks like too much work for me compared to the Rapco stuff I used.
I removed all my wheels and removed the back plate from the hub and inspected the spindle nuts today. All of them appear to be tight and all four have the upgraded eight slot nut. The rears had a bit of surface rust on the spindle nuts from what appears to have been a lack of sealant applied to the back plate the last time they were inspected. I cleaned them off with a toothbrush and gear oil and then sealed them back up. Obviously I also changed all the hub oil today too. While I had the wheels off I replaced them with my 24 bolt wheels and Baja tires. They look a lot better! I'll get a decent pic in a few days. I'd take one today, but I'm tired of posting bad pics of my Humvee. Removing and replacing tires is a lot of work when your air tank doesn't have the needed power for the impact wrench. Anyways, does anyone need some 12 bolt wheels with Goodyears mounted? If so, let me know and I'll cut you a sweet deal. |
|
|
|
|
[#41]
Originally Posted By EagleArmsHBAR:
Good luck with the paint! I'm interested to see how it works out, but it looks like too much work for me compared to the Rapco stuff I used. Yeah, the mixing and setup of the equipment will definitely take a little more work but, I'm hoping not much. If the weather would cooperate and quit raining, I'd love to get started on the interior Lizard Skin and Monstaliner. With your spare wheels and tires, I'm pretty certain the HMMWV bolt pattern matches the standard GM/Ford 3/4-1 ton 8x6.5 bolt pattern. You should be able to put them up on Craigslist and get a buyer pretty easily. |
|
|
|
|
[Last Edit: EagleArmsHBAR]
[#42]
It hasn't started raining yet, so I got a pic of the new wheels and tires today when test driving it at lunch. The good news is that the new tire ride a lot better than the old tires. I got it up to 55 mph and it was smooth sailing. The bad news is that all my hubs are now leaking because I either didn't use enough anaerobic sealant of the back cover or I needed to let it dry more than 18 hours before driving it.
Pic:    |
|
|
|
|
[#43]
Damn! That is looking really good buddy!
Looks like a whole different truck than the one I saw. Question: When you painted the truck, did you do the soft top too? |
|
|
|
|
[Last Edit: EagleArmsHBAR]
[#44]
Originally Posted By Ryan_Ruck: Damn! That is looking really good buddy! Looks like a whole different truck than the one I saw. Question: When you painted the truck, did you do the soft top too? Anyone know if there are any tricks to sealing the hub back covers? I used red colored Permatex Gasket Maker Anaerobic Sealant on them yesterday. The package didn't say anything about cure time, whereas other gasket maker sealants (other than anaerobic sealants, which is what the TM calls for) call for a cure time of 24 hours before refilling with oil. |
|
|
|
|
[#45]
You need to let the gasket material cure before refilling. Gives it time to cure. I would wait 24hrs to be on the safe side before refilling.
|
|
|
|
|
[#46]
I took care of a couple of things with my slantback today. While the headlights, marker lights and brake lights worked, the blinkers, interior lights and the horn did not. So I swapped my light switch with a known good unit and voila, everything is working again as it should.
I also installed a Rhino spare tire carrier as well- talk about over-engineered! While it's beefy and heavy, if it keeps me from having to manhandled a spare tire into place, I'll take it. 
|
|
|
|
|
[Last Edit: EagleArmsHBAR]
[#47]
Originally Posted By Lawman734: I took care of a couple of things with my slantback today. While the headlights, marker lights and brake lights worked, the blinkers, interior lights and the horn did not. So I swapped my light switch with a known good unit and voila, everything is working again as it should. I also installed a Rhino spare tire carrier as well- talk about over-engineered! While it's beefy and heavy, if it keeps me from having to manhandled a spare tire into place, I'll take it. http://i28.photobucket.com/albums/c238/Lawdog734/20160514_174751_zpsucjeu2po.jpg And where is your license plate mounted? I finally got mine mounted today using the mount kit from Thise Military Guys and it works great. |
|
|
|
|
[#48]
Originally Posted By EagleArmsHBAR:
Damn, that looks good. My rhino should be delivered this week. Do you have any installation tips? Will the bumper bolts work to mount it? Mine is not coming with mounting bolts. And where is your license plate mounted? I finally got mine mounted today using the mount kit from Thise Military Guys and it works great. I think I used all of the original bolts except for where it mounted over the mudflap. If you have mudflaps, you'll need 2 longer bolts. As far as the license plate - I don't have a plate for this one yet. I ended up ordering a Florida title and I'm still waiting for it. Since I'm still waiting for it with no telling when they'll start sending them again, I might call them back and tell them to just send me the SF-97. |
|
|
|
|
[Last Edit: Ryan_Ruck]
[#49]
Yeah Lawman, that looks great on the slantback! Really starting to get me jonsing for one...
Maybe with some luck I'll wait long enough they'll start selling them by the time I'd be ready to buy one. By the way, don't forget to remove the retaining pin before you try to raise the swingarm or you'll end up with a bent pin you have to hammer out. Just sayin'...
Originally Posted By Lawman734:
I think I used all of the original bolts except for where it mounted over the mudflap. If you have mudflaps, you'll need 2 longer bolts. As far as the license plate - I don't have a plate for this one yet. I ended up ordering a Florida title and I'm still waiting for it. Since I'm still waiting for it with no telling when they'll start sending them again, I might call them back and tell them to just send me the SF-97. Just an FYI, I cancelled my FL title and opted to have them send me the SF97 just over 2 weeks ago. The SF97 was supposed to be here no later than Thursday via FedEx and the $100 was supposed to be refunded to my account. I have neither. Sent an email to the rep that originally emailed me about the FL title delay Thursday afternoon while they were still open. No response or acknowledgement all day Friday even though the rep had been near instant on the replies originally. I'll give them Monday and then I'll be sending Jwade a PM. Would really like to get the paperwork taken care of and get started on getting my plates. 
|
|
|
|
|
[#50]
Originally Posted By Lawman734:
I think I used all of the original bolts except for where it mounted over the mudflap. If you have mudflaps, you'll need 2 longer bolts. As far as the license plate - I don't have a plate for this one yet. I ended up ordering a Florida title and I'm still waiting for it. Since I'm still waiting for it with no telling when they'll start sending them again, I might call them back and tell them to just send me the SF-97. Looks really good and is how I want to set mine up. Hopefully you come across more slantback kits as I am ready for one. As for the tire carrier, is there a gap on the mount when using the mud flaps since it not flat against the bumper? |
|
|
|
 Win a FREE Membership!
Sign up for the ARFCOM weekly newsletter and be entered to win a free ARFCOM membership. One new winner* is announced every week!
You will receive an email every Friday morning featuring the latest chatter from the hottest topics, breaking news surrounding legislation, as well as exclusive deals only available to ARFCOM email subscribers.

AR15.COM is the world's largest firearm community and is a gathering place for firearm enthusiasts of all types.
From hunters and military members, to competition shooters and general firearm enthusiasts, we welcome anyone who values and respects the way of the firearm.

Subscribe to our monthly Newsletter to receive firearm news, product discounts from your favorite Industry Partners, and more.
Copyright © 1996-2024 AR15.COM LLC. All Rights Reserved.
Any use of this content without express written consent is prohibited.
AR15.Com reserves the right to overwrite or replace any affiliate, commercial, or monetizable links, posted by users, with our own.


