


So You Want To Buy A Surplus HMMWV/Humvee - A How-To Guide (And All Other Things HMMWV Too!) (Page 49 of 102)

|
Originally Posted By Lawman734:
There's actually several 3-speed trucks still being driven around R37 at Bragg - I would have figured they would have disappeared a long time ago. It's obvious that a number of "monster garage" mods were done to them over the years. They're not pretty at all. Everything that I've seen assigned to Group and NSW units were 4-speed trucks though - some Turbo trucks but mostly non-turbo. The turbo trucks with extended grill/radiator stacks didn't become prominent until the up-armored trucks came about. SF DMV Attached File SF GMV Attached File |

|
Originally Posted By FKAM: These two pictures are representative of what I remember of the difference as to what was a SF DMV and the newer SF GMV upgrade was in 2003. The only real visible was the extended nose. Both pictures were taken in 2003 in Iraq. For myself I just called them both DMV's but some anal individuals at the time, would correct me and point out the difference. At the time I really didn't care tho. It was a ride to go out and hunt bad guys. I was more interested if the fifty functioned. SF DMV https://www.AR15.Com/media/mediaFiles/455280/37bb9021bed9bf005c2d48466ab1c901-461384.JPG SF GMV https://www.AR15.Com/media/mediaFiles/455280/DSC00147croppedpost-461385.JPG I'm just saying that the vast majority of non-armored GMV's that are out there are M1025 based with comparatively few M1113/14 based. I know there were M1113/14 based trucks but for every non-armored turbo GMV I've seen, there were 10 non-turbo and that was right up until this past year before they started going away. It wasn't until the up-armored stuff came about that it was standardized on the turbo M1165. I based my truck off of an M1113/14 truck I tooled around in at Bragg - armored seats and everything but it should be noted that this was 1 of 3 non-armored turbo trucks in this particular USASOC motor pool. Regardless - if this actually goes up for auction (I'll believe it when it happens), I think we all know it won't be the armored trucks. Speaking of these Army trucks going up for auction - did DLA change the disposition code on slantbacks? I know why the Marine trucks went to auction, but thought the disposition code DLA applied to the slantbacks is what had the Army trucks going to the chipper and not auction. 

|

|
If anyone is looking for some VIC 3 full crew boxes, beltfed has some on ebay right now
Link to crew boxes. |

|
Got my 1" thick 4.5'x20' roll of Mylar/foam insulation from db Engineering today. Looks like good stuff! It's got pressure sensitive adhesive on it. The sides are thermal cut so pretty solid but I got a roll of their 2" edge seal tape to make sure it's all sealed up.
A word of caution, even their cheapest FedEx Ground shipping from Mansfield, TX is outrageously high - $74.  They also won't give you the price on it at the time of purchase so you could be in for some sticker shock. They also won't give you the price on it at the time of purchase so you could be in for some sticker shock.
I was originally going to get the 10' roll with their butyl barrier molded into it but decided that since I've already got the Lizard Skin, I'd just get more coverage area plus the non-butyl is a fair bit cheaper. Should be more than enough to do the firewall and drivetrain tunnel, maybe some on the underside of the hood. Also got my Sure Seal connectors for my trans harness on the way. I'm keeping track of the ones I'll need but unless you're using a 6.5T (ECV/REV engine) or 6.5NA (A2) engine with a harness with the senors on it, you're probably going to need some different connectors to tie to the TPS and RPM sensor. I'll detail what connectors I needed for where and anyone following my build info should be able to figure out what they need instead. I got my Sure Seal connectors from PEI Genesis but, an FYI, call your order in if you're just getting a couple of small connectors. Reason being is that their cheapest online shipping price is a fixed $17 UPS Ground. I called in the order to them to see if they could do something about that, since my order could fit in a tiny padded envelope which definitely shouldn't cost $17 to ship. After checking on what I wanted to order the helpful young woman told me they couldn't do anything about the shipping (  ) but could adjust the prices on the connectors. They ended up being about 50% of their online price which did help make up for the stupid shipping costs. ) but could adjust the prices on the connectors. They ended up being about 50% of their online price which did help make up for the stupid shipping costs.
Should also have my 6.5T repair harness on the way as well. Originally Posted By jake-cutter:
If anyone is looking for some VIC 3 full crew boxes, beltfed has some on ebay right now Link to crew boxes. I wonder what that mounting plate came out of since that's not the HMMWV radio tray mount. |
|
In case anyone didn't know, the Ohio River valley has seen quite a lot of rain recently (we're up over 7" for the month). At Cincinnati the river is up to levels we haven't seen since the 1997 flood but, it's not quite that high yet.
Headed down into town this afternoon in my HMMWV. Ended up meeting up with a buddy that's got a 5 ton (not the one with the gun shop). He checked with incident command at the local school and got us put on a list for high water vehicles but was told since it's been such a gradual rise, they don't expect to need to make any calls. Weather service says the river is cresting now but command said they're thinking another 2'-3' which would put most of the areas in my pics under at least some water. Attached File Attached File Attached File Attached File Attached File |
|
Stole a couple pics off Facebook from someone's drone.
The town municipal building/police department is the square one in the center. I was hanging out near the red building in the upper left. Attached File Closer to where I was. Attached File Main street in town, looking down river towards Cincinnati. Attached File Attached File Looking east up river. Attached File |
|
Originally Posted By jake-cutter:
Stay safe Ryan. Seeing all that water reminds me of how quickly it flooded here with Harvey. 
On that last pic from the drone, I'm at the upper left corner and about another 2 miles back from the river. Thanks though! |
Starting to look like a transmission harness!

Pretty much all of the 18AWG side of stuff has been assembled. Those connectors are all of the transmission side sensors and input/outputs - Trans harness, TISS, and TOSS. The other side (where all the white labels are) will tie to the TCM plug which will be connected once the harness has been run on the body, through the tub, and into the driver's side seat compartment. Instead of zip ties to keep everything together while it is assembled, I decided to use tape. Zip ties are a bigger pain to undo than tape if any errors in assembly need corrected. But, it's not regular electrical tape since that tends to leave a gummy residue. I ordered a 10 pack of Tesa 51036 cloth friction tape for $30 (that's definitely the best price I was able to find on it, should be way more than I need). Once the harness is 100% done, it will be wrapped with the Tesa tape to keep it clean and organized. |
|
Got my Sure Seal connectors from PEI Genesis today and they are exactly the type needed to interface with stuff like the TPS connector on the engine harness, trans light, and brake switch.
Still not sure why they cost $17 to ship though... Also, a word of caution. When PEI Genesis charges for the order, for some reason they charge a crap ton more to make sure your payment will clear. My $22 order charged $56 to my card which they said is supposed to reverse and reflect the accurate one. Just so no one else is surprised like I was and have to waste time asking them why it's so high. Another word of caution. When ordering the Sure Seal connectors, realize they do not come with the pins required for them! You only get the rubber shells. Not sure why, but now I have to potentially order those so I can get charged $17 for shipping again. Going to check a local electronics store I just found out about to see if they have anything that would work with them.
ETA: These are the pins and sockets you need for the Sure Seal connectors that are sized for 18AWG and 16AWG - crimp pins, crimp sockets, technical data on Sure Seal connectors. If you're not starting out with some existing wire leads on the trans (the TISS and TOSS specifically) and possibly the TPS (depending on which you use), you're probably going to need some Weather Pack connectors. I'll try to add in info on which are needed after I complete my specific build so the information is more complete. |
|
Originally Posted By jake-cutter:
Ryan, how much will you have tied up in your harness when its all said and done? I'll total everything up tonight to see where I'm at on costs and estimate what someone would be looking at total if doing from 100% scratch. |
|
I've now got a complete 6.5T engine harness. Got a second harness for $60 from Beltfed that ended up being in better shape than the one I had so I scrapped my plans to graft the plug onto my original one. Just had to take several connectors including a couple glow plug wires, the TSU plug, TPS plug, and a couple others from my original harness and install them on the new one with some adhesive lined heat shrink butt connectors. The nice thing about that is some of my connectors now have much longer leads which give you a little more room to play with. I also scored a 4L80E rear driveshaft from him for $75 shipped and that came in yesterday too. The slip yoke is all rusted so I've got some Evapo-Rust on order from Amazon. I've heard lots of good things about it and am eager to give it a try. I'll make sure I post the results. I've got some new U-joints I picked up from eBay for $2.75 each (they're surplus since they've got NSN stickers on them, got the 5 I needed plus 5 spares  ) to go into the driveshafts as the ones on the shafts I got from Beltfed were toast. I'll put those in after I clean up the shafts. ) to go into the driveshafts as the ones on the shafts I got from Beltfed were toast. I'll put those in after I clean up the shafts.
The ISSPRO EGT/Boost gauge also came in the other day and it looks pretty sharp. Just need to get an AutoMeter pod for it, some 1/8" plastic tubing, and a brass 1/8" hose barb fitting. And, as promised, here's my rough cost breakdown of the harness build so far: - 200' 16AWG Prestolite wire, 10pk both male and female Packard connectors (I may need more of these for other stuff, we'll see), 5x Y Packard connectors (shouldn't need this many but wanted some extras for things like my license plate light and reverse lights), 1x 12AWG male Packard connector - $115, Erik's Military Surplus - 560' 18 AWG military wire - $32, eBay - 100pk 18-22AWG adhesive lined heat shrink butt connectors and 100pk 14-16AWG adhesive lined heat shrink butt connectors - $37, eBay - 10pk Tesa 51036 friction tape, $30, Amazon - 4x Sure Seal connectors and contacts, $45, PEI Genesis (should have been $25 if I had known to order the contacts with the connectors) - Rostra 4L80E external wiring harness - $30, Amazon So grand total around $285, figure in another $15 for odds and ends like labeling tape, a ring connector to tie to the 12v supply, solder, and other stuff you could run into so say $300. You also need a couple feet of 12AWG to tie all the trans stuff from the circuit breaker to the 12v. I had some in my junk wiring harness so I'm using that instead of buying some. If you were doing a 4L80E conversion from scratch on an existing NA engine, you'd need to add in an RPM sensor (around $40-$45 I think), a TPS and wiring harness (Rock Auto seems to have the cheapest at around $40 for the pair [IIRC] and, you could delete one of the Sure Seal connectors and connect your harness right to the TPS harness), and 2 Weather Pack connectors for the TISS and TOSS (Amazon has them at $11 each, just look up "4L80E VSS connector" there could be cheaper ones). My TCM cannon plug was included with the TCM I bought but if you were doing it from scratch you may have to add that in. No idea on cost. So, figure $450ish for a 100% from scratch build. Even at that, it's still at least 1/3 to 1/4 the price of a new body harness. |
|
oh wow. i had resigned to buying a harness but i think i could probably swing the build now. besides, i dont know if a factory harness would fit without removing the body; ive heard that you have to. I manned up and got that broken stud out from the cylinder head (laying on back under the truck head propped up on a pile of shoprags, 12v drill fit just fine with alt bracket out of way) and got everything installed. my belts included with the alternator installation kit were ancient NOS and twisted beyond use. amazon had commercially available cogged v belts for 15 a piece (10 bucks cheaper per belt vs oreillys) so i went that route and they arrive today. today marks 1 month since my 60a burned up so it is time to get back on the road! i keep seeing that the 14v output on the dual voltage alternators should be run to the rear battery, i still need to do that. i have some stranded 12awg laying around, older stuff maybe THW. while not usual for automotive, i dont see why that wouldnt work. during my poking around in the truck, i found two vent lines from the fuel pump that had rubbed on a frame seam and have holes in them. one goes straight up to the air filter, the other disappears near the radiator. i hadnt noticed anything weird in operation but that needs fixed as well. picked up a mudflap kit for the a2 bumper. it may have been 60 bucks so i figured, why not. i installed the hard plastic fillers that bridge the gap between bumper and body corners, in hopes that junk would stop coating the top and face of the bumper. not sure how long those pieces will last, they dont seem very tough. not putting the actual flaps on yet, not sure i ever will. |
|
Originally Posted By Aguas:
oh wow. i had resigned to buying a harness but i think i could probably swing the build now. Originally Posted By Aguas:
oh wow. i had resigned to buying a harness but i think i could probably swing the build now. I will admit, the lengths on my wire leads are extra long over the factory, and so will result in some waste if/when trimmed, but it's outweighed by the savings over buying a factory harness and the risks of having leads come up short and having to go back and lengthen them. Originally Posted By Aguas:
i keep seeing that the 14v output on the dual voltage alternators should be run to the rear battery, i still need to do that. i have some stranded 12awg laying around, older stuff maybe THW. while not usual for automotive, i dont see why that wouldnt work. Originally Posted By Aguas:
during my poking around in the truck, i found two vent lines from the fuel pump that had rubbed on a frame seam and have holes in them. one goes straight up to the air filter, the other disappears near the radiator. i hadnt noticed anything weird in operation but that needs fixed as well. Originally Posted By Aguas:
picked up a mudflap kit for the a2 bumper. it may have been 60 bucks so i figured, why not. i installed the hard plastic fillers that bridge the gap between bumper and body corners, in hopes that junk would stop coating the top and face of the bumper. not sure how long those pieces will last, they dont seem very tough. not putting the actual flaps on yet, not sure i ever will. |

|
I got my engine fan problem solved I think. I got a chance to refill the coolant and trans fluid then started it up. At start up the fan was still locked up so that tells me the fan clutch wasn't seized. In a previous post I said the thermal switch wire was frayed so I moved on to replacing it. When I started it up after putting in the thermal switch I noticed the fan was still spinning just slower. If I unplugged the TDM the fan would spin faster. I decided to plug the TDM back in then take a strip of cardboard and try to slow the fan blades. I got the fan to stop with that so I unplugged the TDM again, tried to stall the fan and couldn't. So I'm thinking I got my fan working and it was the thermal switch causing the problem. I was under the impression that the fan wouldn't spin at all when disengaged though. Can someone confirm the fan does still spin when disengaged just not as fast? |
┌∩┐(◣_◢)┌∩┐
|
Originally Posted By Gixxersixxer:
I got my engine fan problem solved I think. I got a chance to refill the coolant and trans fluid then started it up. At start up the fan was still locked up so that tells me the fan clutch wasn't seized. In a previous post I said the thermal switch wire was frayed so I moved on to replacing it. When I started it up after putting in the thermal switch I noticed the fan was still spinning just slower. If I unplugged the TDM the fan would spin faster. I decided to plug the TDM back in then take a strip of cardboard and try to slow the fan blades. I got the fan to stop with that so I unplugged the TDM again, tried to stall the fan and couldn't. So I'm thinking I got my fan working and it was the thermal switch causing the problem. I was under the impression that the fan wouldn't spin at all when disengaged though. Can someone confirm the fan does still spin when disengaged just not as fast? |
|
Originally Posted By Ryan_Ruck:
It will still spin slightly when disengaged. From what you describe, it sounds like it's working normally now. I picked up a set of troop seats the other day - gonna spend tomorrow cutting them back and fitting them to my buddies 4 door soft-top.,it should give it a nice GMV-like look while making the bed more practical to use. |
|
Originally Posted By Lawman734:
I agree with Ryan - you may have it licked now. I picked up a set of troop seats the other day - gonna spend tomorrow cutting them back and fitting them to my buddies 4 door soft-top.,it should give it a nice GMV-like look while making the bed more practical to use. Originally Posted By Lawman734:
Originally Posted By Ryan_Ruck:
It will still spin slightly when disengaged. From what you describe, it sounds like it's working normally now. I picked up a set of troop seats the other day - gonna spend tomorrow cutting them back and fitting them to my buddies 4 door soft-top.,it should give it a nice GMV-like look while making the bed more practical to use. Will you post pics when you're done? I want to do the same thing once I get my 4 man kit installed. |
┌∩┐(◣_◢)┌∩┐
The talk about cutting down troop seats reminded me I found this photo awhile back. Anybody know the going rate for a hardtop, basic turret and c pillar? slantback kits with all that and sponsons seem to be a good 10k+.

Looks to be an A1 truck without airlift bumper, or rhino. I like the simplicity of it! I've finished the outfitting of my 2 man truck with just those items so I'm not about to throw another ~10K at it (rear x doors, other 4 door hardtop parts) but if I really wanted a 4 man truck that stands out above the softops, this would be like a poorer man's GMV. |
|
Originally Posted By Aguas:
The talk about cutting down troop seats reminded me I found this photo awhile back. Anybody know the going rate for a hardtop, basic turret and c pillar? slantback kits with all that and sponsons seem to be a good 10k+. https://i.imgur.com/TIu3DeL.jpg Looks to be an A1 truck without airlift bumper, or rhino. I like the simplicity of it! I've finished the outfitting of my 2 man truck with just those items so I'm not about to throw another ~10K at it (rear x doors, other 4 door hardtop parts) but if I really wanted a 4 man truck that stands out above the softops, this would be like a poorer man's GMV. Thanks for finding this pic - I've never seen an issued truck with cut-down troop seats. That actually looks really good and may be the DMV that FKAM had mentioned earlier? |
|
Originally Posted By Aguas:
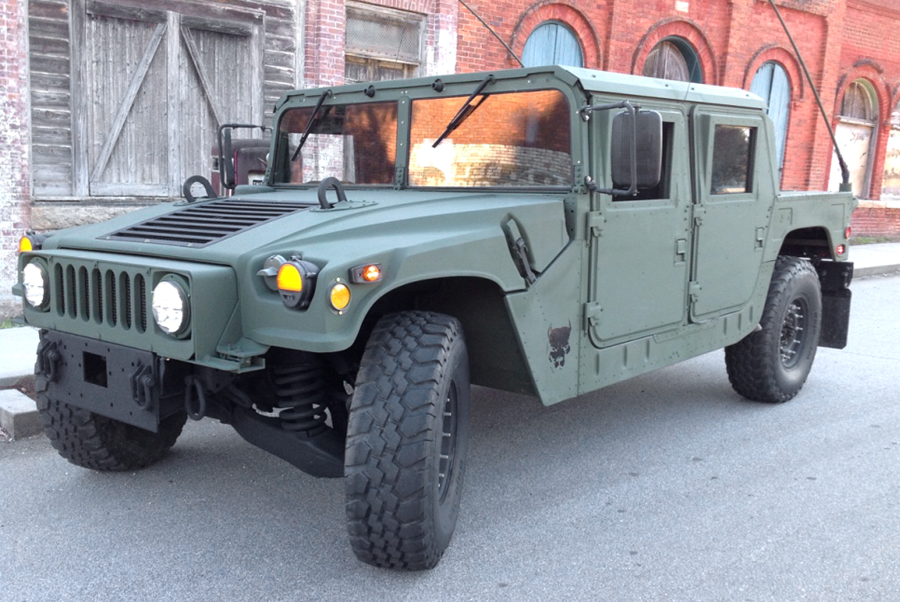
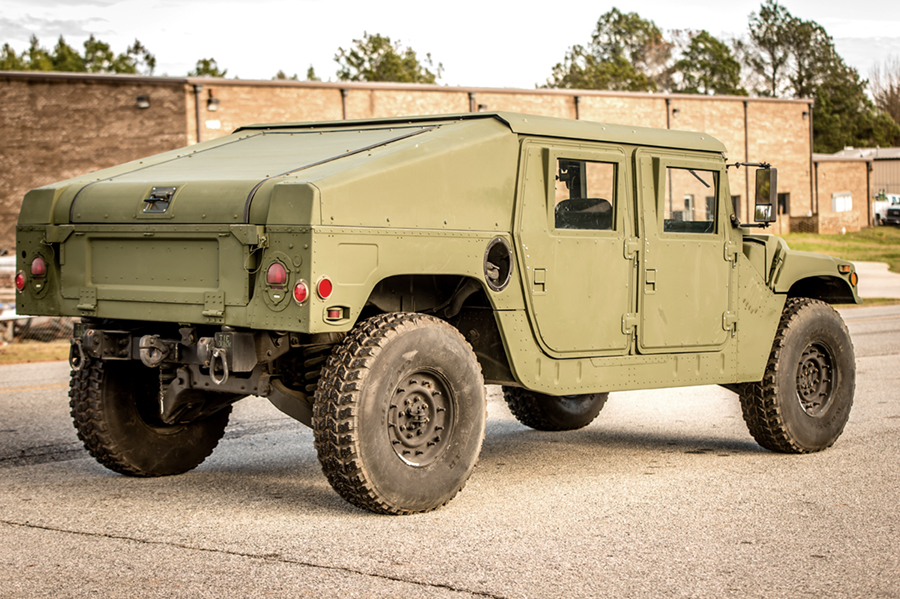
The talk about cutting down troop seats reminded me I found this photo awhile back. Anybody know the going rate for a hardtop, basic turret and c pillar? slantback kits with all that and sponsons seem to be a good 10k+. https://i.imgur.com/TIu3DeL.jpg Looks to be an A1 truck without airlift bumper, or rhino. I like the simplicity of it! I've finished the outfitting of my 2 man truck with just those items so I'm not about to throw another ~10K at it (rear x doors, other 4 door hardtop parts) but if I really wanted a 4 man truck that stands out above the softops, this would be like a poorer man's GMV. Supposedly their M1151 slantback kit includes everything you need including B and C-pillars and, it mounts to the original soft top windshield frame. Their most tricked out package is just over $8300 plus freight. I haven't seen an address on their website but the area code is north GA. I wonder if their gear would work with a turret setup... 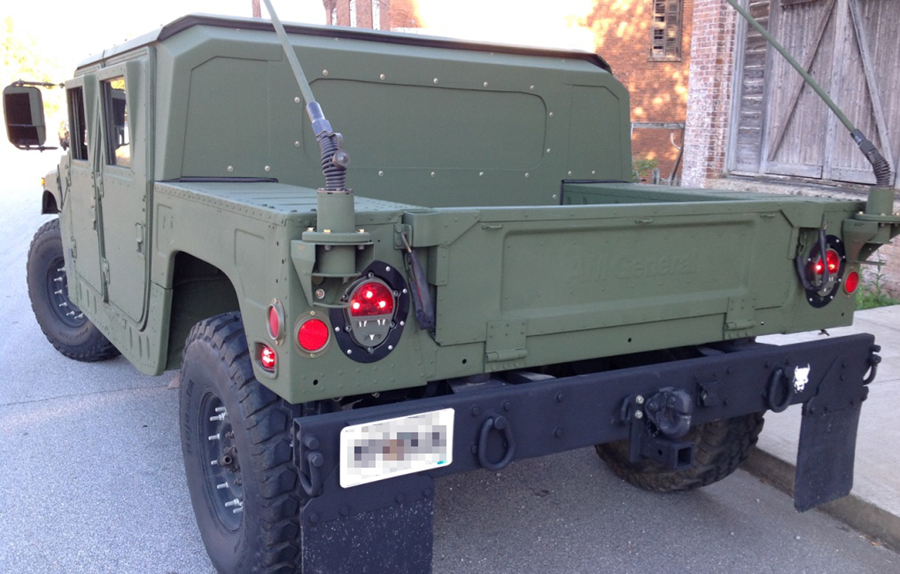
|
|
Originally Posted By Ryan_Ruck:
Just an FYI, there's a company now turning out fiberglass top options to include M1165 and M1151 styles and apparently they're working on exact copy X-doors. Supposedly their M1151 slantback kit includes everything you need including B and C-pillars and, it mounts to the original soft top windshield frame. Their most tricked out package is just over $8300 plus freight. I haven't seen an address on their website but the area code is north GA. I wonder if their gear would work with a turret setup?
As it's currently set up, I'm not sure if it'll work over the turret gear. My biggest concern would be strength - I'm 280lbs and walk on my both of my gun roofs regularly without concern. I wouldn't feel the same with a fiberglass setup and my other concern is the durability of the fiberglass itself. Don't read that as a question of quality, as much as many turret trays aren't perfectly flat. I can see one gouging the hell out of the fiberglass if you were to fit one on. I could see putting a turret on their for nonfunctioning show, but not much of anything else. Mike's roofs have a very unarmored M1165 profile - the basic setup for that I think is something like $4500. I could see GMV rails put on it and it being a bad-ass truck. The good news with his roofs are that they actually keep water out - something both of mine have a near impossible time doing. |
|
Originally Posted By Lawman734:
I know Mike Vaden very well - I spent the morning with him yesterday actually.
As it's currently set up, I'm not sure if it'll work over the turret gear. My biggest concern would be strength - I'm 280lbs and walk on my both of my gun roofs regularly without concern. I wouldn't feel the same with a fiberglass setup and my other concern is the durability of the fiberglass itself. Don't read that as a question of quality, as much as many turret trays aren't perfectly flat. I can see one gouging the hell out of the fiberglass if you were to fit one on. I could see putting a turret on their for nonfunctioning show, but not much of anything else. Mike's roofs have a very unarmored M1165 profile - the basic setup for that I think is something like $4500. I could see GMV rails put on it and it being a bad-ass truck. The good news with his roofs are that they actually keep water out - something both of mine have a near impossible time doing. Originally Posted By Lawman734:
Originally Posted By Ryan_Ruck:
Just an FYI, there's a company now turning out fiberglass top options to include M1165 and M1151 styles and apparently they're working on exact copy X-doors. Supposedly their M1151 slantback kit includes everything you need including B and C-pillars and, it mounts to the original soft top windshield frame. Their most tricked out package is just over $8300 plus freight. I haven't seen an address on their website but the area code is north GA. I wonder if their gear would work with a turret setup?
As it's currently set up, I'm not sure if it'll work over the turret gear. My biggest concern would be strength - I'm 280lbs and walk on my both of my gun roofs regularly without concern. I wouldn't feel the same with a fiberglass setup and my other concern is the durability of the fiberglass itself. Don't read that as a question of quality, as much as many turret trays aren't perfectly flat. I can see one gouging the hell out of the fiberglass if you were to fit one on. I could see putting a turret on their for nonfunctioning show, but not much of anything else. Mike's roofs have a very unarmored M1165 profile - the basic setup for that I think is something like $4500. I could see GMV rails put on it and it being a bad-ass truck. The good news with his roofs are that they actually keep water out - something both of mine have a near impossible time doing. And thanks for the first hand impressions.
I think you're right with the strength part as that's typically not something fiberglass is known for. Like he points out on his site though, it would be more resistant to temperature transfer and noise. I'd imagine there's some decent weight savings over the metal roofs as well. Maybe a more turret compatible roof setup could be a future project for him. |
|
Originally Posted By Ryan_Ruck:
Cool! Tell him good job on bringing some nice looking and reasonably priced products to market. And thanks for the first hand impressions.
I think you're right with the strength part as that's typically not something fiberglass is known for. Like he points out on his site though, it would be more resistant to temperature transfer and noise. I'd imagine there's some decent weight savings over the metal roofs as well. Maybe a more turret compatible roof setup could be a future project for him. As far as another version for turrets - I'm not sure it would be worth it. To take the existing setup, you're removing a large cross-section of roof so the strength would be gone - and you need turret trays to finish it out. There aren't that many more trays out there then roofs, so I'm not sure the investment would be worth the limited sales. |
Here's the yoke as it came off the new rear shaft:


Gave it a good scrubbing with some Dawn and a Scotchbrite pad to clean all of the loose stuff off. The Evapo-Rust says it's safe on all plastics so I grabbed a clear plastic bin I had so I could keep an eye on it. The instructions say to keep it submerged from 1-12 hours depending on level of rust, checking it periodically. I'm going to rotate it in a couple hours just to make sure no air pockets get trapped inside it. 
Instructions say it can also be reused until the performance of it drops off so when I'm done I'll run it through a coffee filter and keep it for use again. They sell it in quantities up to 55 gallon drums and 275 gallon liquid totes. 
Originally Posted By Lawman734: I think for it's purpose, you won't find anything better. You get a military looking roof with all the attributes you pointed out. As far as another version for turrets - I'm not sure it would be worth it. To take the existing setup, you're removing a large cross-section of roof so the strength would be gone - and you need turret trays to finish it out. There aren't that many more trays out there then roofs, so I'm not sure the investment would be worth the limited sales.
|
|
Holy crap! Evapo-Rust is awesome!
Some pics before I oiled it. 

It left a slimy, blackish residue on the yoke that you wash off per the instructions. The remaining Evapo-Rust is a bit cloudy and has bits floating around. 
I'm filtering that now. It's crazy it does such an amazing job in just 6.5 hours and you can just reach right into the stuff bare handed to handle the parts no problem. Come to think of it, it kind of reminds me of CLR. I wonder how similar the two are since both are reportedly non-toxic and perform similar functions... |
|
now, ill need a tank big enough to submerge my rhino....
i ordered some current nato jerry cans so i dont have to fight the broke ass safety nozzles on my fuel cans anymore. i hear they are worlds better than the US version that we had. i need gas as well as diesel, but im not sure the condition of the insides yet and it seems diesel might require a different gasket than gas, least i think so. we shall see. i keep daydreaming about the gmv type trucks; but if one discounts the cost, theres still the issue of raintightness, and then the color. im off to google to look for 3 color woodland trucks. |
|
Originally Posted By Aguas:
I keep daydreaming about the gmv type trucks; but if one discounts the cost, theres still the issue of raintightness, and then the color. im off to google to look for 3 color woodland trucks. 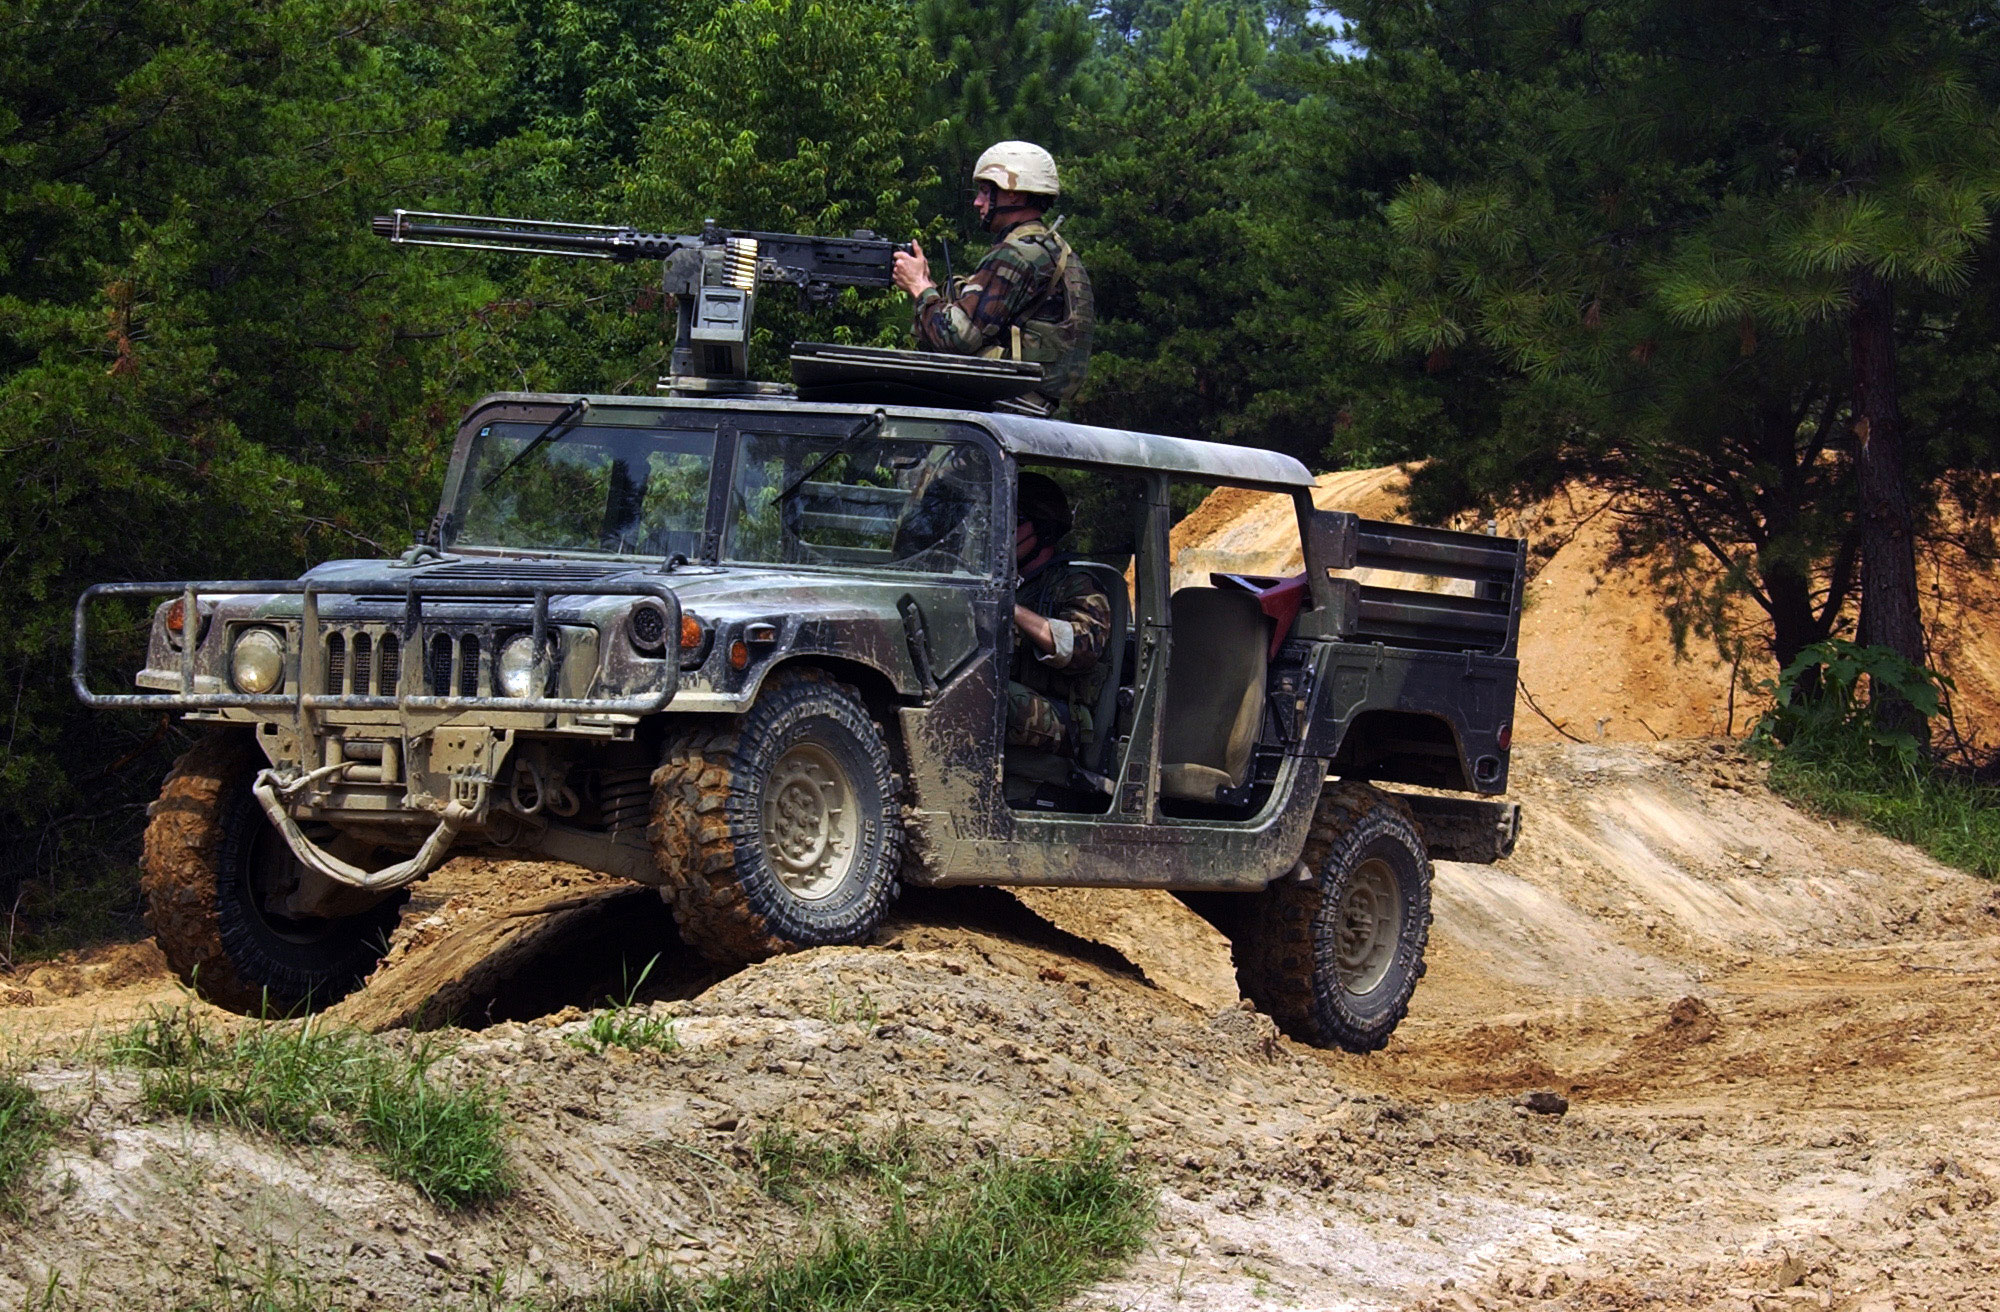
|
|
Originally Posted By Aguas:
now, ill need a tank big enough to submerge my rhino.... i ordered some current nato jerry cans so i dont have to fight the broke ass safety nozzles on my fuel cans anymore. i hear they are worlds better than the US version that we had. i need gas as well as diesel, but im not sure the condition of the insides yet and it seems diesel might require a different gasket than gas, least i think so. we shall see. i keep daydreaming about the gmv type trucks; but if one discounts the cost, theres still the issue of raintightness, and then the color. im off to google to look for 3 color woodland trucks. For the fuel cans, you'll probably need to make sure the gaskets are Viton. If you haven't seen it, head over to the Fuel Can Oracle in the Survival forum. Should have all the info you need. Originally Posted By Lawman734: Pics are out there, usually from very early GWOT. Ya gotta remember that most all of them were built for the war effort, so they're going to be tan http://www.americanspecialops.com/images/photos/navy-seals/seals-gmv-hr.jpg I thought my GMVish truck was going to be the first.
|
|
So, I helped (and by helped, I provided intellectual support, he did all the work) my buddy with modifying the troop seats for use on a 4-man truck. Overall, it wasn't a terribly difficult project. Just about all of the work can be done with hand tools in your driveway - you can put it together in your driveway and drive it to someone with a welder if needed. I would say that an angle grinder with cut off wheels are a must, but a circular or jig saw is nice - electricity makes life easier. I didn't include any measurements just because everybody's truck is different - placement of the holes on each side of the truck were actually slightly different, so I'd cut them to fit your specific truck.
Start by separating the seat from the back - they're held in place with a pin and cotter pin. They can be tight, so penetrating fluid would be good to have on hand. 
Use your cut off wheel to zip through the welds of the gusset and the center seat mount. If you zip through the welds on one side and bottom of the gusset, you can use a pair of channell-locks to grab one side and break the weld on the other side. It's important that you preserve the gusset as you'll want it for later. You can smack the seat mount off with a hammer after zipping through the welds. 

Use a grinding wheel to clean up the welds that you just cut through. 
This is where a square would come in handy......or a large clamp as in this case, but figure out the length you'll need for the bottom slat (actually, steel). Then using the square, to establish what's vertical from the length of the bottom slat, measure the distance from vertical to the length you'll need to meet the angle of the top slat. 
Transfer those measurements to the seat backs. Use a straight edge to scribe what you'll need to cut. 
Use the angle grinder with cut off wheel to cut through the steel bottom "slat". Use a saw to cut through the 2 wooden slats. If your intent isn't to be able to roll up the curtain, you can cut the slats tight up against the c-pillar with minimal gap. Even this close, there's room to slip a bit of u-channel over the ends to tie the slats together. Hell, if ya want to can leave the ends unsupported without u-channel but I think they wouldn't serve much of a utilitarian purpose beyond looks as it wouldn't be very rigid. You'll want to bolt through the wooden slats and weld the u-channel to the steel that makes up the bottom of the seat backs. You can also see in this pic the only bolts supporting the front of the bed rails are those at the edge of the fender. The rear of the rails do have 2 bolts to provide some lateral support. 
You could go to the hardware store and buy a section of u-channel to tie the front slats together, but we opted to utilize as much stuff from the seats as possible, so we cut the u-channel that had been the forward edge of the troop seats off. 
Once we cut the u-channel off, we fit it in place. You can see here how we adjusted the length to allow almost 2" of space between the end of the u-channel/slats and the c-pillar. He wants to be able to roll up the curtain on nice days and this will allow sufficient room. Unlike in the earlier pic where the steel was cut square, you can also see where the steel was now relieved at the bottom to allow space for rolling/unrolling the curtain. Up to this point, if you don't haveva welder you can put it all together and drive it to someone with a welder. The bottom of the u-channel will be pulled flush with the long edge of the seat bottom and welded in place. You don't have to do this, but without it the front of your bed rails are basically for show as they're not sufficiently supported for anything else. 
Lastly, you'll want to take the gusset you cut off earlier and have it welded in place. By adding this gusset, it'll allow for additional lateral support - someone can lean on it if seated on the fender and it won't be as likely to shake and rattle as bad if on a rough trail. The aluminum body won't overheat if you weld things in place, so if you don't have access to a welder, you can drive somewhere and have them weld everything. You can bolt the gusset down when you get home. 

All welded up, to include a portion of the cut-down seat base too. 


All done!  Overall, it gives the truck a "poor-man GMV" look. I really think it transforms the look of the truck, but most importantly - it let's you make better use of the bed. |
|
Originally Posted By Lawman734:
So, I helped (and by helped, I provided intellectual support, he did all the work) my buddy with modifying the troop seats for use on a 4-man truck. Overall, it wasn't a terribly difficult project. Just about all of the work can be done with hand tools in your driveway - you can put it together in your driveway and drive it to someone with a welder if needed. I would say that an angle grinder with cut off wheels are a must, but a circular or jig saw is nice - electricity makes life easier. I didn't include any measurements just because everybody's truck is different - placement of the holes on each side of the truck were actually slightly different, so I'd cut them to fit your specific truck. ... Overall, it gives the truck a "poor-man GMV" look. I really think it transforms the look of the truck, but most importantly - it let's you make better use of the bed. You know... I think I'd like to start linking good writeups like this in my OP so they don't get buried in this thread since it's gotten so long lived. A "HMMWV Tech How-To" section... So, if anyone finds any they'd like linked just let me know. Got a lot going on but I'll try and dig through it and find stuff I've done. Also, I like those jerry can mounts up by the seat belt anchors. Those a home brew solution? That's a good way to utilize that space up there. |
|
Originally Posted By Ryan_Ruck:
Great writeup! You know... I think I'd like to start linking good writeups like this in my OP so they don't get buried in this thread since it's gotten so long lived. A "HMMWV Tech How-To" section... So, if anyone finds any they'd like linked just let me know. Got a lot going on but I'll try and dig through it and find stuff I've done. Also, I like those jerry can mounts up by the seat belt anchors. Those a home brew solution? That's a good way to utilize that space up there. As for the jerry can mounts - they're pretty generic. I found the same ones on Amazon. Jerry Can Mount |
|
Originally Posted By Lawman734:
So, I helped (and by helped, I provided intellectual support, he did all the work) my buddy with modifying the troop seats for use on a 4-man truck. Overall, it wasn't a terribly difficult project. Just about all of the work can be done with hand tools in your driveway - you can put it together in your driveway and drive it to someone with a welder if needed. I would say that an angle grinder with cut off wheels are a must, but a circular or jig saw is nice - electricity makes life easier. I didn't include any measurements just because everybody's truck is different - placement of the holes on each side of the truck were actually slightly different, so I'd cut them to fit your specific truck. SNIP I submitted for insurance underwriting with Hagerty yesterday and hope to get an emissions inspection done today. If all goes well I'll have proof of insurance in hand on Friday and go to the DMV to register my vehicle. As a bonus I got a call yesterday that the airlift bumper I bought off ebay arrived at Fastenal so I'll pick that up Friday too. |
┌∩┐(◣_◢)┌∩┐
|
Originally Posted By Aguas:
looks like 86Humv has a few GMV toolboxes and some smoke grenade dealies for sale at g503. seems like a rare thing! 
|
|
Just found out about this so sorry for the super short notice but, you can get 20% off up to $100 on most items on eBay by 8pm PST if you use code PSPRING20.
And if you check out as a guest, you can use it multiple times. So, any HMMWV stuff you need, now's your chance to get it cheaper! |
|
Since I need new front springs to replace my saggy ones, I checked on eBay and thought I had gotten a really good price on a set of front plow springs at $80 each after discount plus $58 shipping (they were $60 cheaper total shipped than Equipment Parts Sales even). But then I found them at Army Surplus Warehouse for $30 each plus $60 shipping so I cancelled my eBay order. Anyone bought anything from Army Surplus Warehouse before? I paid with Paypal and credit card so I've got buyer protection... Guess I'll just settle for the New Xbox One X I got $100 cheaper than at Costco thanks to the eBay discount.
|
|
Originally Posted By Ryan_Ruck:
Since I need new front springs to replace my saggy ones, I checked on eBay and thought I had gotten a really good price on a set of front plow springs at $80 each after discount plus $58 shipping (they were $60 cheaper total shipped than Equipment Parts Sales even). But then I found them at Army Surplus Warehouse for $30 each plus $60 shipping so I cancelled my eBay order. Anyone bought anything from Army Surplus Warehouse before? I paid with Paypal and credit card so I've got buyer protection... Guess I'll just settle for the New Xbox One X I got $100 cheaper than at Costco thanks to the eBay discount. Packaging and shipping is not like Amazon, couple days to pull the order together before shipping was my experience. There's room to improve in this age of what a customer sees as normal now but really no worse than how mail order stuff used to be. |
┌∩┐(◣_◢)┌∩┐
|
Originally Posted By Gixxersixxer:
I haven't bought humvee stuff from them but I've bought surplus stuff from them. Their inventory count sucks. On more than one item I bought multiples of I got shorted, but was billed correctly. They just never told me I would be shorted. I had to find out by opening the box. Packaging and shipping is not like Amazon, couple days to pull the order together before shipping was my experience. There's room to improve in this age of what a customer sees as normal now but really no worse than how mail order stuff used to be.
|
|
anybody ever replaced a steering wheel on one of these? ive never done so on any vehicle, i understand there are puller tools out there to rent.
ive got the ultra skinny hand cramping A0 wheel now, which i though was cool at first cause it its similar to the surplus vehicles of old. but id like to stop having hand cramps, and the hmmwvs of my time all had the big black plastic wheel so nostalgia and practicality and boredom win. i see them for $120 or so on ebay, but that looks like just a wheel, no horn or anything. i assume the old horn button and wiring will transfer over. as usual, i havent consulted the TM yet. ive gone on some short trips to town since i got everything put back together; the hard doors are nice! finally somewhere solid to rest my elbow when the window is open, and the low profile latches allow for better fit in my microgarage. my biggest concern is theft, i wish i could drill and tap the bottom of the hingepin to allow for a square or torx drive screw to better retain things, but the hingepin is too small diameter. maybe i ought to just get keyed locks and also better keep people out (it is a softop, that wont stop a motivated thief). i heard about the ebay discount on GD, but i wasnt ready to pull the trigger on a steering wheel until i knew more about the assembly. |
|
Originally Posted By Aguas:
anybody ever replaced a steering wheel on one of these? ive never done so on any vehicle, i understand there are puller tools out there to rent. ive got the ultra skinny hand cramping A0 wheel now, which i though was cool at first cause it its similar to the surplus vehicles of old. but id like to stop having hand cramps, and the hmmwvs of my time all had the big black plastic wheel so nostalgia and practicality and boredom win. i see them for $120 or so on ebay, but that looks like just a wheel, no horn or anything. i assume the old horn button and wiring will transfer over. as usual, i havent consulted the TM yet. ive gone on some short trips to town since i got everything put back together; the hard doors are nice! finally somewhere solid to rest my elbow when the window is open, and the low profile latches allow for better fit in my microgarage. my biggest concern is theft, i wish i could drill and tap the bottom of the hingepin to allow for a square or torx drive screw to better retain things, but the hingepin is too small diameter. maybe i ought to just get keyed locks and also better keep people out (it is a softop, that wont stop a motivated thief). i heard about the ebay discount on GD, but i wasnt ready to pull the trigger on a steering wheel until i knew more about the assembly.
I'm like you, I kind of like the nostalgia of it but wouldn't mind upgrading at some point if the price was right. Supposedly this puller with some M6 1.00 x 70 bolts and washers works fine. As for the horn button, I seem to recall seeing it does direct swap but you'd probably want to double check that to be 100% sure. |
Speaking of steering wheels and horns. A couple of days ago I came across the video below on changing them.
 Steering Wheel and Horn Button Replacement As for the ebay discount, I did order the door latches for the X doors that lock from the outside and inside. The discount brought the price closer to what I was willing to pay, I still think they are over priced but Federal Military Parts is the only one that has them. I even found the manufacture, but I would have had to order a certain amount to get them to make a run and it would have still been close to $200 a set unpainted. |
|
You need to be creative with most of the generic steering wheel pullers that are out there. You can try the old "pull and tap with a mallet" trick, but if it's being stubborn (seems most are), you'll need the puller. I've got the correct military steering wheel puller if ya want to borrow it, but it's heavy and you'd be covering the shipping both ways. |
|
Originally Posted By Lawman734:
You need to be creative with most of the generic steering wheel pullers that are out there. You can try the old "pull and tap with a mallet" trick, but if it's being stubborn (seems most are), you'll need the puller. I've got the correct military steering wheel puller if ya want to borrow it, but it's heavy and you'd be covering the shipping both ways. |
|
Originally Posted By Lawman734:
You need to be creative with most of the generic steering wheel pullers that are out there. You can try the old "pull and tap with a mallet" trick, but if it's being stubborn (seems most are), you'll need the puller. I've got the correct military steering wheel puller if ya want to borrow it, but it's heavy and you'd be covering the shipping both ways. |
|
You guys inspired me to finally put mine on. Had it for over a year just never changed it. Pretty fast and easy, but I did have to put my puller on the mill and modify it a bit. The original steering wheel is more period appropriate for my project, but I told myself it's not going into a museum and I owe myself a few comforts. My horn button was a little different than the one in the posted video.
Attached File Attached File |
