


3D suppressors (Page 6 of 11)

|
Originally Posted By mvintx: Did you have to use supports for the spindle? Looked like it needed them. I picked up a Diamondback nozzle. On the road right now and haven't had a chance to install it. Originally Posted By mvintx: Originally Posted By CFletch: I finally finished printing the new spindle. It works great. Did you have to use supports for the spindle? Looked like it needed them. I picked up a Diamondback nozzle. On the road right now and haven't had a chance to install it. I will modify my statement about fit. The spindle works great but is a tad too long, we're talking a mm or 2. I need to grind it a little after annealing it, and if I was re-doing it I'd have measured the inside of my dryer at the center and chopped off the length a bit (from the long end) to accomidate. The rest of the holder for it is also a bit too long on one side, which I'm pretty sure is an issue from my dryer not actually being squared up inside rather than the holder. After annealing I'll try to shove it in there once the parts and dryer have cooled down, and grind it a bit if it doesn't fit. |
Participation in the rights of citizenship presumes participation in the duties of citizenship

|
Originally Posted By CFletch: yes, but it wasn't an issue. When I removed the spindle from the plate, the plate held onto the supports for me. A little scraping of the remnants with my fingernail and it was good to go. I will modify my statement about fit. The spindle works great but is a tad too long, we're talking a mm or 2. I need to grind it a little after annealing it, and if I was re-doing it I'd have measured the inside of my dryer at the center and chopped off the length a bit (from the long end) to accomidate. The rest of the holder for it is also a bit too long on one side, which I'm pretty sure is an issue from my dryer not actually being squared up inside rather than the holder. After annealing I'll try to shove it in there once the parts and dryer have cooled down, and grind it a bit if it doesn't fit. I made it the same length as the one from thingi |
|
Originally Posted By Blob: I made it the same length as the one from thingi Originally Posted By Blob: Originally Posted By CFletch: yes, but it wasn't an issue. When I removed the spindle from the plate, the plate held onto the supports for me. A little scraping of the remnants with my fingernail and it was good to go. I will modify my statement about fit. The spindle works great but is a tad too long, we're talking a mm or 2. I need to grind it a little after annealing it, and if I was re-doing it I'd have measured the inside of my dryer at the center and chopped off the length a bit (from the long end) to accomidate. The rest of the holder for it is also a bit too long on one side, which I'm pretty sure is an issue from my dryer not actually being squared up inside rather than the holder. After annealing I'll try to shove it in there once the parts and dryer have cooled down, and grind it a bit if it doesn't fit. I made it the same length as the one from thingi |
Participation in the rights of citizenship presumes participation in the duties of citizenship

| Seems crazy people are having so much trouble printing these things. I’ve printed like 10 of um with a 200 dollar Infimech tx running cheap eBay 3 pack of volcano .6 nozzles out of a cheap Vevor fruit dehydrator that goes up to 195* with zero problems. I actually had more problems with pla+. I’m using sunlu pa6-cf with the 300blk settings after drying the spools for 48ish hours. It works so good and sunlu is so cheap it’s the only material I even print with anymore. |


|
Originally Posted By CFletch: Sounds like I'll be making some more cans in 7 days unless a court stays the injunction against the NFA that just removed cans and barrel length from regulation. I'm pretty sure that's going to be a back-and-forth battle between different courts until it hits the Supreme Court. |
|
Originally Posted By GlutealCleft: I'm pretty sure that's going to be a back-and-forth battle between different courts until it hits the Supreme Court. Originally Posted By GlutealCleft: Originally Posted By CFletch: Sounds like I'll be making some more cans in 7 days unless a court stays the injunction against the NFA that just removed cans and barrel length from regulation. I'm pretty sure that's going to be a back-and-forth battle between different courts until it hits the Supreme Court. |
Participation in the rights of citizenship presumes participation in the duties of citizenship


|
Originally Posted By CFletch: Sounds like I'll be making some more cans in 7 days unless a court stays the injunction against the NFA that just removed cans and barrel length from regulation. Same. I'll print a whole build plate of 22 cans. Lol |
"Freedom is a messy business." - LaRue_Tactical
I am a sack of blood, held together by un-tanned leather. . .
I am a sack of blood, held together by un-tanned leather. . .
|
Attached File ^Just in case it's helpful to someone next week after ATF goes in front of a federal judge and says "yes your honor we absolutely do gargle balls and hope to continue gargling balls" |
The hardest part about a zombie apocalypse will be pretending I'm not excited.

| Has anyone used Sunlu PA6-CF20 for suppressors? At only $35 a kilo from Amazon, I am tempted to give it a try unless someone says it is garbage. |
"Fully-loaded, safety off. This here is a recipe for unpleasantness." - Malcom Reynolds
"He's a precision-guided asshole who only deploys on deserving targets." - Grok
"He's a precision-guided asshole who only deploys on deserving targets." - Grok
|
Need some help with this. I'm going with the SLR Plan B mount for a FTN5 and printed the threaded insert for it today, and the way it's designed to print is causing a flat spot in the ID of the insert: Attached File Printed with a pretty hefty density of tree supports got me this: Attached File That flat spot won't let the two halves fully seat: Attached File What can I do to help this thing print with a more accurate ID? Right now I'm considering splitting the .stl in the slicer and printing it on end, but I know that's a weaker orientation. |
The hardest part about a zombie apocalypse will be pretending I'm not excited.
|
Originally Posted By thezentree: Need some help with this. I'm going with the SLR Plan B mount for a FTN5 and printed the threaded insert for it today, and the way it's designed to print is causing a flat spot in the ID of the insert: https://www.ar15.com/media/mediaFiles/142455/insert_orientation_jpg-3807041.JPG Printed with a pretty hefty density of tree supports got me this: https://www.ar15.com/media/mediaFiles/142455/Plan_B_issues_jpg-3807042.JPG That flat spot won't let the two halves fully seat: https://www.ar15.com/media/mediaFiles/142455/IMG_1892_jpeg-3807043.JPG What can I do to help this thing print with a more accurate ID? Right now I'm considering splitting the .stl in the slicer and printing it on end, but I know that's a weaker orientation. The direct thread adapters are printed vertically. I'd think it would be fine because it's going to be reinforced with JB and a sleeve in addition to the baffle/tube, plus the muzzle device itself is going to take up most of the forces. |
|
Originally Posted By Smokehouse_83: I use the sunlu pa6-cf exclusively. It's great. |
"Fully-loaded, safety off. This here is a recipe for unpleasantness." - Malcom Reynolds
"He's a precision-guided asshole who only deploys on deserving targets." - Grok
"He's a precision-guided asshole who only deploys on deserving targets." - Grok
|
Originally Posted By thezentree: Need some help with this. I'm going with the SLR Plan B mount for a FTN5 and printed the threaded insert for it today, and the way it's designed to print is causing a flat spot in the ID of the insert: https://www.ar15.com/media/mediaFiles/142455/insert_orientation_jpg-3807041.JPG Printed with a pretty hefty density of tree supports got me this: https://www.ar15.com/media/mediaFiles/142455/Plan_B_issues_jpg-3807042.JPG That flat spot won't let the two halves fully seat: https://www.ar15.com/media/mediaFiles/142455/IMG_1892_jpeg-3807043.JPG What can I do to help this thing print with a more accurate ID? Right now I'm considering splitting the .stl in the slicer and printing it on end, but I know that's a weaker orientation. I added supports and it worked for me...had to do a little scraping to make the SLR blast shield fit. Then I decided to print it standing on end, as one piece. That was stupid because the mouth of the shield is narrower than the base. Now I'm going to print it standing on end, in two separate halves. Like Blob infers, a pistol cartridge makes a whole lot less pressure and uses a whole lot less powder than a rifle cartridge so I don't believe the added strength you gain from a horizontal print is worth it. Oh, and you don't have to 'slice' it. Just take the two halves and stand them on end. |
|
This is for a 5.56 can. Printing it on end seems to have worked a lot better but man the threads are tight in the test part threaded section of the can I printed yesterday. What’s acceptable for dimensional tolerance here, and how is that adjusted in Qidi/Orcaslicer short of just manually scaling each part? I made a X100 x Y10 x Z10 bar and got 100.2 x 10.1 x 10 actual after the part cooled. Flow is 0.98 and seems pretty good but I’m a little hesitant to go much lower than that. I’m not sure why X and Y dimensions are that far apart. |
The hardest part about a zombie apocalypse will be pretending I'm not excited.
|
Originally Posted By thezentree: This is for a 5.56 can. Printing it on end seems to have worked a lot better but man the threads are tight in the test part threaded section of the can I printed yesterday. What’s acceptable for dimensional tolerance here, and how is that adjusted in Qidi/Orcaslicer short of just manually scaling each part? I made a X100 x Y10 x Z10 bar and got 100.2 x 10.1 x 10 actual after the part cooled. Flow is 0.98 and seems pretty good but I’m a little hesitant to go much lower than that. I’m not sure why X and Y dimensions are that far apart. Is a tap available for the thread pitch? The few 1/2x28 threaded things I've printed so far have all been a little off. I think I like the threads printed a little tight then cleaning them up with a tap. |
"Freedom is a messy business." - LaRue_Tactical
I am a sack of blood, held together by un-tanned leather. . .
I am a sack of blood, held together by un-tanned leather. . .
|
Originally Posted By thezentree: This is for a 5.56 can. Printing it on end seems to have worked a lot better but man the threads are tight in the test part threaded section of the can I printed yesterday. What’s acceptable for dimensional tolerance here, and how is that adjusted in Qidi/Orcaslicer short of just manually scaling each part? I made a X100 x Y10 x Z10 bar and got 100.2 x 10.1 x 10 actual after the part cooled. Flow is 0.98 and seems pretty good but I’m a little hesitant to go much lower than that. I’m not sure why X and Y dimensions are that far apart. The insert doesn't seem to have correct geometry modeled. Specifically the thread crests are sharp pointed and the flanks don't have enough clearance. I had to truncate them in cad and offset the flanks by a few thousandths and then it went together. |
|
I'm not sure, it may not be a standard thread form. It'll be a couple hundred dollars if it is though. This is for the large two piece threaded insert that encloses a SLR blast can, not the little 13/16 to 1/2-28 threaded inserts for the direct thread versions. ETA: Originally Posted By Blob: The insert doesn't seem to have correct geometry modeled. Specifically the thread crests are sharp pointed and the flanks don't have enough clearance. I had to truncate them in cad and offset the flanks by a few thousandths and then it went together. ugh. I don't wanna haha. |
The hardest part about a zombie apocalypse will be pretending I'm not excited.
|
Originally Posted By thezentree: This is for a 5.56 can. Printing it on end seems to have worked a lot better but man the threads are tight in the test part threaded section of the can I printed yesterday. What’s acceptable for dimensional tolerance here, and how is that adjusted in Qidi/Orcaslicer short of just manually scaling each part? I made a X100 x Y10 x Z10 bar and got 100.2 x 10.1 x 10 actual after the part cooled. Flow is 0.98 and seems pretty good but I’m a little hesitant to go much lower than that. I’m not sure why X and Y dimensions are that far apart. If you print the insert on it's side, the threads - at least on my machine and settings - are not well defined. They do not have sharp points, they're more rounded. I haven't successfully printed a horizontally oriented can yet so I'm just guessing if that will be a better fit into the suppressor body's threads. Just guessing. Update: Printed the SLR insert today, both halves standing on end. Threads look great but the SLR blast can doesn't fit for crap. Going to print the looser threads version, both halves down the way the maker intended. Adding more supports to see I can prevent some of the sagging. It's only filament, right? Noticed on Bambu's website that they recommend using ASA for both interface and support when printing PA6CF. Second update: Very frustrated. I've spent hours doing calibrations trying to improve my horizontal prints and they still look like crap. This is the third time I've printed the SLR insert and the damned blast can won't fit for shit and the insert looks like shit too. Think I'm going to sideline this project for awhile. I'm just wasting filament and time. Might try cutting the vertically printed adaptor on a bandsaw and see how that works.  Third update: Still a lot of ooze from the nozzle as it leaves the prime tower. Sometimes it will stick to the silicone sock or get stuck on the nozzle blocker, or it will curl around and get stuck on the other nozzle. Then it gets drug all around the print, screwing up the surface. Looking at retraction and ramming settings. |
|
Originally Posted By thezentree: Need some help with this. I'm going with the SLR Plan B mount for a FTN5 and printed the threaded insert for it today, and the way it's designed to print is causing a flat spot in the ID of the insert: https://www.ar15.com/media/mediaFiles/142455/insert_orientation_jpg-3807041.JPG Printed with a pretty hefty density of tree supports got me this: https://www.ar15.com/media/mediaFiles/142455/Plan_B_issues_jpg-3807042.JPG That flat spot won't let the two halves fully seat: https://www.ar15.com/media/mediaFiles/142455/IMG_1892_jpeg-3807043.JPG What can I do to help this thing print with a more accurate ID? Right now I'm considering splitting the .stl in the slicer and printing it on end, but I know that's a weaker orientation. I printed the SLR threaded insert horizontally with different supports, hoping to have less sagging in the areas that meet the blast shield. Unfortunately it didn't help. Then I printed it vertically in one piece then used a hacksaw to split it in half. The blast shield seems to fit OK and there is about a 1/16" gap between the two halves. It measures the same in X and Y but I don't have a completed FTN PCC to check the fit. Printing a 4th attempt now. Used Bambu's settings for their PA6CF and it looks better than my previous attempts with my own calibrations. I just told the slicer I was using Bambu filament but I was using Fiberon filament. Honestly, I've had the best luck with both Fiberon and Sunlu on rimfire suppressors using Bambu Studio's default settings. No calibration. The only thing I changed were the speeds, the bed and chamber temps and reduced the volumetric flow to 3. 
|
| I ended up splitting the merged part (the e-z thread or whatever) in the slicer and printing on end with a brim and it came out well. I printed the back 1/2” or so of a rifle can by just dragging the can down until only the threaded portion was above the build plate. That threaded pretty well so when I can figure out the discontinuities in my sliced model I think this will go in pretty easily. |
The hardest part about a zombie apocalypse will be pretending I'm not excited.
|
I hope it works for you. Pretty clever lowering the suppressor through the plate to print the part you want. I usually use the cut tool to do that. I've tried printing that suppressor twice now in a vertical orientation. Print quality is great but layer adhesion is not so great. When it first happened I was playing around with reducing the printing temp to reduce oozing and thought that might be the cause. But today I was printing at 300° and it did the same thing. Something tells me the baffles were meant to be printed horizontally. I'm also thinking the H2D may not be capable of doing this print. Too much filament oozing after the nozzle leaves the prime tower. The pieces get drug into the print and mess it up. Some searching online tells me this is a problem with H2Ds. Maybe I'll try it in my P2S? 
|
|
Got the spool holder all ground to fit my E2 dryer better. Works great now. I discovered a few useful things in the process: Nylon-CF does not turn to dust when ground on, it melts. Which is actually really nice since it leaves a smooth end and doesn't make a huge mess. The extra nylon pushed out of the way can be knocked off with a quick swipe of a knife edge and leaves surprisingly clean edge behind. Also, with the E2 dyrer you can just hit the "down" arrow on the timer to set it backwards to 99 hours. That's nice, though it'd have been nicer to have figured out before hitting the up button 94 times. My dryer is running and in 20 hours or so I'll start chasing down the perfect flow rate again, then make some FTN5 rimfire cans and maybe another PCC Flow. |
Participation in the rights of citizenship presumes participation in the duties of citizenship
|
Originally Posted By mvintx: I hope it works for you. Pretty clever lowering the suppressor through the plate to print the part you want. I usually use the cut tool to do that. I've tried printing that suppressor twice now in a vertical orientation. Print quality is great but layer adhesion is not so great. When it first happened I was playing around with reducing the printing temp to reduce oozing and thought that might be the cause. But today I was printing at 300° and it did the same thing. Something tells me the baffles were meant to be printed horizontally. I'm also thinking the H2D may not be capable of doing this print. Too much filament oozing after the nozzle leaves the prime tower. The pieces get drug into the print and mess it up. Some searching online tells me this is a problem with H2Ds. Maybe I'll try it in my P2S? https://i.imgur.com/J9IeqQj.jpeg Does it not retract before moving off the prime tower? Why are you using a prime tower in the first place? If it's oozing that much even after retraction then I would say the filament is still wet. |
|
Originally Posted By CFletch: Got the spool holder all ground to fit my E2 dryer better. Works great now. I discovered a few useful things in the process: Nylon-CF does not turn to dust when ground on, it melts. Which is actually really nice since it leaves a smooth end and doesn't make a huge mess. The extra nylon pushed out of the way can be knocked off with a quick swipe of a knife edge and leaves surprisingly clean edge behind. Also, with the E2 dyrer you can just hit the "down" arrow on the timer to set it backwards to 99 hours. That's nice, though it'd have been nicer to have figured out before hitting the up button 94 times. My dryer is running and in 20 hours or so I'll start chasing down the perfect flow rate again, then make some FTN5 rimfire cans and maybe another PCC Flow. How much do I need to shorten the spindle? I'll make the change and re-upload it. Hell maybe I'll re-design it to be a three piece supportless print. |
|
Originally Posted By Blob: Does it not retract before moving off the prime tower? Why are you using a prime tower in the first place? If it's oozing that much even after retraction then I would say the filament is still wet. The filament is dry, dry, dry. For a second time I dried it for 24 hours in the E2 at 100°. I weighed the spool before and after and the weight was the same. It lives in a dry box with desiccant, the hygrometer says 10%. When I put it in the HT, the humidity bounces between 10 and 12° so I just gotta believe that it's dry. I guess I could get by without the prime tower...I get nasty messages from BS that I won't have nozzle clogging detection. Kinda sensitive about that since I had the meltdown on my P2S. Plus I'm running a Diamondback .06 nozzle and I'd hate to ruin it. When the left nozzle leaves the prime tower it extrudes about an inch of filament. It hangs from the nozzle and sometimes the nozzle blocker will knock it off, other times it drags it into the print and falls off. Why the nozzle doesn't wipe after it leaves the primer tower I don't know. But after a lot of reading, the H2D is known for this over-extrusion with the prime tower. Actually, the print quality is pretty good. A problem worse than the over-extrusion is the Fiberon is curling up at far end of the suppressor. The ASA support filament is not holding the PA6 down. This has happened twice now so maybe ASA is not the ideal support. Maybe I should use PA6 for the support and ASA for the interface? I'm running the bed at 90° for the ASA. Since the Fiberon isn't really touching the bed except at the very end, I don't think the heat is causing the problem. I was running the chamber at 60° and when the first print failed, I turned off the chamber heat but the 90° bed warmed the chamber up to 59°. So I don't think chamber heat is the problem. Maybe the 90° bed is just too warm for the Fiberon. I remember a rimfire can I printed broke loose when I ran the bed at 100°. First print...you can see the warping at the tip.  Today's print. I could see the nozzle bumping into the raised lip and the print flexing up and down as the nozzle passed over it. That must be what caused it to break loose from the bed on yesterday's print. Very frustrating.  |
|
Originally Posted By mvintx: The filament is dry, dry, dry. For a second time I dried it for 24 hours in the E2 at 100°. I weighed the spool before and after and the weight was the same. It lives in a dry box with desiccant, the hygrometer says 10%. When I put it in the HT, the humidity bounces between 10 and 12° so I just gotta believe that it's dry. I guess I could get by without the prime tower...I get nasty messages from BS that I won't have nozzle clogging detection. Kinda sensitive about that since I had the meltdown on my P2S. Plus I'm running a Diamondback .06 nozzle and I'd hate to ruin it. When the left nozzle leaves the prime tower it extrudes about an inch of filament. It hangs from the nozzle and sometimes the nozzle blocker will knock it off, other times it drags it into the print and falls off. Why the nozzle doesn't wipe after it leaves the primer tower I don't know. But after a lot of reading, the H2D is known for this over-extrusion with the prime tower. Actually, the print quality is pretty good. A problem worse than the over-extrusion is the Fiberon is curling up at far end of the suppressor. The ASA support filament is not holding the PA6 down. This has happened twice now so maybe ASA is not the ideal support. Maybe I should use PA6 for the support and ASA for the interface? I'm running the bed at 90° for the ASA. Since the Fiberon isn't really touching the bed except at the very end, I don't think the heat is causing the problem. I was running the chamber at 60° and when the first print failed, I turned off the chamber heat but the 90° bed warmed the chamber up to 59°. So I don't think chamber heat is the problem. Maybe the 90° bed is just too warm for the Fiberon. I remember a rimfire can I printed broke loose when I ran the bed at 100°. First print...you can see the warping at the tip. https://i.imgur.com/aMFJNRg.jpeg Today's print. I could see the nozzle bumping into the raised lip and the print flexing up and down as the nozzle passed over it. That must be what caused it to break loose from the bed on yesterday's print. Very frustrating. https://i.imgur.com/kcrBmpN.jpeg Scroll the slicer preview to where the nozzle is getting ready to leave the tower and look at the gcode and see if it's actually retracting there. What's the idea behind using ASA supports here? Trying to save money? If it was me I'd skip the multi material support in this application since it's just causing so many problems. If all else fails then I would consider tossing out that spool of material and use a different one. I've experienced random problem spools even though several dozen others of the same type printed just fine. The chamber heat is good. I printed my PCC at 100C bed to keep my chamber temps up. I didn't have any problems with it but I wasn't watching it the whole time, and it's very possible that mine curled some too but still smoothed back down as the print went on. I do enable the cooling fan on steep overhangs which helps some, and keep an eye on your layer time to allow the part enough time too adequately cool. The prime tower and nozzle swap are working in your favor here. Other than that I don't really know what else to do to reduce the curling. |


|
Originally Posted By Blob: Scroll the slicer preview to where the nozzle is getting ready to leave the tower and look at the gcode and see if it's actually retracting there. What's the idea behind using ASA supports here? Trying to save money? If it was me I'd skip the multi material support in this application since it's just causing so many problems. If all else fails then I would consider tossing out that spool of material and use a different one. I've experienced random problem spools even though several dozen others of the same type printed just fine. The chamber heat is good. I printed my PCC at 100C bed to keep my chamber temps up. I didn't have any problems with it but I wasn't watching it the whole time, and it's very possible that mine curled some too but still smoothed back down as the print went on. I do enable the cooling fan on steep overhangs which helps some, and keep an eye on your layer time to allow the part enough time too adequately cool. The prime tower and nozzle swap are working in your favor here. Other than that I don't really know what else to do to reduce the curling. 620.11 is supposed to be the long retract command and I do not see one after the nozzle leaves the prime tower. If I omit the tower I wouldn't have that problem but run the risk of a nozzle clog. Bambu recommends using ASA for the support structure and interface, but then I'm not using Bambu filaments...could be part of the problem. Yes, I was trying to save money but I've gone through so much PA6 with these horizontal printing attempts that it's a moot point now. The next try will be with PA6 for both the print and support and ASA for the interface. I'll try a 100° bed since the PA6 will be the bottom layer. As far as layer time, how does one come up with a time when the layers are increasingly longer? I saw one post that suggested 300 seconds. I entered that and sliced it and it added a couple of hours to the print. But if I understand the layer time setting, it slows down the print speed to meet that setting. It's already printing at 30mm/s. Printing the flow can was easy. This is a PIA. |
|
Originally Posted By mvintx: 620.11 is supposed to be the long retract command and I do not see one after the nozzle leaves the prime tower. If I omit the tower I wouldn't have that problem but run the risk of a nozzle clog. Bambu recommends using ASA for the support structure and interface, but then I'm not using Bambu filaments...could be part of the problem. Yes, I was trying to save money but I've gone through so much PA6 with these horizontal printing attempts that it's a moot point now. The next try will be with PA6 for both the print and support and ASA for the interface. I'll try a 100° bed since the PA6 will be the bottom layer. As far as layer time, how does one come up with a time when the layers are increasingly longer? I saw one post that suggested 300 seconds. I entered that and sliced it and it added a couple of hours to the print. But if I understand the layer time setting, it slows down the print speed to meet that setting. It's already printing at 30mm/s. Printing the flow can was easy. This is a PIA. I would just use PA6 for everything including the interface. Use a 0.2mm interface gap and they will break off nice and clean. Here's what the underside of mine looked like after support removal: Attached File My print was running around 300-320s layer time. If you're having trouble meeting that then you can lower the speed at which the support structure prints or add a sacrificial part like a cube off to the side and override its print speed to something really slow, like 10mm/s, maybe give it 10% gyroid infill or something. |
|
Originally Posted By Blob: How much do I need to shorten the spindle? I'll make the change and re-upload it. Hell maybe I'll re-design it to be a three piece supportless print. Originally Posted By Blob: Originally Posted By CFletch: Got the spool holder all ground to fit my E2 dryer better. Works great now. I discovered a few useful things in the process: Nylon-CF does not turn to dust when ground on, it melts. Which is actually really nice since it leaves a smooth end and doesn't make a huge mess. The extra nylon pushed out of the way can be knocked off with a quick swipe of a knife edge and leaves surprisingly clean edge behind. Also, with the E2 dyrer you can just hit the "down" arrow on the timer to set it backwards to 99 hours. That's nice, though it'd have been nicer to have figured out before hitting the up button 94 times. My dryer is running and in 20 hours or so I'll start chasing down the perfect flow rate again, then make some FTN5 rimfire cans and maybe another PCC Flow. How much do I need to shorten the spindle? I'll make the change and re-upload it. Hell maybe I'll re-design it to be a three piece supportless print. |
Participation in the rights of citizenship presumes participation in the duties of citizenship
| after making many, many cubes I have settled on a flow rate of 0.8 for my 0.6mm nozzle and the Fiberon PA6-CF20. It seems low but it also seems to print the line width properly. I'm making a FTN5 rimfire to see how it looks. 0.2mm layers, lots of glue stick on the plate, and the filament has been drying at 100C for 20 hours so it should be good, and I'm printing from the dryer still running at 100C. |
Participation in the rights of citizenship presumes participation in the duties of citizenship
|
Originally Posted By CFletch: after making many, many cubes I have settled on a flow rate of 0.8 for my 0.6mm nozzle and the Fiberon PA6-CF20. It seems low but it also seems to print the line width properly. I'm making a FTN5 rimfire to see how it looks. 0.2mm layers, lots of glue stick on the plate, and the filament has been drying at 100C for 20 hours so it should be good, and I'm printing from the dryer still running at 100C. You have the filament diameter and lime widths defined correctly in the slicer? Which printer is this? |
|
Originally Posted By Blob: You have the filament diameter and lime widths defined correctly in the slicer? Which printer is this? Originally Posted By Blob: Originally Posted By CFletch: after making many, many cubes I have settled on a flow rate of 0.8 for my 0.6mm nozzle and the Fiberon PA6-CF20. It seems low but it also seems to print the line width properly. I'm making a FTN5 rimfire to see how it looks. 0.2mm layers, lots of glue stick on the plate, and the filament has been drying at 100C for 20 hours so it should be good, and I'm printing from the dryer still running at 100C. You have the filament diameter and lime widths defined correctly in the slicer? Which printer is this? The rimfire can I'm printing as a test has some surface irregularities that make me thing it's under-extruding (very slight gap between a layer, only for <1" along the outer wall, seemingly only the outermost wall layer not through the whole thing), so I may need to bump the flow up even if the cube test suggests it should be low. I'm going to let it keep printing to see any other issues, since the print doesn't use much filament and the rimfire can is pretty overbuilt and may still work with some minor print flaws. I do want to get it dialed in so I can tackle 9mm PCC cans again. |
Participation in the rights of citizenship presumes participation in the duties of citizenship
|
Originally Posted By CFletch: after making many, many cubes I have settled on a flow rate of 0.8 for my 0.6mm nozzle and the Fiberon PA6-CF20. It seems low but it also seems to print the line width properly. I'm making a FTN5 rimfire to see how it looks. 0.2mm layers, lots of glue stick on the plate, and the filament has been drying at 100C for 20 hours so it should be good, and I'm printing from the dryer still running at 100C. I had very similar results with both Sunlu and Fiberon and the .6 nozzle, .914 and .9025 respectively. It does seem awful low compared to the default settings. I printed YOLO tiles to determine flow but the layer lines are so crappy, it's hard to pick a good one. Think I came up with a .95 or .96. Odd that a flow rate cube would show such a difference. Correction: I was using a wall thickness of .045 when I should have been using .062 for the .06 nozzle. That's why I was getting such a low flow ratio. Call it senility. |
|
Originally Posted By mvintx: I had very similar results with both Sunlu and Fiberon and the .6 nozzle, .914 and .9025 respectively. It does seem awful low compared to the default settings. Originally Posted By mvintx: Originally Posted By CFletch: after making many, many cubes I have settled on a flow rate of 0.8 for my 0.6mm nozzle and the Fiberon PA6-CF20. It seems low but it also seems to print the line width properly. I'm making a FTN5 rimfire to see how it looks. 0.2mm layers, lots of glue stick on the plate, and the filament has been drying at 100C for 20 hours so it should be good, and I'm printing from the dryer still running at 100C. I had very similar results with both Sunlu and Fiberon and the .6 nozzle, .914 and .9025 respectively. It does seem awful low compared to the default settings. Flow rates of .93 down to 8 all hover right around 1.27-1.3mm for the 2-wall cube, or 0.63ish for a vase single-wall cube. I wonder if I went too low trying to get a more accurate flow rate, and am running into the line-laying accuracy of the printer more than the flow rate causing the variability in the cube's wall width. If so, 0.9-0.93 might be the actual accurate flow rate and that'd make much more sense. |
Participation in the rights of citizenship presumes participation in the duties of citizenship

|
Originally Posted By CFletch: after making many, many cubes I have settled on a flow rate of 0.8 for my 0.6mm nozzle and the Fiberon PA6-CF20. It seems low but it also seems to print the line width properly. I'm making a FTN5 rimfire to see how it looks. 0.2mm layers, lots of glue stick on the plate, and the filament has been drying at 100C for 20 hours so it should be good, and I'm printing from the dryer still running at 100C. I settled on a flow rate of 0.84 for my PA6-CF, based on Ellis' original 'yolo' EM/Flow test. This is with cheap iSANGHU filament from amazon. I printed a Pill Popper v2 22LR last night and it turned out fantastic. 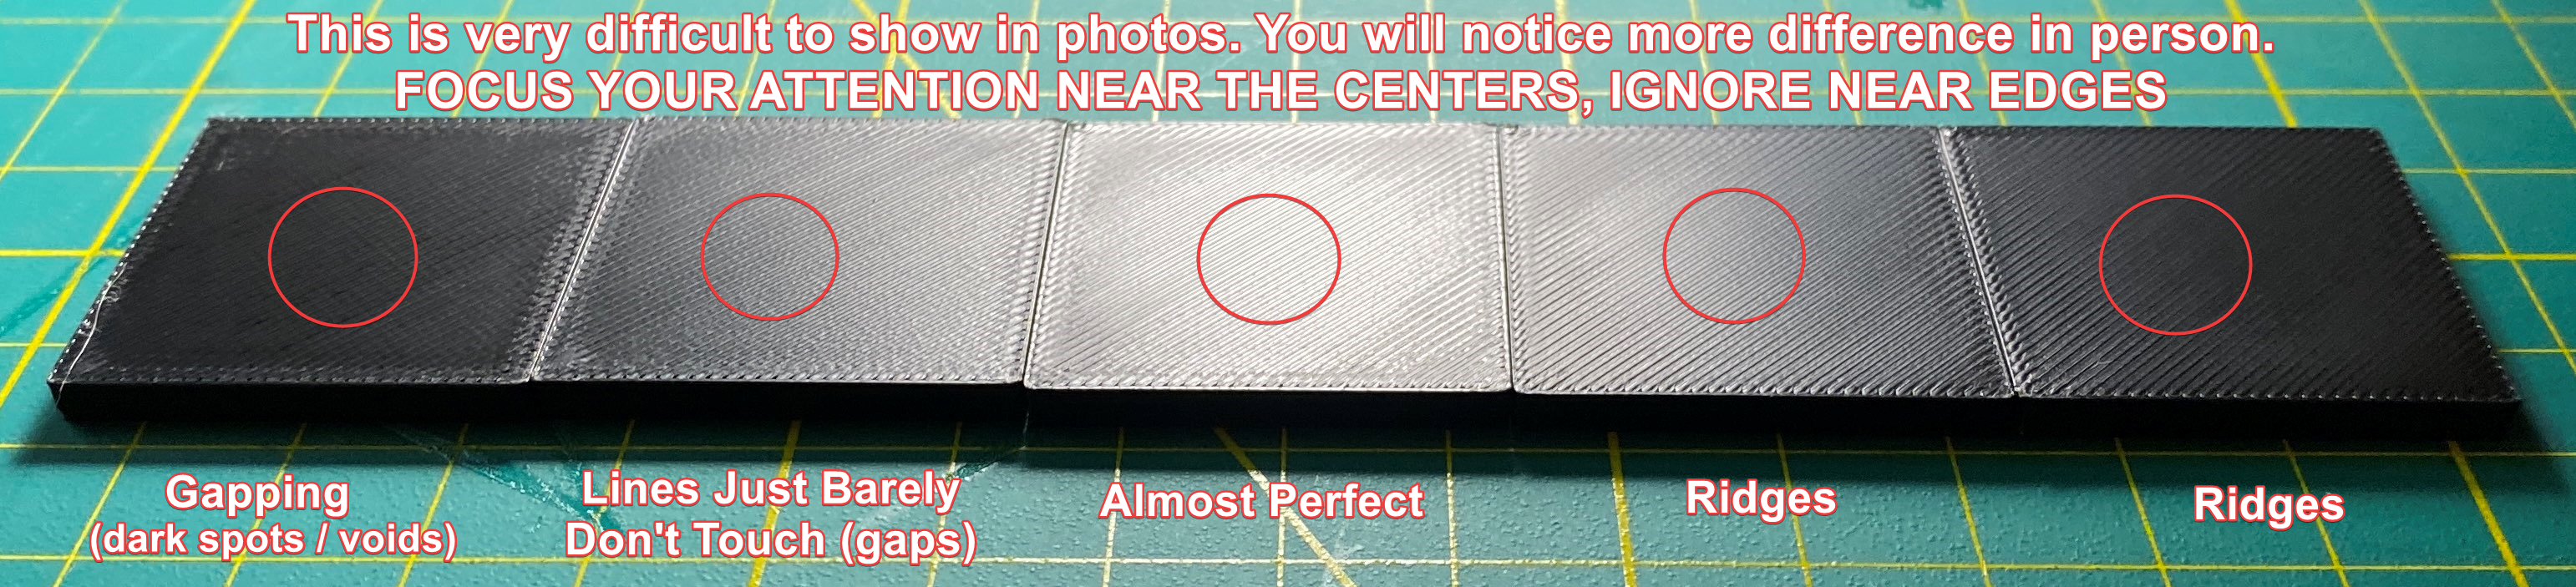
|
post_count += 1
PGP: 912E3E9A194DED4E47DA0BA9D593AD70C8C12B9C
PGP: 912E3E9A194DED4E47DA0BA9D593AD70C8C12B9C

|
Attached File Attached File Attached File Attached File Stopped the test print to inspect. The little double lines it always prints before each print look awful, definitely look like they are under-extruding. Visible gaps between the 3 walls of the outer shell, and layer gaps in the other shell. I'm going to try again with 0.9 flow rate and let it print for an hour or so and see how it looks. |
Participation in the rights of citizenship presumes participation in the duties of citizenship
|
Originally Posted By CFletch: https://www.ar15.com/media/mediaFiles/302267/1000009625_jpg-3811411.JPGhttps://www.ar15.com/media/mediaFiles/302267/1000009626_jpg-3811413.JPGhttps://www.ar15.com/media/mediaFiles/302267/1000009627_jpg-3811414.JPGhttps://www.ar15.com/media/mediaFiles/302267/1000009628_jpg-3811415.JPG Stopped the test print to inspect. The little double lines it always prints before each print look awful, definitely look like they are under-extruding. Visible gaps between the 3 walls of the outer shell, and layer gaps in the other shell. I'm going to try again with 0.9 flow rate and let it print for an hour or so and see how it looks. Looks wet, also. |
post_count += 1
PGP: 912E3E9A194DED4E47DA0BA9D593AD70C8C12B9C
PGP: 912E3E9A194DED4E47DA0BA9D593AD70C8C12B9C
|
Silly question that maybe someone in this thread has some ideas about. Are you guys worried about marking requirements? It looks to me like there might still be a need to mark home built cans because I believe there are non-tax related laws that require it |
"Freedom is a messy business." - LaRue_Tactical
I am a sack of blood, held together by un-tanned leather. . .
I am a sack of blood, held together by un-tanned leather. . .
|
Originally Posted By scul: Can't mention the suppressor without a picture!  https://www.ar15.com/media/mediaFiles/376127/4509-3811401.jpg |
Participation in the rights of citizenship presumes participation in the duties of citizenship
|
Originally Posted By scul: Looks wet, also. Originally Posted By scul: Originally Posted By CFletch: https://www.ar15.com/media/mediaFiles/302267/1000009625_jpg-3811411.JPGhttps://www.ar15.com/media/mediaFiles/302267/1000009626_jpg-3811413.JPGhttps://www.ar15.com/media/mediaFiles/302267/1000009627_jpg-3811414.JPGhttps://www.ar15.com/media/mediaFiles/302267/1000009628_jpg-3811415.JPG Stopped the test print to inspect. The little double lines it always prints before each print look awful, definitely look like they are under-extruding. Visible gaps between the 3 walls of the outer shell, and layer gaps in the other shell. I'm going to try again with 0.9 flow rate and let it print for an hour or so and see how it looks. Looks wet, also. |
Participation in the rights of citizenship presumes participation in the duties of citizenship