|
[#2]
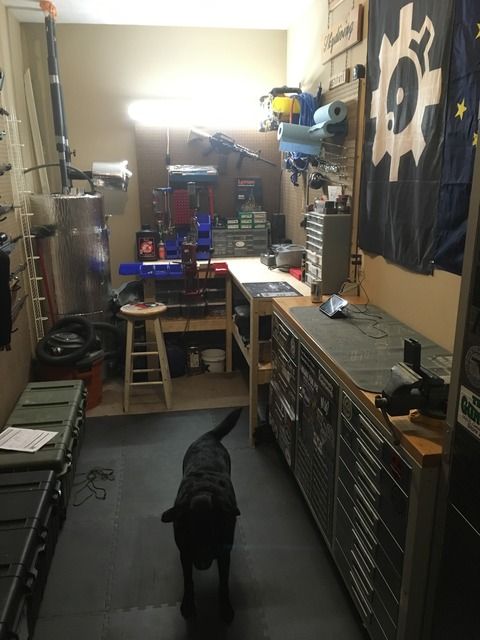
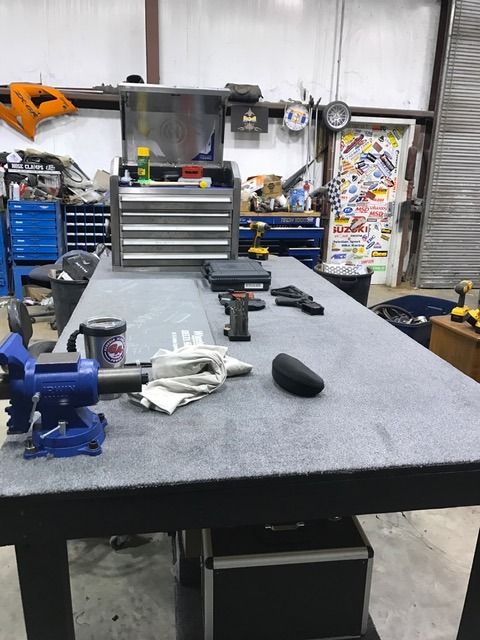
The start of the reloading/gun bench. It has a long way to go


I need to level the table (bowed from 6 years of shit loaded on it) and find something to top it. Then put the press and vise on it. Before I start reloading I'm planning on partitioning the breaker box. |
|
|
|
|
[#3]
Originally Posted By ZacSquatch:
Since we moved into the new house, I had been using a reinforced closet as a holding area and no room to work on guns. (Garage is still a disaster, so that's next) Before the wife left for Iraq, she approved my plan to close in the back of the garage and cut a doorway into the reinforced closet. As an added bonus, it gets the water heater into a heated portion of the house. Well it's almost done after some 2x4's, rebar, insulation and drywall. Before After That's a very nice set up you have there. I don't quite understand the pictures though, is that the reinforced closet at the back of the garage? Are you saying that you closed in that wide doorway? Anyhow, you have a nice selection of toys there. |
|
|
|
|
[#4]
Originally Posted By ChevelleDave:
That's a very nice set up you have there. I don't quite understand the pictures though, is that the reinforced closet at the back of the garage? Are you saying that you closed in that wide doorway? Anyhow, you have a nice selection of toys there. There's a closet inside the house that shared a wall with that back room of the garage. Now there is no wall between them and the garage hole has been filled. |
|
|
|
IN, USA
|
[#5]
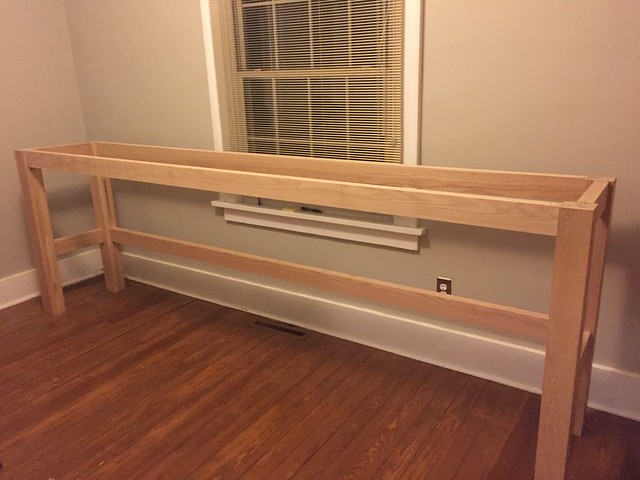
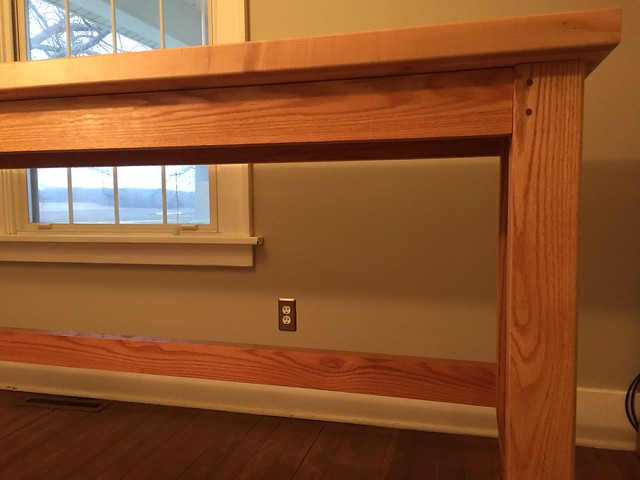
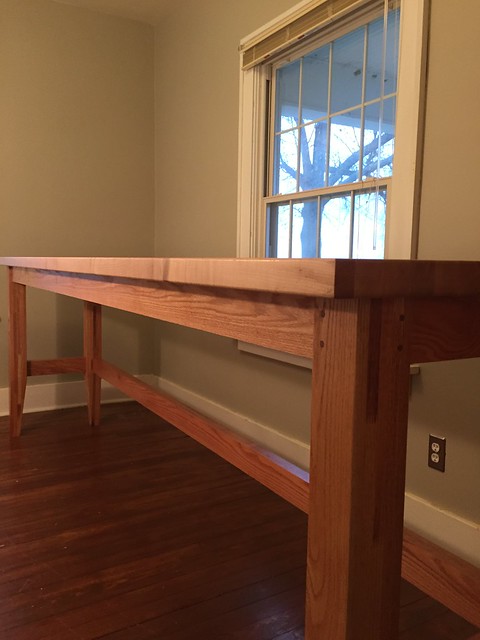
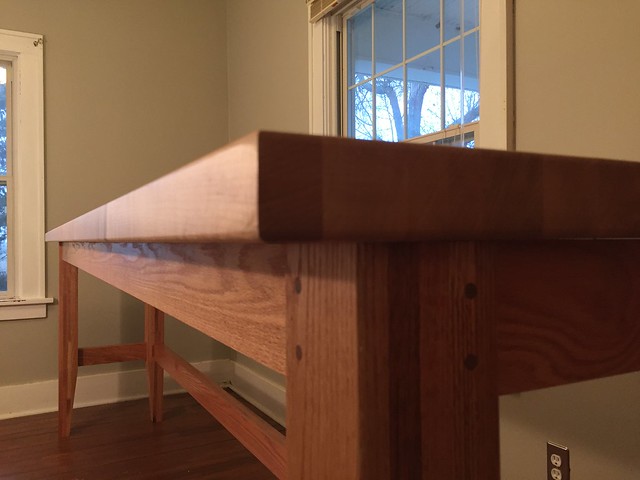
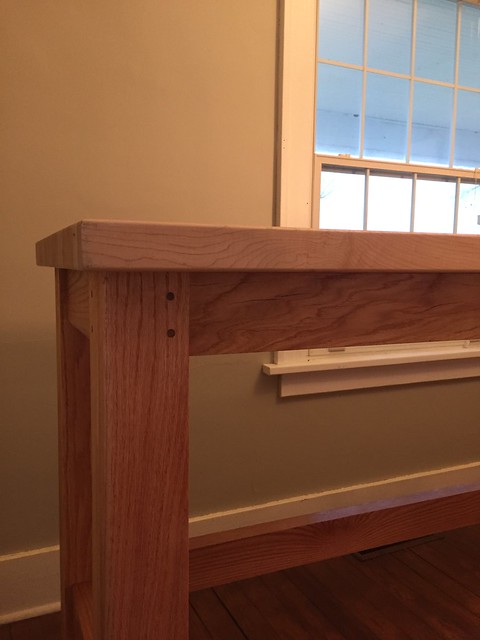
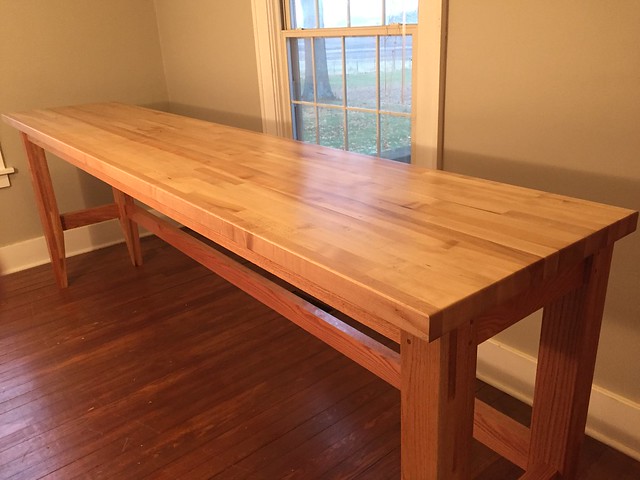
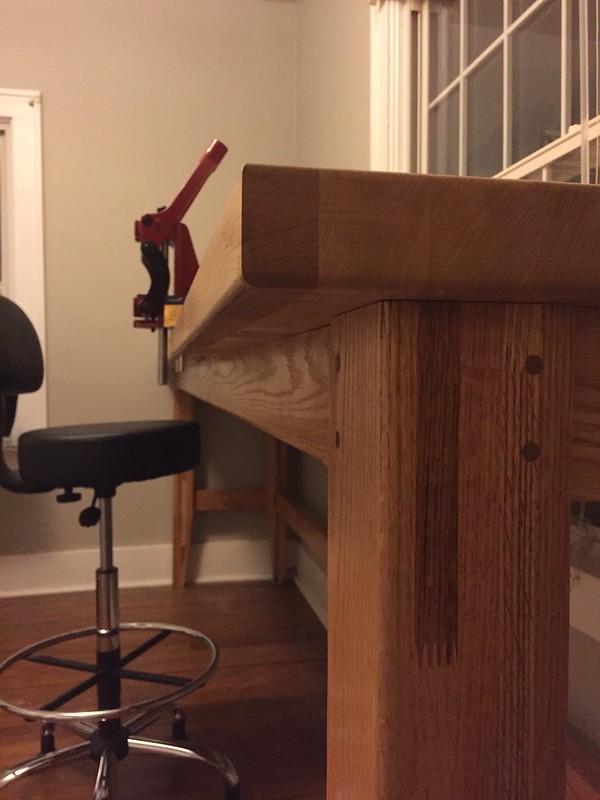
Thought I'd share my bench build for a future reloading set up. I have most of the tools to reload but have not loaded yet.
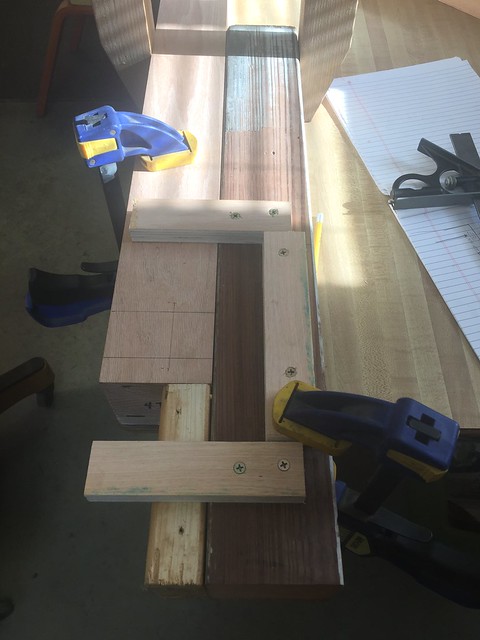
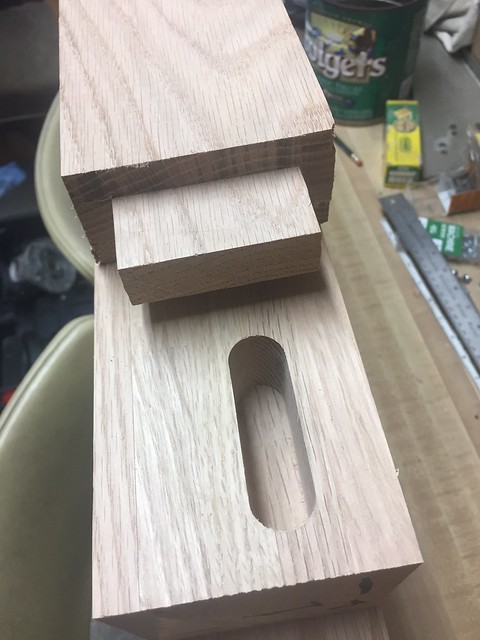
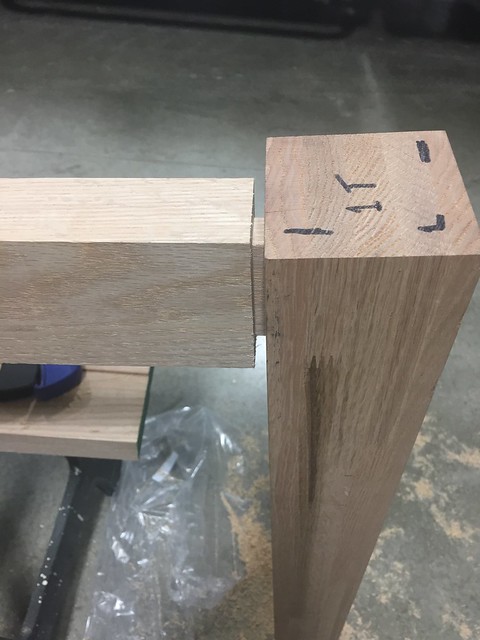
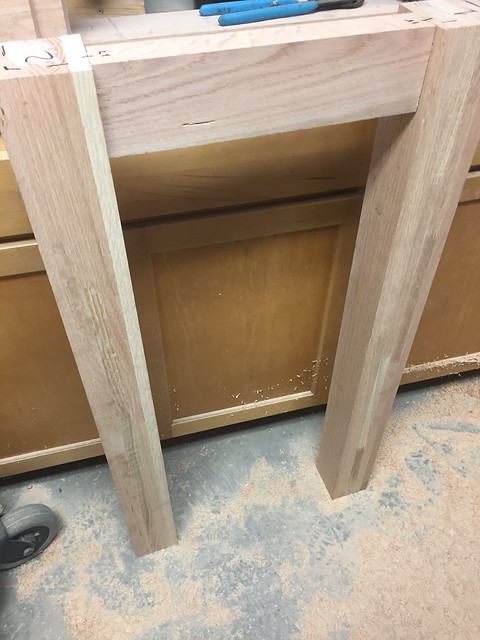
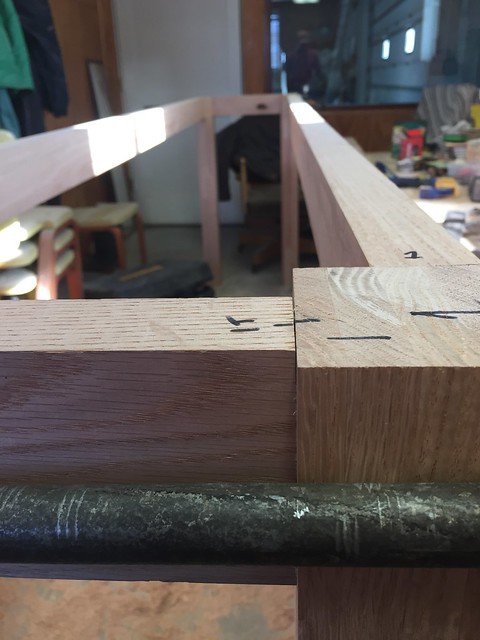
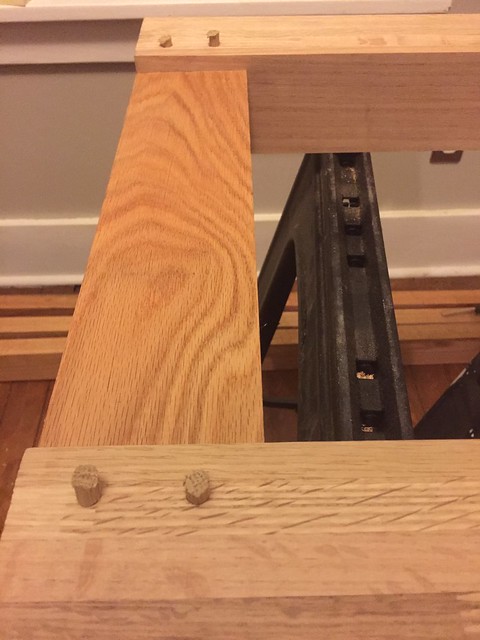
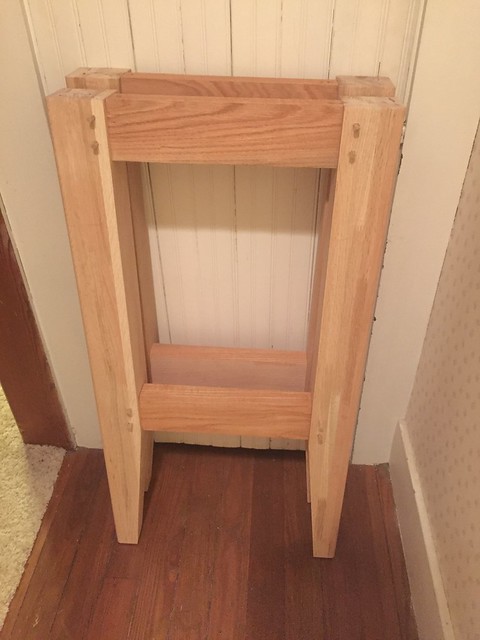
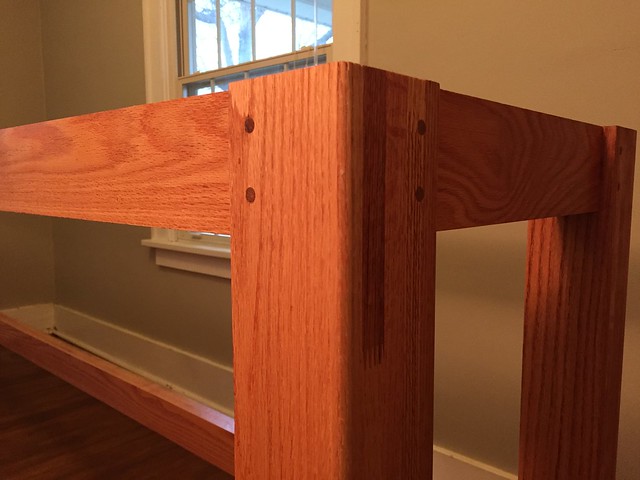
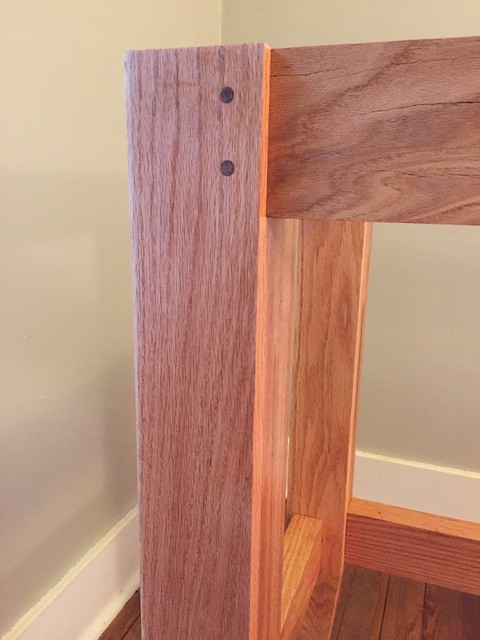
Bench top is a purchased 10' long by 24" wide Hard Maple butcher block top. The base of the bench is my attempt at my first wood working project. I got stuck on not using fasteners/screws for the base for some reason... So the base is mortise and tenoned and held together by draw-boring. Unbelievable solid...more so than I anticipated. I had another piece of Oak and some brace pieces planned to sturdy it...but found I didn't need them. The base is made of solid Red Oak that I had a local hardwood supplier rip and plane for the project. The legs were purchased 3 1/2" x 3 1/2" laminated Red Oak. I wished I had the hardwood supplier take the time to laminate the Oak with only two pieces used to make a more "furniture-ish" looking leg. Anyways...pic galore! 


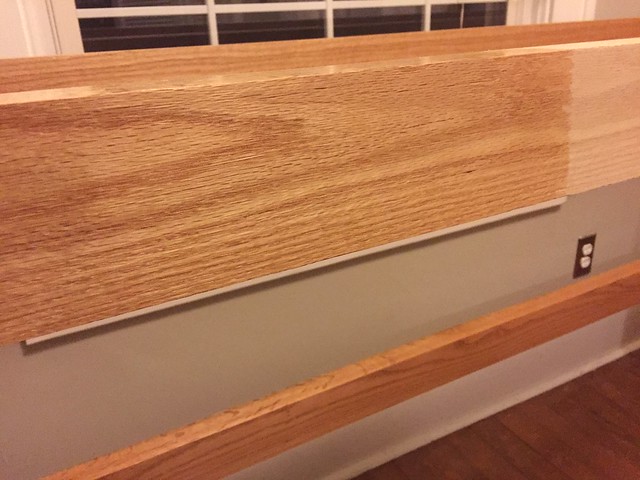
Wood... 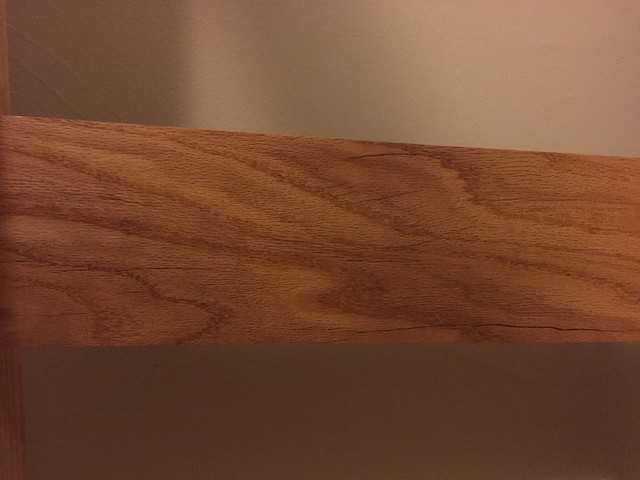
Mortise... 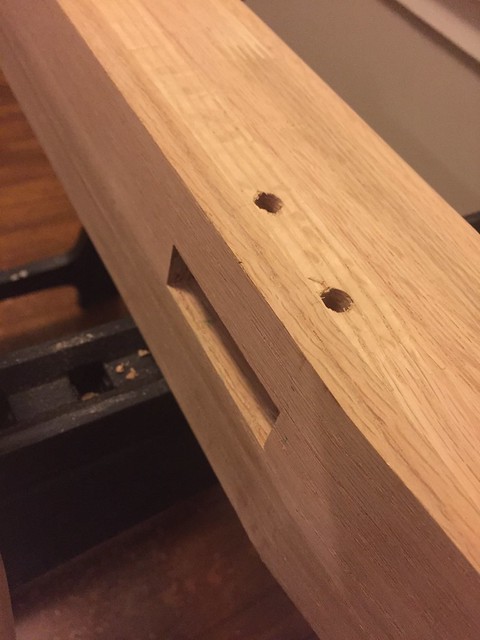
Tenon... 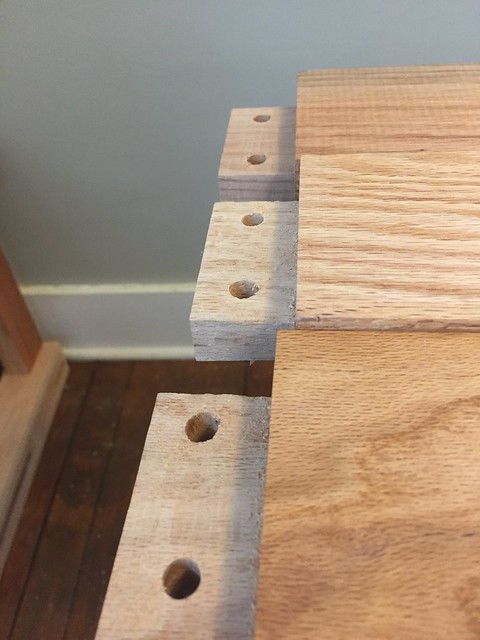
Saw with Fridge magnet to provide spacing 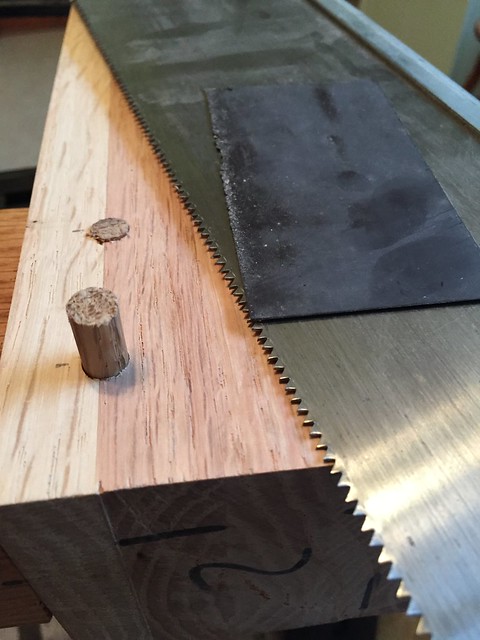
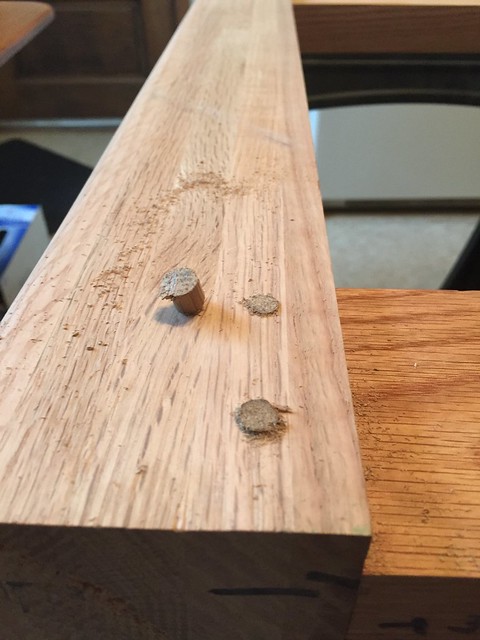
Drawbore... 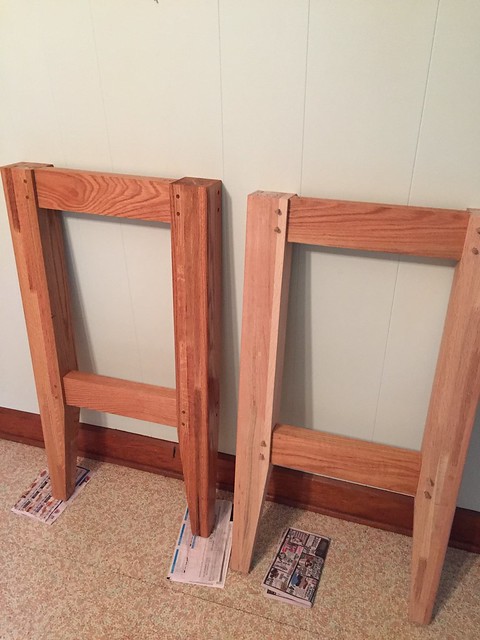

|
|
|
|
[#6]
DANG, Honda, that's gorgeous furniture.
I've been working on my bench over the past week. It needed to be secured to the wall behind it, since loading it down with lead was no longer doing enough to stabilize it. I have it screwed to the wall with 2X4 cleats fastened to the back of the bench. I have really enjoyed the versatility Inline Fabrication's Quick Change Ultramount system has given me, and now I have the 2 station storage plate on the end of the bench for even more versatility. 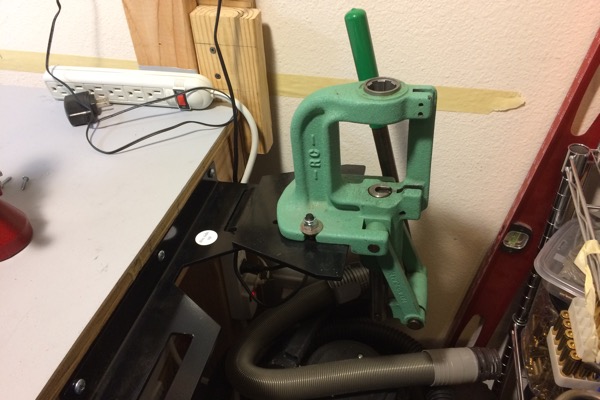
Shelves come next, filling the blank space under the pegboard and going up quite a ways. I'll update when that happens. |
|
|
|
|
[#7]
Honda that is absolutely beautiful! That looks like a piece of fine furniture not a reloading bench.
GH Porter, I use the in-line fabrication QD mounts, and have several of the QD holders as well. Extremely well thought out tools. I have an inset plate and a riser, love them both. Bench is coming along good. |
|
|
|
|
[#8]
Originally Posted By hondacafe:
Thought I'd share my bench build for a future reloading set up. I have most of the tools to reload but have not loaded yet. |
|
|
|
|
[#9]
Originally Posted By hondacafe:
Thought I'd share my bench build for a future reloading set up. I have most of the tools to reload but have not loaded yet. Bench top is a purchased 10' long by 24" wide Hard Maple butcher block top. The base of the bench is my attempt at my first wood working project. I got stuck on not using fasteners/screws for the base for some reason... So the base is mortise and tenoned and held together by draw-boring. Unbelievable solid...more so than I anticipated. I had another piece of Oak and some brace pieces planned to sturdy it...but found I didn't need them. The base is made of solid Red Oak that I had a local hardwood supplier rip and plane for the project. The legs were purchased 3 1/2" x 3 1/2" laminated Red Oak. I wished I had the hardwood supplier take the time to laminate the Oak with only two pieces used to make a more "furniture-ish" looking leg. Anyways...pic galore! Wood... Mortise... Tenon... Saw with Fridge magnet to provide spacing Drawbore... Damn that is beautiful...........Talent, you has it! |
|
|
|
TN, USA
|
[Last Edit: Realtree86]
[#10]
Here is my first bench that I still currently use nothing special.


|
|
|
|
[#11]
Originally Posted By areeves08:
Quig, What type of bench is that? I'm looking for a simple metal design and that fits the bill. Its a metal frame kit from menards with a piece of countertop. The frame is adjustable from 5-8 feet... |
|
|
|
|
[#12]
Originally Posted By Quiganomics:
Its a metal frame kit from menards with a piece of countertop. The frame is adjustable from 5-8 feet... If/when we move thats what my next bench will be |
|
|
|
IN, USA
|
[Last Edit: Doublehelix]
[#13]
duplicate
|
|
|
LA, USA
|
[#14]
Originally Posted By hondacafe:
Thought I'd share my bench build for a future reloading set up. I have most of the tools to reload but have not loaded yet. Bench top is a purchased 10' long by 24" wide Hard Maple butcher block top. The base of the bench is my attempt at my first wood working project. I got stuck on not using fasteners/screws for the base for some reason... So the base is mortise and tenoned and held together by draw-boring. Unbelievable solid...more so than I anticipated. I had another piece of Oak and some brace pieces planned to sturdy it...but found I didn't need them. The base is made of solid Red Oak that I had a local hardwood supplier rip and plane for the project. The legs were purchased 3 1/2" x 3 1/2" laminated Red Oak. I wished I had the hardwood supplier take the time to laminate the Oak with only two pieces used to make a more "furniture-ish" looking leg. Anyways...pic galore! Wood... Mortise... Tenon... Saw with Fridge magnet to provide spacing Drawbore... Hondacafe, that is a beautiful piece of furniture. Mortise and Tenon on your "first woodworking project" is not only ambitious, but was very well executed. Outstanding project! Well Done!! |
|
|
IN, USA
|
[#15]
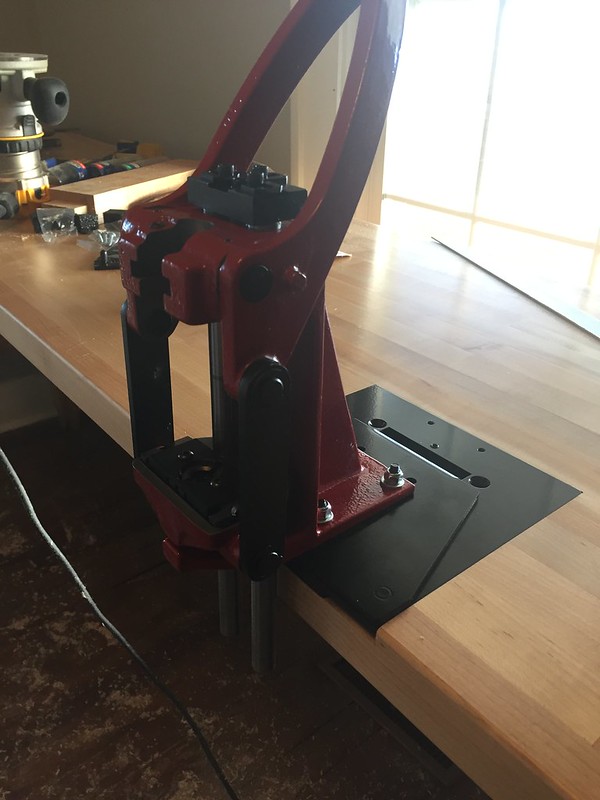
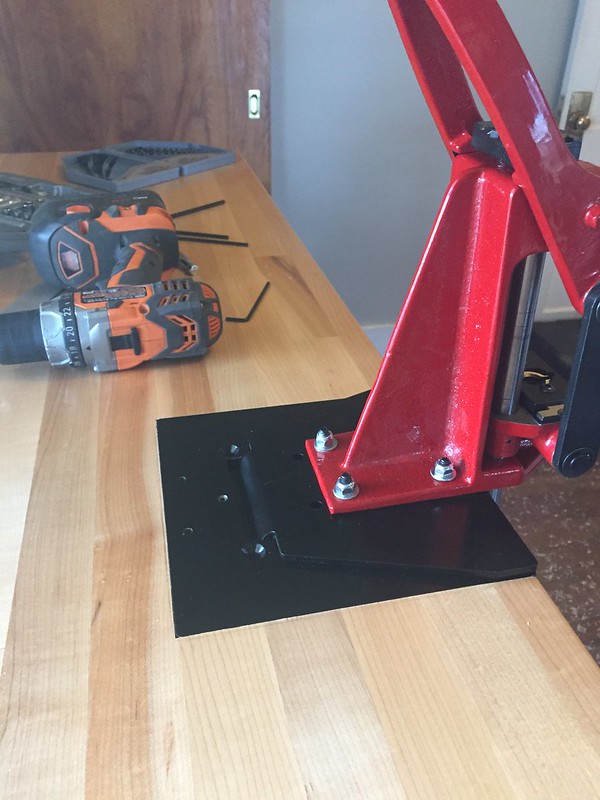
A couple teaser pics for anyone following along as I do the mock up of my Inline mount set flush with the table top.
I didn't like it cantilevered over the edge, so I set it flush with the edge and I'll make some long wing nuts and drill through the wood to secure it. Really like the quality of what I received from Dan so far. Very happy I went this route over T track set in the bench. Next steps after finishing the plate mounting is to start on the backsplash piece for against the wall and then attach the bench to the wall. 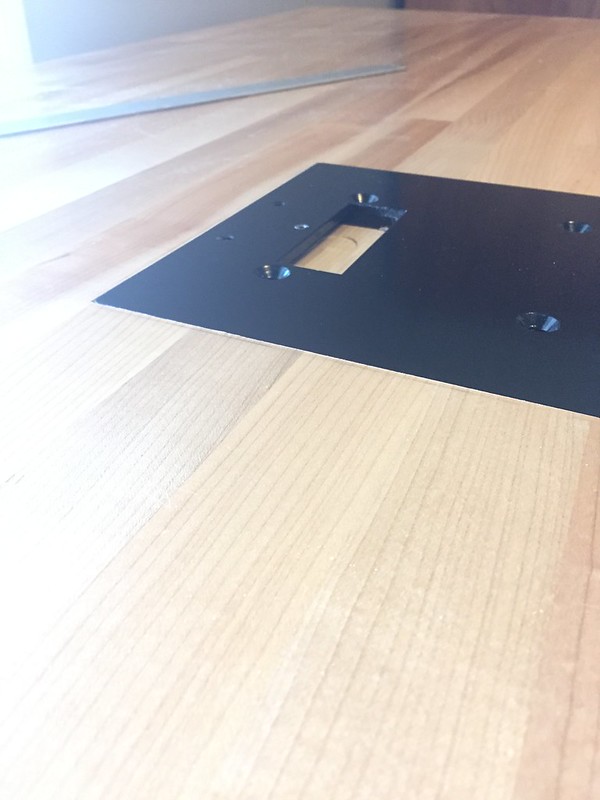
|
|
|
|
[#16]
Originally Posted By hondacafe:
A couple teaser pics for anyone following along as I do the mock up of my Inline mount set flush with the table top. I didn't like it cantilevered over the edge, so I set it flush with the edge and I'll make some long wing nuts and drill through the wood to secure it. Really like the quality of what I received from Dan so far. Very happy I went this route over T track set in the bench. Next steps after finishing the plate mounting is to start on the backsplash piece for against the wall and then attach the bench to the wall. Great Work. |
|
|
|
CT, USA
|
[#17]
Originally Posted By hondacafe:
A couple teaser pics for anyone following along as I do the mock up of my Inline mount set flush with the table top. I didn't like it cantilevered over the edge, so I set it flush with the edge and I'll make some long wing nuts and drill through the wood to secure it. Really like the quality of what I received from Dan so far. Very happy I went this route over T track set in the bench. Next steps after finishing the plate mounting is to start on the backsplash piece for against the wall and then attach the bench to the wall. Beautiful bench. I thought about not having the inline plates hang over the bench. I have toyed with the idea of setting them flush like you did and cutting off the studs and putting an insert into the bench and screwing the plate from the top. |
|
|
PA, USA
|
[#18]
Originally Posted By edgephoto:
Beautiful bench. I thought about not having the inline plates hang over the bench. I have toyed with the idea of setting them flush like you did and cutting off the studs and putting an insert into the bench and screwing the plate from the top. |
|
|
IN, USA
|
[#19]
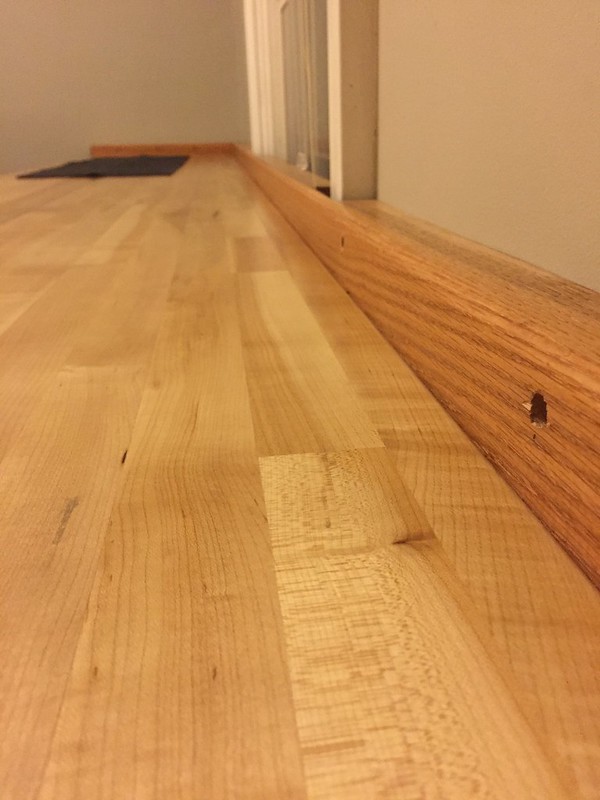
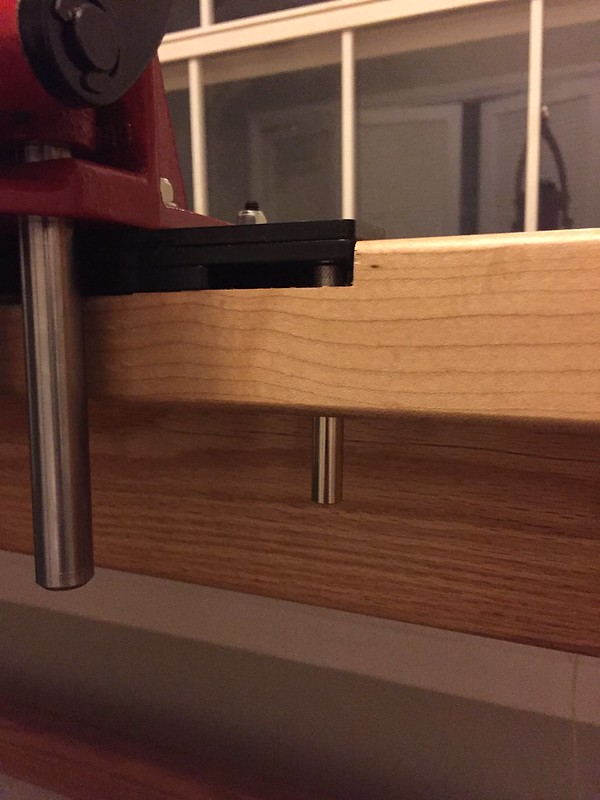
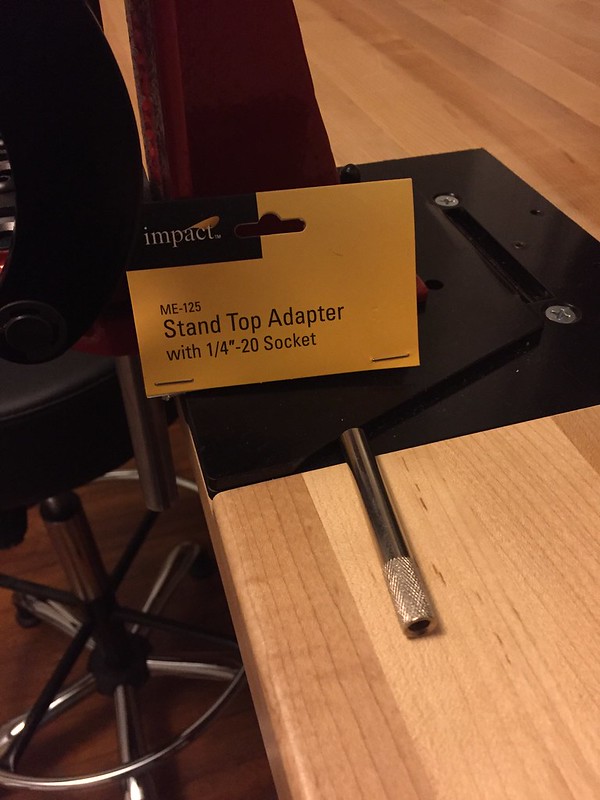
Pretty well finished the bench. Was able to attach the back board. Cut out around my window sill and then fastened the bench to the wall. Finished off with a wipe on polyurethane finish after the danish oil dried.
Just need to get some dowel rod to plug the holes in the backboard. For those interested the top of the bench is at 42" Which at my 5' 10" height puts my forearm, when at a 90deg angle, resting at the top of the bench. So a great height for when standing or in the drafting chair. The bench is 10' long by 24" wide. One of the things I knew I wanted was a large overhang on the front so I could clamp easily. So the front has just over 2" of butcher block past the bench beam. What this later proved to be accidentally beneficial with was the bolt pattern for the Inline mount could be thru bolted and not interfere with the oak beam. Win Win! The sides and back have 1' of overhang. To reach the studs on the inline QD mounting plate I was able to purchase the shown camera mounts. They are solid and threaded on one in. I should be able to adapt them for more leverage to tighten the plate down. They were the best option I could find at the time, on Amazon. https://www.amazon.com/gp/product/B00EHSLMKI/ref=oh_aui_detailpage_o00_s00?ie=UTF8&psc=1&tag=vglnk-c102-20 I appreciate the positive comments! If I can do it anyone can. Next steps are to bring out the rest of the tooling components. Start on organization including bins, shelves and cabinets. Then tackle good lighting. Oh and eventually crank out some ammo ;) 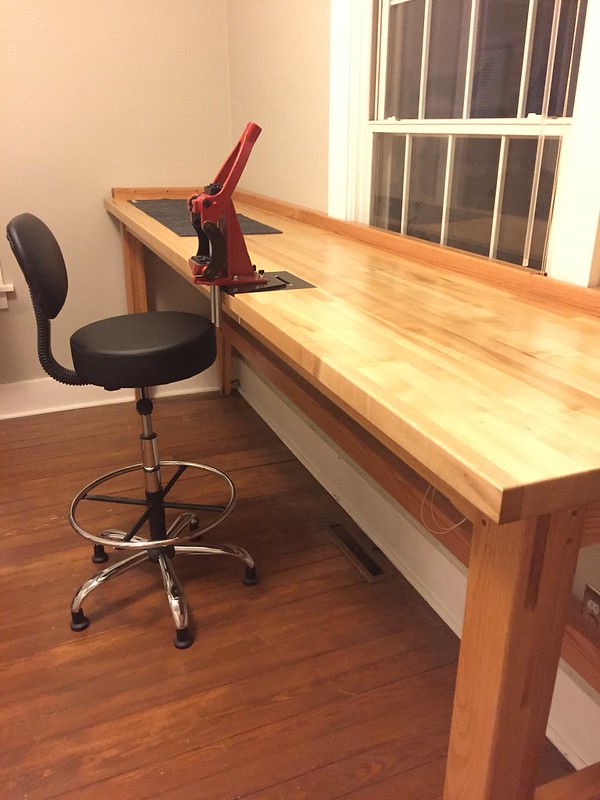
|
|
|
|
[#20]
Originally Posted By hondacafe:
To reach the studs on the inline QD mounting plate I was able to purchase the shown camera mounts. They are solid and threaded on one in. I should be able to adapt them for more leverage to tighten the plate down. They were the best option I could find at the time, on Amazon. https://www.amazon.com/gp/product/B00EHSLMKI/ref=oh_aui_detailpage_o00_s00?ie=UTF8&&tag=vglnk-c102-20;psc=1&tag=vglnk-c102-20 I appreciate the positive comments! If I can do it anyone can. Next steps are to bring out the rest of the tooling components. Start on organization including bins, shelves and cabinets. Then tackle good lighting. Oh and eventually crank out some ammo ;)
So here you just essentially hand tighten the camera mount piece onto the 1/4 stud from the IF QD plate, correct? I will have to try those, beat the coupler idea I think :). |
|
|
|
IN, USA
|
[#21]
At the moment yes. My thoughts are to either affix a knob or drill through the shaft and put a rod in, like on a c clamp.
Originally Posted By 78Staff:
https://c7.staticflickr.com/1/270/32001868382_5f4b1dea6b_c.jpg So here you just essentially hand tighten the camera mount piece onto the 1/4 stud from the IF QD plate, correct? I will have to try those, beat the coupler idea I think :). |
|
|
|
[Last Edit: Quiganomics]
[#22]
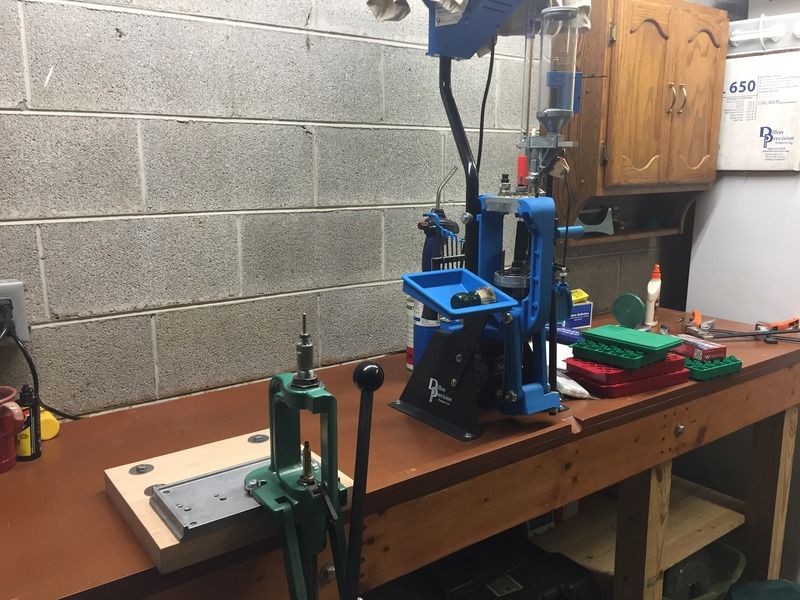
UPDATE: Finally completed my setup. Decided to add another 4' bench for the press, so that the longer 6' section can be dedicated for gunsmithing/cleaning. Here it is:
|
|
|
|
GA, USA
|
[#23]
This was a father daughter project last weekend. I've been working off a small table for years. Now that my 12 yr old daughter has gotten heavy into shooting and now owns here own Glock 17, M&P 22 and a Ruger 10/22. I told her she had to learn to take care of them also. So we decided as a duo lets build a bench large enough for both of us and finally a place to mount all the reloading equipment I have been gathering up. To my advantage I have a 40x60 shop so we had plenty of space
Specs 4x8 table 40" tall 4x4 legs 2x4 frame, braced every 12" 3/4 birch plywood top 20" lower shelf all covered in indoor/outdoor carpet Has its own dedicated vise and tool box that was found on the side of the road a couple years back. 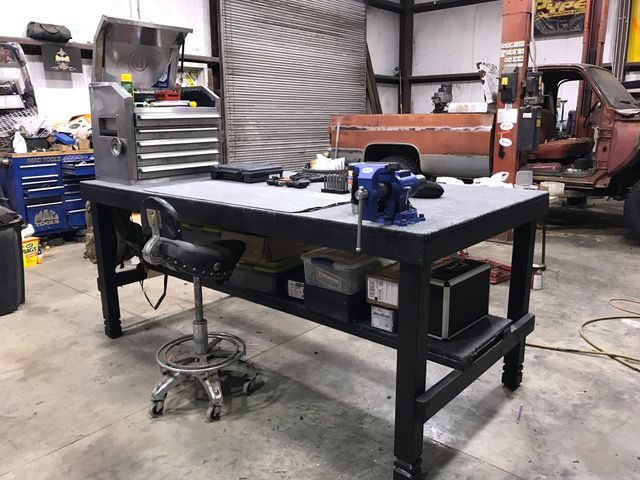
|
|
|
|
[#24]
Originally Posted By boilermaker1:
This was a father daughter project last weekend. I've been working off a small table for years. Now that my 12 yr old daughter has gotten heavy into shooting and now owns here own Glock 17, M&P 22 and a Ruger 10/22. I told her she had to learn to take care of them also. So we decided as a duo lets build a bench large enough for both of us and finally a place to mount all the reloading equipment I have been gathering up. To my advantage I have a 40x60 shop so we had plenty of space Specs 4x8 table 40" tall 4x4 legs 2x4 frame, braced every 12" 3/4 birch plywood top 20" lower shelf all covered in indoor/outdoor carpet Has its own dedicated vise and tool box that was found on the side of the road a couple years back. http://i120.photobucket.com/albums/o169/fletcherscustoms/IMG_2815.jpg http://i120.photobucket.com/albums/o169/fletcherscustoms/IMG_2816.jpg Beautiful bench and shop. Great to her your daughter's enjoying her time. |
|
|
|
|
[#26]
Originally Posted By hondacafe:
A couple teaser pics for anyone following along as I do the mock up of my Inline mount set flush with the table top. I didn't like it cantilevered over the edge, so I set it flush with the edge and I'll make some long wing nuts and drill through the wood to secure it. Really like the quality of what I received from Dan so far. Very happy I went this route over T track set in the bench. Next steps after finishing the plate mounting is to start on the backsplash piece for against the wall and then attach the bench to the wall. Not quite as clean as Hondacafe's install, but got my IF Plate installed, also followed HC's example and flush mounted it as well. Really looking forward to this, opens up a lot of room on the bench not having the IF mount there. 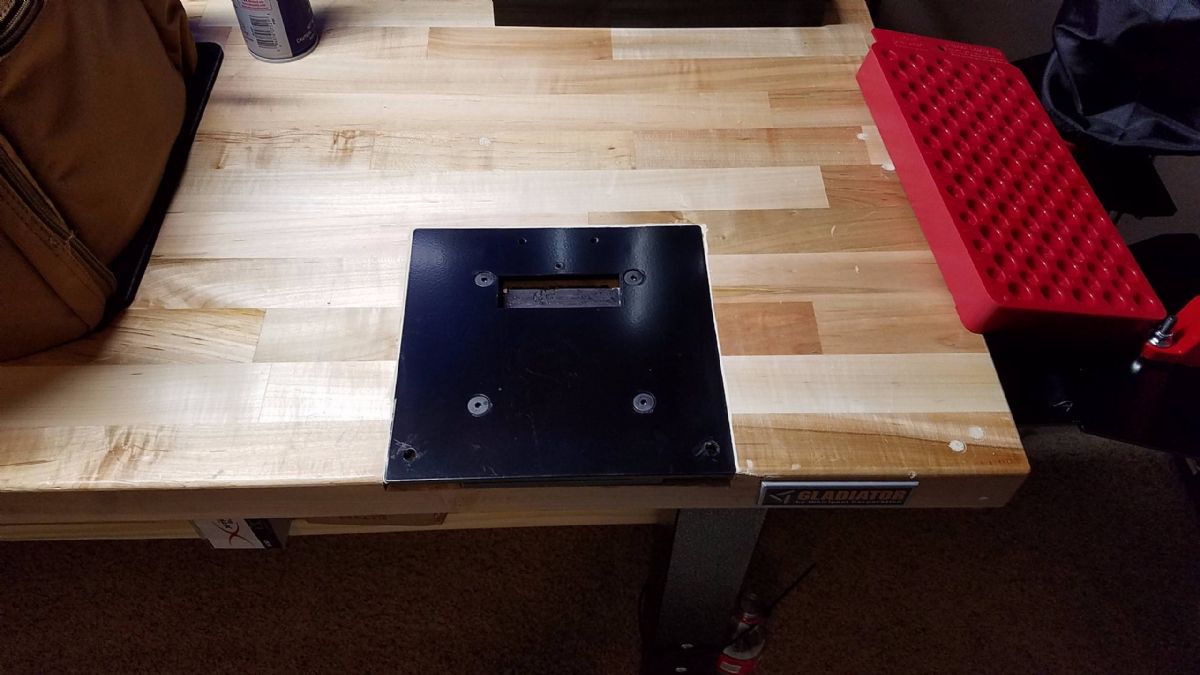
|
|
|
|
MI, USA
|
[Last Edit: 2016ford]
[#27]

My reloading / gun building room. Just built bench on the right side last weekend.. |
|
|
|
[#28]
Well done.
|
|
|
|
|
[#29]
Originally Posted By Gunowner99:
Well done. The biggest thing I miss about living in Michigan is a basement. No such thing here in San Antonio...it'd require blasting to just get started with the excavation. |
|
|
|
|
[Last Edit: 78Staff]
[#30]
Added a fourth Wall Control metal pegboard/slot panel to free up some room on the wall panels, re-jiggered the shelving and organized things a bit better... Need cleanup the power cords and such had to move them around getting the panel installed.
1050 on the left, 550 on the right in an Inline Flush mounted QD plate which allows me to quickly remove it and put the Coax Press, Lee C press for bullet pulling, etc, RCBS trimmer, vice, etc in it's place...or nothing, if I want the workbench clear. 
more pics 
Plate setup also showing a few extra mounted... 
|
|
|
|
|
[#31]
|
|
|
|
|
[#32]
Originally Posted By jmb_nova:
Work in progress but the bench itself is pretty much done... https://www.AR15.Com/media/mediaFiles/182849/wip-139217.JPG Wow. Amazing. |
|
|
|
|
[#33]
Originally Posted By jmb_nova:
Work in progress but the bench itself is pretty much done... https://www.AR15.Com/media/mediaFiles/182849/wip-139217.JPG Wow. Amazing. |
|
|
|
TX, USA
|
[#35]
Dirty south design

Have a turret now but still use a spool |
|
|
|
[#36]

|
|
|
|
|
[#37]
Humbly, I offer: I made this today.

|
|
|
|
|
[#38]
Originally Posted By AR45fan:
Humbly, I offer: I made this today. http://i461.photobucket.com/albums/qq331/AR45fan/27E047E4-C58D-4A5F-BBC1-3683EEBFF932.jpg |
|
|
|
|
[Last Edit: Detn8r-Red2]
[#39]
Updating to a dedicated bench. Still acquiring more stuff, but I went from this:
To this: |
|
|
|
FL, USA
|
[#40]
Originally Posted By ZacSquatch:
Since we moved into the new house, I had been using a reinforced closet as a holding area and no room to work on guns. (Garage is still a disaster, so that's next) Before the wife left for Iraq, she approved my plan to close in the back of the garage and cut a doorway into the reinforced closet. As an added bonus, it gets the water heater into a heated portion of the house. Well it's almost done after some 2x4's, rebar, insulation and drywall. Before http://i55.photobucket.com/albums/g155/zac_squatch/E265863A-5843-46F1-A71F-B1AE4949BDA8_zpsooktwsjc.jpg After http://i55.photobucket.com/albums/g155/zac_squatch/E56A7DE6-EF6D-4453-9398-82388BAD69BB_zpsymla0qd7.jpg http://i55.photobucket.com/albums/g155/zac_squatch/5FDC7F6D-384D-401E-9B27-68AA048D0A6F_zpspawtmdsf.jpg http://i55.photobucket.com/albums/g155/zac_squatch/634E9933-2FDF-4D89-800C-AF2DF59D8094_zpsmejgw91d.jpg http://i55.photobucket.com/albums/g155/zac_squatch/464A29C3-3A97-4E9B-A1A5-4A83B46AD369_zpsqjici0s3.jpg |
|
|
|
[Last Edit: AR45fan]
[#41]
Minor update on my portable reloading press; I was a little worried that the fact that the top leans back at an angle might mess with the gravity feed of the primer feeder, but I primed and flared 700 .45 cases today and it worked flawlessly... and I was able to work on my tan. So, win-win.
Don't worry, I'll do the powder drop indoors. 
|
|
|
|
|
[#42]
Originally Posted By AR45fan:
Minor update on my portable reloading press; I was a little worried that the fact that the top leans back at an angle might mess with the gravity feed of the primer feeder, but I primed and flared 700 .45 cases today and it worked flawlessly... and I was able to work on my tan. So, win-win. Don't worry, I'll do the powder drop indoors. http://i461.photobucket.com/albums/qq331/AR45fan/48188127-80E7-4F10-A7AB-1009FE0C14F9.jpg Originally Posted By AR45fan:
Minor update on my portable reloading press; I was a little worried that the fact that the top leans back at an angle might mess with the gravity feed of the primer feeder, but I primed and flared 700 .45 cases today and it worked flawlessly... and I was able to work on my tan. So, win-win. Don't worry, I'll do the powder drop indoors. http://i461.photobucket.com/albums/qq331/AR45fan/48188127-80E7-4F10-A7AB-1009FE0C14F9.jpg Originally Posted By hondacafe:
Thought I'd share my bench build for a future reloading set up. I have most of the tools to reload but have not loaded yet. 
|
|
|
|
|
[Last Edit: AR45fan]
[#43]
Originally Posted By ontime1969:
What a cool idea. Mobile is good, I would love to work on reloading on my back patio or even living room. I may have to copy your rig there. Is there anything you would do different now if you could? Thanks for sharing. |
|
|
|
IN, USA
|
[Last Edit: smitters]
[#44]
I can officially join the reloading bench gang!!!

|
|
|
|
[#45]
Here is a portable reloading station I threw together in about an hour. Just more proof you don't need a ton of room to get started. Made it up on the fly and used up some scrap plywood I had laying around. Press and powder measure are held down by T-nuts. I used a fostner bit to countersink the ones for the powder measure.
If someone wants "plans" I can draw them up pretty easily. It may seem a bit cramped but it actually works out quite nicely. Ill eventually get around to filling, sanding, and painting it. I also want to refinish the press and powder measure stand since they had a galvanic reaction while in storage and the powder coat is peeling off the aluminum. |
|
|
|
NY, USA
|
[#46]
Just moved into a new house, and I've had my eye on this space for a reloading area since we first saw it. It's a large closet off of my home office.
More pics to follow as I get some more things done. Today I got the bench frame built. I'm planning to top it with two layers of 3/4" plywood, wrap the edges with something, maybe poplar, and cover the top with a sheet of formica. That'll do till I have some free time to build the shelves and drawers that I'm thinking on. 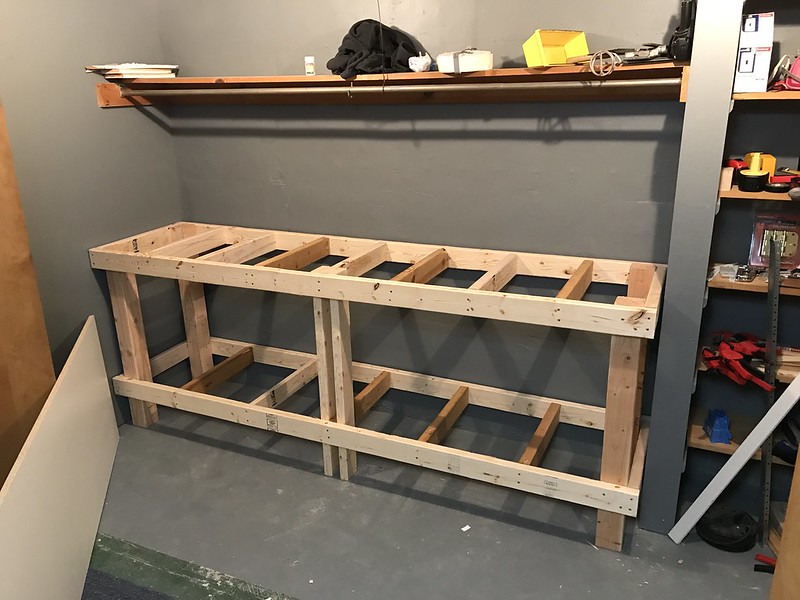
|
|
|
|
[#47]
Originally Posted By chrisben:
Just moved into a new house, and I've had my eye on this space for a reloading area since we first saw it. It's a large closet off of my home office. More pics to follow as I get some more things done. Today I got the bench frame built. I'm planning to top it with two layers of 3/4" plywood, wrap the edges with something, maybe poplar, and cover the top with a sheet of formica. That'll do till I have some free time to build the shelves and drawers that I'm thinking on. https://c1.staticflickr.com/5/4160/34135613740_742e72ccc5_c.jpg |
|
|
|
|
[#48]
Finally got my bench built out in the garage and I'm starting to get the press put together and set up (Lock N Load AP):


|
|
|
|
NY, USA
|
[Last Edit: chrisben]
[#49]
Today I built the top for my bench.
For those interested in the process... Bought a 4x8 sheet of 3/4" plywood from home depot, and in the store, had them cut (rip) it the long way at 24" You loose a little bit the thickness of the blade but you end up with two nearly identical pieces. ( I used the longer piece for the top of the bench surface, and aligned the extra length to the back of the bench, so I won't even have to deal with it.) Then I picked which side I Wanted for the top of the bench, and stacked the two pieces together. I flipped the boards over, top down, and drew lines in a grid pattern on what's going to be the bottom of the bench, every 4 inches. Then I drilled holes with a drill + countersink bit where each of the lines intersected. Flipped up the board with the countersunk holes in it, and poured most of a bottle of wood glue on the board below. Spread the glue out with a scrap peice of thin wood, so it's even across the surface. Then I put the other board back doen, so everything was sandwiched together, and put a bunch of book boxes on top of the board. (The weight helps to keep the boards together and flat agains the bench frame as you attach the screws. It's pretty much going to keep whatever shape you give it here by the time it's screwed and glued, so got to make it level) Now I put a 1 1/4" drywall screw in each of the holes that I had predrilled thru the top board and countersunk. (this pre-drilled hole allows the screw to better suck the boards together.) once all the screws were in, I flipped the whole thing back up, and put it in place, top side up on the bench frame. Now I placed the weights (boxes of books) back on the top surface of the bench, probably unneeded by now with all those screws, but I had to put them somewhere, and I didn't feel like unpacking them into the bookshelf yet. Here's a photo of the underside of the top, with the grid and screws. 
Here's a photo of the top sitting in place, with glue drying, ready to be attached. 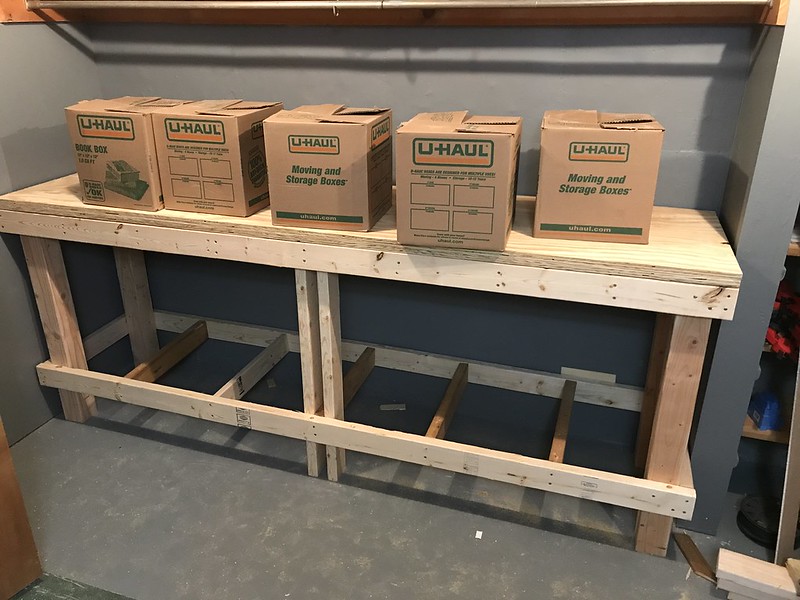
Next steps will be, Patching and Sanding the benchtop smooth (It'll be a little bit till I get around to laminating it) Attaching the benchtop ( Timming the board for the bottom shelf (I got a piece of 3/4" melamine coated board for this, I just need to cut out the areas for the legs.) Screwing it to the wall with Tapcon screws or redhead concrete anchors or something. |
|
|
AL, USA
|
[#50]
I am building mine. I took the first layer and screwed it to the bench work, then came behind with glue and screws from the bottom to hold the top board to the bottom with weights stacked on it. Real strong and used 3 inch screws to tie the bottom board to the 2x6s... Zero flex.
Dennis Pictures soon. |
|
|
 Win a FREE Membership!
Sign up for the ARFCOM weekly newsletter and be entered to win a free ARFCOM membership. One new winner* is announced every week!
You will receive an email every Friday morning featuring the latest chatter from the hottest topics, breaking news surrounding legislation, as well as exclusive deals only available to ARFCOM email subscribers.

AR15.COM is the world's largest firearm community and is a gathering place for firearm enthusiasts of all types.
From hunters and military members, to competition shooters and general firearm enthusiasts, we welcome anyone who values and respects the way of the firearm.

Subscribe to our monthly Newsletter to receive firearm news, product discounts from your favorite Industry Partners, and more.
Copyright © 1996-2024 AR15.COM LLC. All Rights Reserved.
Any use of this content without express written consent is prohibited.
AR15.Com reserves the right to overwrite or replace any affiliate, commercial, or monetizable links, posted by users, with our own.