


Do it yourself Kydex.... (Page 1 of 83)

Posted: 9/26/2009 10:55:37 PM EDT
[Last Edit: VA-gunnut][Edited]
|
I thought I would try my hand at making a holster for my little 1911. The cost of some of the 'good' holsters on the market is pretty steep. I was able to buy everything I need to make the holster for about $30 give or take. I only used a 12x7.5 rectangle of material out of the 12x24 sheet I bought. I did buy the clips from Comp-tac. Nothing like learning another skill and saving a ton of money. I plan on making more widgets out of the leftovers. 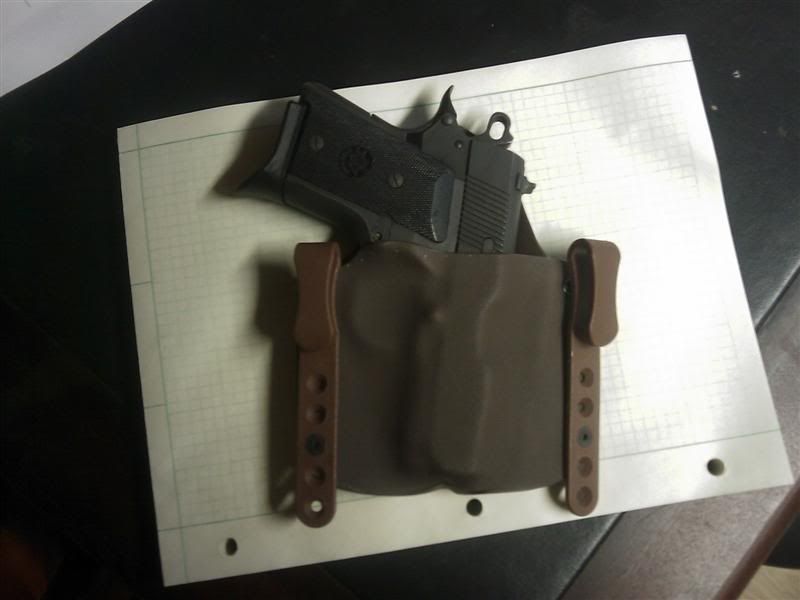 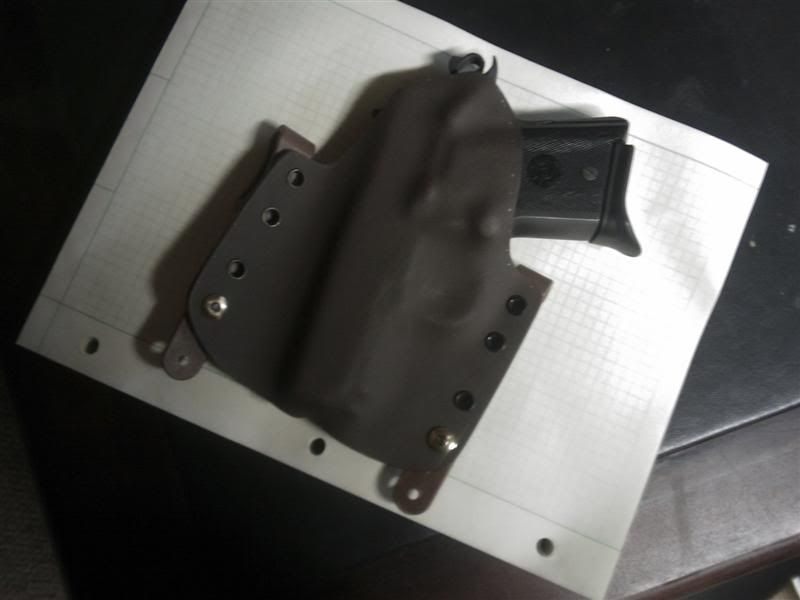  Tips and tricks. -You can build a press from a walmart foam mat. I had a used one in the closet. I cut 4-12x12 pieces out of the mat. I used two plywood pieces 12x12 for the top and the bottom. I used four 20" long 2x4's and some chute cord to make a clamp. I stood on the press for pressure and then tied it down to 'rest' for about 10 minutes to mold the Kydex. -I used the oven to heat up the Kydex for molding. The best temp seemed to be about 275 degrees. It takes about 10 minutes to heat the stuff up. I used an upside down teflon cookie sheet to hold the kydex. It didn't stick at all and the by using the pan upside down I was able to slide the kydex off very easily into the press while hot. - You can adjust where you want the middle of the holster by adding foam to the top and bottom. I had 2 thicknesses of foam on each side to make the 'seam' in the middle. -Once you get the holster formed you can drill the eye holes with a pilot drill then to size. Once you get the holes drilled, 1/4" in my case, you can use a short 1/4" bolts and wing nuts to hold everything together while you cut and sand to a final shape. -I used 60 grit sandpaper for rough shaping the edges after I cut the shape pretty close with the tin snips. Then I used 100 grit followed by a red scothbrite pad for the final edge prep. -Prep the halves separately. Its much easier to get in some areas with the halves apart. You can always check where you are at by re-assembling with the wing nut/bolts. -You can use boiling water to heat up areas of the plastic if you need to. I had to do this to form the bends in the mounting 'ears' of the holster. These bends made the holster tuck a lot closer into my body. I will take more pictures on the next projects. I didn't expect this to turn out this good on the first try! Its always good to learn a new skill! Anyone else have any Kydex tips, projects, or ideas they want to share? Advertising Warning: This is a DIY Kydex picture thread. This is not a venue for you to advertise your wares. This includes pictures with watermarks, logos, etc... Any advertising may result in the loss of your posting privileges. |


|
Originally Posted By Metcalf: I bought everything from Knifekits.com They shipped very fast. I had everything in less than a week. Fair prices I thought. +1 For knifekits.com. I've ordered several sheath kits from them and they have great prices and shipping times. |
Stop future AWBs!
http://www.jobrelatedstuff.com/forums/topic.html?b=1&f=5&t=784480
http://www.jobrelatedstuff.com/forums/topic.html?b=1&f=5&t=784480


Member of the dreaded fuzzy bunny militia
Joined:
Apr 2006
Posts:
560
EE: 100% (86)
 TX, USA
| Great work Metcalf! Please post picture of the press and walk us through the actual "how-to." I have a .45 with an aftermarket rail and TLR1 that I need a good holster for. This would be just the ticket. Thank you, Mark |
Hunting and fishing are sports. A sport is where something stands a better than even chance of dying. Everything else is just a game.

Chances are, I am who pissed in their cheerios...
Joined:
Mar 2007
Posts:
2392
EE: 100% (4)
VA, USA
|
^^^^^
crazy timing is correct... i just recieved 1 x Rivets - (Black) - #8-8 (1/4) - (For .080 KYDEX™/Concealex) (KYSR8-100) = $12.00 and 4x KYDEX™ Sheet - (.08 Olive Drab) (KYSHOD08) = $24.96 i ordered from knife kits dot com in the mail this morning(saturday)... planning on making a sheath for this beast i made for a friend of mine a while back... 
while i have it back in my possession from him, i think i may try to grind in an edge on the reverse side. this machete will end up having a kukri /bolo style blade on one side and a short extra stout scimatar design on the other side... i may try to add a small pouch for a sharpener and a few small survival supplies affixed to the sheath... K. |
My conservative commonwealth's 232 year old state seal is a direct COC violation. Our founding fathers approved of images of bared breasts...
WWW.ASHBYARMS.COM
WWW.ASHBYARMS.COM
|
This next week I will make a holster for my camp knife and document everything.....
Other tips- -If the molding doesn't go to plan or you don't get enough definition you can 'remold' the kydex by heating it up in the oven again. It will go back to perfectly flat and you can start over. You can also save larger scraps and remold them into new projects. -You need a pretty good amount of pressure to mold a clean shape. I am about 180lbs and that was just enough. -Don't use a sharpie to mark on the kydex. That stuff doesn't come off! :) Maybe white out or something? -Go easy with the manual rivet tool. You don't need a lot of force. Light hits with a ball peen hammer will set the rivet without splitting it. -Put the pre-formed side of the rivet on the side that you will see. This will make a better final product. -If you wear some of the 'black' off the rivets a black sharpie can fix that. I'll have some pics of my press up in the next day or two. Something as simple as standing on two 12x12, 3/4" thick plywood pieces with some 12x12 foam camping mat squares will work just fine. You just have to stand in the same place for 10 minutes or so :) I plan on modifying mine with some eye bolts and wing nuts to make it more adjustable with more constant tension. Best of luck guys. Have fun with it. |


|
Good timing on this thread. I have the stuff I need for making Kydex stuff, just need the time to do it now.
Question, do you think that the clamp on a Black & Decker Workmate table would provide enough pressure to mold the Kydex once heated? For the foam I have 1" foam I got from KnifeKits.com backed up by 3/4" plywood backers. I was thinking I could drop that halfway (for even pressure) into the Workmate table jaws and clamp that way... |
Let's Go Red Wings!
Beautifying the world one logo at a time since 1993.
Attention "Republicans": NO MORE COMPROMISES.
Soli Deo Gloria
Beautifying the world one logo at a time since 1993.
Attention "Republicans": NO MORE COMPROMISES.
Soli Deo Gloria

|
If the that table doesn't provide enough force you can always reheat the kydex and just stand on the boards for 10 minutes....as long as you weigh about 180lbs :)
That's what I did the first time. Note: if your making a 'folded' part I don't know if you could reheat it. |

|
Thanks for the Wingnut tip, I gotta try that next time!!
Other tips that are useful: If using a manual rivet set, i.e. punch and anvil type, try using a large C clamp or bench vise to provide the pressure to get a much more uniform roll on the rivet. A little bit of grease on the rivet punch helps too. I've got the arbor press with the dies now, but did it this way for many sheaths. If you decide to go that route, just buy the arbor press from harbor freight and you can mod the press yourself with a drill press. When drilling for rivets, if you have a 1/4" Forstner bit, it works much better than a standard bit. Once it's all put together, use a bench grinder with a dry cloth buffing wheel to finish the edges. It will melt the edges slightly and bond them together. Also good for rounding corners. Just do it lightly so you don't eat too much plastic away. A heat gun or hair dryer on high will also help soften the kydex if you need to make small adjustments. Make sure your work area is CLEAN. Nothing is worse than picking up a piece of debris in your hot kydex, molding it around a blade, and scratching the blade/gun when you pull it out. Along with that, clean your kydex up before assembly, buffing and cutting it often produces lots of nasty little plastic bits. |
|
Originally Posted By Metcalf:
If the that table doesn't provide enough force you can always reheat the kydex and just stand on the boards for 10 minutes....as long as you weigh about 180lbs :) That's what I did the first time. Note: if your making a 'folded' part I don't know if you could reheat it. I haven't weighed 180lbs since I was about 14 years old.  I'd be afraid of breaking a gun if I stood on it! I'd be afraid of breaking a gun if I stood on it!
|
Let's Go Red Wings!
Beautifying the world one logo at a time since 1993.
Attention "Republicans": NO MORE COMPROMISES.
Soli Deo Gloria
Beautifying the world one logo at a time since 1993.
Attention "Republicans": NO MORE COMPROMISES.
Soli Deo Gloria

|
Originally Posted By Metcalf:
If the that table doesn't provide enough force you can always reheat the kydex and just stand on the boards for 10 minutes....as long as you weigh about 180lbs :) That's what I did the first time. Note: if your making a 'folded' part I don't know if you could reheat it. After coming across this topic, I did some youtube research. One guy reheated a folded kydex sheath 3 times no problem. Im planning on making a folded XD9 holster over the weekend. I am planning to use 2x8 as the press (cuz I don't have any 3/4 ply right now), and a couple of clamps. I weigh a lot, I'm afraid if i stand on it I might break the frame. I will let yall know how it comes out. Anyone see any problems with this? (I'm not referring to problems you may have with my weight!) |
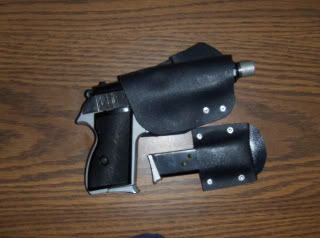

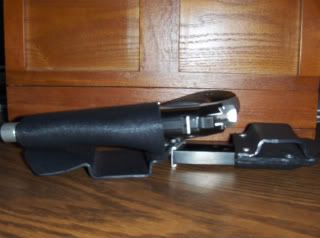
Member of the dreaded fuzzy bunny militia
Joined:
Apr 2006
Posts:
566
EE: 100% (86)
TX, USA
|
So I tried it, with the tips given above but with the twist of only using one piece, and wrapping it around the gun.
It worked perfectly first try. This stuff is amazing. I will post some pics later. For now, just a few more tips. I ran a 1/4 dowell that I flattened the bottom of between the front and rear sight to create a channel for the front sight to follow on its way out. I also put a flat square piece of material on the gun on the side where my belt clip is. This keeps the bolts from rubbing against the gun when its in the holster, and gives a stable surface to mount the clip to. DO NOT use gloves with any texture. Mine had a sort of grippy surface, and the hot kydex ended up taking a little bit of this texture. Dremmel tool with a course sanding bit works well to remove material, but keep it at a very low speed. You can also score it a few times with a utility knife, then break it off. I used a silver sharpie to draw where I wanted to cut, and to dremmel, and washed it off later with a cotton ball and rubbing alcohol. I used a kydex with a smooth finish though, and i don't know how well this will work if yours has a texture. |
This is the stuff i used as a press. I laid the hot kydex on the curved piece of foam (it wasn't curved before), then I laid the gun in it and wrapped it around. Then i laid that on the foam covered board on the bottom, and put a small square piece of foam under the trigger area, then a double thickness of foam on top of the trigger area. Then I put the top board with foam on it over the whole thing and pushed down. My Wife then clamped the back of the whole press, and I moved my grip to the long board that is attached to the top of the press to get a little more leverage. My wife then clamped the rest of it to the table.

This is the front of the holster, you can see the area where my gloves left a print in the kydex 
This is the back. I used a Bladetech type belt clip. 
And of course finished product. 
One final note, my wife just came in to show me how much melty black kydex came off of her good cookie sheet. Don't make this mistake. |
|
Ok, I'm getting long winded, but I forgot to mention the tension screw below the trigger guard. It is just an extra screw set for attaching the belt clip to the holster, with a rubber washer behind it.
And since the XD9 is pictured, thought I would mention the front sight. Whatever the factory put in to make the white dot came out once while I was at the range. After considering night sights, gold dots, and numerous other options, I chose a single drop of white fingernail polish from Walmart. |

|
I've made several kydex holsters and would be happy to help anyone who is interested in starting.
OP, where did you get your hardware? I hate chicago screws but that is about all I can find. Thanks |
".....it's only on the brink that people find the will to change. Only at the precipice do we evolve. This is our moment."

Member of the dreaded fuzzy bunny militia
Joined:
Apr 2006
Posts:
569
EE: 100% (86)
TX, USA

|
If possible a list of all supplies and tools you used would be helpful.
Like the special rivets, rivet tool and a drawing or pic of your homemade press. You also mention some sort of matting which you found at Wally World. Any more info on that? What dept did you find it in? I'm Very interested in doing some of this this winter. Thanks! |
Authentic frontier gibberish!

He who needs to stop buying toys and simplify!
Joined:
Feb 2006
Posts:
5287
EE: 100% (10)
MO, USA
|
Here's another thread I bookmarked back when I was looking in to doing some kydex work. It shows his homemade press as well. I spoke with Mark Craighead of Crossbreed holsters a couple times (nice guy, great holsters) and he said that the most imporant part of the press is using good foam, like the foam knifekits.com sells. He said most any foam will work, but if you use the real deal, the results will be better. YMMV.
Kydex Holster Tutorial |
"You wanna see a gun show, I'll lift up my shirt." -Ted Nugent NRA Annual Meeting 2007
NRA Life Member
NRA Life Member
|
Originally Posted By all4freedom:
Here's another thread I bookmarked back when I was looking in to doing some kydex work. It shows his homemade press as well. I spoke with Mark Craighead of Crossbreed holsters a couple times (nice guy, great holsters) and he said that the most imporant part of the press is using good foam, like the foam knifekits.com sells. He said most any foam will work, but if you use the real deal, the results will be better. YMMV. Kydex Holster Tutorial Yeah good call, my foam sucked. |
He who needs to stop buying toys and simplify!
Joined:
Feb 2006
Posts:
5288
EE: 100% (10)
MO, USA
For those interested in knife sheaths..... 
Kydex Sheath Making |
"You wanna see a gun show, I'll lift up my shirt." -Ted Nugent NRA Annual Meeting 2007
NRA Life Member
NRA Life Member
|
I figured I would throw my .02 in for anyone that wants to listen. I've made several sheaths out of kydex and it's pretty easy to work with. I do offer the following suggestions, however.
Use a toaster oven (if possible) to evenly heat the kydex,It works better than a heat gun. Heat guns are good for fine tuning the part when you are done with the overall mold. Also, heat the kydex to no more than about 275 deg. Once kydex gets to 300+ it starts releasing some fumes you don't need to be breathing. Remember that the kydex is forming an exact fit of the item. If you want any chance of being able to remove the item from the sheath you need to think about how the item will pull up out of the sheath and what areas on the item that is being formed need to covered prior to forming. If you are doing a knife - place 2 or 3 layers of blue painters tape over the blade and trim to fit exactly. The tape makes the formed kydex a tad bigger than the blade which aids in releasing. Also, use pieces of kydex much larger than you think you need when you are first starting. It is easier to trim some away than it is to keep re-heating and molding. When I first started playing with kydex I used my truck and a jack stand as a "redneck" press. I have since converted a regular bench top vice to stand vertical. Now all I need to do is place the piece on the bottom part of the vice and screw it down - works great and was much cheaper than a "press" since I got the vise at a garage sale for $5. Here are some pics of when I first started and a few sheaths I made. I don't have any of the recent stuff or my converted vice - I'll try to get some of those up later. 
homemade "redneck" press 
first knife I formed (Swamp Rat Knife Works HRLM) 
first sheath - I've since ordered and use kydex rivets instead of chicago screws 
A small pocket sheath I made to carry when I go hunting - flashlight and SAK farmer ETA - I FORGOT TO PASS ON A TIP I LEARNED WHEN I FIRST GOT STARTED - GO TO THE FOLLOWING LINK AND REQUEST A SAMPLE OF KYDEX IN WHATEVER THICKNESS AND COLOR YOU WANT. THEY WILL SEND YOU A 12X12 SHEET FOR FREE. http://www.kleerdex.com/samples.aspx |
|
Originally Posted By bmw20:
GO TO THE FOLLOWING LINK AND REQUEST A SAMPLE OF KYDEX IN WHATEVER THICKNESS AND COLOR YOU WANT. THEY WILL SEND YOU A 12X12 SHEET FOR FREE. http://www.kleerdex.com/samples.aspx Damn, there are a lot of choices ... how do I know what would be good for a holster? or to just play with? |
|
Originally Posted By Metcalf:
I thought I would try my hand at making a holster for my little 1911. The cost of some of the 'good' holsters on the market is pretty steep. I was able to buy everything I need to make the holster for about $30 give or take. I only used a 12x7.5 rectangle of material out of the 12x24 sheet I bought. I did buy the clips from Comp-tac. There are some pretty decent kydex holsters available in the $30 range. OTOH, a new hobby and skill is a welcome thing. |
|
Big think w/ Kydex - DON'T LET IT SMOKE! If you get it too hot it will give off DEADLY vapors. Right around 275 is all you should need. You would probably be wise to start low and heat up until its pliable enough. That said, it is fun and you can make some really nice stuff with practice; not to mention all the money saved.
Have fun and be safe.... |
|
I think you guys got the hang of it. I made a knife holster on Thursday night. I still need to finish the belt clips and then I will post some pics. I made the sheath so it can be very ambidextrous with a bolt on belt clip system that will let you have a horizontal or vertical knife position and/or right or left handed. Fun experiment.
More tips and tricks... -Only use teflon coated cookie sheets. Use the underside so its not in the 'food prep' area to keep the S.O. happy -250 degrees works just fine for forming kydex. Just give it a little longer soak in the oven instead of more temp. -Use a glove when handling 250 degree kydex. -By NOT using foam on one side of the press you can mold the kydex over the top of whatever and create a flat surface on one side. -Pilot drill the rivet holes with a small bit...then finish them out with a 1/4" bit ( for 1/4" rivets ) -You can remold the kydex very easy. I did this sheath three times before I liked it. -Thin kydex will work better on most things. .080 is really thick in my mind. Next time I will go to .060 or thinner. The stuff is really strong so don't worry about it. -Don't get obsessed with high quality foam. The camping mat stuff works fine. It gives enough definition for sure. With thinner kydex you will get even more! Be careful not to get too tight a fit. -Boiling water works well for adjusting fit. Just hold the item in the boiling water for a few minutes and rework with gloves. I had to do this alot to get the knife fit right. Note: I have been wearing my kydex holster every day for a few weeks now. Its VERY comfortable, by far the best holster I have had so far. Conceals very well. I know that there is not a store bought holster for $30 that will equal it. I already have plans for another holster that will be even better. The next one will be a wrap around with one belt clip on the forward fold. This should help the holster be even tighter to the body since the belt will be able to loop around the front of the holster. I saw a custom leather holster like this one...so I am modifying the idea. |
|
Here's an overview of Thermoforming from the Kydex website. Hope this helps.
http://www.kydex.com/briefs/116.pdf Guide to Thermoforming: http://www.kleerdex.com/methods/thermoforming |
|
Originally Posted By leatherman84:
Inquiring minds would like to know what the ideal samples are. Sorry for the late reply. They have way more types of kydex now than when I requested my sample - I'm not sure what would be the best. When I requested my sample I typed in the "notes" field that I was interested in kydex for sheath making and told them the thickness and color (.093 in black). I don't want to steer anyone wrong - I really don't know what would be best out of all the different types they currently have. I'm sure if you left them a note they will send what you are looking for. |
Member of the dreaded fuzzy bunny militia
Joined:
Apr 2006
Posts:
571
EE: 100% (86)
TX, USA
|
I have done some of this out of utility. I will just mention what I noticed, as you can see the general process of heat, fold, rivet, already.
The carbon fiber looking stuff is nicer to work with as far as folding, but shows prints and imperfections more. For me it also didn't reheat as well. Be careful using clips or loops out of Kydex if you don't rivet them down. If you leave them open and you catch the sheath on something, they can bend so far they break. If you want, use leather rivets to hold the kydex together. If you don't have the sleeping pad foam, use a towel and wear gloves. Heat the Kydex up, then just form it with gloves on the counter, and when you get it about right, throw a folded towel over it and put your weight on it. You can use a lighter to soften areas that are too tight a fit, but it is easy to make an ugly shiny spot. Tape a pencil around the barrel between the sights before starting. If you screw up, don't keep messing with it...throw it back in the oven for a minute or less and try again. The hotter it is, the more definition you can get, but it has to be held in position longer. You don't have to have every detail showing for a nice holster, and it can be bad if it makes it too hard to remove the gun. Make sure of your pattern. Not only do you have to get the right hand, ideally the grain side will be on the outside.
I preferred the thinner .060? kydex, but think you run the risk of cracking it if you fell on it with no gun in it. It makes for a very slim holster though. It is maybe a little easier to work also. |