NM, USA
|
Posted: 2/18/2011 3:11:59 AM EDT
[Last Edit: GWhis]
PhotoBucket destroyed all my pictures in this thread..
|
|
|
|
[#1]
Looks good. You might want to cut the slot in the plastic tube for the pressure switch a bit narrower if you plan on using it for small caliber rifle ammo like .223.
|
|
|
|
FL, USA
|
[#2]
nice job GWhis, if I was ever to get the Bullet feeder I would do the same mod. I would add more heat shrink to the power connectors. and why not replace the hole spring with some clear tubing. But other then that good job ,I bet you will have a lot of people copying your set up.
|
|
|
|
[Last Edit: Mugbug]
[#3]
Thanks for posting this....
One thought and one question. First the thought regarding the bullets hanging in the switch. I would bet if you flattened out the hump on the switch lever it would solve the problem with the lighter bullets hanging up. The question is... Did you have any issues with the stock spring flopping around with heavy .45 bullets....Mine turns into spaghetti and I have to wire tie it to the support hook. I may try replacing it with the tubing and see how it works. ETA: maybe tubing over the spring to act as a support might be the way to go. |
|
|
|
NM, USA
|
[Last Edit: GWhis]
[#4]
gone
|
|
|
NM, USA
|
[Last Edit: GWhis]
[#5]
gone
|
|
|
|
[#6]
Thanks...I was using the support wire but the spring was so floppy it kept falling off the hook, hence the wire tie.
The velcro is a pretty good idea....I think I am going to try a piece of tubing over the spring to give it some integrity and see what happens. |
|
|
|
NM, USA
|
[Last Edit: GWhis]
[#7]
gone
|
|
|
|
[#8]
Makes you wonder why they didn't build it with a cutout switch to start with...
|
|
|
|
NM, USA
|
[Last Edit: GWhis]
[#9]
gone
|
|
|
|
[Last Edit: GWhis]
[#10]
gone
|
|
|
|
|
[#11]
Ive been racking my brain on how to make this instal more elegant. For a long time..
After my last work on my 3d printer adding auto level, I was introduced to proximity switches. And thought HEY! that might work if I can find a AC compatible version. After searching Amazon, I found a 18mm dia with 8mm distance. You can find it here. Its a normally closed, so it opens the connection when something metal passes over the sensor. So picking up a bit of 1 inch Nylon Rod and a section of 5/8. I was able to reproduce the feed ends that go on the metal springs. And adapters (one inch in outer dia) to attach to the clear section of tube. And I ended up with something that looks like this.. 

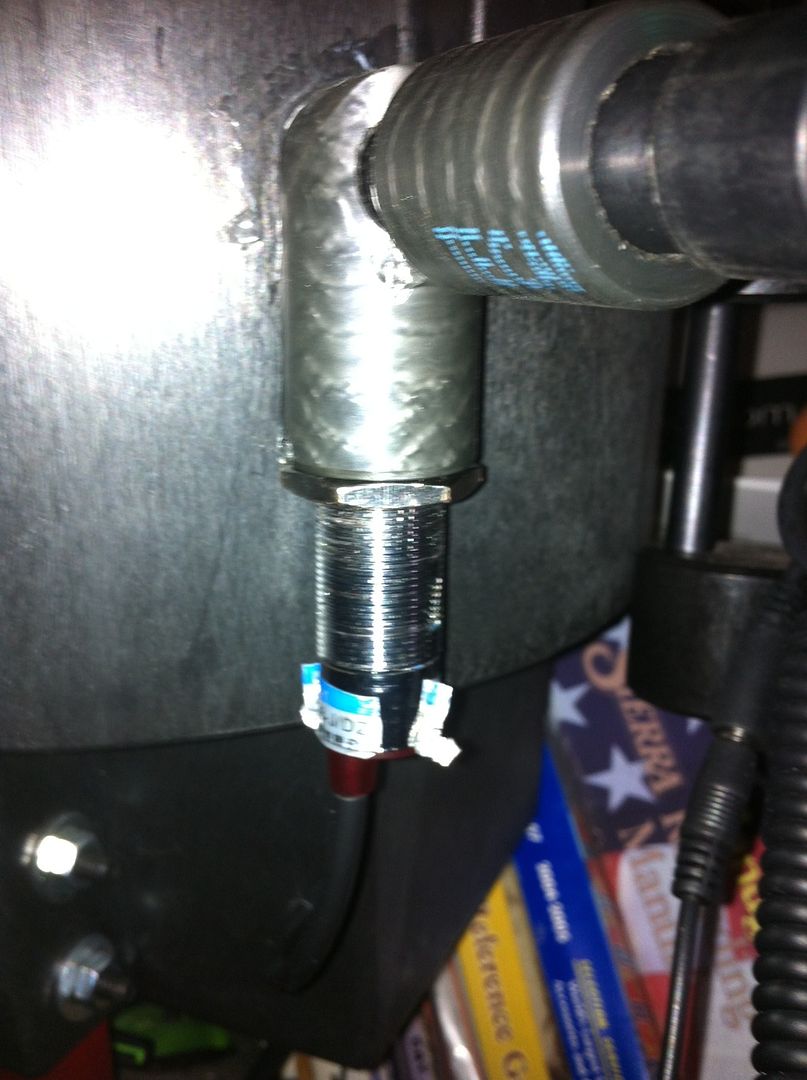
The 2 leads that come off of the sensor wire in, Just like the switch in GWhis's tutorial. I have mine set flush with the tube and it cuts off with all types of bullets. Lead to copper it don't care. These pictures do not reflect the slight change that I made tonight and that's drilling and tapping 2 nylon set screws into the tube ends to hold the funnels to the spring tubing. Lastly to stop the spring tube from flopping around I added shrink tube to it like so. 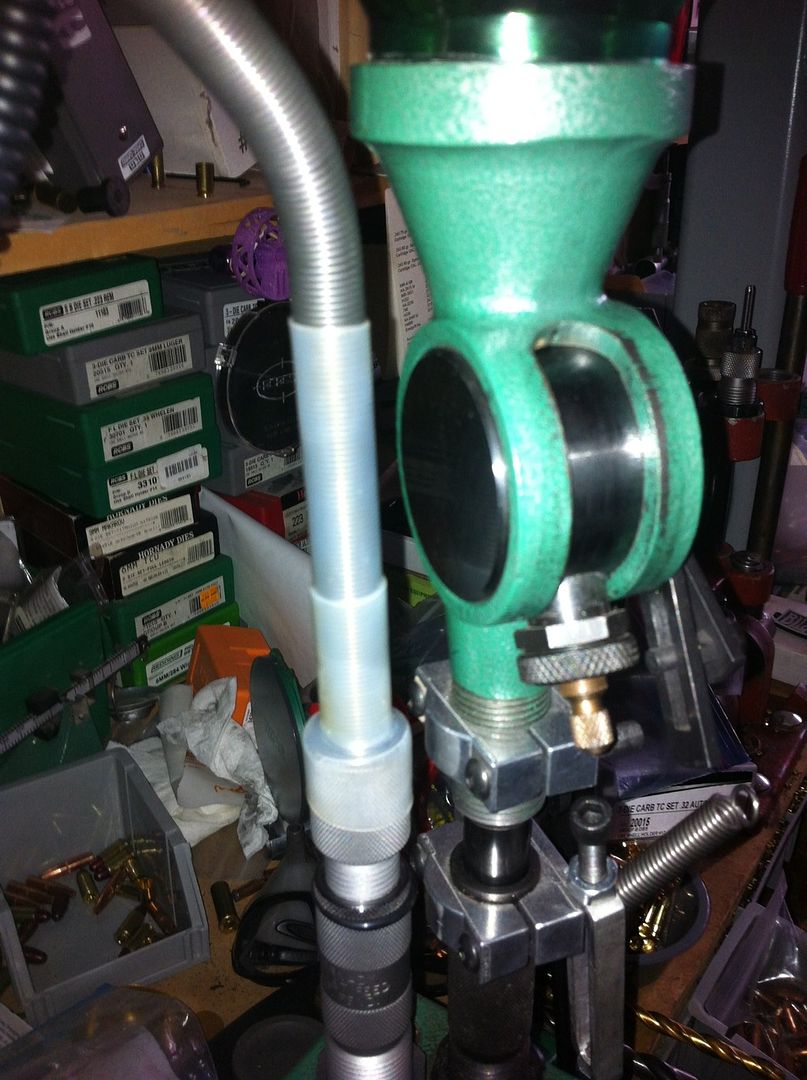
Thanks GWhis for the original idea.. |
|
|
|
NM, USA
|
[Last Edit: GWhis]
[#12]
McNasty has the absolute best idea for a switch! Thank you! That's a keeper!
|
|
|
|
[#13]
Could You use a proximity switch like that to build a counter?
Set it up to sense the case as it goes through the last station on a 1050, to a digital counter? I'd like to see the video, alway's interested to read Your posts and input/ideas. |
|
|
|
NM, USA
|
[Last Edit: GWhis]
[#14]
I have no idea....
|
|
|
|
[#15]
NO prob thank you, for planting the seed.. I have re done mine as well, and changed the length of my clear tube and the way it hooks up. Ill get some pics once all the Epoxy drys.
|
|
|
|
NM, USA
|
[Last Edit: GWhis]
[#16]
gone
|
|
|
NY, USA
|
[#17]
@GWhis any chance you still have the original photos of this?
|
|
|
NM, USA
|
[Last Edit: GWhis]
[#18]
emailed.... last call....no longer available.
|
|
|
NY, USA
|
[#19]
Thank you so much!
|
|
|
NM, USA
|
[Last Edit: GWhis]
[#20]
You're Welcome
|
|
|
 Win a FREE Membership!
Sign up for the ARFCOM weekly newsletter and be entered to win a free ARFCOM membership. One new winner* is announced every week!
You will receive an email every Friday morning featuring the latest chatter from the hottest topics, breaking news surrounding legislation, as well as exclusive deals only available to ARFCOM email subscribers.

AR15.COM is the world's largest firearm community and is a gathering place for firearm enthusiasts of all types.
From hunters and military members, to competition shooters and general firearm enthusiasts, we welcome anyone who values and respects the way of the firearm.

Subscribe to our monthly Newsletter to receive firearm news, product discounts from your favorite Industry Partners, and more.
Copyright © 1996-2024 AR15.COM LLC. All Rights Reserved.
Any use of this content without express written consent is prohibited.
AR15.Com reserves the right to overwrite or replace any affiliate, commercial, or monetizable links, posted by users, with our own.


