


AR Sponsor

[ARCHIVED THREAD] - I welded together a steel receiver from theflatspot.net. Update 6/11 Paint Job on page 3 (Page 1 of 3)
Posted: 6/3/2014 8:42:33 PM EDT
I know. She's ugly, morbidly obese, and downright dirty. But for $25 she's mine and I love her
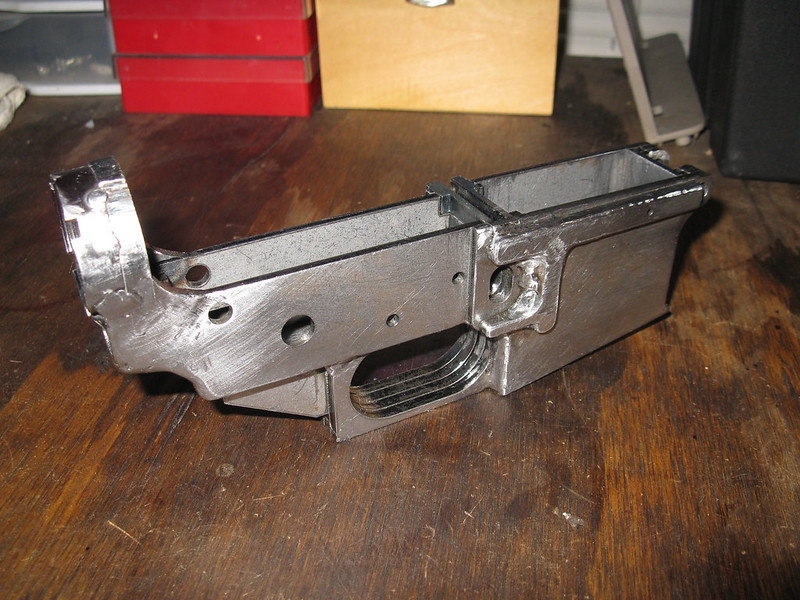
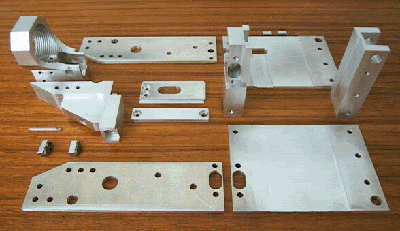
Here's what shows up in the mail: 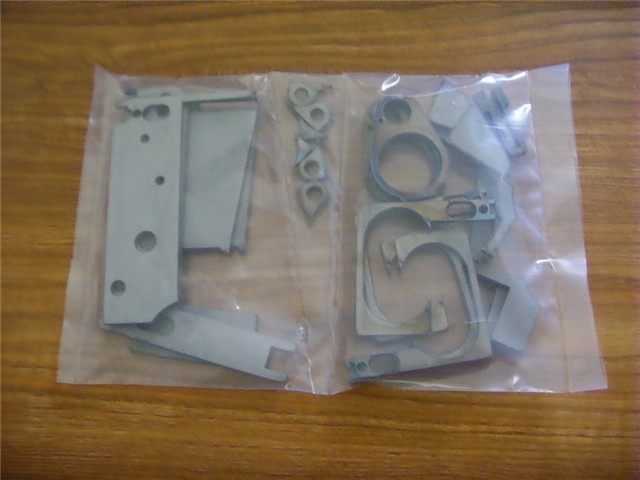
The downloadable instructions: 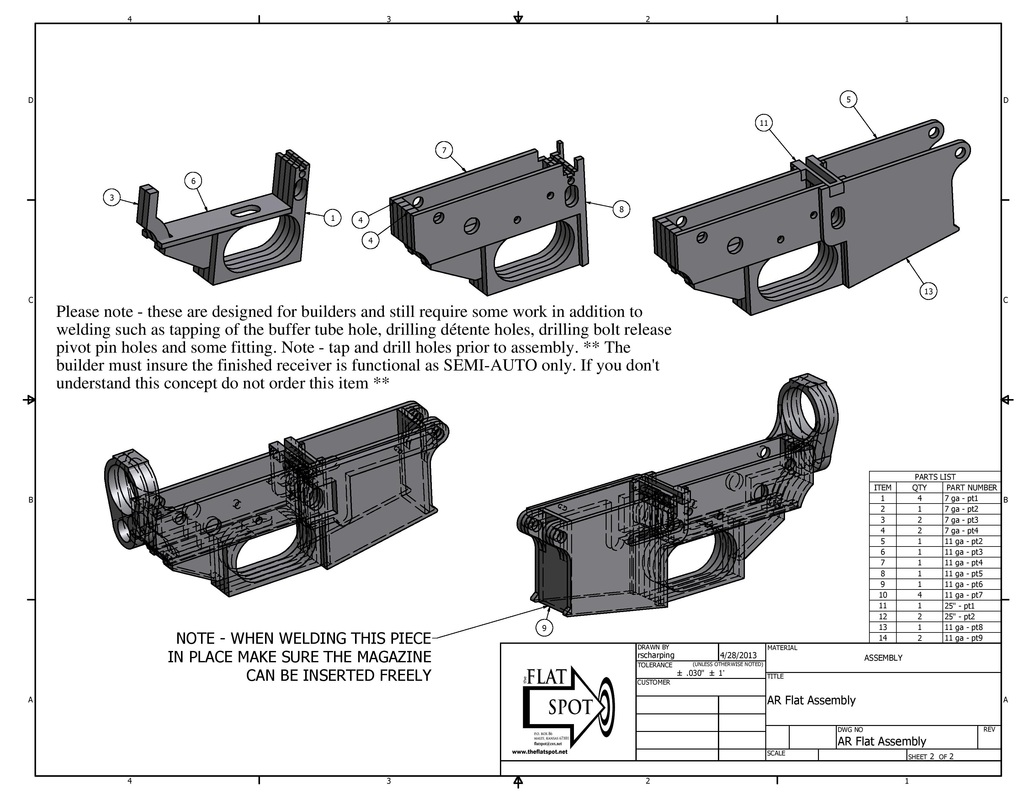
Pics: 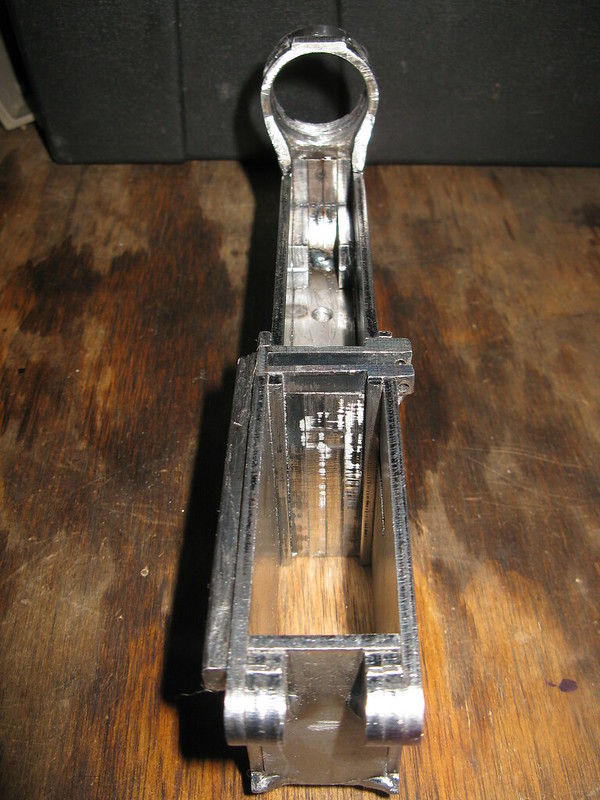
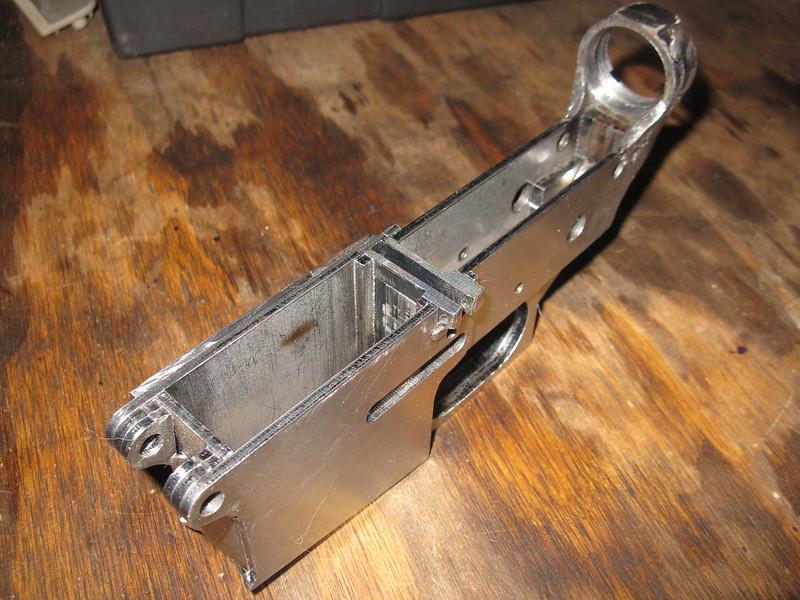
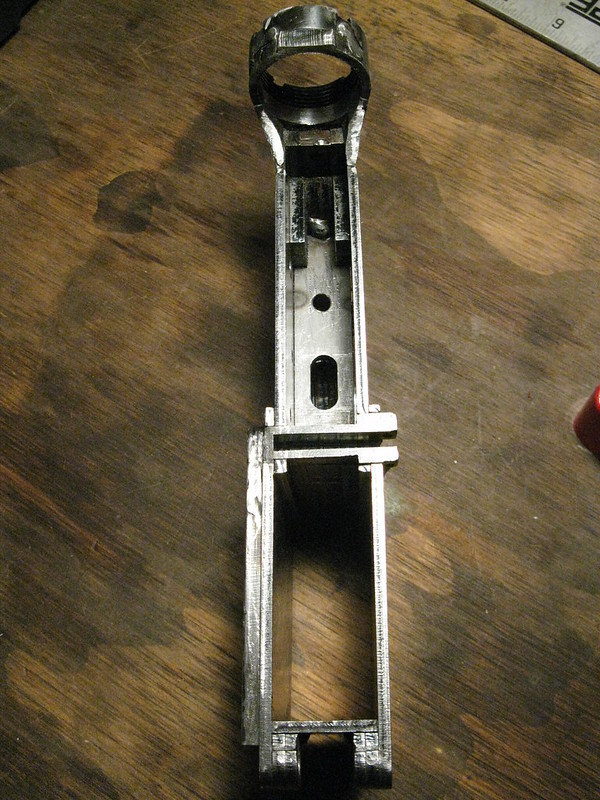
In this pic you can see where I welded in a castle nut. I didn't feel like paying for the expensive tap. 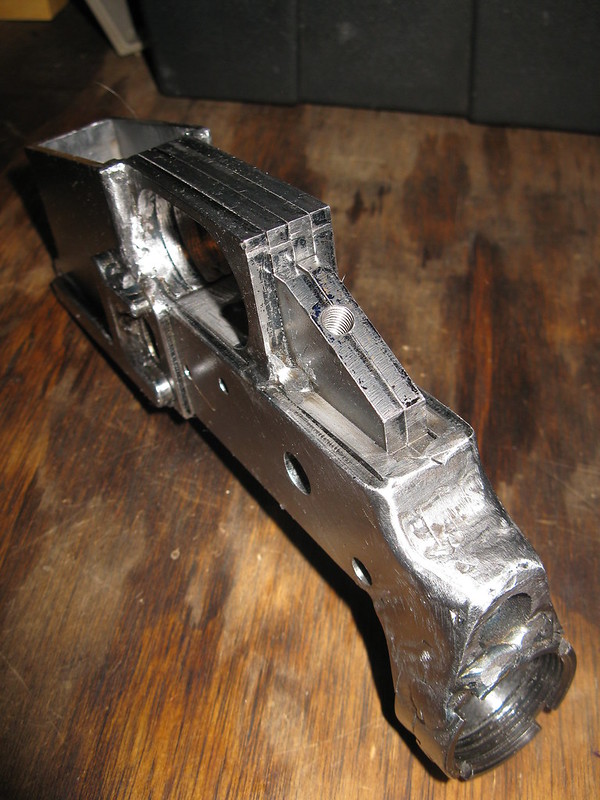
And here are a few of her dressed up and ready to go out: 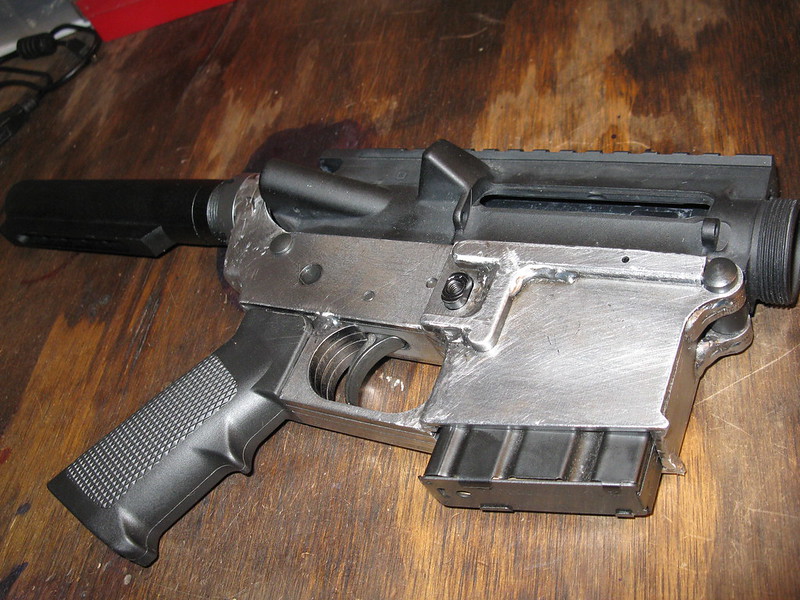
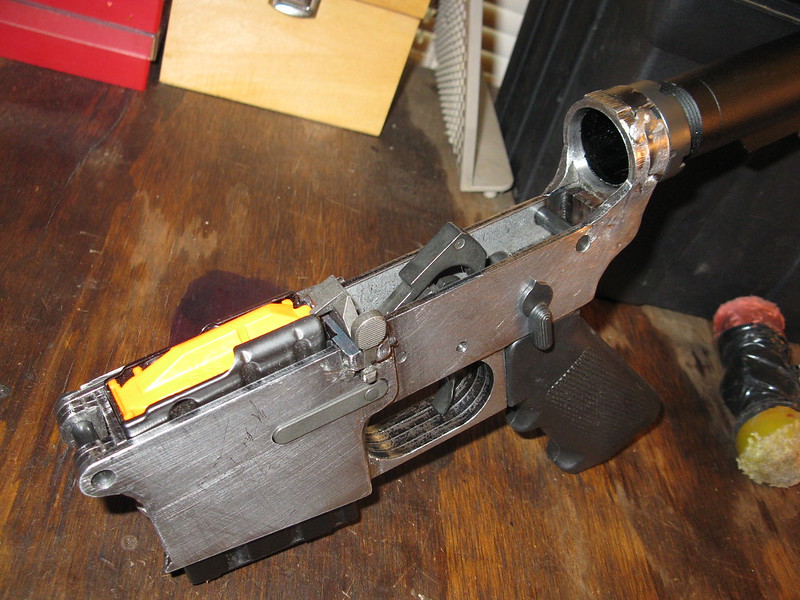
I did this with a solid wire feed MIG and shielding gas. I am in no way a professional and wasn't planning on achieving perfection. That is what buying an 100% completed is for. What I did achieve is a bad ass, beefy, steel AR receiver. Also, I was looking for a fun and challenging welding project. I have a little more work to do cleaning up the welds and drilling a few detente holes, but overall I am happy with the results. One thing I might try later down the road is brazing one together. I'm sure that it would look much nicer. My plans for this are to paint it with Alumahyde II matte black. I'm toying around with the idea of a pump action AR, so I'm probably going to skip drilling the buffer retainer hole and installing a buffer/spring. I am aware that this is an ugly mutant of the AR world, but it was fun and I would recommend it to anyone looking for a challenging project. So fire away with your questions and comments. I plan to follow up with pics of the paint job in a couple of days. |
|
Quoted:
Pretty clever welding on the castle nut. Nice build. How hard was it to tap the pistol grip screw hole? The tapping required a bit of elbow grease, but other than that it went right through. Fairly smoothly in my opinion. I'm new to tapping so I have little experience to compare it to. What was nice is that the drill bit and tap were available cheaply at my local hardware store. |
|
What's going to hold your buffer in, Or are you planning on using a JP captured spring? Also does the pivot pin spring hole need to be drilled? For the rear, I'm assuming you'll be using a KNS pinless takedown pin? Selector lever detent spring hole? This thing looks like it's soo much work it would be easier to just drill out a block of steel! But I'm glad someone is trying it and thank you for posting your progress.
Very interesting project. Please keep us posted! 
|
| The BCG generally holds the buffer in place; the buffer retention pin is helpful, but not necessary on an AR. The pivot spring detent hole does have to be drilled if you choose to use it. The safety detent hole has to be drilled - you can see the OP hasn't yet drilled it. The rear takedown pin detent hole has already been drilled through the receiver extension bosses, but not through the side plates. |
|
Quoted:
What's going to hold your buffer in, Or are you planning on using a JP captured spring? Also does the pivot pin spring hole need to be drilled? For the rear, I'm assuming you'll be using a KNS pinless takedown pin? Selector lever detent spring hole? This thing looks like it's soo much work it would be easier to just drill out a block of steel! But I'm glad someone is trying it and thank you for posting your progress. Very interesting project. Please keep us posted! I may not be needing a buffer for this gun as I might convert it to a bolt/pump action. NY laws really suck right now and I want to turn it into a fun range toy without getting arrested. As far as the pivot pin goes, I will be drilling a hole and using a normal spring, detente, and pin. Easy work on the mill. The rear will probably end up being some sort of pinless takedown so I don't have to drill through or reinforce the steel walls. I'm not above simply using a nut and bolt if all else fails. This thing is already pretty ugly. The safety detente hole will be a tricky one though. Might have to weld in some extra metal to drill through. There are a few bugs to work out, but nothing too difficult. |
|
Quoted:
I'd probably opt to simplify the build by using KNS takedown/pivot pins (no drilling), a JP captured spring (no detent) and just be left with drilling the selector lever detent spring hole (I can't think of way around that one). Mosin safety.  If I superglue one, that's what I'll use. If I superglue one, that's what I'll use.
OP, thanks for showing me where the little pieces on the receiver extension boss go. I thought they went up front somehow. Have you thought about using a rear takedown pin you can yank out so you can quickly load your fixed mag? |
|
Quoted:
Mosin safety. If I superglue one, that's what I'll use.
OP, thanks for showing me where the little pieces on the receiver extension boss go. I thought they went up front somehow. Have you thought about using a rear takedown pin you can yank out so you can quickly load your fixed mag? Quoted:
Quoted:
I'd probably opt to simplify the build by using KNS takedown/pivot pins (no drilling), a JP captured spring (no detent) and just be left with drilling the selector lever detent spring hole (I can't think of way around that one). Mosin safety. If I superglue one, that's what I'll use.
OP, thanks for showing me where the little pieces on the receiver extension boss go. I thought they went up front somehow. Have you thought about using a rear takedown pin you can yank out so you can quickly load your fixed mag? I'm not planning a semi auto. Therefore detachable mags are fine in this case. |
|
Quoted:
The only hole you "must" drill is the safety detent - and if you're willing to run a Mosin safety, you don't even have to do that. Quoted:
Quoted: I employ many welders - they don't know how to tap holes. The only hole you "must" drill is the safety detent - and if you're willing to run a Mosin safety, you don't even have to do that. How would you run a "Mosin Safety" in an AR? |
|
Quoted:
How would you run a "Mosin Safety" in an AR? Quoted:
Quoted:
Quoted: I employ many welders - they don't know how to tap holes. The only hole you "must" drill is the safety detent - and if you're willing to run a Mosin safety, you don't even have to do that. How would you run a "Mosin Safety" in an AR? Keep the chamber empty until you're ready to shoot.  Ever try to manipulate a Mosin safety? Ever try to manipulate a Mosin safety?
|
Nice job! The dudes at Kyber Pass are jealous! Can you hold your parts with your toes while you machine with a flat file while sitting on a pile of camel dung? 
Lol jk. I saw this recently and wondered how many kits would be completed. That is definitely some serious DIY! Good work, no telling what you could build with proper machine tools. Chris |


|
Quoted:
I want one  We're gonna have to come up w/ the ARFCOM People's Import/Export Corporation for all the onesies/twosies we've got. Sending Italian Garands south of your border, AR flats north, we need something w/ lawyers to run ITAR interference... Wait. Don't we HAVE lawyers?
|
|
Tonight I addressed the issue with the safety selector.
I tried to zoom in as best as I could, but in this picture I am trying to show where I welded in a small square of metal over the selector hole then drilled it out to the correct hole diameter. This gave me some metal to work with for the detente hole. 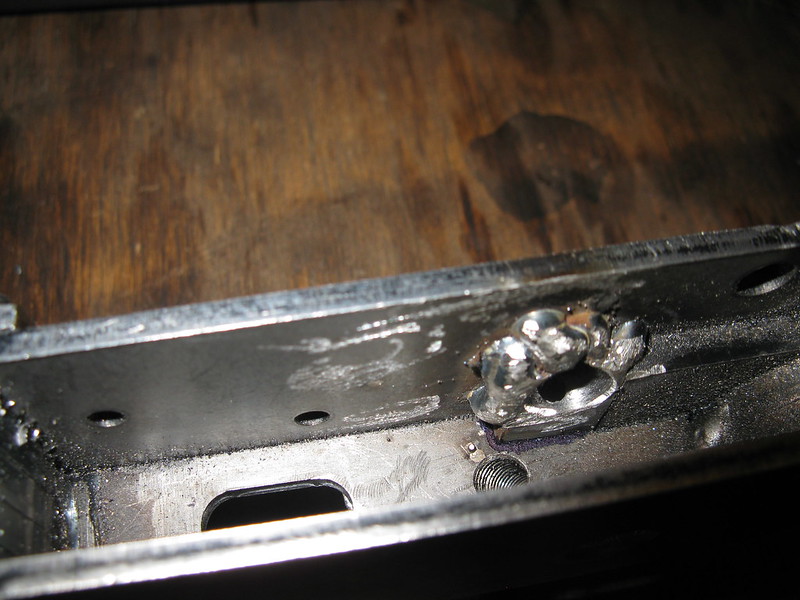
Then from the bottom I drilled the detente/spring hole. 1/8" through and 5/32 drill for a depth of 0.188” 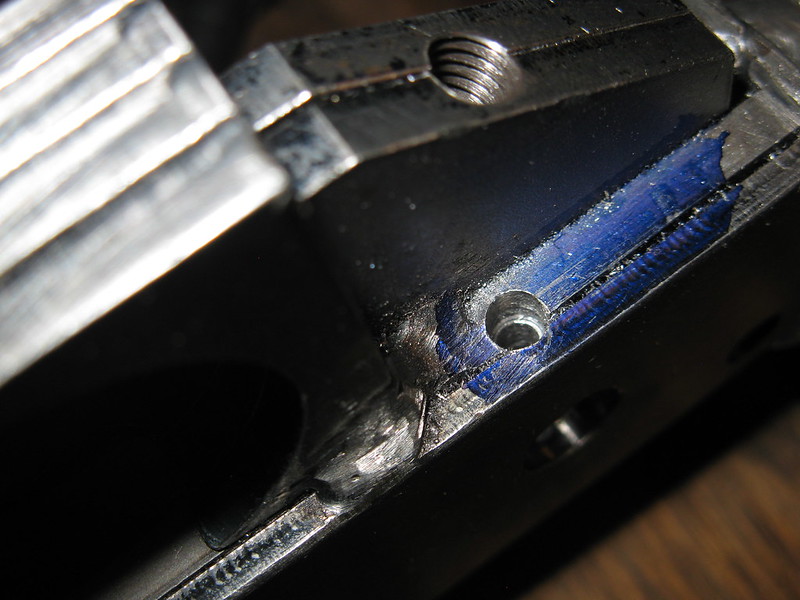
Bam! Functional selector switch! 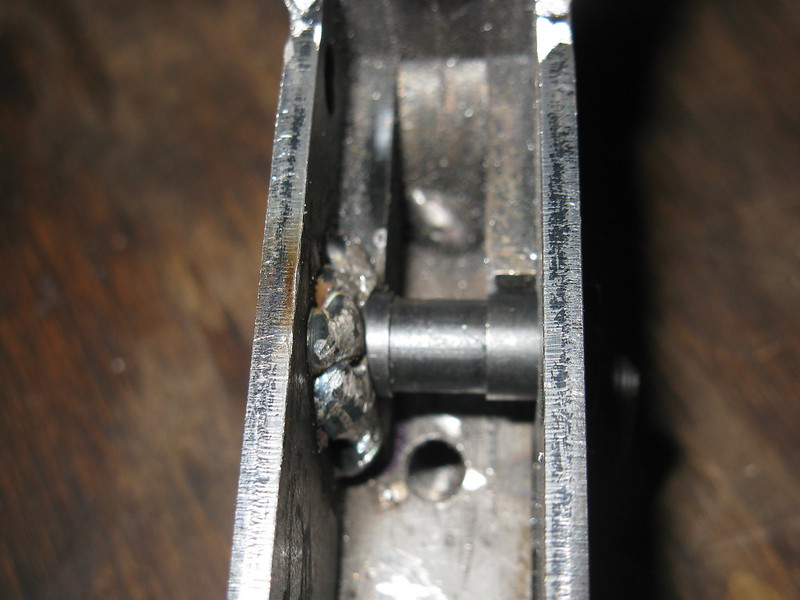
|
|
Quoted:
You have mad skilz, sir. So the detent wouldn't have worked if you'd just drilled straight through, w/o welding in that piece? Correct. The receiver walls were too thin. The detente and spring probably would have slid into the fire control pocket and not worked at all. Probably would have compromised structural integrity as well. |
|
Quoted:
Yes! I was actually thinking about that. Especially since I am considering crafting my own wood furniture. That would be a pretty neat look. Is that an expensive process? Quoted:
Quoted:
For a finish - have you considered color case hardening?  Yes! I was actually thinking about that. Especially since I am considering crafting my own wood furniture. That would be a pretty neat look. Is that an expensive process? Depends on who you get the bones from.
|
|
Quoted: You'd think they could tap the buffer hole for you. The cost of the tap is prohibitive unless you are doing a bunch of them, IMO. Not sure they can, since the receiver extension boss comes in two pieces you're supposed to weld together: 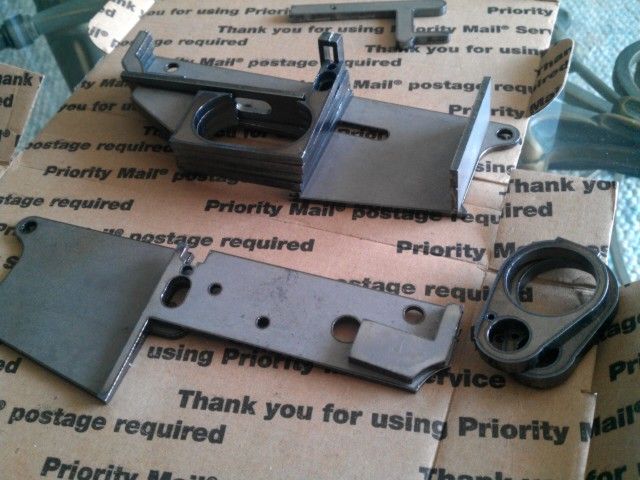
There are several ways around it: Weld on a steel castle nut, as D-Rock has done; Cut a rifle tube to ACE stock dimensions, and glue it in place, as I'm going to try; Weld in a steel tube, as simply_green did in this thread: http://www.ar15.com/forums/t_3_4/647105_Steel_AR_flats_from_the_Flat_Spot.html&page=3#i6490270 |
|
Quoted:
Where did you find this aluminum one? How much?! Quoted:
Quoted:
Quoted:
How long till they release an Aluminum one? http://i147.photobucket.com/albums/r291/atfsux/boltTogetherAR15.gif Where did you find this aluminum one? How much?! http://www.weaponeer.net/forum/uploads/Weaponeer/files/2007-10-17_131429_AR_15_Scratch_Built_Receiver.pdf |
|
Awesome! I'm thrilled that there more and more of these builds being posted. Especially in identifying the work-arounds and problem areas. I hadn't realized that the safety would need additional material for the detent.
I'm totally cool with the "ugliness factor". Have you noticed that the magazine catch isn't quite right? I did a test fit on mine and it doesn't engage the magazine slot. I'm able to get back to my project this weekend and will post pics in the other thread. |

|
Quoted:
Awesome! I'm thrilled that there more and more of these builds being posted. Especially in identifying the work-arounds and problem areas. I hadn't realized that the safety would need additional material for the detent. I'm totally cool with the "ugliness factor". Have you noticed that the magazine catch isn't quite right? I did a test fit on mine and it doesn't engage the magazine slot. I'm able to get back to my project this weekend and will post pics in the other thread. Yeah, I forgot to comment on that. I got the mag catch to work by adding some weld to the release itself. I gobbed on some extra metal and then ground it down to the correct slope to engage the magazine. It was a very easy fix. I'll post some pictures when I get a chance. |
|
Quoted:
Have you tried turning the magazine catch another turn or two? Saw a M4 in Iraq that wouldn't hold magazines, gave it a turn or two, it was GTG. I did try that. The problem is that the steel walls are too thick in the mag well area. The catch won't clear the walls no matter how tight you screw it in. It just needs to be a little longer. |
I had to modify the mag catch by adding some metal to it. First I clamped it down to a piece of copper backing
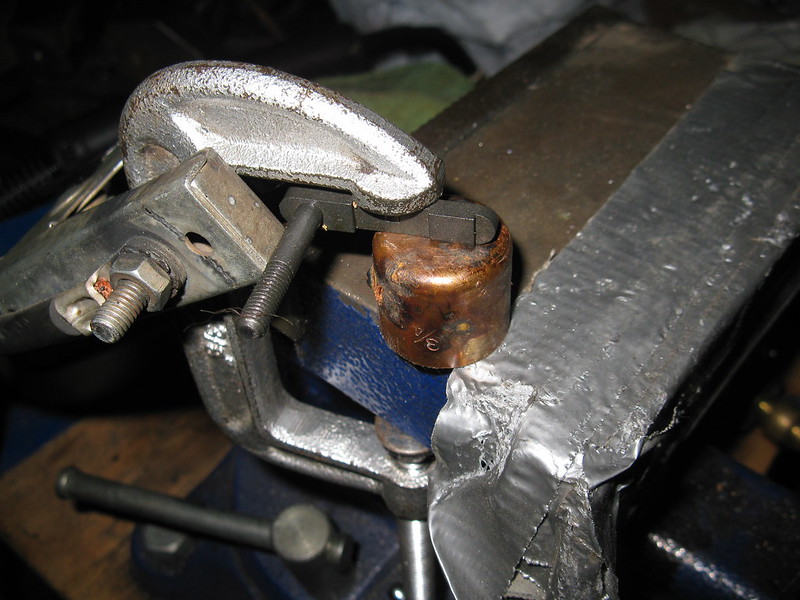
I gobbed on some weld 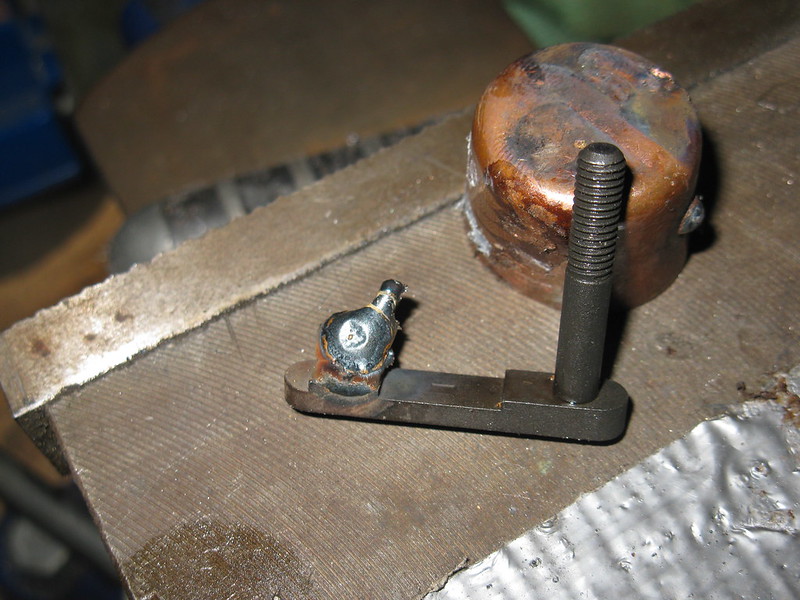
Then ground it down to the correct size to catch the magazine 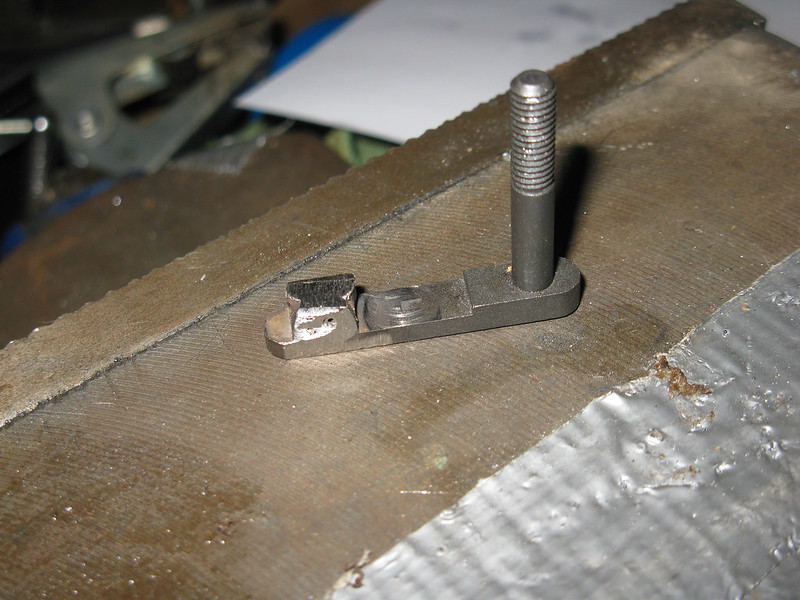
Here you can see how it sticks out past the mag walls. I may take a little more off if needed. 
Here is a pic of the front takedown pin detente hole. My bit walked a little while drilling and isn't lined up exactly perfect, but works good enough for me. 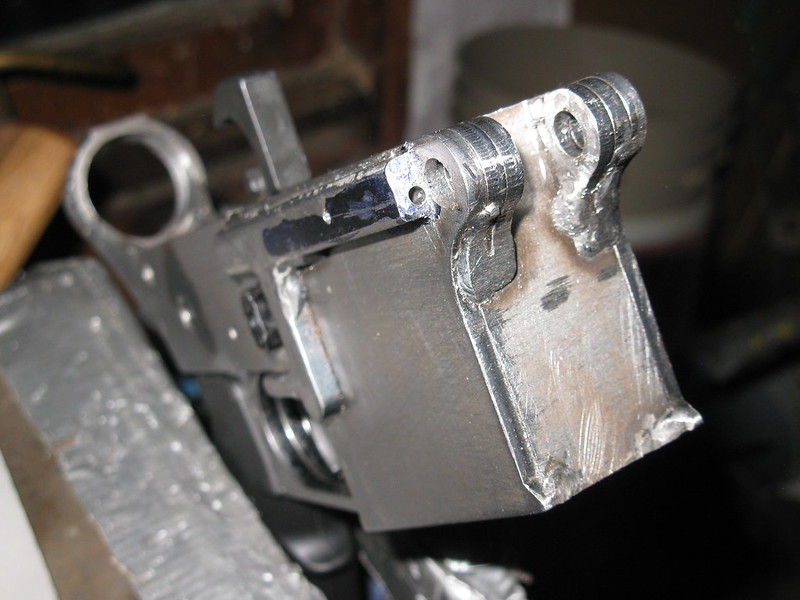
|
[ARCHIVED THREAD] - I welded together a steel receiver from theflatspot.net. Update 6/11 Paint Job on page 3 (Page 1 of 3)
AR Sponsor
Join the Community
Your next conversation starts here.
Create your free account to join discussions, share your experience, save topics, and connect with the AR15.COM community.
- Join discussions
- Follow topics and replies
- Connect with fellow enthusiasts
Already a member? Sign in
Stay informed by subscribing to our Newsletter