|
Posted: 9/28/2009 5:27:09 PM EDT
In honor of some of the great boxes that have been shared, here is my version. It is inspired by ar-jedi (like a LOT of the others), but with a few twists.
* No fuses (sound familiar?). * Capable of being powered by either 12VDC or 120VAC. * No fast-on connectors for high-current connections * I put a lot of thought into having batteries in a box, but this thing weighs 23 pounds like it is. My antenna systems are packaged separately anyhow, so it is not a huge to carry another box. * Self-contained as much as practical. * Small size (it's all relative). * Use existing case (I had the case laying around from a different project). The other choice was a BIG Pelican box that I have laying around, but this worked out better, I think. * I wanted to be able to plug and play without futzing around with removing from a case to allow airflow. * I wanted HF capabilities. * After a bit of soul-searching, if it isn't needed, it isn't in the box. 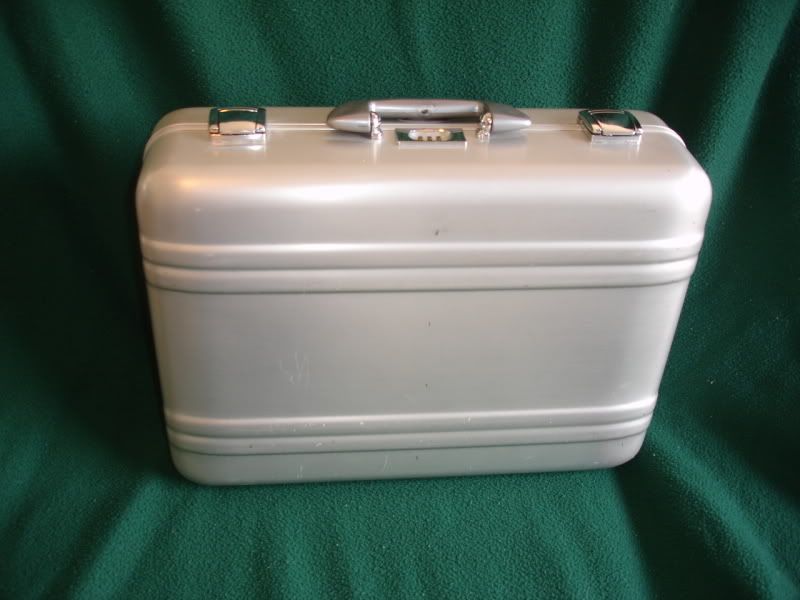
Here is the case 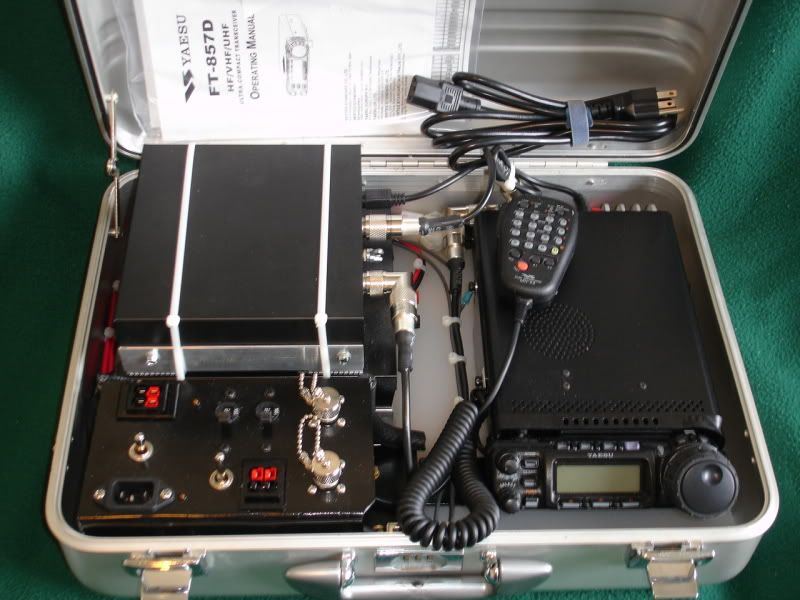
Here is the packaging of the components. All of the components are mounted to a Wal-Mart cutting board that has been cut to size and contoured to fit the case. All of the high-current power runs down the left side and the back. The center is reserved for coax and ground wires that tie everyone together. This actually worked out pretty not bad. 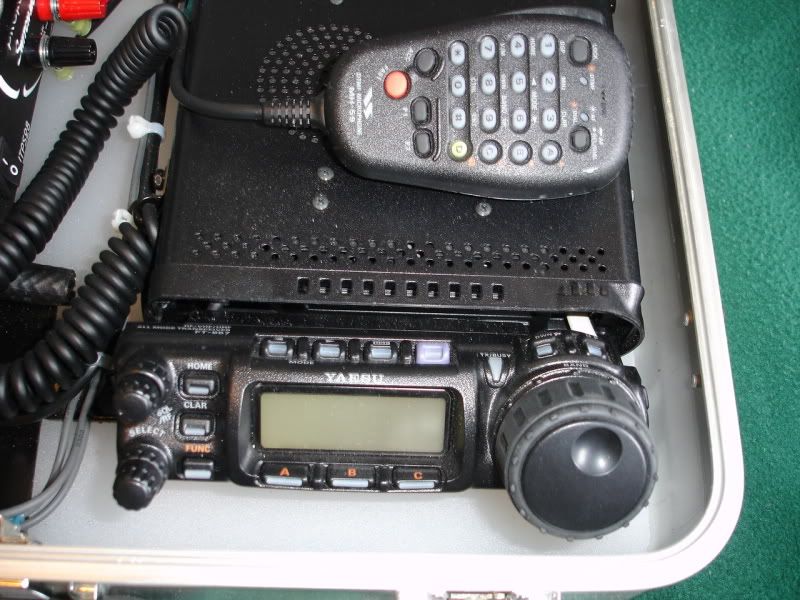
Here is the radio. As it is set into the case, the head is mounted up and on a 45degree angle. It is moved slightly to the left to allow access to the buttons on the right side of the dial. The fancy microphone gets to ride inside a clean gym sock in between the radio and power supply. 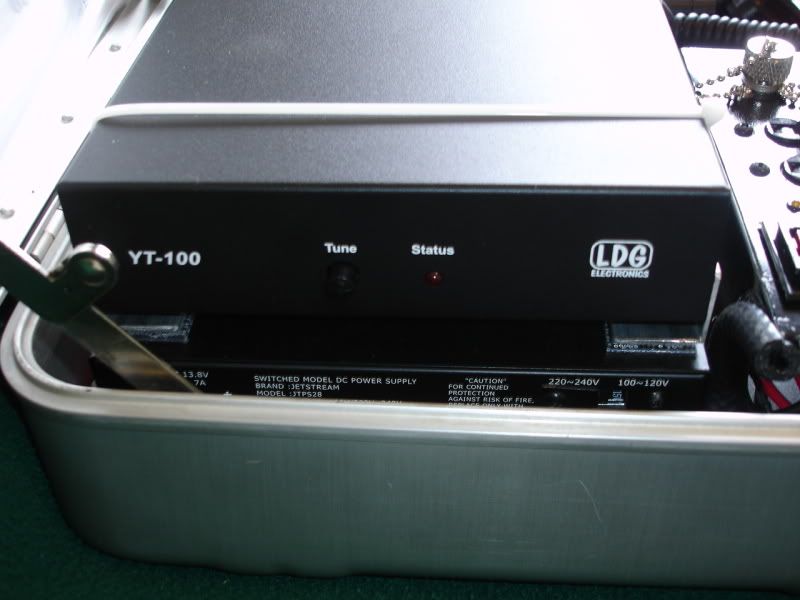
Here is a close-up of the tuner. The tuner is mounted to the top of the switching power supply using 3M Dual Lock tape. It is secure, but it is stabilized using TyWraps. The 'custom' brackets are made from aluminum angle as neither the tuner or power supply is designed for a portable application. The power supply has been mod'd with a Silenx case fan. It moves a lot more air and does it almost inaudibly. 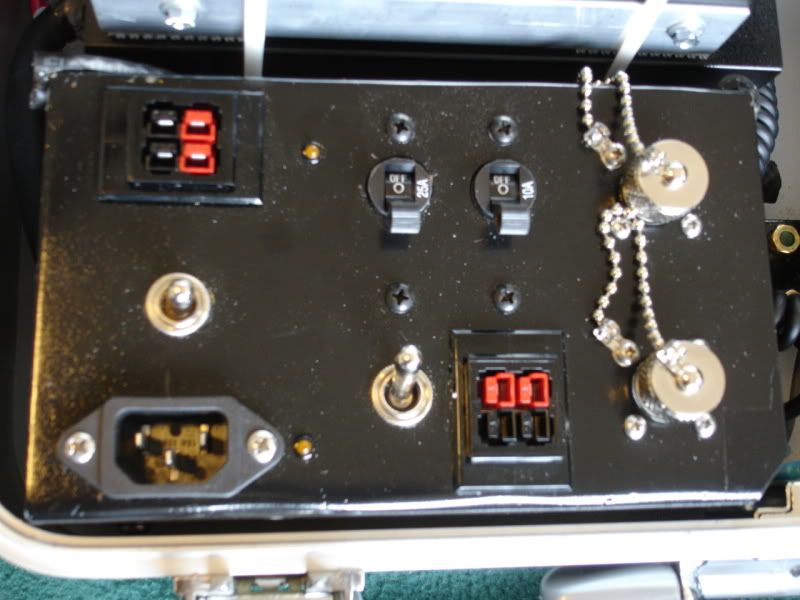
Here is the panel that houses the external connections. It is fabricated from sheet steel formed into a 3x4 rectangle. The power connections are on the left side. 12VDC on the top through 45amp PowerPoles, 120VAC on the bottom. The wire is all 10 gauge (it will be 12 gauge next time). The DPDT center-off switch in the center switches between the two sources. The LED indicators to the right of the inputs illuminate when the respective sources are active. The 25 AMP circuit breaker supplies current to the radio. The 10 AMP breaker supplies the AUX PowerPole connectors just below. The other switch is a battery saver and limits the radio to 20 watt output. The radio has a built in volt meter, so an external one would be redundant for me. The antenna connections are VHF/UHF on the top and HF on the bottom. Anyhow, I am wide open for suggestions! I carry my dipole in a battery jumper cable bag along with the PowerPole extension cords, adapters, and coax. |
|
|
|
[#1]
excellent project approach and a nicely finished package. 
ps1: Quoted:
a Wal-Mart cutting board folks, i'm here to tell you that there is no ham-radio related project that can not be improved by the addition of a Wal-Mart cutting board! these types of Delrin boards are easy to cut/shape/drill/machine, won't rot/warp/degrade, and of course are great insulators. ps2: i wish we had an award to hand you for "The First Ever ARFCOM Ham Radio Forum Project With Correct Andersen PowerPole Connector Orientation On First Try". ar-jedi |
|
|
|
[#2]
Where's the antenna?
|
|
|
|
[#3]
Very nice! I like the clean runs down the center. Maybe you could somehow tie the heatsinks of the gear to the case so the case acts like a giant heat shrink? How about a divider/shelf in the lid where you could store papers, band charts etc. Excellent job
|
|
|
|
[#4]
Love the idea of converting a briefcase into an EMCOMM box. Thank you very much for the inspiration
After seeing your pics, I have a large, unused Pelican laptop case that would be perfect for this. Thanks again for the detailed pics and description of your setup-I'm pretty stoked |
|
|
|
[#5]
Quoted:
Love the idea of converting a briefcase into an EMCOMM box. Thank you very much for the inspiration After seeing your pics, I have a large, unused Pelican laptop case that would be perfect for this. Thanks again for the detailed pics and description of your setup-I'm pretty stoked I have a Pelican 1520 I think may be my winter project for something along this lines........ |
|
|
|
[#6]
Quoted:
Where's the antenna? "Anyhow, I am wide open for suggestions! I carry my dipole in a battery jumper cable bag along with the PowerPole extension cords, adapters, and coax."
|
|
|
|
[#7]
Quoted:
i wish we had an award to hand you for "The First Ever ARFCOM Ham Radio Forum Project With Correct Andersen PowerPole Connector Orientation On First Try". ar-jedi Ha!... I feel dirty now. That was the first thing I looked for. 45C_B, NICE looking box.
|
|
|
|
[#8]
Quoted: Ok explain to some of us less informed about Proper Orientation.ps2: i wish we had an award to hand you for "The First Ever ARFCOM Ham Radio Forum Project With Correct Andersen PowerPole Connector Orientation On First Try". ar-jedi |
|
|
|
[#9]
Anderson PowerPoles can be assembled in a number of ways. There is a standard orientation of the black (-) and red (+) terminals as used on West Mountain Radio Rig Runners, other gear.
http://www.westmountainradio.com/supportrr.htm http://www.flyrc.com/articles/using_powerpole_1.shtml Remember: Tongue Top Red Right. 
To echo what WRM said, don't use roll pins to keep the two pieces together. They can fall out, and may fall into a vent and short something out. I use 1/2" heat shrink. That is too tight to go over, and 3/4" is too large. I slip the piece of heat shrink over the jaws of some needle nose pliers, open the pliers and stretch the heat shrink slightly. Then slip on the PowerPole, positioning the heatshink edge to fall in the little grooves on each side. 

|
|
|
|
[#10]
a single drop of hot glue would stop the pin from falling out.
|
|
|
|
[#11]
Quoted:
ps2: i wish we had an award to hand you for "The First Ever ARFCOM Ham Radio Forum Project With Correct Andersen PowerPole Connector Orientation On First Try". Ya mean that you aren't supposed to install the connectors in a random fashion? Quoted:
Where's the antenna? I'll take a picture of the antenna and jumper cable bag arrangement, but there isn't a whole lot to see. The jumper cable just worked out to be a handy size and holds loosely coiled wires nicely. Quoted:
Very nice! I like the clean runs down the center. Maybe you could somehow tie the heatsinks of the gear to the case so the case acts like a giant heat shrink? How about a divider/shelf in the lid where you could store papers, band charts etc. Excellent job If you look closely, the manual and EmComm chart (with a band plan on the opposite side) show up in the second picture. These are in a big ziplock bab and ride on top of the radio during transport. There is not enough room on top of the tuner for the manual and still have the lid close. I use a mouse pad on top of the tuner to hold it all in place and to prevent it from rattling. It would be a real chore to tie all of the heat sinks together and conect them to the case! Forced air works just fine in this application. Quoted:
Remember: Tongue Top Red Right. To echo what WRM said, don't use roll pins to keep the two pieces together. They can fall out, and may fall into a vent and short something out. I use 1/2" heat shrink. That is too tight to go over, and 3/4" is too large. I slip the piece of heat shrink over the jaws of some needle nose pliers, open the pliers and stretch the heat shrink slightly. Then slip on the PowerPole, positioning the heatshink edge to fall in the little grooves on each side. All good stuff. There are a ton of tips in A_F_M's reply. |
|
|
|
[#13]
Yeah, but with 3/4" I couldn't control it to make it tuck into the grooves and also to snug in next to the wires on the back side.
The 1/2" I used is 3:1. I just had to stretch it a little to get it on. I slipped on some 3/8" over the bare wires first, then crimped on and soldered the contacts, slipped them into the plastic house. Then pushed the 3/8" heat shrink up to the back of the housing and shrunk in place. Finally the 1/2" overall. That gives a nice, well, not so much strain relief, but keeps the wiring from flexing right behind the housing. Makes for a nice neat terminal, I think. Also, if doing all this is just too much for you, you can buy almost any cable you could want already made up by Powerwerx. www.powerwerx.com Check this out, too: http://www.powerwerx.com/anderson-powerpoles/accessories/ and http://www.powerwerx.com/powerpole-power-splitters/ |
|
|
|
[#14]
Where did you get the case?
Ideally I would like to be able to yank it all out and slip it in my pack also. |
|
|
|
[#15]
Quoted:
Quoted:
Ok explain to some of us less informed about Proper Orientation.
ps2: i wish we had an award to hand you for "The First Ever ARFCOM Ham Radio Forum Project With Correct Andersen PowerPole Connector Orientation On First Try". more detail and an easy-to-remember rule-of-thumb here: http://www.ar15.com/forums/topic.html?b=10&f=22&t=627054&page=3#10693539 ar-jedi |
|
|
|
[#16]
45ColtBisley,

Very nice, original execution! |
|
|
|
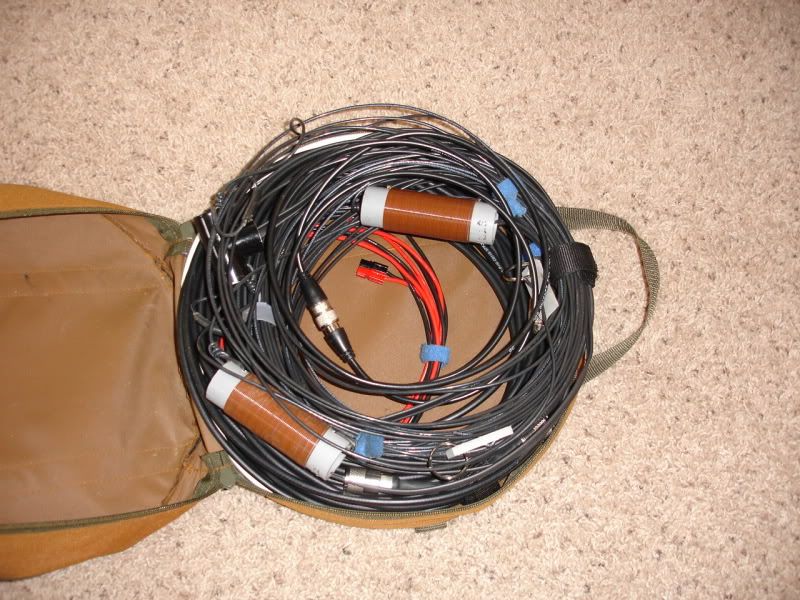
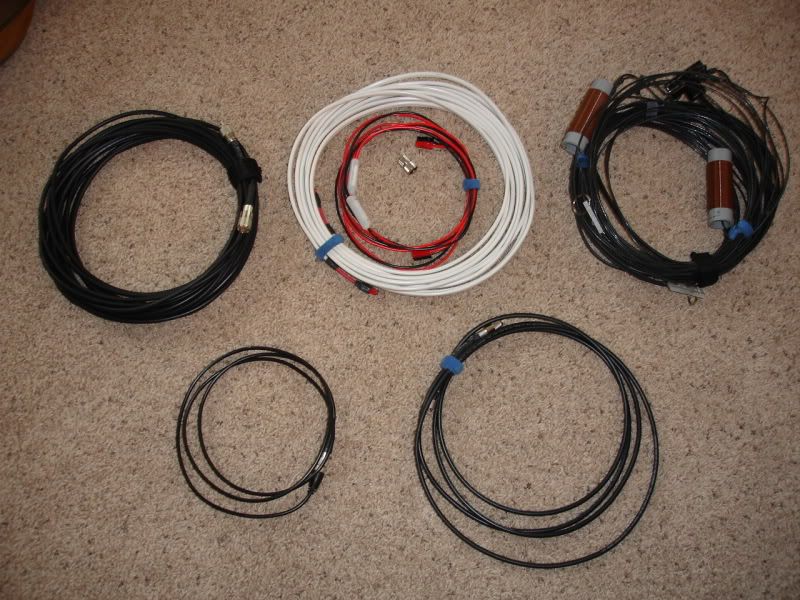
[#17]
Quoted:
Where's the antenna? Here is the antenna bag. I carry spare coax and power cables in it as well. The antenna is a coil-loaded dipole which will go down to 80 meters (but not really well). The wire with the white insulation is 12 gauge Ancor Boat Cable, not Romex. The boat cable was easier to find locally when I was looking. The coax jumpers are RG8X. I usually carry a small bag of adapters in the center but it isn't shown in the pictures. The jumper cable bag just worked out to be the right size for the application. 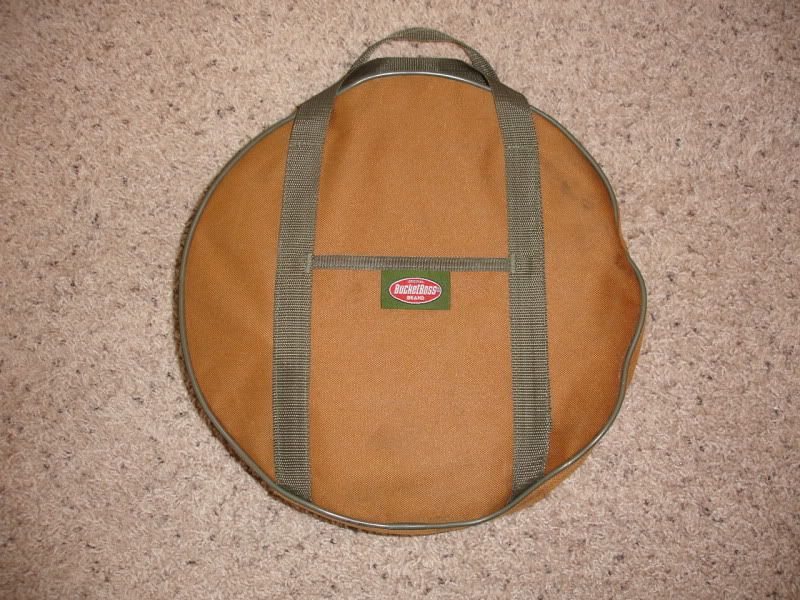
Here is the battery box. It houses a U1 size Deka AGM battery. It won't win any weight contests (26 lbs), but it is portable and it has a reasonable capacity. The battery is hard-wired to the PowerPole connecter mounted in the lid. The battery charges through the PowerPoles when it is not in use (Battery Tender Jr). 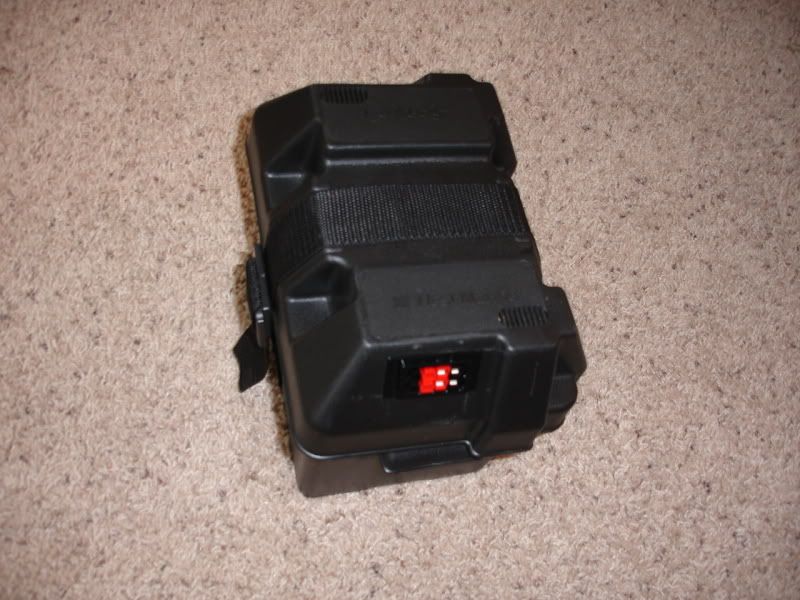
Quoted:
Where did you get the case? Ideally I would like to be able to yank it all out and slip it in my pack also. The case is a Zero Halliburton. These are available used on eBay (and other sites) and can be reasonably priced. If I remember correctly, I think I am out less than $20 for the case (not counting the $15 shipping). I think that the Pelican is probably a bit tougher, but I don't plan to bounce this thing down a rock face or drag it behind my pickup. 
|
|
|
|
[#18]
How long is that dipole?
Being happy here at the house with a Carolina Windom 80, I am gving thought to the Carolina Windom Low Profile. It is 132" long but using a a wrist rocket finding a place to hang it is no problem. Using the same tuner as you gives full useage from 80-6. 
|
|
|
|
[#19]
Where did you get the battery case? Got any pictures of the inside where the power pole connectors go through the case?
|
|
|
|
[#20]
Quoted:
Got any pictures of the inside where the power pole connectors go through the case? the panel mount is simply a holder for the powerpole connectors; there is nothing special except the plastic housing which snap fits (via spring ears) into a panel. picture/details/ordering info: http://www.powerwerx.com/product.asp?ProdID=35997&CtgID=1679 drawing: http://www.powerwerx.com/download.asp?Action=Download&FileID=212 looks like this mounted in a panel: http://losdos.dyndns.org:8080/public/ham/races-box/construction/IMG_1814_sm.jpg http://losdos.dyndns.org:8080/public/ham/races-box/construction/IMG_1813_sm.jpg requires a square cutout, see drawing above: http://losdos.dyndns.org:8080/public/ham/races-box/construction/IMG_1893_sm.jpg http://losdos.dyndns.org:8080/public/ham/races-box/construction/bottom-bracket-02_sm.jpg ar-jedi |
|
|
|
[#21]
Quoted:
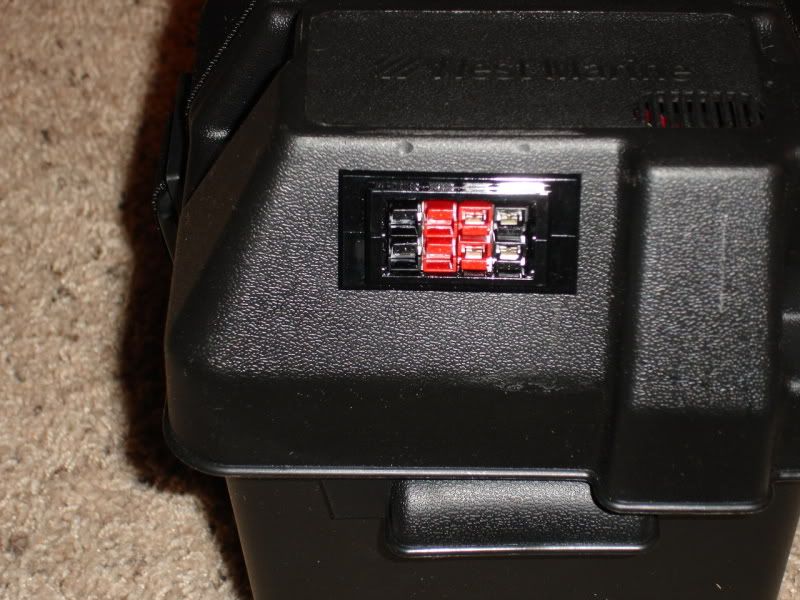
Where did you get the battery case? Got any pictures of the inside where the power pole connectors go through the case? The battery case is a plain vanilla West Marine (handy but not-so cheap) U1-series box. As ar-jedi eluded to, the PowerPole connector is one of the snap-in ones. I ran a bead of RTV down both sides on the inside to stabilize it a bit. I did beef up the bottom of the box a bit with some aluminum strap to allow an internal battery hold-down strap. The external strap holds the lid on the box. 
On the inside, there is nothing too fancy; 12 ga wire with ring terminals to the battery 'posts'. 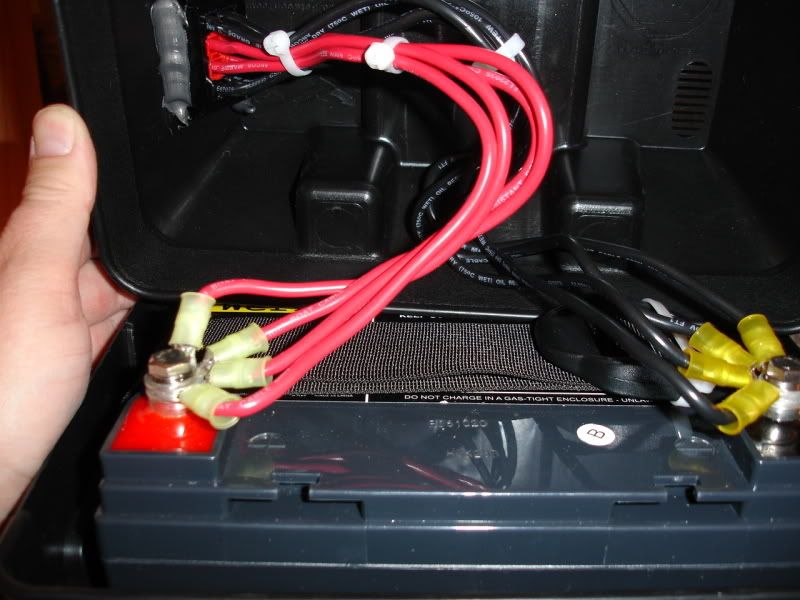
|
|
|
|
[#22]
Quoted:
How long is that dipole? The antenna is a Radiowavz G5RV Lite. It measures 67 feet long. It works well in my backyard as I stay portable with the kids running around. I string the antenna between the house and shop and support it in the middle. It works out to be a sloping inverted vee. I plan to spend some quality time playing with antennas but I haven't had the time lately. 
|
|
|
 Win a FREE Membership!
Sign up for the ARFCOM weekly newsletter and be entered to win a free ARFCOM membership. One new winner* is announced every week!
You will receive an email every Friday morning featuring the latest chatter from the hottest topics, breaking news surrounding legislation, as well as exclusive deals only available to ARFCOM email subscribers.

AR15.COM is the world's largest firearm community and is a gathering place for firearm enthusiasts of all types.
From hunters and military members, to competition shooters and general firearm enthusiasts, we welcome anyone who values and respects the way of the firearm.

Subscribe to our monthly Newsletter to receive firearm news, product discounts from your favorite Industry Partners, and more.
Copyright © 1996-2024 AR15.COM LLC. All Rights Reserved.
Any use of this content without express written consent is prohibited.
AR15.Com reserves the right to overwrite or replace any affiliate, commercial, or monetizable links, posted by users, with our own.


