FL, USA
|
Posted: 8/15/2010 7:54:56 PM EDT
I wanted to share my experience trying out Sponge Camo and found only a few references on some other forums so I thought I would post a how to.
Materials- Khaki, OD, and Oregano Rustoleum or Krylon Sponge-Walmart craft section buy the one that look like natural sponges. Gloves A likely victim I started by painting an old stock with a base coat of khaki. 
I then painted random but fairly evenly spaced stripes of OD over the khaki base coat. 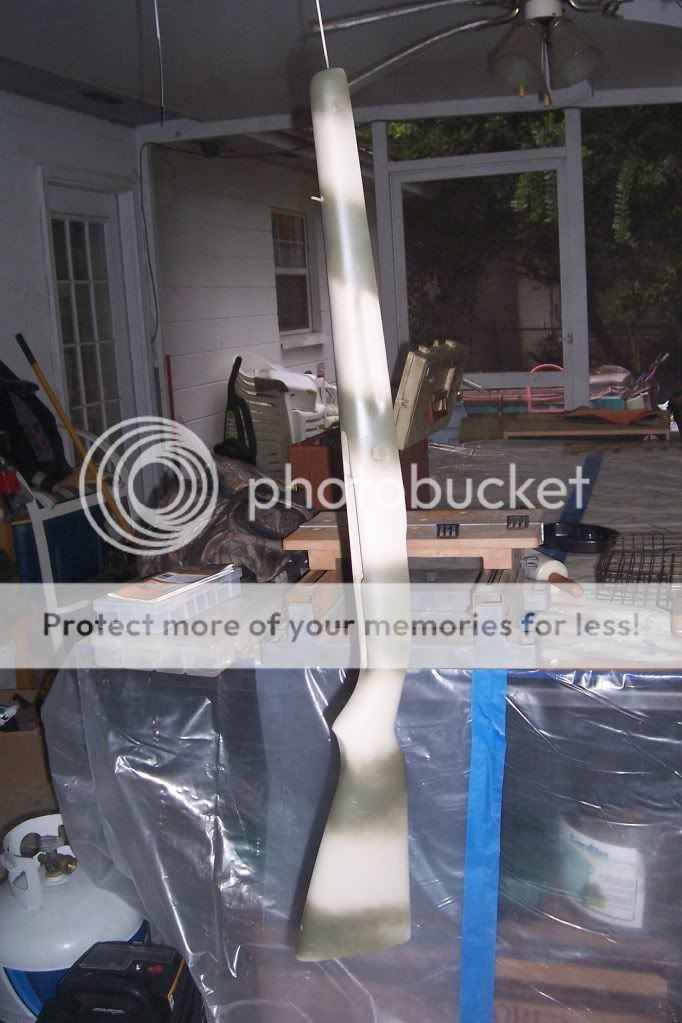
The next step was to spray some of the khaki onto a paper plate, then dip the sponge into the paint and dab the khaki paint onto the OD stripes. Dont go to heavy. 
The next step is to take the sponge then dip it in OD paint then dab the OD paint on the kahki. Again don't go to heavy. 
This is what you should have so far- not half bad but we're not done. The next step is to put some Oregano color over the whole thing again using the paper plate and the sponge. 
After the Oregano. 
I should have left well enough alone at this point but thought it needed some brown or dark tan so I started with a liitle Rustoleum Nutmeg and although its kind of close to the dark tan background in woodland Marpat I thought it was to light. I then followed up with some Rustoleum Chestnut-still to light. So––- I went with Rustoleum Flat Brown. It finished up a little busy but blends in well. 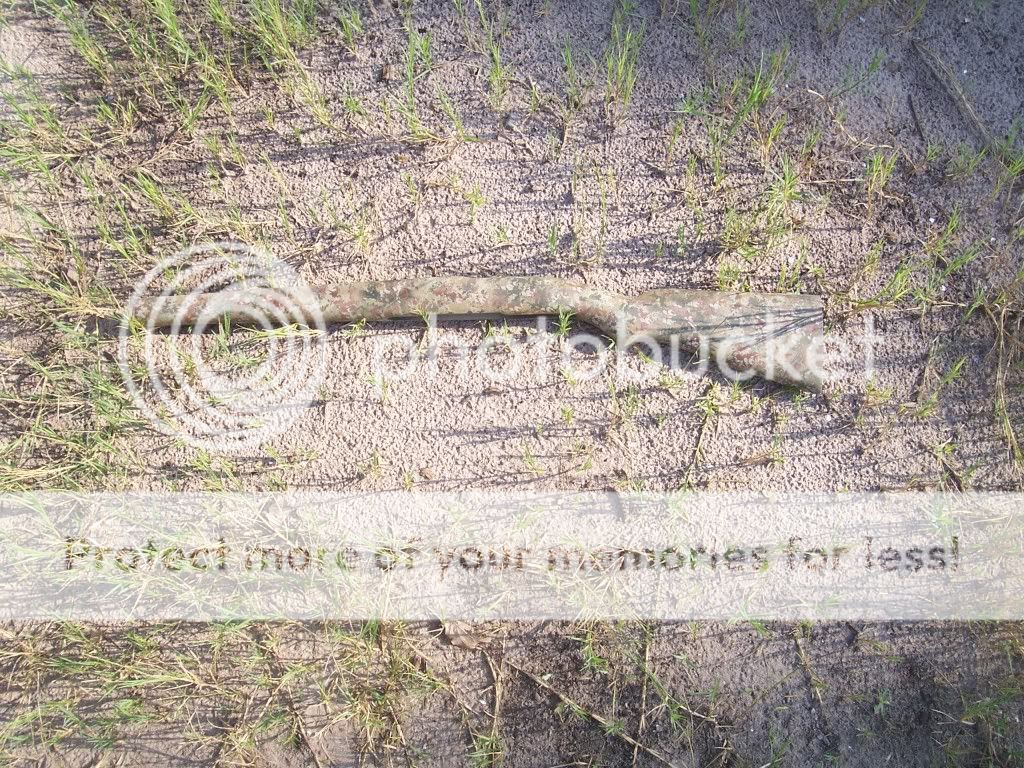

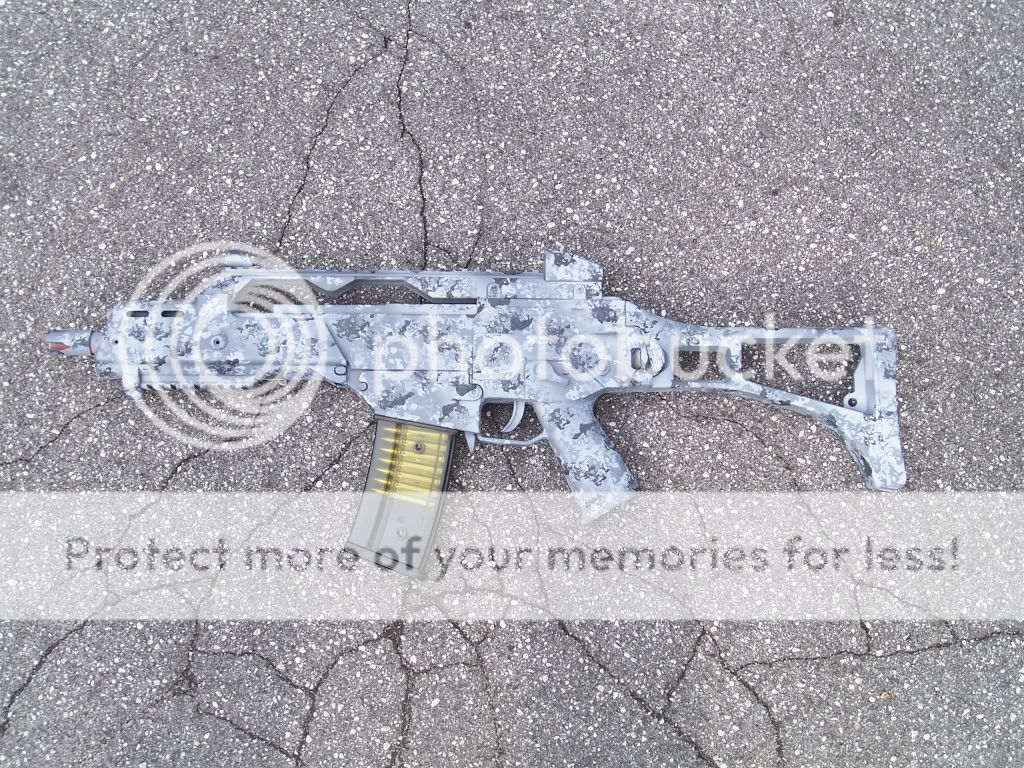
Not bad for a first attempt. I liked the overall effect and thought that for a rattle can job it looks outstanding. For my next attempt I decided to try an urban type camo consisting of Rustoleum light gray, medium and dark gray primer. The victim is my son's old airsoft gun. 
Here is the finished product. It seems that using three colors keeps the pattern a little more open and defined. 
I was wondering if it would be possible to use this technique with Duracoat. I've painted with stencils and will continue to do so but this seems like alot of fun and it's not permanent. The next victim will be one of the ARs. |
|
|
|
[#1]
Originally Posted By PhreakMode: Instead of using a sponge, try a piece of plastic tarp (in a similar manner): http://i206.photobucket.com/albums/bb211/phreakmode/DSC_0195_zps48cf6aa2.jpg |
|
|
|
OR, USA
|
[#2]
Mind going into detail on how you pulled that off? This is some of the best sponge camo I've seen. |
|
|
IL, USA
|
[#3]
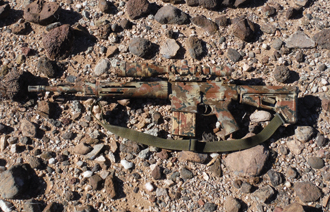
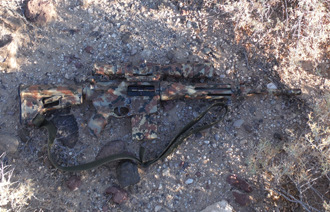
Hey thanks! It was my first attempt! I used a basecoat of rustoleum satin dark taupe, then a few big stripes of rustoleum flat camo dark green. Tore up little pieces of sponge and dabbed the taupe over the green stripes and dabbed green over the taupe stripes. Then all over dabbed the rustoleum camo flat light green and rustoleum camo flat light sand or tan-cant remember the exact color names of the camo paints but they only make 4 or 5 colors anyway.
After that just sort of keep dabbing all four colors as you see fit for a nice blend. I also sprayed the sling in the satin dark taupe and striped it with the darker green. Overall the whole thing looks really good in person, I was afraid to do it at first, drank two beers to get started, and I'm really happy with the result. Thanks to this forum for the inspiration.  . http:// . http://
|
|
|
|
[Last Edit: ultramagbrion]
[#4]
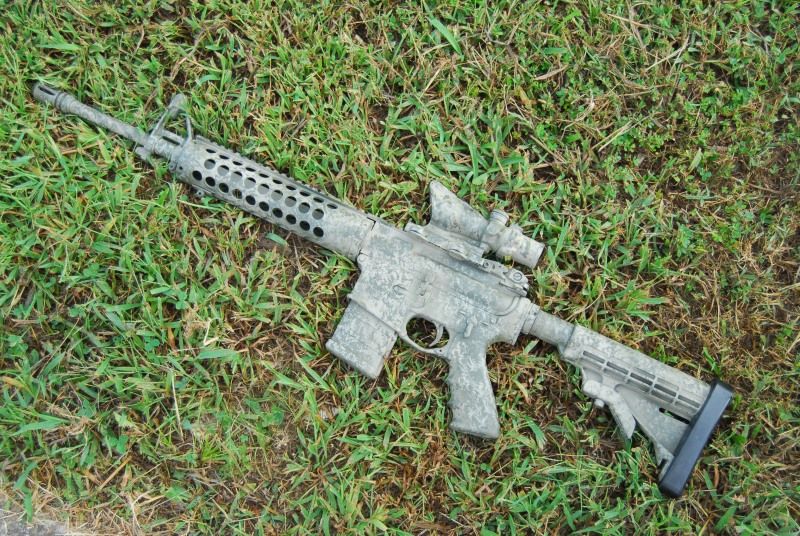
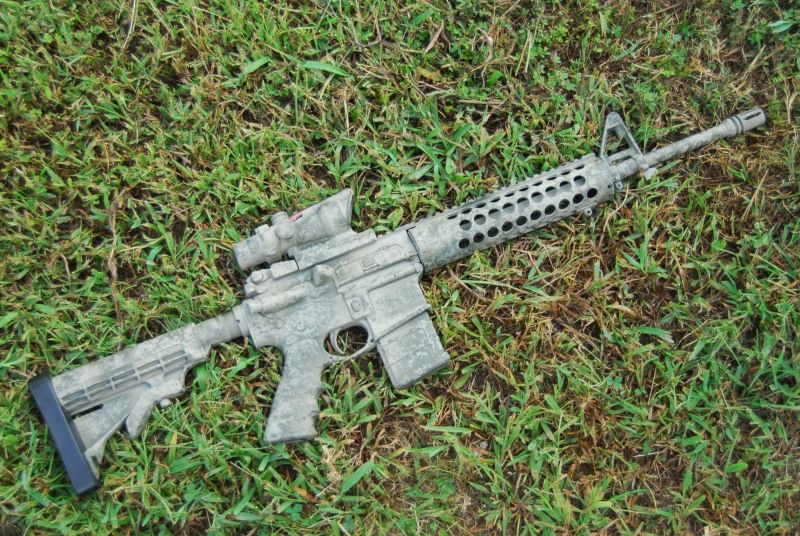
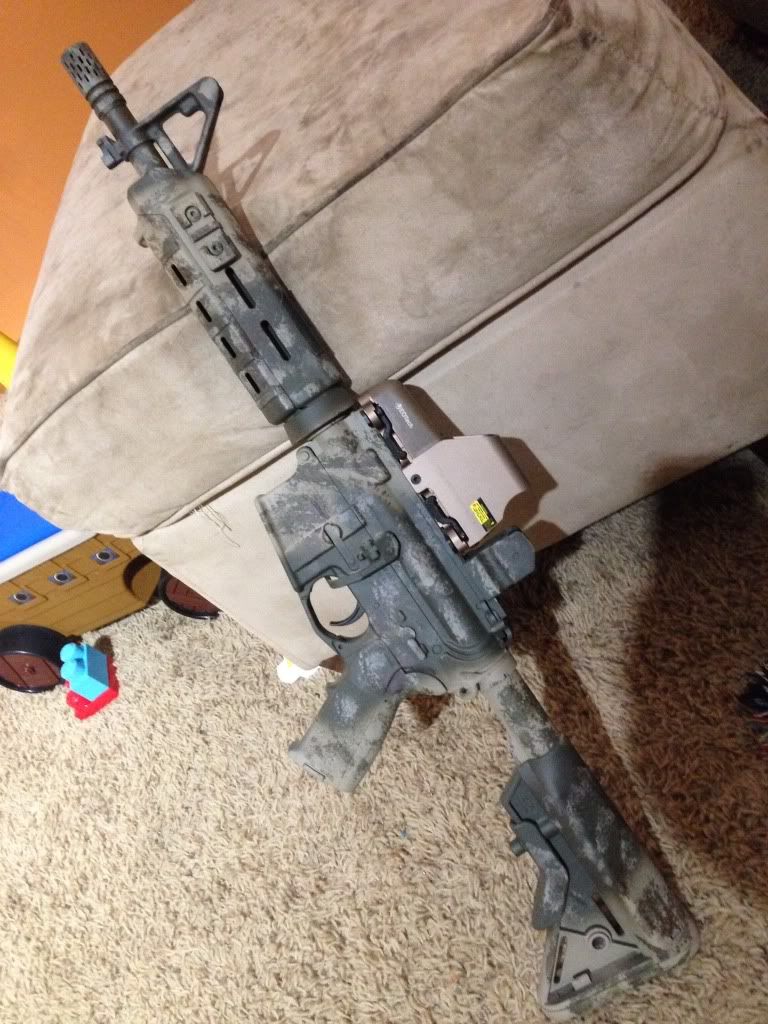
I shot a base of darker green , and then hand painted the gray and brown 'branches'....then started sponging on the colors, black over the 'branches' ....
 .....then some greens and tan  I'll let it set all up and then check a few spots to see if I should put a flat clear over it all .  Its cloudin up hard here ....gonna get wet soon , but together , waiting on optics ....  |
|
|
|
|
[#5]
Originally Posted By jrn156:
I wanted to share my experience trying out Sponge Camo and found only a few references on some other forums so I thought I would post a how to. i just noticed that your table cloth would make an interesting pattern |
|
|
|
|
[#6]
after a very unfortunate sponge painting episode with one of my rifles, i came up with this design on a pair of old handguards. gonna repaint the rifle as soon as i get the old paint off.
 |
|
|
|
NY, USA
|
[#7]
here is my attempt at it krylon olive drad,rustoleum army green,krylon sand, krylon black. 2 light coats of krylon matte clear


|
|
|
KY, USA
|
[Last Edit: theunforgivenll]
[#8]
gave it a try on the old sks, it was easy, laid down a texutred base, followed buy khaki tan, then sponged brown and black.

|
|
|
|
[#9]


|
|
|
|
IA, USA
|
[#10]
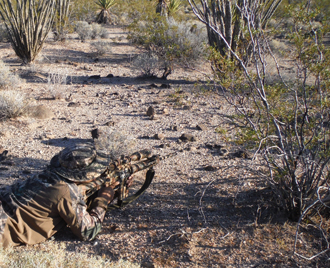
I already posted this scheme earlier in the thread, but I never posted one outside (these were taken in the spring).


|
|
|
AZ, USA
|
[#11]
Most of these turned out seriously amazing looking. I'm still trying to gather the balls to do this to one of mine. I have a few spare stocks laying around that I will experiment with first. Thanks for sharing guys!
|
|
|
AL, USA
|
[#12]
1st time with a sponge.
   |
|
|
|
[#13]
You guys clear coat over it? If so, what will hold up to my kids abuse best?
|
|
|
|
|
[#14]

So this is my Ruger 10/22 stock cut down 4 inches for my 7 year old daughter... Roughed up take off i got for $25 at gun show... not original for this rifle. Before i re-assemble, do i put on protective coat or no? |
|
|
|
IA, USA
|
[#15]
Originally Posted By 1969iggy:
You guys clear coat over it? If so, what will hold up to my kids abuse best? I wanted my camo to hold up a little while longer, so I did 2-3 "light" clear coat applications. That way it would build up and not have as much sheen to it. Seems to have worked fine, and I haven't noticed anything other than some slight wear on my grips. Even there it isn't really noticeable. It still looks great after 5-6 months using it every weekend. |
|
|
AL, USA
|
[#16]
 |
|
|
|
[#17]
Originally Posted By secretwheelman:
http://i1008.photobucket.com/albums/af204/secretwheelman/100_0739_zpsa2b366dd.jpg Best sponge camo I have ever seen. Very well done. |
|
|
|
AL, USA
|
[#18]
Originally Posted By TheTacticalCoyote: Best sponge camo I have ever seen. Very well done. Originally Posted By TheTacticalCoyote: Originally Posted By secretwheelman: http://i1008.photobucket.com/albums/af204/secretwheelman/100_0739_zpsa2b366dd.jpg Best sponge camo I have ever seen. Very well done. That means a lot coming from a man of your experience; thank you. I'm seriously considering repainting my mk12 in a similar pattern. |
|
|
TN, USA
|
[#19]
Originally Posted By TheTacticalCoyote:
Best sponge camo I have ever seen. Very well done. Originally Posted By TheTacticalCoyote:
Originally Posted By secretwheelman:
http://i1008.photobucket.com/albums/af204/secretwheelman/100_0739_zpsa2b366dd.jpg Best sponge camo I have ever seen. Very well done. Agreed. It's a fantastic looking rifle. This effort has finally given me the nerve to begin painting my favorite AR. The khaki base is drying now...I'll post pics when it's done. Aiming that first blast of Krylon at the ACOG still made me nervous, though. |
|
|
TN, USA
|
[#20]
Well, better or worse, here it is...
|
|
|
AZ, USA
|
[#21]
Originally Posted By secretwheelman:
http://i1008.photobucket.com/albums/af204/secretwheelman/100_0739_zpsa2b366dd.jpg Just curious, what did you use for the sponging? Doesn't look like a natural sponge type pattern. |
|
|
|
[#22]
Laser Strike with new TKC scales.
Sponge job to Sheath 

|
|
|
|
AL, USA
|
[Last Edit: secretwheelman]
[#23]
Originally Posted By 0uTkAsT: Just curious, what did you use for the sponging? Doesn't look like a natural sponge type pattern. Originally Posted By 0uTkAsT: Originally Posted By secretwheelman: http://i1008.photobucket.com/albums/af204/secretwheelman/100_0739_zpsa2b366dd.jpg Just curious, what did you use for the sponging? Doesn't look like a natural sponge type pattern. I used natural sponges and went pretty light on the pressure.  |
|
|
|
[#24]

|
|
|
|
|
[#25]
Originally Posted By bigmoney327:
<a href="http://s1053.photobucket.com/user/bigmoney327/media/20130915_195732_zps39ada909.jpg.html" target="_blank">http://i1053.photobucket.com/albums/s466/bigmoney327/20130915_195732_zps39ada909.jpg</a> ... and you did a great job on that peach too! 
|
|
|
|
|
[Last Edit: Doomstick]
[#26]
Here is my first attempt. Thanks to jrn156 and all the other contributors for the advices and ideas!
|
|
|
|
|
[Last Edit: MisterPX]
[#27]
Thanks for teh inspiration, and showing that's it's so damn easy, even I could do it.
Receiver will get done after I throw an optic on there. Finished now 
|
|
|
|
TX, USA
|
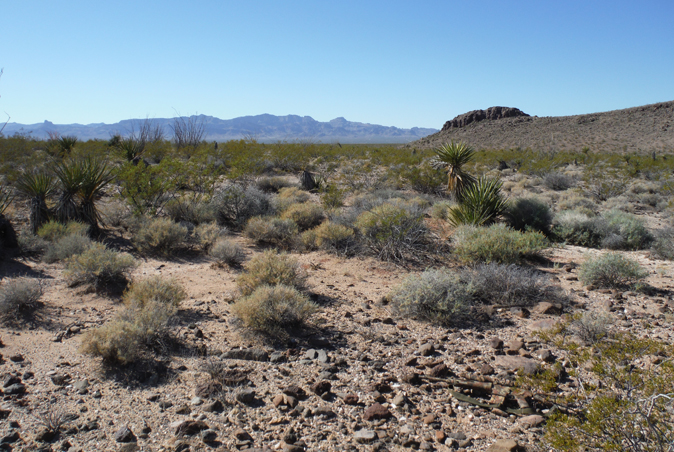
[#28]
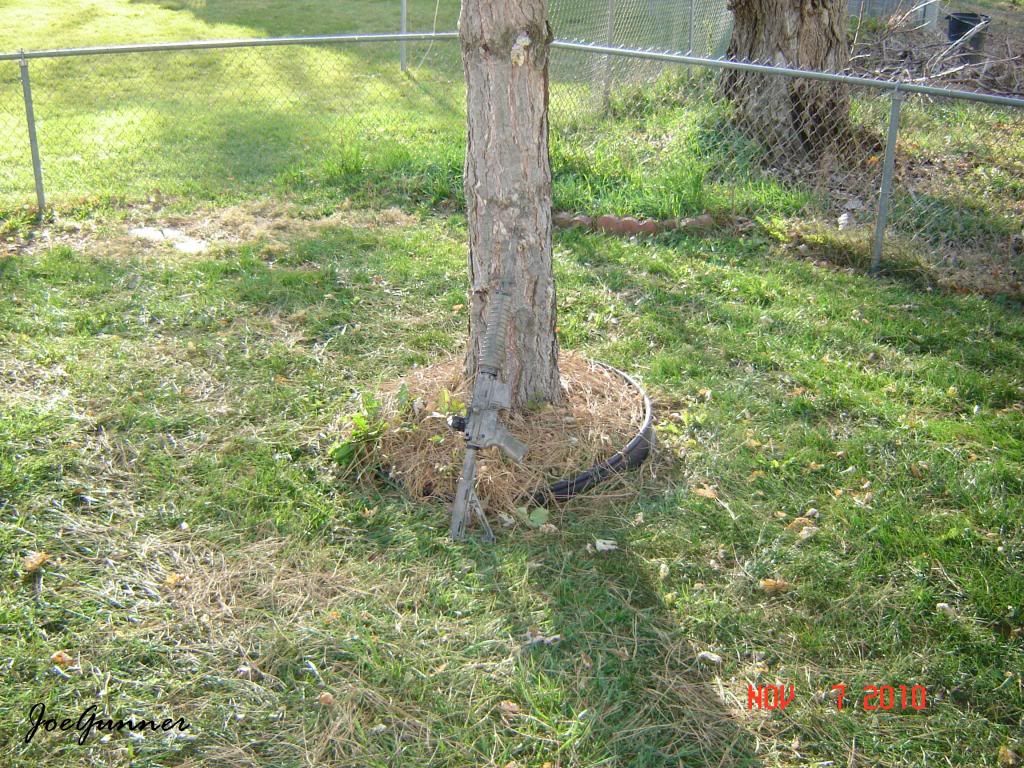
Yeah, nice try, jerk! You think by posting a picture of a tree that I'm just going to assume that your AR is camo'd so good that I won't be able to see it. Great plan. I'm onto you; there's no AR in this picture. Whatevs, bro. Whatevs. |
|
|
|
[#29]
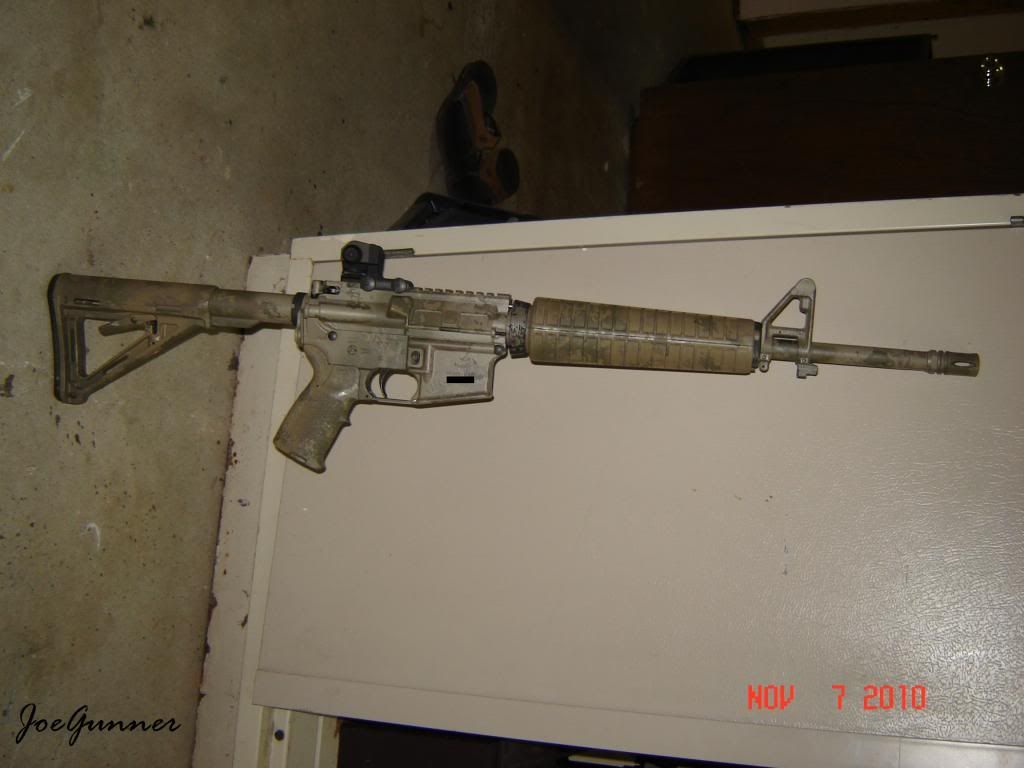
Finished product, just ahve to get the scope back on and re-zero.

|
|
|
|
|
[#30]
Originally Posted By 1969iggy:
Finished product, just ahve to get the scope back on and re-zero. http://i41.tinypic.com/16c5dnp.jpg Outstanding! |
|
|
|
NY, USA
|
[#31]

|
|
|
WA, USA
|
[Last Edit: Stjjames]
[#32]
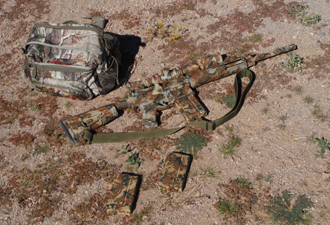
Older pic of a sidearm & some gear I painted / sponged.


|
|
|
|
[#33]
My attempt. Outside pics to follow once I can get it out in daylight.
|
|
|
|
USA
|
[#34]
I read like the first sentence..and then I just started putting on a ton of paint..with a sponge..

|
|
|
|
[#35]
Originally Posted By camoman33935:
Here's my contribution to the thread. Just did it about 30 mins ago. I'm not totally sure if I like it or not...I guess it's a good thing I practiced on an old BB gun first lol. I think I may have went a little to heavy on the khaki spots. What do yall think? Sorry for the huge pic. http://i959.photobucket.com/albums/ae75/camoman33935/Camo%20Project/IMG_1331.jpg Rotate the sponge every time so the splotches aren't uniformly shaped. That's a little sparse but a good start. Also vary the size of the sponge splotches as well as the orientation. Remember, think "random". |
|
|
|
|
[Last Edit: guns762]
[#36]
Originally Posted By ColonelHurtz:
Rotate the sponge every time so the splotches aren't uniformly shaped. That's a little sparse but a good start. Also vary the size of the sponge splotches as well as the orientation. Remember, think "random". Originally Posted By ColonelHurtz:
Originally Posted By camoman33935:
Here's my contribution to the thread. Just did it about 30 mins ago. I'm not totally sure if I like it or not...I guess it's a good thing I practiced on an old BB gun first lol. I think I may have went a little to heavy on the khaki spots. What do yall think? Sorry for the huge pic. http://i959.photobucket.com/albums/ae75/camoman33935/Camo%20Project/IMG_1331.jpg Rotate the sponge every time so the splotches aren't uniformly shaped. That's a little sparse but a good start. Also vary the size of the sponge splotches as well as the orientation. Remember, think "random". Something I discovered after this weekends painting was that the sponges work better if they have dried paint on them, making them stiff. My used sponges from the morning spotting scope painting, worked much better in the evening on the rifle because they were so stiff. It creates more intricate detail in the markings, and less blotchyness. It's easier to get varied amounts of paint, and size of markings.  </a> image by guns762, on Flickr" /> </a> image by guns762, on Flickr" />
 image by guns762, on Flickr" /> image by guns762, on Flickr" />
|
|
|
|
IA, USA
|
[#37]
Originally Posted By guns762:
Something I discovered after this weekends painting was that the sponges work better if they have dried paint on them, making them stiff. My used sponges from the morning spotting scope painting, worked much better in the evening on the rifle because they were so stiff. It creates more intricate detail in the markings, and less blotchyness. It's easier to get varied amounts of paint, and size of markings. Very true, I happened to come across this last time I painted. Stiff sponges > soft sponges It helps make more unique patterns, and looks better to me. |
|
|
AL, USA
|
[#38]
  |
|
|
GA, USA
|
[#39]
I just realized I hadn't posted the results of my experiment in the sponge cammo technique! Strange, since it was this thread from which I learned it. Thanks to all for the tips and inspiration!
I did two Chinese guns I picked up cheap (for very good reason). The stocks on both now probably have more wood filler and epoxy than actual wood, so a paint job was mandatory (in my mind, anyway). 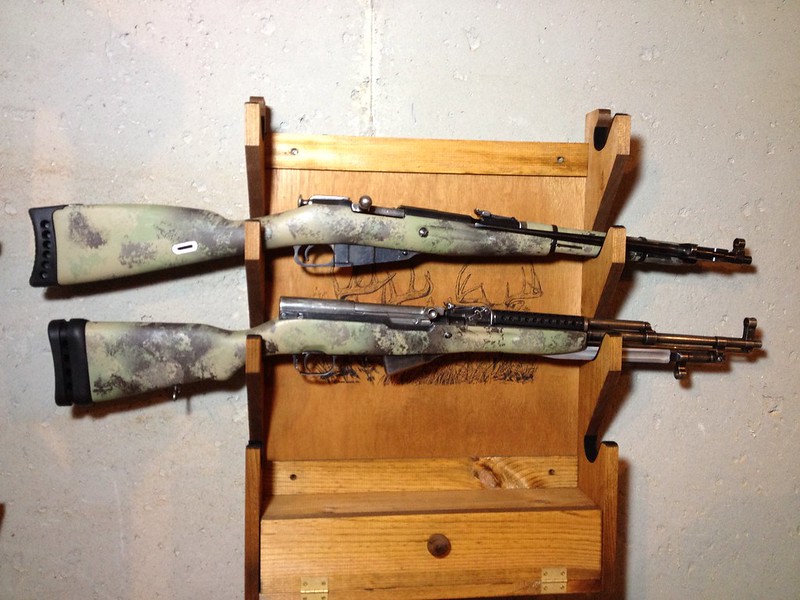
Type 53 (top), Type 56 (bottom) |
|
|
HI, USA
|
[Last Edit: Dragonfly228]
[#40]
My buddies sponge job.
|
|
|
|
[#41]


|
|
|
|
|
[#42]

|
|
|
|
USA
|
[#43]
Looks good, but the off-color FDE mag makes it very easy to pick out. |
|
|
|
[#44]
Originally Posted By DelTonGuy:
Looks good, but the off-color FDE mag makes it very easy to pick out. Originally Posted By DelTonGuy:
Looks good, but the off-color FDE mag makes it very easy to pick out. Ive painted the mags since posting those pics but no outside pics with them. 

|
|
|
|
|
[Last Edit: The_Hammer]
[#45]


|
|
|
|
FL, USA
|
[Last Edit: SHWELL]
[#46]
Weird, I thought I posted some of my Sponging jobs in the past. If I missed where I posted them, sorry.. This thread was such an Inspiration back in 2010, I haven't stopped sponging since finding this thread and making that YT vid about it..
Here are a few of my favorites. These are all Airsoft, but I have done a few Real Steel guns that I don't have access to pics of right now.. 


|
|
|
GA, USA
|
[#47]
I've been incredibly skittish about painting any of my guns, but this technique seems just easy enough that I might not screw it up. I am VERY much not an artsy person.
|
|
|
|
[#48]
Originally Posted By EvanWeeks:
I've been incredibly skittish about painting any of my guns, but this technique seems just easy enough that I might not screw it up. I am VERY much not an artsy person. Go for it. Worst case, you mess it up, and have to spray your firearm down with brakleen to get it back to stock. |
|
|
|
TX, USA
|
[#49]
finally finished. pretty happy with it, going to do a magazine to match i think.

|
|
|
|
[#50]
  |
|
|
|
 Win a FREE Membership!
Sign up for the ARFCOM weekly newsletter and be entered to win a free ARFCOM membership. One new winner* is announced every week!
You will receive an email every Friday morning featuring the latest chatter from the hottest topics, breaking news surrounding legislation, as well as exclusive deals only available to ARFCOM email subscribers.

AR15.COM is the world's largest firearm community and is a gathering place for firearm enthusiasts of all types.
From hunters and military members, to competition shooters and general firearm enthusiasts, we welcome anyone who values and respects the way of the firearm.

Subscribe to our monthly Newsletter to receive firearm news, product discounts from your favorite Industry Partners, and more.
Copyright © 1996-2024 AR15.COM LLC. All Rights Reserved.
Any use of this content without express written consent is prohibited.
AR15.Com reserves the right to overwrite or replace any affiliate, commercial, or monetizable links, posted by users, with our own.


