|
Posted: 7/10/2010 7:24:52 AM EDT
I figured a separate topic might be a good idea for this.
The early Armalite rifles used a "double slab side" lower, as can be seen in this picture here: 
The question is, what would the best way to recreate these be? These lowers lack the raised area on the side of the mag well, they lack the reinforcement at the rear of the receiver, the bolt catch seems to be anchored internally, and the selector markings are different. I would imagine the right side is similar to that of a 601 for the most part. I kind of thought that using an 80% lower for this would be a good starting point but, I'm worried about removing the material on the left side of the mag well. As it turns out, these are cut on the inside for the bump on the side of the mags themselves. I don't think there's enough material present to go to town milling or grinding away at this area. Even if you don't break through the side, this portion would be left very thin. Anybody have any thoughts, theories, trial and error, or anything else? |
|
|
|
[#1]
It has been done, there is a picture floating around this forum of a rifle someone has done that to.
I'd be interesed in seeing some up close pics of how they did the bolt catch. I am working on an 80% lower myself (for a prototype replica), and I decided against removing the raised area on the left side of the magwell. With the lower I have, it could have been done, but by my estimate there would have been .020 or less material in that area. That's getting mighty thin, and I sure wouldn't want to engrave there. I'm sure someone out there has the skill and tools to fill that area from the inside, but then you get into the additional cost, plus figuring out how to get a magazine to work. I did do some other mods to my 80% receiver. I should have it back from the engraver in a week or so. I'll post some pictures when I get it back. John Thomas |
|
|
|
[#2]
A member has done one,I thought last time this question popped up the it was peepshowal,but he corrected me,but son of a gun,I can't remember who it was.But bottom line,the ears were removed,a channel was cut from the top of the receiver sidewall down to the depth needed,and I believe the hole in the bolt catch needed to be welded over and new hole drilled (NOT sure about that).So basically,the roll pin would be inserted into the bolt catch,then the unit was dropped in from the top.Does this make sense??
|
|
|
|
[#3]
Quoted:
A member has done one,I thought last time this question popped up the it was peepshowal,but he corrected me,but sone of a gun,I can't remember who it was.But bottom line,the ears were removed,a channel was cut from the top of the receiver sidewall down to the depth needed,and I believe the hole in the bolt catch needed to be welded over and new hole drilled (NOT sure about that).So basically,the roll pin would be inserted into the bolt catch,then the unit was dropped in from the top.Does this make sense?? That sounds right from what I remember reading, I remember the talk of milling the channel out, but man... I wonder how the originals were made? I would think there was some way of removing the bolt release. Any AR10 owners out there with some insight/pictures? John Thomas |
|
|
|
[#4]
|
|
|
|
[#5]
I found this thread on an AR-10.
http://www.ar15.com/forums/topic.html?b=3&f=62&t=501546 If you look at the first picture, there appears to be a single tiny hole for a pin of some kind. Without seeing the inside, or the rest of the parts, it almost raises more questions than answers. |
|
|
|
[#6]
Thanks cracked,that's the one I was looking for.
|
|
|
|
[#7]
This is a different view of the same reweld. A funny dowel goes through the pivot hole in the bolt catch. That funny dowel has a little bitty hole in it which lines of with the pin hole you noticed in the left side of the receiver. If you like I could get photos of all these AR10 parts.

The bottom line is that the there is a neck on the AR10 bolt catch so that it sticks far enough outside the receiver. It would be great to be able to use vintage AR10 parts in a retro AR15 build. However, the bolt catches are rare because they one of the few parts that occassionaly fails. The prototype's bolt catch looks identical to the early Sudanese variant of the Dutch AR10. The Portuguese and Sudanese bolt catches looked different but are interchangeable. Would it be possible to CNC some bolt catches? Or must they be cast? If the AR10 bolt catches were faithfully reproduced than they might satisfy both AR15 and AR10 communities. 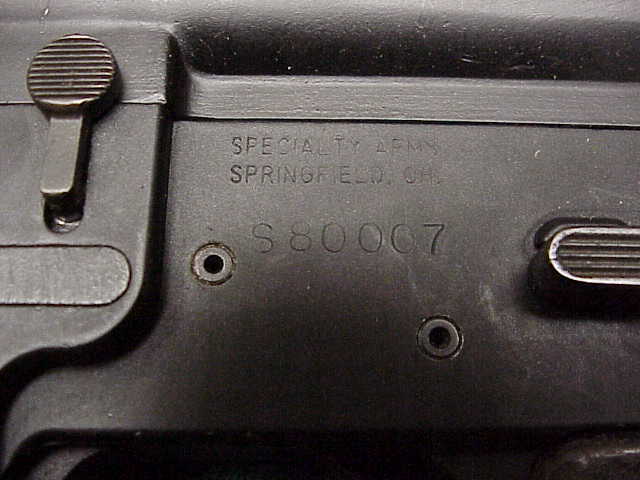
|
|
|
|
[#8]
Quoted:
This is a different view of the same reweld. A funny dowel goes through the pivot hole in the bolt catch. That funny dowel has a little bitty hole in it which lines of with the pin hole you noticed in the left side of the receiver. If you like I could get photos of all these AR10 parts. Yes, I would love to seem them. I don't see why these couldn't be machined, cnc'ed or other wise, as long as the steel is properly hardened. |
|
|
|
[#9]
Here are some photos. The side view photo below shows the funny dowel sitting on top of the lower. Once the dowel goes all the way inside you can see how the little pin holes will line up. If I had put the bolt catch in place then none of this would be easily visible.

The next photos shows a view where you can see how then funny dowel and bolt catch fall into place. 
Finally, here is a family photo. The middle one is for the later Portuguese AR10 because I do not own or need an earlier bolt catch. The one on the right is a generic AR15 catch. Using the dowel hole as basis, the AR10 catch level sticks out the side of the receiver much father than the AR15 catch would. Now on the left is a broken AR10 catch. That is why nobody would ever sell an extra AR10 bolt catch to anyone who would use it other than on another AR10. 
|
|
|
|
[#10]
Quoted:
Here are some photos. The side view photo below shows the funny dowel sitting on top of the lower. Once the dowel goes all the way inside you can see how the little pin holes will line up. If I had put the bolt catch in place then none of this would be easily visible. The next photos shows a view where you can see how then funny dowel and bolt catch fall into place. Finally, here is a family photo. The middle one is for the later Portuguese AR10 because I do not own or need an earlier bolt catch. The one on the right is a generic AR15 catch. Using the dowel hole as basis, the AR10 catch level sticks out the side of the receiver much father than the AR15 catch would. Now on the left is a broken AR10 catch. That is why nobody would ever sell an extra AR10 bolt catch to anyone who would use it other than on another AR10. Thanks for the pictures. That clears it up. One more question. I guess to remove the tiny roll pin that holds the "funny dowel", it has to be driven all the way though from the outside in, then the tiny roll pin drops out the magazine well? That's the only way I can see getting the tiny roll pin out. Is this correct? Man, it would be super if someone could make some bolt catches like this. Thanks again, John Thomas |
|
|
|
[#11]
The little bitty pin is pushed all the way through to remove it.
Is there anyone with enough metals and fab knowledge to confirm that a bolt catch from CNC might be ok? Not ok? |
|
|
|
[#12]
So, not that it matters, but in the picture below, do you know if this style works the same way? Is the hole for the tiny roll pin just further to the side and not visible in the picture?
Thanks, John Thomas
|
|
|
|
[#13]
Quoted:
Is there anyone with enough metals and fab knowledge to confirm that a bolt catch from CNC might be ok? Not ok? I'm no expert, but it looks like the part could be machined either on a CNC or a regular milling machine. I'm sure you'll get feedback on that. John Thomas |
|
|
|
[#14]
The older style (Sudanese) bolt catch is interchangeable with the later (Portuguese). However, the Sundanese lowers did bot have the little bitty pin hole. Instead I believe that the funny dowel was jammed in place. Below is a diagram of a Tranitional lower receiver setup. That means its a mutt mixture of old (Sudan) and new (Porto) pices on a Sudan lower with no buffer tower hump. Notice no pin hole. Notice also the later bolt catch.

|
|
|
|
[#15]
Quoted:
The older style (Sudanese) bolt catch is interchangeable with the later (Portuguese). However, the Sundanese lowers did bot have the little bitty pin hole. Instead I believe that the funny dowel was jammed in place. Got it... it would be held in place by the installed upper receiver. John Thomas |
|
|
|
[#16]
I was going to ask....why the dowel that the bolt release pivots on could not just be jam or pressure fitted?
Have it bottom out in the cavity, and long enough to fit flush with the upper edge of the lower, held in place by the upper??? |
|
|
|
[#17]
Quoted:
I was going to ask....why the dowel that the bolt release pivots on could not just be jam or pressure fitted? Have it bottom out in the cavity, and long enough to fit flush with the upper edge of the lower, held in place by the upper??? Yessir, that is how I think the original Sudanese variant AR10's worked, with no itty bitty pin. The old AR10 bolt catches are rare enough that I happily paid $20 for the broken one in the previous group photo, in the hopes of rewelding it with the business end of a DPMS-308 bolt catch (photo below). Some nice old dude must fave felt sorry for me when he recently sold me his spare for $50, which included the dowel thingy. These AR10 parts make Colt 601 stuff look cheap. At least you guys can get original furniture, but at a price. 
|
|
|
|
[#18]
Thanks very much for the pictures. Those go a long way toward explaining how these things were put together.
Is that AR-10 lower cut in half? That's a real shame there's not a lot of love for those early guns. I love the look of them myself. The very first ones with the massive flash hiders are my favorite. I don't think it'd be any trouble at all to get some bolt catches machined. Going over it in my head, I could probably do it with a small block of steel and some time on a mill. If I could just get a mill. You really don't appreciate them until you don't have one. I would think any small parts shop would be able to do it however. Not sure on the cost though. |
|
|
|
[#19]
Yes, the lower has been hack-sawed. Many of the old ones were emasculated that way when it was sufficient. Now I think the ATF would recommend or require running over it with a bulldozer. Saw-cut AR10 lowers are easy to come by and more than a few folks have contemplated and accomplished a rejoining of sorts.
If the bolt catch could be CNC'ed then I wonder why it has not already been done for the AR10's? For retros maybe it would be as simple as cutting and rejoining an M16 bolt catch, adding more distance between the lever and the lower!?!? Could a bolt catch be successfully welded anyhow? |
|
|
|
[#20]
I would imagine the lack of AR-10's on the market would limit the demand. Most people probably don't shoot them or shoot them very little to avoid breaking the hard to find parts. As for welding a bolt catch, I would imagine you could. I'm not sure how it would hold up though.
A discussion in another thread brought up a potential dilemma. It would appear the 80% lower I planned on using comes pre-marked with "SAFE" and "FIRE". This is not good. The benefit of using an 80% is lost because of this. I would just buy a blem NDS 601 lower and be half there already. Question that arises is, how would I go about re-marking a lower that is already engraved? Could I grind away the current "FIRE" and "SEMI" markings? Maybe filling them with JB weld and stenciling the markings on then covering the whole thing with some type of hard core clear coat would be better? |
|
|
|
[#21]
Quoted:
I would imagine the lack of AR-10's on the market would limit the demand. Most people probably don't shoot them or shoot them very little to avoid breaking the hard to find parts. As for welding a bolt catch, I would imagine you could. I'm not sure how it would hold up though. A discussion in another thread brought up a potential dilemma. It would appear the 80% lower I planned on using comes pre-marked with "SAFE" and "FIRE". This is not good. The benefit of using an 80% is lost because of this. I would just buy a blem NDS 601 lower and be half there already. Question that arises is, how would I go about re-marking a lower that is already engraved? Could I grind away the current "FIRE" and "SEMI" markings? Maybe filling them with JB weld and stenciling the markings on then covering the whole thing with some type of hard core clear coat would be better? I just posted instructions and a pic on the other thread regarding removing the safe fire. I also have it on GOOD authority that a member may well be offering bolt stops you need when he finishes perfecting his method! ETA,YOU CAN NOT ANODIZE OVER JB WELD,it's an epoxy.Anodizing will only adhere to aluminum. |
|
|
|
[#22]
Will that method work on an already milled out lower? I'd imagine I'd need to shove some steel stock into the recess to support it and be a bit more gentle.
More importantly, could I still engrave/etch over that? |
|
|
|
[#23]
I think that if you do a good cleaning job, fill, and dress down JB weld they can engrave thru/over it.
I have had it done, the engraving was great, but my finishing of the lower was not as good as it should have been. |
|
|
|
[#24]
Quoted:
Will that method work on an already milled out lower? I'd imagine I'd need to shove some steel stock into the recess to support it and be a bit more gentle. More importantly, could I still engrave/etch over that? I did that on my 602.It took longer and you have to be real careful not to distort the side of the receiver,so what ever you use to block in the FC pocket needs to be nice and snug in there.,So to answer,,YES you can. As for engraving over it,I don't know as I ran out of $ after Victor anodized them,I plan to check with Jason (Identi Marking) when I'm ready to send them. ETA I used a solid piece of steel that fit into the pocket that was a tad loose,I then added a wood wedge (actually a spare wedge I had that's used to tighten up a hammer head) to snug it up. 602 
|
|
|
|
[#25]
Wow, you can't tell there was ever anything there. Thanks for the information on this, if the 80%'s don't work out, this'll be the way to go for sure.
|
|
|
|
[#26]
Quoted:
Wow, you can't tell there was ever anything there. Thanks for the information on this, if the 80%'s don't work out, this'll be the way to go for sure. Ahhh,octane,this was an 80%er from Tactical Machine.. This one was bought this past Feb or March and DID have the safe/fire on it.But JT has just posted that he received his TM in June and it had no markings on it. Just want to clarify. |
|
|
|
[#27]
Did you finish your 80% with a mill?
|
|
|
|
[#28]
No,antique drill press,and dremel and plenty of hand filing,that's why the rear detent hump ain't so great.View this thread and see what I used for removing the fence and the buffer tower re-inforcing,then used smaller dremel bits.http://www.ar15.com/forums/topic.html?b=3&f=123&t=504067
ETA for the inside finish work,and pin holes I have the CNCGunsmithing jig set and also use the antique drill press for that as well. |
|
|
|
[#29]
To quote m1sniper:
I also have it on GOOD authority that a member may well be offering bolt stops you need when he finishes perfecting his method!
Are you talking about vintage AR10 or AR15 bolt stops? I recall the production AR10 bolt stops were made from lost wax castings. Am looking for the reference. |
|
|
|
[#30]
Quoted:
To quote m1sniper: I also have it on GOOD authority that a member may well be offering bolt stops you need when he finishes perfecting his method!
Are you talking about vintage AR10 or AR15 bolt stops? I recall the production AR10 bolt stops were made from lost wax castings. Am looking for the reference. The finished product will look like the AR10 one you guys were talking about up top,but for use in the AR 15 lower for the potential build you guys are wanting to do..Round button head and then extending down flat like the one in the pic posted up top somewhere in this thread .The member sent me pics of before,during,and an almost complete one he has done,specifically for what you guys are in need of.I am NOT at liberty to give his name at this time.When he's ready,he will make them available.He asked my opinion on his work to date,and I think they look great! |
|
|
|
[#31]
That's exciting news. I've drawn up plans for an edgewater look-a-like. It won't function like the real thing but, it'll look like the real thing. I'm following a few leads and trying to get one machined for a reasonable price.
Also, I'm tossing around the idea of using one of the A2 lowers that NDS is selling at an absurdly low price. It's kind of a difficult choice, either way I go, I'm in for a lot of detail work. |
|
|
|
[#32]
I think I'm fairly certain as to which direction I'm going to take this but, I wanted to ask one more question.
I'm thinking it's probably a bad idea to take a torch to a lower and fill in the engravings with some aluminum brazing rod? What kind of horrible things might happen if I did that? 
|
|
|
|
[#33]
Well,I don't know for sure about brazing but can add this info.I had a lower engraved by Ident.A little mistake was made.They took it back and welded it over.A special rod/wire was needed that was specifically for 7075 T6 aluminum.The finished product looked great,HOWEVER,I was forwarned by Ident and Victor that the anodizing would show up with a blemish in the welded area.They both said will,,,not might.They could not say just how noticable it would be,,,BUT it would be there.I have not had it anodized as I ran into a different problem involving a snapped drill bit in the rear takedown detent hole.
|
|
|
|
[#34]
I think I may end up painting the end result, whatever it may be, just for simplicities sake. Might run a little DIY anodizing to protect the surface but, nothing more. At this point, weighing in all the variables, I'm thinking the 80% route is the way to go. Of course, I'll email them first and make sure they're not engraved just to be on the safe side.
I'm still going to experiment with the brazing though. I think I'll run a few tests with some scrap aluminum I have. It works at a fairly low temp but, it might still be high enough to cause some damage. I'll try a few different techniques and report back. |
|
|
|
[#35]
Quoted:
I think I may end up painting the end result, whatever it may be, just for simplicities sake. Might run a little DIY anodizing to protect the surface but, nothing more. At this point, weighing in all the variables, I'm thinking the 80% route is the way to go. Of course, I'll email them first and make sure they're not engraved just to be on the safe side. I'm still going to experiment with the brazing though. I think I'll run a few tests with some scrap aluminum I have. It works at a fairly low temp but, it might still be high enough to cause some damage. I'll try a few different techniques and report back. might want to add some of this stuff to your experiments to see how well it works at filling in engraving and taking anodizing http://durafix.com/ |
|
|
 Win a FREE Membership!
Sign up for the ARFCOM weekly newsletter and be entered to win a free ARFCOM membership. One new winner* is announced every week!
You will receive an email every Friday morning featuring the latest chatter from the hottest topics, breaking news surrounding legislation, as well as exclusive deals only available to ARFCOM email subscribers.

AR15.COM is the world's largest firearm community and is a gathering place for firearm enthusiasts of all types.
From hunters and military members, to competition shooters and general firearm enthusiasts, we welcome anyone who values and respects the way of the firearm.

Subscribe to our monthly Newsletter to receive firearm news, product discounts from your favorite Industry Partners, and more.
Copyright © 1996-2024 AR15.COM LLC. All Rights Reserved.
Any use of this content without express written consent is prohibited.
AR15.Com reserves the right to overwrite or replace any affiliate, commercial, or monetizable links, posted by users, with our own.


