|
Posted: 4/11/2009 6:54:54 PM EDT
I used 6530's thread as a basic starting point and inspiration. My father was visiting for the week, so he helped me with some really great ideas (he's an Advance license ham operator) and I practically did everything else (mounting, running cables, etc). I'm extremely happy with the overall progress with the exception of some minor problems that will be listed at the bottom of this thread.
MOUNTING ATAS-120A attached to the Diamond K400C mount 
Two inner screws are tapped into the metal strip that came with the mount. The two outer screws are lightly screwed into the trunk. 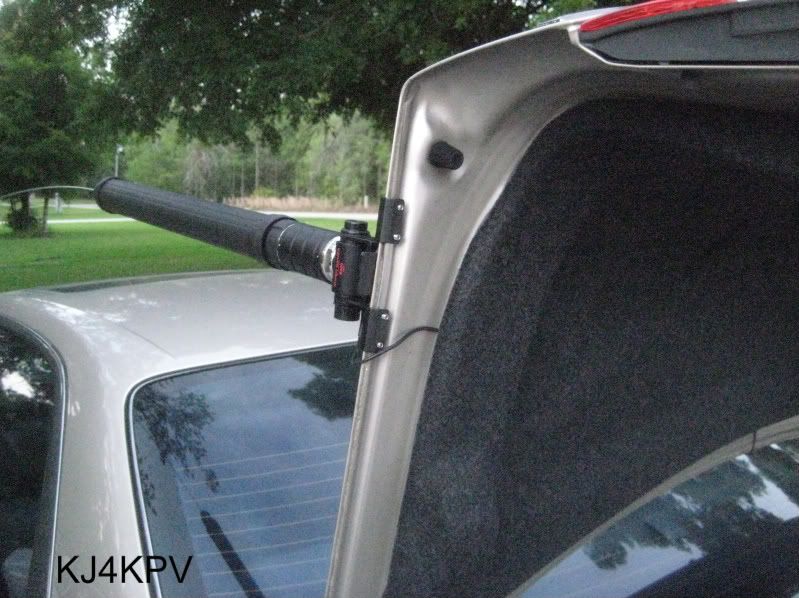
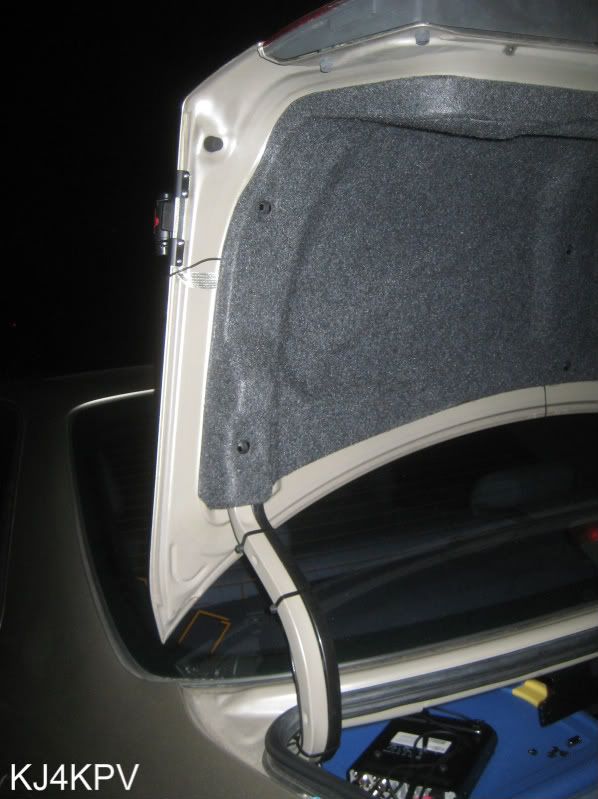
I had tucked the extra coax into the vanity liner and ran the rest down the hinge. I used black zipties to secure it in place 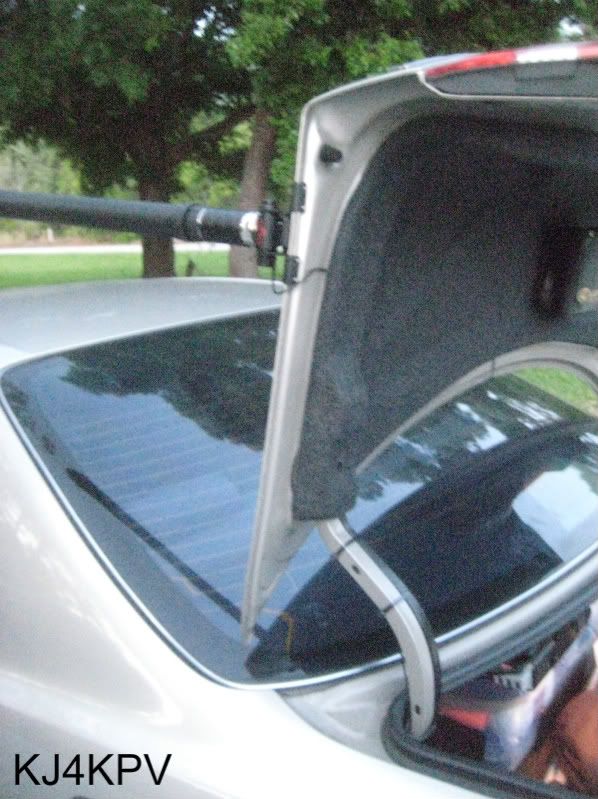
I used a small plastic cable clamp to hold the coax in place when the trunk hinge closes down. 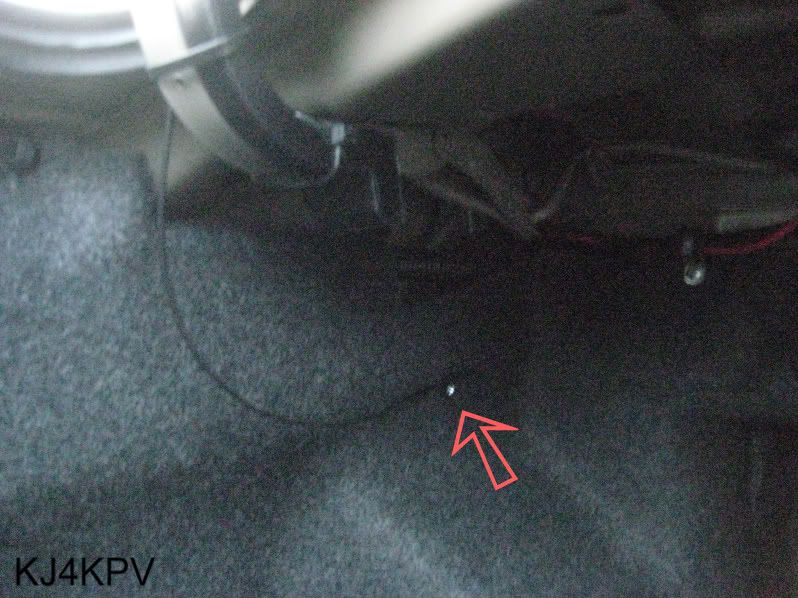
Another cable clamp screwed down to secure the rest of the cables out of the way (instead of hanging free). 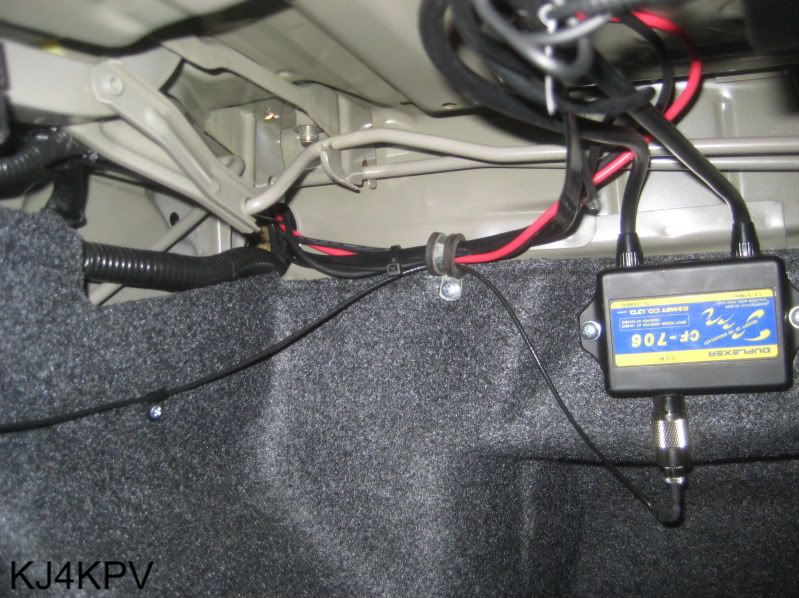
Since the metal plate was directly behind the vanity liner, the duplexer was mounted solid. It was the only place to mount it since the cables were short and it was a tight fit 
Now me being somewhat of a perfectionist, I didn't want to destroy the vanity liner in my Lexus mounting the radio (some parts of the vanity liner was not flush with the metal plates). As I had looked around, I had realized the top of the trunk was all metal. What could be a better place to put it than tucked away from above? 
Here's the overall look from the outside 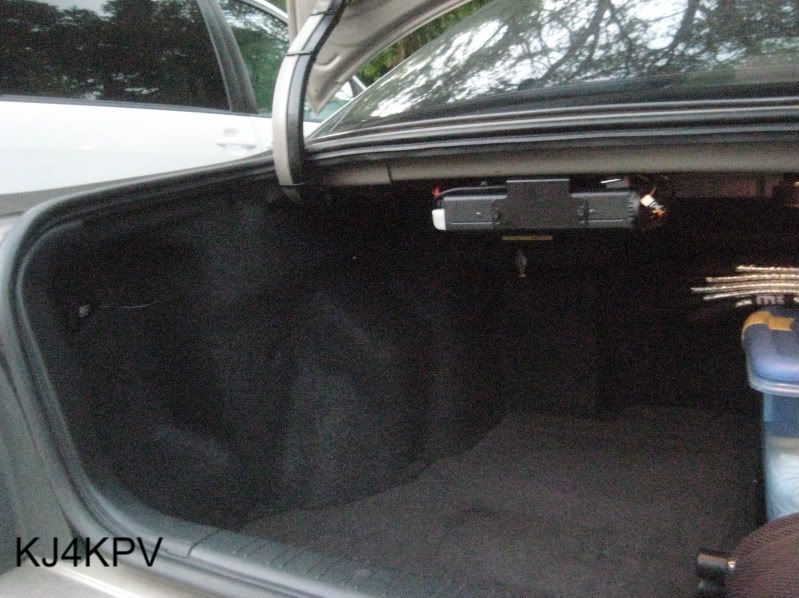
RUNNING POWER I had some difficulty trying to run the power cables from the battery to the rig. The Lexus was built too tight to the point that I was about to drill underneath the dash so I could get to the engine compartment. Then it hit me... Why not just run the cables on the inner part of the outside paneling, through the crevice of car door and down the strip? Then it was done... There wasn't enough factory cable to run it from the battery to the rig. I went to AutoZone and bought 2x 12' 12awg (pos and neg), spliced both ends and used a twist-cap wire connector. When I have more time, I'll purchase PowerWerx connectors to make it more professional looking. I know I did not really need to do this, but I wrapped the twist-caps with electrical tape. The fuses are located where the red arrow is pointing. 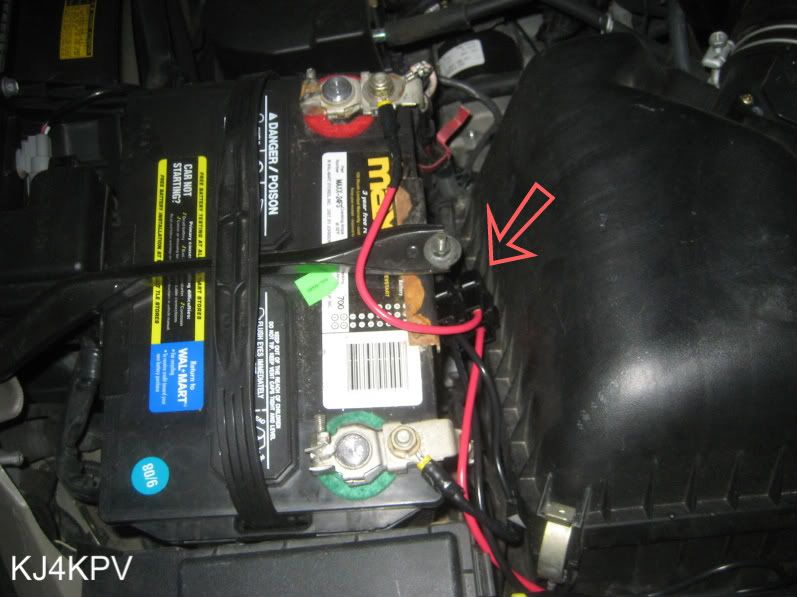
I ran the cable along the edge of the engine compartment. Because the cables were loose and risked being pinched from the hood, my father suggested Shoe Goo... his miracle fixer-upper to my duct tape. 
The first arrow on the left shows where the cable is coming out from the engine compartment. I used a small, black rubber hose to hide the red wire from outside view when the door is closed. Since there is rubber stripping all around the area, there is no risk of pinching. I tucked it up just in case it was raining so it wouldn't drip inside the cabin. I then tucked the wires inside the paneling. 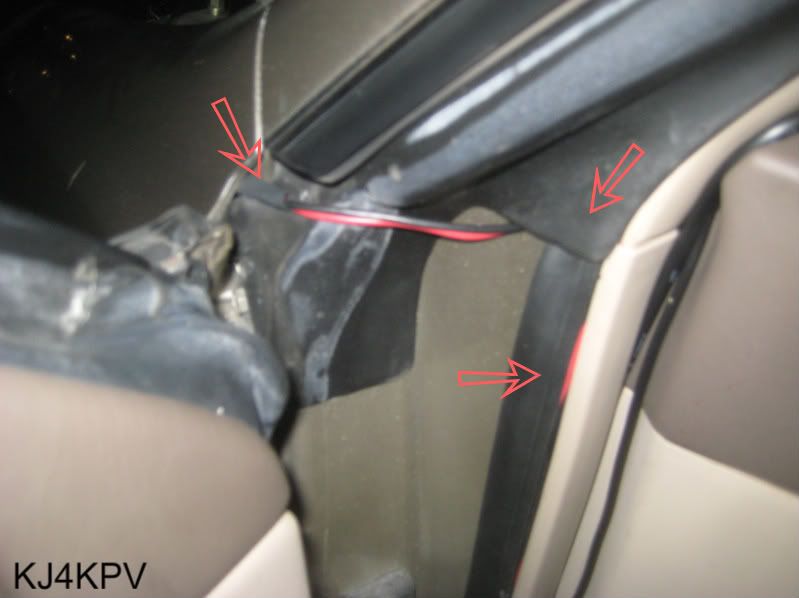
The power cable continues on underneath the paneling. 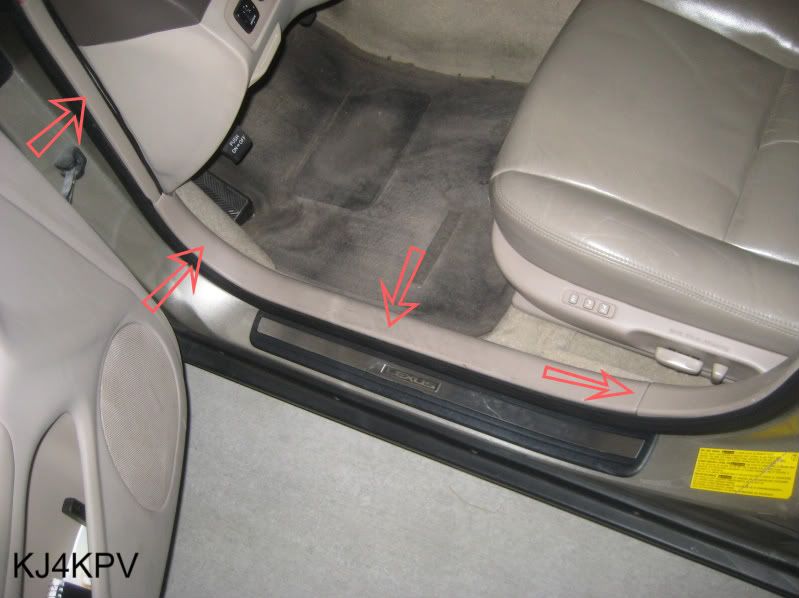
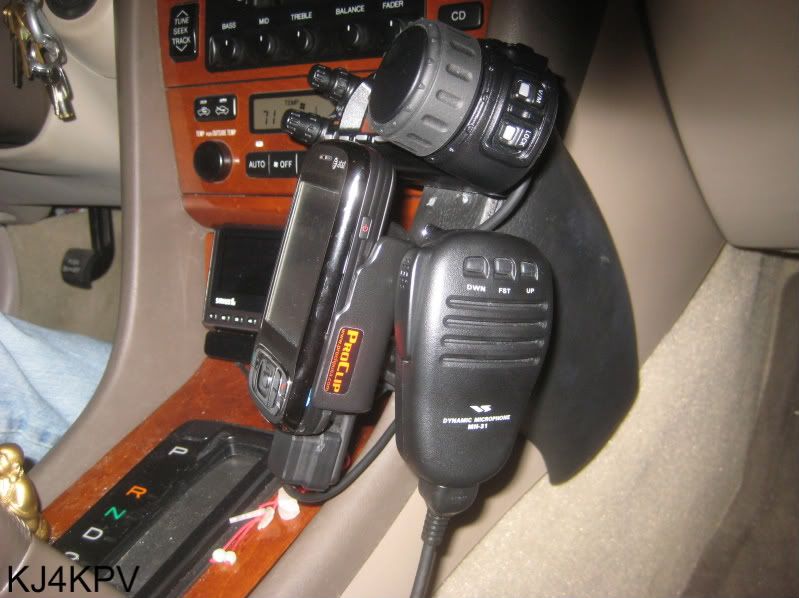
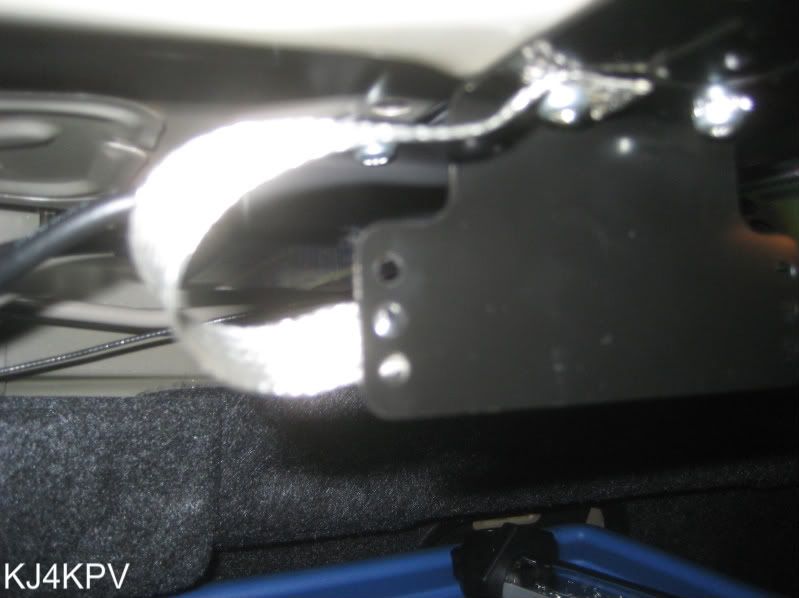
AND NOW FOR THE BEST PART! Originally, the only thing I had mounted on the black paneling (forgot the name of the company that makes it), there was only the Sirius radio on top and my cell phone on the bottom. Since I don't smoke, I moved the Sirius radio to the ashtray compartment and secured it with industrial-strength Velcro, which held very nicely. In place of the old spot was the faceplate of the FT-857D. It was a perfect fit! I have easy access to my cell phone and the rig is well within reach. The external speaker (from an old hands-free cellphone unit) was placed under the driver's seat. It's loud and clear. I have a mono-earbud to use just in case my fiancee doesn't want to listen to incoming chatter. She can listen to the Sirius radio when we're driving together. The final part bugged me for a while... where to mount the mic? I didn't want to risk drilling into the dash, plus I wanted something that will be sturdy from the constant grabbing and replacing the mic into the holder. After long and hard thought-grinding, my father stepped in and said, "Why not just mount the mic in the same place with the radio/cellphone holder?" Great freaking idea! So I did... and it's the perfect spot! The rest of the pictures speak for themselves/ Driver Side 
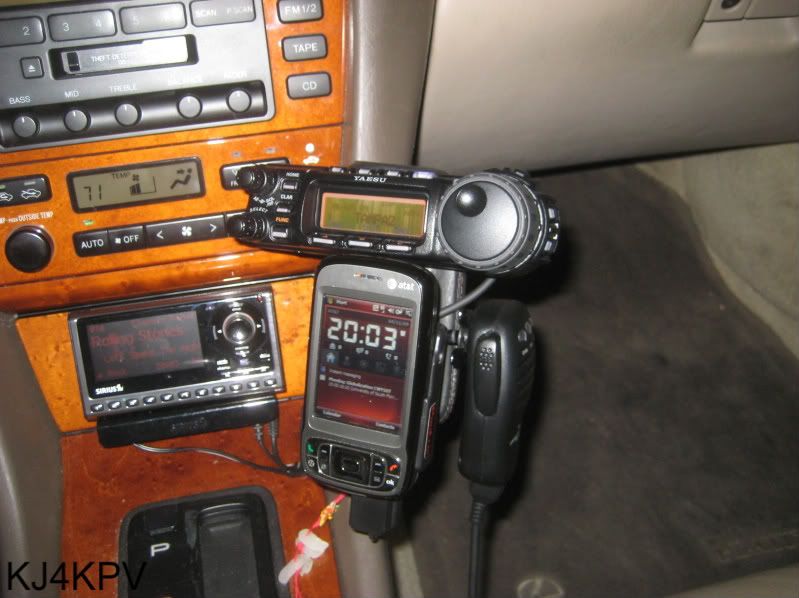
Passenger Side 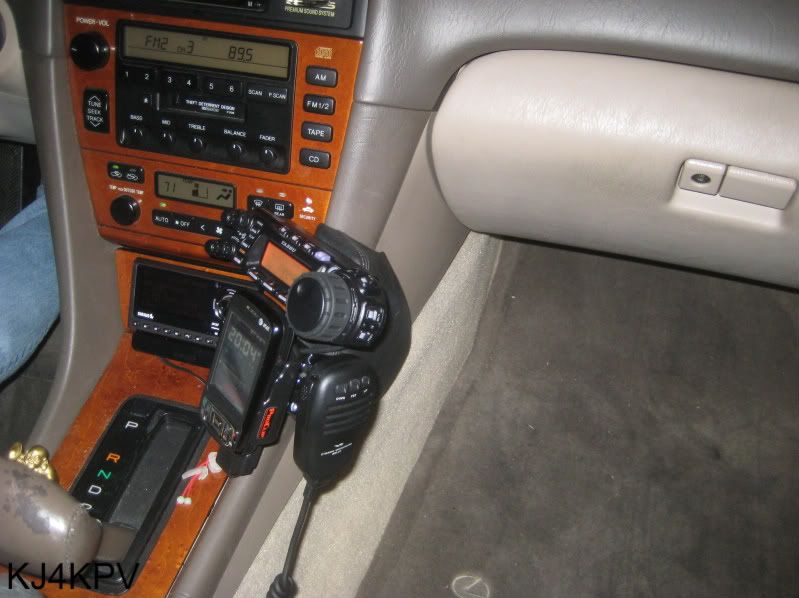
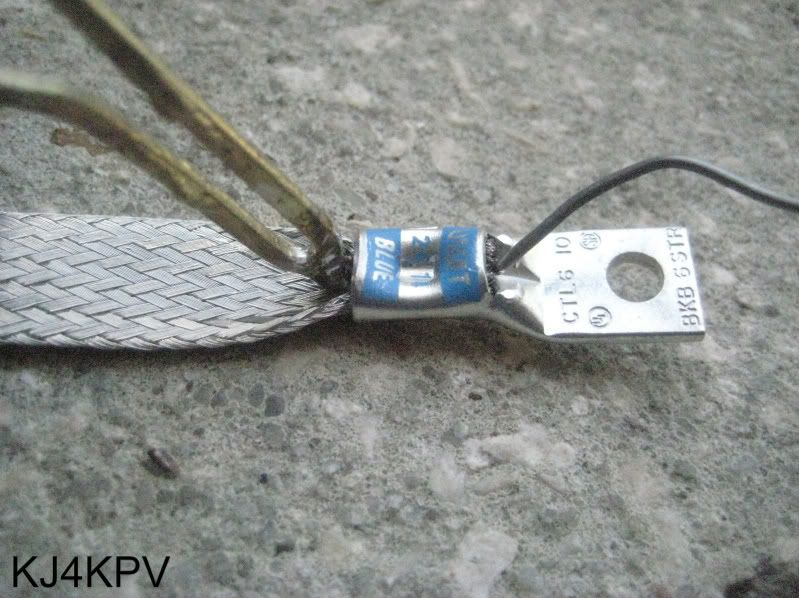
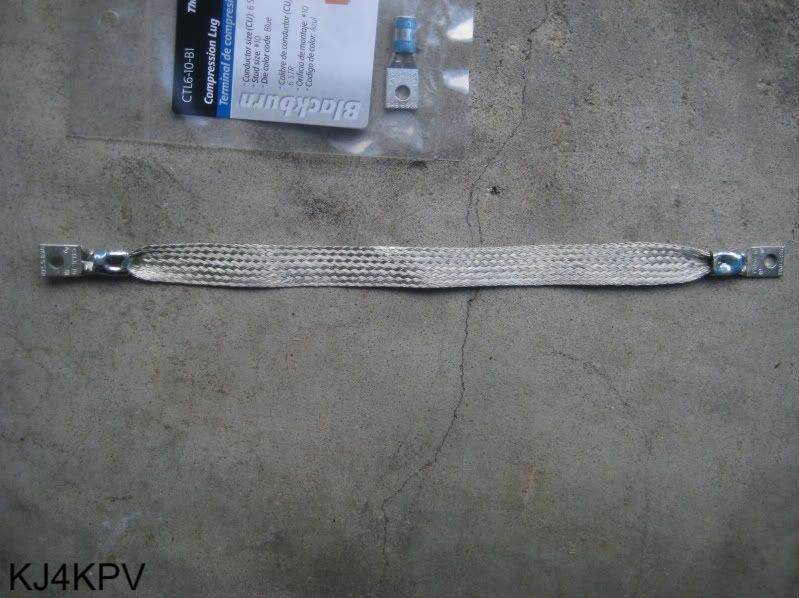
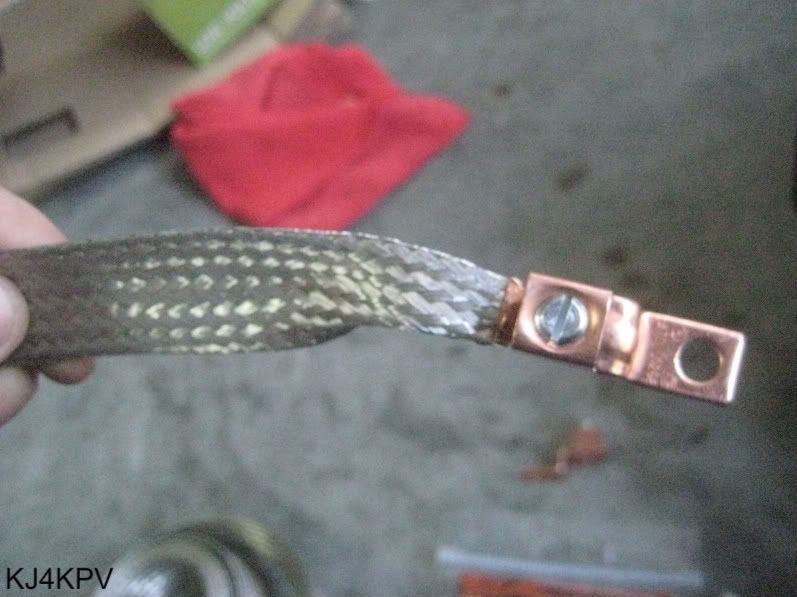
BUT........ WHAT'S THE PROBLEM? My father and I have noticed a few problems. When the radio was tuned to certain freqs (just a few, both HF and VHF), we were listening to ignition chirping and alternator whining. First step: I need to RF ground everything (hood, trunk lid, exhaust, etc.). Second step: Get capacitors for the alternator. Then we'll see where it goes from there. It still needs more work, but the major hurdle of finding the right places to install my rig has been a success. I now have a mobile station. Semper Fi, 73 ChinoUSMC / KJ4KPV ETA: Power was running at a smooth 14v (3+/-). The ATAS and the K400C mount held up very nice while I was cruising down the hwy at 80+mph. I didn't see any stress to the mount or the trunk lid. ETA2: My next add to this thread will be pictures of RF grounding. UPDATE: I bought some braided straps from the AES store in Orlando (a 66mi trip for me). I also got star washers, Well, here's the pics. Since I still have some leftover straps, I'll probably add more in the engine compartment and underneath the car. PARTS I bought compression lugs for the half-inch braided straps. Then I crimped and soldered them and it was solid. 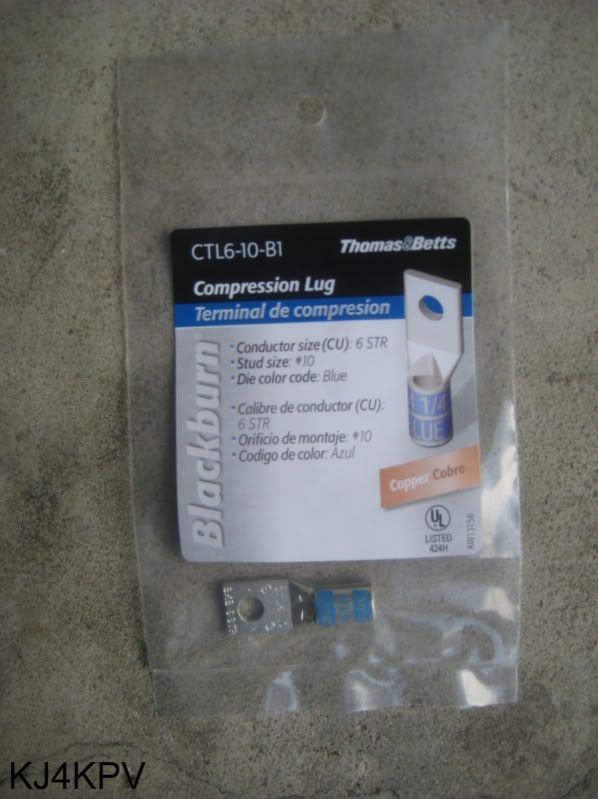
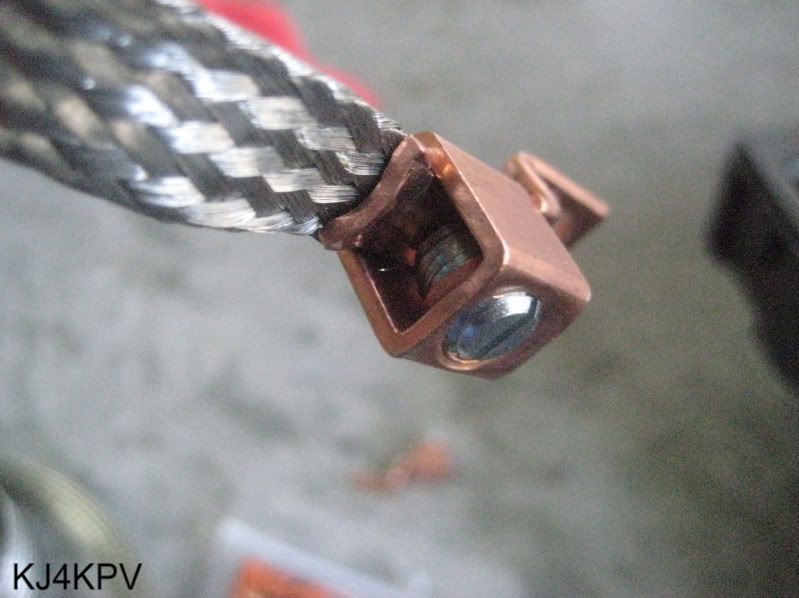
I also bought Copper Thermal Lugs for the full inch braided straps 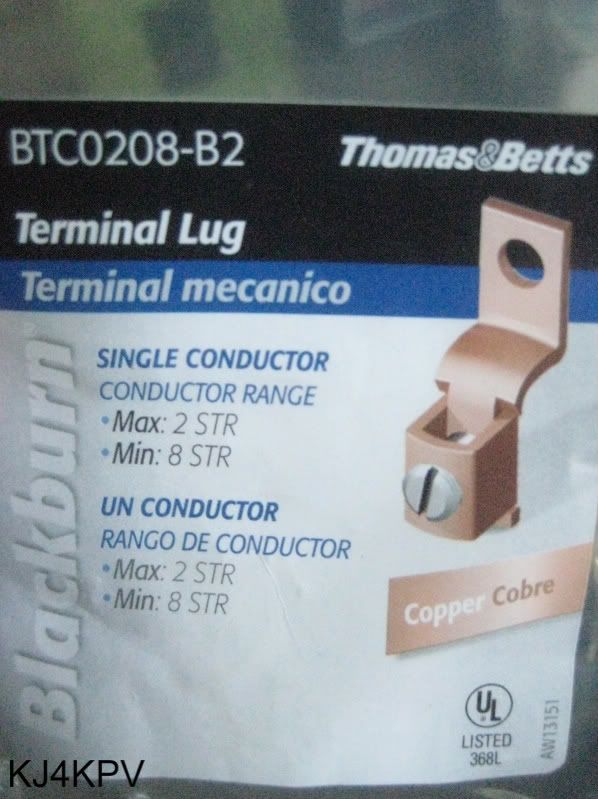
I bought Self-tapping screws (10x1/2), some star washers, and a pipe holder 
ON TO THE MOUNTING I started with the easiest part first, the hood. I used a bolt that was already mounted on the car. For the other end, I used the self-tapped screw. 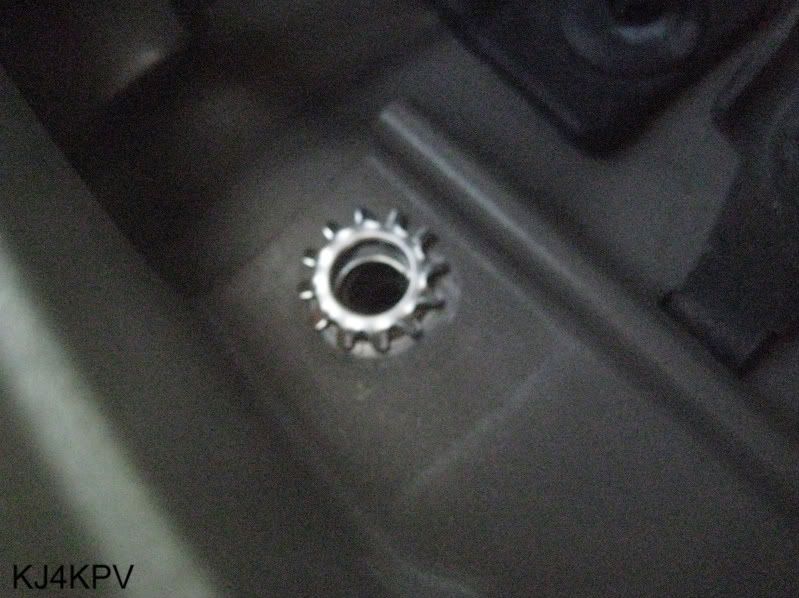
Since the car bolt (size 12) was slight larger than the hole in the compression lug (made for a size 10), I had to drill it to make it slightly bigger. Under the silver coating is all copper. 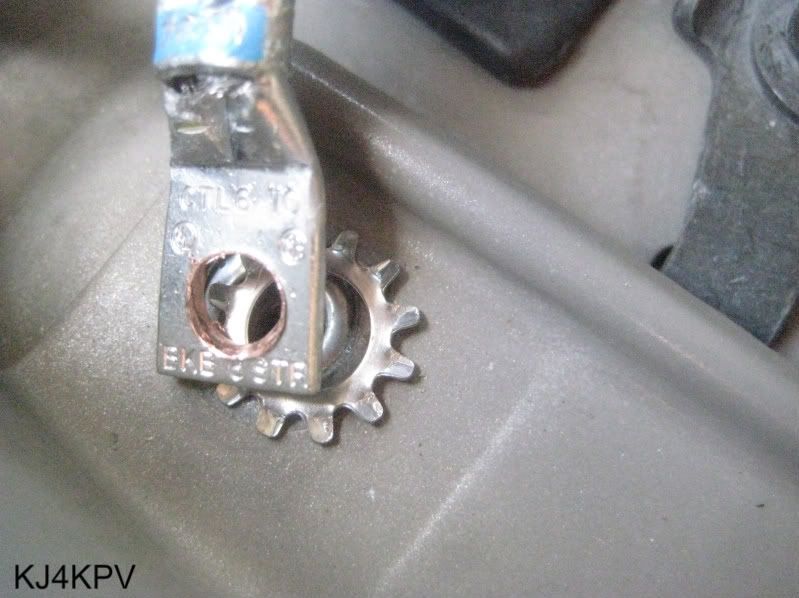

Mounted to the hood 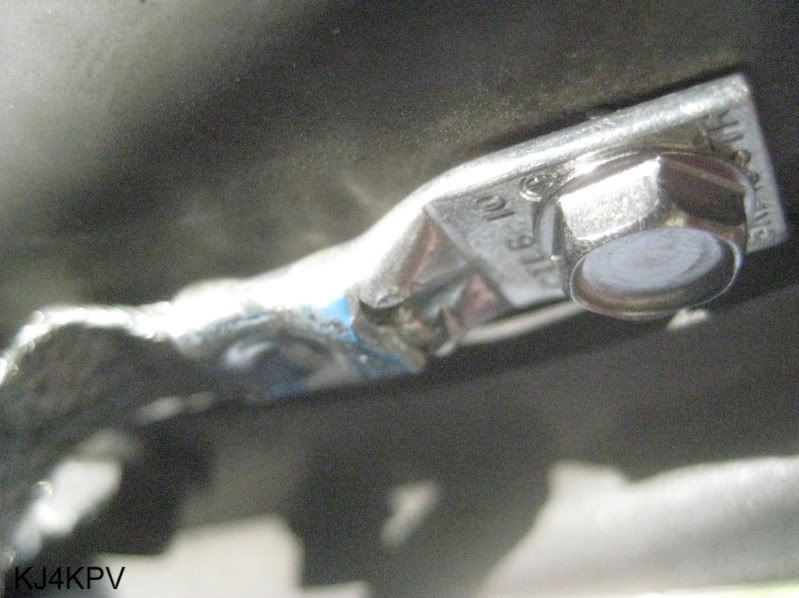
As you can see, I folded the strap so when the hood closes, it folds like an accordion. This will prevent the straps from getting caught onto something or from getting pinched 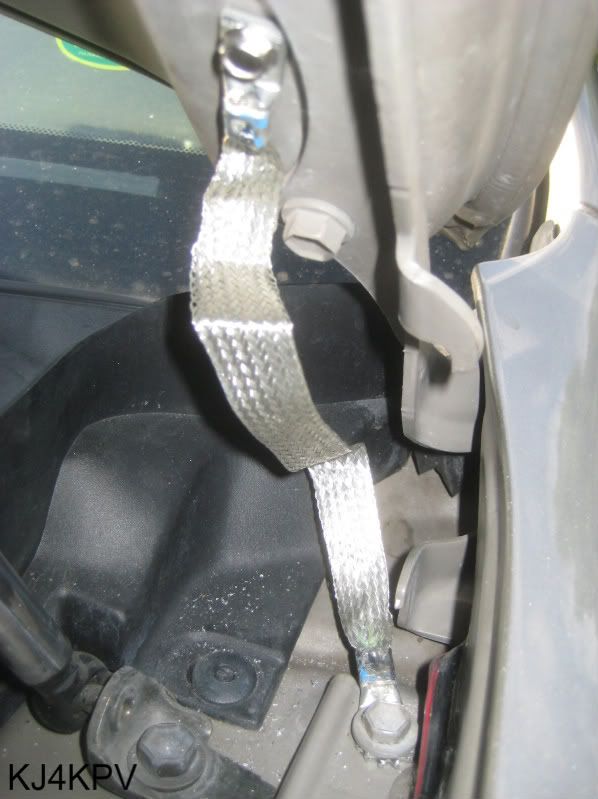

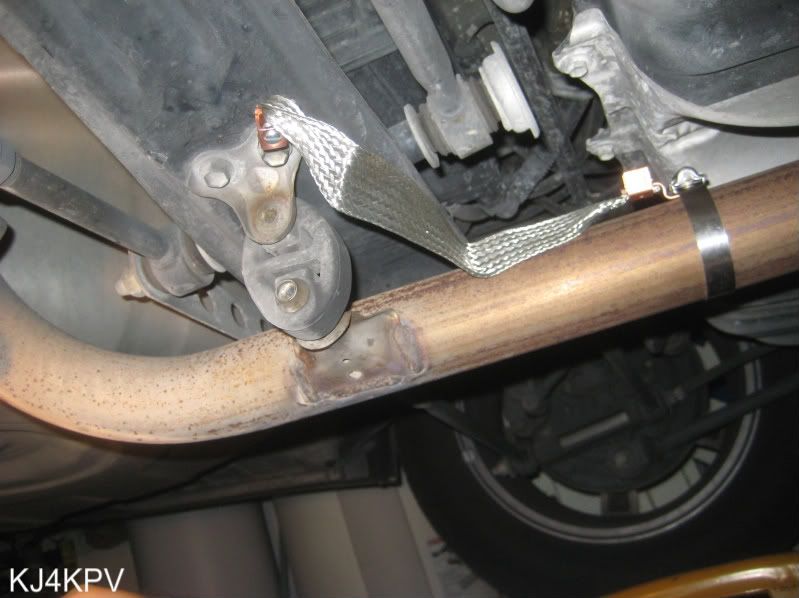
Now for the next part, I backed my car up onto ramps. It makes it easier to access the exhaust pipe and it would bring the trunk to my chest level. I worked on the exhaust system first. First, I searched for the nearest bolt that was screwed in solid to something metal (I made sure there was a star washer placed under it). Then I ran the 1in braided cable to the exhaust pipe and secure it with a pipe holder. 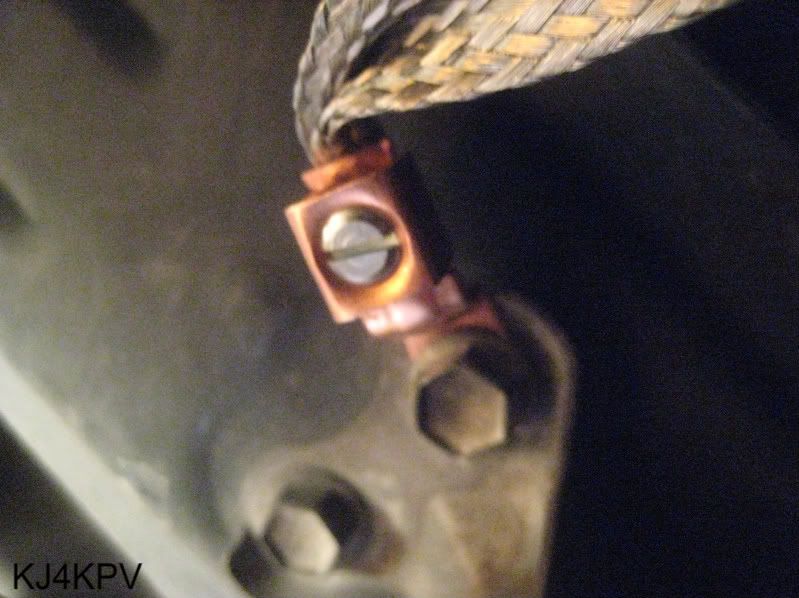
Now it's time for the trunk lid. First, I placed the strap directly underneath the K400C mount. I carefully pulled the vanity liner off. I ran the entire length, folded it over and ran it to the inner portion of the trunk, which I secured it with a self-tap screw. Folded it over again and ran it down to the arm that was attached to the lid. I secured the final spot. 

And I did the same to the other side... only that the strap is smaller. Before I screwed it down, I soldered the ends to make sure it did not fray later on. 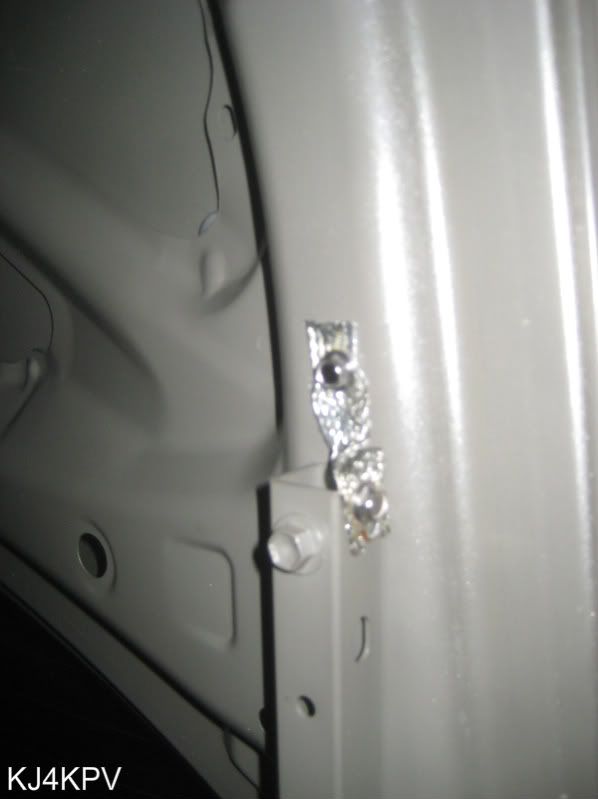
Now for the trunk... I ran just the right amount of cable to make sure there was enough when it was opened and just enough when it closed. I did the same to the other side. I also ran some cable from the radio to the mount and secured it to the trunk. This is with the trunk lid open 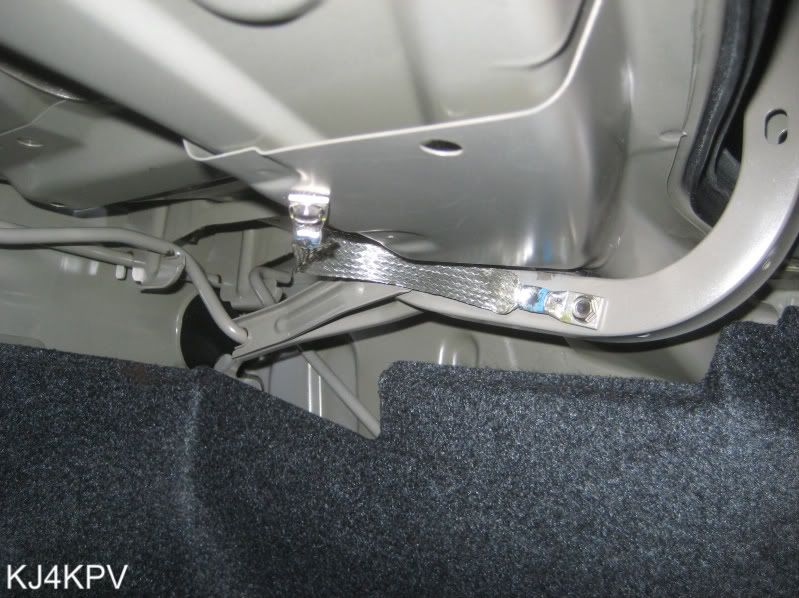
This is with it closed 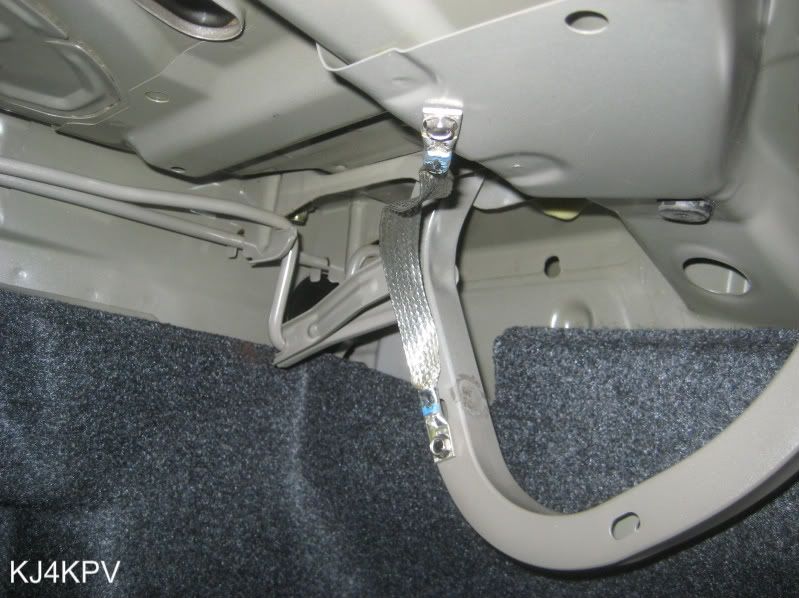
And here is with the vanity liner put back on. As you can see, everything is mostly hidden. I also secured some of the extra wires with shoe goo. 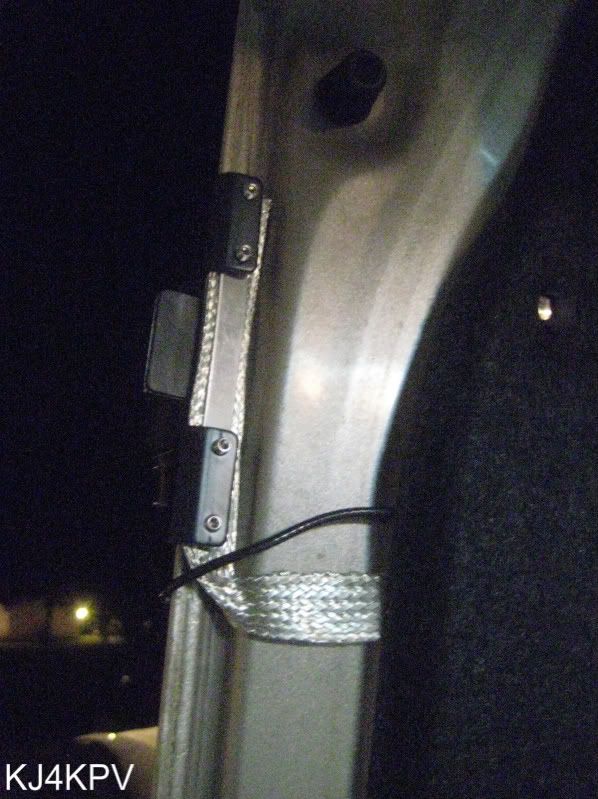
Shortly after the last picture was taken, I mounted the radio back and cleaned everything up. THE RESULTS? Amazing. For only having a FT-857D w/ an ATAS120A, I was picking up CW on 160m, some sort of chatter on the 80m, picked up what sounded like a radio station slightly lower than 80m limit (lower in Hertz, that is), and CW/chatter on the 40m. Normally, the ATAS-120 was designed for 40m - 70cm, with some interaction with 80m, but was not designed for 160m and I was picking that up nicely. Before I had installed the straps, I was picking up a lot of noise. With the straps in place, it cleared up a lot... and I mean a lot. In total, it took me about 10 hours to complete this job. Most of it was poking around trying to find the right spot, dropping screws into crevices, losing parts, soldering, and drilling with self-tapping screws. It was well worth it. My next project will be installing capacitors on my alternator to cure the whining and working on fixing the ignition popping. If I can secure some Copper Tape, I plan on shielding some electrical wires, spark plug connectors, etc, but that stuff is really pricy. That will be for my next update. |
|
|
|
[#1]
Very nice... I'm loving the radio. Can't wait to get one of my own.
|
|
|
|
[#2]
Nice job! Let us know how the noise problem is resolved. It seems that it used to be just alternator whine or ignition noise, but now with all the electronics on board sheeesh..

P.S. Your dad automatically became an extra when they did away with the advanced class license some time back. |
|
|
|
[#3]
Nice and clean.
Bob |
|
|
|
[#4]
Quoted:
P.S. Your dad automatically became an extra when they did away with the advanced class license some time back. What? If I told him that he would say I'm joking. Can you show me where I could find info on that? I checked his call and it says Advance. I tried to search through the FCC database, but that's searching for a needle in a haystack. It didn't yield results. Does he need to take the test to have the database reflect Extra as opposed to Advance or is there something else... catch? |
|
|
|
[#5]
I am mis-informed. I took this to be true hearing it from a local VE when I took my Extra exam a few years ago. I just searched the ARRL site and found the Advanced class license was not affected by the abolishment of the Advanced class license. My bad. I feel so stupid now...
|
|
|
|
[#6]
Nah, no worries mate. I won't hold it against you. |
|
|
|
[#7]
UPDATE The RF Grounding pics are located in the 1st post. Enjoy! |
|
|
|
[#8]
Now thats the HAM porn I've been looking for. Thanks.
|
|
|
|
[#9]
GREAT POST, especially since I'm getting all the parts together to do the same in my Chevy HHR!! My biggest problem is SERIOUS lack of interior room for mounting a 857 AND a FT 8800R head!! Yes I know the 857 will do the VHF BUT not at the same time you're monitoring HF thus 2 radios! But as we hams are experimenters at heart I'll find a way!!
Sarge |
|
|
 Win a FREE Membership!
Sign up for the ARFCOM weekly newsletter and be entered to win a free ARFCOM membership. One new winner* is announced every week!
You will receive an email every Friday morning featuring the latest chatter from the hottest topics, breaking news surrounding legislation, as well as exclusive deals only available to ARFCOM email subscribers.

AR15.COM is the world's largest firearm community and is a gathering place for firearm enthusiasts of all types.
From hunters and military members, to competition shooters and general firearm enthusiasts, we welcome anyone who values and respects the way of the firearm.

Subscribe to our monthly Newsletter to receive firearm news, product discounts from your favorite Industry Partners, and more.
Copyright © 1996-2024 AR15.COM LLC. All Rights Reserved.
Any use of this content without express written consent is prohibited.
AR15.Com reserves the right to overwrite or replace any affiliate, commercial, or monetizable links, posted by users, with our own.


