


Armory Sponsor


| Does anyone have a file on primer tubes? I can't print a 100ct tube as they would be too tall but you could print 2 50's and print a sleeve that would fit over them and secure them together. |
3-7-77
Proud Member of the Leather Head Mafia
“In my opinion, the M1 Rifle is the greatest battle implement ever devised” - George S. Patton
Proud Member of the Leather Head Mafia
“In my opinion, the M1 Rifle is the greatest battle implement ever devised” - George S. Patton
|
Originally Posted By TOTHEMAX: Does anyone have a file on primer tubes? I can't print a 100ct tube as they would be too tall but you could print 2 50's and print a sleeve that would fit over them and secure them together. ETA: sounds like different press manufacturers use different sized tubes - which brand are you using? |
|
Originally Posted By KPtexan: You just mean the STL files right? I don't, but could draw some up with a minute or 2 in fusion. Are you looking for small primer, large, or both? ETA: sounds like different press manufacturers use different sized tubes - which brand are you using? Originally Posted By KPtexan: Originally Posted By TOTHEMAX: Does anyone have a file on primer tubes? I can't print a 100ct tube as they would be too tall but you could print 2 50's and print a sleeve that would fit over them and secure them together. ETA: sounds like different press manufacturers use different sized tubes - which brand are you using? Yes STL files. I was hoping to model the Dillon tubes. https://www.amazon.com/Dillon-Primer-Pickup-Tubes-Small/dp/B00PW7MMUC/ref=sr_1_2?dchild=1&keywords=dillon+primer+tubes&qid=1611195428&sr=8-2 I have the colored ends so it just needs to be the tubes. I figured you would have to make them in two sections with a connecting sleeve as they would be too tall to make on the printer. |
3-7-77
Proud Member of the Leather Head Mafia
“In my opinion, the M1 Rifle is the greatest battle implement ever devised” - George S. Patton
Proud Member of the Leather Head Mafia
“In my opinion, the M1 Rifle is the greatest battle implement ever devised” - George S. Patton
|
Originally Posted By TOTHEMAX: Yes STL files. I was hoping to model the Dillon tubes. https://www.amazon.com/Dillon-Primer-Pickup-Tubes-Small/dp/B00PW7MMUC/ref=sr_1_2?dchild=1&keywords=dillon+primer+tubes&qid=1611195428&sr=8-2 I have the colored ends so it just needs to be the tubes. I figured you would have to make them in two sections with a connecting sleeve as they would be too tall to make on the printer.  . I'll post up download link here once I'm done. . I'll post up download link here once I'm done.
|

|
Originally Posted By Brawnydog: Yeah I'm wondering if the guy who told me "don't think you can buy one for less than 1k and don't buy a $300 printer" knows what $300 can buy now or if he really thinks $300 printers are junk. I'm going to go with either all he's experienced is the Makerbot printers or hasn't kept up with the advances of the last couple years. If you've got the skills to proficiently reload, you'll have more than enough skills to handle a 3d printer. The Ender 3 is an amazing printer for the price, but there is some things it can't do while being stock. Filaments that like to anneal themselves - This affects lots of Bowden tube printers due to the length of retraction needed to reduce stringing. PLA with straight 4043D is difficult to print on it. Soft filaments like TPU - Again Bowden tube makes this super difficult PETG - Because the printer uses Teflon tube all the way down the heat break. Sure, you could push the printer, but you could also be off gassing horrible shit from the Teflon tube. Direct Drive upgrade would fix the first two, and an all-metal heat break would fix the third one. Downside of the Direct Drive upgrade is the potential for increased ringing since you are moving a heavier hot end around. For printing regular PLA and PLA+ though, it does an amazing job. My recommendation for the Ender 3 or Ender 3 Pro is to get a glass bed, the yellow springs, and a silent mainboard upgrade. You'll need an all-metal extruder eventually because the plastic one they include sucks. |
|
Originally Posted By TOTHEMAX: Yes STL files. I was hoping to model the Dillon tubes. https://www.amazon.com/Dillon-Primer-Pickup-Tubes-Small/dp/B00PW7MMUC/ref=sr_1_2?dchild=1&keywords=dillon+primer+tubes&qid=1611195428&sr=8-2 I have the colored ends so it just needs to be the tubes. I figured you would have to make them in two sections with a connecting sleeve as they would be too tall to make on the printer. OK, give this a shot: https://www.prusaprinters.org/prints/53009-dillon-primer-pickup-tubes I did not put the cotter pin holes in since I don't know how high they are on the Dillon tubes (only have Hornady here for reference). If I know that then I can add them to the design easily, or they can just be drilled. |

|
Originally Posted By KPtexan: @TOTHEMAX OK, give this a shot: https://www.prusaprinters.org/prints/53009-dillon-primer-pickup-tubes I did not put the cotter pin holes in since I don't know how high they are on the Dillon tubes (only have Hornady here for reference). If I know that then I can add them to the design easily, or they can just be drilled. Thank you @KPtexan This will be one of the first things I print. FYI, the cotter pins on the dillon tubes go through the plastic inserts, not the metal tube. So what you designed is perfect the way it is. Hornady tube is in the middle, Dillon tubes on each side. Attached File |
We're living in an episode of Who's Line is it Anyway.
Where everything's made up and the points don't matter.
Where everything's made up and the points don't matter.
|
Originally Posted By KPtexan: @TOTHEMAX OK, give this a shot: https://www.prusaprinters.org/prints/53009-dillon-primer-pickup-tubes I did not put the cotter pin holes in since I don't know how high they are on the Dillon tubes (only have Hornady here for reference). If I know that then I can add them to the design easily, or they can just be drilled. Originally Posted By KPtexan: Originally Posted By TOTHEMAX: Yes STL files. I was hoping to model the Dillon tubes. https://www.amazon.com/Dillon-Primer-Pickup-Tubes-Small/dp/B00PW7MMUC/ref=sr_1_2?dchild=1&keywords=dillon+primer+tubes&qid=1611195428&sr=8-2 I have the colored ends so it just needs to be the tubes. I figured you would have to make them in two sections with a connecting sleeve as they would be too tall to make on the printer. OK, give this a shot: https://www.prusaprinters.org/prints/53009-dillon-primer-pickup-tubes I did not put the cotter pin holes in since I don't know how high they are on the Dillon tubes (only have Hornady here for reference). If I know that then I can add them to the design easily, or they can just be drilled. Sweet. I will give it a try! |
3-7-77
Proud Member of the Leather Head Mafia
“In my opinion, the M1 Rifle is the greatest battle implement ever devised” - George S. Patton
Proud Member of the Leather Head Mafia
“In my opinion, the M1 Rifle is the greatest battle implement ever devised” - George S. Patton

|
Originally Posted By KPtexan: @TOTHEMAX OK, give this a shot: https://www.prusaprinters.org/prints/53009-dillon-primer-pickup-tubes I did not put the cotter pin holes in since I don't know how high they are on the Dillon tubes (only have Hornady here for reference). If I know that then I can add them to the design easily, or they can just be drilled. Originally Posted By KPtexan: Originally Posted By TOTHEMAX: Yes STL files. I was hoping to model the Dillon tubes. https://www.amazon.com/Dillon-Primer-Pickup-Tubes-Small/dp/B00PW7MMUC/ref=sr_1_2?dchild=1&keywords=dillon+primer+tubes&qid=1611195428&sr=8-2 I have the colored ends so it just needs to be the tubes. I figured you would have to make them in two sections with a connecting sleeve as they would be too tall to make on the printer. OK, give this a shot: https://www.prusaprinters.org/prints/53009-dillon-primer-pickup-tubes I did not put the cotter pin holes in since I don't know how high they are on the Dillon tubes (only have Hornady here for reference). If I know that then I can add them to the design easily, or they can just be drilled. |
|
Here's a new design I just did that's reloading related: https://www.prusaprinters.org/prints/53041-spent-primer-tube-bottle-cap-and-clamp Wanted to set up a spent primer bottle for my Hornady press, but didn't want pay for Hornady's version or wait on it. Attached File |
|
Originally Posted By KPtexan: @TOTHEMAX OK, give this a shot: https://www.prusaprinters.org/prints/53009-dillon-primer-pickup-tubes I did not put the cotter pin holes in since I don't know how high they are on the Dillon tubes (only have Hornady here for reference). If I know that then I can add them to the design easily, or they can just be drilled. Originally Posted By KPtexan: Originally Posted By TOTHEMAX: Yes STL files. I was hoping to model the Dillon tubes. https://www.amazon.com/Dillon-Primer-Pickup-Tubes-Small/dp/B00PW7MMUC/ref=sr_1_2?dchild=1&keywords=dillon+primer+tubes&qid=1611195428&sr=8-2 I have the colored ends so it just needs to be the tubes. I figured you would have to make them in two sections with a connecting sleeve as they would be too tall to make on the printer. OK, give this a shot: https://www.prusaprinters.org/prints/53009-dillon-primer-pickup-tubes I did not put the cotter pin holes in since I don't know how high they are on the Dillon tubes (only have Hornady here for reference). If I know that then I can add them to the design easily, or they can just be drilled. I'll run a little round file on that section later, and it that doesn't do it I'll print at 101% size. Very cool deal and either way it's a small tweak. Thanks again for creating and putting up the file for us. |
|
Originally Posted By TGE: I printed the small primer tube last night. I slid a primer thru and it got caught at what I think the probably the print base side. Either I got a tiny amount of shrinkage with the PLA or I've got a little bit of flare where the initial layers were pressed to the print bed. I'll run a little round file on that section later, and it that doesn't do it I'll print at 101% size. Very cool deal and either way it's a small tweak. Thanks again for creating and putting up the file for us. |
|
Originally Posted By KPtexan: I should've added a bit more detail in my post - they are modeled at exact OEM dimensions but, due to quirks in FDM printing of thin wall thicknesses, you may need to tweak it a bit in your slicer. You're on the right track by bumping your X/Y scale percentages slightly. I would also cut it off in slicer so you don't have to print more than 20-30mm of the length to test it - once you have it ironed out, then you can print the full length. Additionally, there's very little surface area on the build plate with that design, so I would be using a brim as well. Originally Posted By KPtexan: Originally Posted By TGE: I printed the small primer tube last night. I slid a primer thru and it got caught at what I think the probably the print base side. Either I got a tiny amount of shrinkage with the PLA or I've got a little bit of flare where the initial layers were pressed to the print bed. I'll run a little round file on that section later, and it that doesn't do it I'll print at 101% size. Very cool deal and either way it's a small tweak. Thanks again for creating and putting up the file for us. I actually meant to print with a brim but forgot to change that setting and it printed fine. I was surprised it worked and won't count on that again! Now that you mention it I bet a brim solves the "squished first couple layers" issue anyway. I believe that's the technical term |

My @memsu bullet tray should be done soon.  Attached File |
Verbum caro, panem verum, verbo carnem efficit.

|
Originally Posted By Milsurpninja: My @memsu bullet tray should be done soon. https://www.ar15.com/media/mediaFiles/102025/AAC27FC0-7B20-41ED-B3A8-6A57AB2B86EC_jpe-1792104.JPG Let me know how that clip works on the new style presses. I have the old style press, so I never got to test it. I have 2 other members trying them out now, waiting on their feedback from the samples I sent them. I'm working on a completely new clip design that will screw together. No chance at all of the clip coming undone from the press from the weight of the bullets. |

The only reloading related part I designed is a tray for MEC shotshell reloader powder bushings.  |
"You know how butt ugly people are said to have hit every branch on the way down the ugly tree.
Well, the dumbass tree done drilled you in the butt and laid eggs in ya." -RJinks
Well, the dumbass tree done drilled you in the butt and laid eggs in ya." -RJinks
|
Originally Posted By memsu: Let me know how that clip works on the new style presses. I have the old style press, so I never got to test it. I have 2 other members trying them out now, waiting on their feedback from the samples I sent them. I'm working on a completely new clip design that will screw together. No chance at all of the clip coming undone from the press from the weight of the bullets. Turns out I have the old style press, so no data on the new clip, sorry. The old clip fits great though. This tray seems like it’s going to work out. Nice job on the dovetails. |
Verbum caro, panem verum, verbo carnem efficit.
|
Has any tried this WFT-style trimmer on Thingiverse? Looks well conceived. Purchase parts are close to $100 though. Attached File https://www.thingiverse.com/thing:2569955 ETA: $80 +s&h Attached File ETA2: I fent on $35 woth of eBay alternatives. At least the end mill is US made. Attached File |
Verbum caro, panem verum, verbo carnem efficit.
|
Originally Posted By Milsurpninja: Has any tried this WFT-style trimmer on Thingiverse? Looks well conceived. Purchase parts are close to $100 though. https://www.ar15.com/media/mediaFiles/102025/5AC8BB8E-920A-4CF5-9B7A-6EA289214FEF_jpe-1793632.JPG https://www.thingiverse.com/thing:2569955 ETA: $80 +s&h https://www.ar15.com/media/mediaFiles/102025/526BE30D-0C0B-446C-93AF-4FBA0F68D68E_jpe-1793646.JPG ETA2: I fent on $35 woth of eBay alternatives. At least the end mill is US made. https://www.ar15.com/media/mediaFiles/102025/0BD456A6-5FD7-47F8-A2FC-4634EC804A4A_jpe-1793673.JPG |
|
Originally Posted By TGE: I'd appreciate a report once you get the stuff in. Looks interesting for sure. I've got some of the small bearings already on hand and found this adjustable lock nut on one of the "makes" - https://www.thingiverse.com/thing:4576118 Great idea with that adjustable lock nut! Wishing I had a resin printer to make one that pristine. If this thing turns out halfway decent, it should be a lot better than my Lee SlowTrim. |
Verbum caro, panem verum, verbo carnem efficit.
|
I have updated my clip design for my bullet tray. This version should be able to handle any weight of bullets you put in the tray. The screw version of the dovetail will fit both clip designs. It also may be a great design for other accessories that could mount to the support bar like a support for the open bullet feeder. Get me some dimensions of a rod or square shaft and I can get something worked out to support the bullet feeder. https://www.thingiverse.com/thing:4699476   
|
|
Originally Posted By memsu: I have updated my clip design for my bullet tray. This version should be able to handle any weight of bullets you put in the tray. The screw version of the dovetail will fit both clip designs. It also may be a great design for other accessories that could mount to the support bar like a support for the open bullet feeder. Get me some dimensions of a rod or square shaft and I can get something worked out to support the bullet feeder. https://www.thingiverse.com/thing:4699476 https://cdn.thingiverse.com/assets/7b/9f/df/d6/35/20210123_190105.jpg https://cdn.thingiverse.com/assets/f8/e3/82/f8/ba/20210123_190058.jpg https://cdn.thingiverse.com/assets/dc/95/f0/ec/f4/20210123_185929.jpg Nice work. I have an Inlinefab press handle and I noticed when I have the tray opening facing the left of the machine, the dovetail will hit the handle. If the opening is facing forward (at the operator) it has clearance. I actually prefer the opening facing the left as its easier to grab bullets out of. I may just cut the dovetail off so it won't hit the handle. |
3-7-77
Proud Member of the Leather Head Mafia
“In my opinion, the M1 Rifle is the greatest battle implement ever devised” - George S. Patton
Proud Member of the Leather Head Mafia
“In my opinion, the M1 Rifle is the greatest battle implement ever devised” - George S. Patton
|
Originally Posted By TOTHEMAX: Nice work. I have an Inlinefab press handle and I noticed when I have the tray opening facing the left of the machine, the dovetail will hit the handle. If the opening is facing forward (at the operator) it has clearance. I actually prefer the opening facing the left as its easier to grab bullets out of. I may just cut the dovetail off so it won't hit the handle. I can remove the dovetail pretty easily then I'll throw it up on thingiverse. @TOTHEMAX Edit: Bullet tray with one set of dovetails is now uploaded on thingiverse. |
|
Originally Posted By memsu: I can remove the dovetail pretty easily then I'll throw it up on thingiverse. @TOTHEMAX Edit: Bullet tray with one set of dovetails is now uploaded on thingiverse. Originally Posted By memsu: Originally Posted By TOTHEMAX: Nice work. I have an Inlinefab press handle and I noticed when I have the tray opening facing the left of the machine, the dovetail will hit the handle. If the opening is facing forward (at the operator) it has clearance. I actually prefer the opening facing the left as its easier to grab bullets out of. I may just cut the dovetail off so it won't hit the handle. I can remove the dovetail pretty easily then I'll throw it up on thingiverse. @TOTHEMAX Edit: Bullet tray with one set of dovetails is now uploaded on thingiverse. Thanks |
3-7-77
Proud Member of the Leather Head Mafia
“In my opinion, the M1 Rifle is the greatest battle implement ever devised” - George S. Patton
Proud Member of the Leather Head Mafia
“In my opinion, the M1 Rifle is the greatest battle implement ever devised” - George S. Patton
|
Looks like someone did another remake of the case feeder for the Hornady LNL press that uses lots of bearings. Looks pretty slick. https://www.thingiverse.com/thing:4719734?fbclid=IwAR2pV4h7ONO_sFdWjqGbV5iMHnFx4r0QgItN7H8Q987YJCh4nF4bLfaPb3U https://www.facebook.com/1304610640/videos/10200825623065274/ |
|
This thing is going to be handy! Attached File |
Verbum caro, panem verum, verbo carnem efficit.
Guns don't kill people, the gubbermint does.
Joined:
Dec 2006
Posts:
13173
EE: 100% (190)
 PA, USA
|
Pretty sweet little print here, a primer advance stop for the Dillon 650. Maybe once I'm more skilled with the press I won't need this is much, but on my first couple runs I could have used this several times. All I had handy for the pin was this rusted out old allen key I got in a box of stuff from my dad a while back, who in turn had it from my granddad. At first I was thinking I'd turn a little pin on the lathe to fit, but on second thought I'll keep this for personal historical significance. I'll pull and try to scrape the rust off though. Printer has been running full-time this weekend on this and some glock parts, but I'll take another shot at that primer tube soon, maybe tonight. Attached File Attached File |
|
I made this die holder today. https://www.thingiverse.com/thing:4002586 
|
3-7-77
Proud Member of the Leather Head Mafia
“In my opinion, the M1 Rifle is the greatest battle implement ever devised” - George S. Patton
Proud Member of the Leather Head Mafia
“In my opinion, the M1 Rifle is the greatest battle implement ever devised” - George S. Patton
|
Are you guys sourcing everything off thingiverse? Feels like there's a pretty small amount of real fun gun stuff other than some small reloading parts. Ive printed off the standard Dillon Acro bin extenders, a Dillon tool holder, locator buttons for the press, and thumb wheels for my powder measures, but have kinda run out of things I can utilize from there. |
|
Originally Posted By Milsurpninja: Has any tried this WFT-style trimmer on Thingiverse? Looks well conceived. Purchase parts are close to $100 though. https://www.ar15.com/media/mediaFiles/102025/5AC8BB8E-920A-4CF5-9B7A-6EA289214FEF_jpe-1793632.JPG https://www.thingiverse.com/thing:2569955 ETA: $80 +s&h https://www.ar15.com/media/mediaFiles/102025/526BE30D-0C0B-446C-93AF-4FBA0F68D68E_jpe-1793646.JPG ETA2: I fent on $35 woth of eBay alternatives. At least the end mill is US made. https://www.ar15.com/media/mediaFiles/102025/0BD456A6-5FD7-47F8-A2FC-4634EC804A4A_jpe-1793673.JPG I'm going to move to a standard set screw collar on the back (the threaded adjustable one is nice but pricey and hard to find). I'm also thinking about stepping up the bearing size on the front to an R12 to allow optimal cartridge insert print wall thickness for short mags, and also to allow a groove for a seating an o-ring. Hopefully have no more than $25 in it even with a US made carbide cutter. |
|
Originally Posted By WIZZO_ARAKM14: Are you guys sourcing everything off thingiverse? Feels like there's a pretty small amount of real fun gun stuff other than some small reloading parts. Ive printed off the standard Dillon Acro bin extenders, a Dillon tool holder, locator buttons for the press, and thumb wheels for my powder measures, but have kinda run out of things I can utilize from there. |
|
Originally Posted By TGE: Pretty sweet little print here, a primer advance stop for the Dillon 650. Maybe once I'm more skilled with the press I won't need this is much, but on my first couple runs I could have used this several times. All I had handy for the pin was this rusted out old allen key I got in a box of stuff from my dad a while back, who in turn had it from my granddad. At first I was thinking I'd turn a little pin on the lathe to fit, but on second thought I'll keep this for personal historical significance. I'll pull and try to scrape the rust off though. Printer has been running full-time this weekend on this and some glock parts, but I'll take another shot at that primer tube soon, maybe tonight. https://www.ar15.com/media/mediaFiles/384595/IMG_20210124_160405_jpg-1795262.JPG https://www.ar15.com/media/mediaFiles/384595/IMG_20210124_160412_jpg-1795261.JPG |

|
Originally Posted By Redcat: Direct Drive upgrade would fix the first two, and an all-metal heat break would fix the third one. Downside of the Direct Drive upgrade is the potential for increased ringing since you are moving a heavier hot end around. My recommendation for the Ender 3 or Ender 3 Pro is to get a glass bed, the yellow springs, and a silent mainboard upgrade. You'll need an all-metal extruder eventually because the plastic one they include sucks. Or get an Artillery Sidewinder X1 and have all of this from the get-go for probably less money overall. They are on sale 21% off right meow from the manufacturer website. I've had mine about six months and it is a GREAT printer. I like the 120V bed - it heats up real quick. So far I haven't noticed any ringing in my prints. I run prototype fit tests at 100-120 mm/s and it prints better than my old printer running 40. When I run this one at a slow 40-60 it prints REALLY well. I use Repetier and Slic3r to gen the gcode. Oh, print volume is YUUUUUUGEEE. ETA: The Genius (same basic printer as the Sidewinder just smaller) is $319 now. |
Just doing what I can with what I got. - Burt Gummer
Honey badger don't give a shit!
Justice for Ashli.
Honey badger don't give a shit!
Justice for Ashli.
|
Ive been working on a trimmer, primer reamer. Got a total of $35 invested in it. Works well so far, but making some additional changes. The e-powder dumper is pretty decent, but still got some changes working on there too. You can do quite a bit of stuff with 3d printers! 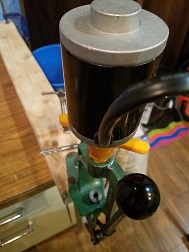 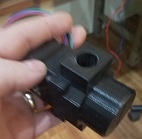 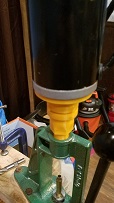 |
|
I printed that case trimmer and the lock nut, guess I need to buy the endmill bit. Turned out pretty good. Attached File |
|
Originally Posted By TGE: I printed that case trimmer and the lock nut, guess I need to buy the endmill bit. Turned out pretty good. https://www.ar15.com/media/mediaFiles/384595/IMG_20210127_110323_jpg-1799327.JPG I've ordered parts for my design as well, and will let everyone know how it works out. |
|
Originally Posted By KPtexan: Toss it in some Evaporust! That stuff works like magic for me. Originally Posted By KPtexan: Originally Posted By TGE: Pretty sweet little print here, a primer advance stop for the Dillon 650. Maybe once I'm more skilled with the press I won't need this is much, but on my first couple runs I could have used this several times. All I had handy for the pin was this rusted out old allen key I got in a box of stuff from my dad a while back, who in turn had it from my granddad. At first I was thinking I'd turn a little pin on the lathe to fit, but on second thought I'll keep this for personal historical significance. I'll pull and try to scrape the rust off though. Printer has been running full-time this weekend on this and some glock parts, but I'll take another shot at that primer tube soon, maybe tonight. https://www.ar15.com/media/mediaFiles/384595/IMG_20210124_160405_jpg-1795262.JPG https://www.ar15.com/media/mediaFiles/384595/IMG_20210124_160412_jpg-1795261.JPG |
|
Originally Posted By KPtexan: Very nice! Interested to see how the bearings fit. I hope to get mine tight enough where I need to freeze the bearings to get them in there - certainly don't want them walking out. I've ordered parts for my design as well, and will let everyone know how it works out. Originally Posted By KPtexan: Originally Posted By TGE: I printed that case trimmer and the lock nut, guess I need to buy the endmill bit. Turned out pretty good. https://www.ar15.com/media/mediaFiles/384595/IMG_20210127_110323_jpg-1799327.JPG I've ordered parts for my design as well, and will let everyone know how it works out. |
|
Originally Posted By TGE: I've got naval jelly on hand which works OK for light surface rust IME, but if that doesn't do it I'll try the Evaporust, thank you! A tip for evaporust... The final step after you've soaked the part and removed the rust is to rinse the part with water and dry it. In my experience evaporust works excellent, but the part will rust back very quickly if you don't remove all of the moisture. A common approach is to soak the part in kerosene or diesel fuel for a few hours or overnight and that will pull all traces or the moisture out. Then treat it with a good protectant such as Birchwood Casey barricade. When restoring firearms its very common to boil the part to convert the red rust to black rust, lightly remove the black rust, then soak in kerosene overnight to remove moisture from the boiling process. |
We're living in an episode of Who's Line is it Anyway.
Where everything's made up and the points don't matter.
Where everything's made up and the points don't matter.
|
Originally Posted By TOTHEMAX: Sweet. I will give it a try! Originally Posted By TOTHEMAX: Originally Posted By KPtexan: Originally Posted By TOTHEMAX: Yes STL files. I was hoping to model the Dillon tubes. https://www.amazon.com/Dillon-Primer-Pickup-Tubes-Small/dp/B00PW7MMUC/ref=sr_1_2?dchild=1&keywords=dillon+primer+tubes&qid=1611195428&sr=8-2 I have the colored ends so it just needs to be the tubes. I figured you would have to make them in two sections with a connecting sleeve as they would be too tall to make on the printer. OK, give this a shot: https://www.prusaprinters.org/prints/53009-dillon-primer-pickup-tubes I did not put the cotter pin holes in since I don't know how high they are on the Dillon tubes (only have Hornady here for reference). If I know that then I can add them to the design easily, or they can just be drilled. Sweet. I will give it a try! Well, it took two attempts and I got the tubes to print. A SR primer got stuck halfway down. I can see some rough areas in the tube so I am going to try and clean them out with a file. Next one I make I will up it a size on the cad program. |
3-7-77
Proud Member of the Leather Head Mafia
“In my opinion, the M1 Rifle is the greatest battle implement ever devised” - George S. Patton
Proud Member of the Leather Head Mafia
“In my opinion, the M1 Rifle is the greatest battle implement ever devised” - George S. Patton
|
Originally Posted By TGE: I should have everything by Saturday. That's a good idea on freezing em in. Hopefully it's super tight, yes. Will post back as soon as I get the bearings. Printed the trimmer body but forgot to put in supports (d’oh) so wasn’t happy with the surface the large bearing sits on. From my test fit in the messed up body, the bearings fit good and tight (will need to press or hammer in) and the bushings fit perfect in the large bearing. Printing a new trimmer body now and just waiting on the end mill. I did notice that a .223 case fits kind of loose in the .223 bushing. |
Verbum caro, panem verum, verbo carnem efficit.
|
Originally Posted By Milsurpninja: Printed the trimmer body but forgot to put in supports (d'oh) so wasn't happy with the surface the large bearing sits on. From my test fit in the messed up body, the bearings fit good and tight (will need to press or hammer in) and the bushings fit perfect in the large bearing. Printing a new trimmer body now and just waiting on the end mill. I did notice that a .223 case fits kind of loose in the .223 bushing. Originally Posted By Milsurpninja: Originally Posted By TGE: I should have everything by Saturday. That's a good idea on freezing em in. Hopefully it's super tight, yes. Will post back as soon as I get the bearings. Printed the trimmer body but forgot to put in supports (d'oh) so wasn't happy with the surface the large bearing sits on. From my test fit in the messed up body, the bearings fit good and tight (will need to press or hammer in) and the bushings fit perfect in the large bearing. Printing a new trimmer body now and just waiting on the end mill. I did notice that a .223 case fits kind of loose in the .223 bushing. My bushing fit actually feels pretty good on a case. Maybe you could notch it down to 99.5% size in your slicer or something if needed? I need the bearings to really see how this all fits together and works, I guess. |

|
Got the trimmer together. Pros: -It works! -It’s fast -Length seemed consistentish on the ~20 cases I was using to dial it in (+/- 1-2 thou, based on a handful of measurements; no Cpk yet, boys) Cons: -There is more slop in the system than I like, leading to some squareness issues -Some chatter in the finish on the case mouth Conclusion: I think this is a keeper for processing a lot of brass for loading up range ammo. Those chasing accuracy won’t be satisfied. I plan to print a spacer for the bushing because the end mill has flutes in contact with the bearing instead of shaft, so I need to shift it up ~.2”. I will continue to play around with this, but it’s usable as is, and has room for improvement. I just got a standard shaft collar and don’t feel e need for the fancy adjustable one at this time. Attached File Attached File Attached File |
Verbum caro, panem verum, verbo carnem efficit.
|
Originally Posted By Milsurpninja: Got the trimmer together. Pros: -It works! -It's fast -Length seemed consistentish on the ~20 cases I was using to dial it in (+/- 1-2 thou, based on a handful of measurements; no Cpk yet, boys) Cons: -There is more slop in the system than I like, leading to some squareness issues -Some chatter in the finish on the case mouth Conclusion: I think this is a keeper for processing a lot of brass for loading up range ammo. Those chasing accuracy won't be satisfied. I plan to print a spacer for the bushing because the end mill has flutes in contact with the bearing instead of shaft, so I need to shift it up ~.2". I will continue to play around with this, but it's usable as is, and has room for improvement. I just got a standard shaft collar and don't feel e need for the fancy adjustable one at this time. https://www.ar15.com/media/mediaFiles/102025/D8FF9A41-CAF4-4FEE-9FBC-1AD03AE77B21_jpe-1801290.JPGhttps://www.ar15.com/media/mediaFiles/102025/39EB7175-F8A5-44A1-8121-963C34289978_jpe-1801291.JPGhttps://www.ar15.com/media/mediaFiles/102025/38059A07-78E0-4600-B227-852AB8EB9FB2_jpe-1801292.JPG I got in the small bearing today, endmill and larger bearing should be here Saturday so I can start messing with it. |

|
Originally Posted By Milsurpninja: Has any tried this WFT-style trimmer on Thingiverse? Looks well conceived. Purchase parts are close to $100 though. https://www.ar15.com/media/mediaFiles/102025/5AC8BB8E-920A-4CF5-9B7A-6EA289214FEF_jpe-1793632.JPG https://www.thingiverse.com/thing:2569955 ETA: $80 +s&h https://www.ar15.com/media/mediaFiles/102025/526BE30D-0C0B-446C-93AF-4FBA0F68D68E_jpe-1793646.JPG ETA2: I fent on $35 woth of eBay alternatives. At least the end mill is US made. https://www.ar15.com/media/mediaFiles/102025/0BD456A6-5FD7-47F8-A2FC-4634EC804A4A_jpe-1793673.JPG At close to a hundred bucks, you could just get a Giraud Tri-way. I do love the ingenuity, tho. |
Never confuse faith that you will prevail in the end—which you can never afford to lose—with the discipline to confront the most brutal facts of your current reality, whatever they might be. - Adm James Stockdale
|
Originally Posted By 1Andy2: At close to a hundred bucks, you could just get a Giraud Tri-way. I do love the ingenuity, tho. Originally Posted By 1Andy2: Originally Posted By Milsurpninja: Has any tried this WFT-style trimmer on Thingiverse? Looks well conceived. Purchase parts are close to $100 though. https://www.ar15.com/media/mediaFiles/102025/5AC8BB8E-920A-4CF5-9B7A-6EA289214FEF_jpe-1793632.JPG https://www.thingiverse.com/thing:2569955 ETA: $80 +s&h https://www.ar15.com/media/mediaFiles/102025/526BE30D-0C0B-446C-93AF-4FBA0F68D68E_jpe-1793646.JPG ETA2: I fent on $35 woth of eBay alternatives. At least the end mill is US made. https://www.ar15.com/media/mediaFiles/102025/0BD456A6-5FD7-47F8-A2FC-4634EC804A4A_jpe-1793673.JPG At close to a hundred bucks, you could just get a Giraud Tri-way. I do love the ingenuity, tho.  And it's fun to mess with. Like you said, I admire the ingenuity. |
|
Originally Posted By TGE: Cool! Thank you for posting. You think the slop is mostly a result of the flutes touching the bearing? I got in the small bearing today, endmill and larger bearing should be here Saturday so I can start messing with it. It’s that plus play in the bushing-bearing slip fit. I think I will design a new bushing from scratch. Tighten the fit of the bushing to the bearin, case in the bushing, and move the mill up for better contact in its bearing. |
Verbum caro, panem verum, verbo carnem efficit.
|
Originally Posted By Milsurpninja: It's that plus play in the bushing-bearing slip fit. I think I will design a new bushing from scratch. Tighten the fit of the bushing to the bearin, case in the bushing, and move the mill up for better contact in its bearing. Originally Posted By Milsurpninja: Originally Posted By TGE: Cool! Thank you for posting. You think the slop is mostly a result of the flutes touching the bearing? I got in the small bearing today, endmill and larger bearing should be here Saturday so I can start messing with it. It's that plus play in the bushing-bearing slip fit. I think I will design a new bushing from scratch. Tighten the fit of the bushing to the bearin, case in the bushing, and move the mill up for better contact in its bearing. Look forward to seeing what you do with it. |
Armory Sponsor