


AR Sponsor


Posted: 4/14/2014 6:26:17 AM EDT
| I've seen pictures of properly staked gas keys and my DPMS Recon 16 does not look exactly like those pics. Is it normal to be able to see bubbles coming from under the key when blowing through a straw? Putting some oil around the key and blowing I can see bubbles coming from 3 sides of the key where it contacts the carrier. This is a new rifle and it has short stroked since I've had it. DPMS replaced the carrier but the new one does the same thing. I've seen some keys put on with red Locktite to seal them. Is this a good idea under the circumstances? Any help would be greatly appreciated. |
|
Quoted:
I've seen pictures of properly staked gas keys and my DPMS Recon 16 does not look exactly like those pics. Is it normal to be able to see bubbles coming from under the key when blowing through a straw? Putting some oil around the key and blowing I can see bubbles coming from 3 sides of the key where it contacts the carrier. This is a new rifle and it has short stroked since I've had it. DPMS replaced the carrier but the new one does the same thing. I've seen some keys put on with red Locktite to seal them. Is this a good idea under the circumstances? Any help would be greatly appreciated. Sounds like either a warped carrier where the key mates up or a warped key. You could go with what Colt does, they use a LIGHT application of Aviation Permatex #3. 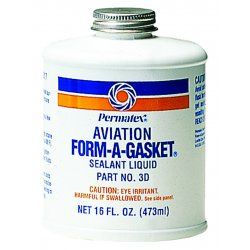
|
|
As long as the key is properly tightened small leaks generally seal up by firing.
If possible try a known good carrier. If not possible I would be inclined to replace the key using the Permatex sealer and stake it. I don’t think the on-site TM is up to date on screw torque. The current spec calls for 50 in/lbs to 58 in/lbs. You could probably get away with reusing the key, but it is not recommended to reuse the screws. |
|
The sealant is used vary sparingly; think of applying thermal paste to the cooling fan heat sink for a CPU.
The parts are parkerized, all you are doing is filling the microscopic voids in the Parkerizing. I have heard of people sanding the bottom of the key, but I have never needed to do that. |
|
I use this stuff and 56inlbs. Pocket MOACKS to stake.
CMT/Stag make a good gas key w/screws for $10.75. 
|
|
Quoted:
Good suggestions. After 4 months of firing with the original carrier the key did not seal. Time will tell with the replacement key. The sealant sounds like a good idea but I really shouldn't have to do this with a new rifle. No you should not have to, but it is what it is. |
|
Quoted:
Yep, that's WAY overdone. When you displace the head so bad it won't except a hex wrench....  Quoted:
I was taught not to punch/stake directly on the screws, only displace key material into the screw head serrations. Yep, that's WAY overdone. When you displace the head so bad it won't except a hex wrench.... Most pictures people post here of "There, I did it myself because it wasn't done right" are done WRONG. The TM calls for displacing 0.02" of material into the knurling on the screw head in two or three spots around each screw. That's enough to lock the screw in place, but not enough to keep you from unscrewing it. If you use the MOACKS according to the instructions, you'll displace more than that amount, but in such a way that the screws are still removable. If you overdo with a MOACKS, you can bugger up the key so badly that you can't cycle the carrier. If you use a tool, use it right, and just saying "I used my MOACKS so it's gotta be right" is wrong - it's gotta be according to the instructions. My armorer instructor suggested "counterstaking," where he displaces some of the screw head material out into the hole in the key; I'm not sure that's a great idea, but it works for him. As to using Permatex, I'm told it's in the Colt armorer's manual, and I can't dispute that. It shouldn't be needed. 10-20 rounds should seal that key up tight. But using Permatex (the aviation gasket material, not automotive) is a workable shortcut that makes the key seal for the very first shot. Just follow the instructions carefully, including cleaning the snot out of the carrier and key before applying the Permatex. |
| Problem Soved! Thanks to PursuitSS for suggesting to seal the key. After receiving the second carrier from DPMS, it too was not staked properly and I was able to remove both screws with no resistance. I sealed the key to the carrier with a small amount of Loctite Hi-Temp and let it cure the recommended 72 hours. I went to the range with 8 different brands of ammo which were all short stroking and I even took 2 that wouldn't even strip the next round or feed properly. Every round fired perfectly! All rounds fed properly and the bolt locked back after each mag was empty. Thanks for everyone's help. |
AR Sponsor