|
[#1]
Quoted:
Link to this trigger mod? http://www.sargenthome.com/15_Minute_AR_Trigger_Job.htm I have done this mod over a dozen times and it works great! I have only had problems with one, thats because I didn't know that the hammer spring I cut was already a reduced power spring. I have put literally thousands of rounds through such modified rifles. I would not, and have not, hesitated taking these rifles in to harms way. If you don't like the results, it cost you a hammer spring and a trigger spring. |
|
|
|
[#2]
|
|
|
|
[#3]
|
|
|
|
[#4]


|
|
|
|
[#6]
Handy cleaning / build / display / range stand. Made from a broken mag and a couple pieces of wood.

I should be patenting this, but..... 
Don't have a pic, but 5 quarters taped together makes the perfect support for putting trigger guard pins in. |
|
|
|
[#7]
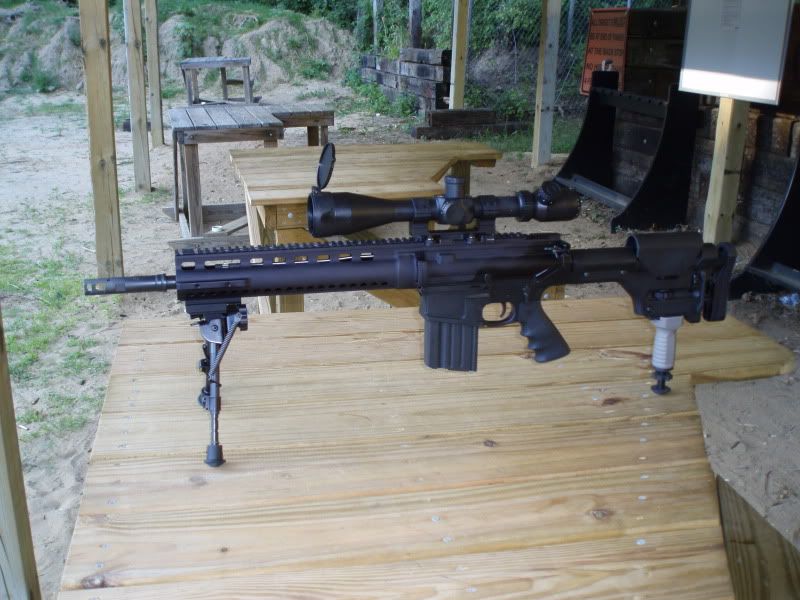
Is it me or do you need to properly crown your barrels for accuracy, not being lame but seems odd. Also why not leave a bit and thread it for a flash hider?
|
|
|
|
[#8]
Quoted:
Handy cleaning / build / display / range stand. Made from a broken mag and a couple pieces of wood. http://i35.photobucket.com/albums/d162/k80clay/IMG_20110801_144653.jpg I should be patenting this, but..... http://i35.photobucket.com/albums/d162/k80clay/IMG_20110801_144845.jpg Don't have a pic, but 5 quarters taped together makes the perfect support for putting trigger guard pins in. I like that cleaning stand idea. |
|
|
|
[#9]
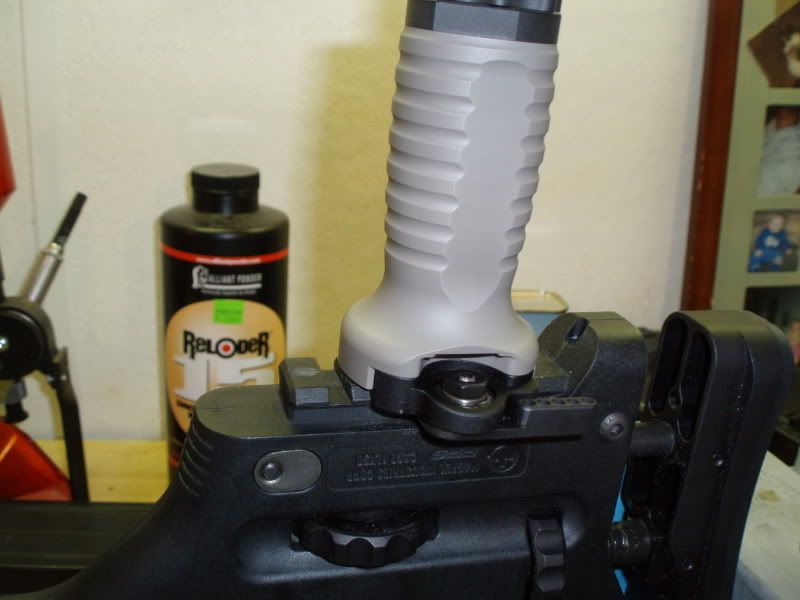
I don't quite follow how the MOE QR swivel stud was accomplished...I see the drill bit, but how did you fabricate and attach the receptacle?
How does that SBR shoot? Looks like a hoot. |
|
|
|
[#10]
Quoted:
I don't quite follow how the MOE QR swivel stud was accomplished...I see the drill bit, but how did you fabricate and attach the receptacle? How does that SBR shoot? Looks like a hoot. QD attachment is 3 pieces. Screw, one half with a threaded hole, and another half with no threads. Forstner bit to create 1/2" hole with flat bottom (but don't drill all the way through) , drill through hole for screw, cut screw to length, attach two halves on each side with screw. |
|
|
|
[#11]
Are you using a Magpul factory QD receptacle? If not, what are the dimensions of the stock you used and where can I aquire it?
|
|
|
|
[#12]
Quoted:
Is it me or do you need to properly crown your barrels for accuracy, not being lame but seems odd. Also why not leave a bit and thread it for a flash hider? For best accuracy yes something like a 11 degree target crown would be best but the brass screw method works just fine. It's not as accurate as my 11.5 uppers but I would not want to face somebody at 100 yards against it. I'd say its about as accurate as a AK. |
|
|
|
[#13]
Bought the QD studs on ebay. They're the standard 1/2" diameter studs. Can use the Magpul studs, but they just cost more.
|
|
|
|
[#14]
This isn't my mod, I've never actually tried it, and I don't remember who originally posted it.
I know the Captured detent for the rear take down pin has been posted before, and there was some mentioning of a captured detent on the Safety Selector or buffer tube. I couldn't find a post about it, so I figured I would make my own.
My modification replaces the regular detent with a 1/8" hard chrome ball bearing. 
Tools Required: Flat Head screwdriver, 8-32 Tap and Tap Handle, 5/64 allen wrench, a 1/8" drill bit, and a set of diagonal cutting pliers (dikes). Materials required: 1/8" ball bearing, 8-32 x 3/16" set screw, cutting oil. So here it goes. First things first, remove the pistol grip, detent spring, and detent. Then remove the safety selector. Use the 8-32 tap and tap out the hole from the bottom. Go slow and use some form of cutting oil. 
Then put the 1/8" drill bit in the tap handle and use it to clean out the hole all the way into the area where the selector passes through. This ensures that all the rough edges left from the tap are gone as well as smoothing out the hole for the ball bearing. 
Insert the selector lever, then insert the ball bearing. Using the detent spring, ensure that the bearing is making contact with the selector surface. If not, try cleaning the hole with the drill bit again. Now it's time to trim the detent spring. I start off at 3/8". 
Insert the spring and set screw. Test the tension on the selector lever. It's probably too tight at this point, so remove the spring and trim it a little bit more. Go 1 coil at a time to avoid taking off too much. I usually end up with a section that's a tad longer than 1/4". Once you've got the tension where you want it, put a small drop of oil in the tip of the spring, reinstall the spring and set screw. 
Most of you are probably thinking this is a waste of time, and for most people it probably is. What I do know is that on the two lowers I have done this to, they show substantially less wear on the selector lever than the two other lowers that I haven't done yet. My theory is that down the road I will have to replace the detent/selector less often. As always YMMV. |
|
|
|
[#15]
I had a bunch of A2 grips laying around and decided I wanted to try my hand at plastic stippling. I used them to practice on so if I screwed up I could just toss them and not feel bad. I started off by grinding off the finger groove on the front. Then I stippled the entire front with a soldering iron. I was just using them as test pieces, but it turns out I really like the texture and lack of finger groove. I also stippled a Troy BattleAx grip. I liked the size and shape but found it a bit slick. Problem solved
|
|
|
|
[#16]
PRS stock with a modified rail to fit an LT FUG/monopod.
The standard PRS rail is not picatinny. I marked the rail by rubbing the slots of the FUG against it, then I used a hacksaw blade that I gripped in my hand and went slow until I had a cut out. I finished with a file to keep everything tight and smooth. The adjustable monopod cap was purchased a long time ago on the EE, but it only consists of a threaded cap, a screw and a locking nut. 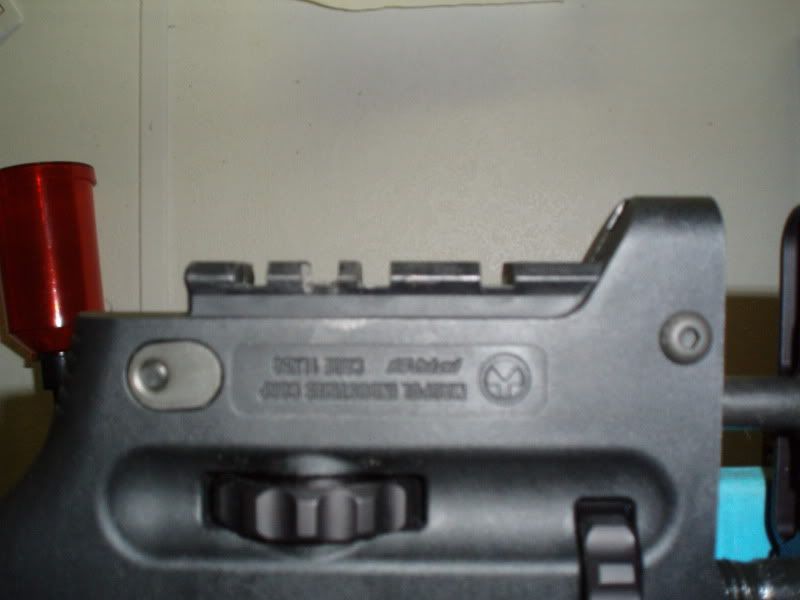
|
|
|
 Win a FREE Membership!
Sign up for the ARFCOM weekly newsletter and be entered to win a free ARFCOM membership. One new winner* is announced every week!
You will receive an email every Friday morning featuring the latest chatter from the hottest topics, breaking news surrounding legislation, as well as exclusive deals only available to ARFCOM email subscribers.

AR15.COM is the world's largest firearm community and is a gathering place for firearm enthusiasts of all types.
From hunters and military members, to competition shooters and general firearm enthusiasts, we welcome anyone who values and respects the way of the firearm.

Subscribe to our monthly Newsletter to receive firearm news, product discounts from your favorite Industry Partners, and more.
Copyright © 1996-2024 AR15.COM LLC. All Rights Reserved.
Any use of this content without express written consent is prohibited.
AR15.Com reserves the right to overwrite or replace any affiliate, commercial, or monetizable links, posted by users, with our own.


