|
[#1]
just off the printer, tactical vest hanger

|
|
|
|
|
[#2]
Damn good idea. I've been looking at something for my plate carriers
|
|
|
|
|
[#3]
That’s what I was trying to make when my printer went all spaghetti and locked up. To busy at work this week to mess with the fix |
|
|
|
|
[#4]
Originally Posted By ErikS: Got a Creality PEI flex steel bed. My glass bed actually cracked off a chunk of glass on a print. Weird. I printed another pegboard item, a drill holder and it came out PERFECT. No problem at all getting it off or getting it to stick. I am sold on the flexible steel and the PEI. Within the first month of getting my sovol, which came with a textured glass bed, I had 2 different prints take chunks out of the glass. And that was just with pla! I switched my tronxy to steel/pei and love it. Just waiting for fulament to get back in stock with the 350x350 plates. |
|
|
|
|
[#5]
Did some TPU pouches for cheap baofeng radios (like the BF-888S).
One example: Put the files on Thingiverse: https://www.thingiverse.com/thing:5028890 |
|
|
|
|
[Last Edit: -Obsessed-]
[#6]
Modified some leg supports from the Lack V2 enclosure to allow for a third table.
They turned out great, although five perimeters and 40% infill was likely overkill. I could probably break a window with these things. Third table...just sitting there on the third table for now. My handles are printing, so need to wait for them to finish... |
|
|
|
|
[#7]
Originally Posted By -Obsessed-: Modified some leg supports from the Lack V2 enclosure to allow for a third table. They turned out great, although five perimeters and 40% infill was likely overkill. I could probably break a window with these things. https://www.ar15.com/media/mediaFiles/467079/20211027_101102_jpg-2144981.JPG Third table...just sitting there on the third table for now. My handles are printing, so need to wait for them to finish... https://www.ar15.com/media/mediaFiles/467079/20211027_101109_jpg-2144983.JPG Why did you have to modify them? I made a 3 high stack of those tables, and simply printed an extra set of extension feet. They didn't NEED to be extended, just used them for attaching 2nd table to bottom table. |
|
|
|
|
[Last Edit: -Obsessed-]
[#8]
Originally Posted By rcav8r: Why did you have to modify them? I made a 3 high stack of those tables, and simply printed an extra set of extension feet. They didn't NEED to be extended, just used them for attaching 2nd table to bottom table. I removed the wings that hold the acrylic panels. Nothing major. Just didn't want those as they would just be in the way and generally don't look clean. Not sure what you mean by extension feet. Not familiar with those...this is the MMU2S (V2) version of the enclosure, if that matters. |
|
|
|
|
[#9]
Originally Posted By -Obsessed-: I removed the wings that hold the acrylic panels. Nothing major. Just didn't want those as they would just be in the way and generally don't look clean. Not sure what you mean by extension feet. Not familiar with those...this is the MMU2S (V2) version of the enclosure, if that matters. https://www.ar15.com/media/mediaFiles/467079/20211027_120756_jpg-2145069.JPG Ah, OK. My sets didn't have the slots for the acrylic. All 4 sides are hinged. By extension, the feet printed higher to give the necessary clearance for my Ender 3. |
|
|
|
|
[Last Edit: -Obsessed-]
[#10]
Printing a 10:1 blown up Lego Skeleton that I found on Prusa's site for Halloween. The creator did an amazing job designing it.
I also get to test the SpoolJoin feature of the MMU2S. It should run out of filament dab smack in the middle of the next print. I have no idea how atomic terminates the filament on the spool so hopefully it doesn't cause issues. Here is a leg for size reference. Looks like he will stand ~16" tall when done. |
|
|
|
|
[#11]
Originally Posted By -Obsessed-: Printing a 10:1 blown up Lego Skeleton that I found on Prusa's site for Halloween. The creator did an amazing job designing it. I also get to test the SpoolJoin feature of the MMU2S. It should run out of filament dab smack in the middle of the next print. I have no idea how atomic terminates the filament on the spool so hopefully it doesn't cause issues. Here is a leg for size reference. Looks like he will stand ~16" tall when done. https://www.ar15.com/media/mediaFiles/467079/20211028_153506_jpg-2146420.JPG I don't have any Atomic spools that are nearly empty handy, but IIRC you should be GTG. |
|
|
|
|
[Last Edit: thezentree]
[#12]
They’re jammed backwards into a notch in the spool hub and wound backwards so the filament makes sort of a hook, like weedeater string. It definitely kinks the filament, and it’s kinda wedged in there, but the extruder can probably pull it out.
ETA listen here iphone, I’ve typed “extruder” enough times that you don’t need to autocorrect it to “extruded” |
|
|
|
|
[Last Edit: -Obsessed-]
[#13]
Originally Posted By Rat_Patrol: I've used spool runout, but on 3D Fuel refuel spools. Worked well. I don't have any Atomic spools that are nearly empty handy, but IIRC you should be GTG. Originally Posted By thezentree: They’re jammed backwards into a notch in the spool hub and wound backwards so the filament makes sort of a hook, like weedeater string. It definitely kinks the filament, and it’s kinda wedged in there, but the extruder can probably pull it out. ETA listen here iphone, I’ve typed “extruder” enough times that you don’t need to autocorrect it to “extruded” Sounds good, thanks guys. Already have my next project lined up. I re-designed the rear endcap for the buffer to have the tubes going down to the printer be further back, and out. Trying to get my fingers in there to feed the filament into the MMU2 unit is a frustrating endeavor. I'm hoping this gives me enough room to actually get my fingers in there without driving me crazy. |
|
|
|
|
[Last Edit: Mr_Psmith]
[#14]
|
|
|
|
|
[#15]
Printed the extended rear buffer plate for the MMU2S and got it installed.
Works perfectly. Before: After: |
|
|
|
|
[#16]
Originally Posted By -Obsessed-: Printed the extended rear buffer plate for the MMU2S and got it installed. Works perfectly. Before: https://www.ar15.com/media/mediaFiles/467079/20211030_081136_jpg-2148512.JPG After: https://www.ar15.com/media/mediaFiles/467079/20211030_082951_jpg-2148514.JPG STL? I have the same problems |
|
|
|
|
[Last Edit: -Obsessed-]
[#17]
Originally Posted By Rat_Patrol: STL? I have the same problems Sure thing let me upload to Thingiverse. Let me know if you have feedback. Happy to adjust and refine. It is my first iteration so it's bound to be ripe for revisions. Thingiverse Link I printed it with the back facing down, and it worked flawlessly. I printed it out of PLA, but I'm sure you could do ABS to match the rest of the black buffer parts if you wanted to. |
|
|
|
|
[Last Edit: -Obsessed-]
[#18]
Happy Halloween everyone.
Here is my finished Lego-inspired Skeleton guy. He turned out great. 660g of Atomic Bright White PLA and 47 hours of printing. |
|
|
|
USA
|
[#19]
Careful, if you call your 3d printed parts "legos" I hear they send attorneys with ball peen hammers to your house and break your kneecaps.
|
|
|
|
[#20]
Originally Posted By Redarts: Careful, if you call your 3d printed parts "legos" I hear they send attorneys with ball peen hammers to your house and break your kneecaps. Fixed. Also sketched up and printed a router jig last night. Worked perfect but I'm going to tweak the design for a different router bit. It's printing now. |
|
|
|
|
[#21]
|
|
|
|
|
[#22]
Originally Posted By Rat_Patrol: Damn good idea. I've been looking at something for my plate carriers Originally Posted By Rat_Patrol: |
|
|
|
|
[Last Edit: -Obsessed-]
[#23]
Originally Posted By Holloway: Just finished one this morning. It's been holding this 17lb vest for a hour now. https://www.ar15.com/media/mediaFiles/131761/20211031_101447_jpg-2149752.JPG What did you print it with? Be aware PLA fatigues with time. PETG and ASA do not. So if you run into issues, PETG might be an easy alternative. --- Pulled my other router jig off the printer and it worked flawlessly. I'm ripping down floor transition spacers to give them a wedge profile as I need to cant the trim piece as the carpet/LVP transition is an appreciable height variation. |
|
|
|
|
[Last Edit: scul]
[#24]
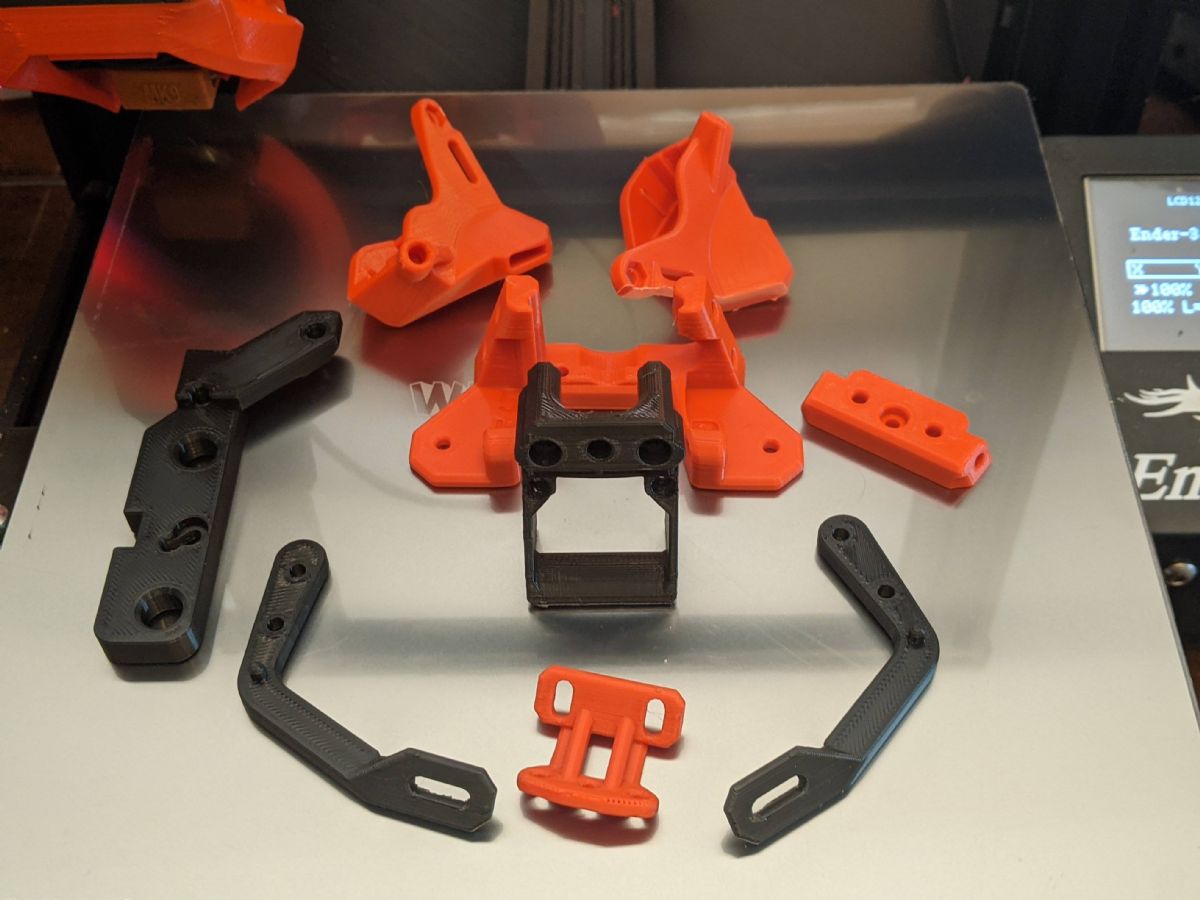
Parts for a Manta mk2, with a few remixed to fit my setup. Still need to design a mount for my hot end drag chain.
|
|
|
|
|
[Last Edit: -Obsessed-]
[#25]
Printed a simple router mount for the basement.
Printing another for the Laundry room router. Wife said she doesn't want to see the mounting bracket below it so I'm doing the bracket inverted. Won't be as strong but should be fine. ETA: Upstairs router mount done. |
|
|
|
|
[#26]
I enjoy these silly 22s Also, please ignore the trash on the floor. My stupid dog decided to get into my trash bucket in the garage/shop... I'll clean it up tomorrow. |
|
|
|
|
[#27]
Originally Posted By JoelAC89: https://www.ar15.com/media/mediaFiles/242385/20211101_165524_jpg-2151759.JPG I enjoy these silly 22s Also, please ignore the trash on the floor. My stupid dog decided to get into my trash bucket in the garage/shop... I'll clean it up tomorrow. Great, thanks. Now I'm gonna have to explain to my wife why I bought another .22 
|
|
|
|
|
[#28]
|
|
|
|
|
[Last Edit: NoFnNamesLeft]
[#29]
Oil separator/catch can for crankcase vent on minibikes. Had to add a second crankcase vent since these are running far in excess of the engine’s design. The line on the case itself isn’t as “clean” as the vent up in the valve cover. Lots more oil in the air. This keep the oil separated from the vent air, and returns it to the engine instead of spewing it all over. Tucks up nice & clean under the seat and sits tight to the frame with minimal line runs. It doesn’t really show up here, but there’s a open channel through all the baffles to allow the captured oil to run back through and drain (I agree, having an installed pic would help make sense of things, unfortunately, Wang Dong didn’t weld the cross member at the same point on both sides of the frame, and I only measured 1 side. Back to the drawing board to widen the cut out on the back and run another 17 hr print) |
|
|
|
|
[#30]
Figured out my printer issue yesterday. The roller on the back bar was binding with the motor. Moved and tightened and it’s been good.
Printed up a body armor hanger! Freed up room in my gun room tool box and makes it easier to get stuff out and on in a hurry. This is the first I’ve done something that wasn’t one piece. Pretty happy with how it turned out and saved me like $30 from buying one. I figure at this rate I’ll have the printer paid off in about 3 weeks so the rest is just the cost of the filament |
|
|
|
PW, USA
|
[#31]
Originally Posted By -Obsessed-: Happy Halloween everyone. Here is my finished Lego-inspired Skeleton guy. He turned out great. 660g of Atomic Bright White PLA and 47 hours of printing. https://www.ar15.com/media/mediaFiles/467079/20211030_195134_jpg-2149643.JPG Here is my tiny Lego-inspired skeleton guy. This one took about 1hr 25 min. 
|
|
|
|
[#32]
Figured I'd try a baby menendez. Hand cycles fine and locks the slide back. Need to find time to hit the woods with it. |
|
|
|
|
[#33]
Battery holder! Stores 18 AA and cycles them down by itself. We go through a ton of batteries with kids and their toys and my wife has battery candles everywhere. Replacing with rechargeable but wanted to get storage squared away first.
|
|
|
|
KY, USA
|
[#34]

|
|
|
PW, USA
|
[#35]
Another larger skeleton. The grey one is at 100%, the white at 300%. My son loves these things.

|
|
|
|
[#36]
Made 2 of these. It took sizing them down down to 99.6% to get a perfect fit.
|
|
|
|
|
[#37]
 Still getting it tweaked just right, but these are carpel tunnel hand stretchers. I'm currently using commercially available ones, but they cost me $100ish per month. Instead of the usual 6 week course, since my condition is decades old, I'll be using them for a while if not permanently. They just use standard 1" and 3/4" medical tape, the "springs" are part of the printed part. Made from TPU. |
|
|
|
|
[#38]
Originally Posted By Rat_Patrol: https://www.ar15.com/media/mediaFiles/165887/Carpel_Tunnel_stretcher-2156017.jpg Still getting it tweaked just right, but these are carpel tunnel hand stretchers. I'm currently using commercially available ones, but they cost me $100ish per month. Instead of the usual 6 week course, since my condition is decades old, I'll be using them for a while if not permanently. They just use standard 1" and 3/4" medical tape, the "springs" are part of the printed part. Made from TPU. Could you expand on this some? I'm kind of suffering from it, but the VA just wants to throw meds at it and not correct the problem. I work with my hands for a living and it makes things difficult. |
|
|
|
|
[#39]
Originally Posted By SecretSquirell: Could you expand on this some? I'm kind of suffering from it, but the VA just wants to throw meds at it and not correct the problem. I work with my hands for a living and it makes things difficult. Originally Posted By SecretSquirell: Originally Posted By Rat_Patrol: https://www.ar15.com/media/mediaFiles/165887/Carpel_Tunnel_stretcher-2156017.jpg Still getting it tweaked just right, but these are carpel tunnel hand stretchers. I'm currently using commercially available ones, but they cost me $100ish per month. Instead of the usual 6 week course, since my condition is decades old, I'll be using them for a while if not permanently. They just use standard 1" and 3/4" medical tape, the "springs" are part of the printed part. Made from TPU. Could you expand on this some? I'm kind of suffering from it, but the VA just wants to throw meds at it and not correct the problem. I work with my hands for a living and it makes things difficult. Just making a 3d printed version of these: https://www.mycarpaltunnel.com/carpal-solution/the-carpal-tunnel-solution/ If you can swing it, I'd just try the commercial version. Usually a single treatment is supposed to work, but I've dealt with it since I was a young teen and never had treatment. I've seen a great improvement. I went from being worthless and having crippled hands to about 75% gone. |
|
|
|
|
[#40]
Originally Posted By Rat_Patrol: Just making a 3d printed version of these: https://www.mycarpaltunnel.com/carpal-solution/the-carpal-tunnel-solution/ If you can swing it, I'd just try the commercial version. Usually a single treatment is supposed to work, but I've dealt with it since I was a young teen and never had treatment. I've seen a great improvement. I went from being worthless and having crippled hands to about 75% gone. Originally Posted By Rat_Patrol: Originally Posted By SecretSquirell: Originally Posted By Rat_Patrol: https://www.ar15.com/media/mediaFiles/165887/Carpel_Tunnel_stretcher-2156017.jpg Still getting it tweaked just right, but these are carpel tunnel hand stretchers. I'm currently using commercially available ones, but they cost me $100ish per month. Instead of the usual 6 week course, since my condition is decades old, I'll be using them for a while if not permanently. They just use standard 1" and 3/4" medical tape, the "springs" are part of the printed part. Made from TPU. Could you expand on this some? I'm kind of suffering from it, but the VA just wants to throw meds at it and not correct the problem. I work with my hands for a living and it makes things difficult. Just making a 3d printed version of these: https://www.mycarpaltunnel.com/carpal-solution/the-carpal-tunnel-solution/ If you can swing it, I'd just try the commercial version. Usually a single treatment is supposed to work, but I've dealt with it since I was a young teen and never had treatment. I've seen a great improvement. I went from being worthless and having crippled hands to about 75% gone. Looks interesting. Might have to give it a try. They gave me braces to wear at night but they literally cause more pain than just going without and dealing with the pain. |
|
|
|
|
[#41]
Originally Posted By SecretSquirell: Looks interesting. Might have to give it a try. They gave me braces to wear at night but they literally cause more pain than just going without and dealing with the pain. I had the same experience with standard rigid braces. These work by gently stretching the part of the hand tissue that is encroaching on the median nerve. Seriously, give them a try. |
|
|
|
|
[#42]
Originally Posted By Rat_Patrol: I had the same experience with standard rigid braces. These work by gently stretching the part of the hand tissue that is encroaching on the median nerve. Seriously, give them a try. Originally Posted By Rat_Patrol: Originally Posted By SecretSquirell: Looks interesting. Might have to give it a try. They gave me braces to wear at night but they literally cause more pain than just going without and dealing with the pain. I had the same experience with standard rigid braces. These work by gently stretching the part of the hand tissue that is encroaching on the median nerve. Seriously, give them a try. I just might. Thanks! |
|
|
|
|
[#43]
Ditched the spring, these are much better.
I'll likely cast something very similar out of silicone unless I come across a super stretchy tpe. 
|
|
|
|
|
[Last Edit: Sgtmack122]
[#44]
STL source? I really need a couple of these. @Overkill777 |
|
|
|
KY, USA
|
[#45]
Originally Posted By Sgtmack122: STL source? I really need a couple of these. @Overkill777 PM sent |
|
|
|
[Last Edit: steviesterno16]
[#46]
Printed a dinosaur claw that I buried in the yard.
My 5.5 year old found it and declared himself a real archeologist. So that’s a win Also I made this. Always wanted a set and never wanted to pay for them. |
|
|
|
|
[#47]
Originally Posted By steviesterno16: Battery holder! Stores 18 AA and cycles them down by itself. We go through a ton of batteries with kids and their toys and my wife has battery candles everywhere. Replacing with rechargeable but wanted to get storage squared away first. https://www.ar15.com/media/mediaFiles/455820/A0C6F942-9CA8-430A-B5C9-38C22EDBF068_jpe-2153383.JPG That is awesome! Originally Posted By steviesterno16: Printed a dinosaur claw that I buried in the yard. My 5.5 year old found it and declared himself a real archeologist. So that’s a win Also I made this. Always wanted a set and never wanted to pay for them. https://www.ar15.com/media/mediaFiles/455820/D1888B73-0A64-4212-813D-880DF67CDADF_jpe-2159841.JPG You can cast them is brass or aluminum now that you have the plastic one. (YouTube lost pla casting) |
|
|
|
|
[#48]
Originally Posted By DFARM: That is awesome! You can cast them is brass or aluminum now that you have the plastic one. (YouTube lost pla casting) Wait what?!?! |
|
|
|
|
[Last Edit: DFARM]
[#49]
It appears to be basically the same as lost wax casting. You'd add a sprue onto your plastic paperweight, then stick it in wet plaster and let the plaster harden. Then you'd set the plaster block with the sprue facing down and melt the plastic/wax out(don't do this in your kitchen oven). Now you have a mold that you'd fill with molten metal. Once the metal solidifies, you remove the plaster and finish the metal part.
I still don't own a 3d printer, but this process was what came to mind when they first started becoming available for home users. With a 3d printer, a tabletop pottery kiln or probably an old oven and a way to melt metal, you can make all kinds of cast goodies at home. |
|
|
|
|
[#50]
Originally Posted By steviesterno16: Wait what?!?! Yeah man, check it out. It's insanity. I watched a guy make an amazing (literally, amazing) two way nut and bolt. My mind has never been so blown.  Making a bolt with double threads - DOES IT WORK? - Lost PLA metal casting - 3d print to solid metal |
|
|
|
 Win a FREE Membership!
Sign up for the ARFCOM weekly newsletter and be entered to win a free ARFCOM membership. One new winner* is announced every week!
You will receive an email every Friday morning featuring the latest chatter from the hottest topics, breaking news surrounding legislation, as well as exclusive deals only available to ARFCOM email subscribers.

AR15.COM is the world's largest firearm community and is a gathering place for firearm enthusiasts of all types.
From hunters and military members, to competition shooters and general firearm enthusiasts, we welcome anyone who values and respects the way of the firearm.

Subscribe to our monthly Newsletter to receive firearm news, product discounts from your favorite Industry Partners, and more.
Copyright © 1996-2024 AR15.COM LLC. All Rights Reserved.
Any use of this content without express written consent is prohibited.
AR15.Com reserves the right to overwrite or replace any affiliate, commercial, or monetizable links, posted by users, with our own.


