|
[#1]
Didn't think to take before pics, but my brick mailbox was leaning left towards the neighbors mailbox next to it, with only about 1.5" of clearence at the top.
Built a 2x4 frame around the base, with a vertical 2x8x8 on the left (low) side. Used a couple chains and a come along between a parked SUVs rear tie down loop and the top of the 2x8. Tightened the come along until the mailbox was just past plumb going the opposite direction. Dug out the left side of the footing, enough so I could get a few bricks underneath on the low side. Compacted the dirt, placed the bricks and continued to refill and tamp down (only a few inches of space between the two mailboxes). Removed tension on the come along and the mailbox settled to plumb. Will keep an eye on it. Been here for about 6 years, it has taken that long to lean as much as it did. If I do have to fix it again, will pour some quick setting concrete instead. Had to be careful digging, as their is gas lines and a FiOS terminal box right behind the two mailboxes. May have to do the same to pull the neighbors mailbox plumb eventually as well, to the left (she is a nice old lady). After pic: 
|
|
|
|
|
[#2]
Nice work on an out of the normal type problem.
|
|
|
|
|
[#3]
Used some brick to make a baby retaining wall for my generator pad. Hope to minimize mud slopping on it. No mortar or anything, just a quick reason to be outside in pretty fall weather.
|
|
|
|
|
[#4]
Originally Posted By 0100010:
Didn't think to take before pics, but my brick mailbox was leaning left towards the neighbors mailbox next to it, with only about 1.5" of clearence at the top. Built a 2x4 frame around the base, with a vertical 2x8x8 on the left (low) side. Used a couple chains and a come along between a parked SUVs rear tie down loop and the top of the 2x8. Tightened the come along until the mailbox was just past plumb going the opposite direction. Dug out the left side of the footing, enough so I could get a few bricks underneath on the low side. Compacted the dirt, placed the bricks and continued to refill and tamp down (only a few inches of space between the two mailboxes). Removed tension on the come along and the mailbox settled to plumb. Will keep an eye on it. Been here for about 6 years, it has taken that long to lean as much as it did. If I do have to fix it again, will pour some quick setting concrete instead. Had to be careful digging, as their is gas lines and a FiOS terminal box right behind the two mailboxes. May have to do the same to pull the neighbors mailbox plumb eventually as well, to the left (she is a nice old lady). After pic: https://s25.postimg.org/ipn4app73/20171001_133231.jpg I always wonder if my neighbors think I'm on drugs when they see me out there "hooking a come-along to my mailbox" (not that I've done that specifically but you know what I mean). 
|
|
|
|
|
[#5]
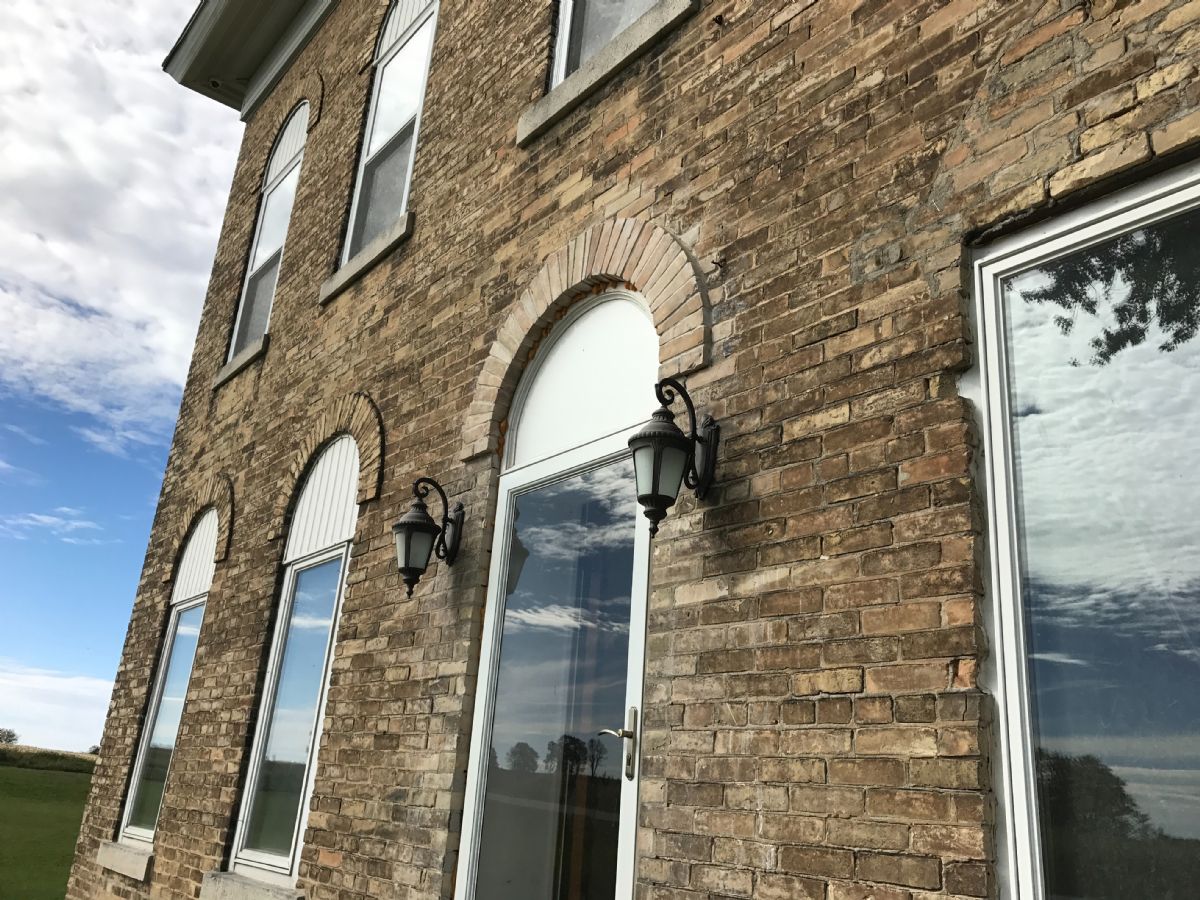
Got some exterior lights installed. When we were wiring the house I used a 4" hole saw to sink the boxes into the brick so the lights would be flush. House never had exterior lights before.

Trimmed out an area above our rear entrance door (was a garage in the 50's) Last fall a venture to defeat a wasp nest caused me to tear the plywood off and leave the framing exposed. Now after a year of exposure there were two wasp nests so it was time to get it sealed up right. Aluminum sheet and vinyl trim. Soon the rest of the crappy wood will get torn out. 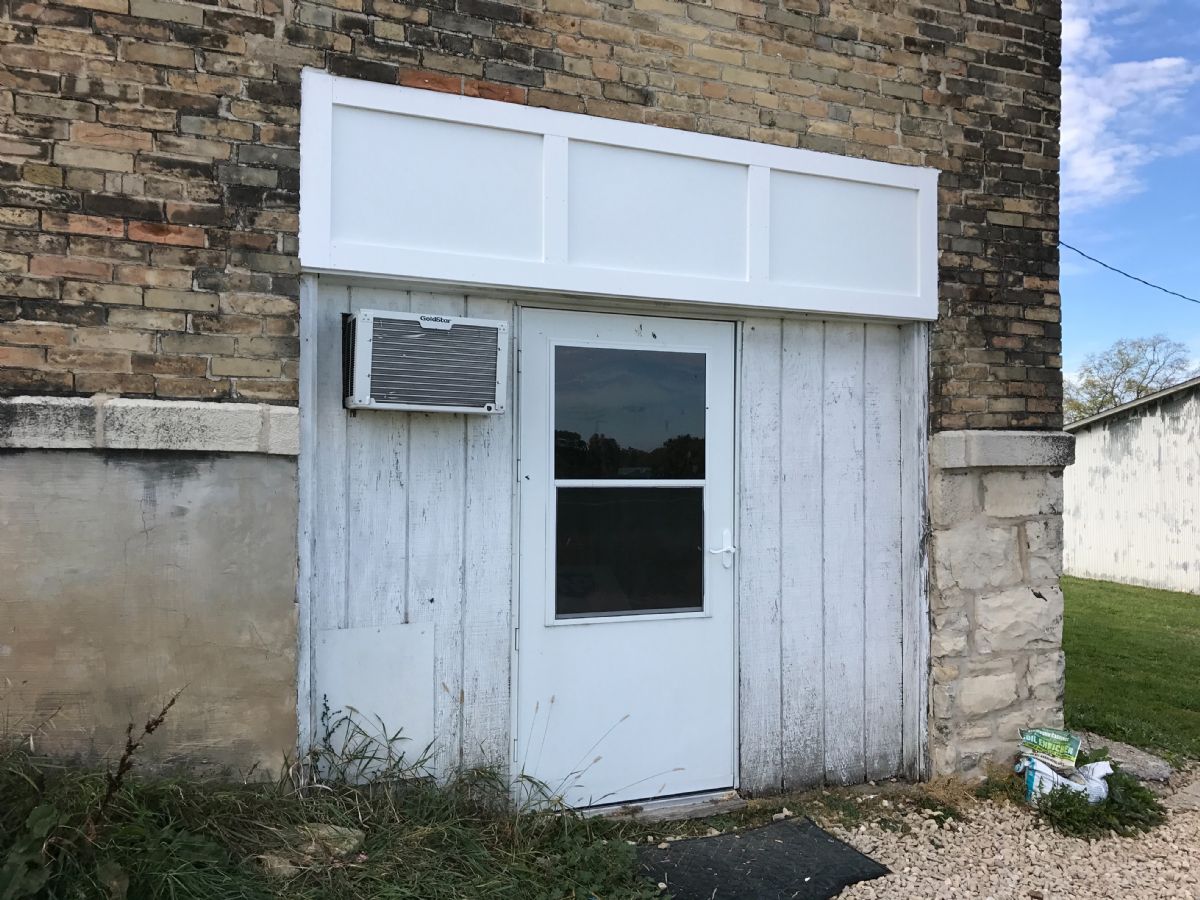
Big project for the weekend was fixing a bouncy spot in a walkway between our dining room and kitchen. I needed to patch the edges of the floor anyhow so I decided to cut it out and frame it up. The walkway bounces inside the brick opening, 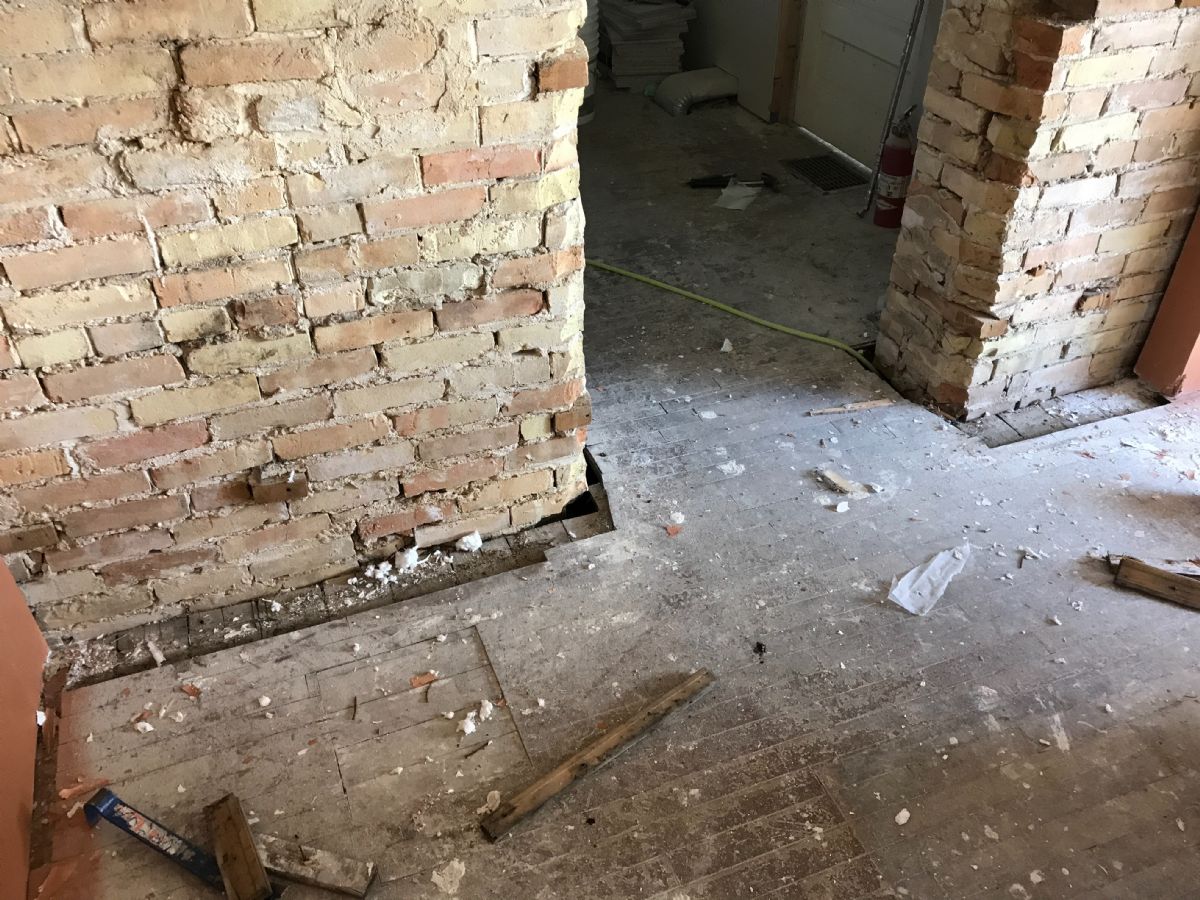
Cutting the flooring back I found the plank subfloor beneath ended short, i.e. With the brick being 16" thick and the joists a few inches from the brick these boards were protruding 18" unsupported. 

A few rough sawn 2x6's to stiffen it up. 
Plywood, a sheet of luan, and new 3/4 maple going in. 
All patched up. 
|
|
|
|
TX, USA
|
[#6]
Worked on my old 1997 F-250 Powerstroke yesterday. I replaced both valve cover gaskets/ wiring harnesses. (Goofy design IMHO) My truck started running real rough, with hardly any power. After a little research, I unplugged one of the clips to the harness, and found one connection melted. After taking it off, the whole connection was starting to melt. They way I understand, alot of these trucks have burned up because of this. The picture shows the gasket/ harness that is melting, and the connector with the melted plug. This sucked, but hopefully I won't have to worry about it again.

|
|
|
|
[Last Edit: magicman93]
[#7]
Tore off 2 layers and put a new roof on my garage this weekend. Still gotta replace trim and paint, but it's getting there. Never doing roofing again, BTW.

|
|
|
|
|
[#8]
|
|
|
|
|
[#9]
Beautiful dry 74 degree evening. Decided to install an arched window above our front door. Easy peasy. Not.
When I built the door frame I had to order the window custom. Put a temporary panel in place until the glass arrived ( hence the loose trim) 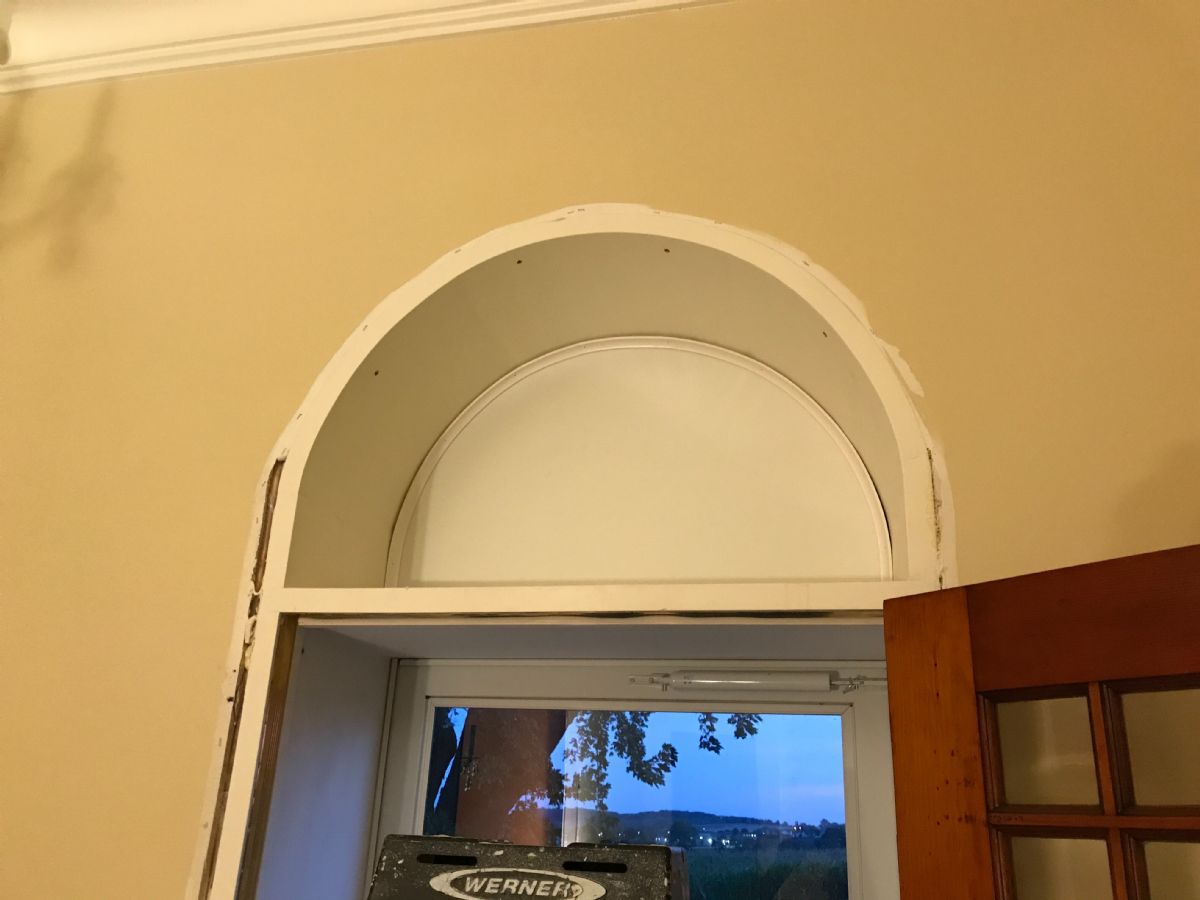
Popped the panel out. 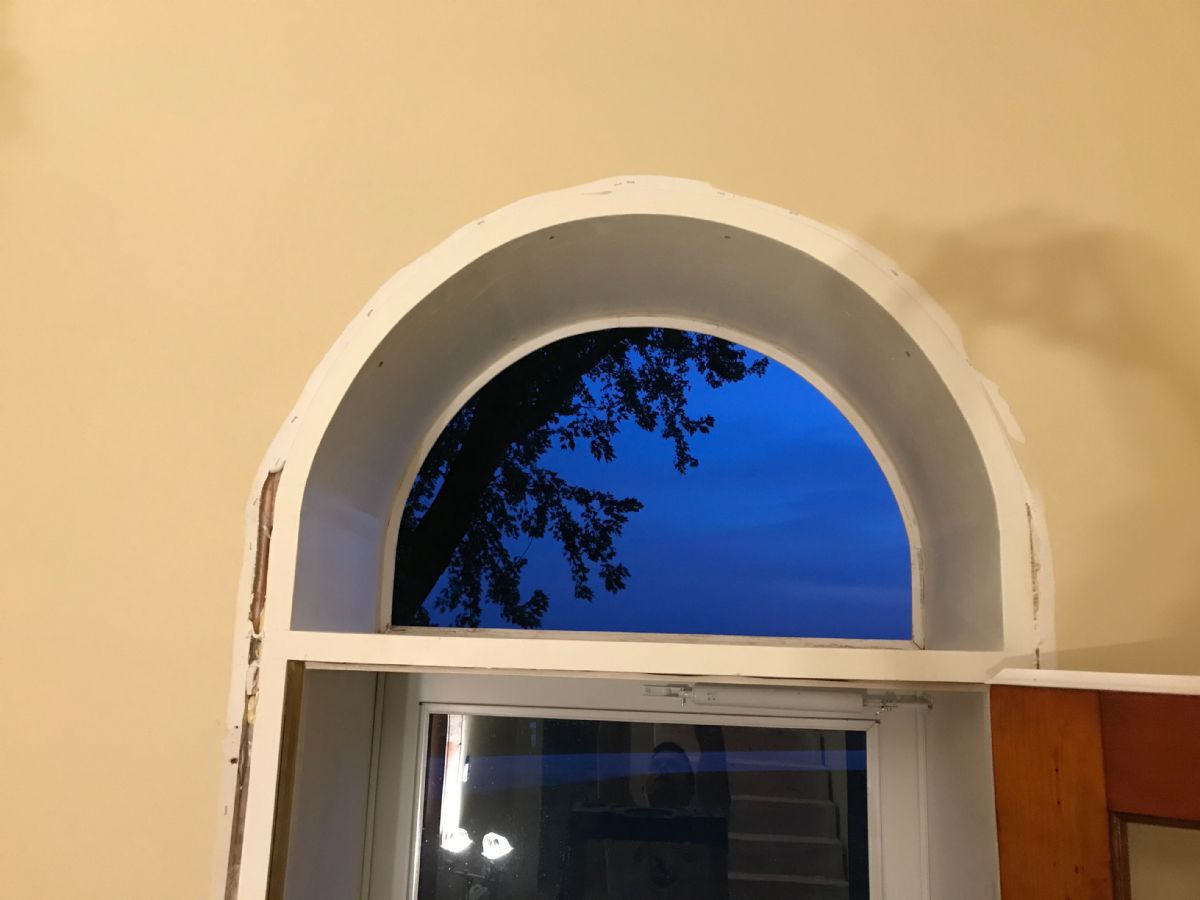
This is where I learned to dry fit this type of thing. Got the frame all caulked up and the window wouldn't fit. Ended up wiping an entire tube of caul off, grinding and sanding the frame, and finally installing the window. 
Stupid thing took two hours and a weeks worth of curse words. Looks good though. |
|
|
|
|
[#10]
Applied some final coats of poly to a butcher block countertop I made out of 2x4's.
Drew / 3D printed a spacer for a blue sea systems fuse box mount that required being mounted on a canted surface. |
|
|
|
|
[#11]
Trimmed my tailstock chuck taper so I could get some more travel.
Prep for more pen making.. |
|
|
|
|
[#12]
Originally Posted By phatmax:
Trimmed my tailstock chuck taper so I could get some more travel. Prep for more pen making.. https://www.AR15.Com/media/mediaFiles/38726/20171003_201023-323802.JPG |
|
|
|
|
[#13]
Originally Posted By jacobsk:
How'd ya do that? I mean it seems simple enough but not really considering it's a taper... |
|
|
|
|
[#14]
|
|
|
|
|
[#15]
That’s a cool stylus.
Away rotation? I spent the day finishing up sanding then trimming out and painting the barn door to go at the master bath. It’s a heavy beast. |
|
|
|
|
[#16]
Originally Posted By SouthernBeau:
That’s a cool stylus. Away rotation? I spent the day finishing up sanding then trimming out and painting the barn door to go at the master bath. It’s a heavy beast. https://www.AR15.Com/media/mediaFiles/190729/AF718AEE-E8BA-4226-87F3-249BAA3B441A-325514.JPG https://www.AR15.Com/media/mediaFiles/190729/8858C576-2E6A-4FD0-B1AF-FE5C194A0B00-325515.JPG https://www.AR15.Com/media/mediaFiles/190729/3FDA672F-D3E1-4660-A168-0AE8AA27CF39-325516.JPG And she is up in Boston for 2 years... Finishing residency there.. |
|
|
|
|
[#17]
Two years, that blows. At least Boston is cool to visit.
Going to give this hardware a try. Barn Door Hardware |
|
|
|
|
[#18]
Originally Posted By jacobsk:
Last drywall patch up from our storm damage, once I get a chance to inspect this in the dark I'll texture and paint it (again) https://www.AR15.Com/media/mediaFiles/116241/IMG_1706_JPG-315240.jpg One of the next steps as we head towards trimming out the interior is to make our window sills. Since the brick walls are 16" thick in this house we have to have something which can span from the window through the framing and past the drywall. Rather than make window sills from wood I wanted something more robust, which could handle weight if someone sits or stands on one, and heaven forbid the wife places spot with flowers on the sill I didn't want to have to deal with water staining etc. about a year ago I experimented with different proportions of Portland cement, sand, and clay dug up from the yard. I cast 10 different samples and let the wife pick her favorite color, she picked a color which is very close to the limestone we have throughout the construction of our home. I use a 5/16" glass shower door I picked up from Craigslist to cast the sills, it leaves a smooth shiny surface on whatever you cast to it. The frame is 2x material cut and waxed to a rough dimension to the window sill. https://www.AR15.Com/media/mediaFiles/116241/IMG_1729_JPG-315302.jpg Something happened and I can't upload any more pictures  |
|
|
|
|
[#19]
More pen practice. My daughter wanted something colorful. Now her friends want their own.
|
|
|
|
|
[#20]
Knocked out my first wooden one. Purpleheart wood. Sanded and waxed finish.
The wood gets pretty thin around the brass barrel. |
|
|
|
|
[#21]
I've had this project in mind for some time and I finally completed a mount for a 500mm mirror lens I use on my Sony a6000 camera.
|
|
|
|
|
[Last Edit: godzillamax]
[#22]
Some of you have amazing talent and create some cool stuff. My contribution for what I did today. Had to upgrade the chicken coop to accommodate new birds we got as chicks in the spring who are now reaching full size. Went from 8 to 20 layers and the roosts on the other side of the coop just didn't provide enough room since apparently some of my hens are bitches and dislike roosting shoulder to shoulder. Made a poop tray out of scrap lumber I had, and cut down a small diameter poplar tree in the woods to make the roost. Need to add a cover to the electrical outlet so I don't get fried chicken, and add a curtain to the window (they won't roost in front of a window without a curtain).
 
|
|
|
|
|
[Last Edit: jacobsk]
[#23]
Impressive work fellas!
I've been casting away, nothing too exciting. I'm working two sills at a time now. I found that if I let them dry 72 hours I get a much better surface finish. 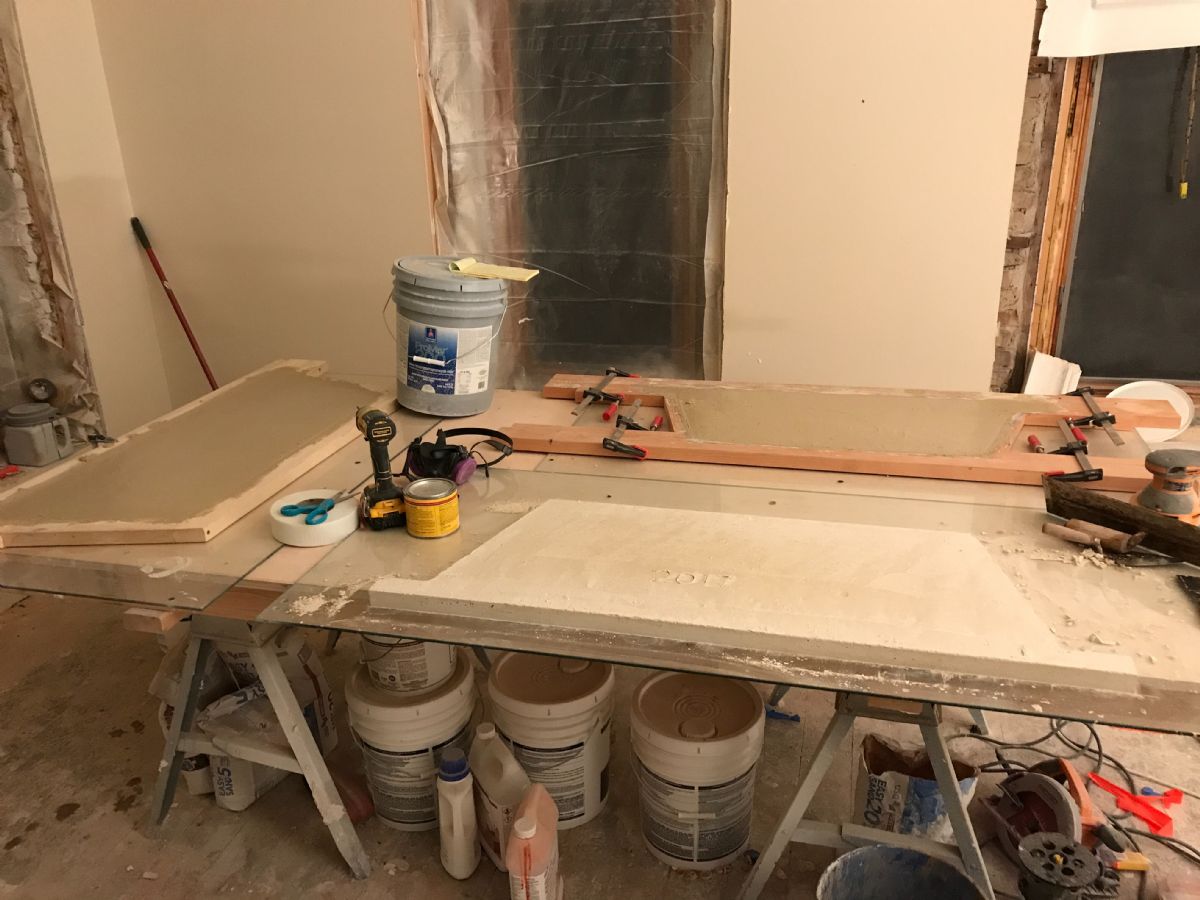

I need more glass, 6 sheets would allow me to cast two per night without any down time waiting for them to cure... which seems to be a reasonable pace based on how long cleaning/ prepping mixing takes. |
|
|
|
|
[#24]
Tonight I spent some more time playing with the vacuum form machine. I switched to using a cast iron grate as the pattern and began using the lid of the machine to hold the plastic while it heated. I think I got it figured out.
This one baked too long, the plastic fused to the cast iron so well it actually removed the paint when I peeled it off. 
Iron pattern in the machine. 
Partial success, still a bit too hot, removing the pattern ruined it. 
This one was just right. First successful form. 
Anyone know of a source for thin pvc sheet stock? When I bought the machine it came with a leftover roll and I'm almost out. It's 28" wide 0.018" pvc sheet that originated as a 250' roll... |
|
|
|
|
[#25]
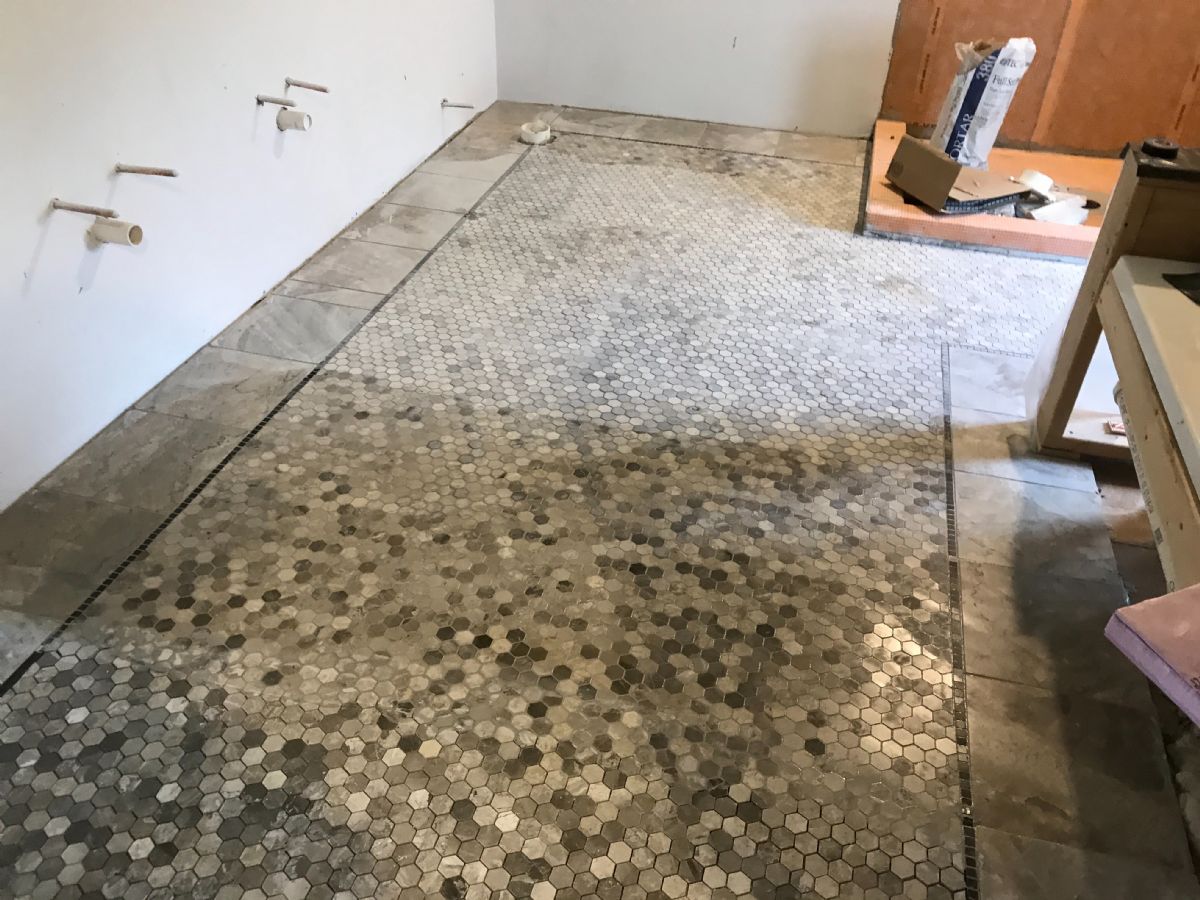
Set the tile in our master today, I had been procrastinating for nearly a month but the wife's patience ran out.


With winter right around the corner I'm trying to get as much stuff put away in the shop as possible. never really got established since we moved down here. 
|
|
|
|
|
[#26]
Tile looks great I really like that design. That vacuum forming thingy is freaking cool. I have no idea what I’d do with one but I kinda want one now.
Also jealous of your shop. A minimum 3 car garage or hopefully a full on detached shop will be in my future. |
|
|
|
|
[#27]
Originally Posted By SouthernBeau:
Tile looks great I really like that design. That vacuum forming thingy is freaking cool. I have no idea what I’d do with one but I kinda want one now. Also jealous of your shop. A minimum 3 car garage or hopefully a full on detached shop will be in my future. |
|
|
|
|
[Last Edit: phatmax]
[#28]
Today has been Diorama day (one). Have to help Nadia build an Indian Winter House and we did the trees, and made rocks and Nadia worked on a dug out canoe.
|
|
|
|
|
[Last Edit: jacobsk]
[#29]
Originally Posted By SouthernBeau:
Tile looks great I really like that design. That vacuum forming thingy is freaking cool. I have no idea what I’d do with one but I kinda want one now. Also jealous of your shop. A minimum 3 car garage or hopefully a full on detached shop will be in my future. Originally Posted By SouthernBeau:
Tile looks great I really like that design. That vacuum forming thingy is freaking cool. I have no idea what I’d do with one but I kinda want one now. Also jealous of your shop. A minimum 3 car garage or hopefully a full on detached shop will be in my future. 
Originally Posted By zegermanznew:
That vacuum form would be awesome for working with Kydex. |
|
|
|
|
[Last Edit: Drifter75]
[#30]
Put this up on Saturday, covered up 30 year old nasty popcorn in our bedroom, next up is paint, then walls painted and finally replace carpet with hardwood. |
|
|
|
|
[#31]
Originally Posted By phatmax:
Today has been Diorama day (one). Have to help Nadia build an Indian Winter House and we did the trees, and made rocks and Nadia worked on a dug out canoe. https://www.AR15.Com/media/mediaFiles/38726/20171015_132002-334251.JPG https://www.AR15.Com/media/mediaFiles/38726/20171015_164110-334254.JPG https://www.AR15.Com/media/mediaFiles/38726/20171015_164918-334255.JPG https://www.AR15.Com/media/mediaFiles/38726/20171015_170145-334257.JPG |
|
|
|
|
[#32]
|
|
|
|
|
[#33]
Grouted the tile today, now we're getting excited.

Then shifted to trimming the first window. This is the kids bath and since it's one of the few rooms with only one window it's a good room to figure out how we're going to do this. Started by sealing and cutting the recently cast window sill, I found the old wooden sill had a high spot that caused the stone to sit high so I got a little dusty grinding it down first. 
Each window was hand made a little different so I make the sills large enough to fit them all, then use a diamond wheel in the grinder to cut each one close. 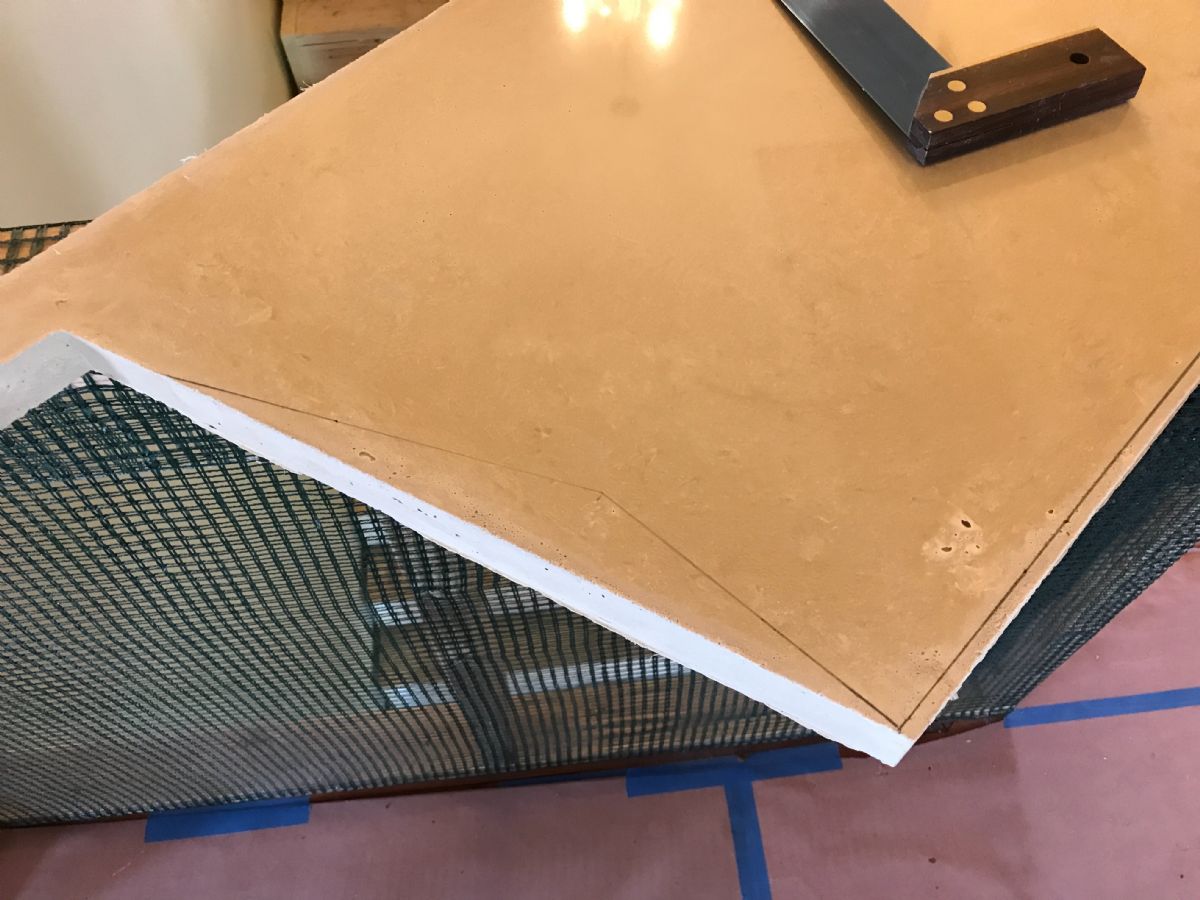
Fits like it should, I pitch them in about 1/8" and shim level left to right. The sill weighs about 50lbs so I lay a thin bead of construction adhesive on the framed wall and old sill to seal drafts and nest the stone. 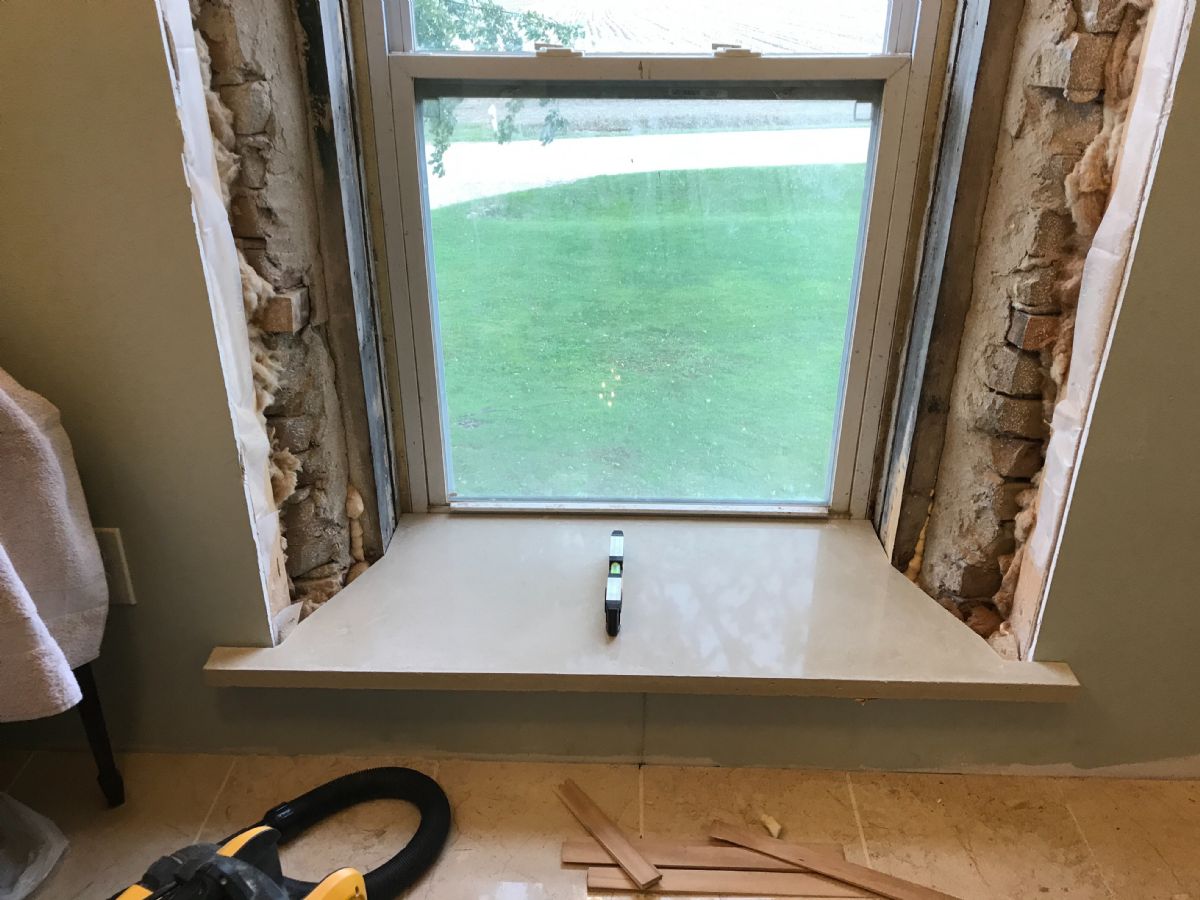
Piecing the trim in these huge awkward windows is somewhat trial and error at this point, so I started with the top and got as far as a test piece for the casing/side interface. 

Since the angles are all a little different and a miter on the casing would be a nightmare I'm going to use a rolling edge to mate the casing with the angled sides. 
Im glad I can post this stuff here, y'all are a good audience
|
|
|
|
|
[Last Edit: larrys]
[#34]
Originally Posted By jacobsk:
Grouted the tile today, now we're getting excited. https://www.AR15.Com/media/mediaFiles/116241/IMG_1956_JPG-334545.jpg https://www.AR15.Com/media/mediaFiles/116241/IMG_1964_JPG-334547.jpg Then shifted to trimming the first window. This is the kids bath and since it's one of the few rooms with only one window it's a good room to figure out how we're going to do this. Started by sealing and cutting the recently cast window sill, I found the old wooden sill had a high spot that caused the stone to sit high so I got a little dusty grinding it down first. https://www.AR15.Com/media/mediaFiles/116241/IMG_1955_JPG-334551.jpg Each window was hand made a little different so I make the sills large enough to fit them all, then use a diamond wheel in the grinder to cut each one close. https://www.AR15.Com/media/mediaFiles/116241/IMG_1954_JPG-334553.jpg Fits like it should, I pitch them in about 1/8" and shim level left to right. The sill weighs about 50lbs so I lay a thin bead of construction adhesive on the framed wall and old sill to seal drafts and nest the stone. https://www.AR15.Com/media/mediaFiles/116241/IMG_1958_JPG-334556.jpg Piecing the trim in these huge awkward windows is somewhat trial and error at this point, so I started with the top and got as far as a test piece for the casing/side interface. https://www.AR15.Com/media/mediaFiles/116241/IMG_1966_JPG-334558.jpg https://www.AR15.Com/media/mediaFiles/116241/IMG_1967_JPG-334559.jpg Since the angles are all a little different and a miter on the casing would be a nightmare I'm going to use a rolling edge to mate the casing with the angled sides. https://www.AR15.Com/media/mediaFiles/116241/IMG_1968_JPG-334561.jpg Im glad I can post this stuff here, y'all are a good audience |
|
|
|
|
[#35]
|
|
|
|
|
[#36]
Originally Posted By phatmax:
A few more pens.. https://www.AR15.Com/media/mediaFiles/38726/20171015_191739-334766.JPG https://www.AR15.Com/media/mediaFiles/38726/20171016_102135-334767.JPG Necklace stylus / pen https://www.AR15.Com/media/mediaFiles/38726/20171016_120954-334769.JPG https://www.AR15.Com/media/mediaFiles/38726/20171016_121037-334770.JPG |
|
|
|
|
[#37]
Originally Posted By jacobsk:
Thanks, the shop is an old heffer barn I sealed up and insulated before the project kicked off. I have so much stuff packed away in such a way that I can't seem to make enough room to use the tablesaw... 1800 soft and it's barely usable
Is kydex expensive? The machine works best with full sheets 28"x60" in order to get maximum vaccuum. I'm having s heck of a time finding material that's the correct size, everyone is selling 12"x12" squares to hobby folks with a 10x markup on material. |
|
|
|
|
[#38]
Originally Posted By zegermanznew:
Kydex is very cheap, take a look at knifekits.com. It's super user friendly. If you mess it up, just heat it up and flatten it out again. It's used for sheaths etc but I find at least a dozen uses for it every year. So much so that I just order a bunch and keep it on hand. Brilliant idea with the rolling edge, I would have never thought of that. I'm gonna store that one away for something some day. The concrete looks awesome. |
|
|
|
|
[#39]
Diorama day two.
Added "water" and built the winter house. Many thanks to Peterson tobacco for providing a 100 gram round tin for my daughter to form the clay around. |
|
|
|
|
[#40]
Went and picked out pumpkins with the kiddos this afternoon so not much progress today. Wife got picky with the type and style of molding for on top of the casing so all I did was mock up the casing for her to noodle on tomorrow.

Since I have thousands of board feet of "OK" pine gluing everything up is a bit tricky. It's 30+ years dry though so the knots are dry and it doesn't warp when cut. I glued up the sides... 11" wide each. I think I need a drum sander. 
I shouldn't really complain about the sandwitch maker. She brings me dinner even when I'm working in the shop 
|
|
|
|
|
[Last Edit: Remydog]
[#41]
Originally Posted By jacobsk:
Grouted the tile today, now we're getting excited. https://www.AR15.Com/media/mediaFiles/116241/IMG_1956_JPG-334545.jpg https://www.AR15.Com/media/mediaFiles/116241/IMG_1964_JPG-334547.jpg Then shifted to trimming the first window. This is the kids bath and since it's one of the few rooms with only one window it's a good room to figure out how we're going to do this. Started by sealing and cutting the recently cast window sill, I found the old wooden sill had a high spot that caused the stone to sit high so I got a little dusty grinding it down first. https://www.AR15.Com/media/mediaFiles/116241/IMG_1955_JPG-334551.jpg Each window was hand made a little different so I make the sills large enough to fit them all, then use a diamond wheel in the grinder to cut each one close. https://www.AR15.Com/media/mediaFiles/116241/IMG_1954_JPG-334553.jpg Fits like it should, I pitch them in about 1/8" and shim level left to right. The sill weighs about 50lbs so I lay a thin bead of construction adhesive on the framed wall and old sill to seal drafts and nest the stone. https://www.AR15.Com/media/mediaFiles/116241/IMG_1958_JPG-334556.jpg Piecing the trim in these huge awkward windows is somewhat trial and error at this point, so I started with the top and got as far as a test piece for the casing/side interface. https://www.AR15.Com/media/mediaFiles/116241/IMG_1966_JPG-334558.jpg https://www.AR15.Com/media/mediaFiles/116241/IMG_1967_JPG-334559.jpg Since the angles are all a little different and a miter on the casing would be a nightmare I'm going to use a rolling edge to mate the casing with the angled sides. https://www.AR15.Com/media/mediaFiles/116241/IMG_1968_JPG-334561.jpg Im glad I can post this stuff here, y'all are a good audience |
|
|
|
|
[#42]
All trimmed out, now just have to close out the arch.

|
|
|
|
|
[#43]
Diorama day three, ready to turn in.
|
|
|
|
|
[#44]
Just whipped together this seat protector for Zeke and the Corrado. I can't claim the idea, an ARFCOMMER did it with truck seats a long while back.
It's just a HF moving blanket and a HF tarp eyelet/ring set. Both things I had lying around and figured, "hey, what the hell". Just put a set of eyelets behind each headrest. Used paracord and paracord buckles to attach/detach from the seat. Now Zeke can ride with me in style. |
|
|
|
|
[#45]
|
|
|
|
|
[#46]
|
|
|
|
|
[#47]
Installed the vanity, another 200lb Craigslist find.

|
|
|
|
|
[#48]
I wanted to improve the tracking on my belt grinder.
The original tracking was provided by a coil spring. I ordered a 40 pound gas spring from McMaster-Carr. I drilled and tapped into the tension arm. This meant that I had to move the handle to pull down the arm. I decided to use the top of the accessory arm mount to attach the other end of the gas spring to. I took a piece of 1 inch square, threw it in the lathe, faced it and drilled and tapped. I welded it to the arm mount. Continued in the next post |
|
|
|
|
[#49]
Once it cooled I put it together.
Completed It runs so much smoother and the tracking is excellent. I have had the grinder for ten years and am pissed I didn't do this sooner. |
|
|
|
|
[#50]
Originally Posted By tinysd:
Once it cooled I put it together. https://www.AR15.Com/media/mediaFiles/213346/IMG_7481-339465.JPG https://www.AR15.Com/media/mediaFiles/213346/IMG_7482-339466.JPG Completed https://www.AR15.Com/media/mediaFiles/213346/IMG_7484-339468.JPG It runs so much smoother and the tracking is excellent. I have had the grinder for ten years and am pissed I didn't do this sooner. |
|
|
|
 Win a FREE Membership!
Sign up for the ARFCOM weekly newsletter and be entered to win a free ARFCOM membership. One new winner* is announced every week!
You will receive an email every Friday morning featuring the latest chatter from the hottest topics, breaking news surrounding legislation, as well as exclusive deals only available to ARFCOM email subscribers.

AR15.COM is the world's largest firearm community and is a gathering place for firearm enthusiasts of all types.
From hunters and military members, to competition shooters and general firearm enthusiasts, we welcome anyone who values and respects the way of the firearm.

Subscribe to our monthly Newsletter to receive firearm news, product discounts from your favorite Industry Partners, and more.
Copyright © 1996-2024 AR15.COM LLC. All Rights Reserved.
Any use of this content without express written consent is prohibited.
AR15.Com reserves the right to overwrite or replace any affiliate, commercial, or monetizable links, posted by users, with our own.


