[ARCHIVED THREAD] - Joining Bench Top Question (Page 1 of 2)
Posted: 10/1/2011 6:07:15 PM EDT
| I will be joining pieces of actual 2.5X2.5X30" into a benchtop of 12.5X40". So I will be gluing the pieces side by side as well as end-to-end. This will be a sitting bench. Will glue suffice? |
| Not exactly visualizing your approach, but I build my benches by running the boards perpendicular to the wall and only screwing them down in case I want to reposition equipment or replace just one of the boards. My shot shell reloader required a pretty big hole to let the shells drop through, if I ever want to move it I just have one simple board to replace. |
|
Long grain to long grain glue is fine (prefer Titebond myself). To make your laminated 30" pieces 40" long you need to stagger your end grain joints so that they are not lined up on your final piece. Think of a hardwood floor; done properly, none of the joints line up. In this instance, again a good quality wood glue is fine.
like this 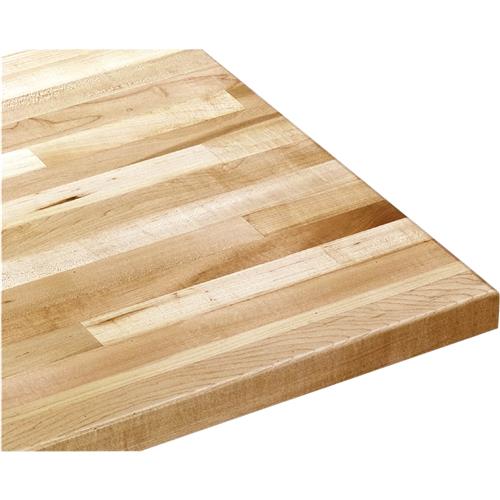
Remember when attaching your top to your base to allow for wood movement. |
|
Quoted:
Long grain to long grain glue is fine (prefer Titebond myself). To make your laminated 30" pieces 40" long you need to stagger your end grain joints so that they are not lined up on your final piece. Think of a hardwood floor; done properly, none of the joints line up. In this instance, again a good quality wood glue is fine. like this http://cdn0.grizzly.com/pics/jpeg500/g/g9919.jpg Remember when attaching your top to your base to allow for wood movement. Thanks. I didn't think about staggering. Sounds like a need more clamps. Would you clamp on both directions? |
|
Quoted:
I will be joining pieces of actual 2.5X2.5X30" into a benchtop of 12.5X40". So I will be gluing the pieces side by side as well as end-to-end. This will be a sitting bench. Will glue suffice? Glue is stronger than the wood itself. I always heard that, but never believed it, until my high school wood shop teach had an entire class devoted to demonstrating just that principle. |
|
5 pieces glued edge-to-edge = 12.5X30"
2 pieces glued edge-to-edge and cut to size lengthwise = 5X12.5" <––-make two of these. Bread board the 5X12.5 to the ends of the 12.5X30 = 12.5X40". Yellow carpenter's glue will be 100% fine for this. Really, there are few glues better for woodworking unless waterproof joints or some other special requirement exists. If it has to be waterproof, why are you using wood? |
|
Quoted:
Quoted:
Long grain to long grain glue is fine (prefer Titebond myself). To make your laminated 30" pieces 40" long you need to stagger your end grain joints so that they are not lined up on your final piece. Think of a hardwood floor; done properly, none of the joints line up. In this instance, again a good quality wood glue is fine. like this http://cdn0.grizzly.com/pics/jpeg500/g/g9919.jpg Remember when attaching your top to your base to allow for wood movement. Thanks. I didn't think about staggering. Sounds like a need more clamps. Would you clamp on both directions? You can never have enough clamps. Need clamps along the long edges and you need clamps to make sure the boards are level with one another. The more clamps the better. Need to make sure you have a thin layer of glue on both surfaces. Don't just spread glue on one side and squish the two boards together. You might be ok if you do but the key word there is might. I stagger my clamps about 4-6 inches apart. You'll get a good bit of glue squeeze out. Just wipe it off with a warm damp rag before it hardens. |

| not the ones above. I only use cauls when I'm using my pipe clamps which I rarely use. Those do have a slight curve to them but you wouldn't know it unless you put them on a flat surface. My parallel cabinet making clamps (Bessey and Jorgensen) are my go to clamps. |
|
I finally found time to put the benchtop together. It worked OK, but not as well as I had hoped. I think by the time I was done applying glue to the last boards, the glue was hardening on the first ones. When I tightened the clamps, the last boards closed together better than the first ones. Maybe with more pressure the first boards would have been perfectly flush too, but I was afraid of squeezing all the fresh glue out from the last boards.
All in all, it was a good learning experience. I will post a photo or two tomorrow when I remove the clamps. If you have any tricks for filling the tiny gaps, I'd appreciate them. |
Actually the best advice I can give is to dry clamp all of your work ahead of time. This will let you know of your boards are jointed properly so they'll fit and reduce the time it takes to get your clamps on after you've applied glue. Also, for spreading glue on projects such as this, use one of these

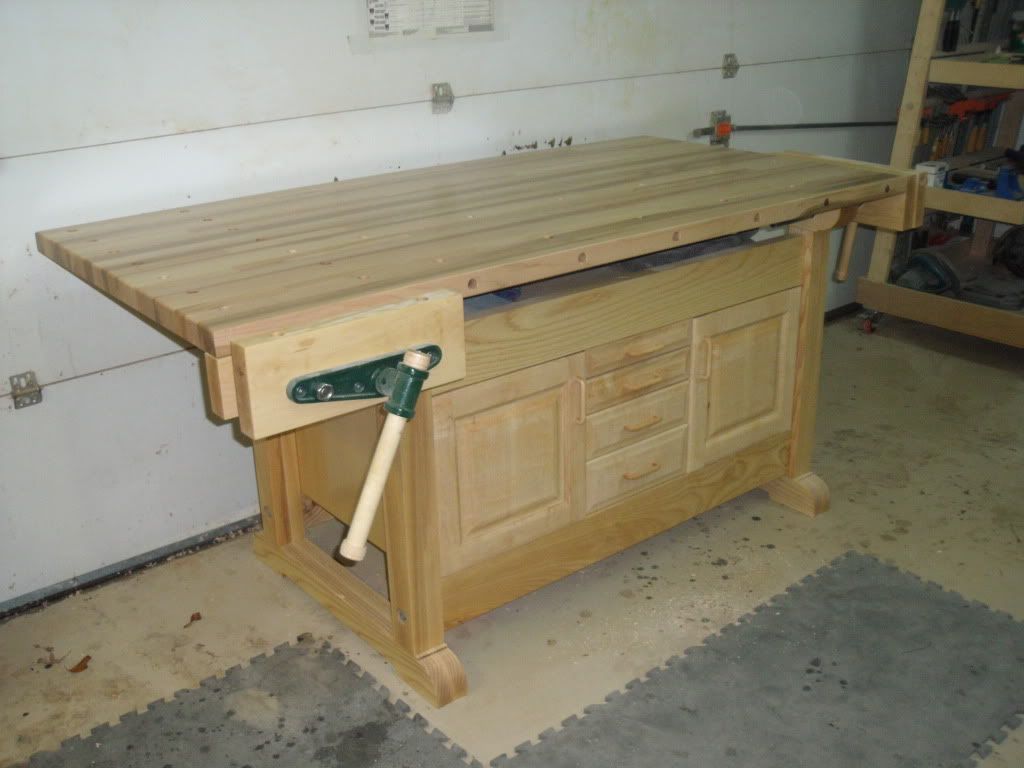
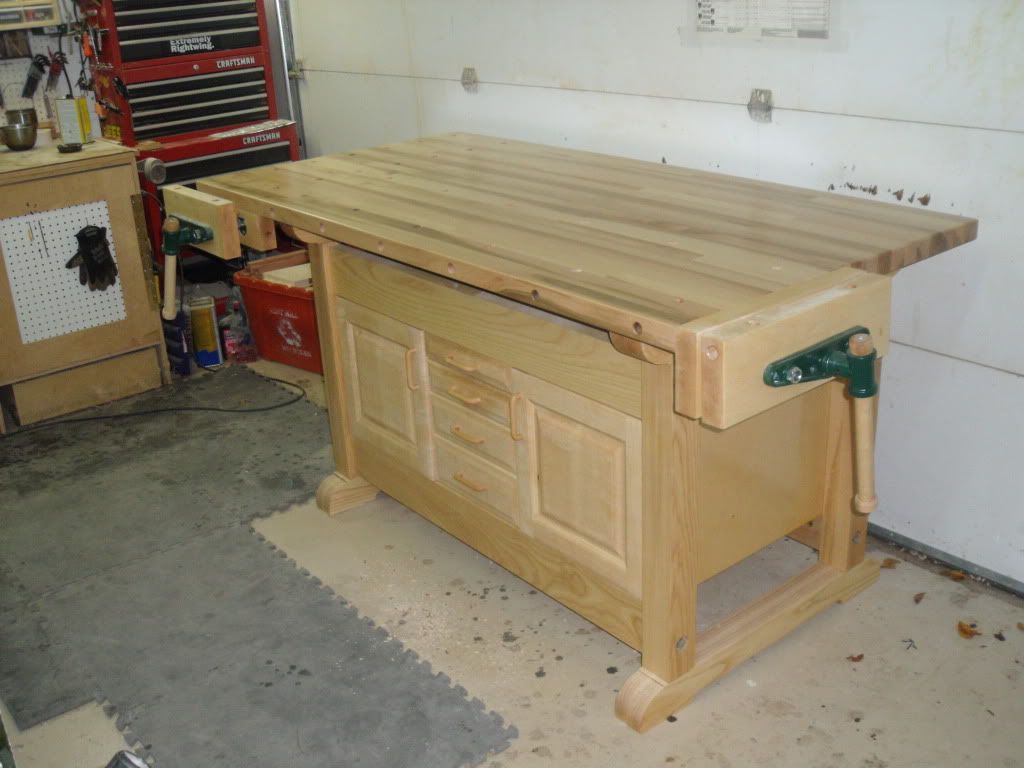
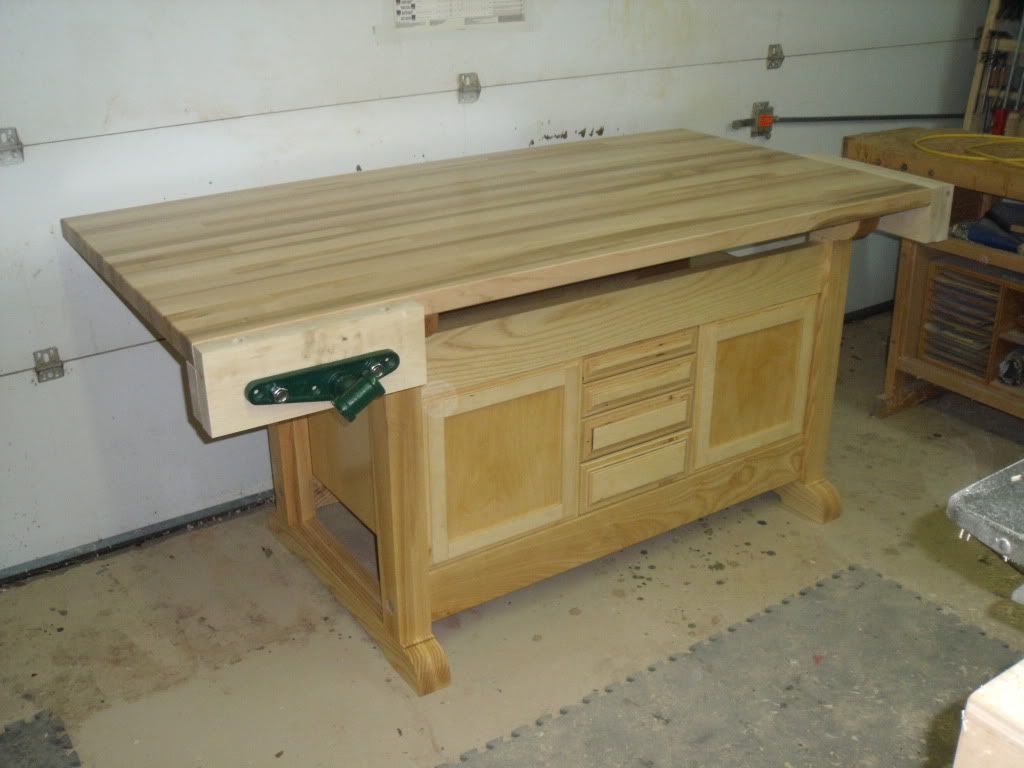
Hobby stores sell them as ink rollers. I think they use them for spreading ink on screen printing or something but they work great for spreading out glue quickly. Sounds like you are now in the market for a belt sander. ETA, filling in the cracks. You could use wood filler paste in the species of wood you used if you're worried about looks. You could also use 24-hour epoxy with a putty knife and work it into the cracks. You could even take some sawdust (from sanding, not cutting) and work it into the putty to try and blend in the seams. Interesting enough, I too am in the process of building another work bench. Here's some pics if you're curious 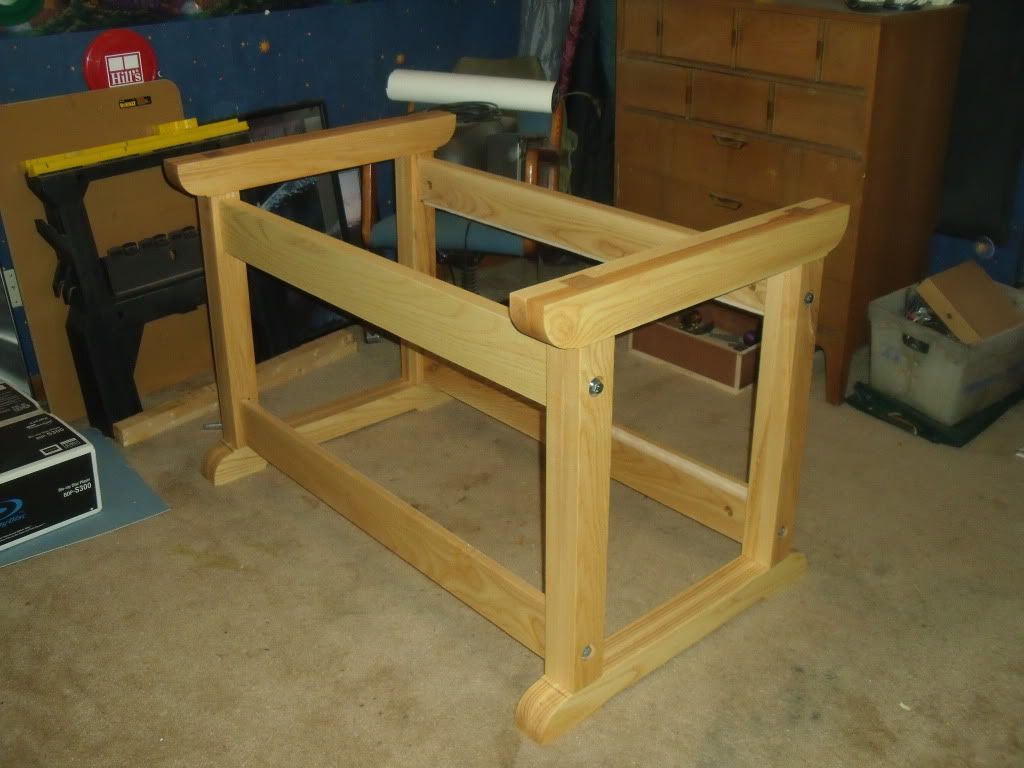
Made from Ash, legs are 3"x3", feet and table support are 3" x 3 1/2", and stretchers are 1 1/2" x 5" 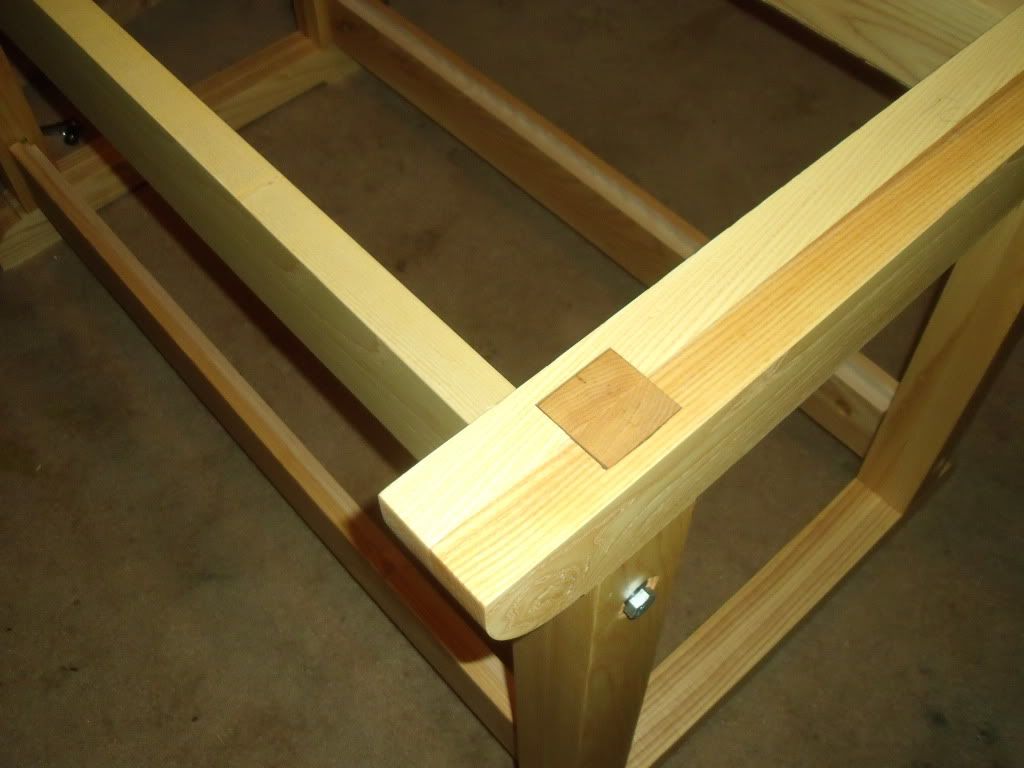
Legs have 2 x 2 x 3 1/2 through tennons 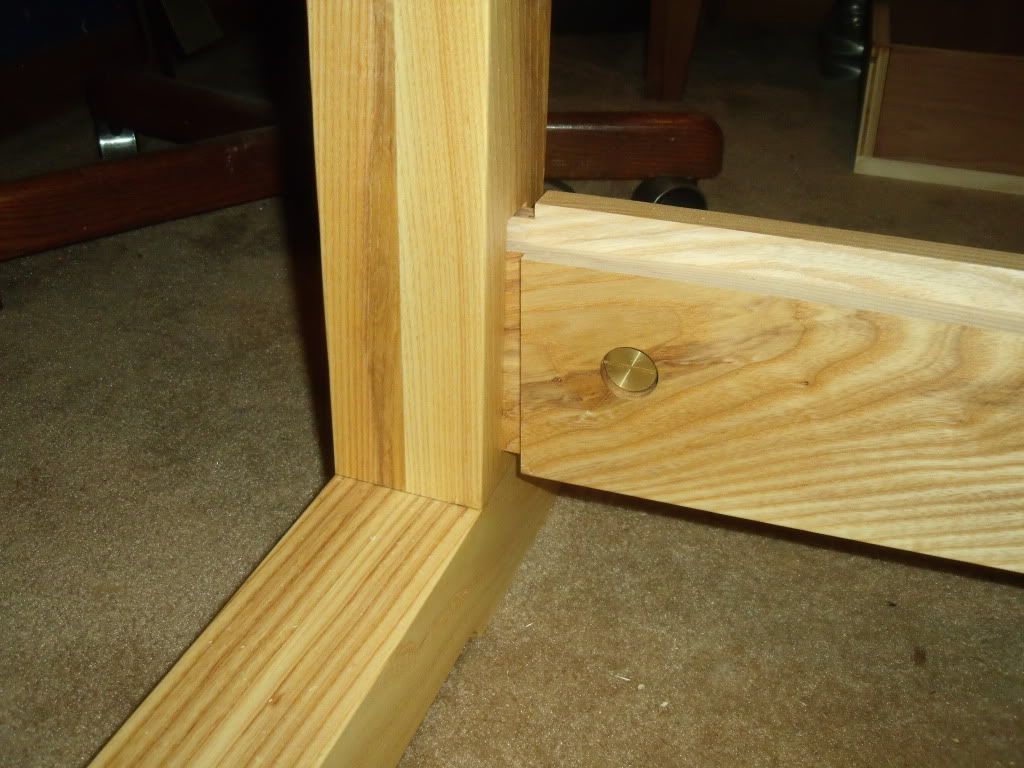
stretchers sit in 1/2" deep mortises and are held in place with 1" bench bolts |
|
That bench looks nice. Mine will be a shoebench, by the way. I did have them set up how I wanted them before glue, but I either did not use enough glue or it hardened quicker than I was working.
Here are some photos and you can let me know if you would worry about the gaps or let the polyurethane seal them. A beltsander would be nice, but I exhausted my budget on Bessey clamps. It will either be an orbital or sanding block. These are right off the clamps (edited out toes 

And the gaps: 

Thanks. |
|
Sand it down to 150 grit and post pics. You might take out most of the ass on those joints with your sanding. Plus as you're working with red oak you should consider some grain filler paste that will also work to hide your seams. Sand down to 150 first though.
Orbital sander would be best. Sanding that by hand with a sanding block will drive you to drink. |

|
Not bad. Be interested to see how they both look after you take the sander to them. Second time you do something always seems to work better than the first time. Did you get a roller to spread the glue for the second one?
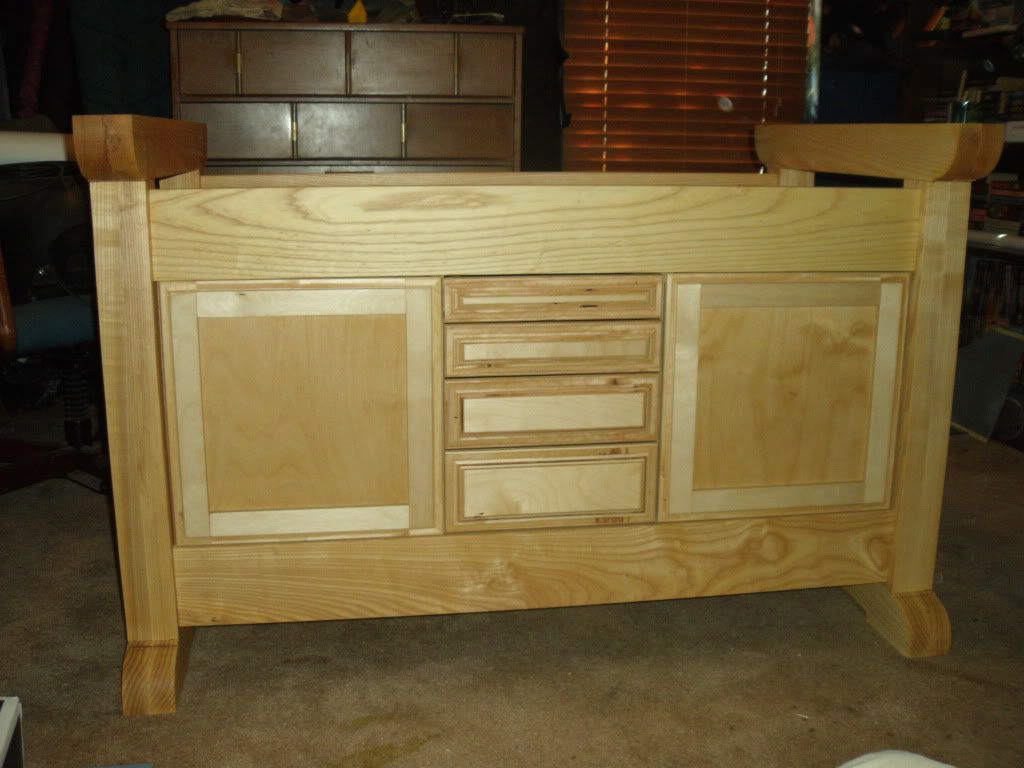
ETA and since I started, here's the cabinet that will fit inside the frame of my workbench 


|


And I bits from this set to make the doors and drawer fronts

Used some scrap baltic birch plywood for the doors and drawer fronts. Haven't decided if I like it or not. Still need to sand and put a finish on them. 
Now you see why I put rabbits in the top and bottom stretchers. Cabinet is trapped inside the frame. ETA now with a finish 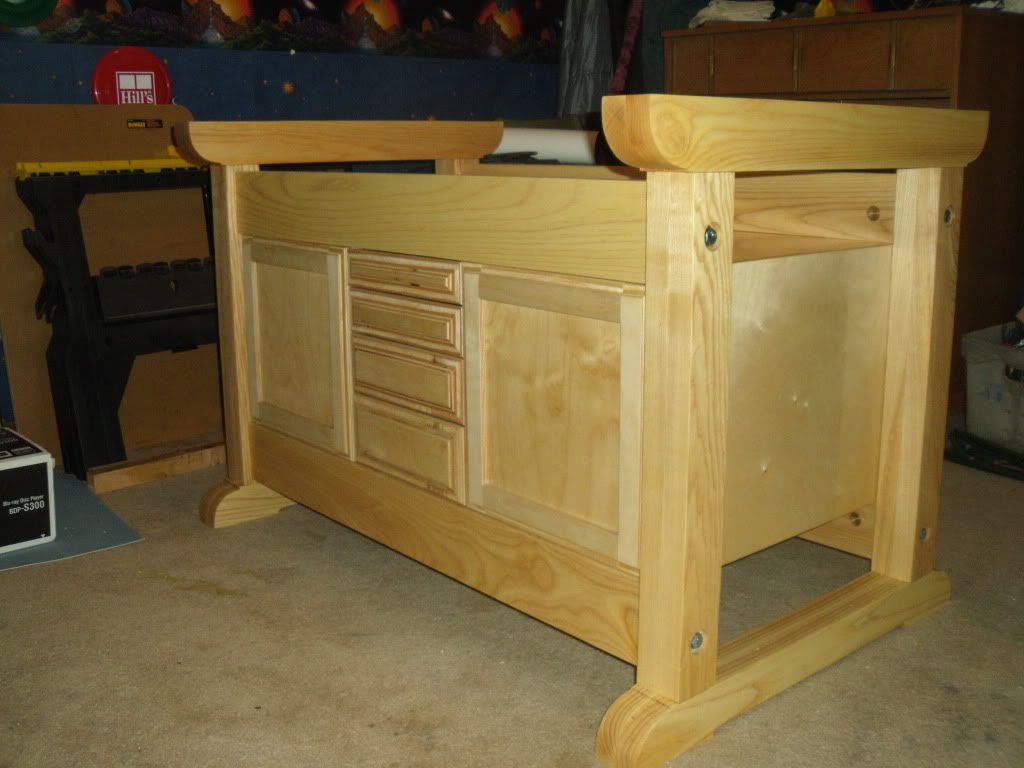
|
|
You put my progress to shame. I was sanding with a Mouse sander from Black and Decker so it took me a while, but here's the benchtop sanded down to 80. I didn't go to 150 yet to minimize oxidation, but this should give a good idea on what it will look like. 
The end joint to the left is the only one that can be felt by hand. 
Bottom shelf: 
Gaps cannot be felt by hand, but I might as well fill them. 
Any other suggestions are always welcome. |
|
Looks great. Now sand with 100 then 120 then 150. Get some red oak wood filler and fill in any gaps. Then sand with your 150 some more. If you want a really nice look, dilute your wood filler and spread it out all over the entire surface of your piece. Then before it dries, take some burlap and wipe it off across the grain. This will fill in the pores in the wood. (don't rub with the grain) Sand again with 150 but just briefly to knock down any rough spots from the filler, then 180 and 220 (and I usually go to 320 next). Apply topcoat.
Red oak will not oxidize as quickly as cherry so no worries there. Good job. Mouse sander? Now that's what I call working with what you got. |
|
Quoted:
Edited: Should I apply polyurethane to the benchtop and shelf before or after assembly? I was about to cut dados into the legs, but if I'm applying polyurethane before assembly, I'll wait as the shelf thickness may change. Personally I would rather finish the top with Tung oil. It is repairable and easy to maintain. |

|
Quoted:
Quoted:
Edited: Should I apply polyurethane to the benchtop and shelf before or after assembly? I was about to cut dados into the legs, but if I'm applying polyurethane before assembly, I'll wait as the shelf thickness may change. Personally I would rather finish the top with Tung oil. It is repairable and easy to maintain. I read up a bit on it. It sounds pretty good, but how well does it seal and protect from water? |
|
That looks awesome. Did you glue the top yourself or bought it ready?
I have not had much time to work on mine, but I did cut the dados on the legs. Tried the bit first on a 2X4, worked great. When I used it on the red oak, it tore the exit side, but it should be an easy fix. Lesson learned: use sacrificial boards on both sides. |
|
Since it will get a lot of sun exposure, you will need to refinish it every couple of years. Tung oil, boiled linseed oil, danish oil (any of the drying oils) are the easiest to refinish. Just scuff it with a green pad, 0000 steel wool, or 320 grit sandpaper and recoat.
Now you can get pure tung oil from a woodworking store or the processed tung oil from Home Depot. I prefer the kind I get from Home Depot. this kind http://www.homedepot.com/h_d1/N-5yc1v/R-100178851/h_d2/ProductDisplay?langId=-1&storeId=10051&catalogId=10053 Sand down to 320 grit, apply a coat with a stiff foam brush and let dry overnight. Scuff surface as noted above and apply another coat, repeat until you get the finish you are looking for. This is 8-9 coats on my mahogany coffee table. 
|
|
I think I'm going to stick with polyurethane or something with similar sealing qualities. Would this be overkill? http://www.rockler.com/product.cfm?page=17644
Also, I tried the red oak wood filler, but the color didn't match so well. It dried like a faded pink. I only tried it on the underside of the bottom shelf so no harm was done. Next I'll try some golden oak or just normal wood filler and see if it will match better. If they do, I'll dilute it with mineral spirits and apply it with burlap as you suggested. |
|
I don't believe in overkill when it comes to building or finishing :)
Never use that product myself. You learn by doing though. You wipe off the grain filler with burlap. Like sponging off grout on a new tile job. Filler just fills in the exposed pores of the wood to give you a flat surface. Your varnish should do this as well. Sand in between coats using a sanding block, use a tack cloth to remove the dust and recoat per the directions. Looking forward to your final work. |
|
I sort of cheated today, because I put it together before it being ready. I think it looks nice. My wife likes it a lot or at least is pretending to. I can't to wait to get it done either, but with homeschooling three children, free time does not come by easy. I have set the goal to finish it before Saturday, even if I have to take off work. |
For most of the boards, the golden oak filler worked great. There was a 2-3" natural small crack that starts about where the clip is pointing:

However, it's not working on the darker boards. The filled grains look whitish. After sanding it down to 150, it feels pretty smooth and given that I like the look of light and dark boards alternated I might let the varnish seal the open grain spots instead of using filler. Had to take this without flash to really show the light color. 
|
| If you want to see what it will look like after you put your finish on it take a rag damped with mineral spirits and rub on the wood. Bet that light grain color will darken. Don't use water or you'll just raise the grain and have to start sanding all over again. Most people sand down to 220 grit but I always go to 320. |
|
You're right, the filler did darken. I tried it in a bigger spot and sanded it down, but it didn't give me the look I was really after. It was real smooth and all, but maybe a bit too smooth. I thought for this project it somehow took away from the natural look and feel of the oak.
I did sand it 220 with the mouse sander, then to 320 by hand. Bringing it down to 320 made a huge difference I thought. After assembling it, I removed all the sawdust I could and applied the varnish. Was a bit nervous about the varnish because it seemed a bit thicker than I thought it should be, but the directions warned against thining. I stuck to the directions and it turned out much better than I expected. Right now it's not dry to the touch yet, but if I get real close and at a low angle, I can see some tiny grains or dust on the surface. I'm hoping they will come out with sanding. Before the next coat, I will vacuum the room to remove as much dust as I can. Overall, the look so far has exceeded my expectations. I will share pics when it's completely done. Thanks again for all your advice. |
|
Sanding between coats you're just scuffing the surface to give the next coat something to grab. Use your 320 and a block of wood. Then tack cloth the dust off the surface. Yeah, the room needs to be pretty clean too I threw away the doors and drawer fronts on my bench. I'll post pics of the final work on Friday. |
|
After all that work, you threw away the doors? Since it will be another week and a half before my bench is complete, here's a photo of it a few hours after the second coat. By the way, the room is not filthy or anything. I think it may be a ventilation problem. We've had some crazy wind and I don't dare crack the window for more than a minute or the temperature in the room will get down to 30s. The varnish requires application in temperatures 50-90. I think the wind kicked up just enough dust to be noticeable from close. The bolts are not all the way in because I didn't want to paint over them. 
|
|
Hey that looks really nice. Like the design and might have to borrow that for my foyeur area. Did you come up with the design or did you get plans?
I've spent almost $800 on my workbench and the plywood doors and drawer fronts were bugging me. Even though they were Baltic Birch ply they just seemed cheap. So I bought some maple and made drawer fronts and raised panel doors. Ordered some maple handles from Lee Valley and they arrive today. All I got to do is throw a quick finish on them and install them and it will be done. What's next? |
|
I had a good idea of what I wanted, but I also searched shoebenches for sale, got some more ideas and combined them into this. When I drew the design, I left my dimensions pretty flexible to adjust for proportionality as I went along. The design paper was saturated in chocolate milk and was thrown away without my permission. |