


I've been building a shed (Page 2 of 4)

|
First bit of field fence installed today for the yard Attached File |
"Byte My Shiny Metal Brass"

|
Nice work, OP! I hope you are enjoying a nice steak and a beer after each of those work days. You certainly earned the calories... Subscribed for updates. Thinking about building my own 14x18 shed since the Amish folk nearby want to rape me at over $40k. This thread is definitely inspiring me to just go for it. |
|
Originally Posted By CPshooter1: Nice work, OP! I hope you are enjoying a nice steak and a beer after each of those work days. You certainly earned the calories... Subscribed for updates. Thinking about building my own 14x18 shed since the Amish folk nearby want to rape me at over $40k. This thread is definitely inspiring me to just go for it. Youtube has an extensive amount of information if you're looking to learn/want motivation. If you're buying lumber, it can go pretty fast too! Harvesting and milling is slowing down the process severely for me |
"Byte My Shiny Metal Brass"
|
I've been commissioned to build a chicken coop for our new feathered friends. The ground is still too wet for me to be pulling trees out and working tractors in front of the sawmill, so I went store bought for this project. I was reminded a little bit into the project to take pictures... but grabbed some before it got too far along. I reused some old 6x6 treated posts to make skids, and attached them with some 2x6's. I placed plywood on that and framed the floor. I insulated the floor, as it's not something that I could easily do later if I decided I needed to insulate the whole coop. Attached File Put some 6 mil plastic on top of the insulation, and added another sheet of plywood. Attached File Installed wall frame. Attached File Installed last wall framed for the door. Attached File Put up the sheathing on one wall. Attached File That was it for the day... work will continue tomorrow! |
"Byte My Shiny Metal Brass"


|
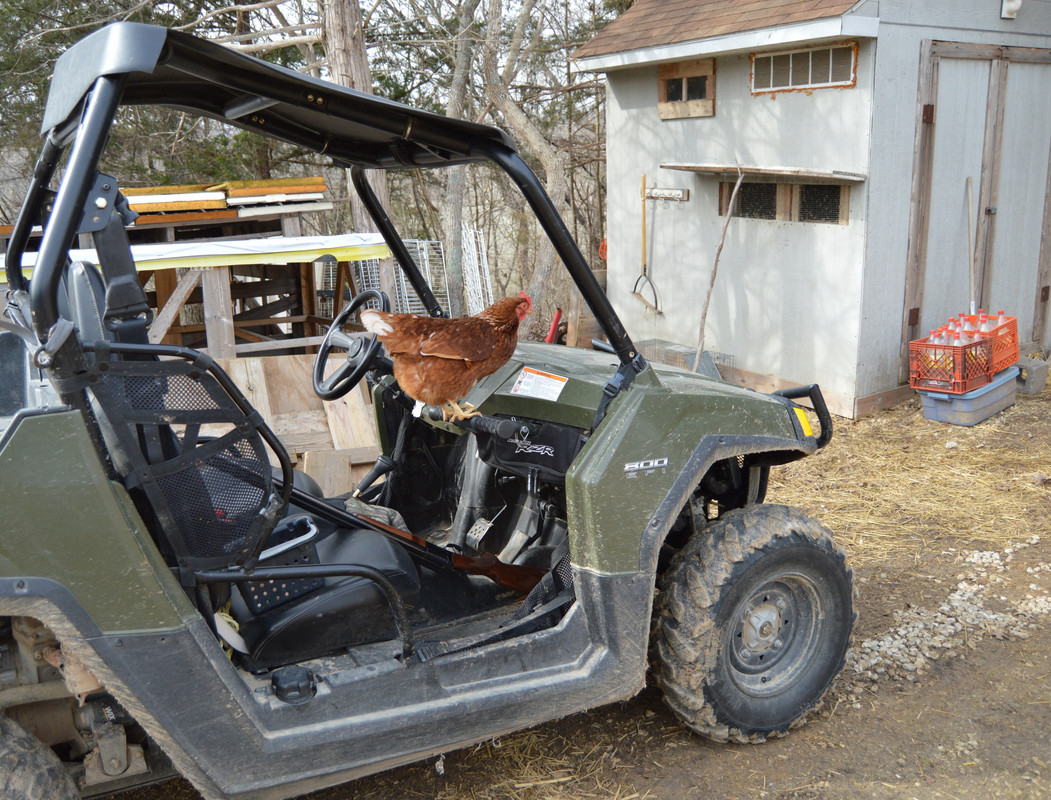
Work continued today. I got the other side wall sheathed and installed the rafters: Attached File I then sheathed up the end walls, the roof, and cut the doorway out: Attached File I want to minimize drafts in the coop, so I decided to wrap it in tyvek: Attached File I'm going to put up board and batten siding on this, so that it matches the shed. I don't have enough of it to finish the coop until I can mill more, so im putting it up as needed for now. It was needed for the door hinges: Attached File Did some jobsite cleanup, and let the chickens into their new house: Attached File |
"Byte My Shiny Metal Brass"
.jpg)
|
I dont have a picture of it, but I drilled some 6" holes on the front and back walls and covered them with wire and screen mesh. Also planning on putting some smaller ones in the blocker boards on the upper eaves. I figure the bigger ones I can block off in the winter time and the smaller ones should still allow enough ventilation |
"Byte My Shiny Metal Brass"

|
I would header the wall off opposite the door about 6” off the floor. Cut the 6” space out of your sheathing. Cut a piece of pressure treated plywood the dimensions of the floor and slide it in. Then replace the sheathing. Trim the opening out with a removable panel. Then, when its time to clean the coup, you remove the panel, slide the plywood out, shovel and hose it off, then slide it back in. Clean chicken coup in 10 minutes. Works great on mine. |
|
Did a little work with the siding on the front wall/door tonight Attached File |
"Byte My Shiny Metal Brass"
|
A little bit more work on it tonight. Added some handles, another piece of siding, and an extension to the roof. Attached File |
"Byte My Shiny Metal Brass"

|
Originally Posted By PyrPaw: OP, do you by chance have measurements for that awesome chicken coop? I'd like to build that for my motorcycle, with a door on each end. Great work! 4'x8' floor (minus the 2x4 framing) Right wall is 8' tall Left wall is 6' tall End walls are framed for 6' with the rafters giving the attachment point for the cut off 4x8 OSB sheathing Door in the end wall is 2' wide |
"Byte My Shiny Metal Brass"

Born with a low tolerance for bullshit
Joined:
Feb 2007
Posts:
52930
EE: 0% (0)
 KY, USA
|
Originally Posted By BMSMB: I dont have a picture of it, but I drilled some 6" holes on the front and back walls and covered them with wire and screen mesh. Also planning on putting some smaller ones in the blocker boards on the upper eaves. I figure the bigger ones I can block off in the winter time and the smaller ones should still allow enough ventilation You likely won't need to cover it, even in winter if it's that small, but you may find you want more ventilation for the warmer months also. It's one of the things I hear a lot--that new henhouses often don't have enough ventilation. They need more than seems obvious at first. |
Nobody ever wakes me at 2 in the morning telling me that my grass is out on the highway.~~Radiopat
Wine is sunlight held together by water~~Galileo Galilei
Well-behaved women rarely make history~~Marilyn Monroe
Wine is sunlight held together by water~~Galileo Galilei
Well-behaved women rarely make history~~Marilyn Monroe
|
Was able to skid out quite a few logs over the weekend and should be milling soon, as long as I, or the tractors, aren't needed for haying when I have the free time! Attached File Smallest log here is at least 6.5 inches. Have enough big logs to get the remaining 6 5x10 floor beams as well. Need about 170 1x6's to finish the siding, so im guessing I'll be dropping more trees to finish the shed. Attached File Finished framing the chicken run as well and have the wire up. Hoping I have the time tomorrow to put in the door from the coop to the run. Attached File |
"Byte My Shiny Metal Brass"
|
Snapped a picture while milling this afternoon: Attached File I was able to get 2 5x10 beams out of this that will be used for another floor section. I've also been milling 1x6's. I need about 160 of them to finish the other 3 sides of the shed. |
"Byte My Shiny Metal Brass"
|
Did someone say the chicken coop needed more ventilation? Problem solved: Attached File Cut out/framed in a scrap window I got from the neighbor: Attached File Attached File |
"Byte My Shiny Metal Brass"
|
Originally Posted By BMSMB: Did someone say the chicken coop needed more ventilation? Problem solved: https://www.ar15.com/media/mediaFiles/481792/1000008692_jpg-3260917.JPG Cut out/framed in a scrap window I got from the neighbor: https://www.ar15.com/media/mediaFiles/481792/1000008693_jpg-3260919.JPG https://www.ar15.com/media/mediaFiles/481792/1000008694_jpg-3260920.JPG  |
|
Spent the past week focused on expanding the goat pasture. Don't have a lot of pictures, but did take these 2 of the diy stringing reel setup: Attached File Attached File Since my last post, I got the old well room tore down, and all of the plumbing for that moved into the new shed. I still need to figure out a classy way to cover the wellhead, as I need to insulate it due to the pipe coming out above ground. I also removed all of the temporary tapping from the walls and put up a layer of tyvek, and I've started getting siding put up. Should make some decent progress this weekend. Attached File Attached File |
"Byte My Shiny Metal Brass"
|
Didn't make as much progress as I had hoped today, but still made some! Attached File |
"Byte My Shiny Metal Brass"
|
Finished all but the last board on this side. I'll wait u til the board is up on the next side, so that I can cut it to line up properly. I'm going to wait to do all of the batten strips until the boards are up on all of the sides. Need to add a bit of framing on the next side that the upper part of the siding will attach to, but going to spend the rest of the day doing clean up... and I need to mill more boards. Attached File Attached File |
"Byte My Shiny Metal Brass"
|
Made some more progress today on the other gable end side. All but one board has been installed on the lower part. I also ordered the roof metal about a week and a half ago. I can't wait to get that tarp out of there. Attached File |
"Byte My Shiny Metal Brass"
|
Made some progress on the other side. I used all of my "good" 1x6's, so it's back to the mill before I can put more up. Luckily, I've got plenty of logs dropped already. Attached File |
"Byte My Shiny Metal Brass"
|
Had a very busy past week and a half. Friday, I went and picked up the metal roofing for the shed. Attached File Saturday I went and got the rest of the roofing materials for the shed... and for the house. Attached File Sunday, Monday, and Tuesday I tore all the shingles off the house. Attached File Attached File As it was showering sporadically, I had to tarp the roof at times. Attached File Wednesday I made another run to grab some last second materials. Thursday, I did final clean up prep on the house, and ARFCOMs favorite roofer @CaliContractor arrived! We then commenced getting some underlayment set up. Attached File On Friday I did what I could to help, but CaliContractor is a beast and knocks this stuff out solo like it doesn't even faze him! He finished half the roof. Attached File |
"Byte My Shiny Metal Brass"
|
On Saturday, I packed up the shingles we needed for the other half, and helped get the underlayment put down. CaliContractor did his thing and started shingling the other side. Attached File We took an afternoon break, and that sadly was the end of my day... I got hit by a nasty stomach bug that had me squirting out both ends with a nasty fever. CaliContractor kept knocking out the work though! The next day, he finished up the last few parts on the house, and we moved on to the shed. Attached File Attached File I was also pretty surprised to get this kick ass Esstac toolbelt in the mail yesterday, and used it to finish putting in the last couple of screws in the shed roof tonight! Attached File I want to say a HUGE thanks again to CaliContractor, he knocked this job out of the park and words cannot describe our gratitude for his help. |
"Byte My Shiny Metal Brass"


|
Originally Posted By CaliContractor: I would say it was fun and a good time, but that's never been said about roofing anything larger than a doghouse. I've roofed a few dog houses and they were only slightly more fun than any other roofing endeavor I've gotten myself into. |
"When you need it and ain't got it, you're singin' a different tune..."
|
Had a good day working on shed putting up more siding. Getting more use out of this awesome Esstac tool belt. Attached File I finished up all of the boards on the left side, and the one remaining bottom board on the back side. I'll use some wider batten boards to cover up the gap in the corner. Attached File I finished up the remaining board on the right side and started doing the upper portion on the back. Attached File |
"Byte My Shiny Metal Brass"

|
Originally Posted By CaliContractor: Looking good, on the down home stretch now before winter. Are you going to stain it or leave it natural? I'm planning on staining it. I'm hoping I can get it dry enough to sand/stain before putting the battens/trim up on these 3 sides. It's going to be kind of a pain to sand the patio side with the batten already installed. |
"Byte My Shiny Metal Brass"
|
That's all for now! Have a woodshed to build now. I can share pictures of that in the meantime until I do the battens/trim on the shed. Attached File |
"Byte My Shiny Metal Brass"
|
Finally got started digging the trench for the permanent electric run to the shed yesterday: Attached File I had to get my first floor beam installed or else the conduit would have made it a little more difficult: Attached File |
"Byte My Shiny Metal Brass"

|
Originally Posted By BMSMB: Finally got started digging the trench for the permanent electric run to the shed yesterday: https://www.ar15.com/media/mediaFiles/481792/1000009420_jpg-3394332.JPG I had to get my first floor beam installed or else the conduit would have made it a little more difficult: https://www.ar15.com/media/mediaFiles/481792/1000009421_jpg-3394336.JPG @BMSMB Great build! I love these type threads. Brand sawmill? |
17 And that no man might buy or sell, save he that had the mark, or the name of the beast, or the number of his name.
|
Originally Posted By Oldgold: @BMSMB Great build! I love these type threads. Brand sawmill? It is a Timber Grizz that my dad picked up in the early 2000's... not a lot of information I could find online about them. Attached File |
"Byte My Shiny Metal Brass"
|
Finished digging the trench and got the PVC glued up everywhere except at the panel in the shed. My temp wire is connected through the hole I'm using, so I won't finish that until right before I pull wire. I used chicken wire to sift bigger rocks out from the dirt/clay for fill right on top of the conduit. Attached File I finished the first layer, but here's a picture with it partially done: Attached File Inside the shed: Attached File I should finish refilling the trench tonight. Depending on how much time I have, I might try to pull the new wire in too... I've never done that before though, so it might wait until I've got plenty of time to commit to it. |
"Byte My Shiny Metal Brass"
|
Didn't do a great job at taking pictures, but I have the floor beams installed for the back half of the shed, and I installed all of the floor joists. I've decided to insulate the floors, so I'll be ripping OSB to block off the bottom of the joists, and I'll fill them with loose insulation. Attached File I'm playing musical junk, so after I finished the back corner, I put down a few sheets of plywood to move everything out of the way so I could do the other corner. Once I have this corner done, I'll clear out the other corner again to finish insulating and laying down plywood. |
"Byte My Shiny Metal Brass"
|
Continued work on the flooring. Ground plastic laid on the ground and attached 1x6 boards to support the OSB that will block off the bottom between the joists. Attached File Attached File After I placed the first bit of OSB, I realized I needed another 1x6 to support in the middle of the 8' sections. Attached File Once all of the OSB was in, I spray foamed the gaps, and put in blocking to support the plywood between the joists. Attached File Did a final dry fit with the plywood. Attached File |
"Byte My Shiny Metal Brass"
|
I'm using loose insulation and breaking it apart by hand. Attached File Once all of the insulation was in, I put a layer of plastic over the top of it. Attached File Then placed down the 2 sheets of plywood that fit in just that corner. The next sheet bridges into the other corner, so im waiting to place it. Attached File With that done, I played musical junk again, and moved everything from the other corner onto the 2 pieces of plywood I just placed. |
"Byte My Shiny Metal Brass"
|
With the other corner cleared out, I got the ground plastic laid down Attached File Installed the 1x6 boards to support the OSB. Attached File Cut down the OSB. Attached File And spray foamed the gaps. Attached File |
"Byte My Shiny Metal Brass"
|
I got all of the blocking in place to support the edges of the plywood. Attached File I started to break the loose insulation apart by hand again. Attached File I got tired of that nonsense and thought of a way to break it apart easier. I grabbed a mortar/concrete mixer for the drill, and sure enough, it worked fantastic. Attached File One problem... with how much looser it was, I ended up packing it in more dense, not realizing it was more than when I broke it apart by hand. I ran out with just a little left to fill in. Attached File Decided to lay down what I could for the plastic anyways. Attached File And laid down the first sheet that bridges between the 2 sides. Attached File Tomorrow after work, I'll pick up another bag of insulation. Then I'll lay down the plywood, which will finish up the back floor for the shed! |
"Byte My Shiny Metal Brass"
|
Originally Posted By 67Firebird: That looks really good. Thank you. After working on this the last few days, and helping pour a pad last year, I can see why people prefer the cement pad! This floor has been a ton of work! |
"Byte My Shiny Metal Brass"