|
Posted: 12/25/2017 3:29:44 PM EDT
Disclaimer: I am not an antique furniture expert. I've read a few books (well, I at least looked at the pictures), but that's it. I am not a professional woodworker. Hell, I'm not even an experienced woodworker. I'm just some guy who likes turning beautiful pieces of wood into piles of shavings and unusable scraps. Occasionally, I manage to build something that doesn't suck.
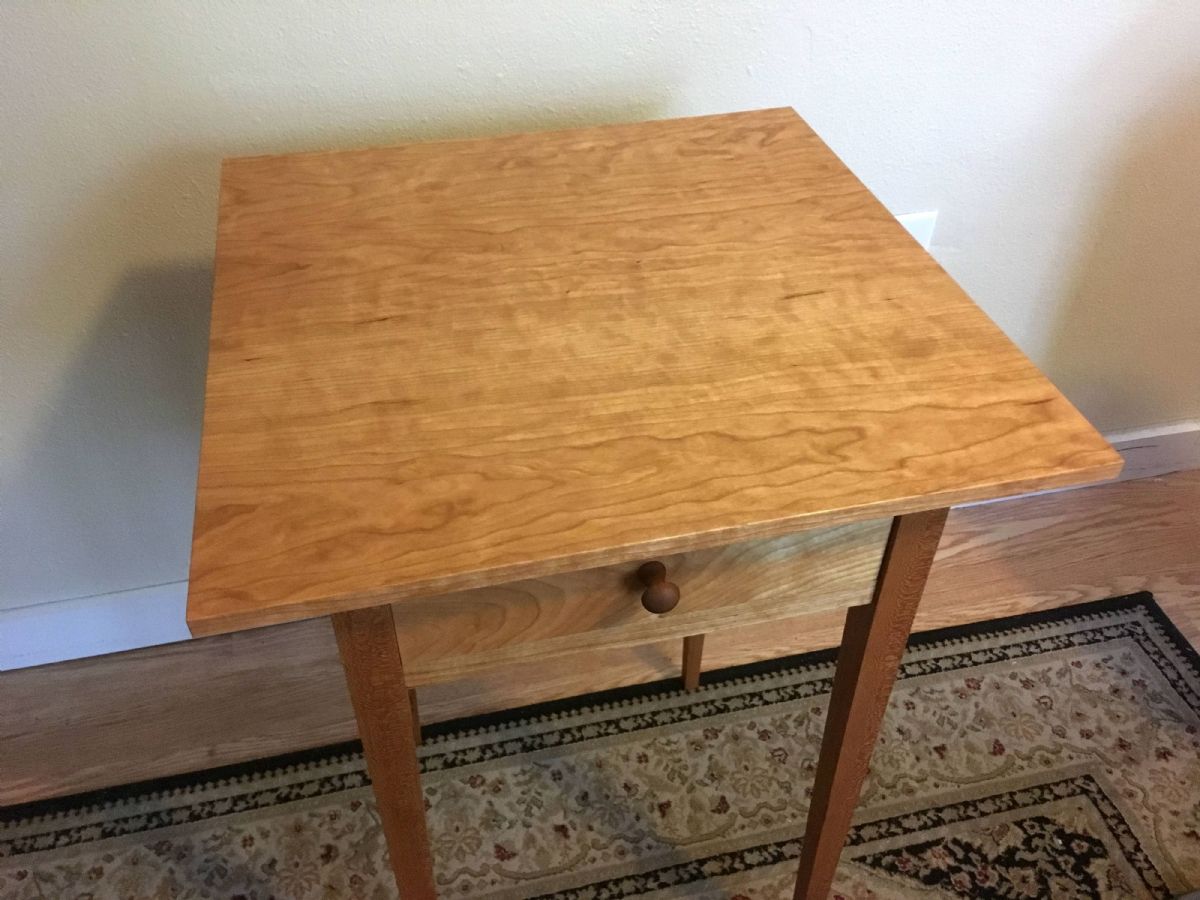
I built this small shaker side table as a Christmas gift for my parents. The design is pretty much a copy of the one in Thomas Moser's book "How to Build Shaker Furniture". It's a small project. I used maybe 12bf of lumber. It's solid cherry with poplar drawer sides, back, and bottom. It all starts at the lumber yard. The legs will require some 8/4 cherry, but everything else will be 4/4. Pick out some nice looking pieces of wood, pay the man, and head home. Once I have the lumber, I figure out what pieces will be used for what, then break down the boards and label everything. The top is probably the most difficult part. The grain should match up from board to board so that it looks pleasing to the eye. It's also important that the grain is all running in the same direction so there isn't excessive tear out when planing the panel flat. I mark the grain direction on both sides of the boards for the top. It makes it easier for me when I'm laying everything out. 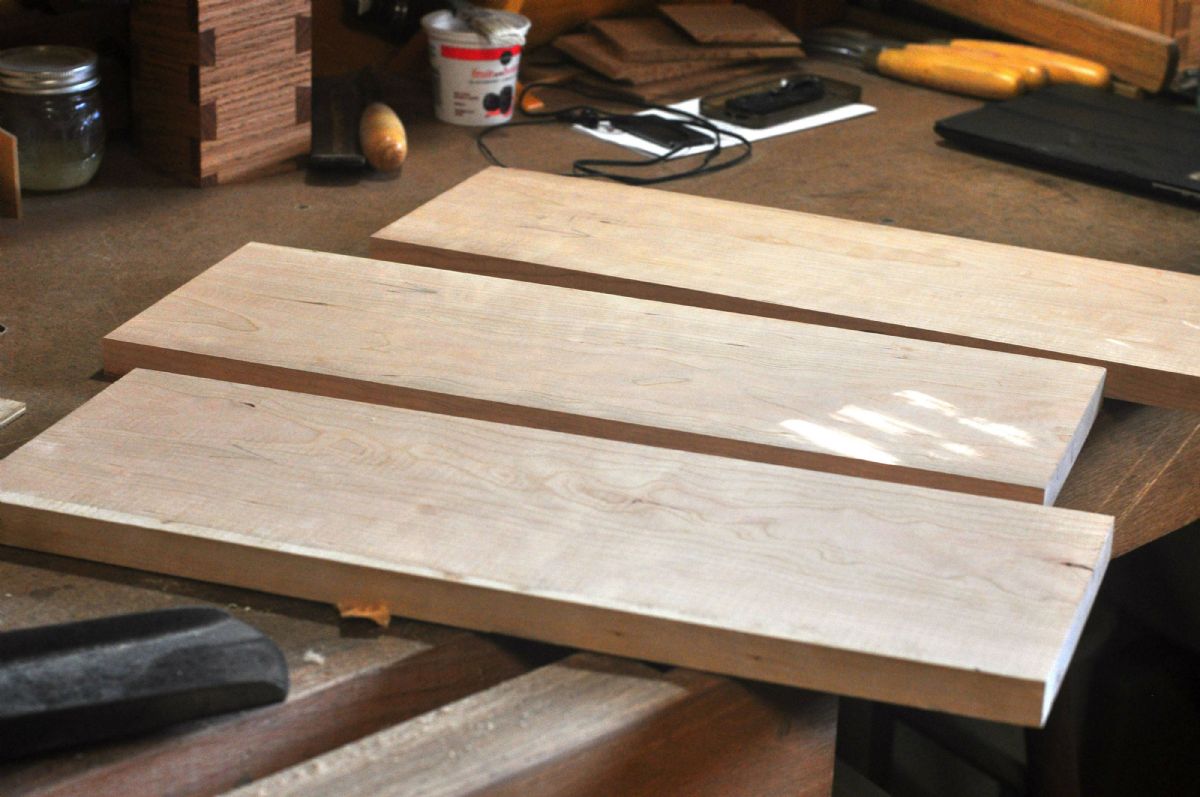
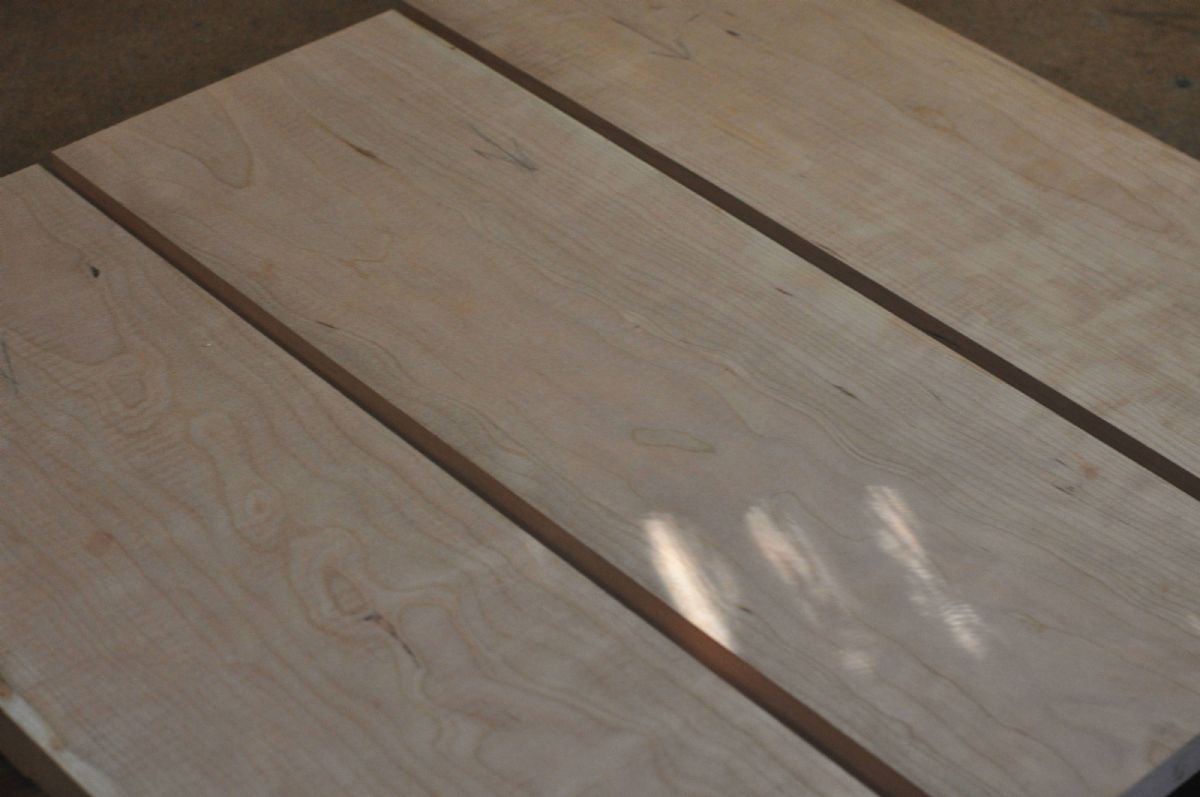
Joint the edges and glue up the panel. 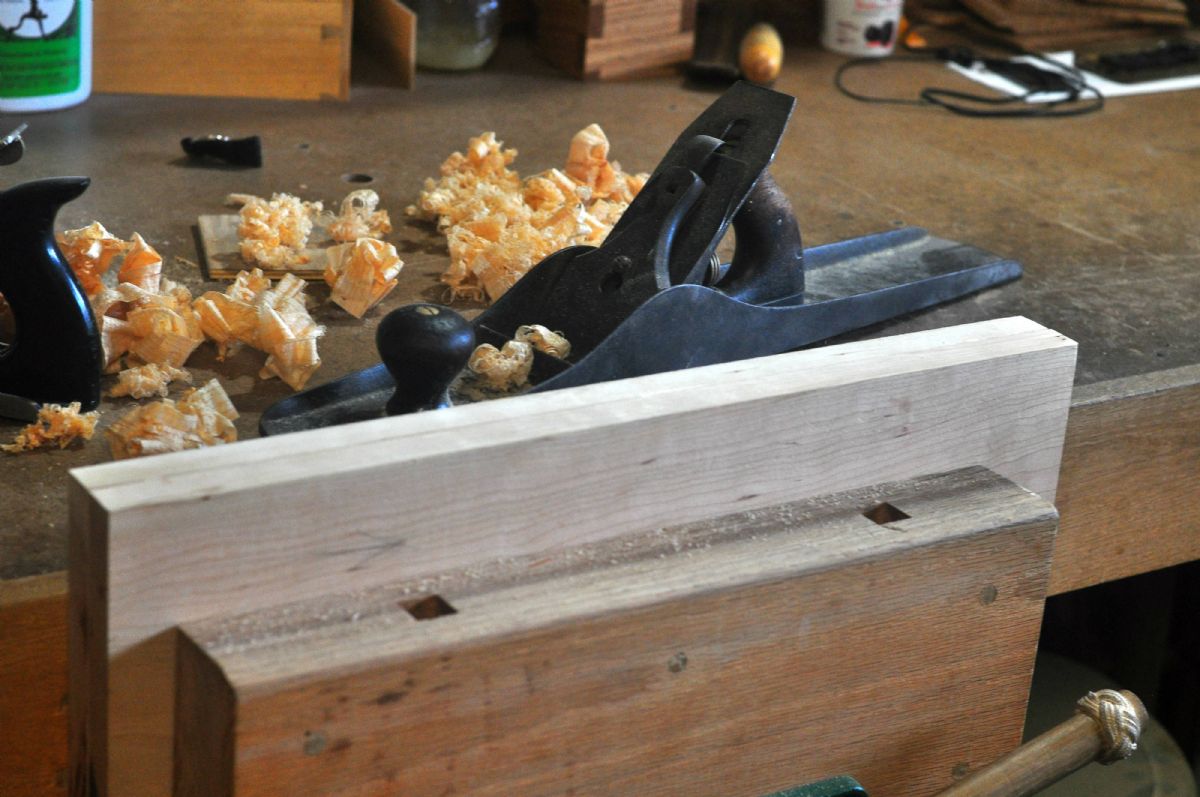


When the glue dries, remove the clamps and flatten the panel. Plane it down to 3/4" thick. To give the table top a more delicate look, the edges are beveled down to 1/2". I think it gives it a great look. Set a marking gauge and scribe a line all the way around the top. On the bottom of the panel, mark a line 2" in from the edge. Now, it's a simple matter of planing the bevel until you hit the two lines. I used my no. 7 and it went quickly. 
Next, the apron pieces and drawer front get some attention.  They're flattened just like the top. Work across the grain first, then diagonally, then with the grain. Check flatness with winding sticks and a straight edge. 

Once they're done set them aside. The tenons will be cut later. The legs are ripped from the 8/4 stock. The legs are only 1 1/8" square so 6/4 would've wasted less wood, but 8/4 was all I could find. I had enough to make an extra leg. I thought it might be a good idea to have a spare, in case I screw one up. 
When marking the legs for the mortises, gang them together and mark them all at the same time. This will help keep everything square. 
Use a mortise gauge and marking knife to mark out the mortises. 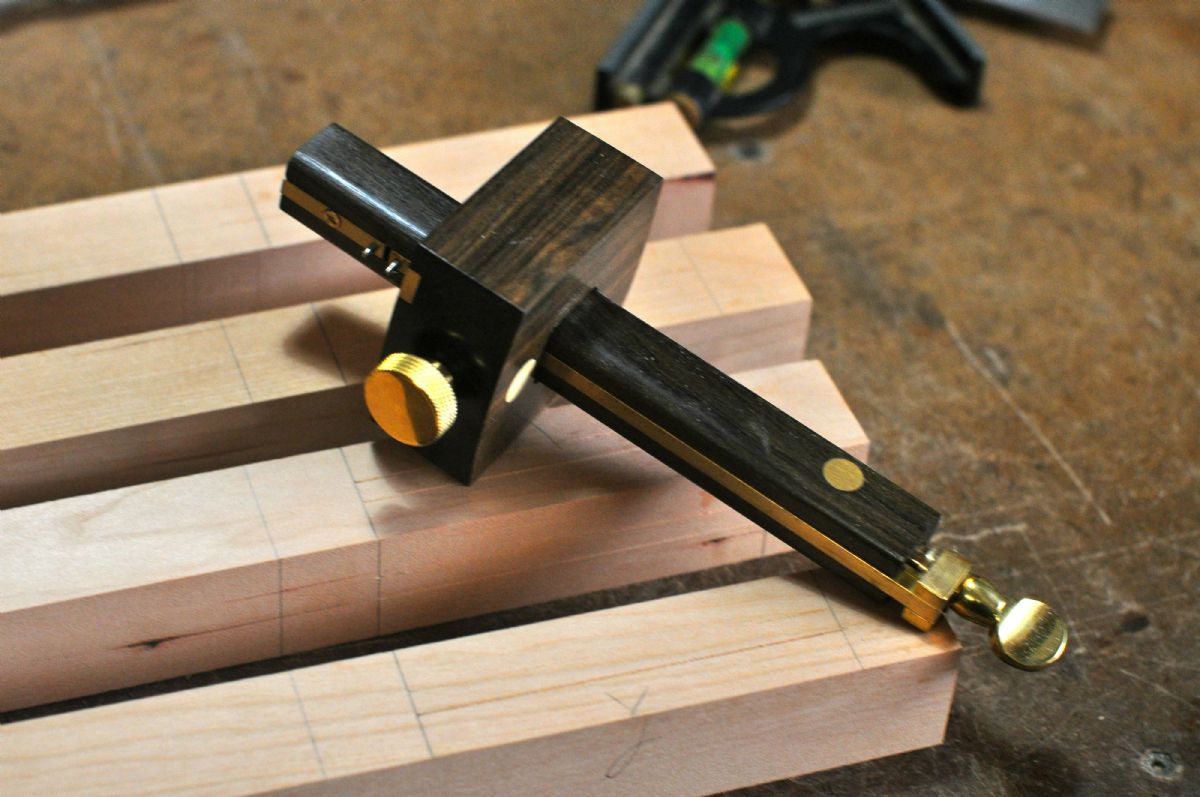
Grab the mortise chisel and get to chopping. Chop! Chop! Chop! Oops, chopped too hard and split the top of a leg. Good thing I made an extra. I used the split leg to practice the taper. 
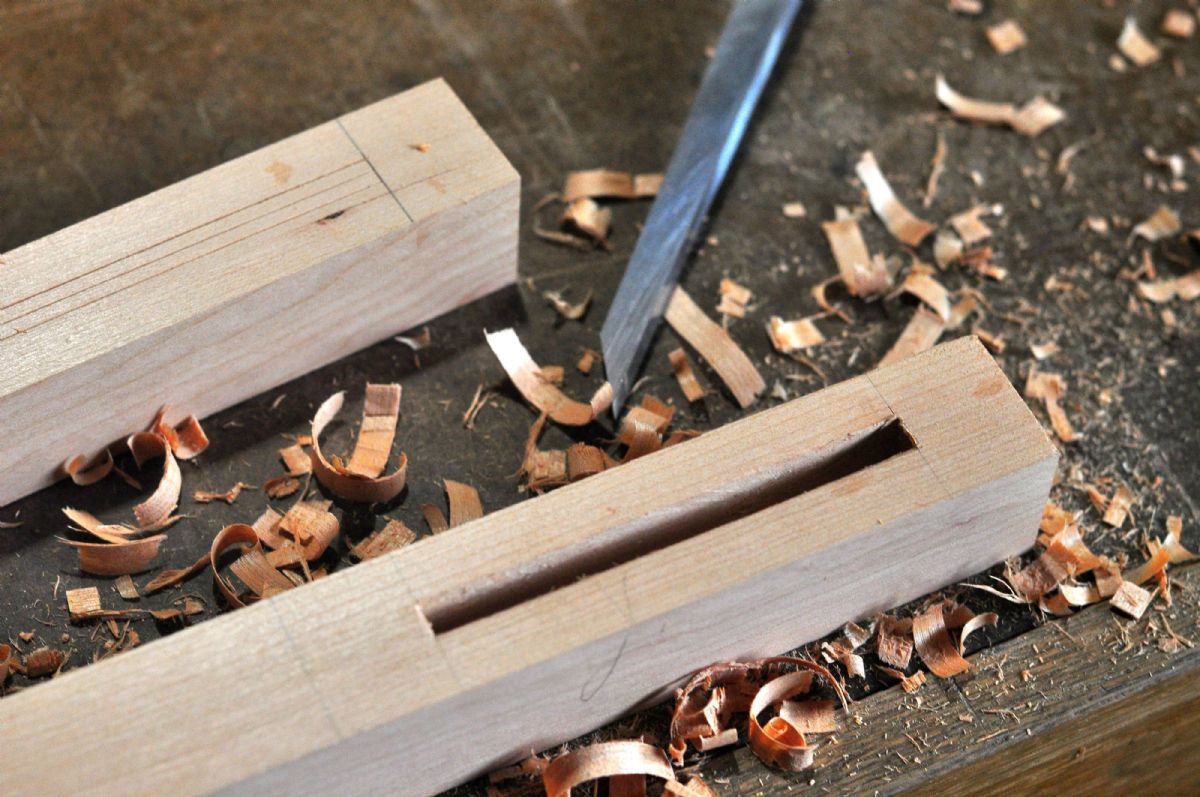
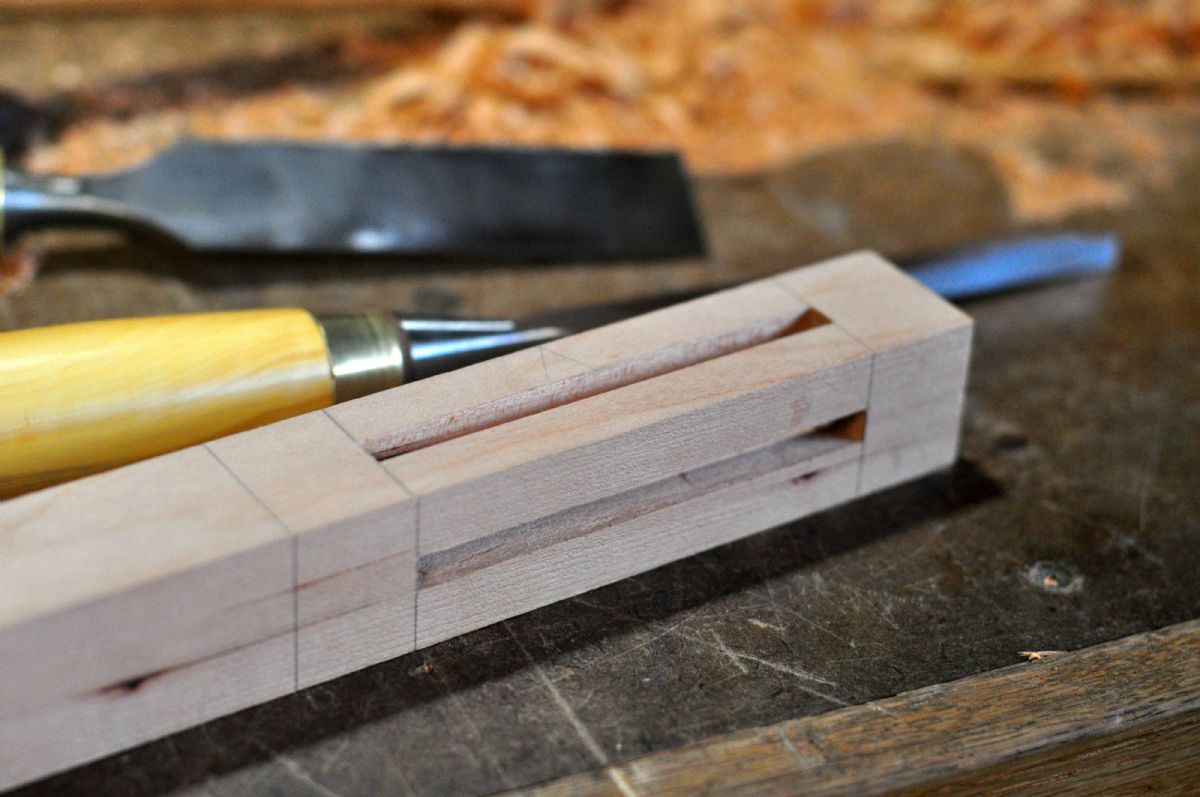
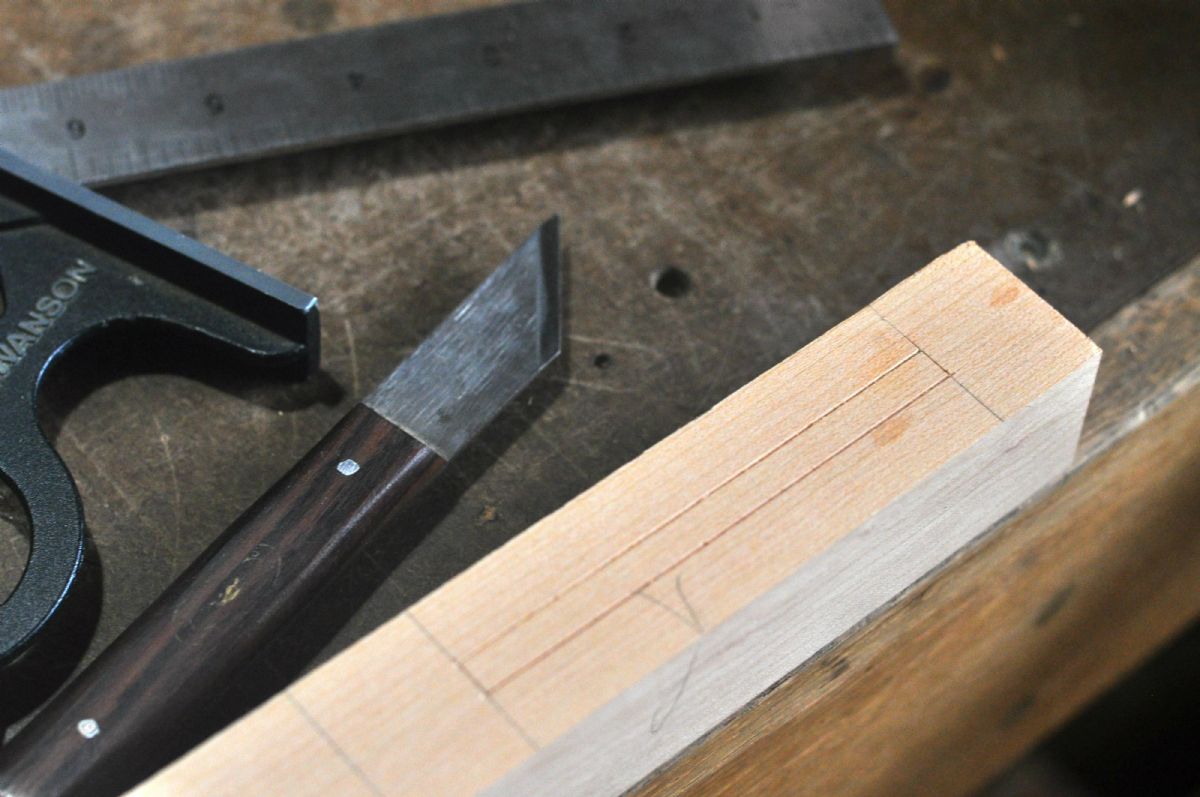
The lower front rail is attached with a mortise and tenon, but the upper rail uses a sliding dovetail. Mark it, saw it out and clean it up with a chisel. 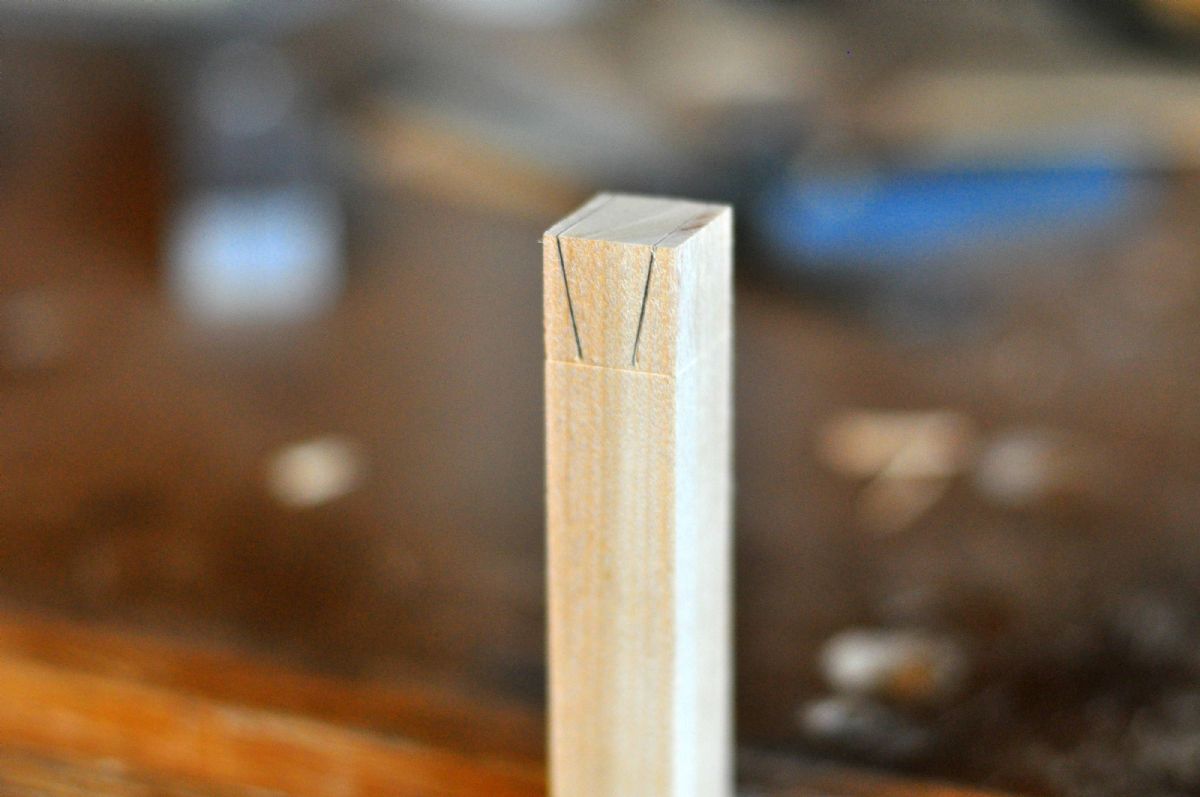


The socket is chopped out of the top of the front legs. This joint will be hidden so it doesn't have to be perfect, but care is needed to avoid splitting the top of the leg. 
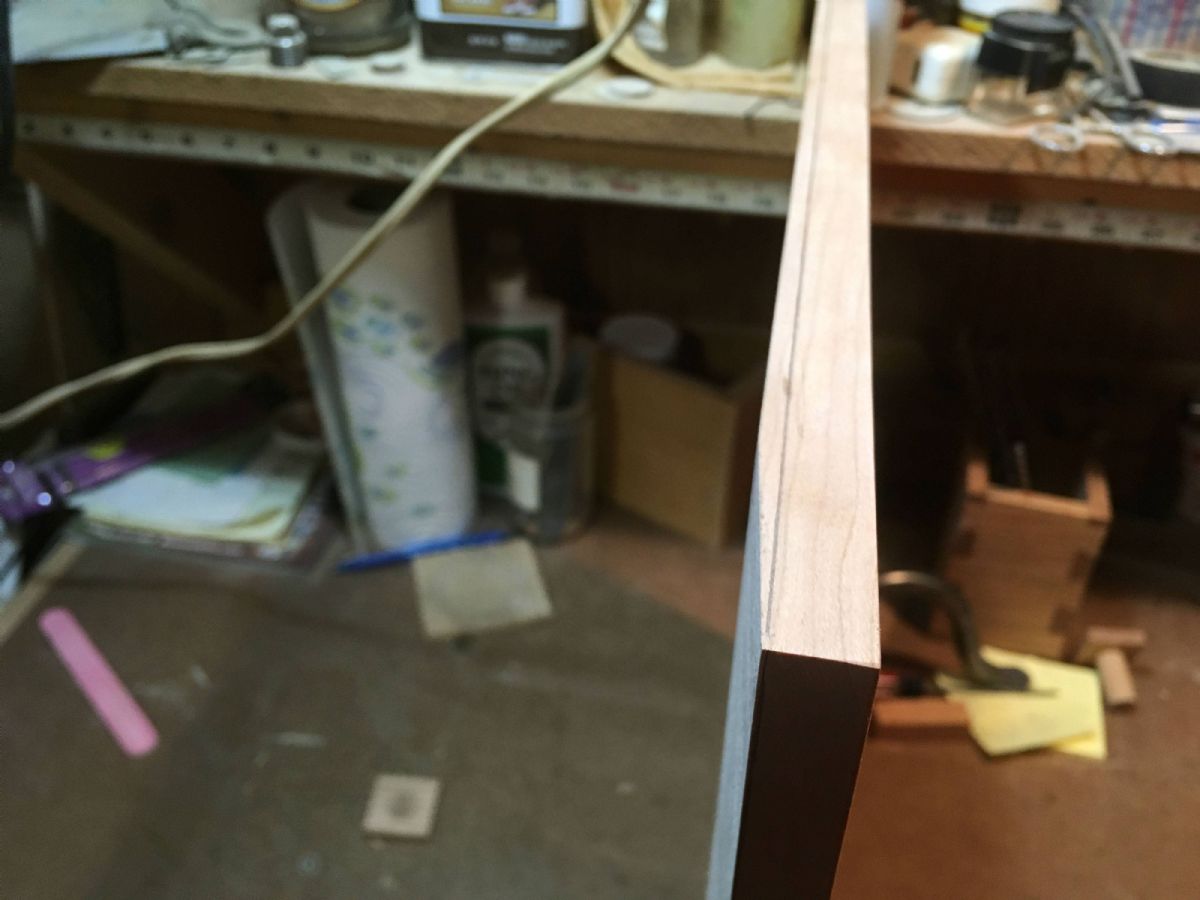
With the mortises finished, check the depth (it should be 3/4") and the tenons on the aprons can be cut. The tenons on the back legs meet in the center of the leg. They're beveled where they meet inside the mortise. This is easily done with a plane. Set a marking gauge to the thickness of the tenon and mark that distance on the correct side of the tenon. Plane down to the line and the opposite corner and "presto" perfect 45. The first photo shows the bevel about half completed. 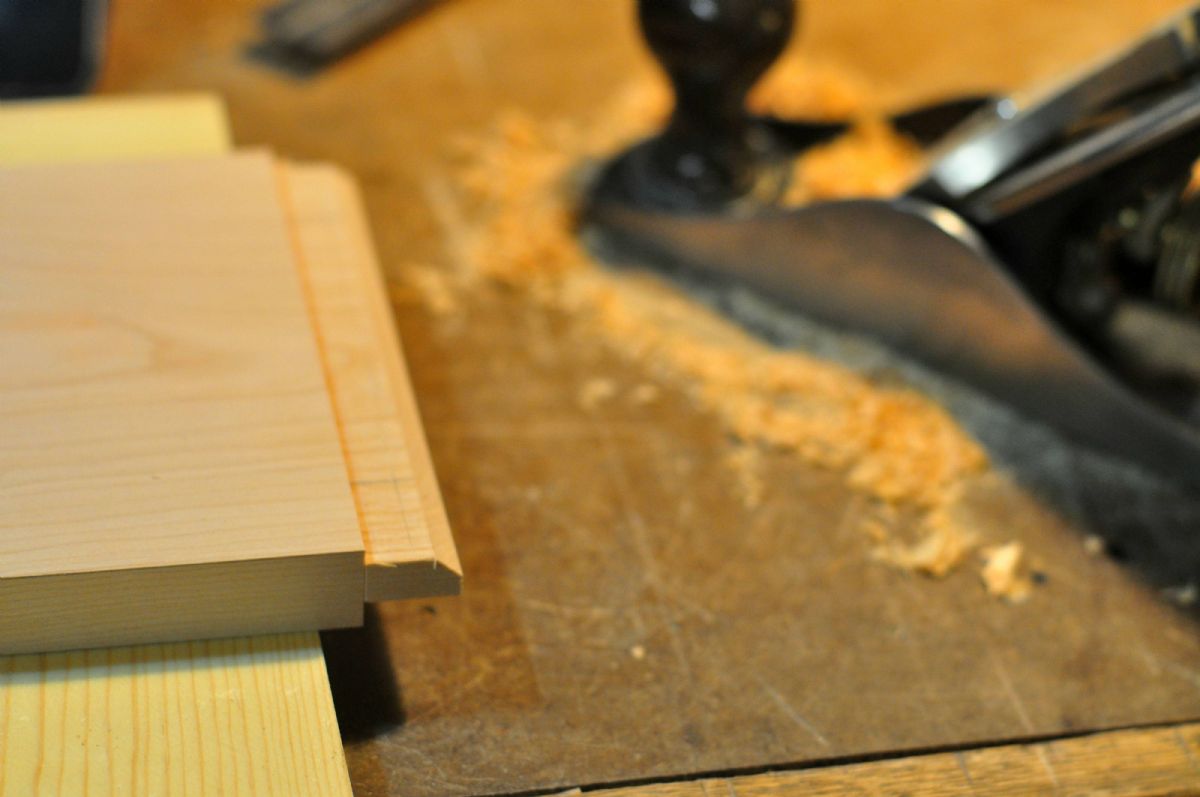

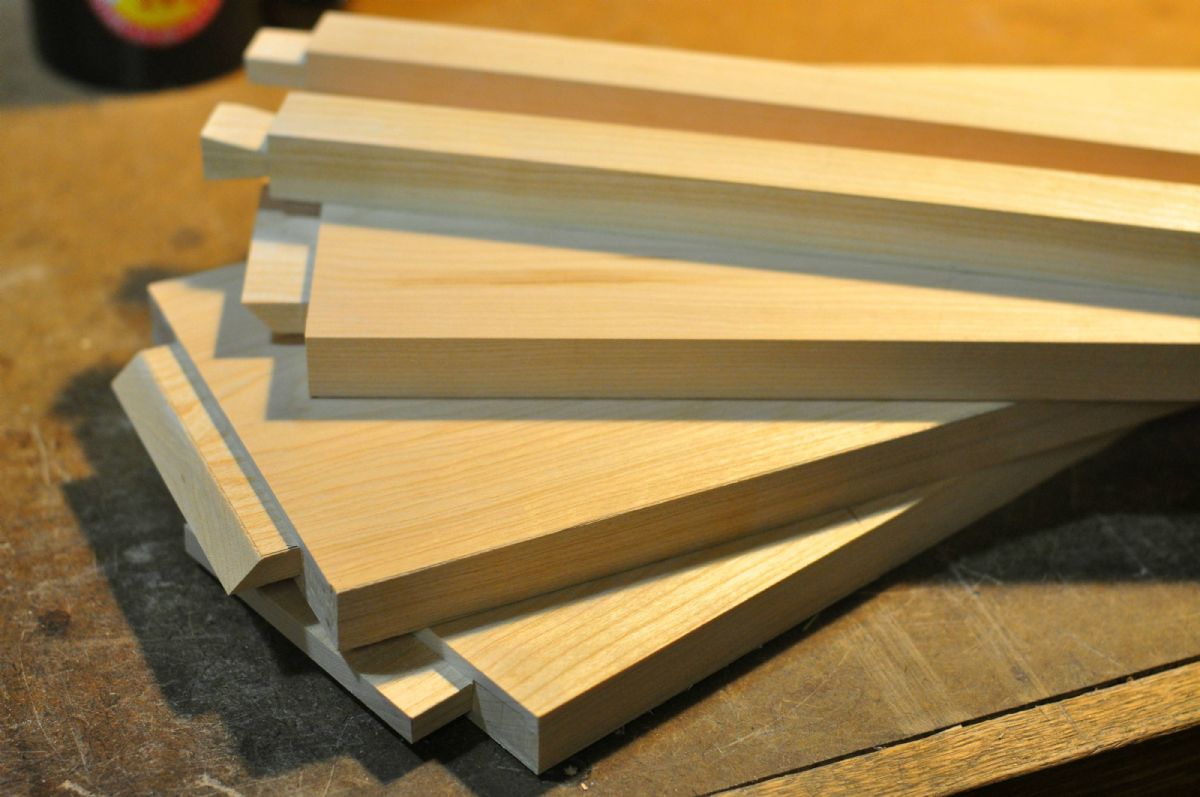
Aprons and front rails all finished. 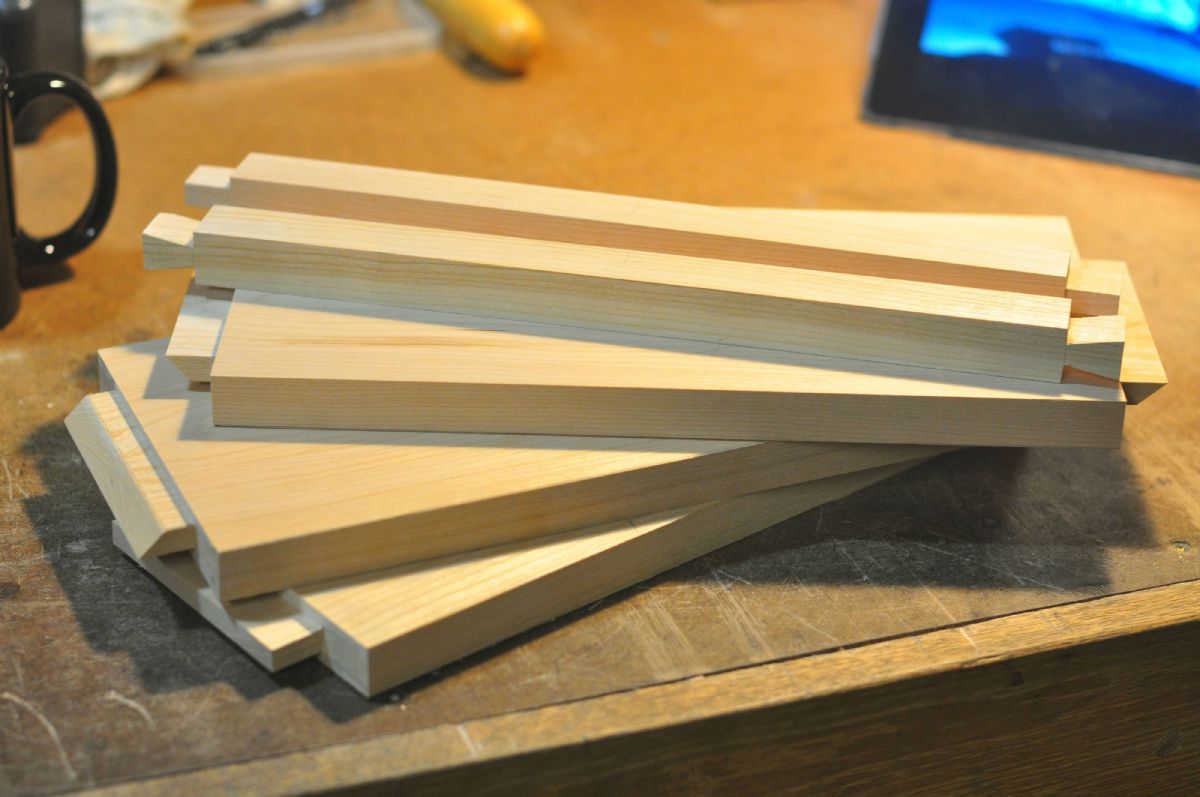
Time for dry fitting. Lets see how it looks and hope everything is square. 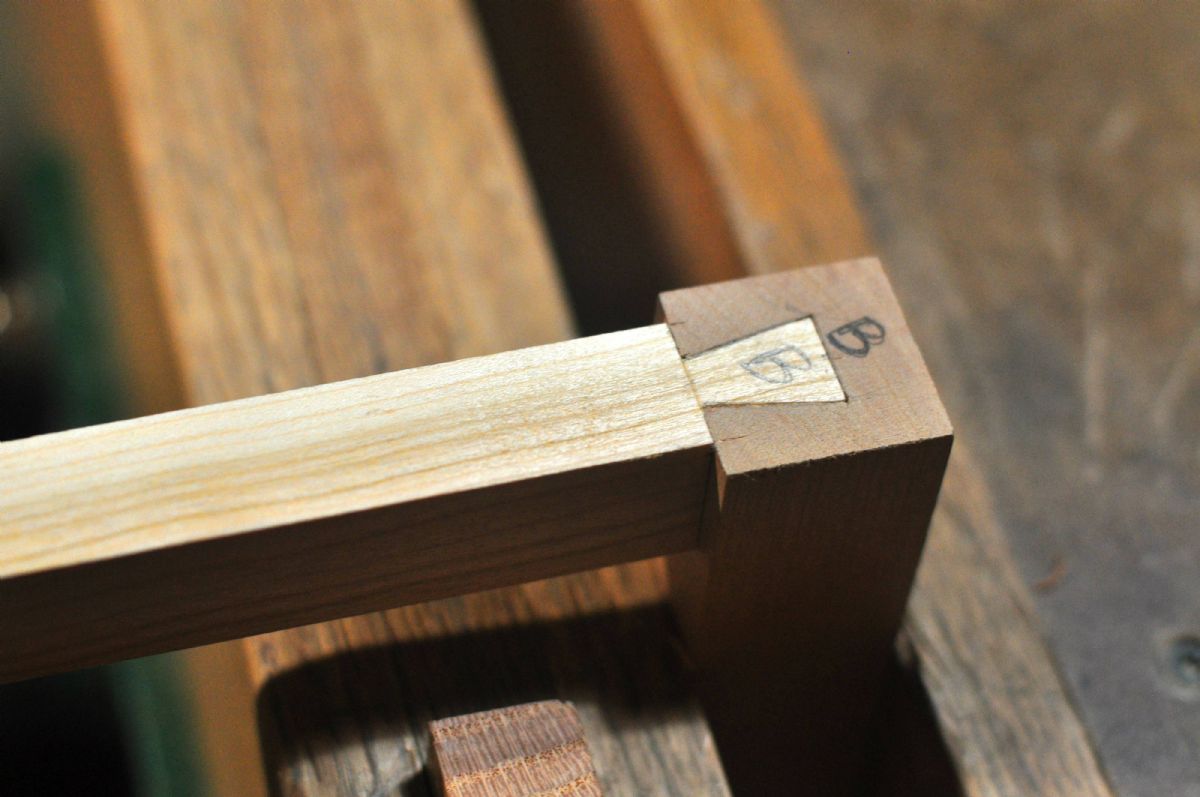
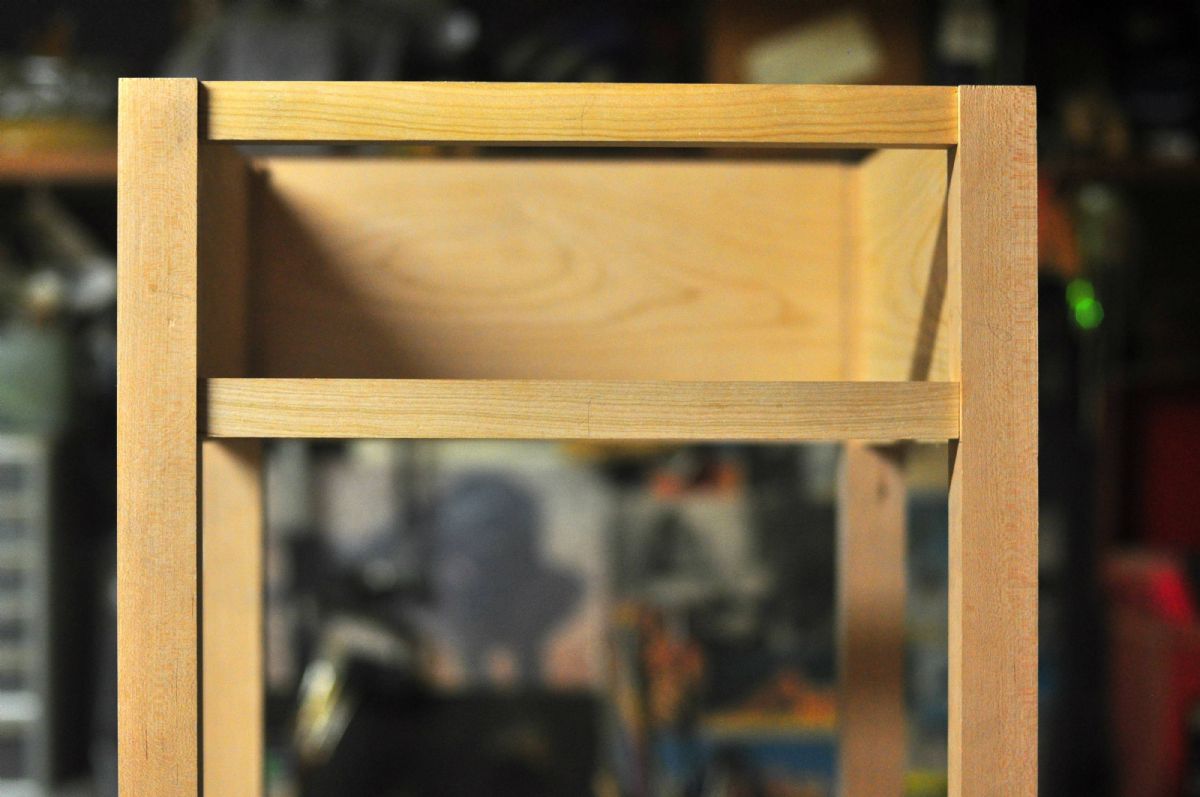
Note: Legs haven't been tapered yet. 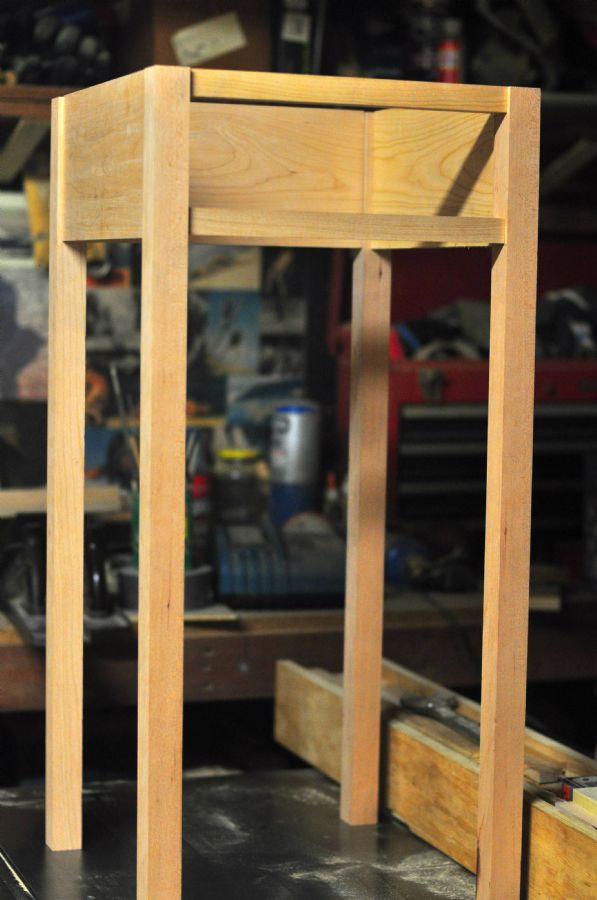
Not too bad so far. Tapering the legs is not nearly as difficult as it seems. The legs are 1 1/8" square and will taper down to 5/8" at the bottom. Set a marking gauge and mark the bottoms of the legs. Be careful here. The legs are only tapered on two sides. Taper the wrong side and you'll be reaching for that extra leg. Start with short strokes at the bottom and slowly work up towards the top (That's what she said.). The taper starts about 1" below the bottom of the apron. Keep an eye on the marks as you progress. Correcting for squareness is easy as you get closer to the line. 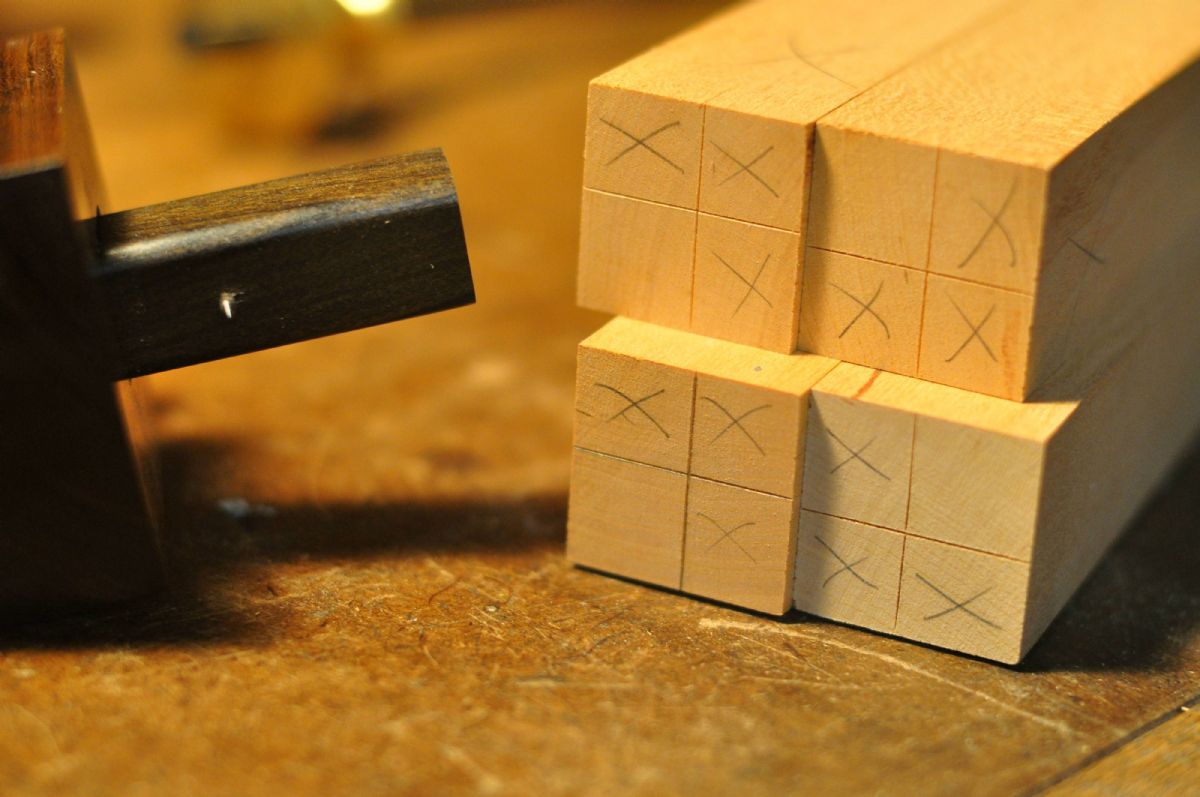


Dry fit with the legs tapered. 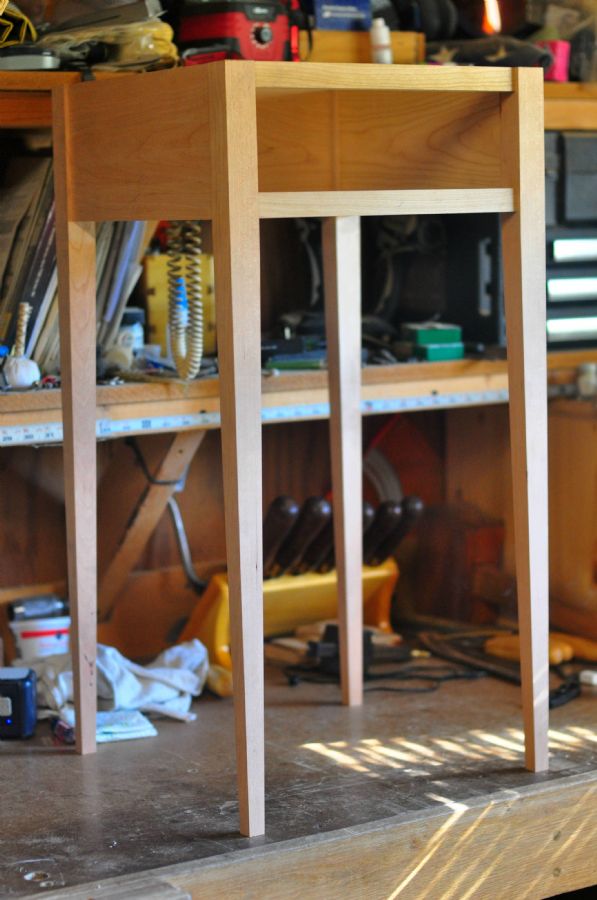
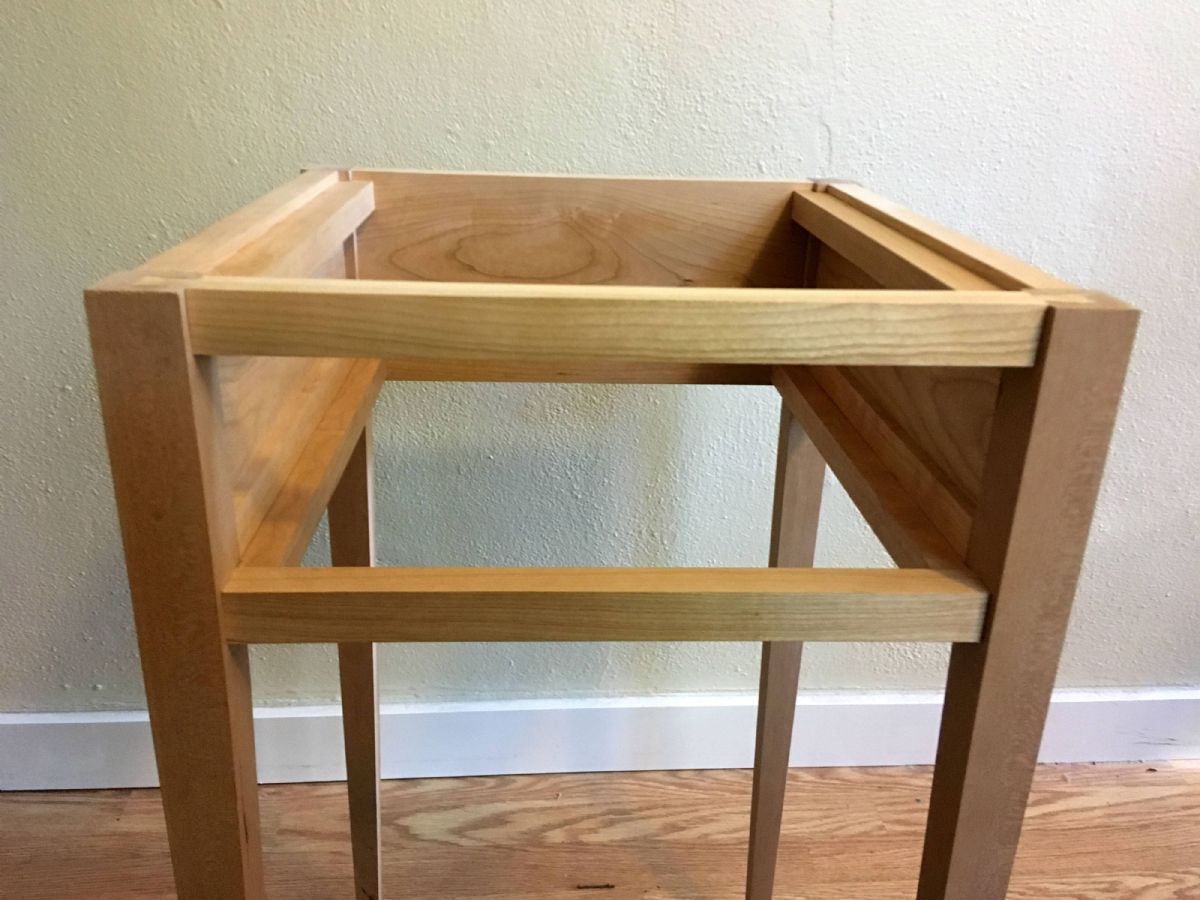
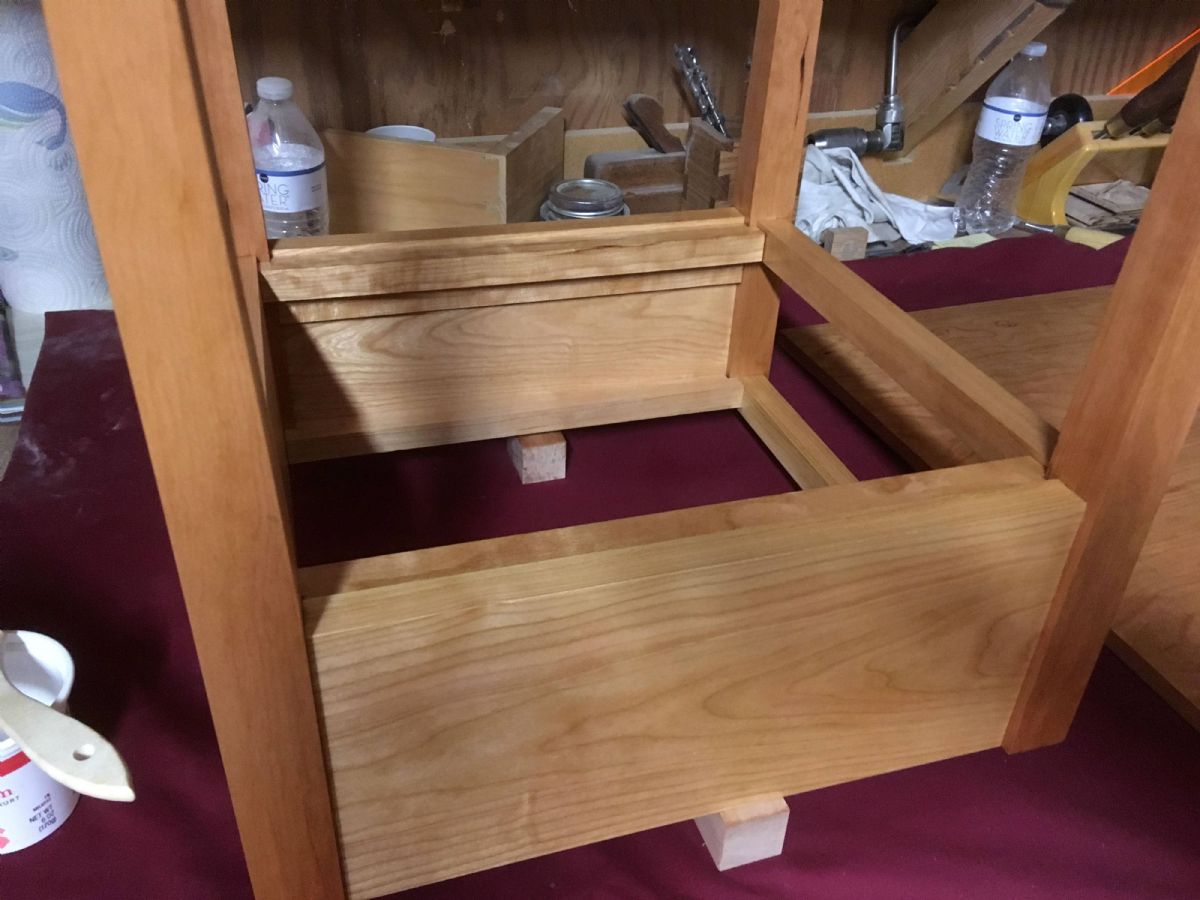
Everything looks good. Time to glue it up. I glue the sides up separately then join them together. It's easier to keep everything square that way. It's also easier to work with fewer moving parts. Success! 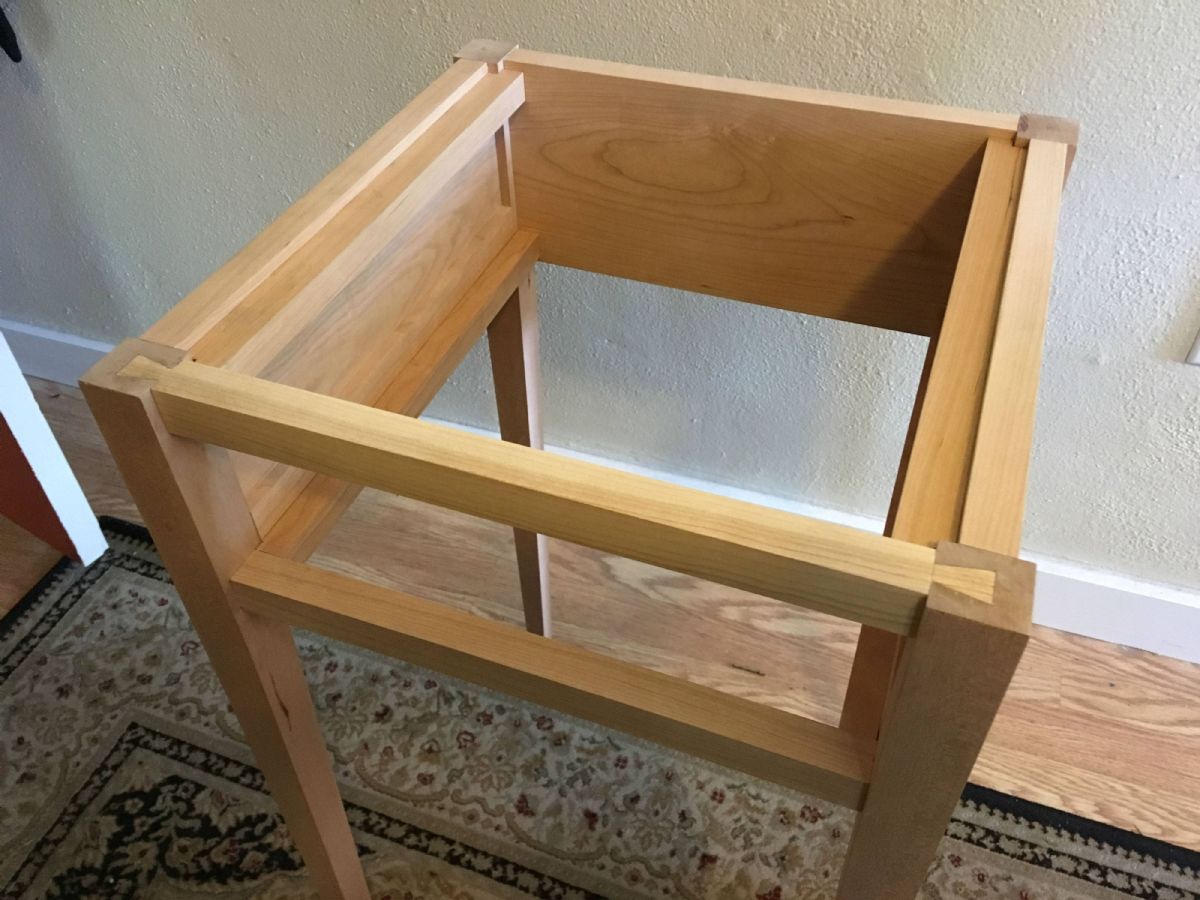
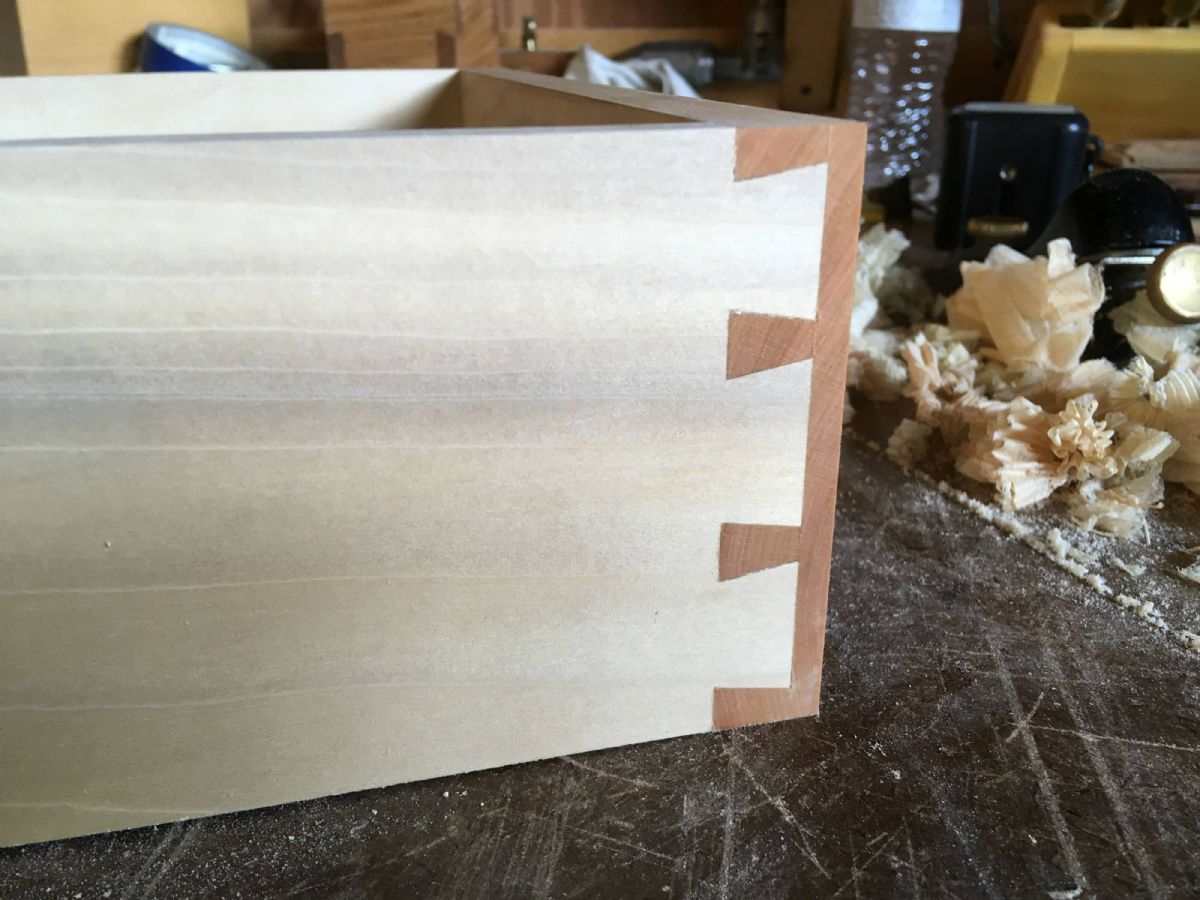
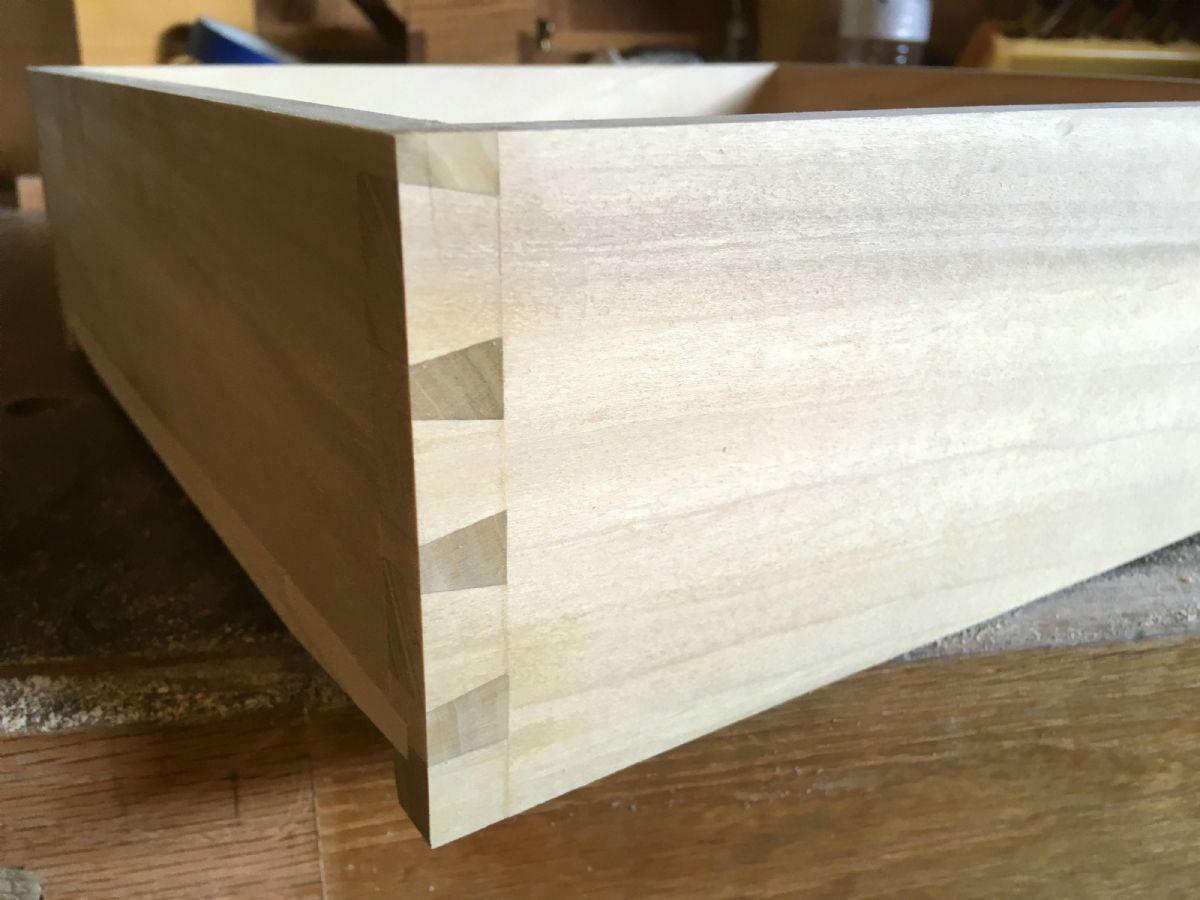
Now that the carcass is finished, it's time to start on the drawer. Nothing fancy here. It's just a basic drawer. The front is 3/4" thick the sides and back are 1/2". The drawer front gets half blind dovetails and the back gets full dovetails. I do the tails first. Some people do the pins first. Those people are wrong. They're probably communists. And, I question their upbringing. Mark the tails, cut them then chop out the waste. 

This is how I mark the pin board (I do the full dovetails the same way). Be careful to support the drawer face when chopping out the pins. It's easy to split the front off. (Been there....done that) 

Here we have the drawer pieces all ready to go. 
The drawer bottom is pretty simple. It's just a 1/2" thick panel. It needs to fit into the 1/4" dado on the drawer sides and front. It could be done with a simple rabbet, but I thought a beveled bottom would be more traditional. It takes a little more time, but not much, and I think it's worth it. Avoid negative waves. 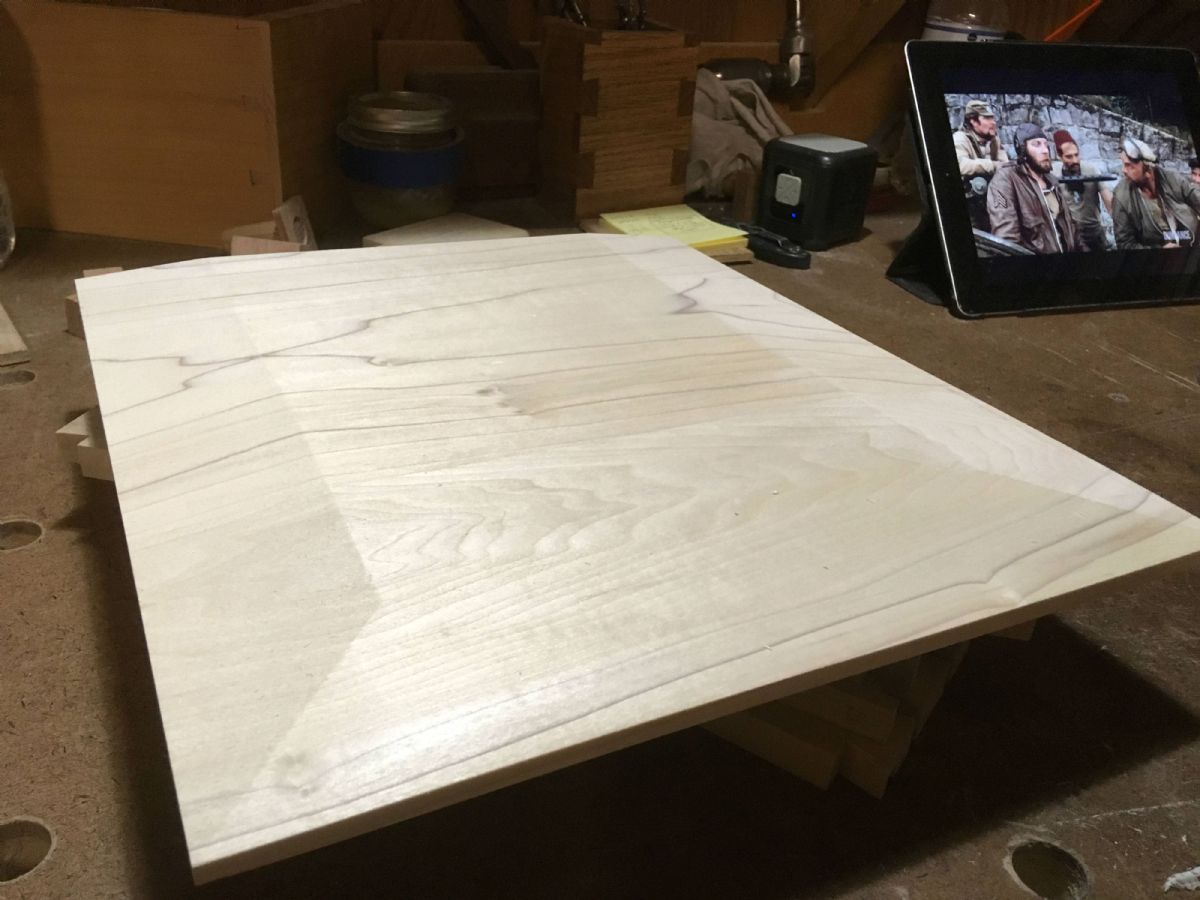
Assembled drawer ready for final fitting. 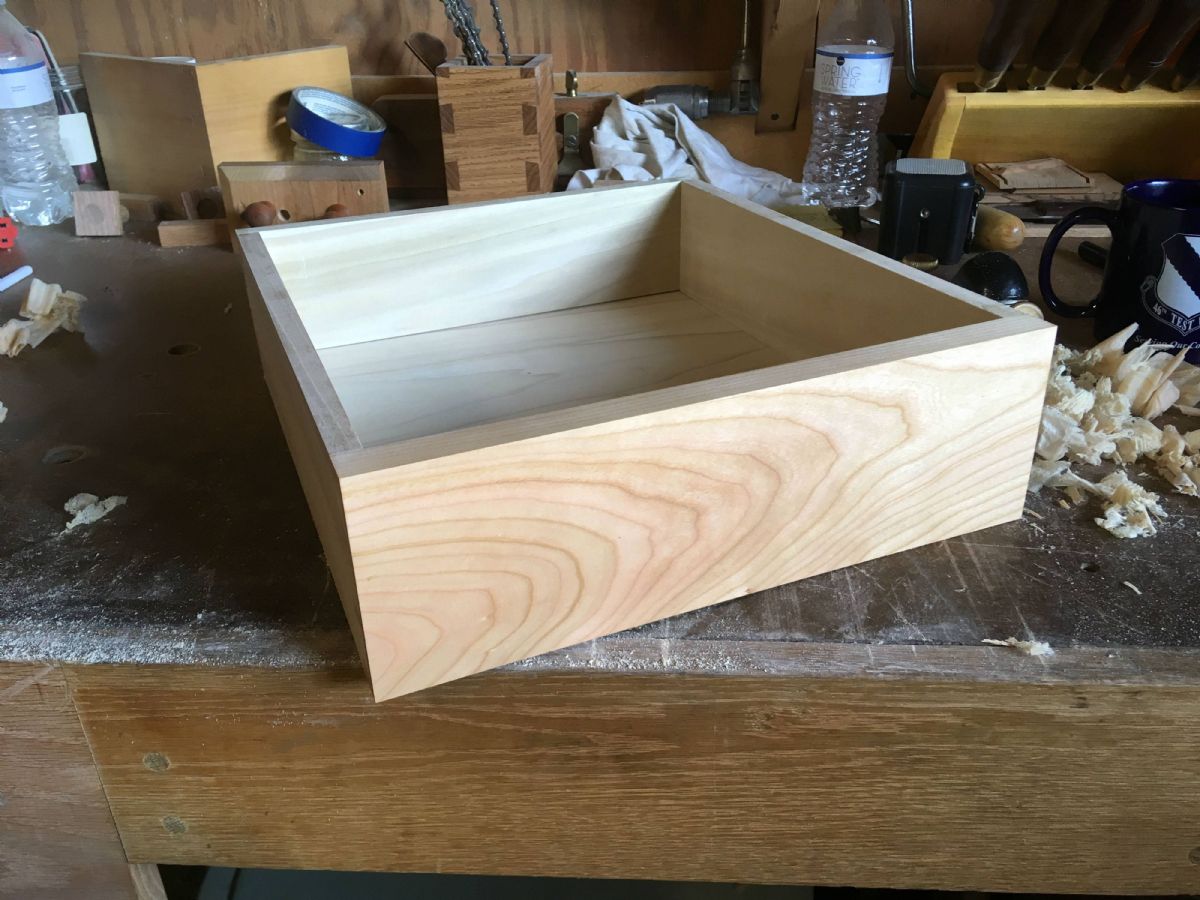
I build the drawer slightly too big then plane it to fit perfectly. I want an equal reveal on all four sides. This is how I clamp the drawer to the bench for planing. 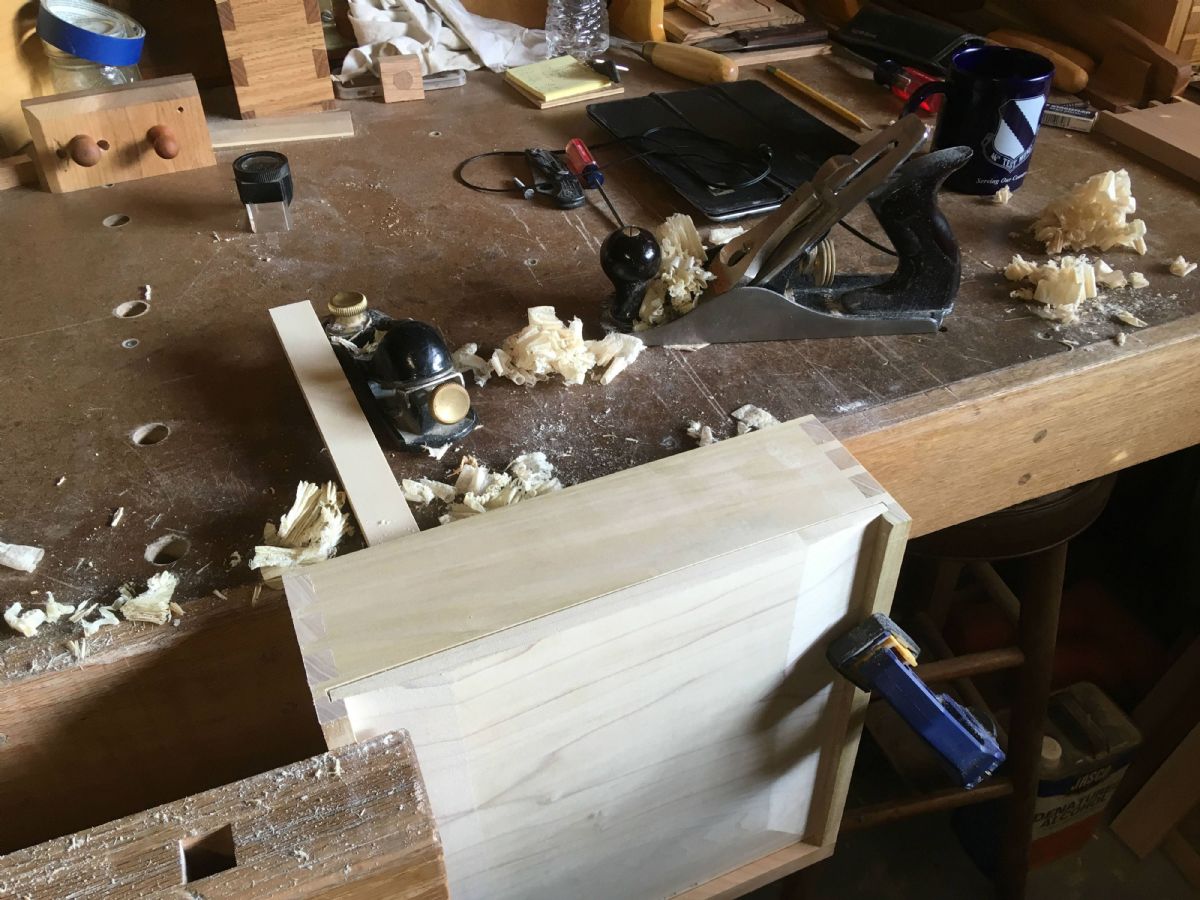 At this point all the difficult work is done and it's time to start putting on the finish. A couple of thick coats of Publix brand lofat blackberry yogurt really makes the grain pop. I know what you're thinking. "Max, if it's made from cherry, why aren't you using cherry yogurt?" Well, I've found that the blackberry give the wood a much richer and deeper tone. Brush it on nice and thick. Let it sit for 30 - 60 minutes then wipe off the excess. Three to four coats should do the trick. Note: If Publix brand yogurt is not available, substitute watco danish oil for the yogurt (Just don't lick the brush). 
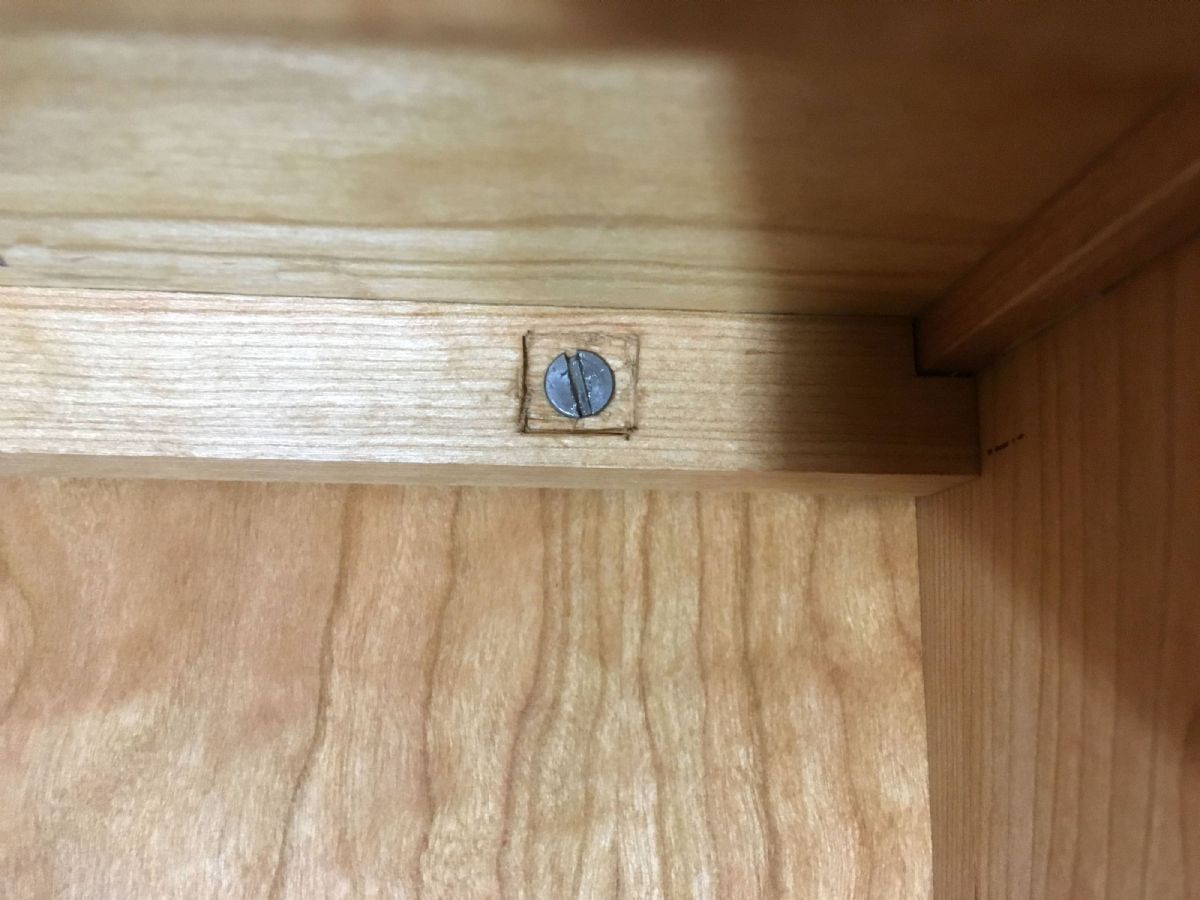
Not entirely sure what knob I want to use, so I finished two of them. 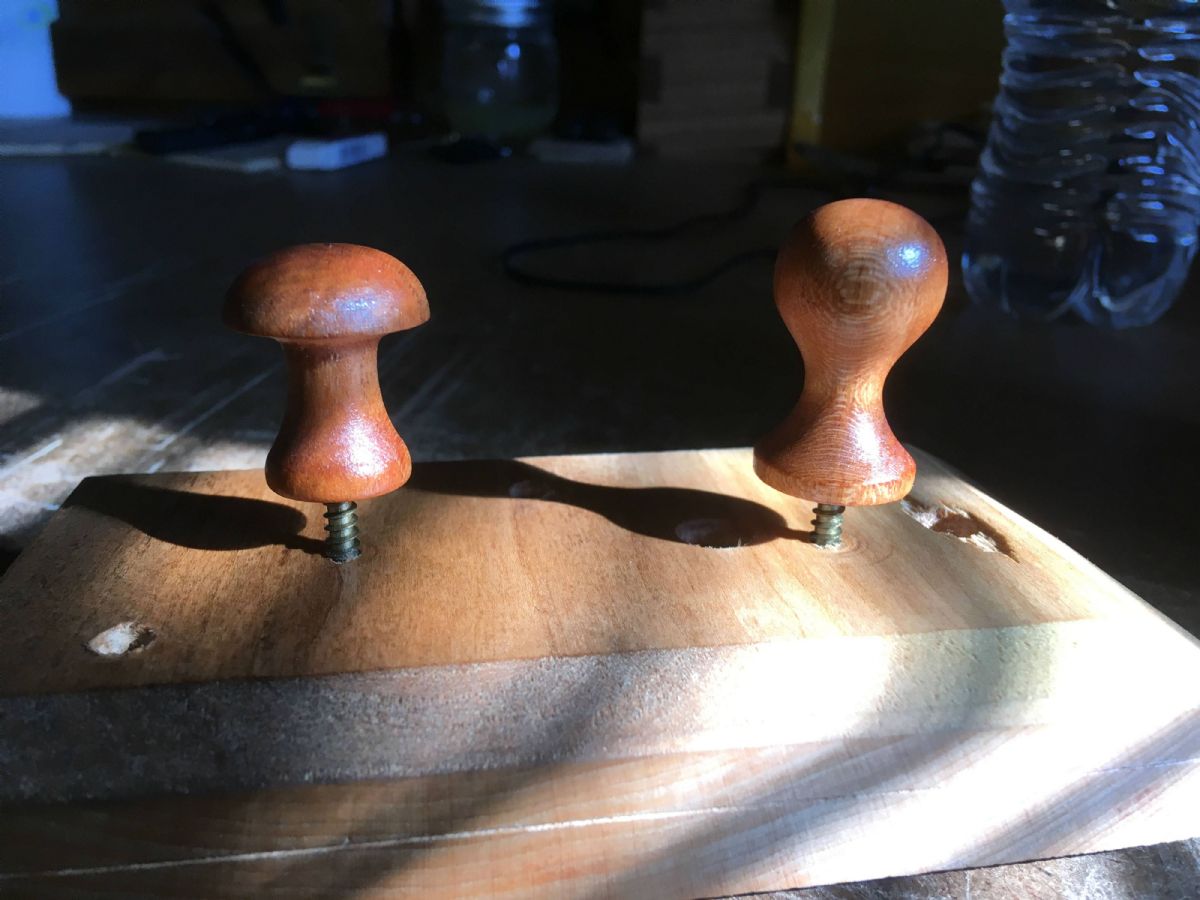
As stated earlier, I'm no furniture expert and have no idea what the correct period hardware would be, but I like to use hardware that I think looks "correct". 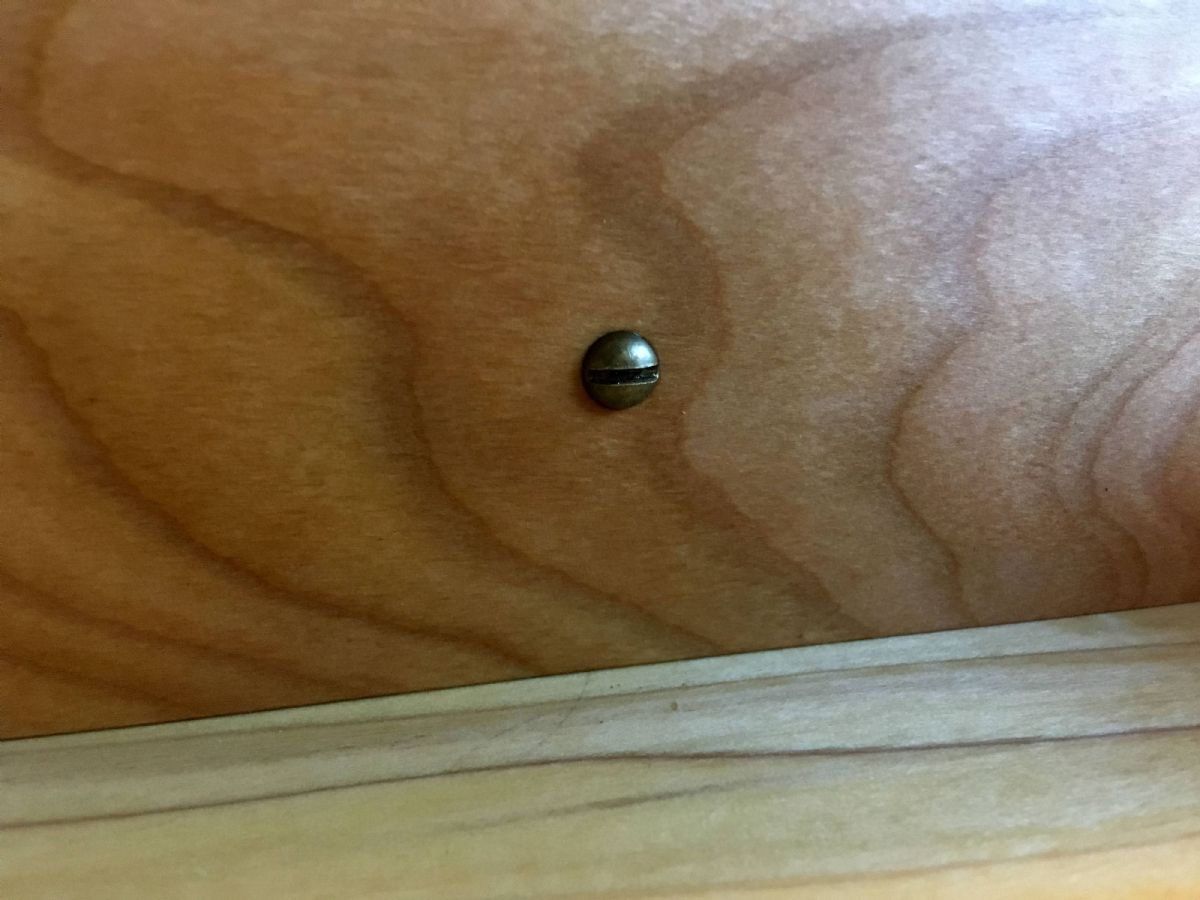
All done. I'm pretty happy with how it turned out. Hopefully my parents will like it 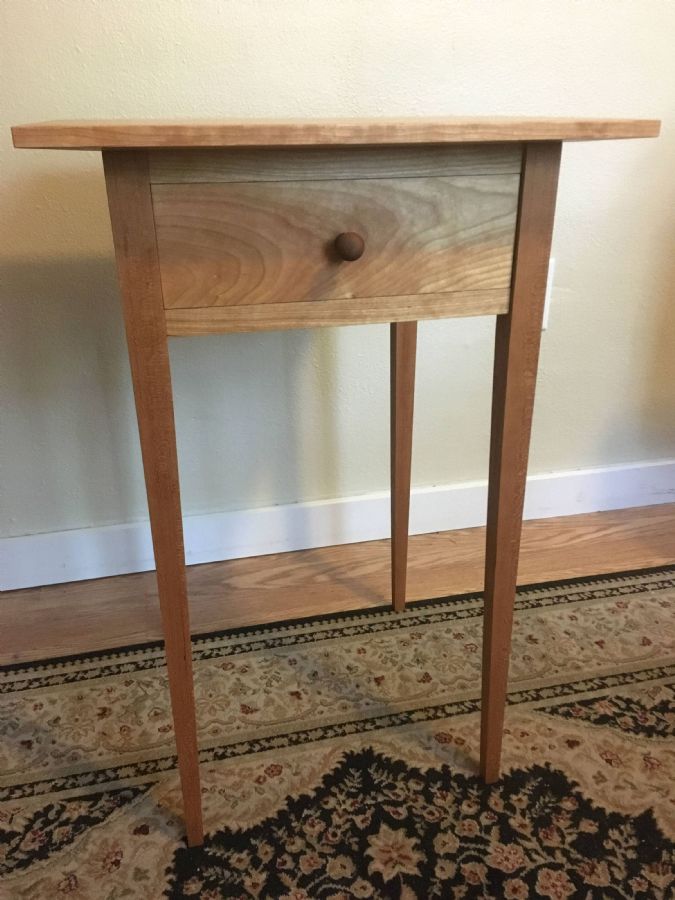


All that's left to do is clean the shop, resharpen the tools and get ready for the next project. Time to have a beer and contemplate the great woodworking mystery; "How did I turn I cubic foot of wood into a table and 3 cubic feet of shavings...... That's like totally more wood that I started with dude. 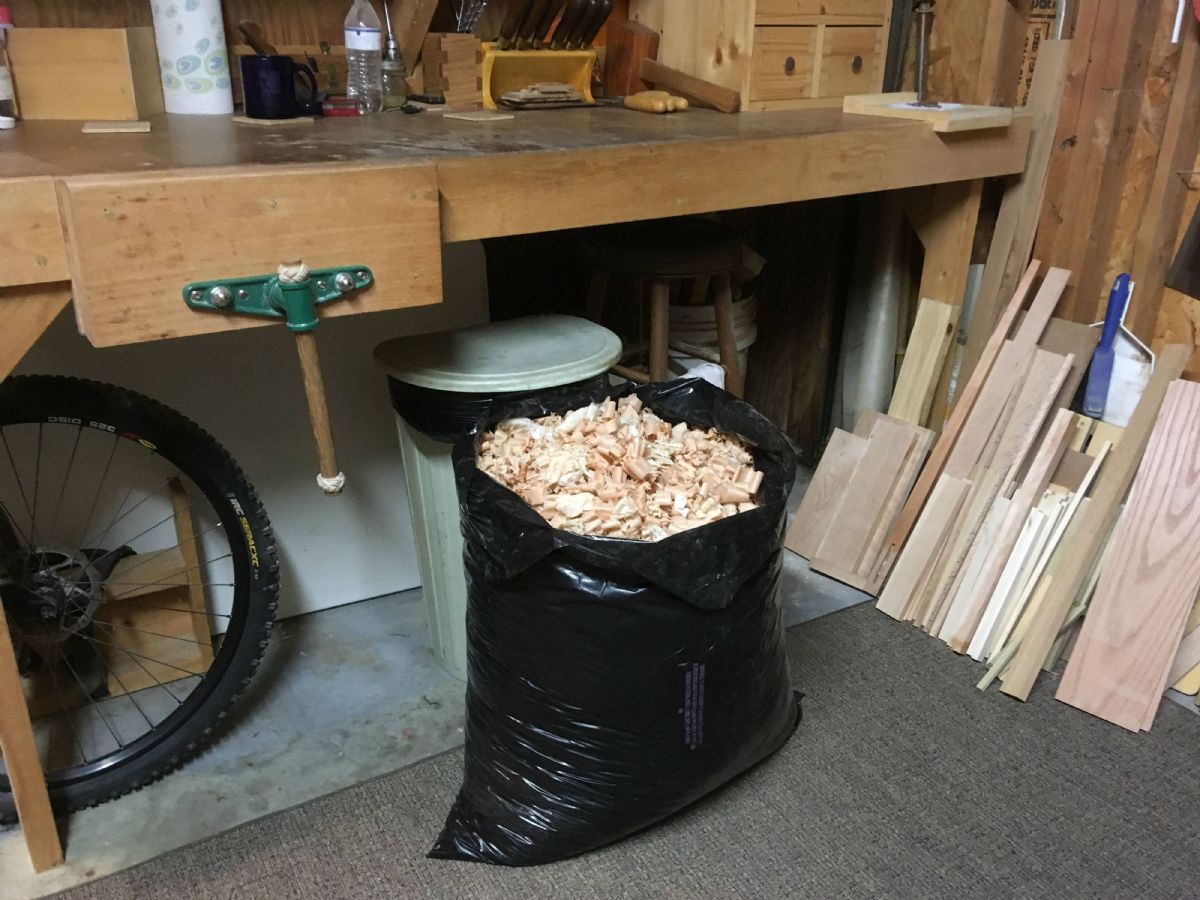
|
|
|
|
[#1]
Nice! Very Nice! You have skills sir. Very well done. AND, yes, you ARE a wood worker.
As someone who builds furniture and boats I am impressed. I thought this may be another example of someone just nailing lumber together ....... was very pleasantly surprised. |
|
|
|
[#2]
Now that is beautiful. I am envious of your handy work.
|
|
|
|
[#3]
Quoted:
Nice! Very Nice! You have skills sir. Very well done. AND, yes, you ARE a wood worker. As someone who builds furniture and boats I am impressed. I thought this may be another example of someone just nailing lumber together ....... was very pleasantly surprised. Maybe Santa will bring me one of those kreg jigs next year.
|
|
|
|
[#4]
You are a woodworker and a comedian
Nice job.
|
|
|
|
[#5]

|
|
|
|
[#6]
|
|
|
|
[#7]
Quoted:
Thanks. Maybe Santa will bring me one of those kreg jigs next year. |
|
|
|
[#8]
Quoted:
How I envision OP.... https://www.AR15.Com/media/mediaFiles/162439/wpt_1396630498-401143.JPG ETA: Very impressive op! |
|
|
|
[#9]
Impressive work
I couln't do that, ever |
|
|
|
[#10]
Very nice!
|
|
|
|
[#11]
The table is much nicer than your false modesty
|
|
|
|
[#12]
Nice work, you have skills.
|
|
|
|
[#13]
Too many hand tools. You should have giant jigs and routers everywhere to make real furniture.
In all seriousness, great post. Nice use of hand tools and a demonstration of how they can be as or more accurate and efficient than power tools for applications like this. Your chisel and saw work is very nice. |
|
|
|
[#14]
How long did that take? Wow
|
|
|
|
[#15]
I was expecting the typical Arfcommer reloading bench or shed debacle, got out the beer and popcorn and prepared myself for a good laugh, and instead I find some really fine work and super finished product.
|
|
|
|
[#16]
Nice work, sir !
|
|
|
|
[#17]
Holy moly.
I feel accomplished when I build an IKEA Billy bookshelf.
|
|
|
|
[#18]
Woodworker (professional) and Tool and die maker here. Lots respect for your skills and patience. Beautifully done.
|
|
|
|
[#19]
Nice joints. Seriously, that's pretty cool.
|
|
|
|
[#20]
Wow! A tip o' the hat to you, good sir! Not only for the beauty of your finished product, but for doing it all the old way. GREAT job!
|
|
|
|
[#21]
Skillz.
You have them. I have a Planer and Jointer for that shit, and am looking to get a mortising machine. And I still probably couldn't make it look that good. |
|
|
|
[#22]
Thanks OP. Very nice. My compliments.
|
|
|
|
[#23]
Do you use the shavings in barbequeing or smoking?
|
|
|
|
[#24]
Very nice work!
Semper Fi |
|
|
|
[#25]
that is very nice
thanks for sharing |
|
|
|
[#26]
Nice work!
|
|
|
|
[#27]
That definitely does not suck.
|
|
|
|
[#28]
Extremely nice craftsmanship OP...

|
|
|
|
[#29]
Looks good to me. You don't have to be an artisan with wood, you just have to be patient.
|
|
|
|
[#30]
but can you build a rocking chair?
FYI I just watched the Patriot |
|
|
|
[#31]
My son is a drug addict.
Your parents won the lotto. |
|
|
|
[#32]
And I'll say my Veritas saws are the awesome!
What kind of planes do you have My main ones are Wood River. I have an old Boston from the early 20th century that I want to restore, and a Harbor freight el cheapo that I reground into a scrub plane. |
|
|
|
[#33]
Nice work Max.
There are those who assemble, and there are those who build. I could compare your work to the statement of my friend who said 1911s built today are assembled, while those who built 1911s 100 years ago were craftsmen. Thank you for giving a visual Christmas gift today and I hope your parents enjoy it for many years. |
|
|
|
[#34]
You got skills
|
|
|
|
[#35]
I would say you are more than a woodworker. It takes a craftsman to use hand tools with the patience and skill that you have shown in this table. Awesome job, and beautiful table! The quartersawn grain in that top just pops.
BTW, if you had used the Kreg jig you could've been done before lunch the first day.
|
|
|
|
[#36]
You have impressive skill!
I have no skill. |
|
|
|
[#37]
Great work!
|
|
|
|
[#38]
Wow, an impressive thread in GD
|
|
|
|
[#39]
very nice neat and clean work. and bonus for doing hand tool joinery.
|
|
|
|
[#40]
Your craftsmanship reminds me of what I saw in the cabinetry shop in Colonial Williamsburg this past October.
Your’s is less ornate. But the dedication to the craft in on par with those pros. |
|
|
|
[#41]
Nice way to spend a few hours, OP.
Mad skills there! |
|
|
|
[#42]
How many hours did it take?
|
|
|
|
[#43]
Thanks everyone.
|
|
|
|
[#44]
Quoted:
How I envision OP.... https://www.AR15.Com/media/mediaFiles/162439/wpt_1396630498-401143.JPG ETA: Very impressive op! |
|
|
|
[#45]
Quoted: OH NO!! WHY!? Those are for people who don't have your skills. You don't need one.
|
|
|
|
[#46]
Very nice OP.
Danny |
|
|
|
[#47]
|
|
|
|
[#48]
Quoted:
Too many hand tools. You should have giant jigs and routers everywhere to make real furniture. In all seriousness, great post. Nice use of hand tools and a demonstration of how they can be as or more accurate and efficient than power tools for applications like this. Your chisel and saw work is very nice. |
|
|
|
[#49]
Quoted:
How long did that take? Wow |
|
|
|
[#50]
Quoted:
Woodworker (professional) and Tool and die maker here. Lots respect for your skills and patience. Beautifully done. |
|
|
 Win a FREE Membership!
Sign up for the ARFCOM weekly newsletter and be entered to win a free ARFCOM membership. One new winner* is announced every week!
You will receive an email every Friday morning featuring the latest chatter from the hottest topics, breaking news surrounding legislation, as well as exclusive deals only available to ARFCOM email subscribers.

AR15.COM is the world's largest firearm community and is a gathering place for firearm enthusiasts of all types.
From hunters and military members, to competition shooters and general firearm enthusiasts, we welcome anyone who values and respects the way of the firearm.

Subscribe to our monthly Newsletter to receive firearm news, product discounts from your favorite Industry Partners, and more.
Copyright © 1996-2024 AR15.COM LLC. All Rights Reserved.
Any use of this content without express written consent is prohibited.
AR15.Com reserves the right to overwrite or replace any affiliate, commercial, or monetizable links, posted by users, with our own.


