|
[#1]
I'm looking forward to your write-up.
|
|
|
|
[#2]
It definitely has the cool factor, neat gun.
|
|
|
|
[#4]
That looks very neat. Now is it going to be offered as a C&R, due to the age of the receivers? And how does that work for firearms that have a receiver 50 years or older, but need a re-work for import rules, such as being a pistol, and also (alas) not full auto?
Does ATF go with the C&R aspect as the receiver is older, or does the re-work reset the clock on the age of it? |
|
|
|
[#5]
Thes are considered newly manufactured firearms so no C&R.
|
|
|
|
[#7]
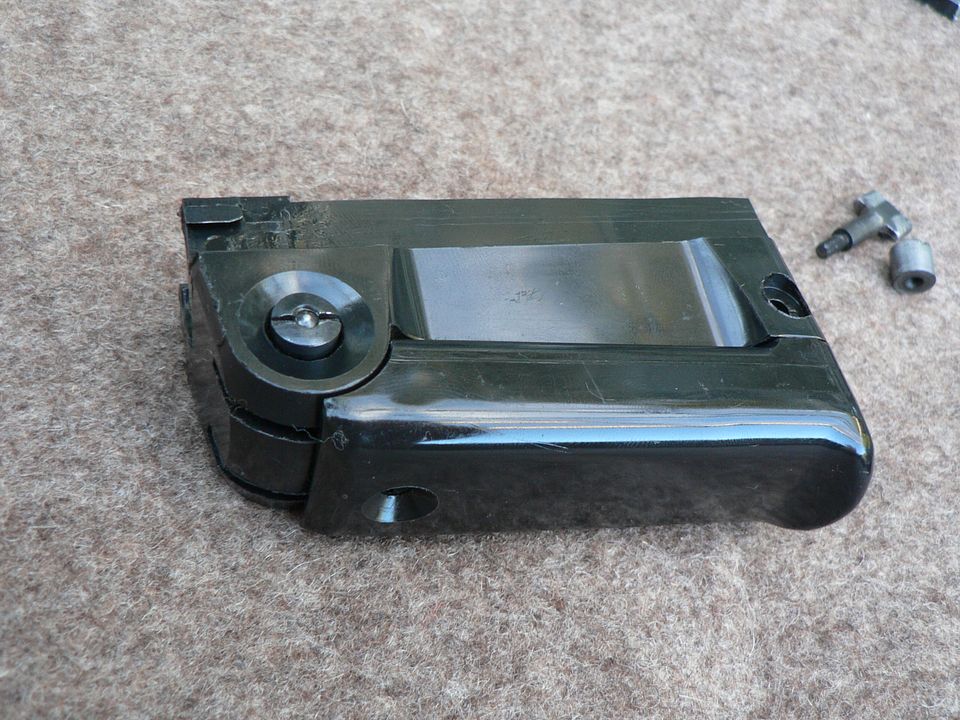
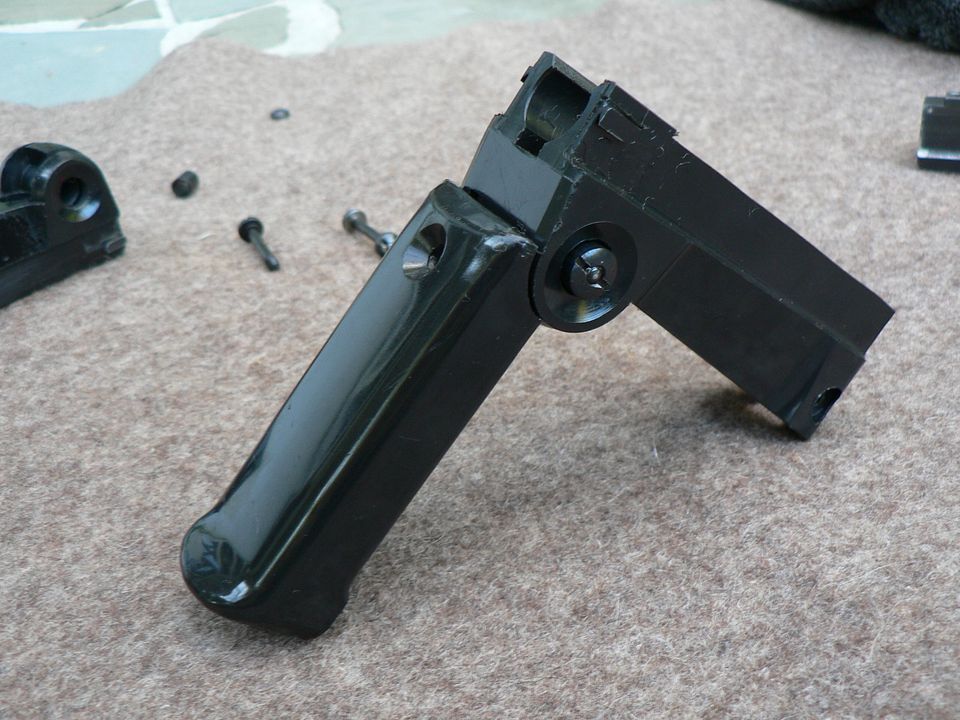
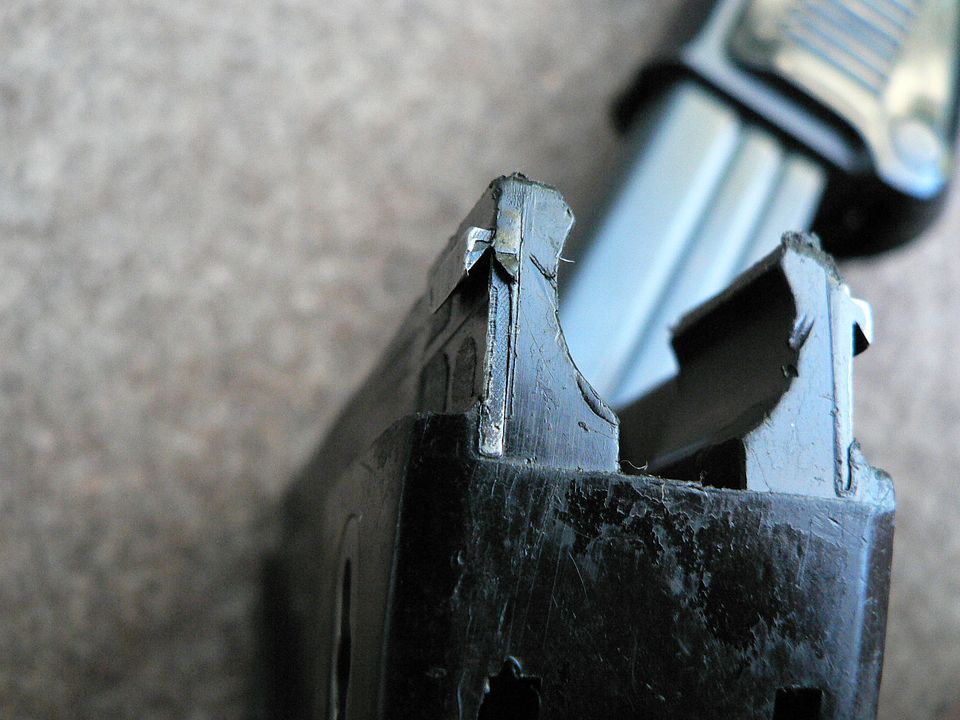
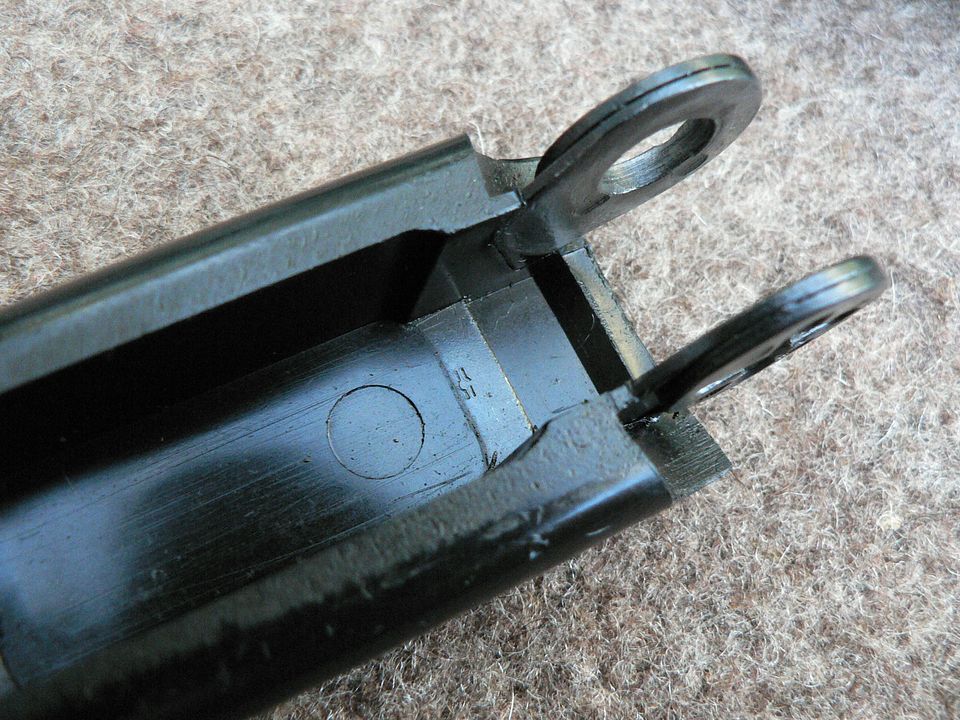
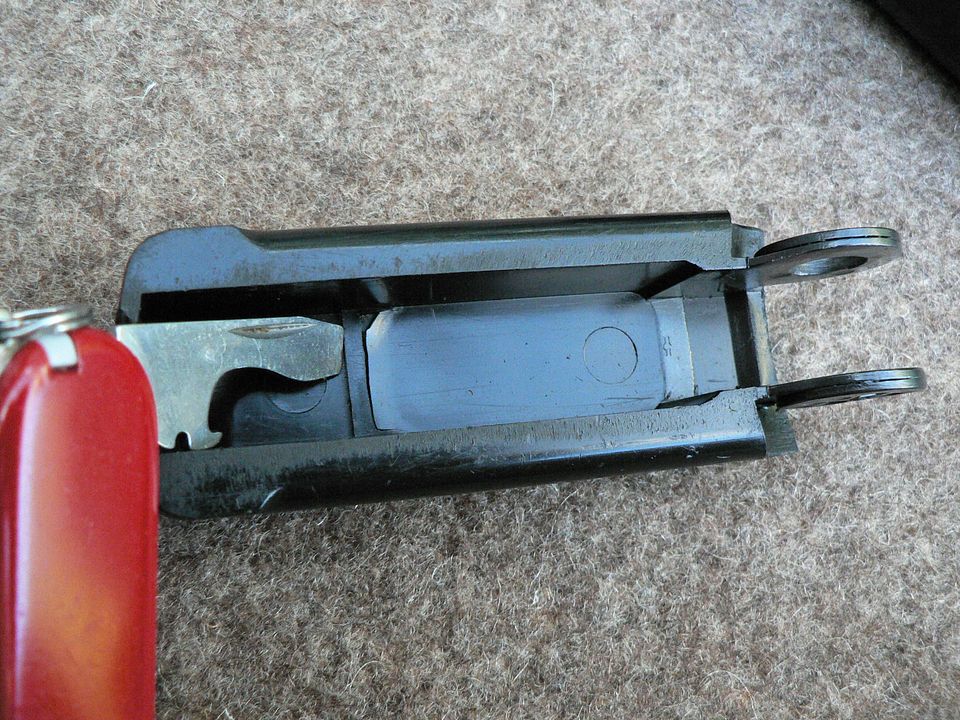
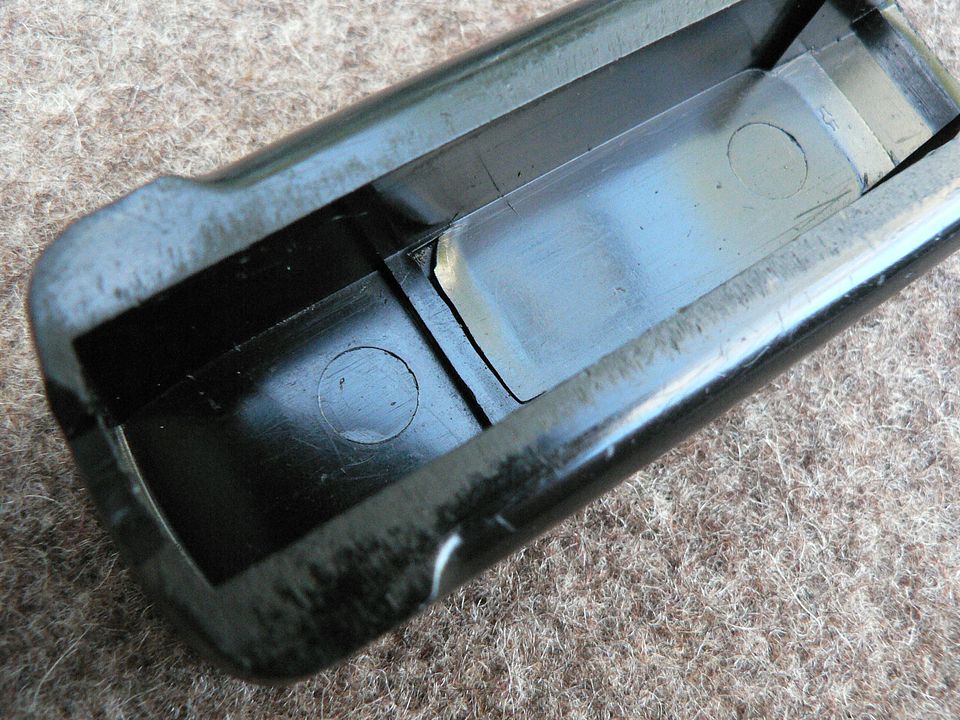
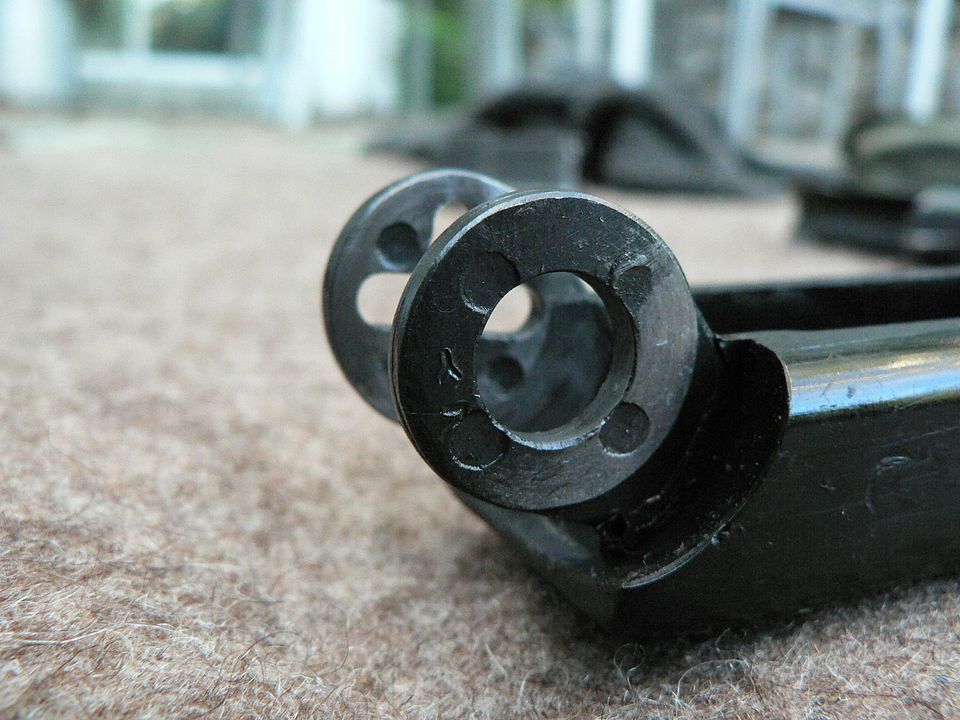
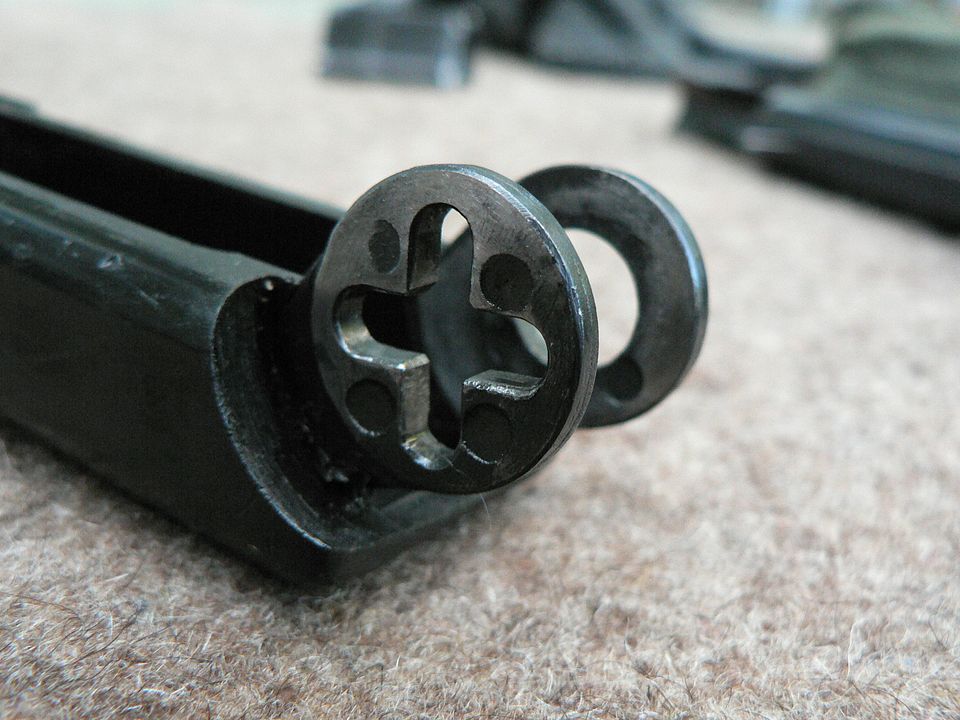
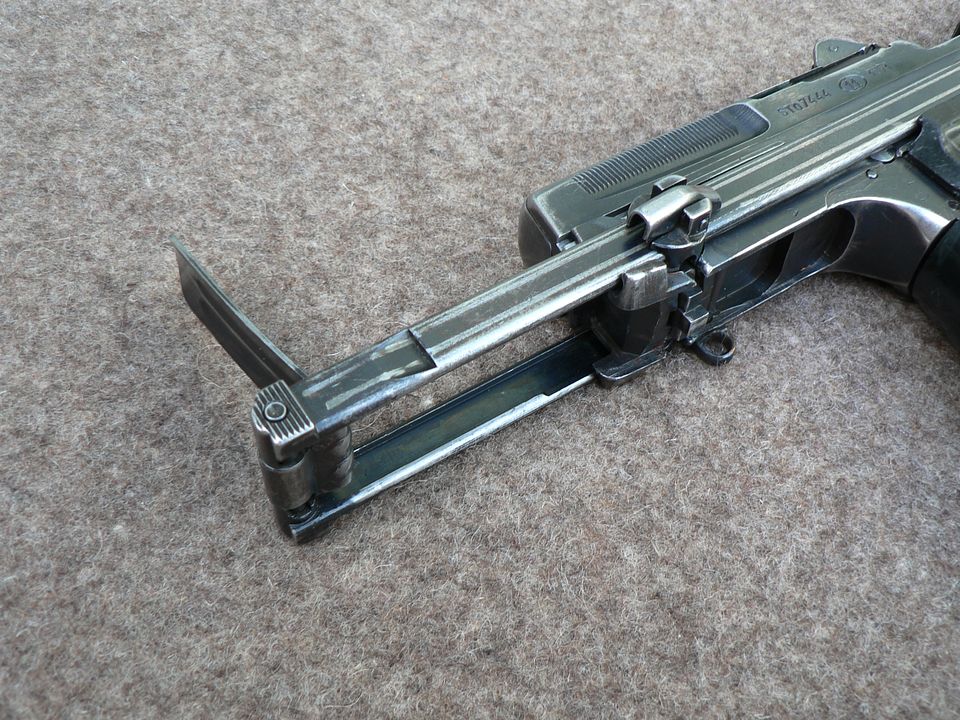
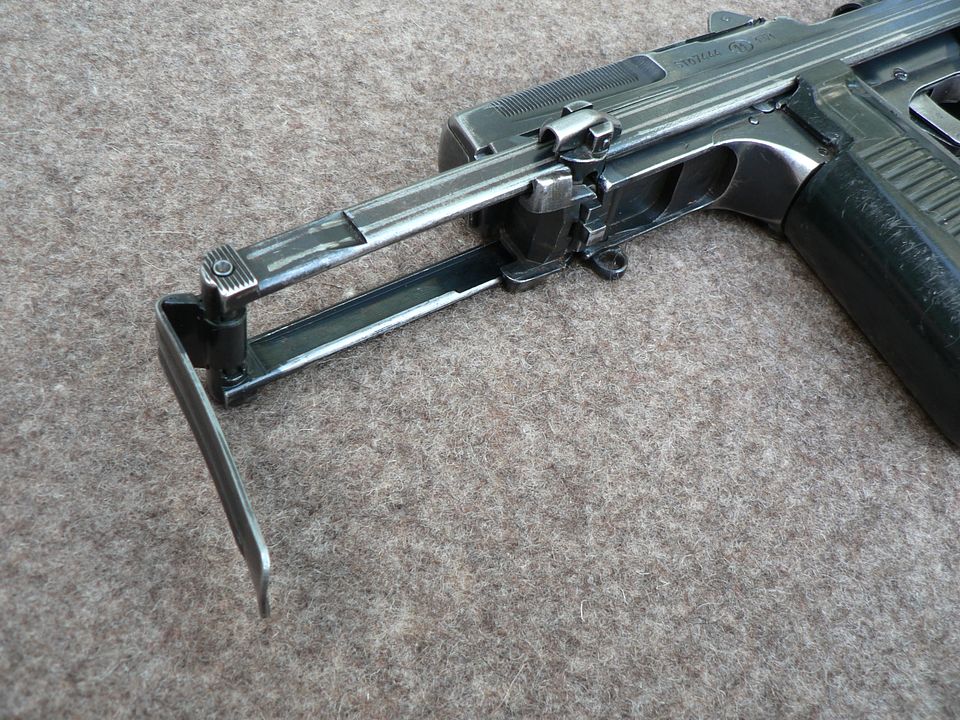
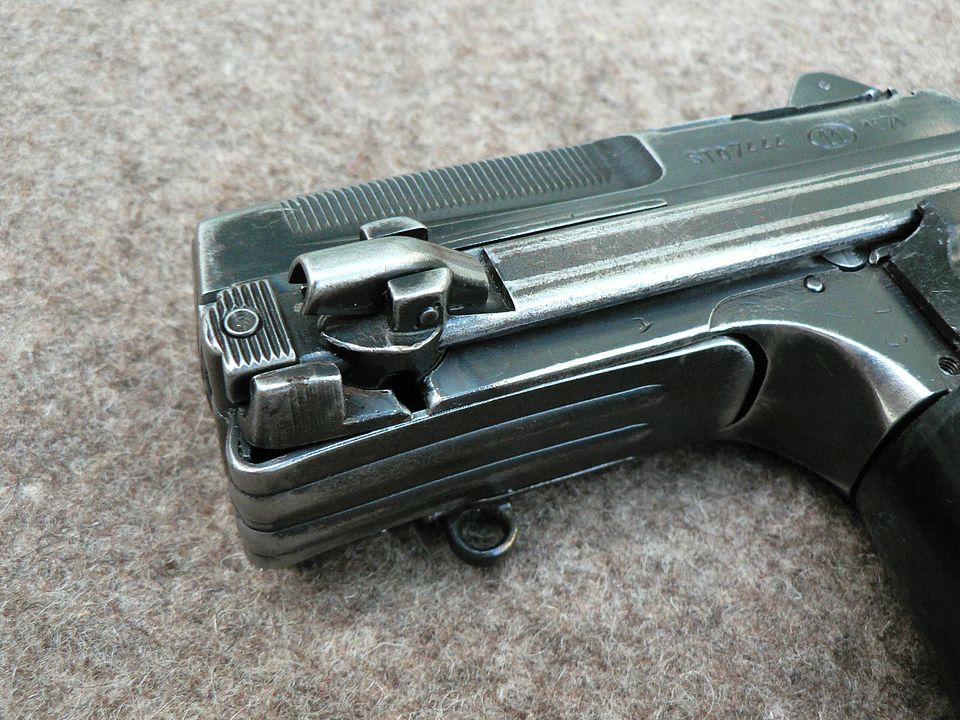
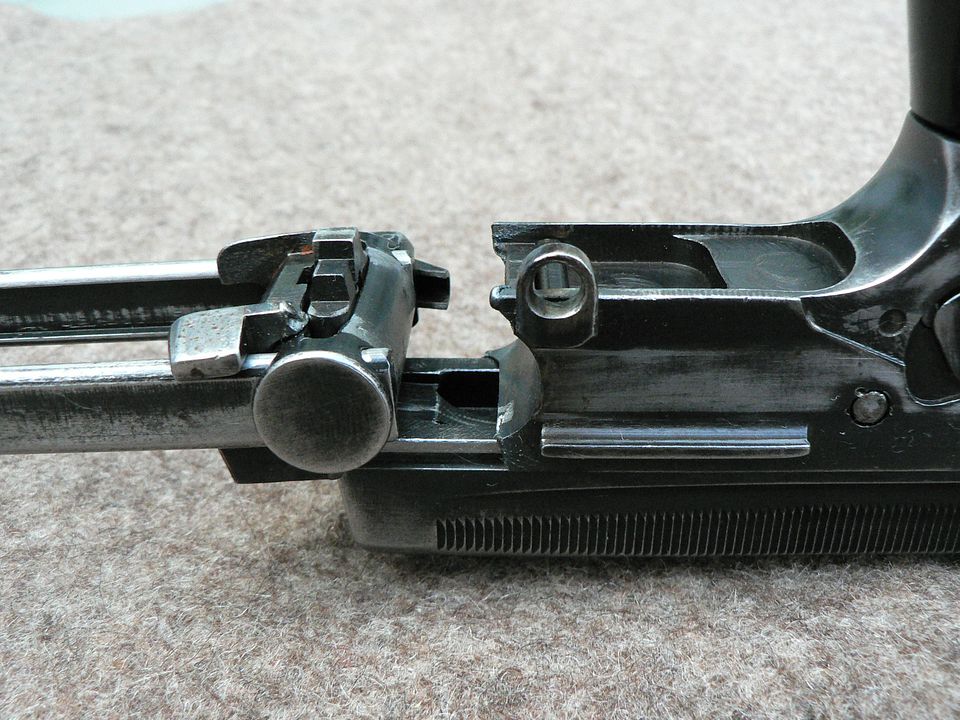
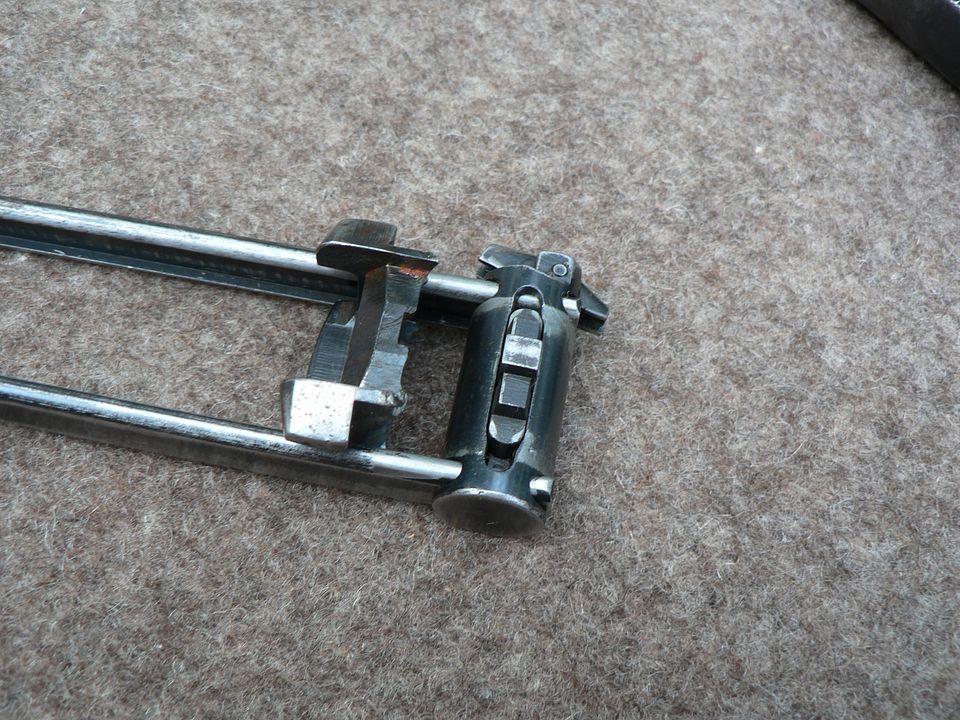
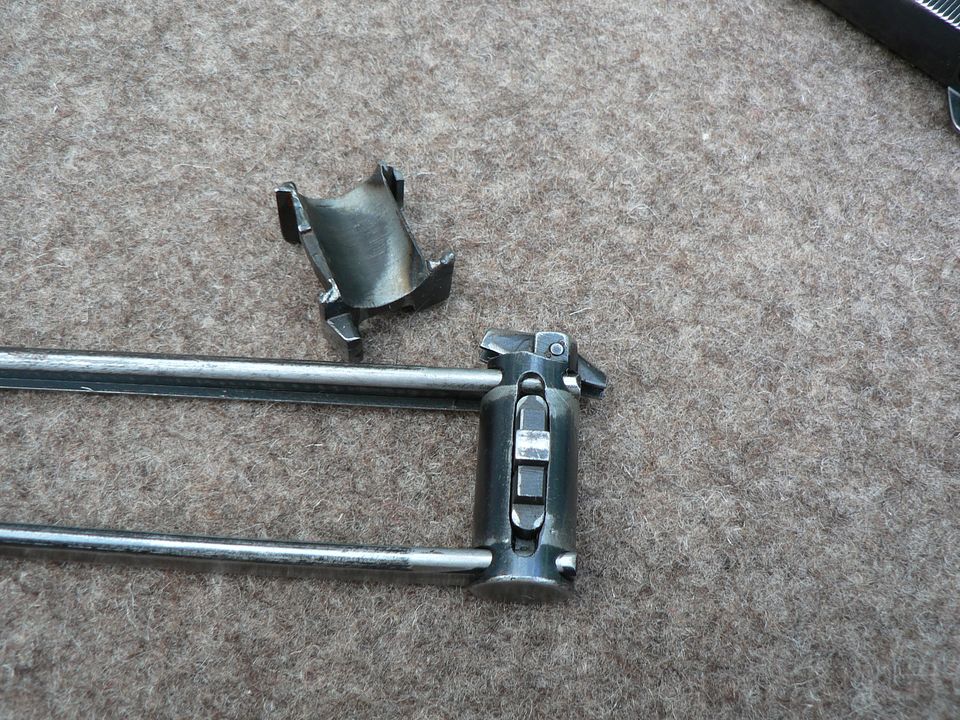
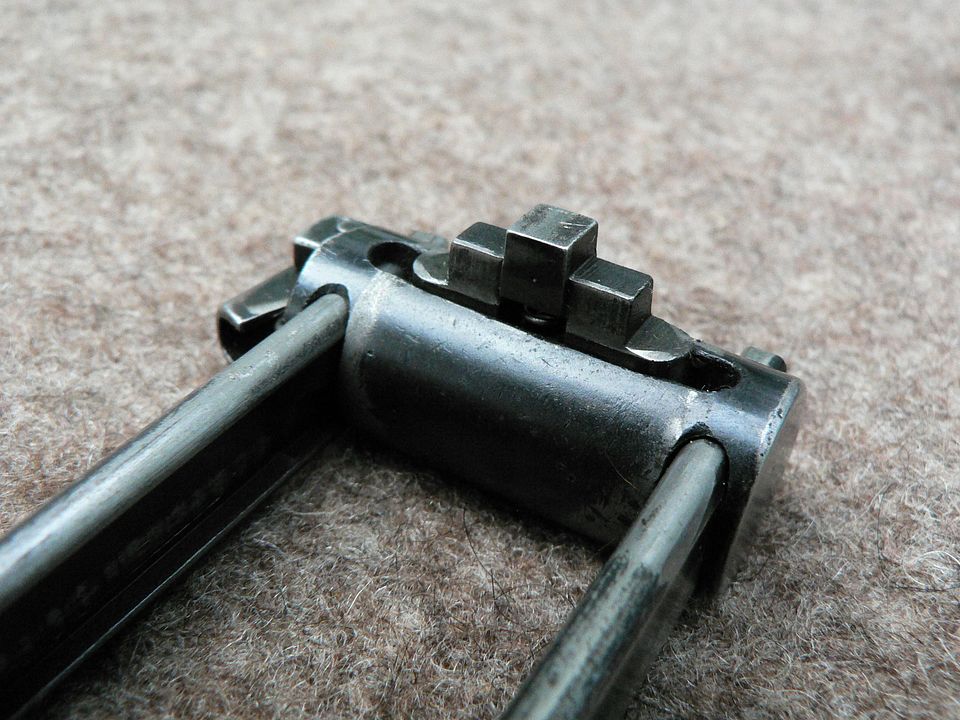
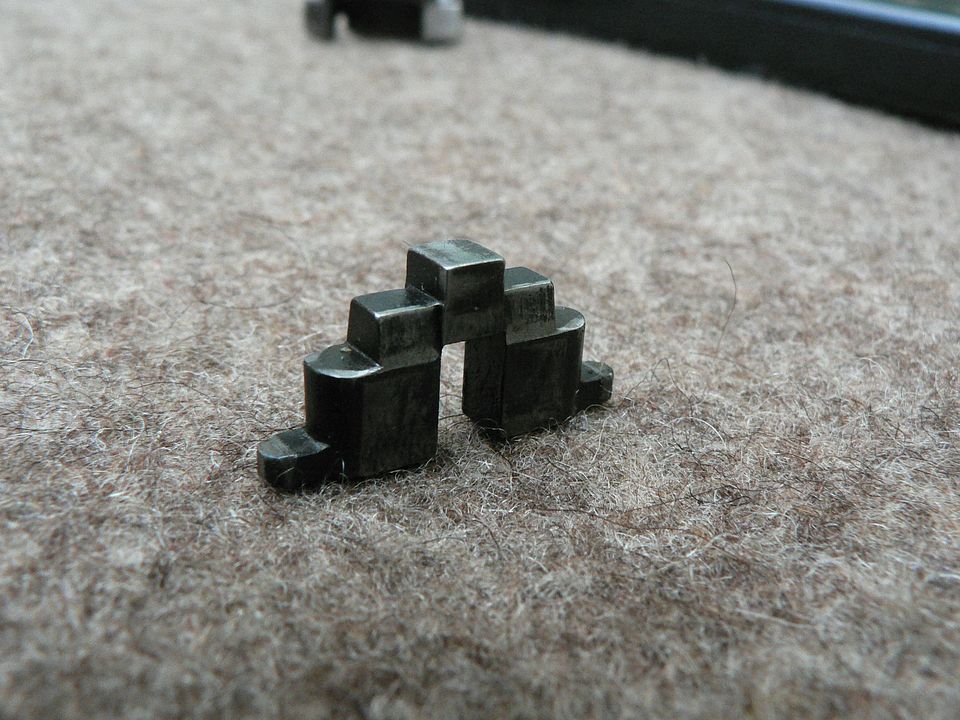
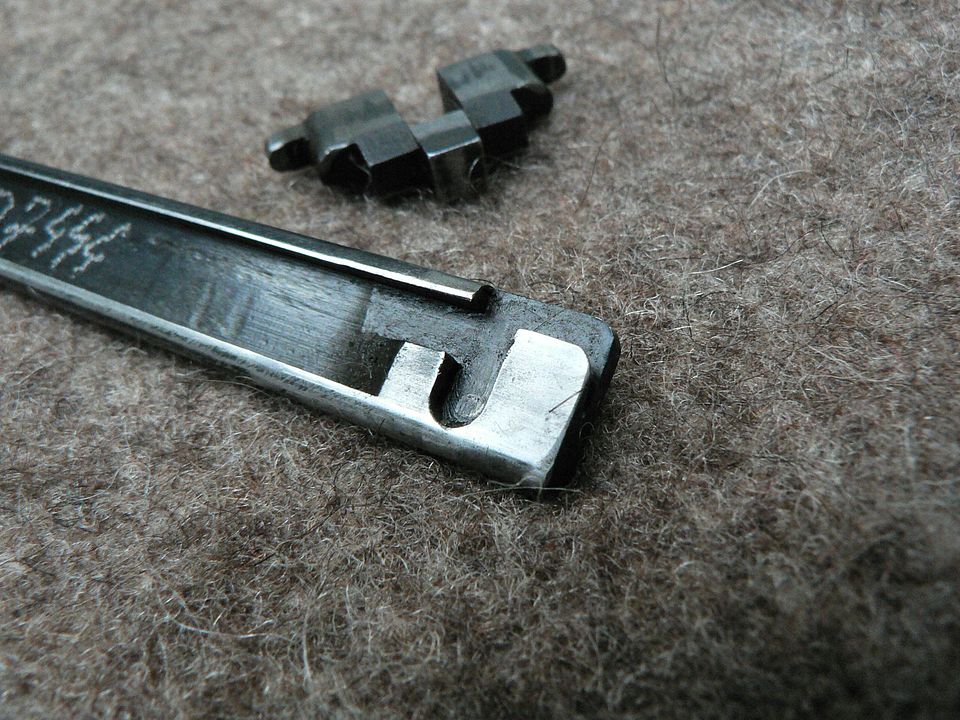
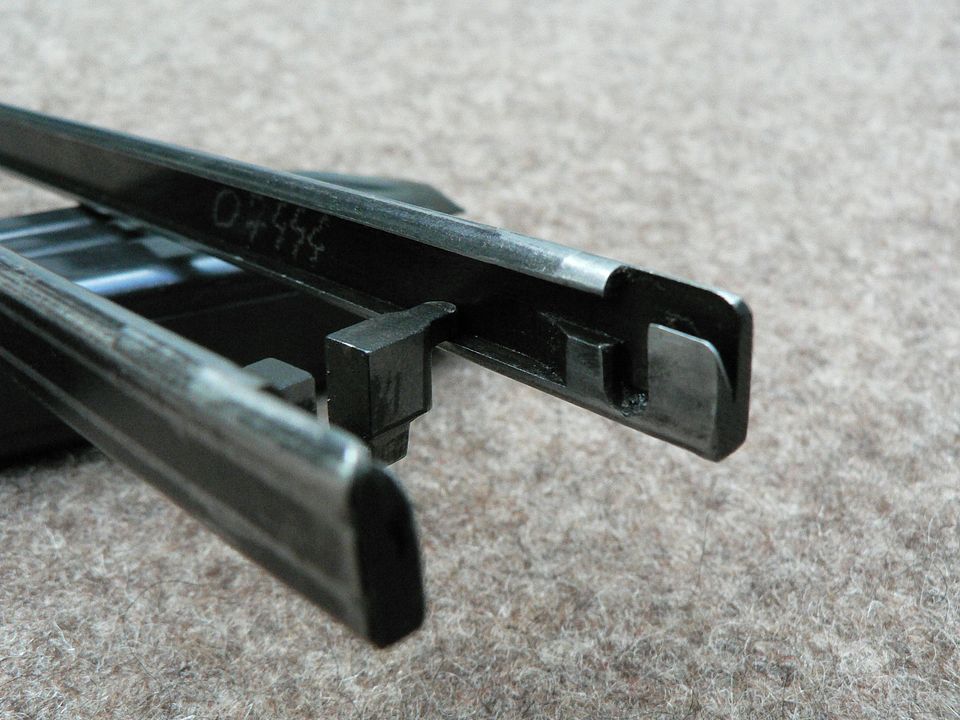
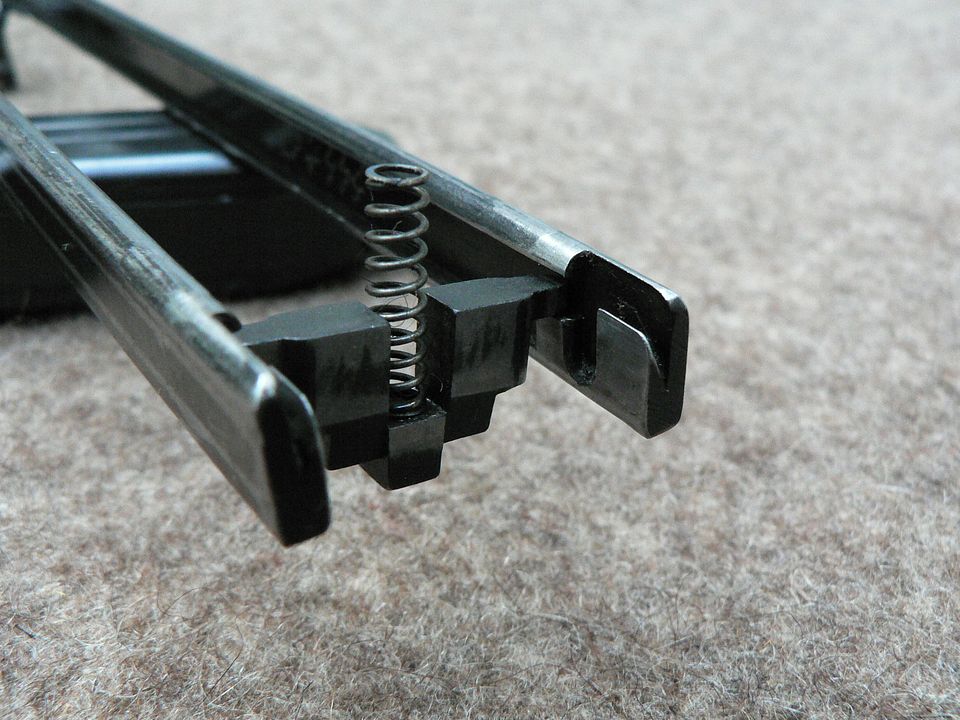
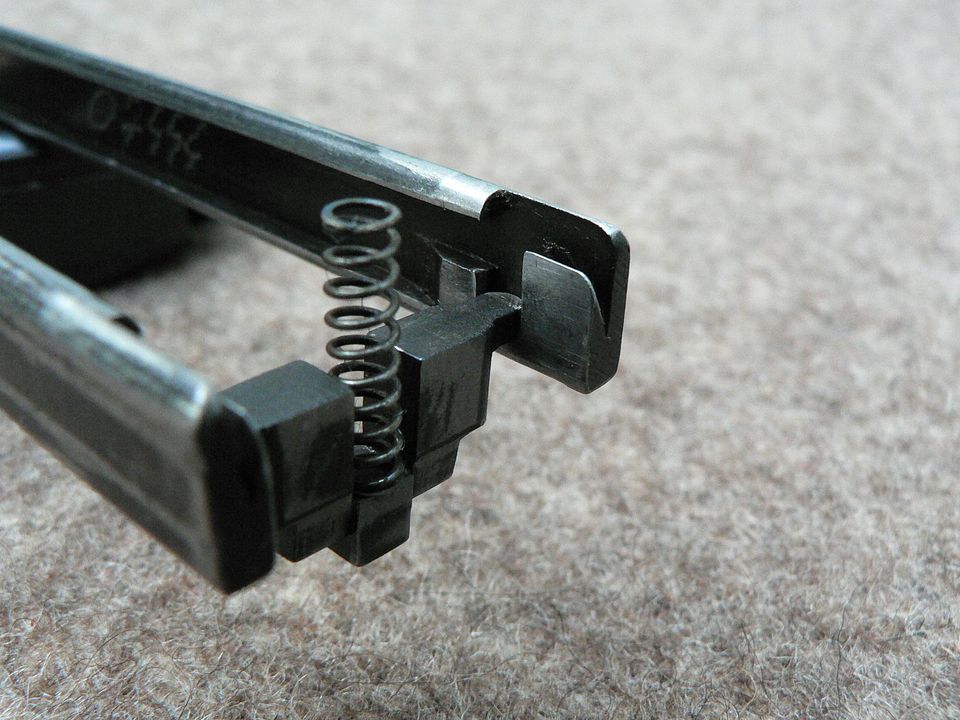
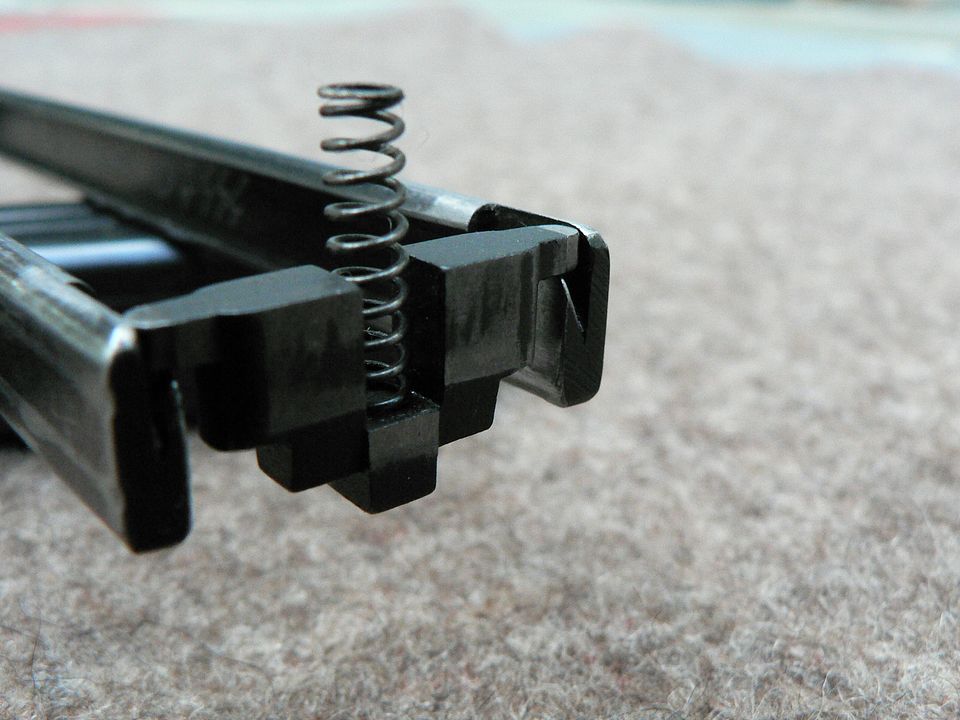
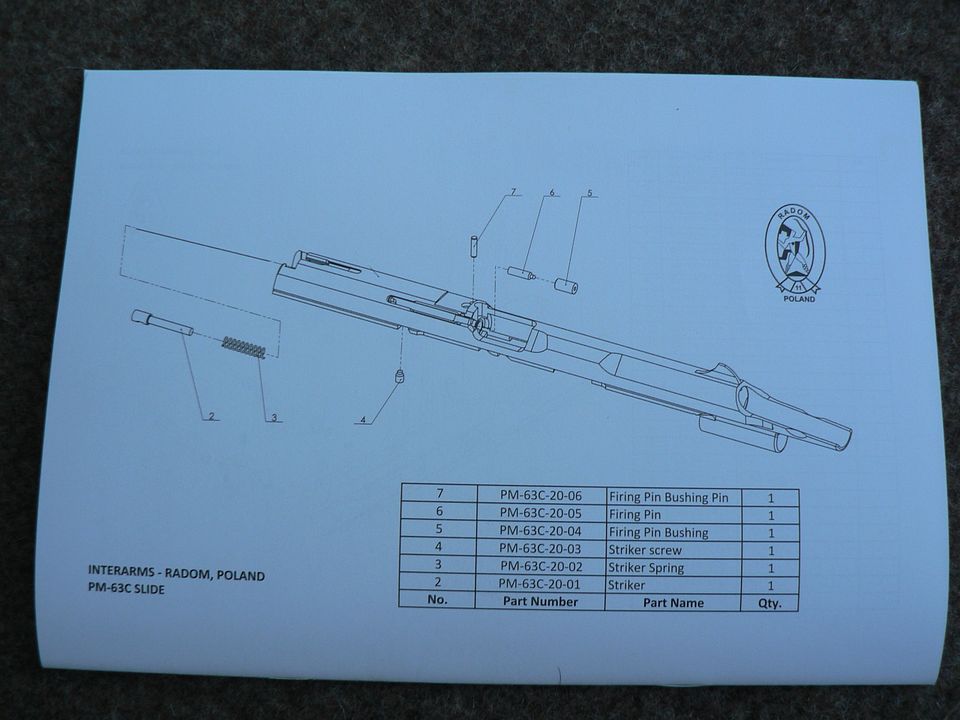
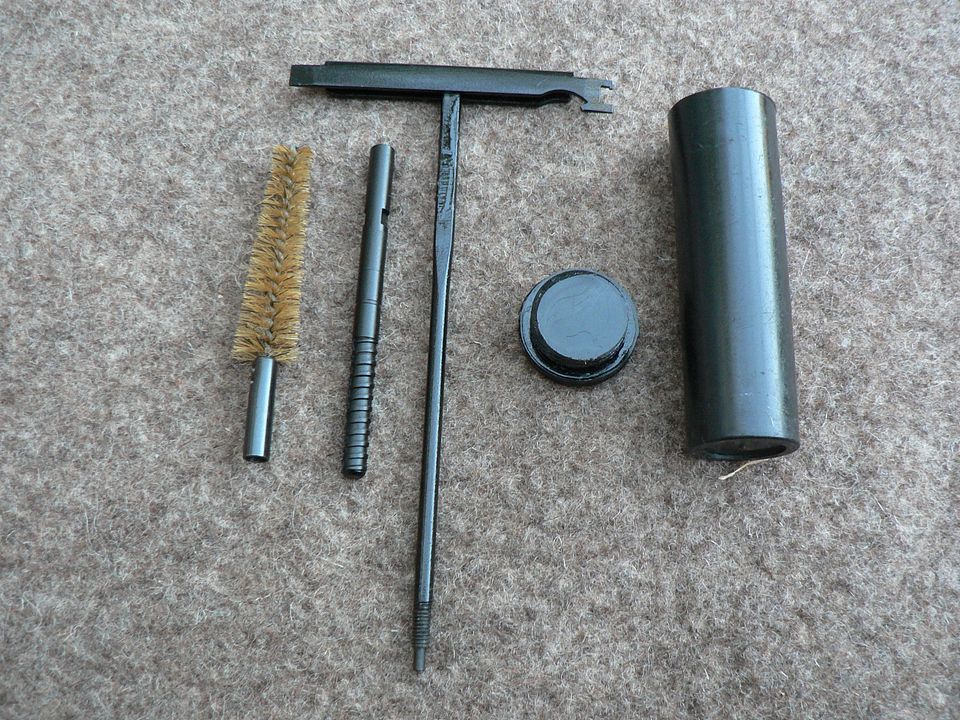
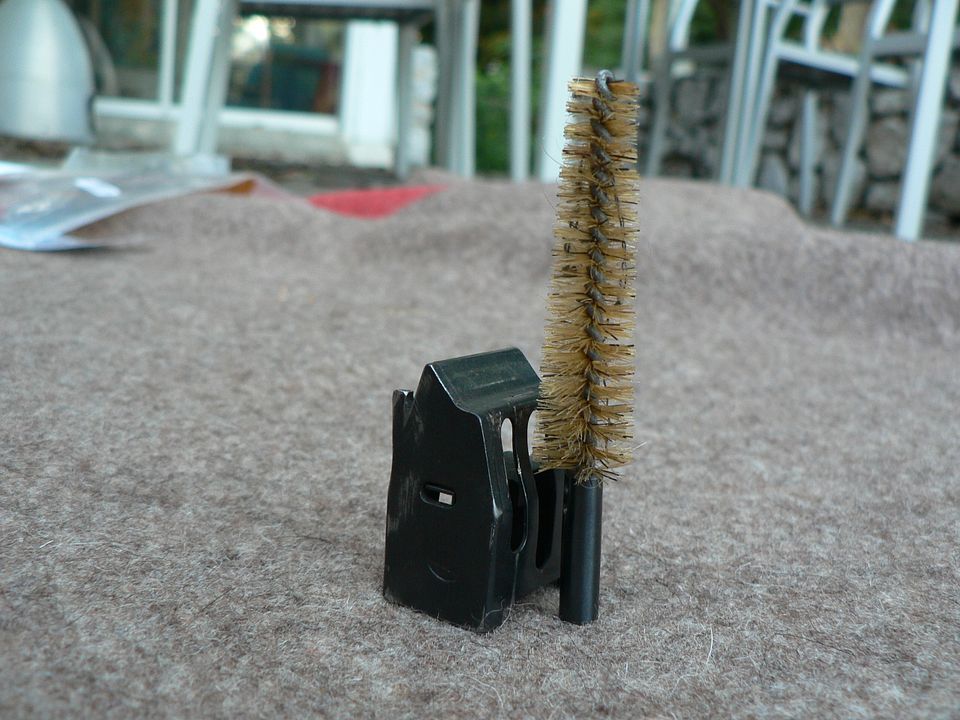
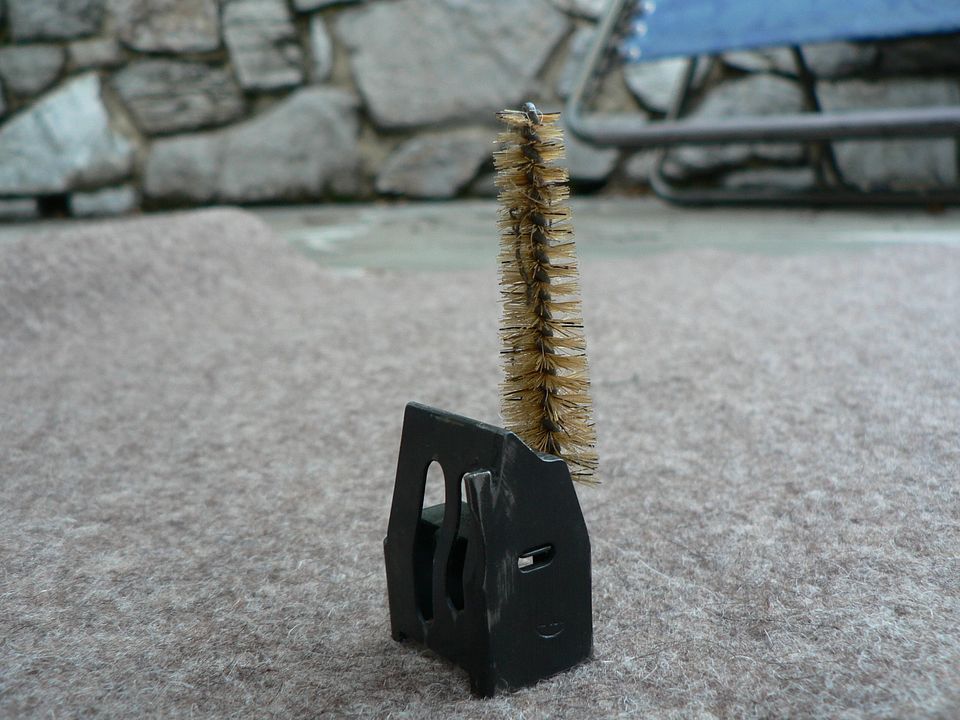
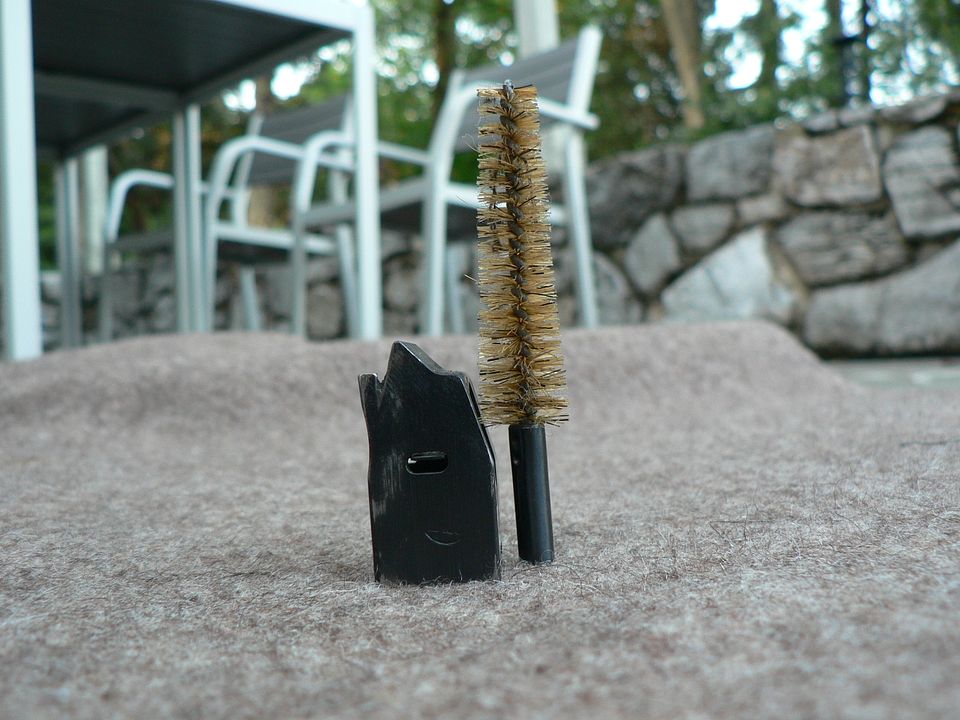
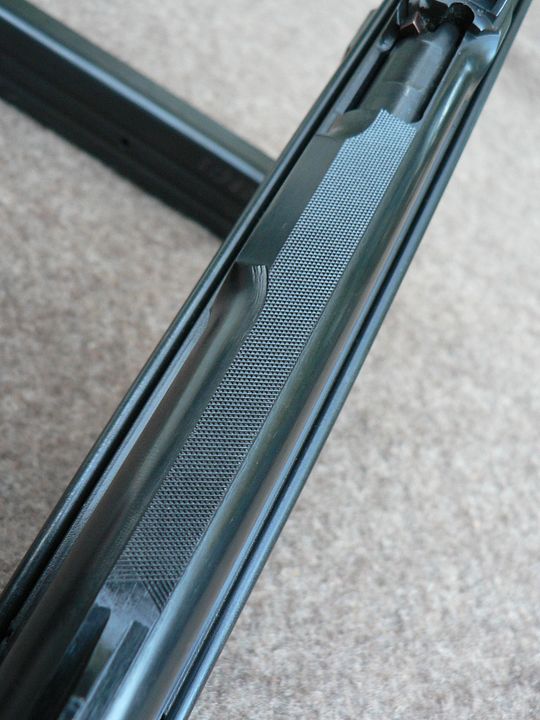
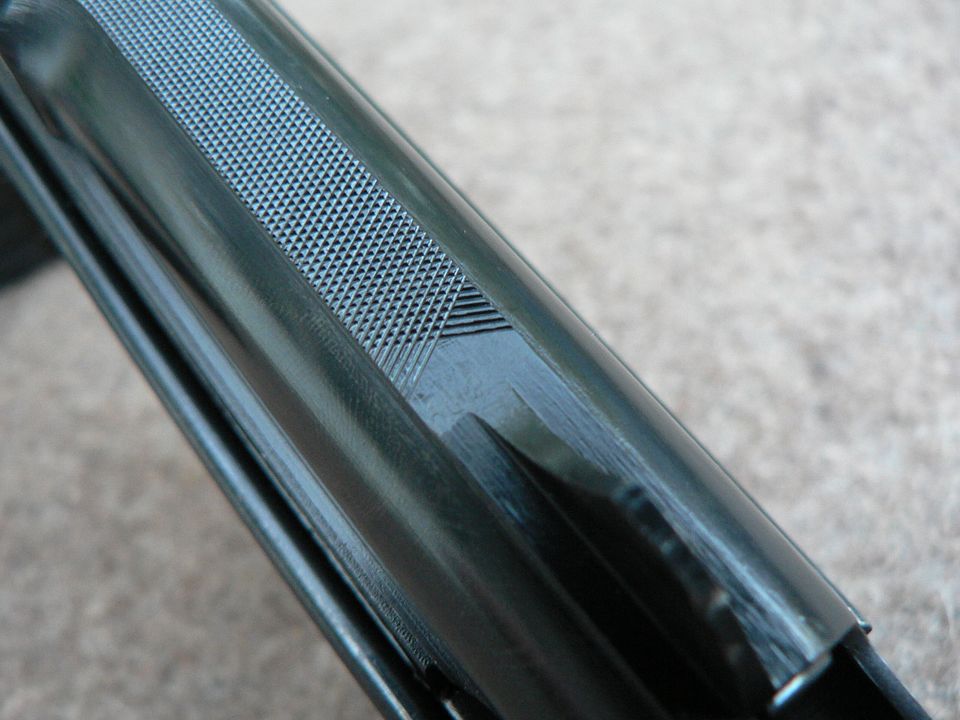
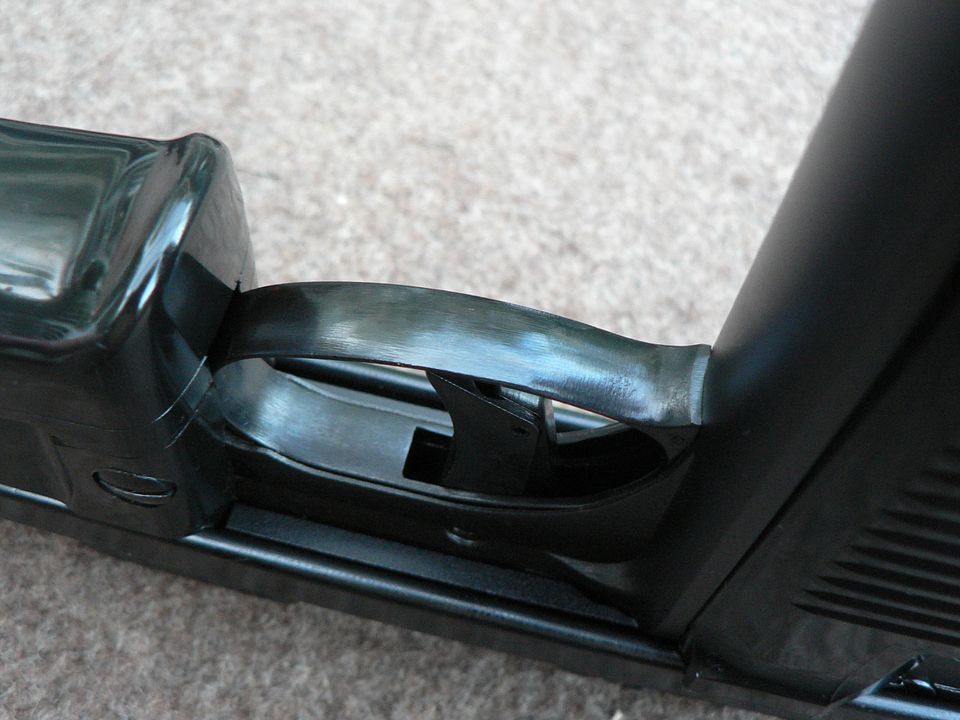
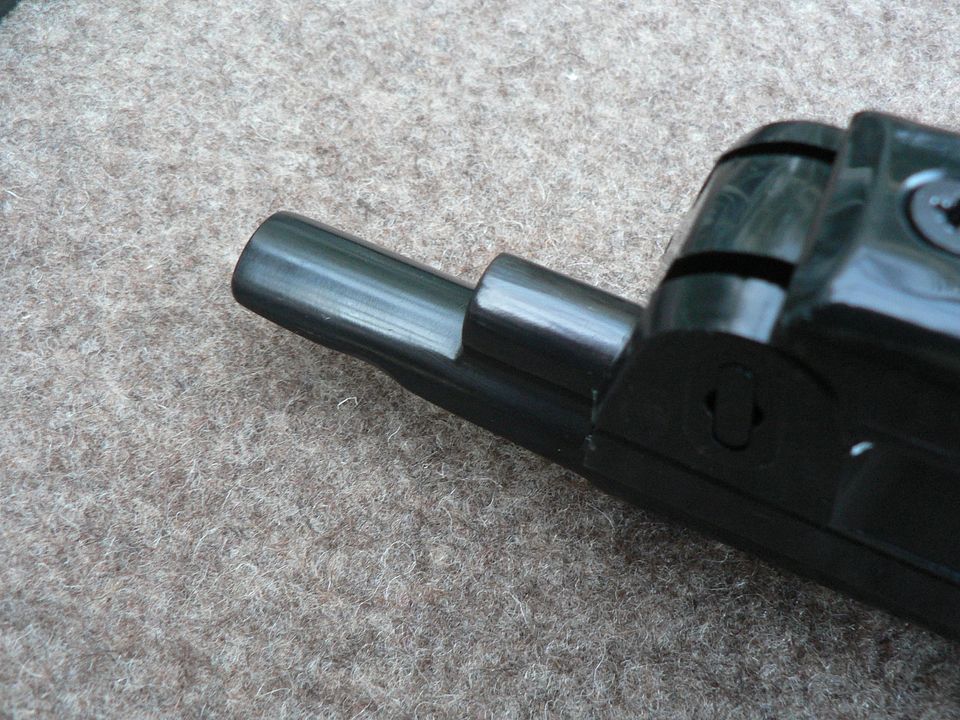
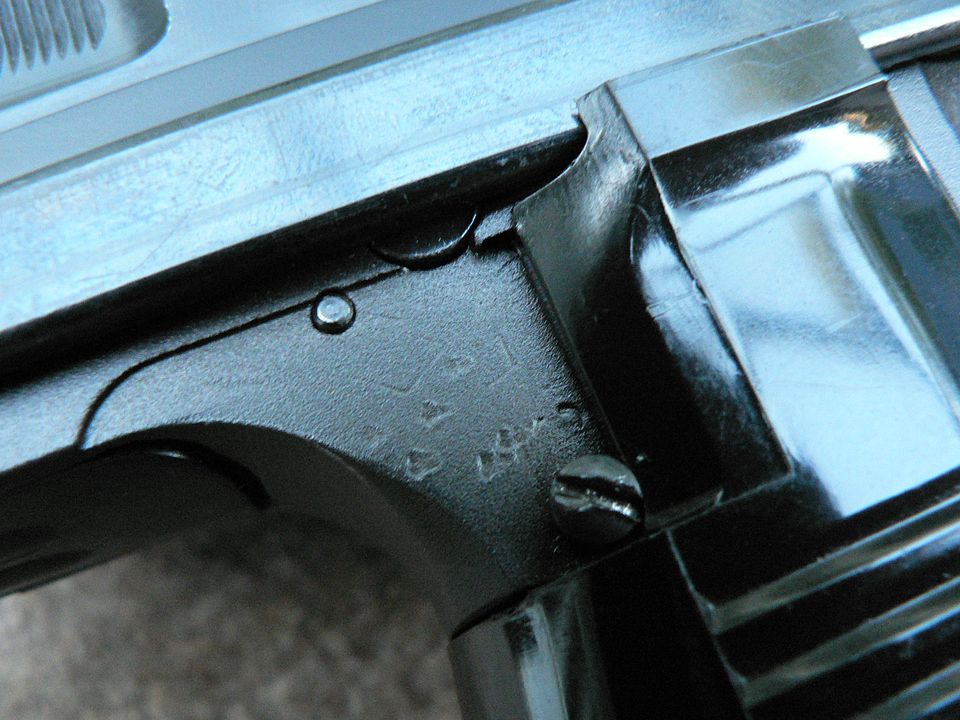
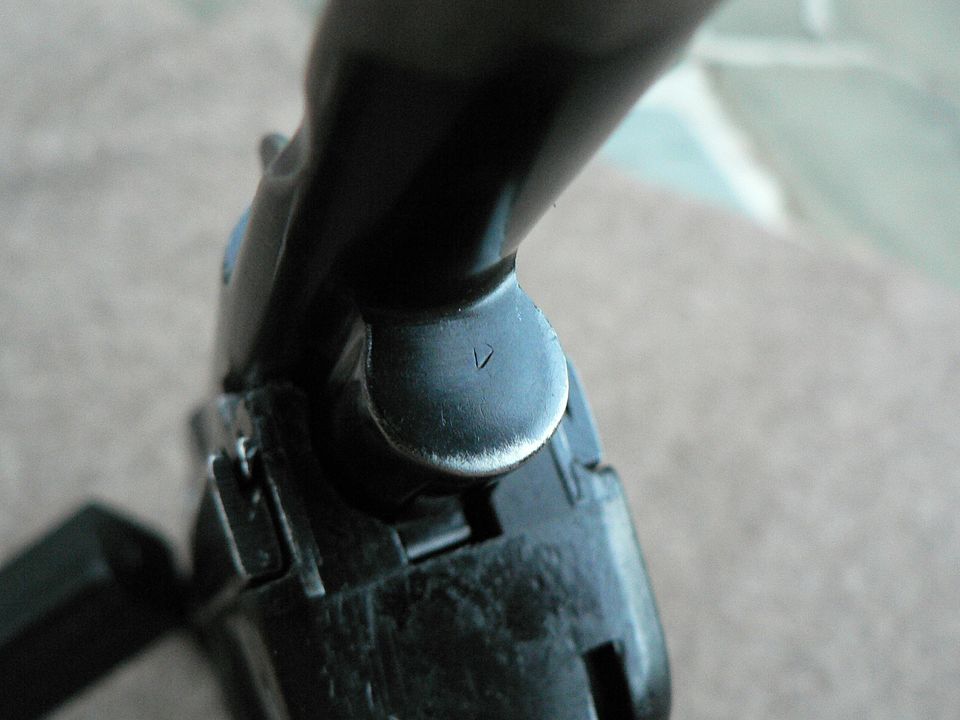
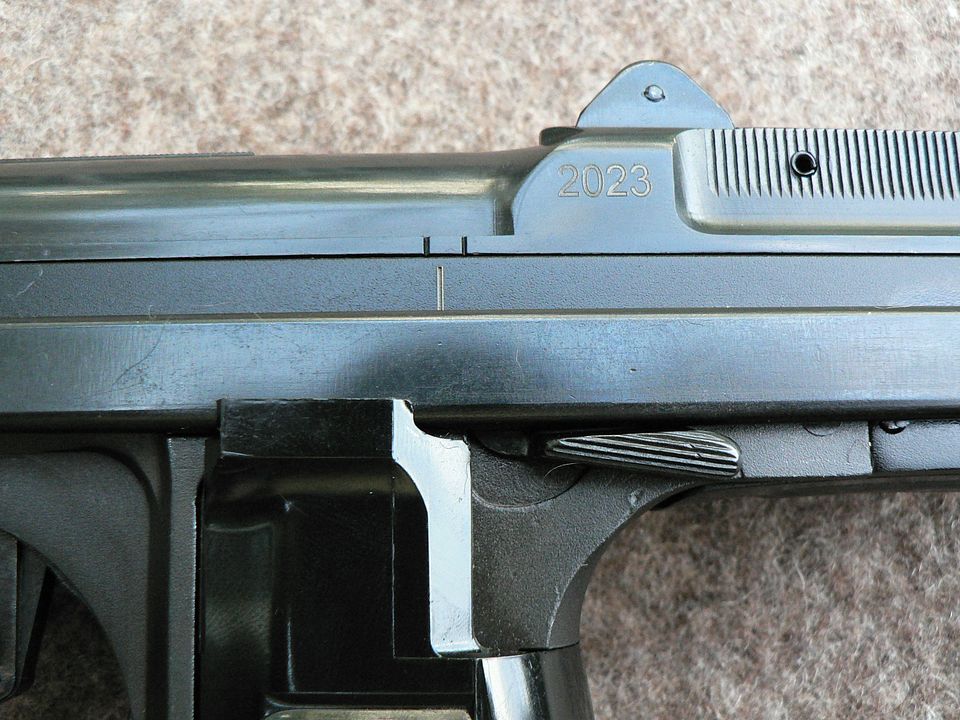
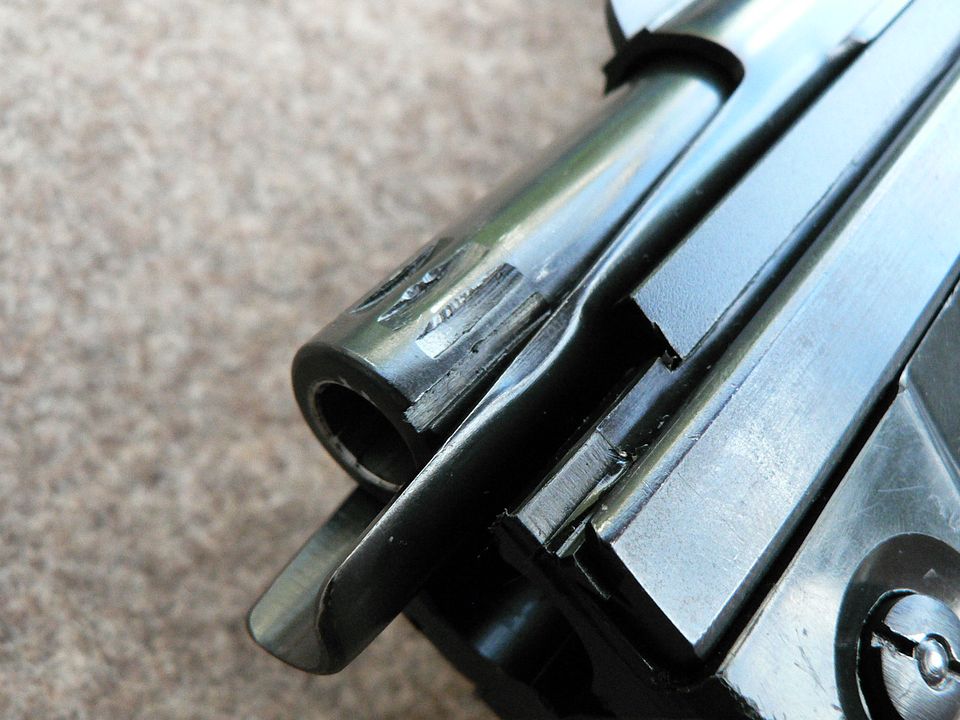
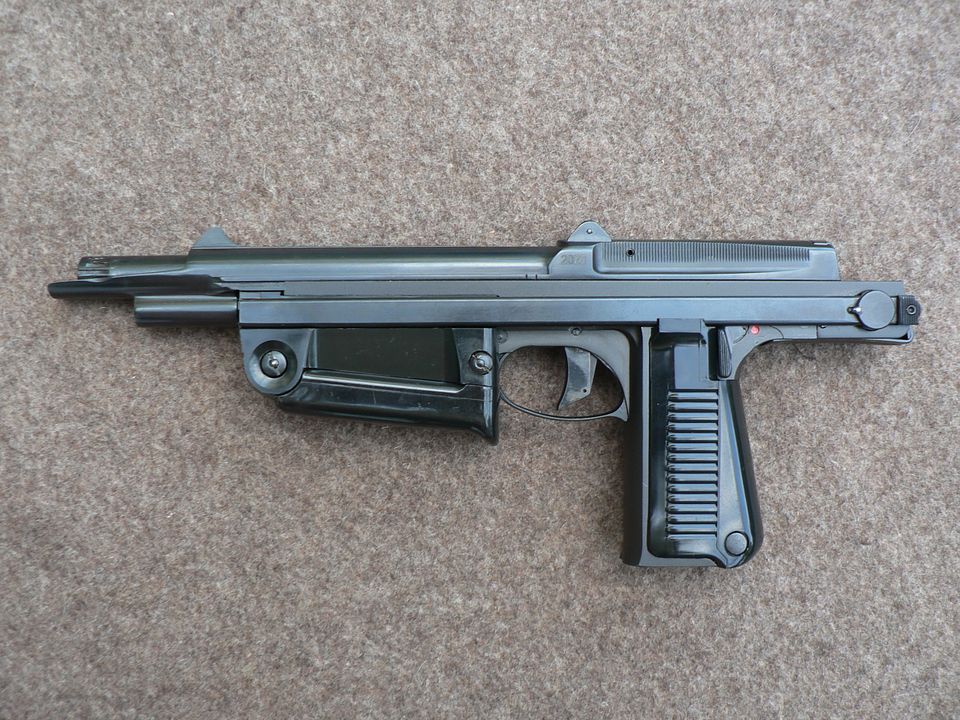
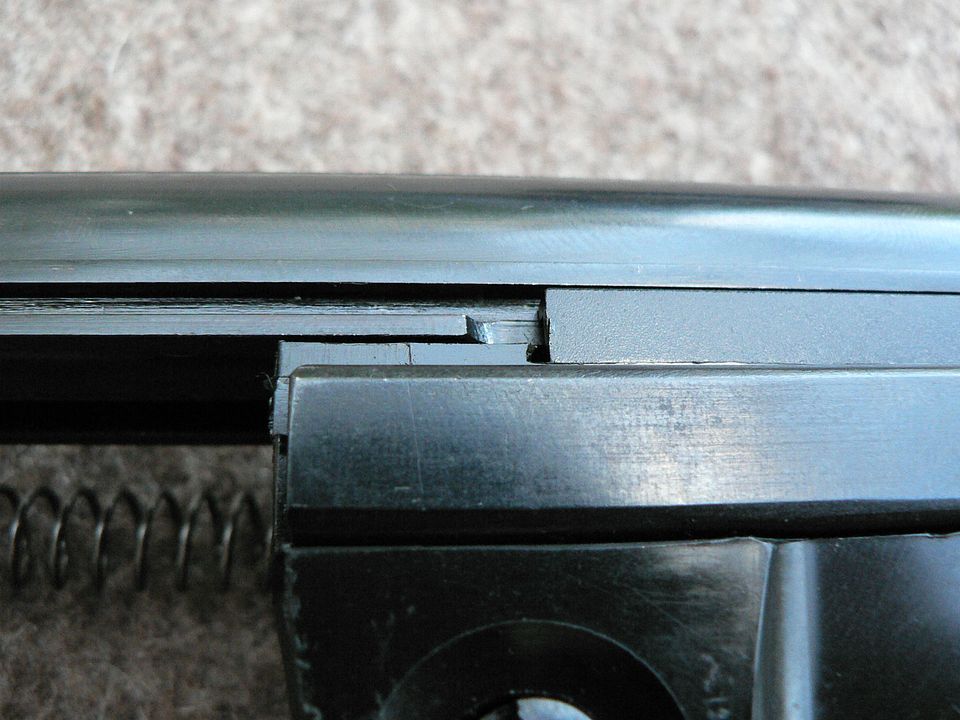
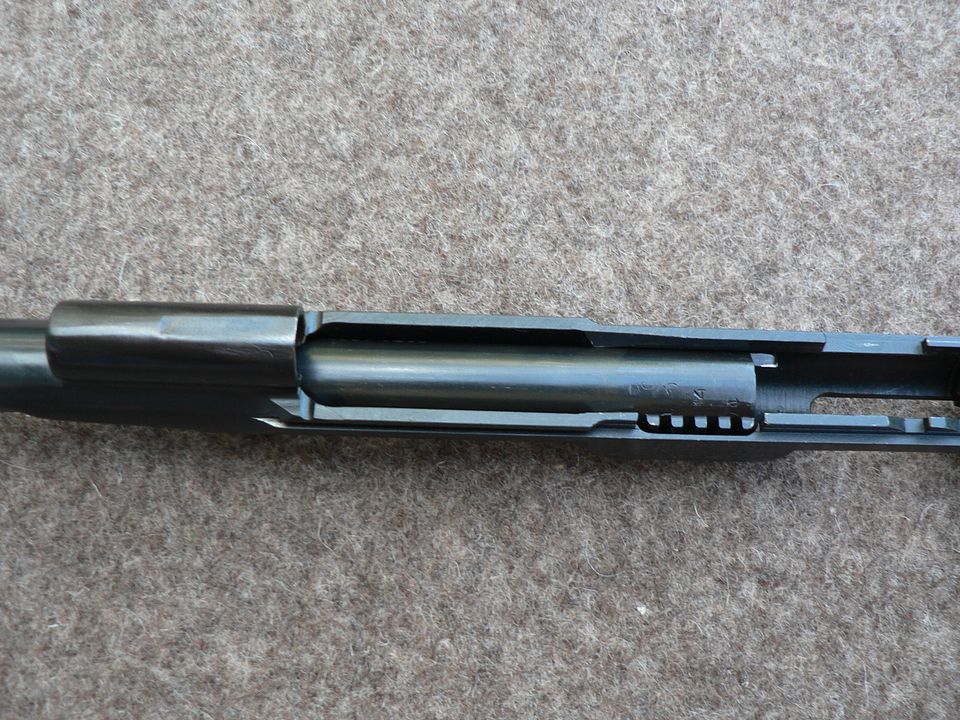
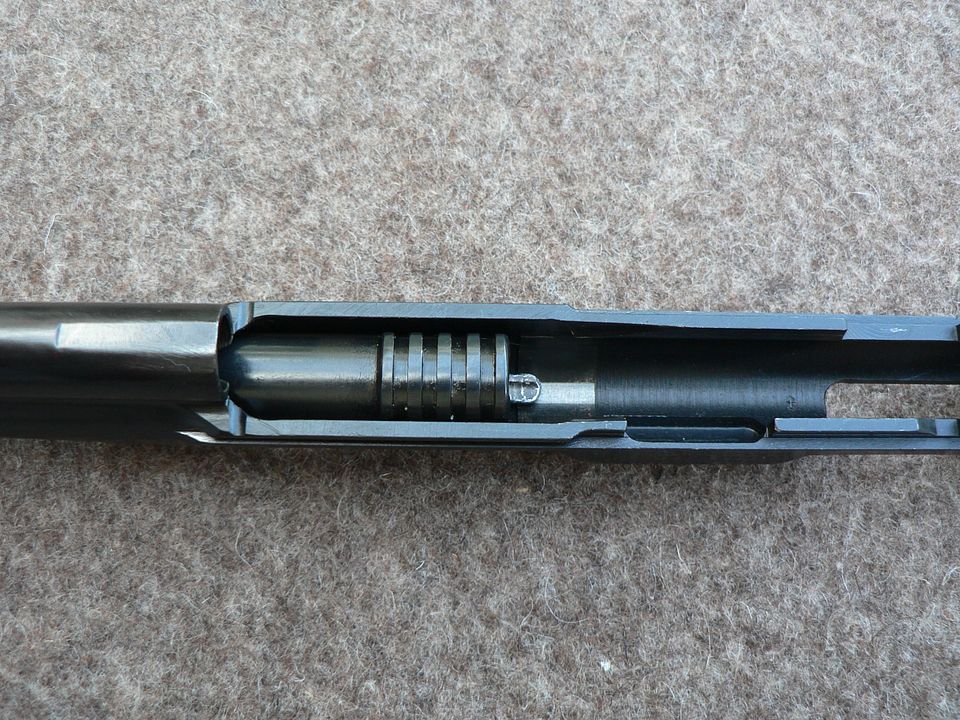
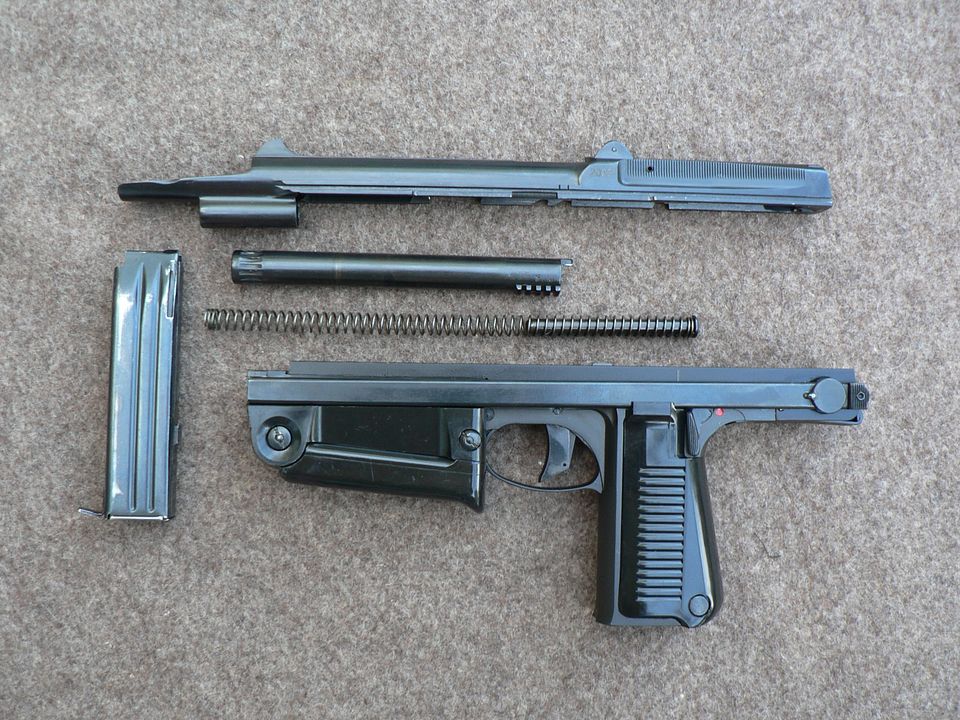
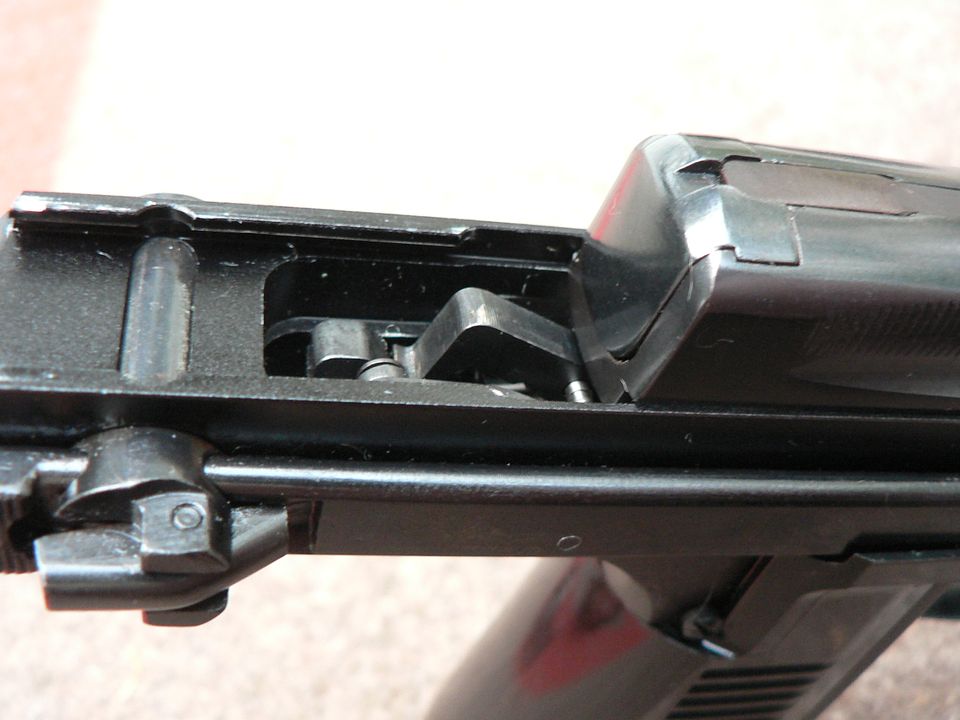
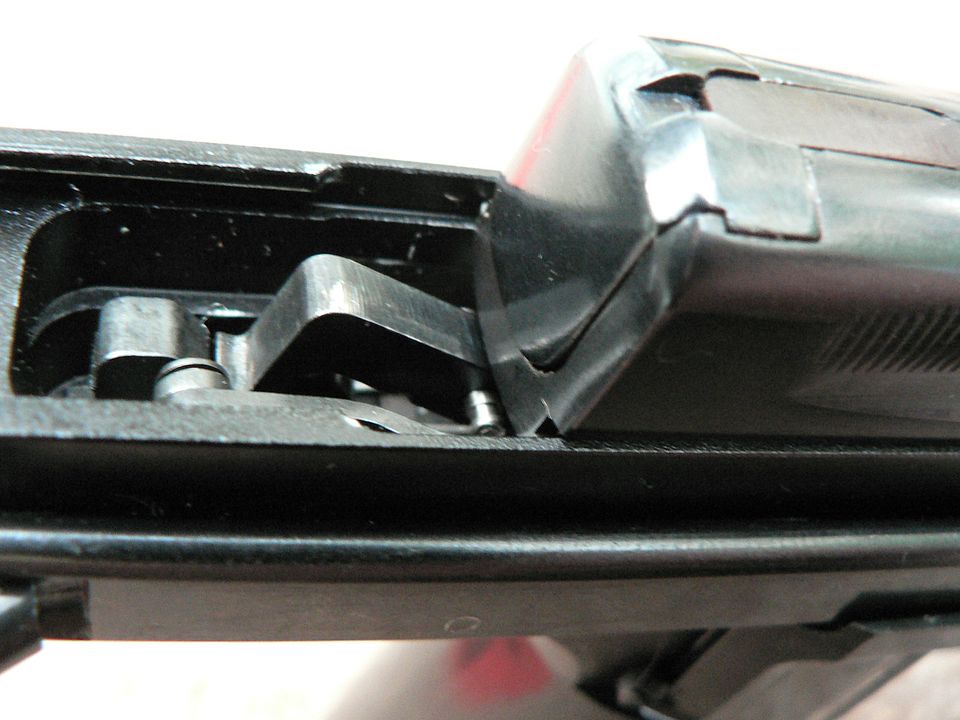
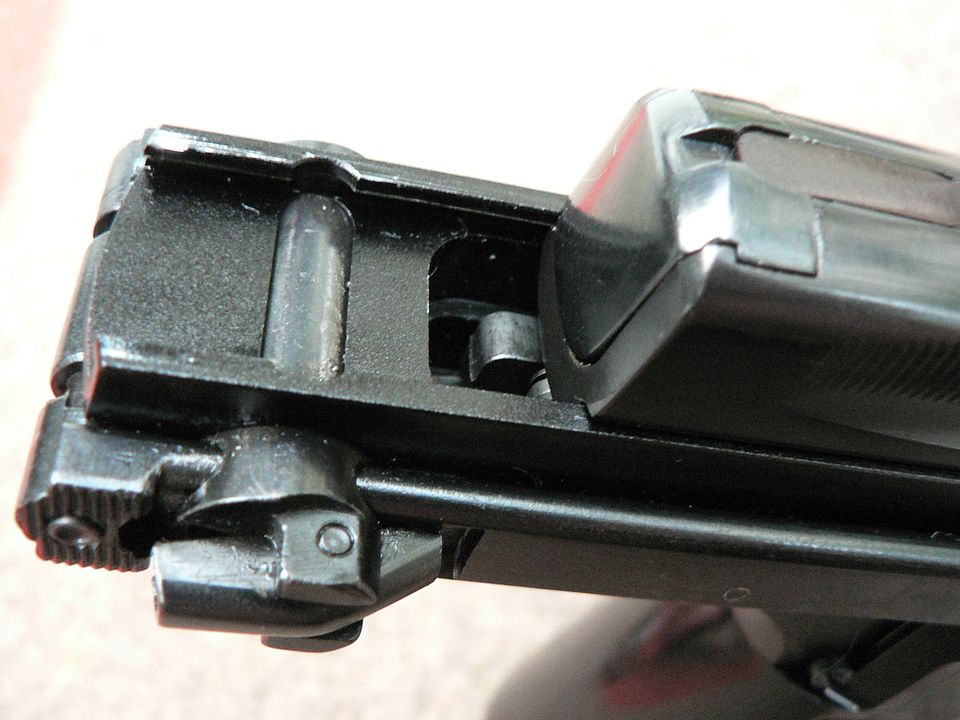
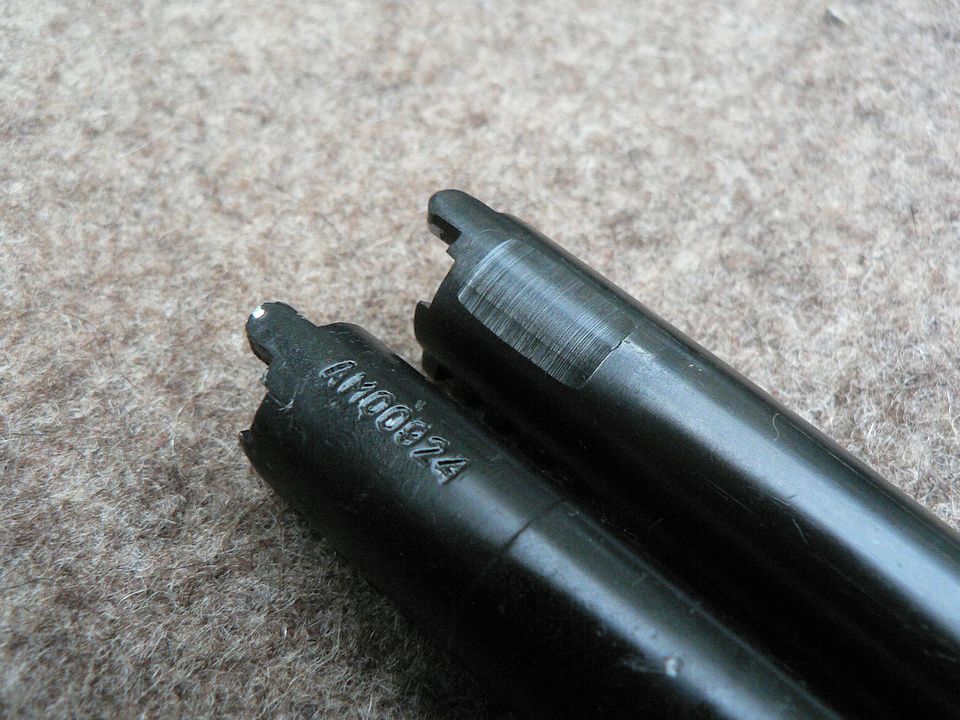
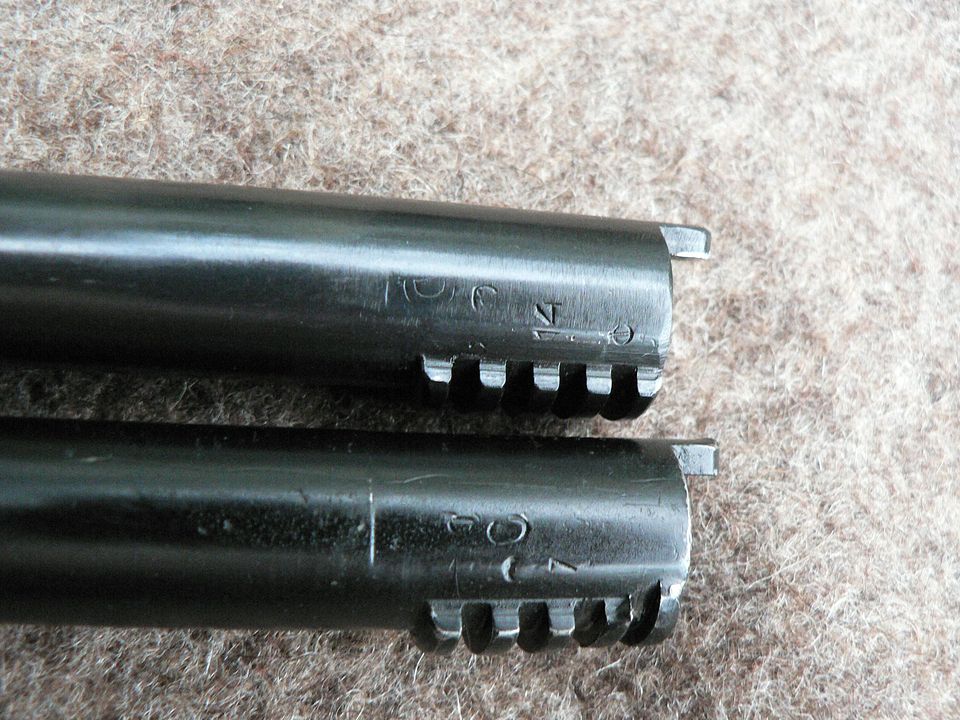
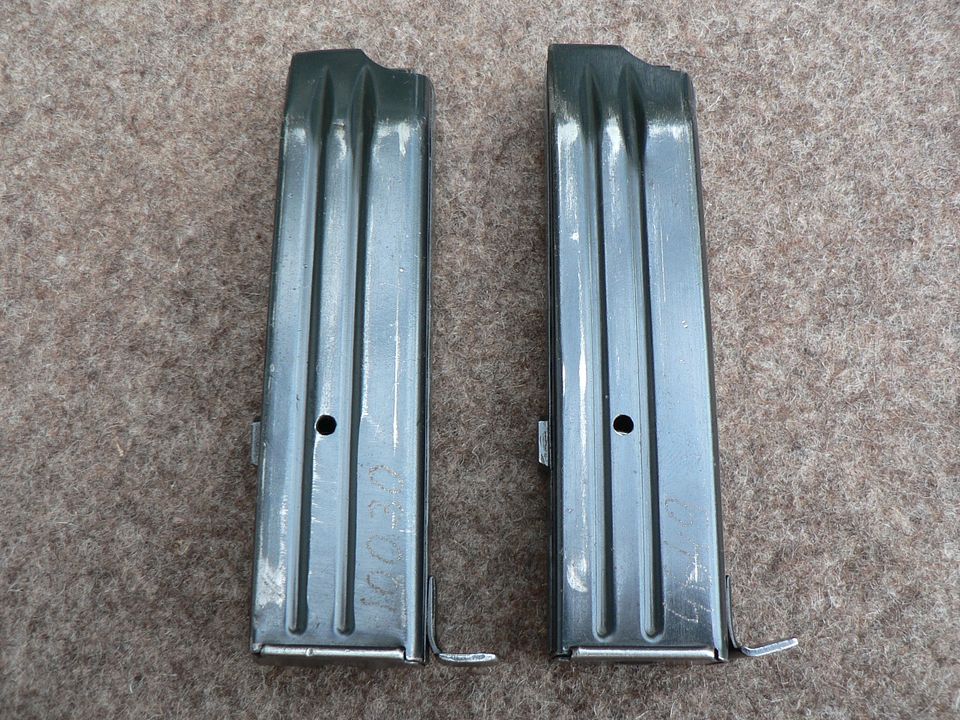
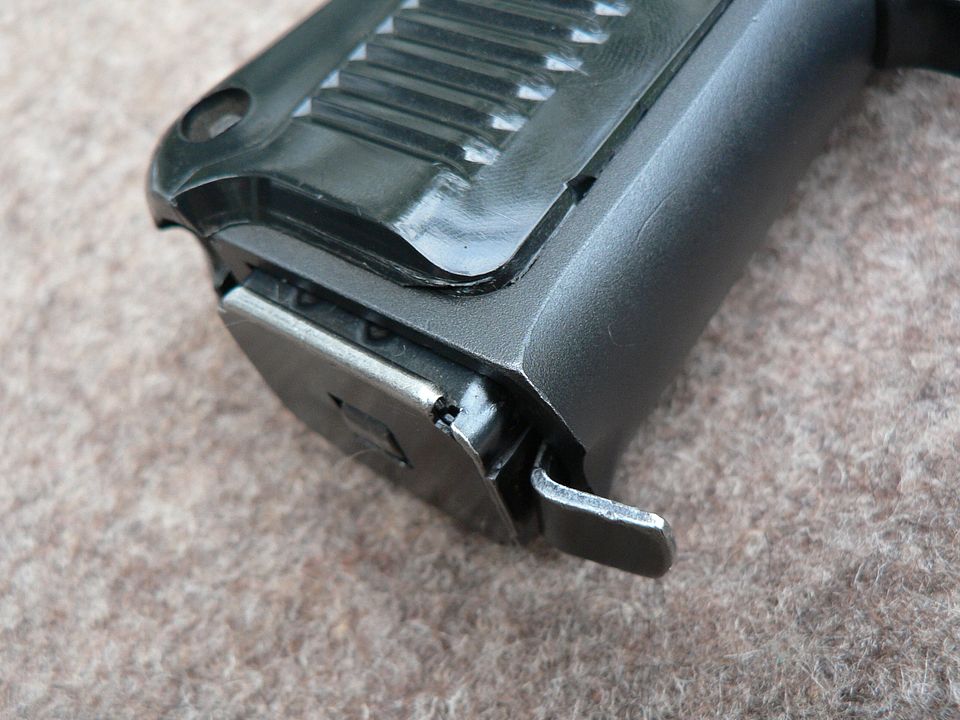
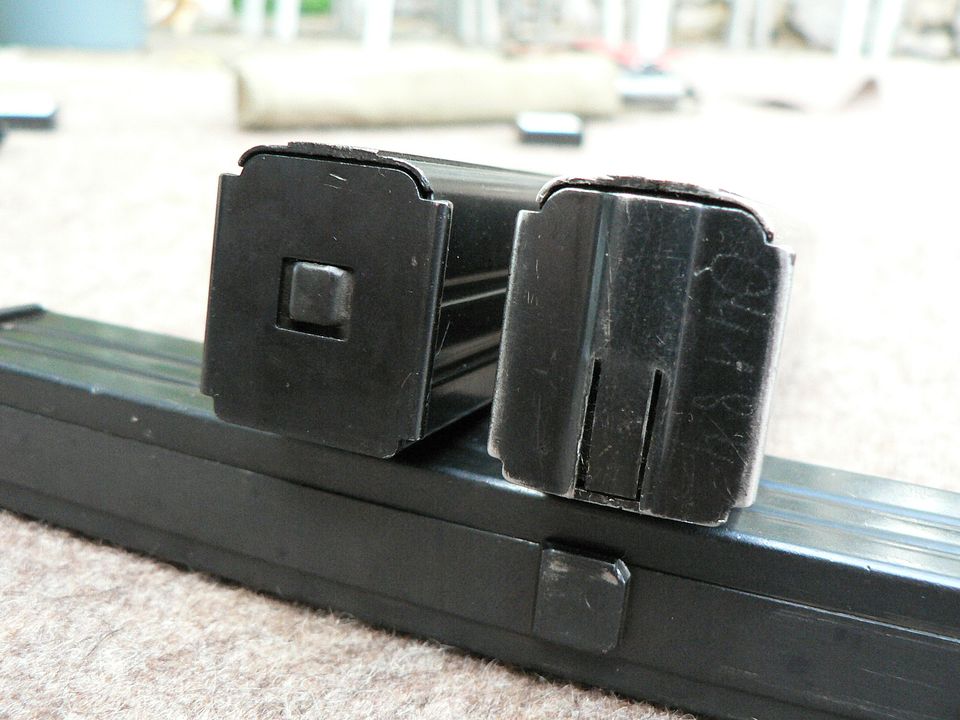
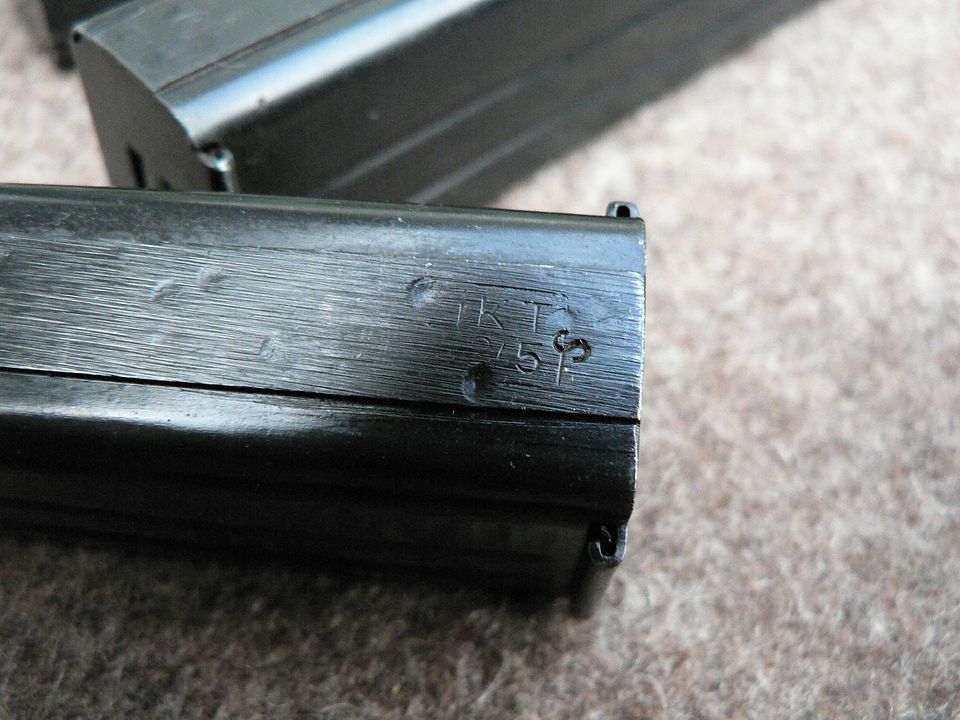
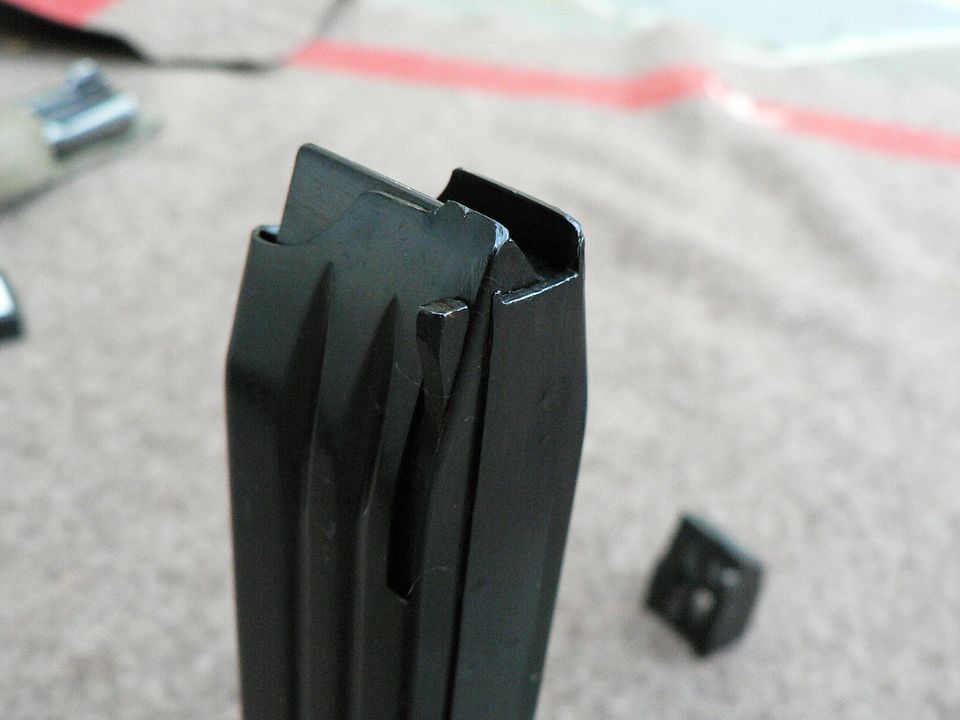
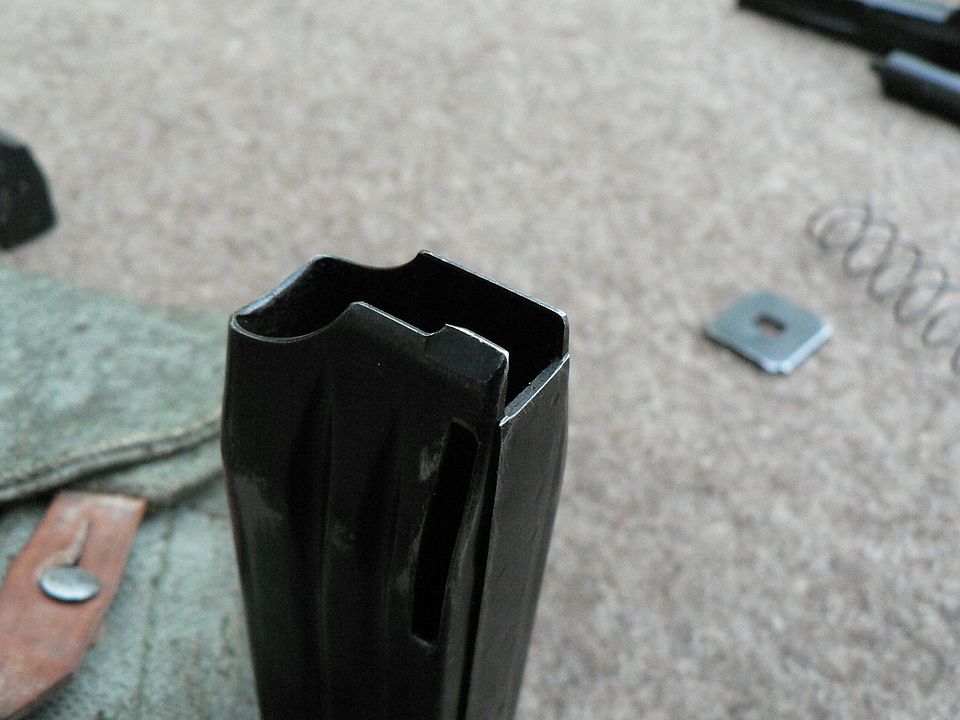
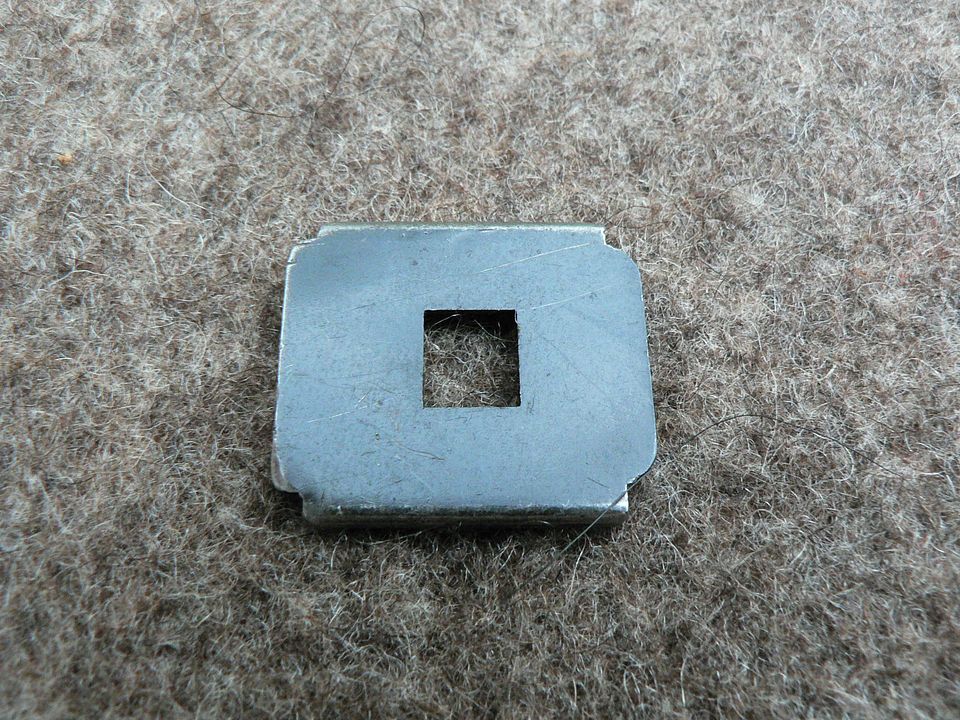
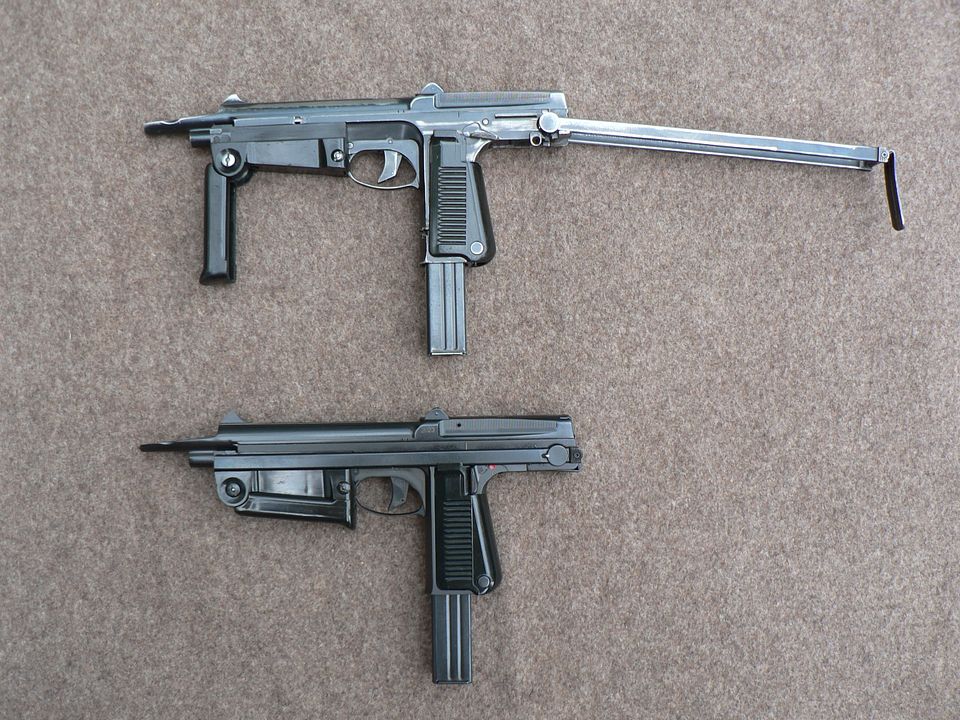
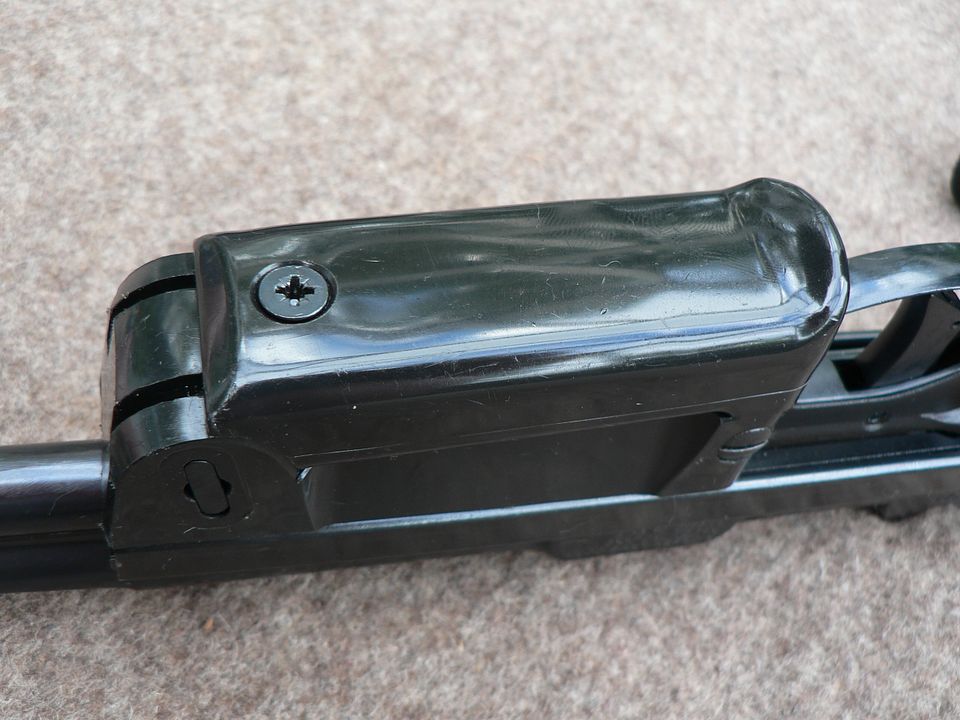
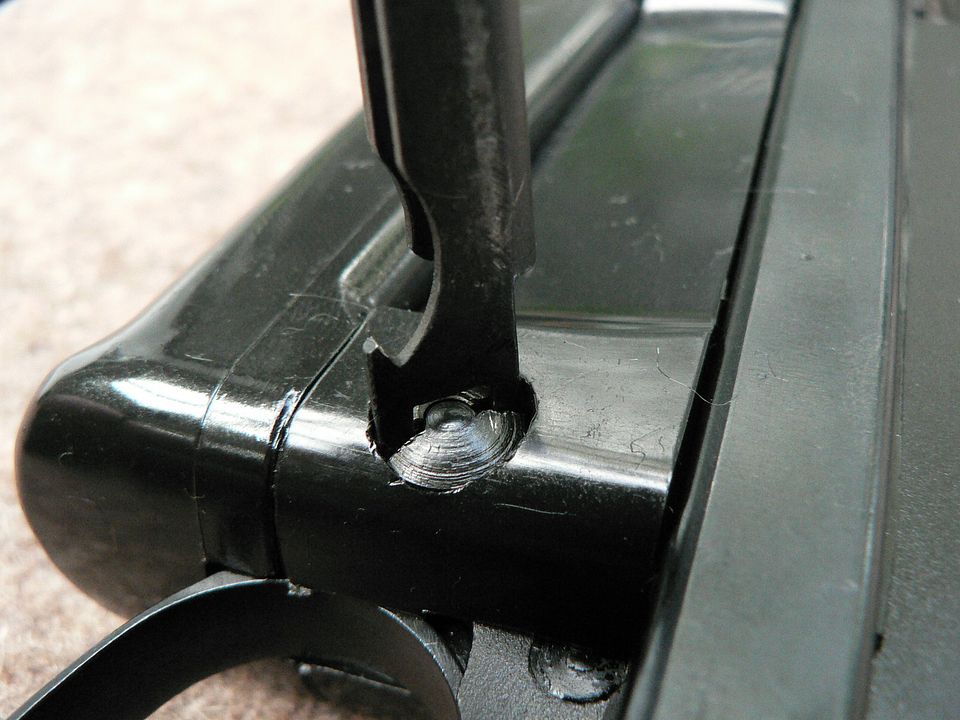
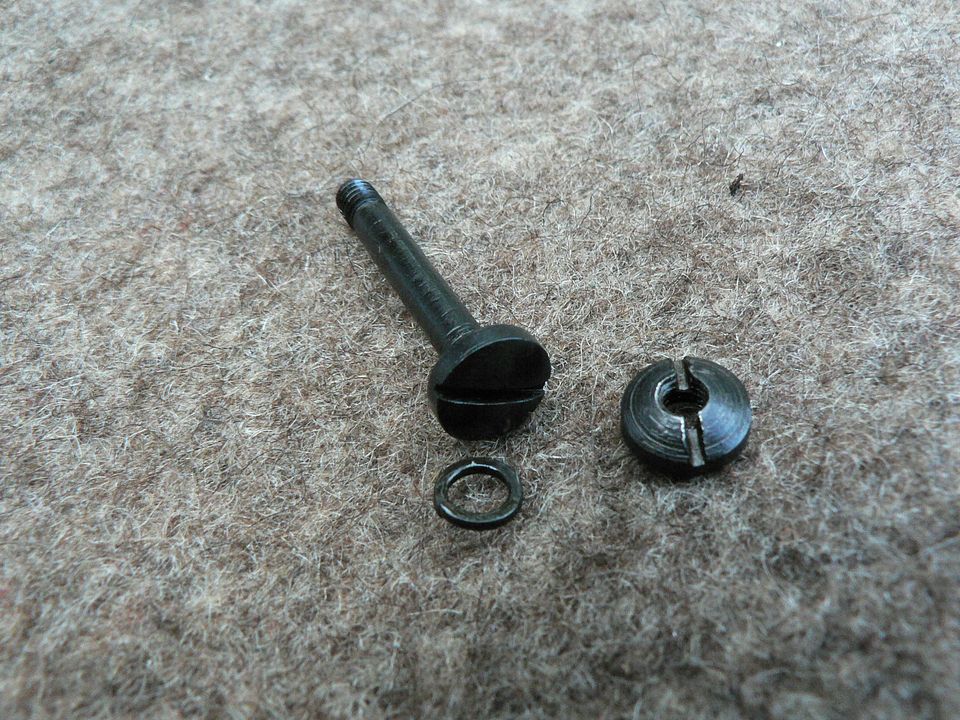
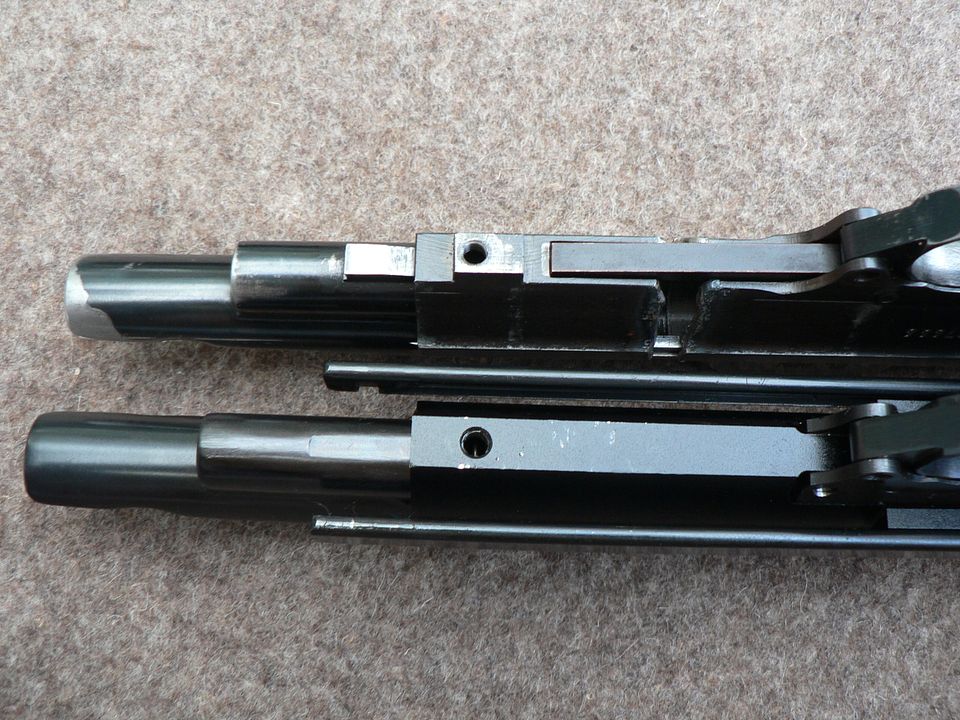
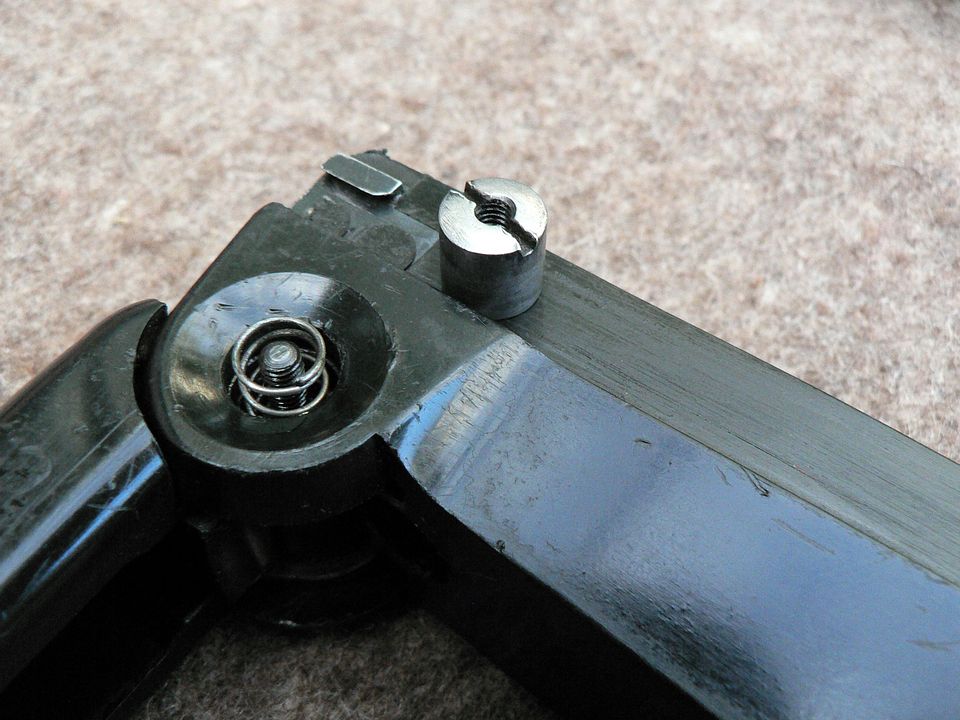
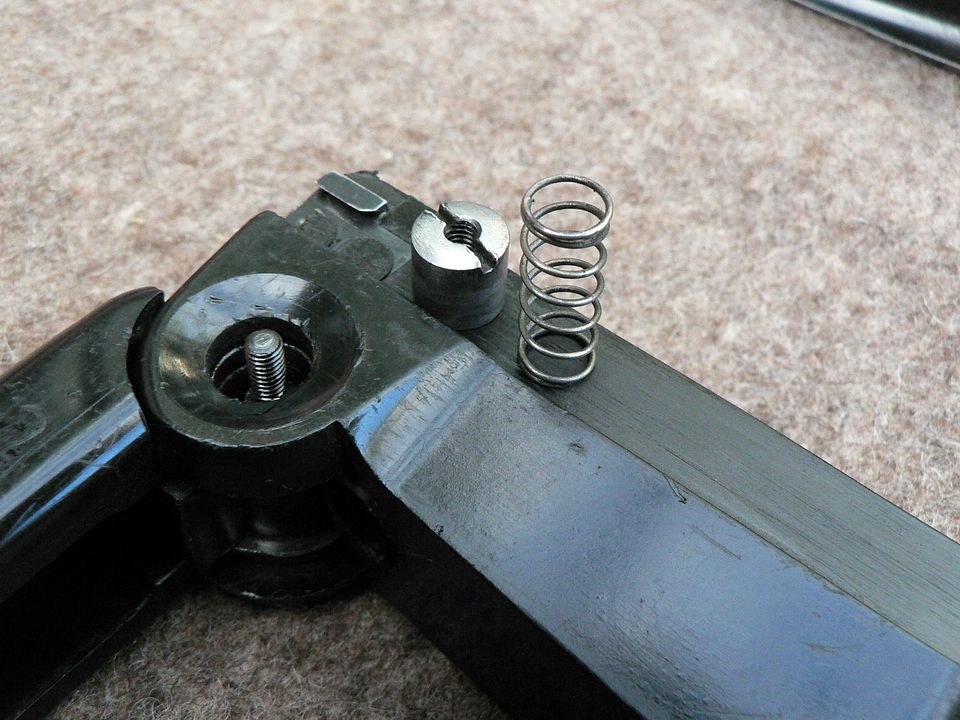
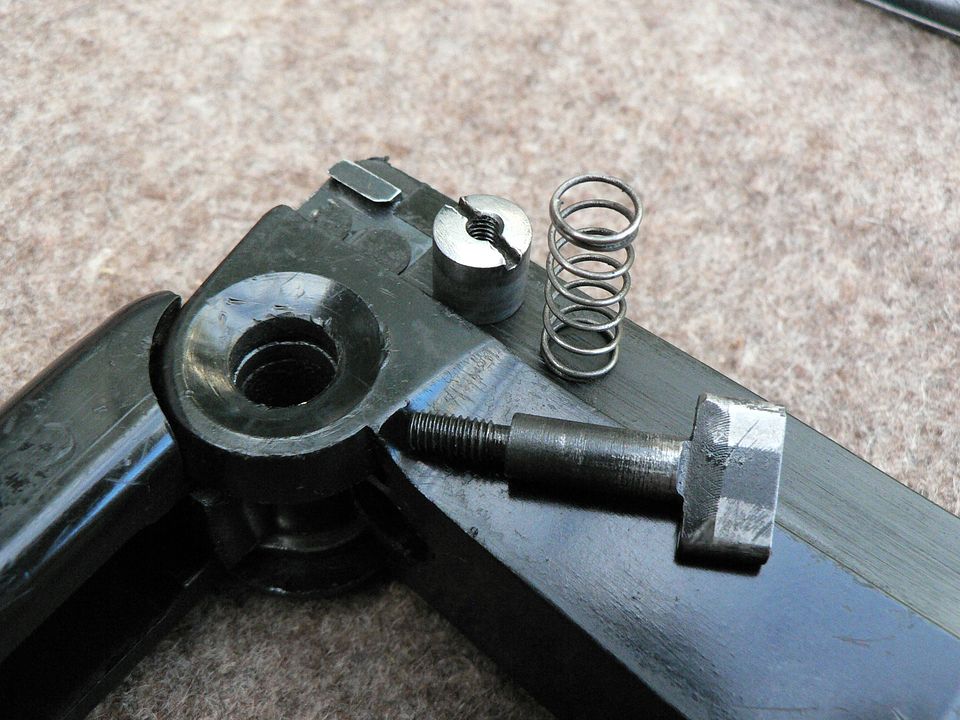
For anyone else looking to get one and SBRing it, I highly recommend getting a demil kit while they’re plentiful and cheap. My PM-63C does not have the stock release mechanism on the right side. On the assembled demil gun in OP’s pic, you can see there are two sets of guides for the stock rails…top and bottom, both toward the rear, the lower set very small and at the very rear of the receiver. These are absent from the PM-63C and would have to be added. Additionally, the bottom slot for the cam that secures the stock lock mechanism in place is also absent and would have to be added. The sling ring is also missing from the semi. On the real one, this is machined at the end of a rod, which is inserted into a hole through the receiver and staked in place on the bottom. The demil kit is ideal for measurement and some spare parts. I was hoping it would be a simpler endeavor, but should be doable. I’ll take it down into the valley behind the house before the end of the weekend and test it out before throwing another $200 into it. |
|
|
|
[#8]
Seriously kicking one of these over....thanks!
|
|
|
|
[#9]
Yeah thanks for this thread, and the great pics.
In for the differences between these frames and the select-fire ones. |
|
|
|
[#11]
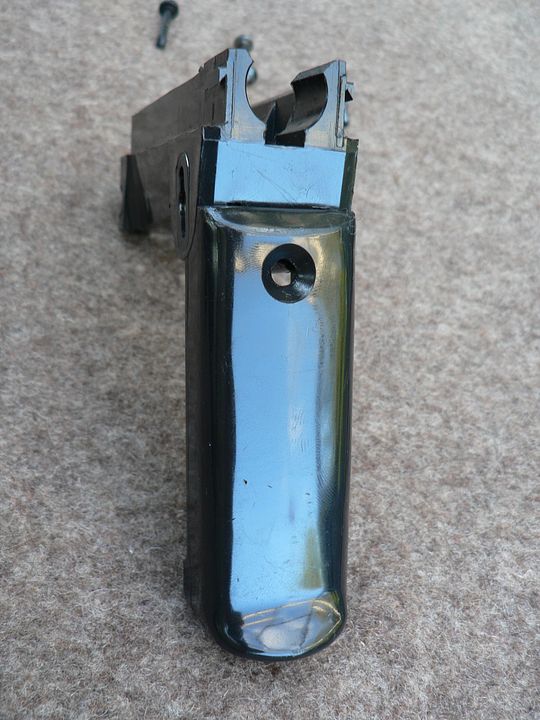
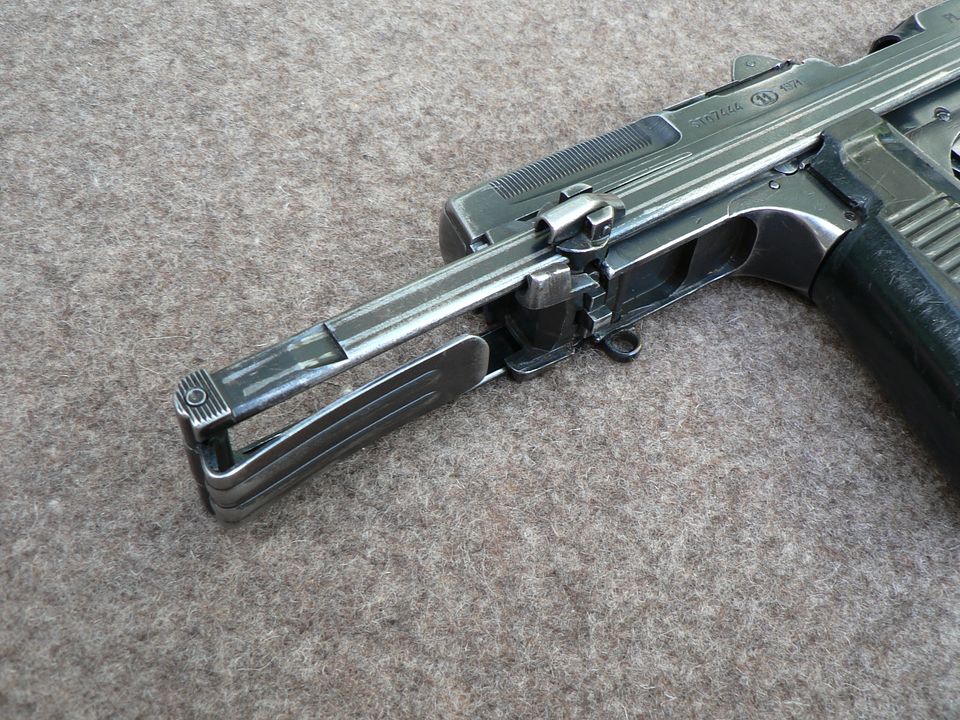
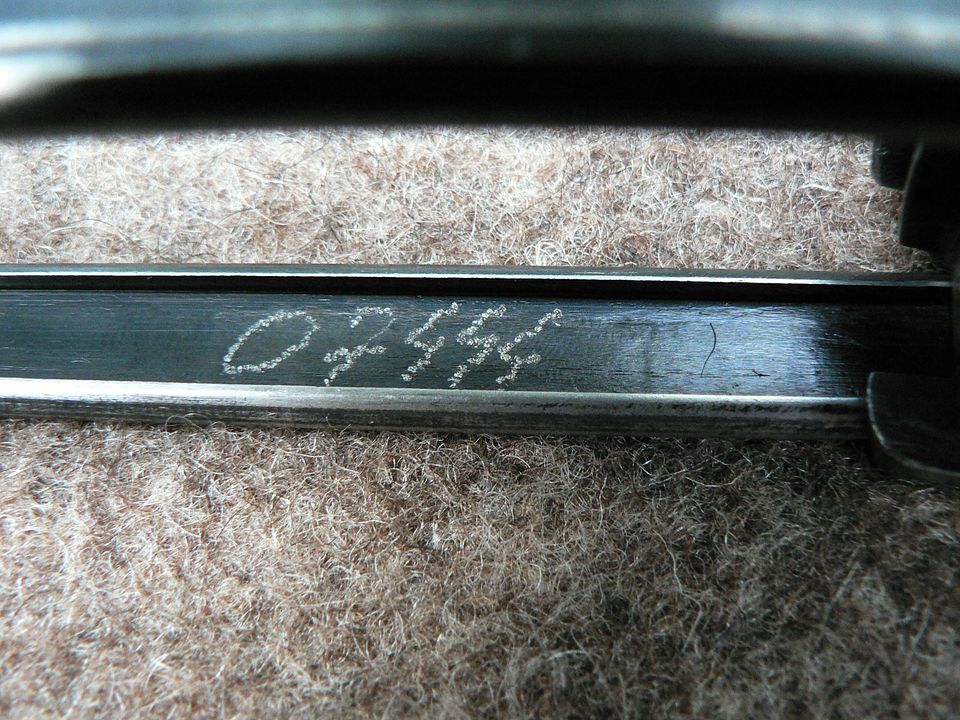
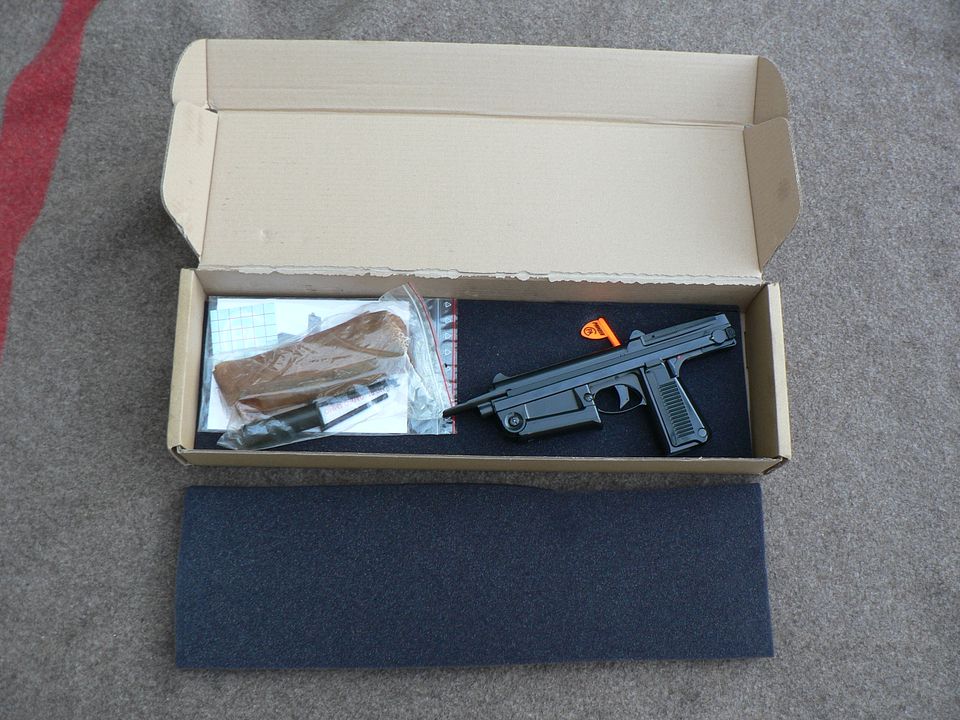
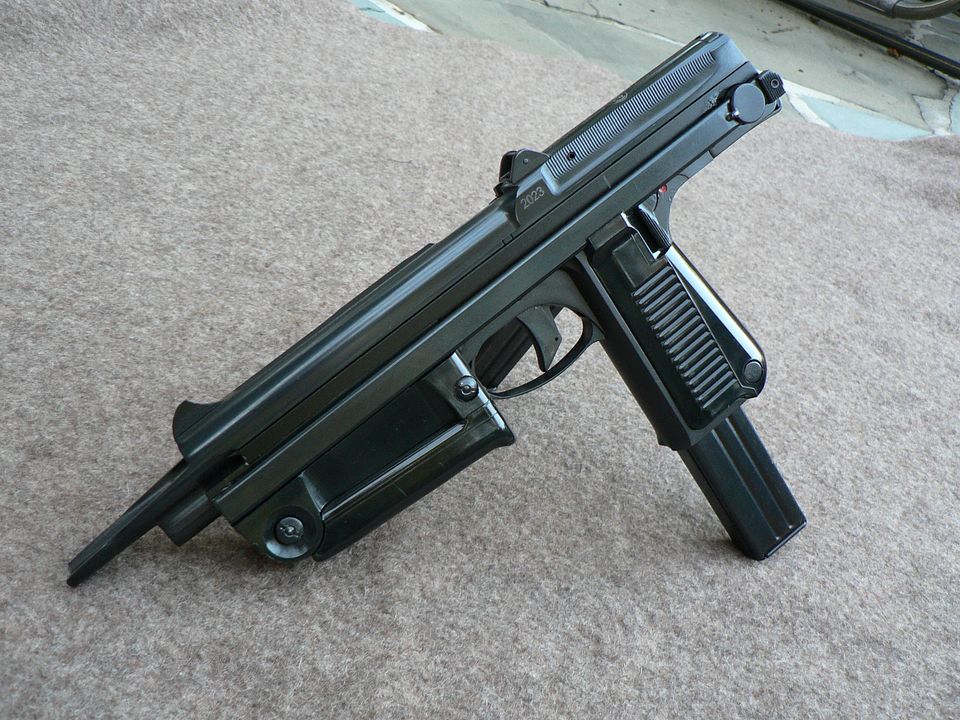
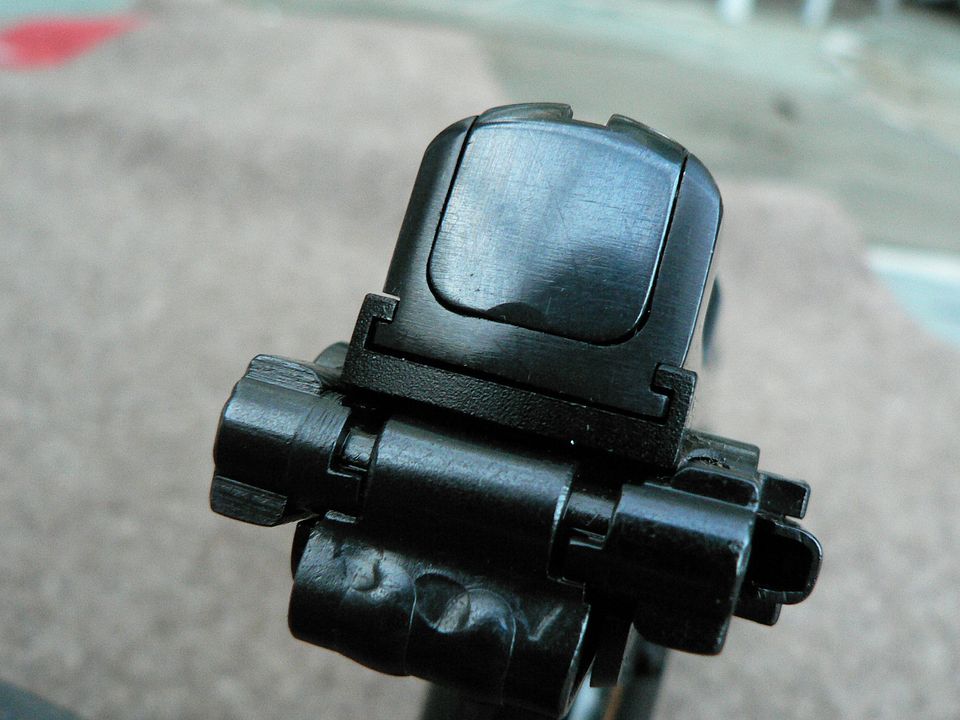
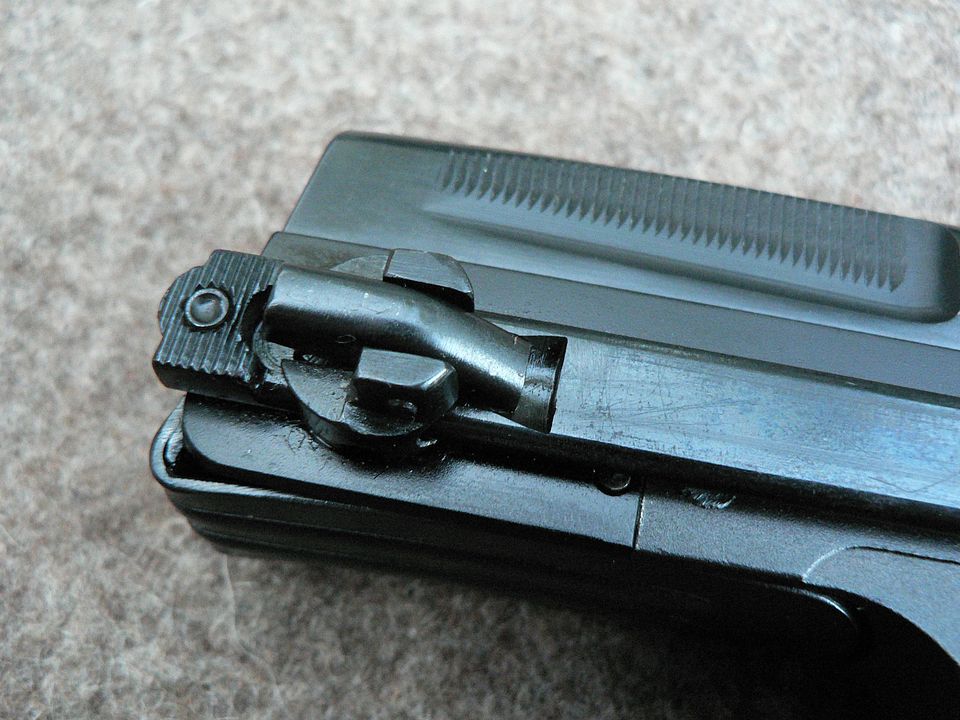
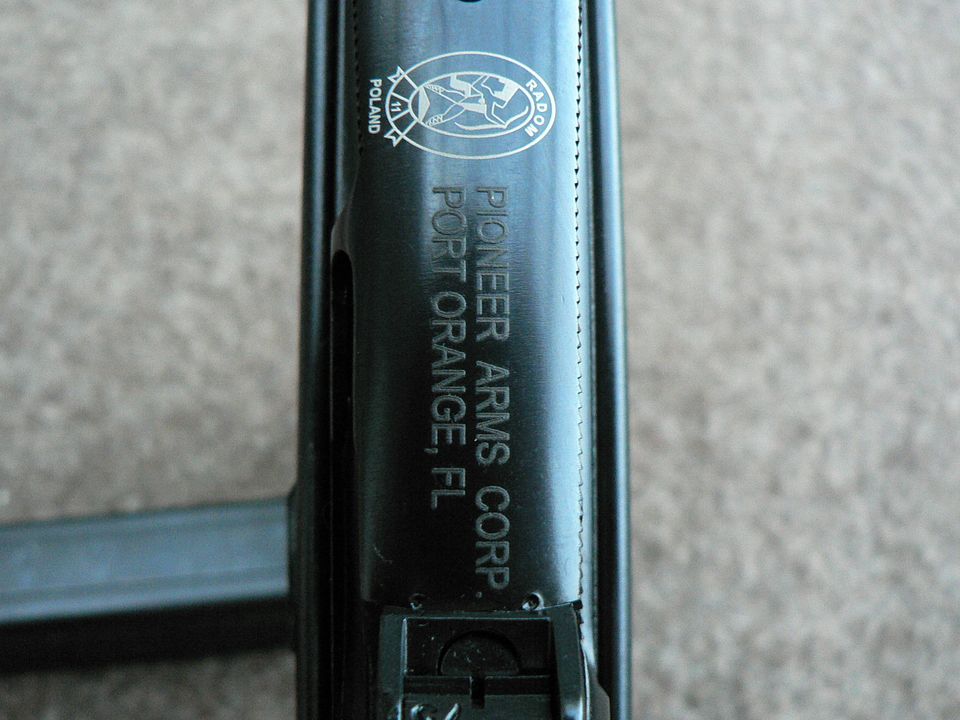
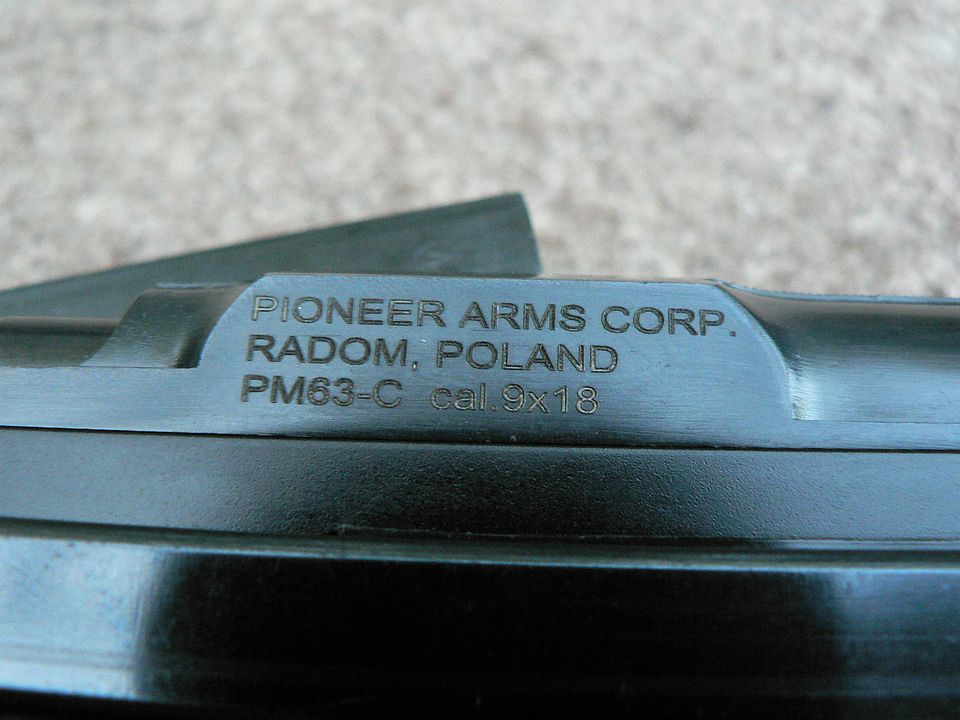
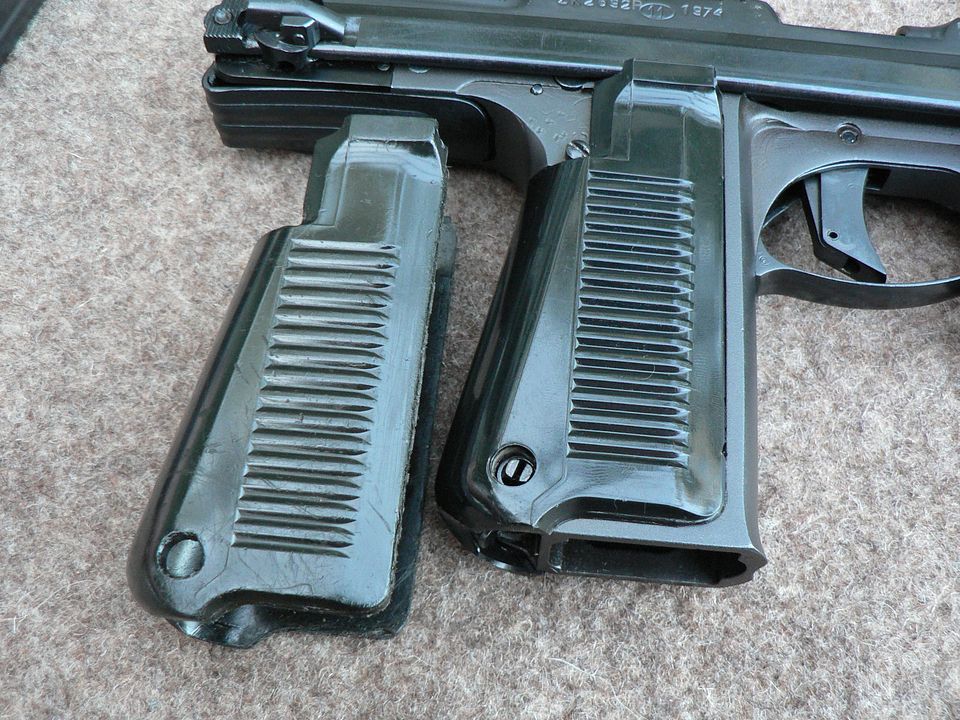
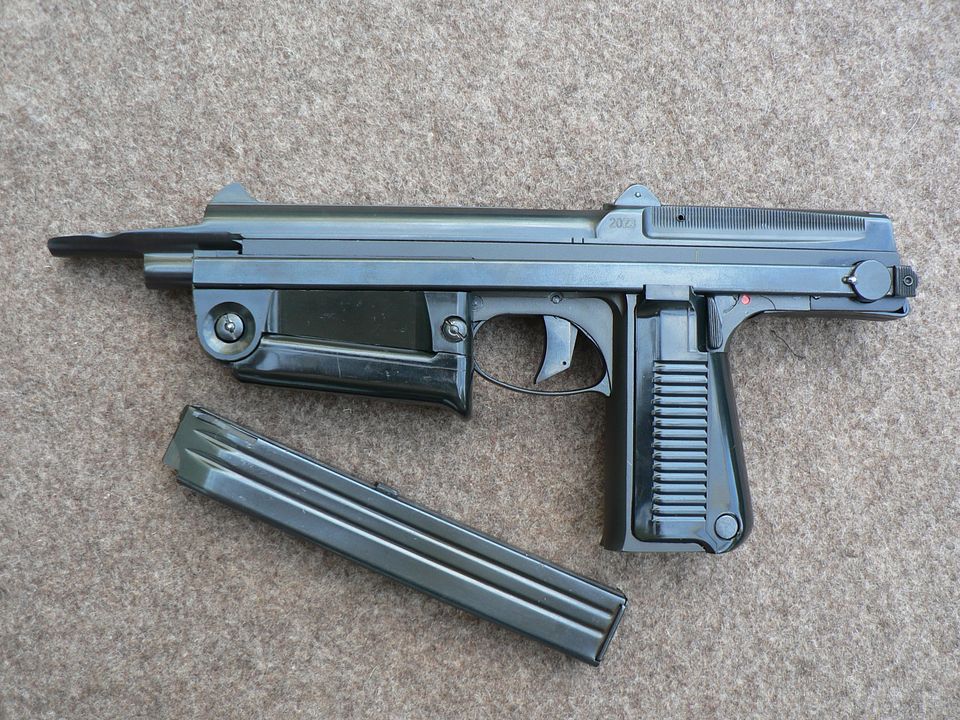
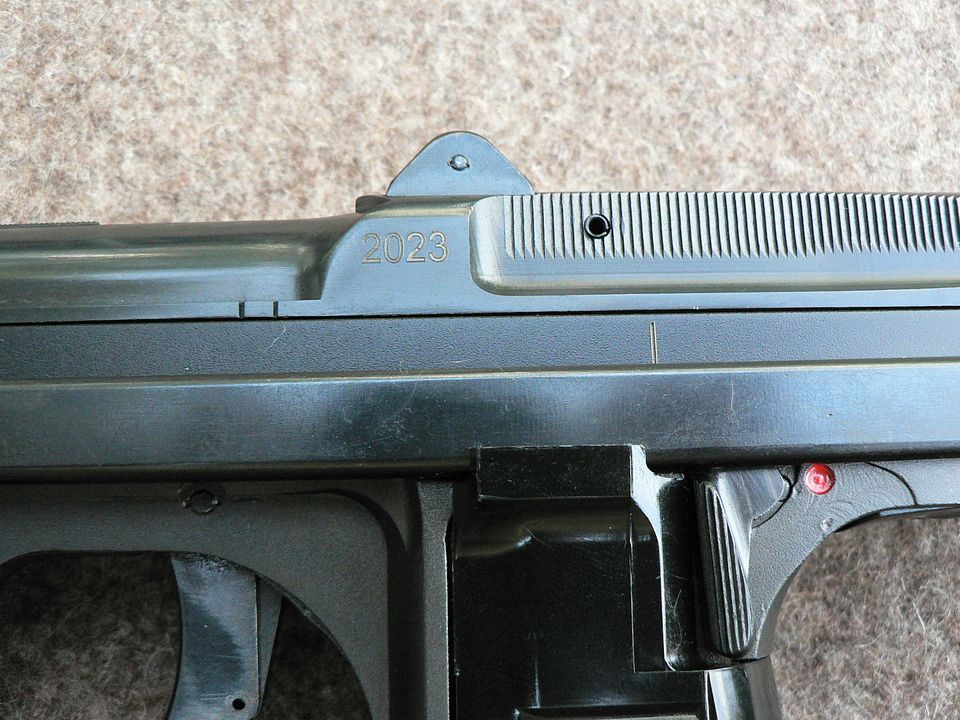
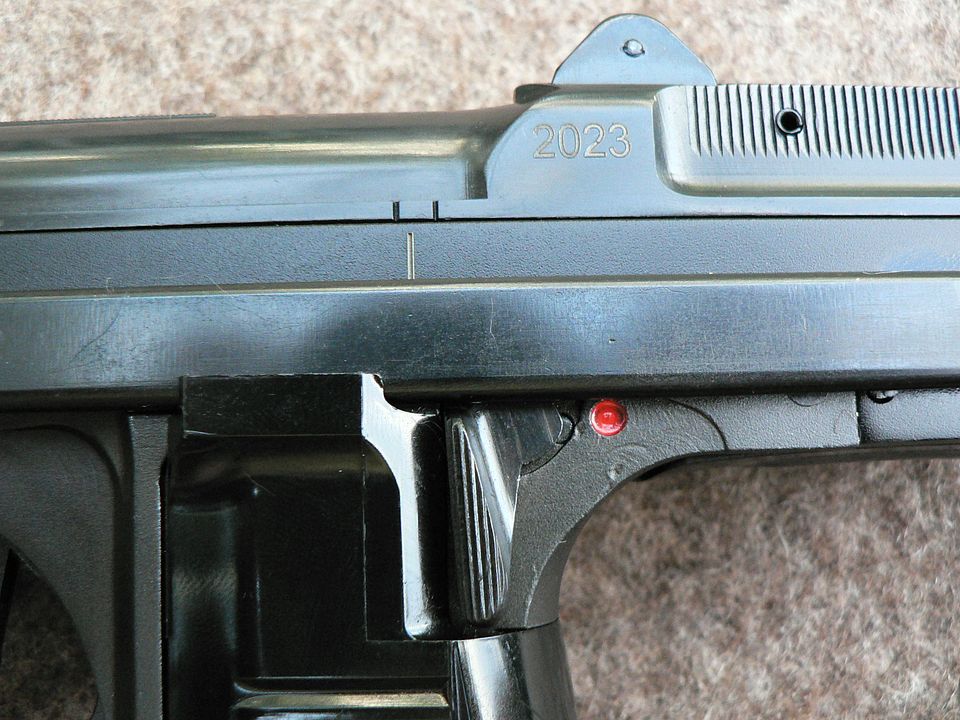
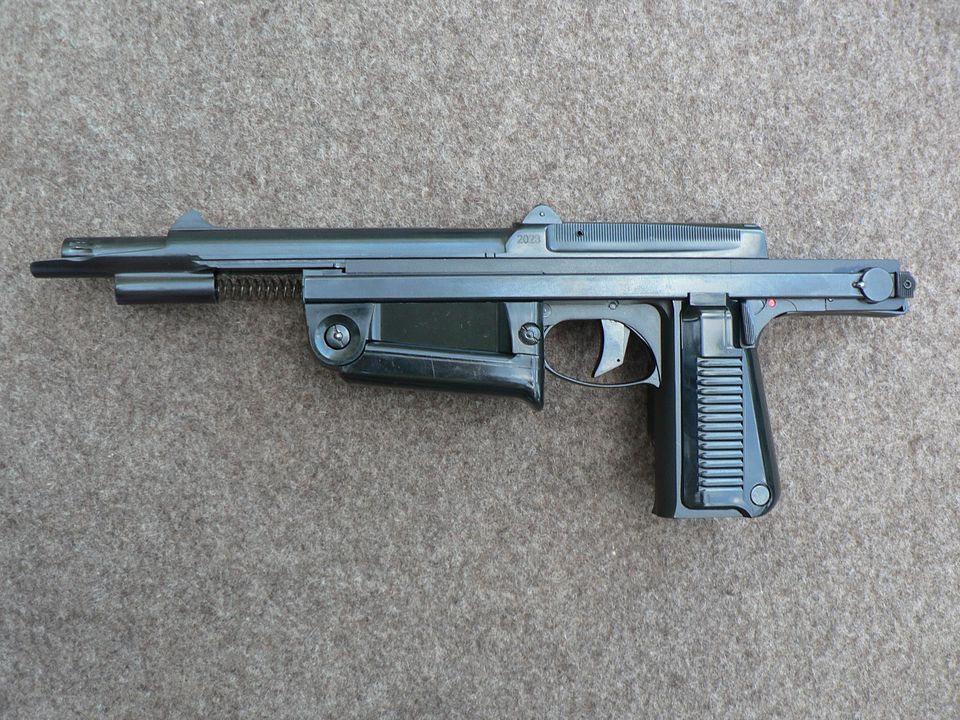
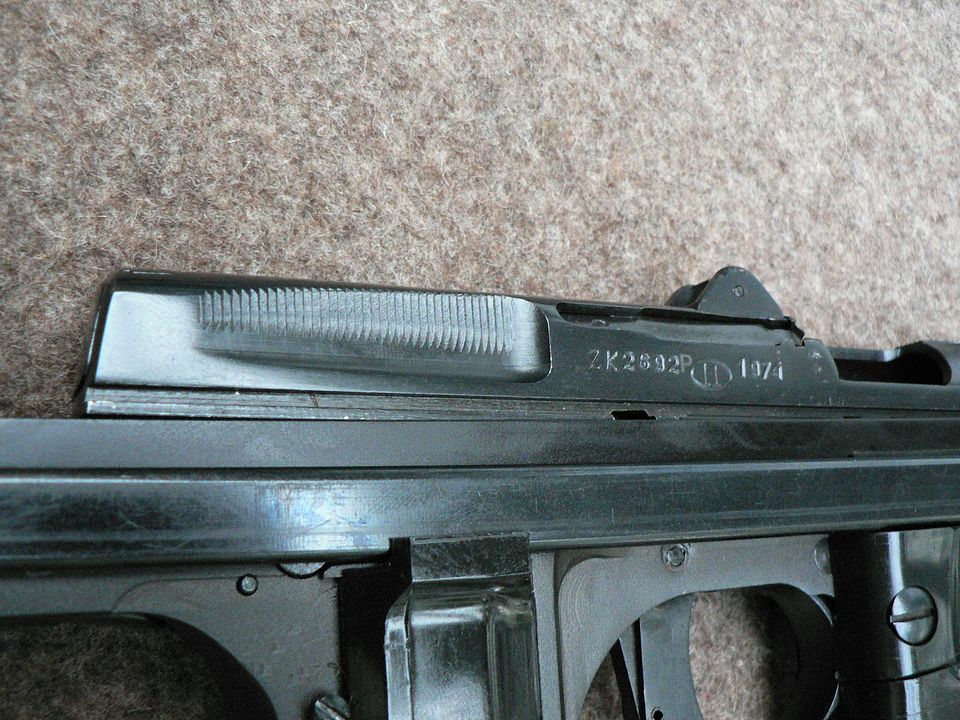
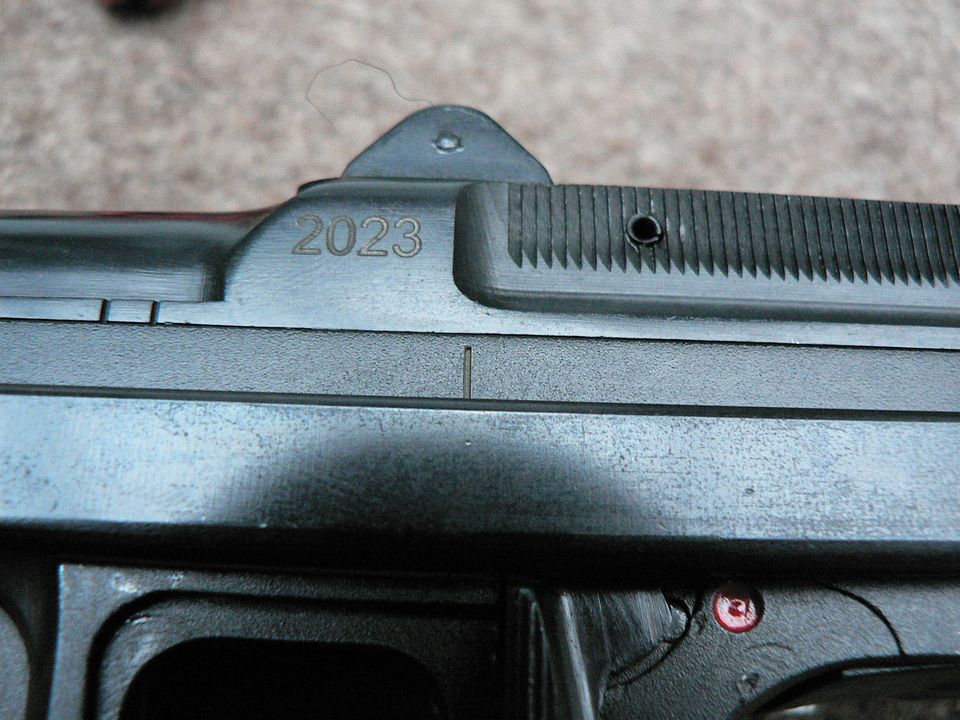
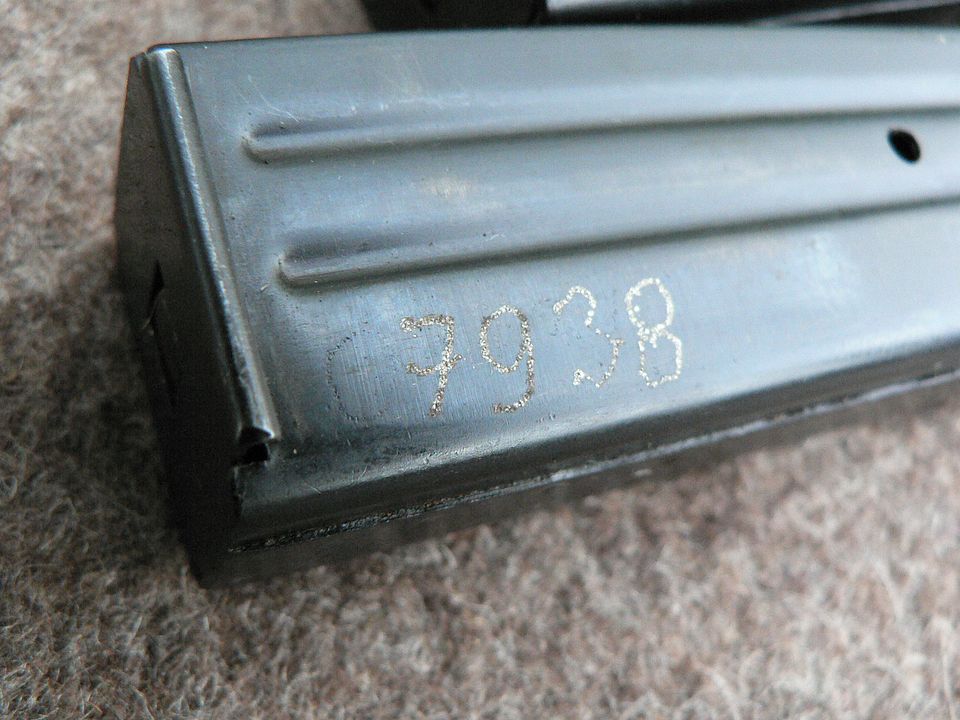
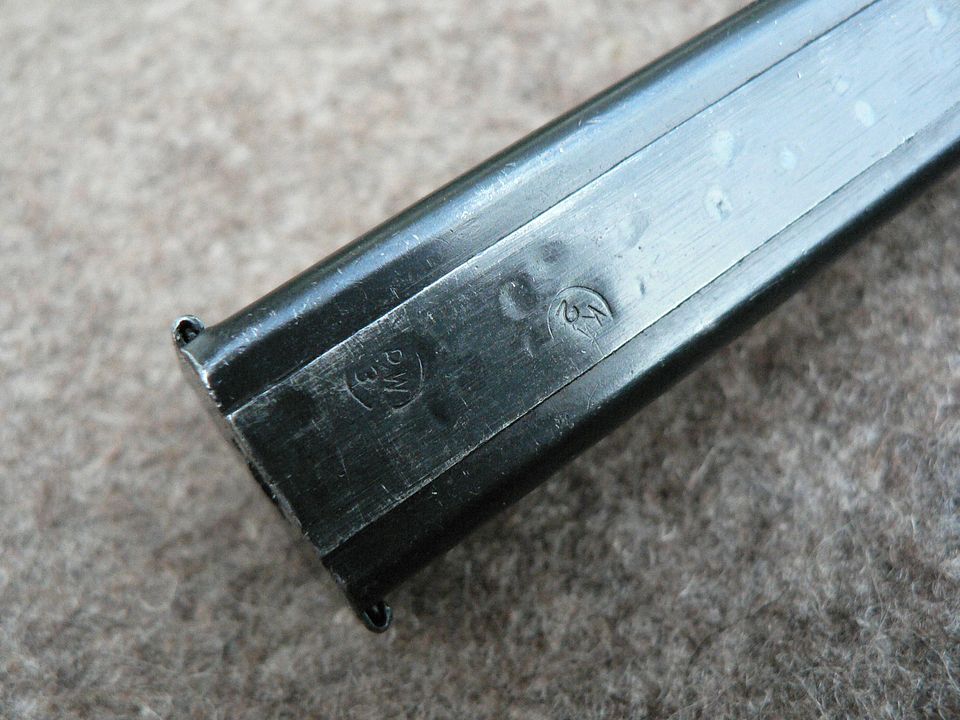
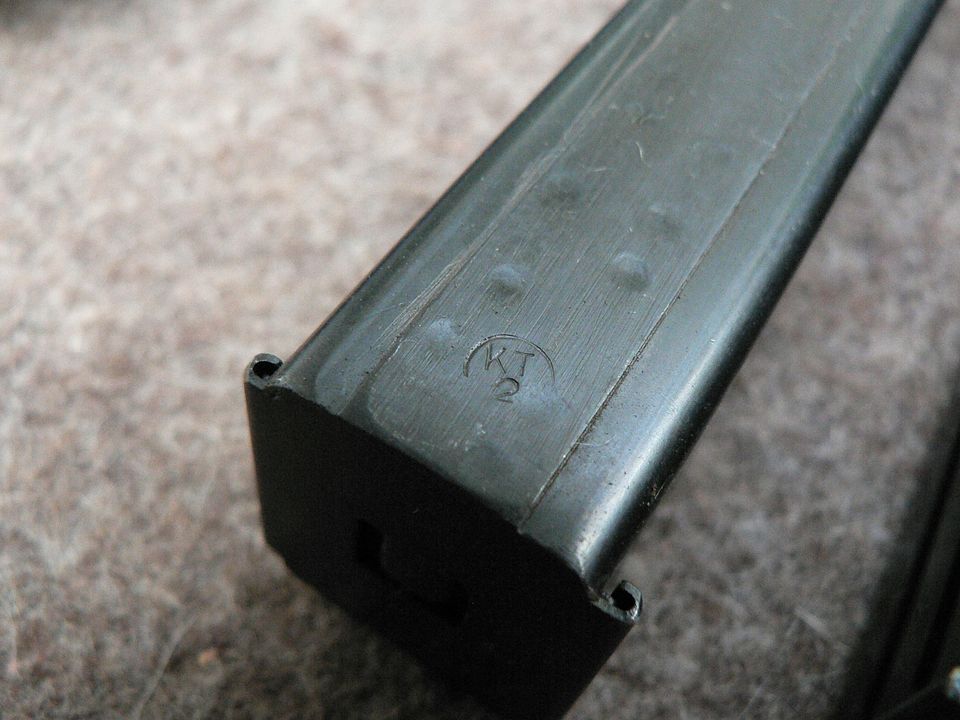
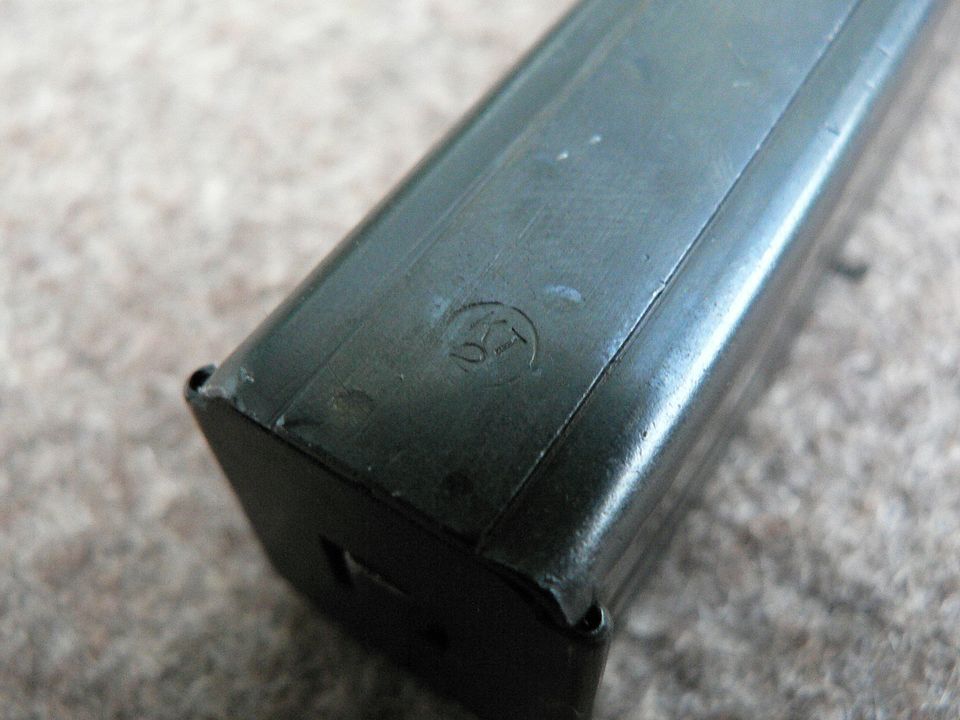
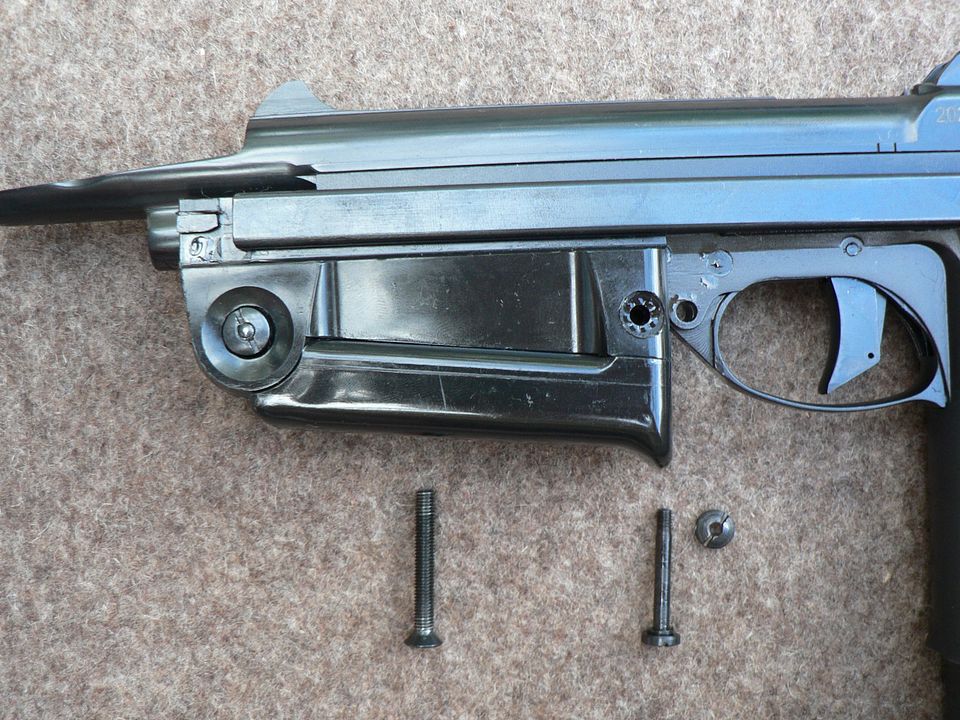
A couple other things…my slide is dated 1975 on the right but remarked 2023 on the left, and the lower SEEMS like they took original grip sections and merged them into the semi-auto section of the (new) receiver. So I think wherever possible they used original unissued PM-63 components.
It is a very neat and impressive looking thing! EDIT: beat |
|
|
|
[#13]

|
|
|
|
[#14]
There are lots of grammatical errors in the above two posts but it's late so I'll clean it up later. All of the information is accurate though.
|
|
|
|
[#15]
Damn you! Damn you all to hell!
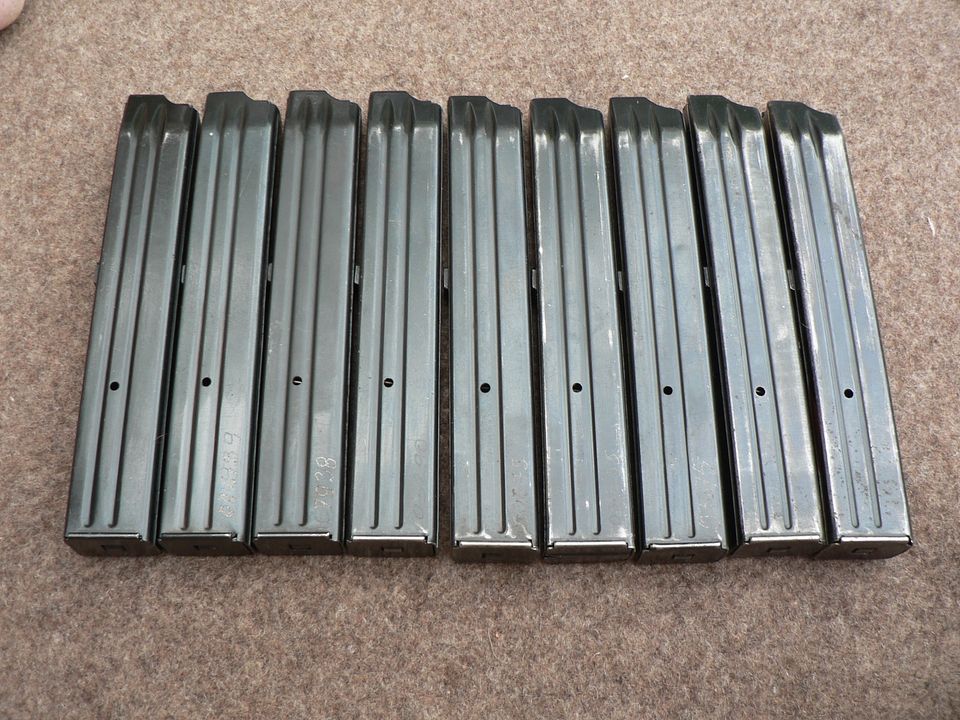
Just ordered one pistol, a parts kits, several 25rd spare mags, a holster, mag pouch and 500 rounds of ammo. |
|
|
|
[#16]
lol. Sorry about that.
|
|
|
|
[#20]
I want one of these for no reason.
Nice pictures and write up. |
|
|
|
[#21]
Thank you sir.
I read about them thirty years ago in Small Arms of the World and wanted one simply because it looked neato! All these years later, I'm quite satisfied. |
|
|
|
[#22]
A lot of videos show these failing to go fully into battery. They do not say what version they have and the date range on the videos are anywhere from 5 years to 5 months.
Is that a problem you've encountered? Is there a company making a new recoil spring for it? Mine arrives today but I'll probably pick it up tomorrow. |
|
|
|
[#25]
Man that's really cool. I'm going to read the whole writeup, but I think it'd be a sweet collectible.
|
|
|
|
[#26]
BZ, ProbableColtAddict
Fantastic write up. For a pistol I don't care much about, I read the whole damned thing.
|
|
|
|
[#27]
Anybody have these in stock ATM?
|
|
|
|
[#28]
Quoted: Anybody have these in stock ATM? Got mine from here Classic Firearms PM53c RAK They have B-Tac on file for an FFL. |
|
|
|
[#29]
Was the one you got Parked or blued? Really want a blued version and to SBE it so I can sell my kits, barrels and jigs and just go with a factory built gun instead of a home build. |
|
|
|
[#30]
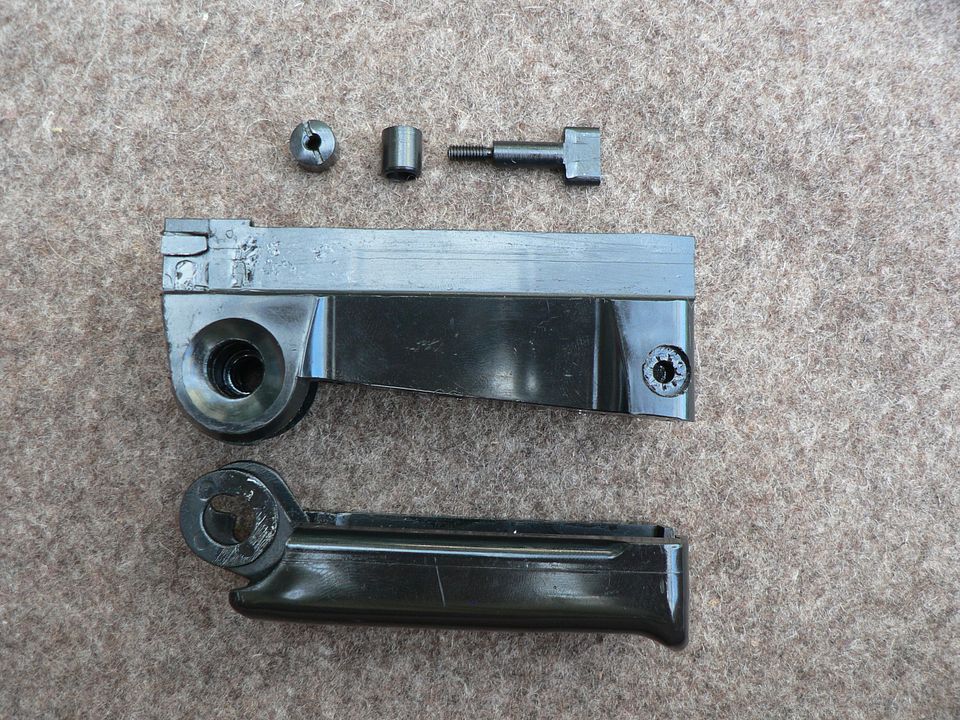
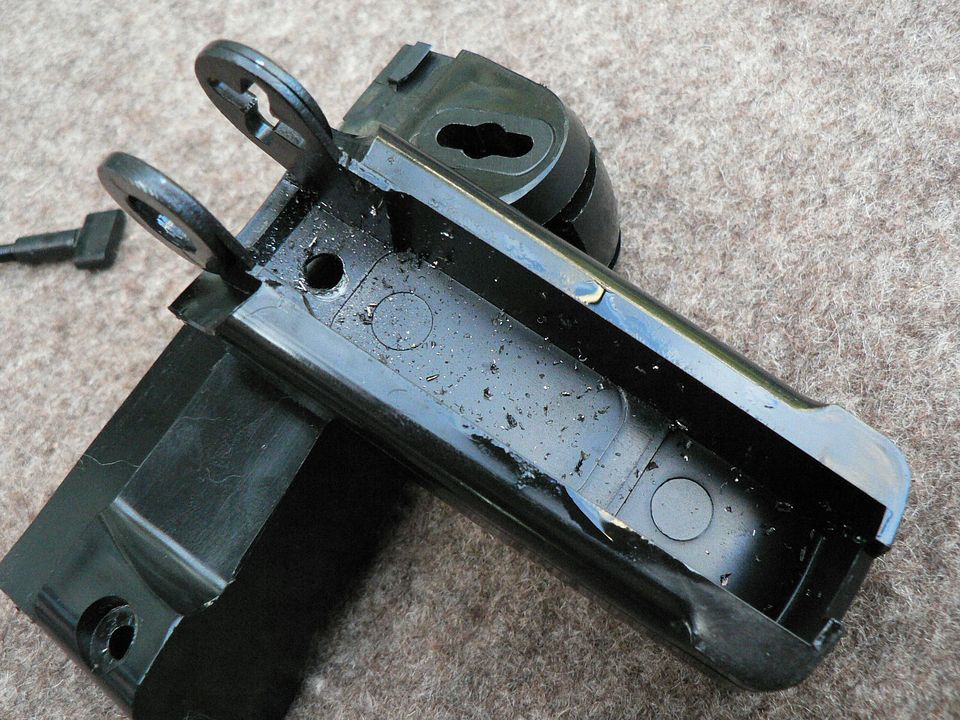
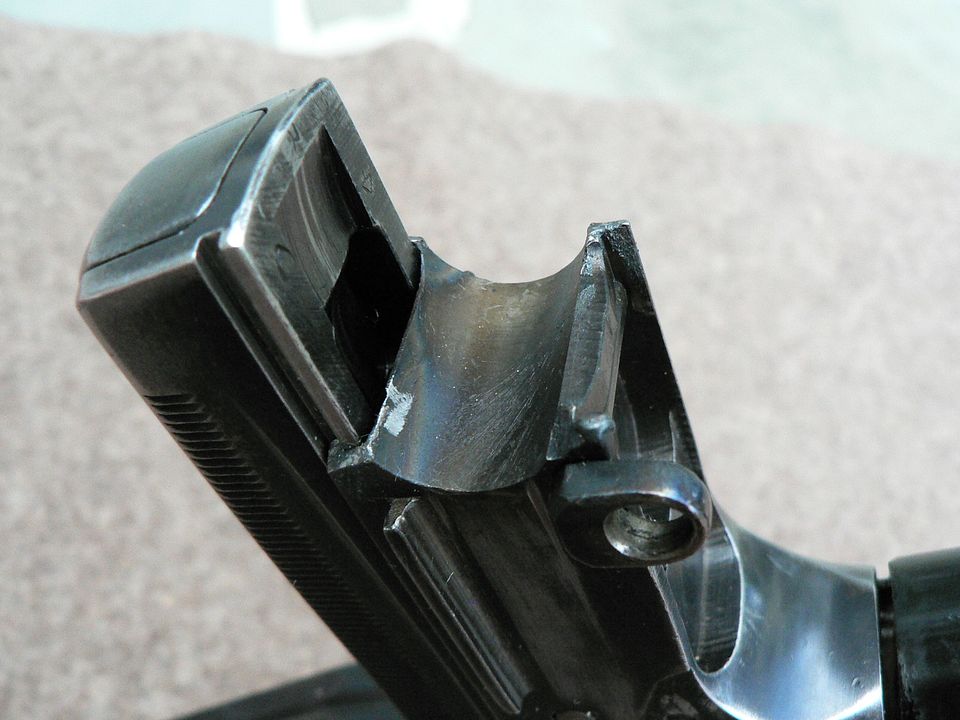
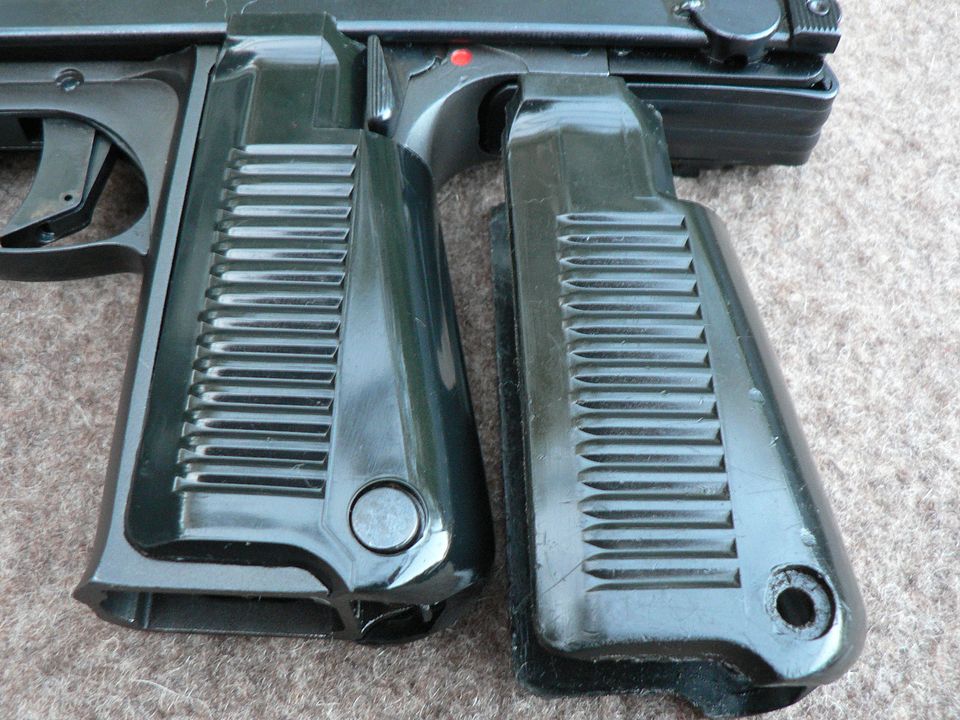
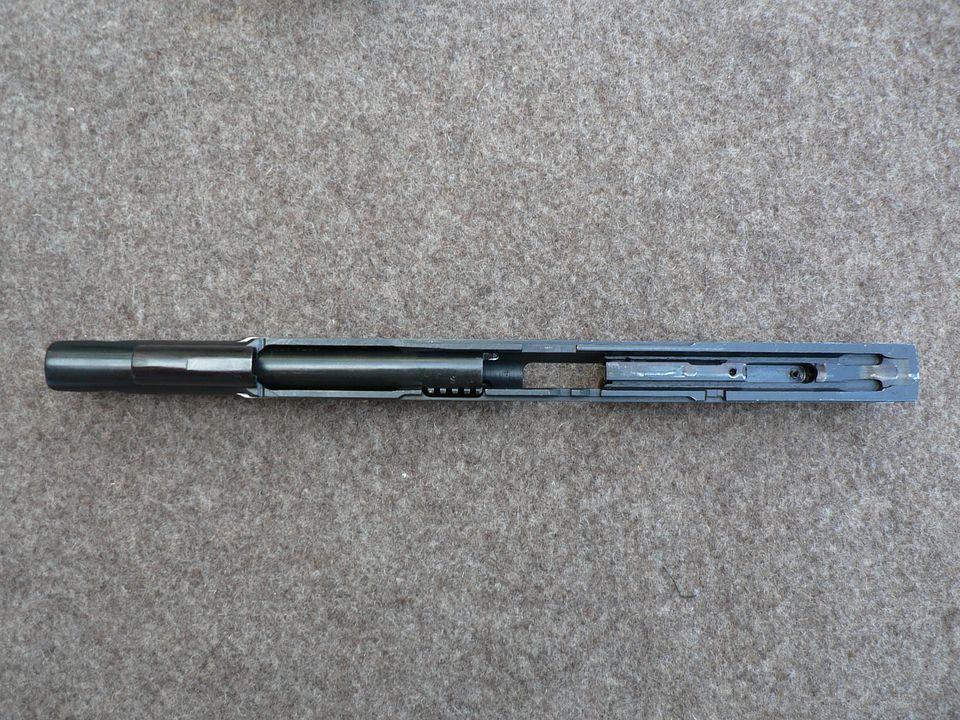
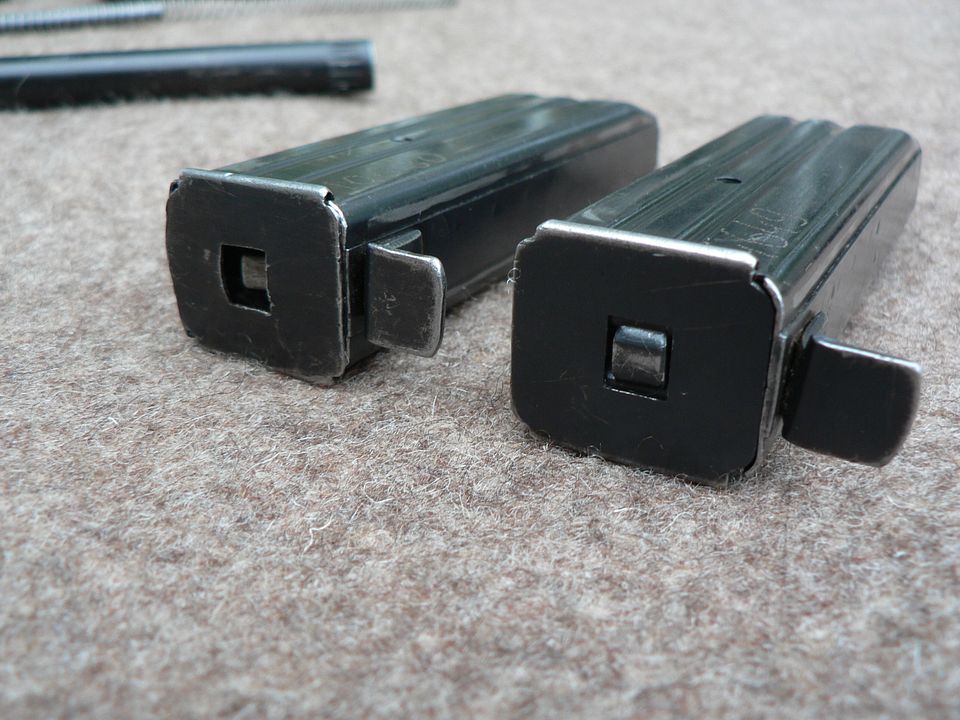
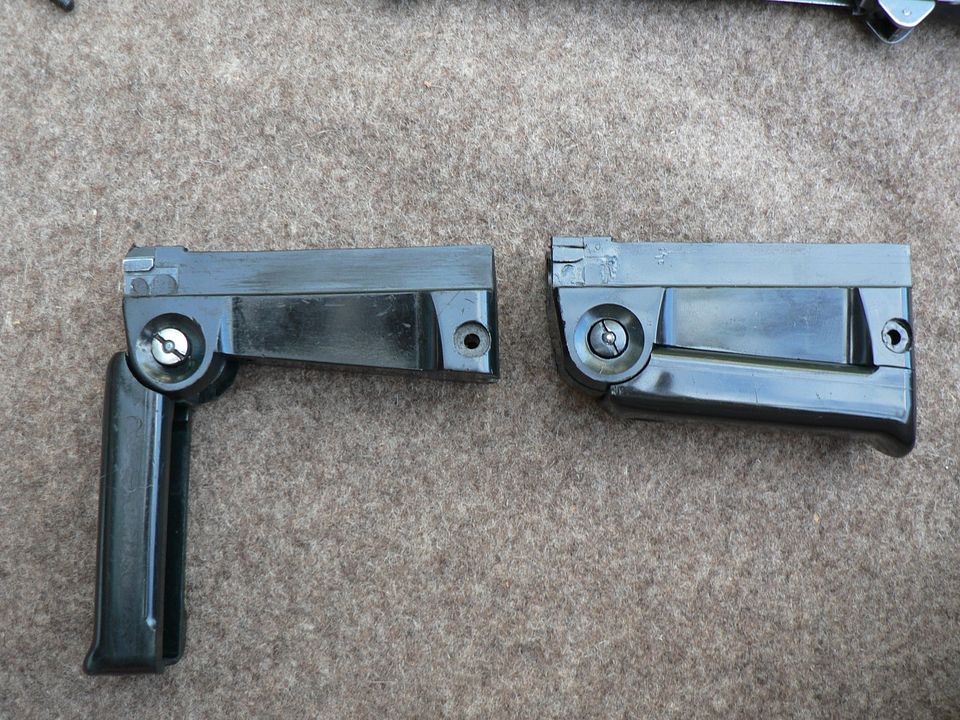
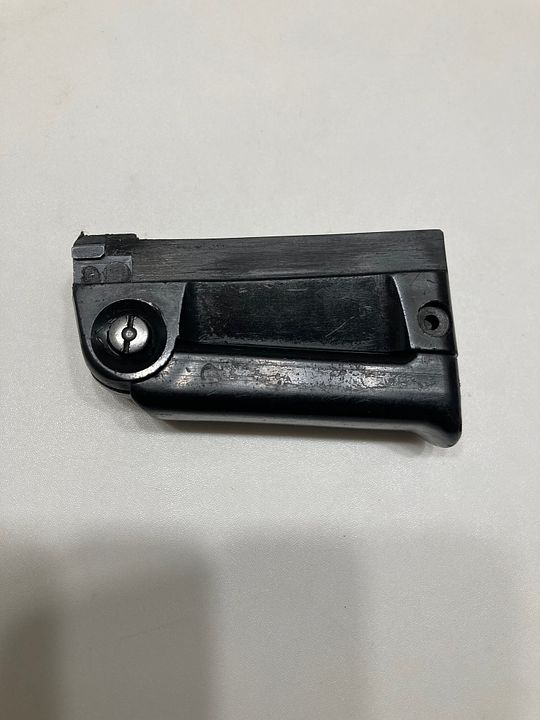
Quoted: Was the one you got Parked or blued? Really want a blued version and to SBE it so I can sell my kits, barrels and jigs and just go with a factory built gun instead of a home build. Quoted: Was the one you got Parked or blued? Really want a blued version and to SBE it so I can sell my kits, barrels and jigs and just go with a factory built gun instead of a home build. The way they are constructed makes SBR'ing one using the original stock almost impossible .....just an FYI The receiver/frame is mostly aluminum, that has been grafted to an original steel pistol grip section, and it is lacking crucial details that allow an original stock to actually function |
|
|
|
[#31]
Quoted: Was the one you got Parked or blued? Really want a blued version and to SBE it so I can sell my kits, barrels and jigs and just go with a factory built gun instead of a home build. Mine is blued. I also picked up a parts kit, holster and two extra 25 rounders from Appalachian Arms |
|
|
|
[#32]
Quoted: The way they are constructed makes SBR'ing one using the original stock almost impossible .....just an FYI The receiver/frame is mostly aluminum, that has been grafted to an original steel pistol grip section, and it is lacking crucial details that allow an original stock to actually function What are the missing details? |
|
|
|
[#33]
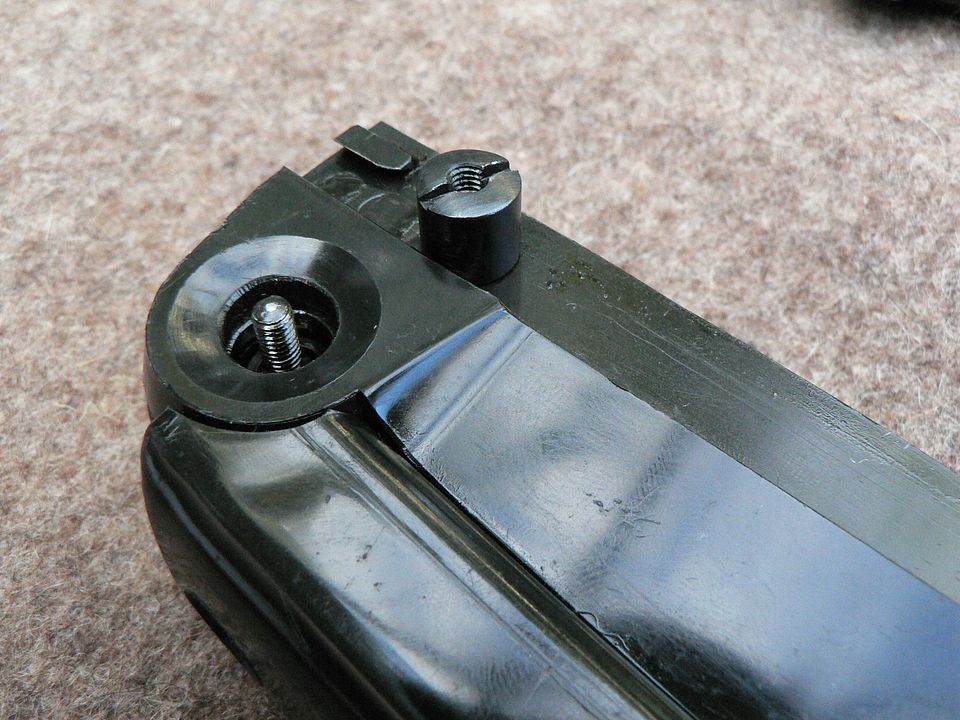
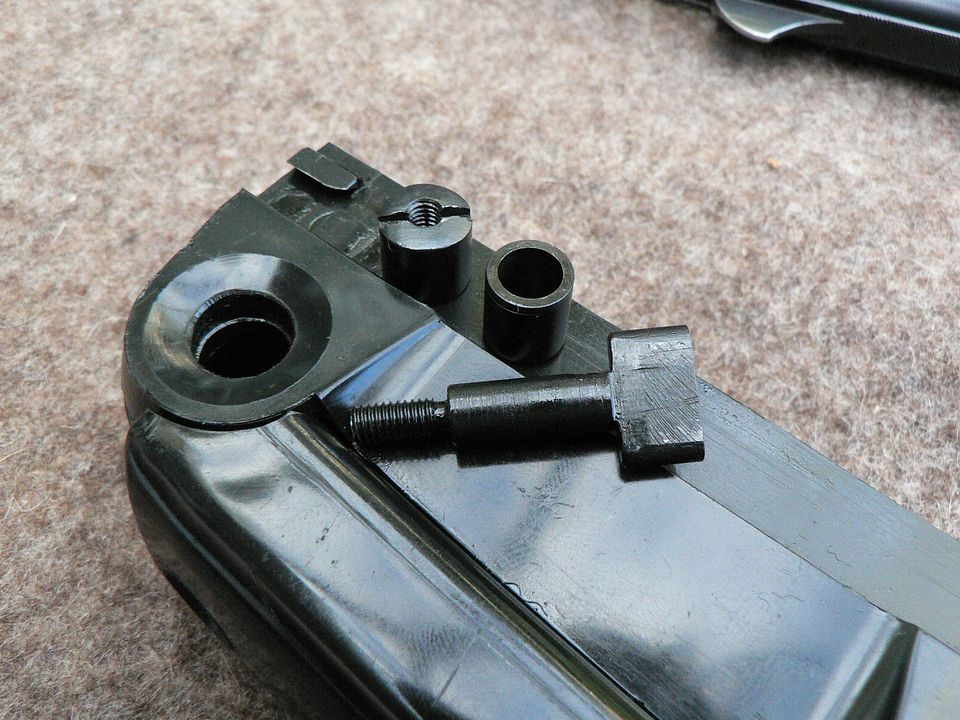
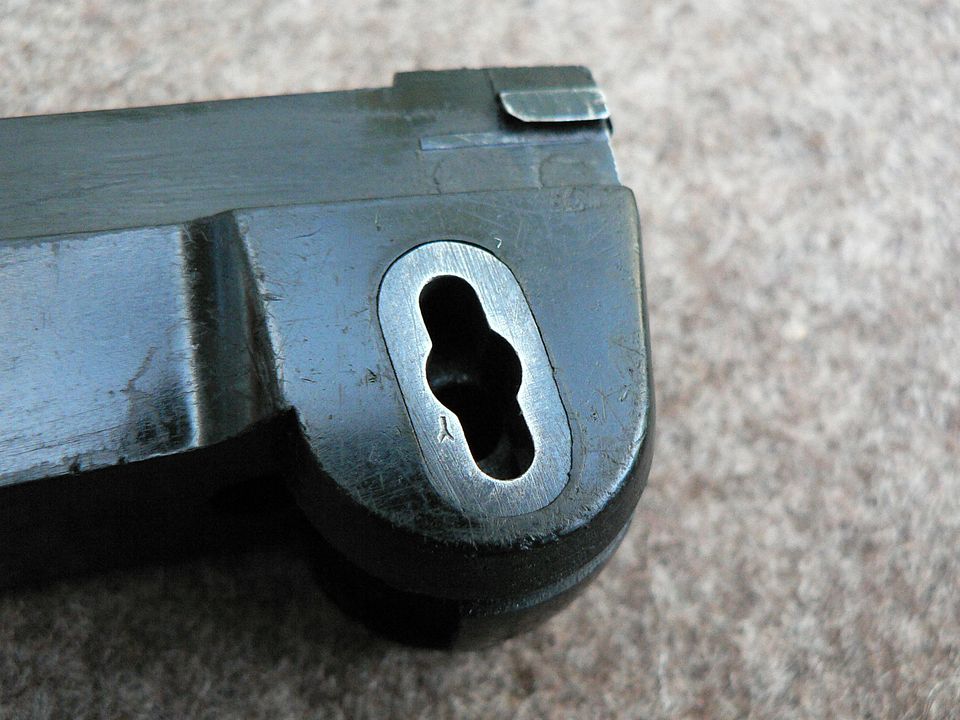
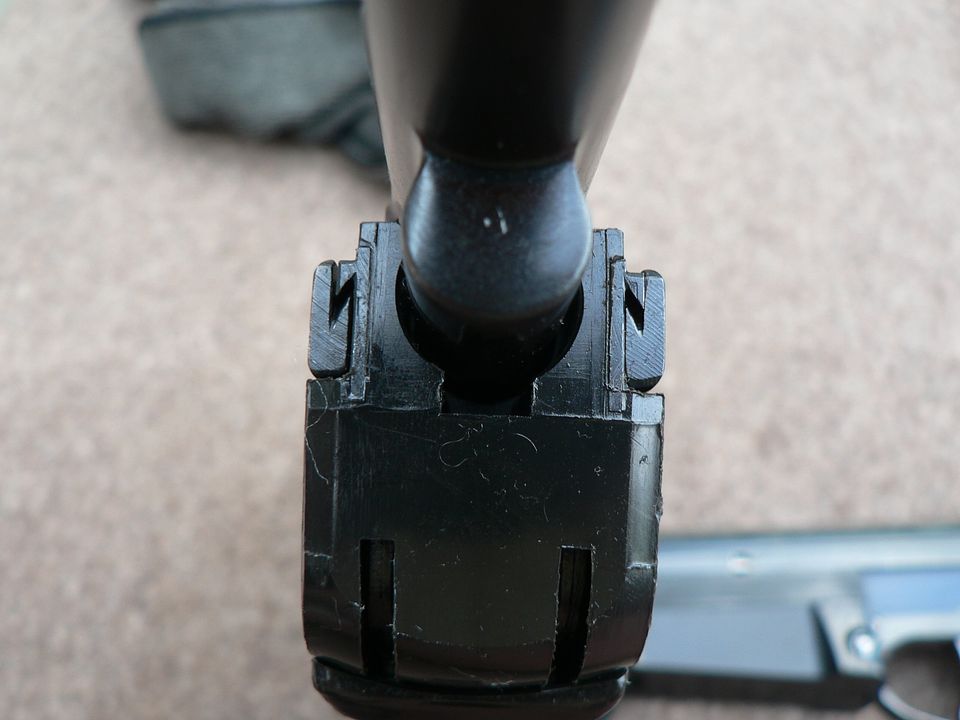
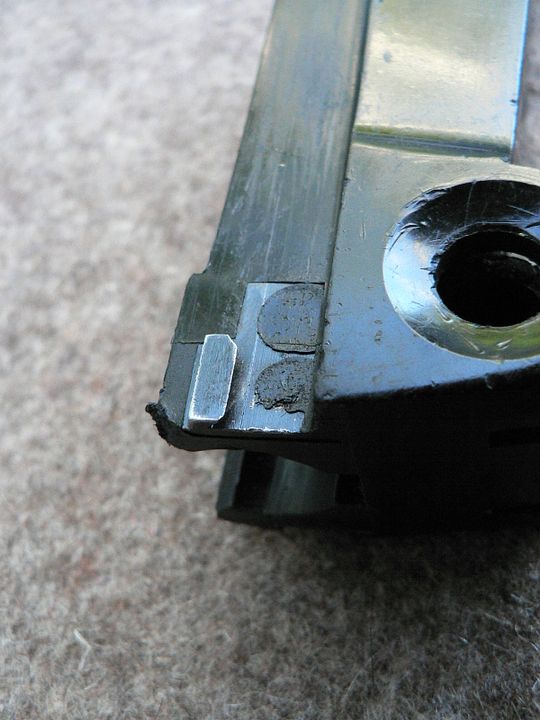
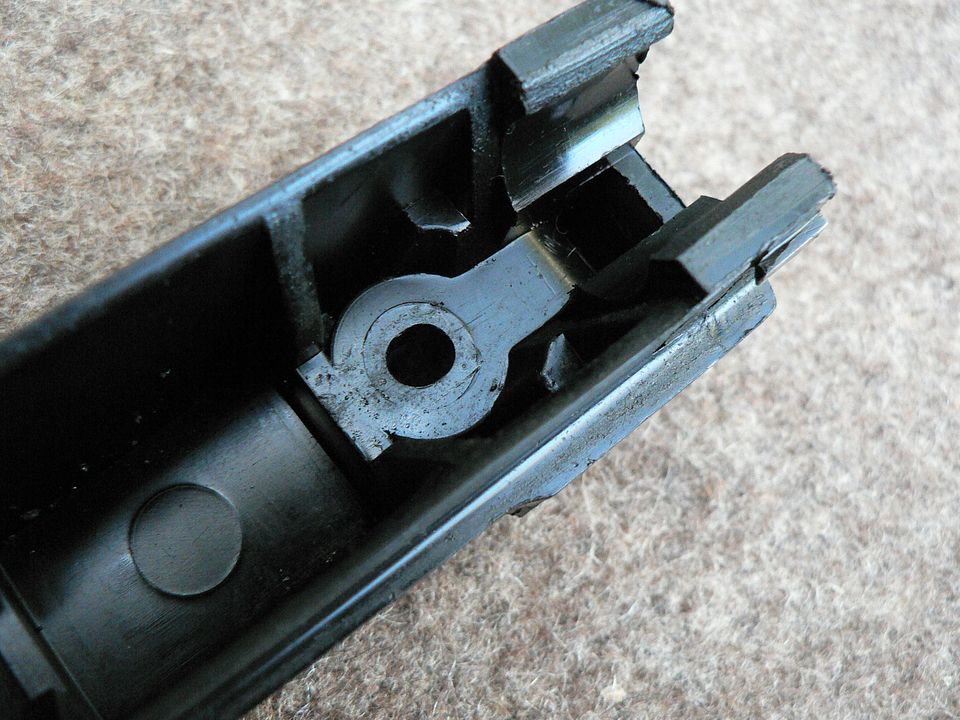
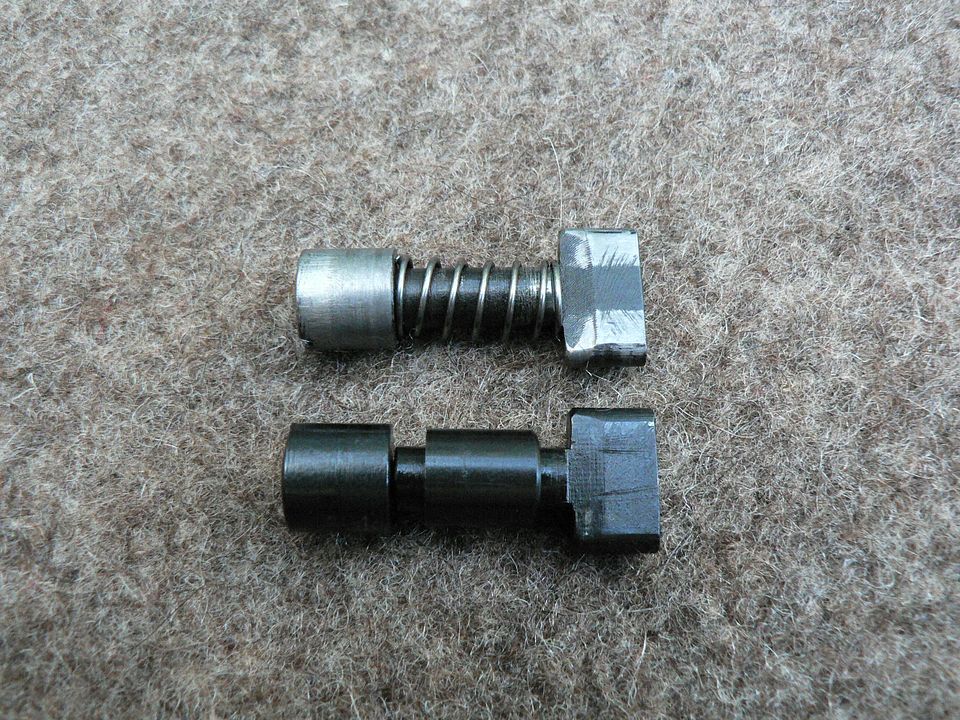
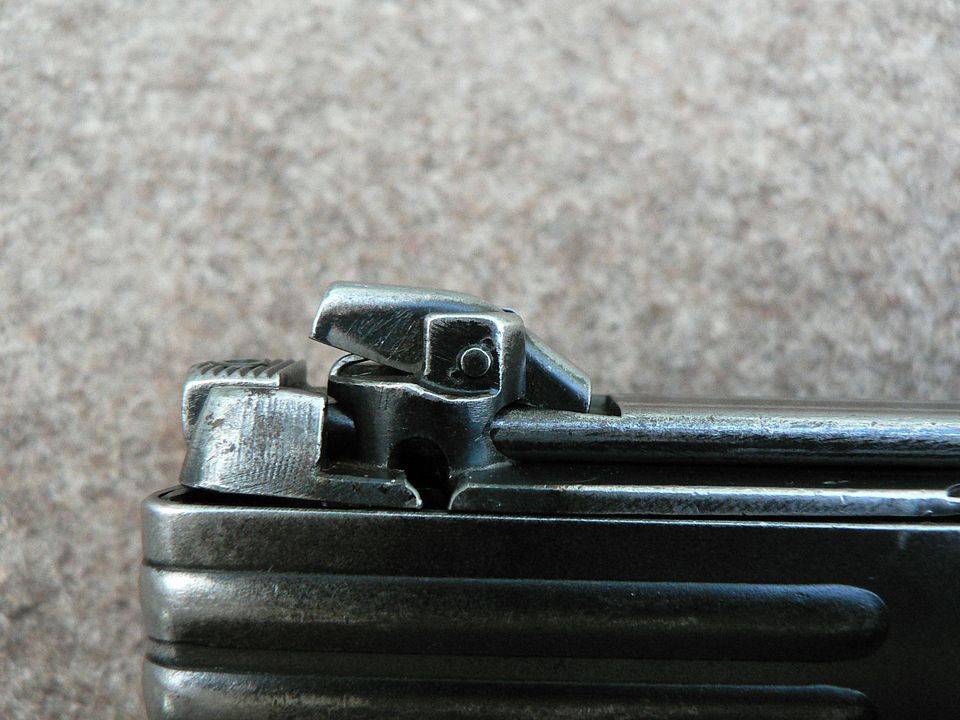
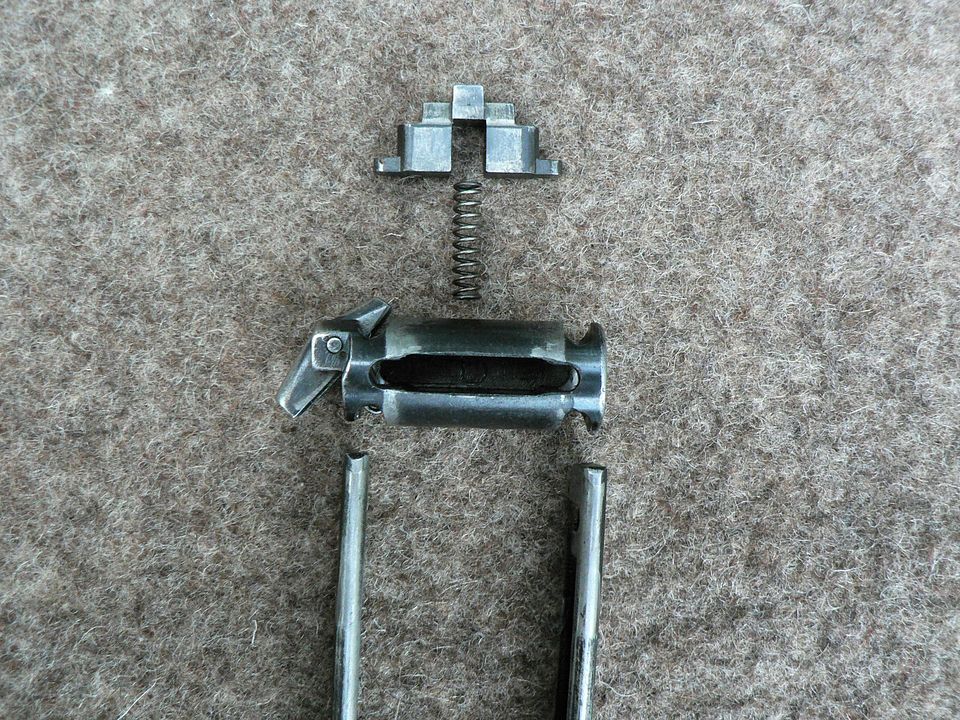
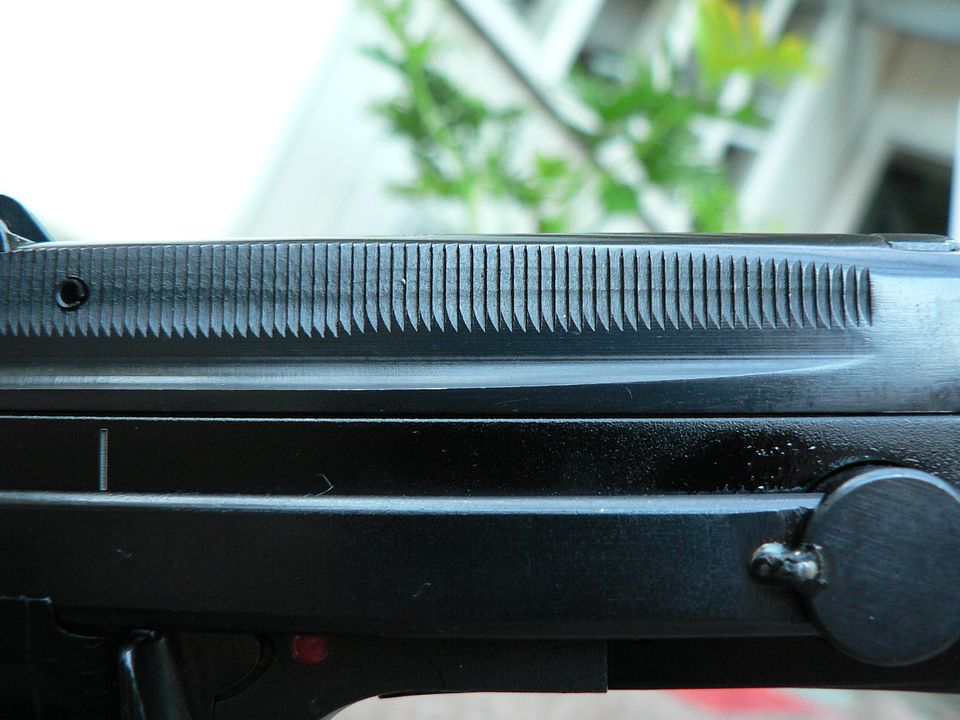
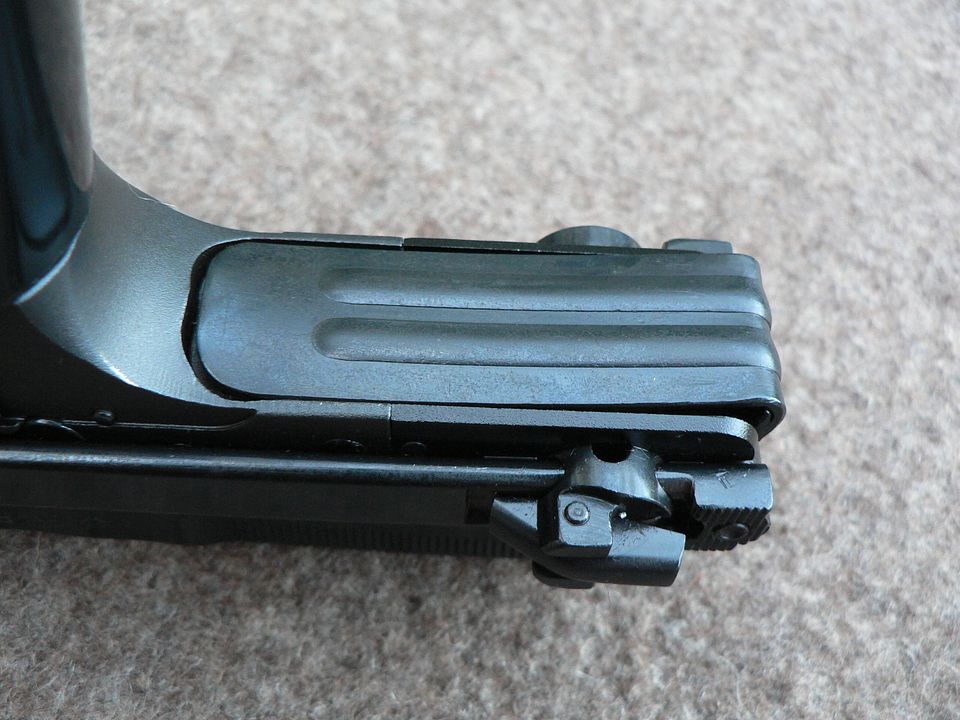
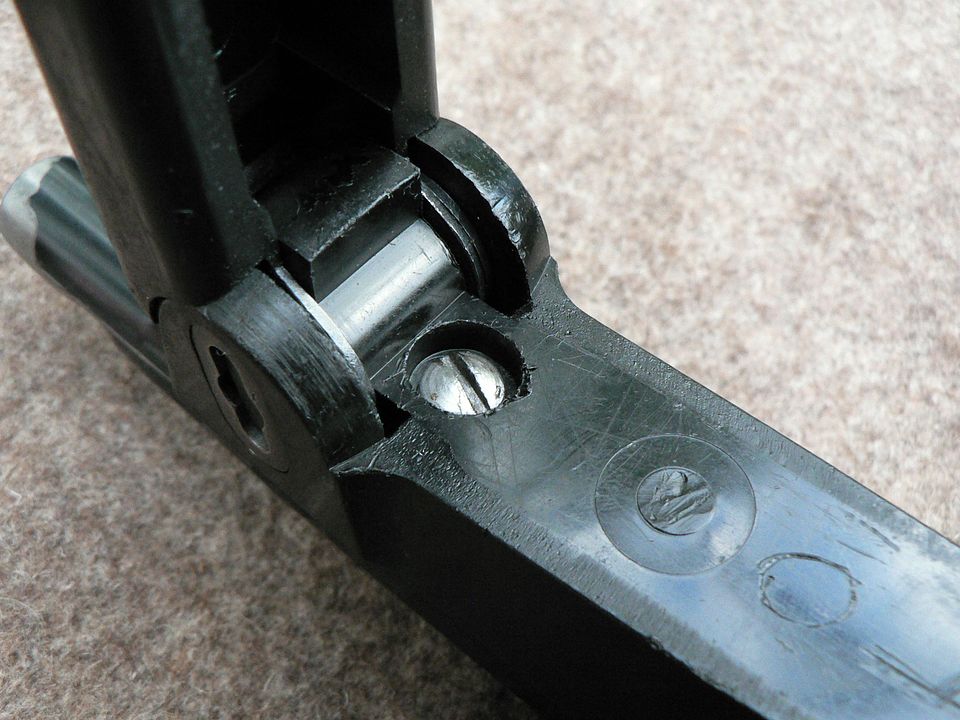
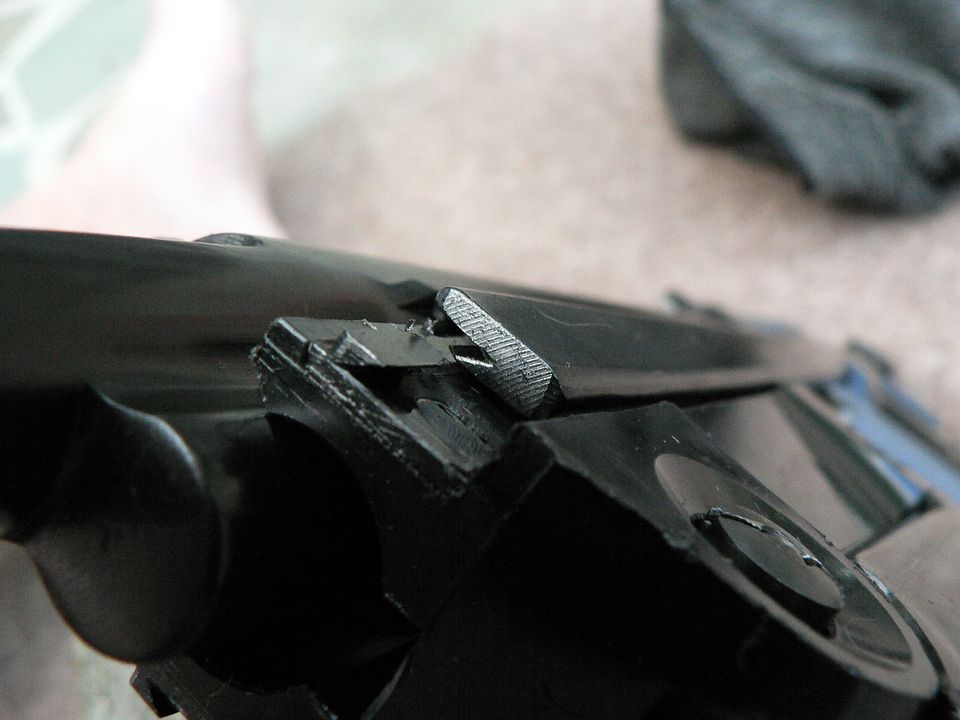
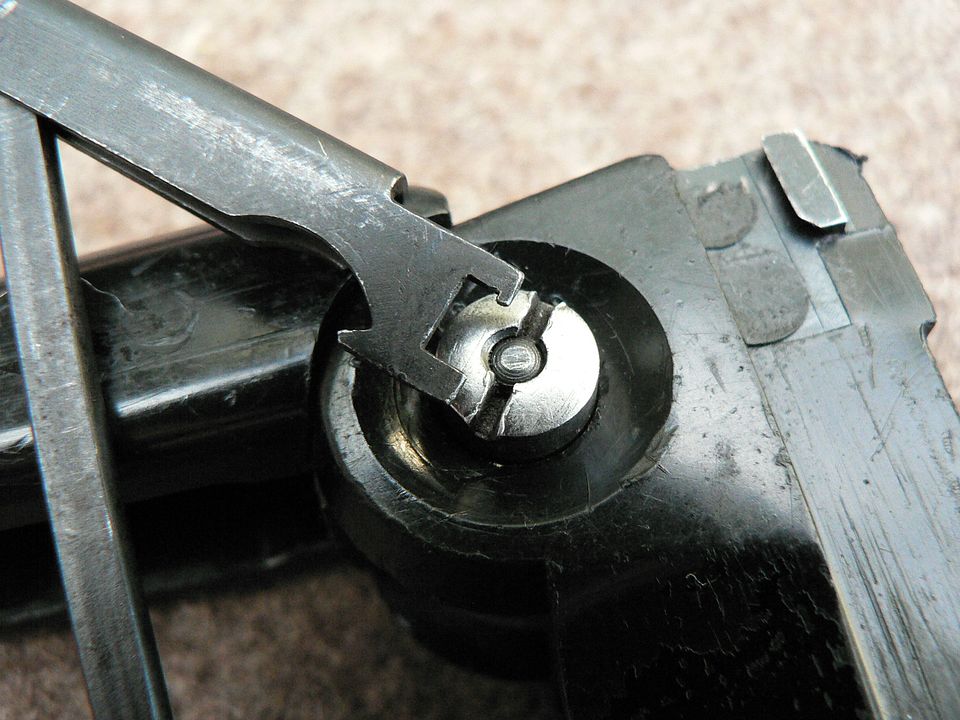
Quoted: What are the missing details? Quoted: Quoted: The way they are constructed makes SBR'ing one using the original stock almost impossible .....just an FYI The receiver/frame is mostly aluminum, that has been grafted to an original steel pistol grip section, and it is lacking crucial details that allow an original stock to actually function What are the missing details? The stock on an original PM-63 both extends, and drops downward before locking in place. There are 2 raised "rails" on each side of the receiver on an original ... they support the stock, and the ass-end of the top rail acts as a stop to keep the stock extended ....they are absent on the semi There is also a spring loaded catch that locks the stock in the downward/extended position.... the machined hole/relief that this part resides in is not present on the semi either... Might as well adapt some other stock to the gun ..... figure out a way to graft it to the rear of some original stock rails |
|
|
|
[#34]
I'll probably just reweld my 2 then and have one in 380 and one in 9x18 if thats the case.
|
|
|
|
[#37]
Excellent, as always. Keep 'em comin'!
|
|
|
|
[#39]
Great write up so far! I had one of the "Gen 1's" that was an absolute turd. This is seriously making me want to get one of the new ones.
|
|
|
|
[#40]
Incredible write up! Thank you. This is the kind of thread ARFCOM needs more of. I have run a bunch of rounds through a post sample PM63, they sure are cool guns.
|
|
|

AR15.COM is the world's largest firearm community and is a gathering place for firearm enthusiasts of all types.
From hunters and military members, to competition shooters and general firearm enthusiasts, we welcome anyone who values and respects the way of the firearm.

Subscribe to our monthly Newsletter to receive firearm news, product discounts from your favorite Industry Partners, and more.
Copyright © 1996-2024 AR15.COM LLC. All Rights Reserved.
Any use of this content without express written consent is prohibited.
AR15.Com reserves the right to overwrite or replace any affiliate, commercial, or monetizable links, posted by users, with our own.


_P1220155.png?width=960&height=720&fit=bounds)
_P1220156.png?width=960&height=720&fit=bounds)
_P1220157.png?width=960&height=720&fit=bounds)


_P1220277.png?width=960&height=720&fit=bounds)


_IMG_0770_cHq4K4MjV7ig7Nyg1YJoRE.png?width=960&height=720&fit=bounds)