


AK Sponsor


[ARCHIVED THREAD] - WASR Project finally completed (Page 1 of 2)
Posted: 8/15/2008 2:35:44 PM EDT
|
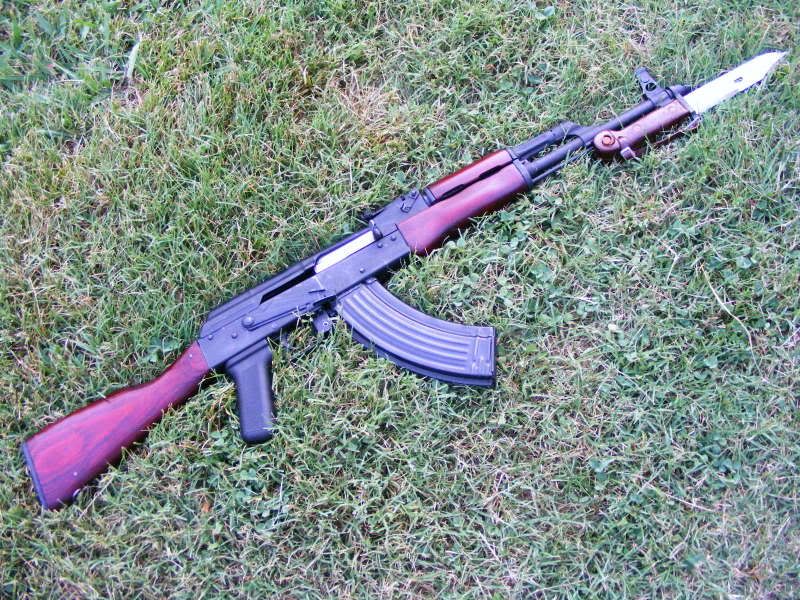
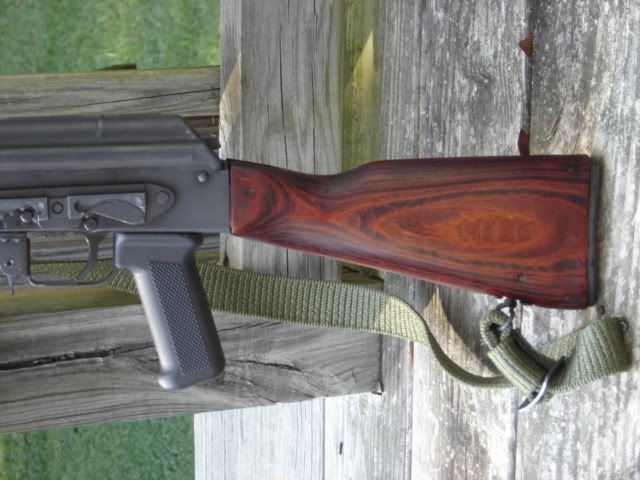
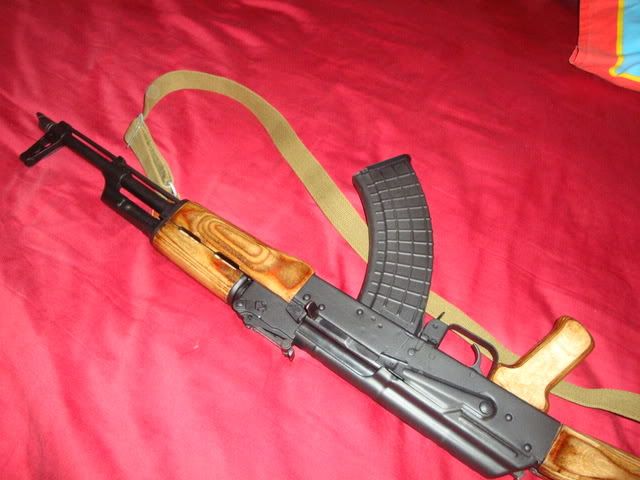
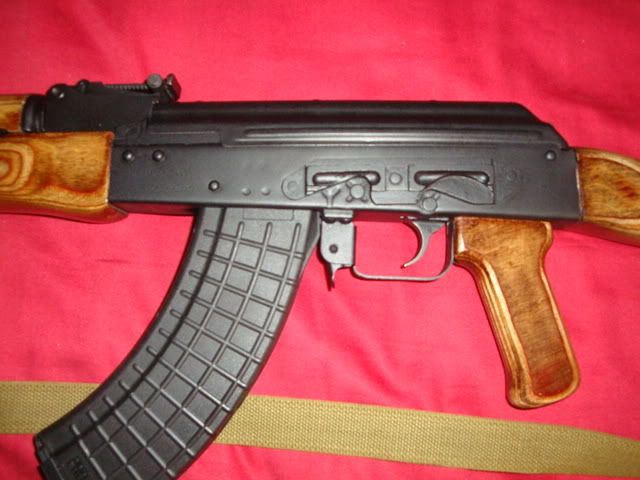
It started as a plain stock wasr-10, that I became inspired when I saw pic's of Loki's wasr, he gave me directions to copy cat his wood color, which turned out real nice, thanks Lokihilehttp://i49.photobucket.com/albums/f253/Tarheel_John/031.jpg http://i49.photobucket.com/albums/f253/Tarheel_John/030.jpg http://i49.photobucket.com/albums/f253/Tarheel_John/032.jpg http://i49.photobucket.com/albums/f253/Tarheel_John/034.jpg I love the Bulgy slabsides, they fit perfect with no waggle like the steal mags do in wasr's http://i49.photobucket.com/albums/f253/Tarheel_John/033.jpg So what do you guys think |

|
|
|
I'm not to worried about that because I keep it in a gun cabnet inside the house where its always air conditioned and doesn't get that humid. |
Nice write-up. I'll use it in the future. |


|
You should spray paint your pistol grip to a brown or red to match to that wood. I did a couple in a maroonish brown color. You can see it on my wasr10 bottom rifle in this pic. Came out pretty good. I used a plain Sears brand spray paint and let it dry out side on a 90 degree summer day. It has held up well. If you want try some Krlylon that's available for plastics. 
|
| Thanks Drobs, but I just ordered a Romanian wine pistol grip, that looks kind of like a blood-red bakelite material grip, I'll post a pic when I get it on there. I should still be fine with the tapco triger assembly (3) + tapco gas piston (4) & US muzzle break makes (5) compliance parts |
|
I believe a stamped receiver AK with muzzle device actually has a 6 US part requirement for 922r. The piston you replaced on the WASR was actually already a US made piston. Century doesn't mark theirs IIRC. I believe they just have an "understanding" with the ATF that they are US made... Take this with a grain of salt though...my legal advice is worth about as much as you paid for it. Someone smarter and more informed than myself should be along to straighten things out soon enough... 
|
When you say let it soak in RIT dye do you mean paint it on like a stain and leave it there for 12 hours, are are you telling me to fill a pan or bucket or something with rit dye and leave all the wood in there overnight? |
I let mine soak overnight. Most just paint it on, but I wanted mine to soak in good. I had to let it dry for a longer time than if I'd just painted on, it took 5 days for the stock to shrink down enough to get it back into the reciever. And I tried to put the gas tube cover on before it completely dried, and it split, had to order a new one. I've found if you paint it on, you get more of a light red, almost pink color. Soaking it for about 12 hours gives you the blood red |
You need multiple bottle of the dye then don't you? What kind of container did you use to soak it in? I'm assuming you let it dry for multiple days before you put the polyurethane/varnish on it? And did you let the stain dry for a day or so before you soaked it in the Rit Dye too? |
Yes I used two bottles of scarlet red and that wasn't enough so I filled one of the bottles up with hot water and mixed it in. I used a big aluminum disposable grilling pan from walmart. Yes I waited a couple days after the stain was applied and when it was dry then I soaked it in dye, fliping it over and stiring up the dye every couple hours, to let the dye set in evenly. It took 4 or 5 days to dry, then it will look a really dark red but after a couple light coats of semi-gloss clear laquer it will shine blood red. Lightly smooth it out with some steal wool before the laquer. |


| If you want an example of brushing the RIT on, Versus soaking it overnight, my pics with the regular front handguard are soaked overnight, the verticle foregrip is the result of the "brush-on" method. When I get the motivation, I'm going to strip the varnish from the foregrip, and soak it, too. |


More of the same WASR that I posted a pic of earlier in the thread- 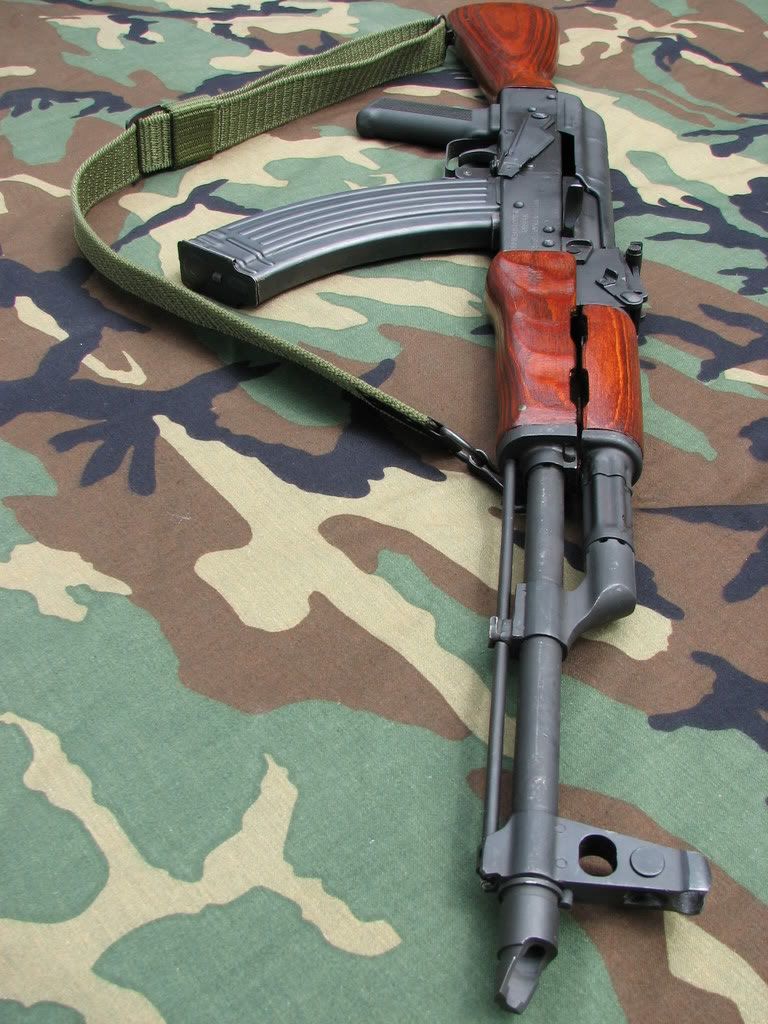   It's the one in the middle of the photo along with the rest of the family... . The AK on the far right is a WASR I refinished as well. It was the first one I refinished and didn't turn out quite as well as my second (learned from my mistakes).-
|
The wood on the SAR-1s that Century sold in the late '90s/early 2000s came finished already. I took the buttstock off and added the side-folder, but kept the bulged forward handguards. I don't know what type of stain they used, but it's a medium brown color, and the finish looks to be varnish or something of that nature. Just wish they would have come with threaded muzzles. I might have to get a hold of a die set-up one of these days and add a slant break to that SAR-1... ETA: Here's a closer look-  
|
That's my first AK. I bought it used off the EE. I don't shoot it too much anymore, the solid stock WASRs with the slant breaks get most of the few rounds I can still afford to fire off put through them. I got the SAR1 back when ammo was still relatively cheap. Didn't stock up nearly as much as I should have. I did do a bit of bumpfiring with that rifle at an arfcom shoot though. Got the barrel so hot it would burn skin (which I found out first hand... ). The handguards were hot enough to be uncomfortable to hold without a glove. You wouldn't think it, but after about 120 rounds (all I bumpfired through it) over the course of a few minutes that thing will start smokin'.Bumpfiring was fun to try once. Ammo is over twice as expensive now though so I probably won't be doing it again...but I won't say never... |
I'm still trying to decide if I should sand it before I let it soak overnight. I was told steel wool but I don't know if it's really needed or not. |
| I decided to just let it soak. Also, as an FYI I came up with a sort of almost really good idea. I filled the empty RIT bottles up with rocks so they would have some weight, then put them in the dye with the wood in an attempt to displace more of the fluid and see if I could completely submerse the wood. It worked but didn't get it completely submersed so I'm still gonna have to flip it. |
I weighted the wood down to keep it under. |
I didn't have enough liquid in the serving pan to cover the wood completely is what I mean. I still don't. I'm considering adding water to it but I think this will work out fine because it seems to be doing ok so far. |
I used 2 bottels dye and another bottle of water to cover the wood. The water didn't thin the dye enough to make any difference. |
| Does anyone know how to go about re-finishing the metal on a WASR (or any AK for that matter)? The paint/finish on mine is kinda dull and has some scratches on it. I just want to give it a nice solid black finish with a slight slight gloss to it... I don't even care if the internals are re-done. Any ideas? I've heard about some sort of paint you can bake on or something. Please anything is helpful, I know absolutely nothing about this type of work! |
|
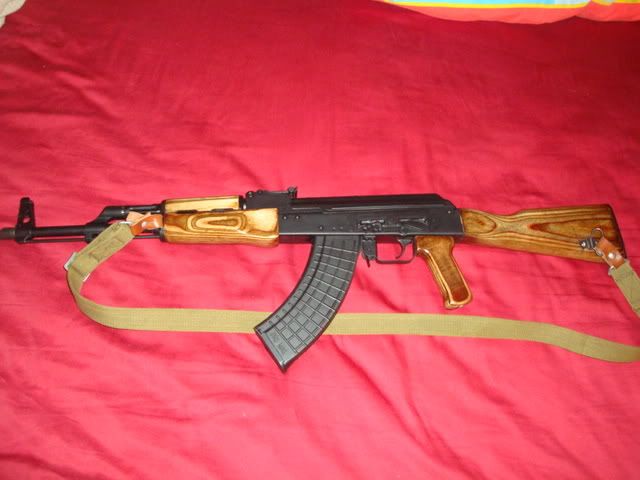
I finished my staining and polyurethane job with the gun some time early last week and I basically let it set for a few days to make sure it properly dried. I took it to the range this past Friday which meant excellent lighting and therefore awesome pictures of the stain. The gunsf rom top to bottom are, my refinished WASR-10/63, my friend's WASR-10/63 as it arrived from the dealer, and my other friend's SAR-1 with the finish it had on it.  Because my friend's WASR is unfinished these next two can almost serve as a before and after picture.   And here is a nice picture of the handguards that really shows off the red. 
|
Awesome! Good job. Now polish that charging handle! |
|
Quoted:
Does anyone know how to go about re-finishing the metal on a WASR (or any AK for that matter)? The paint/finish on mine is kinda dull and has some scratches on it. I just want to give it a nice solid black finish with a slight slight gloss to it... I don't even care if the internals are re-done. Any ideas? I've heard about some sort of paint you can bake on or something. Please anything is helpful, I know absolutely nothing about this type of work! +1 Anyone? |
|
Quoted:
Quoted:
Does anyone know how to go about re-finishing the metal on a WASR (or any AK for that matter)? The paint/finish on mine is kinda dull and has some scratches on it. I just want to give it a nice solid black finish with a slight slight gloss to it... I don't even care if the internals are re-done. Any ideas? I've heard about some sort of paint you can bake on or something. Please anything is helpful, I know absolutely nothing about this type of work! +1 Anyone? Quick and dirty? Strip the gun, sand the finish down, degrease WELL, paint with high-heat black engine paint. |
| damnnn im really impressed by that red finish, i did up mine w all tapco plastic furniture and flashlight and red dot and vertical stock, it looks tactical and bad ass..but this looks like a much more fun fulfilling project though cause its more than just swapping parts.. im going to go with wood grain next..thanks for the inspiration |

|
finally finished mine.
polished the charging handle was gonna paint her, but decided on the weathered look for the metal parts followed loki, and tarheel_johns methods (THANKS!) only thing changed was i used red oak stain not red mahogany and for the rit dye portion, i used 2 bottles of scarlett red and 1 bottle of rit's wine color, plus 2 parts water. im happy with the outcome, thanks again for the info on how to rock the furniture fellas! before http://img.photobucket.com/albums/v11/geakoner/wasrog.jpg after http://img.photobucket.com/albums/v11/geakoner/wasrredo2.jpg http://img.photobucket.com/albums/v11/geakoner/wasrredo1.jpg |
| Looks good you guys, I haven't looked at this forum in awhile, I'm glad to see all the new projects, its to cold in the winter here to do any wood refinishing, so I can't wait till the end of spring and I'll start some new projects of my own. I'm looking for a fixed wood stock Bulgy 74 and if I find one I'm going to stain it red just like my WASR |

[ARCHIVED THREAD] - WASR Project finally completed (Page 1 of 2)
AK Sponsor