|
Posted: 4/10/2006 7:15:00 PM EDT
In this installment I will be using Rit dye to refinish Romanian AK furniture. I've written it on a "complete newbie" level because that's what I was four days ago when I started researching.
I want to thank Eric (getit) for introducing me to this method. When he first showed me the furniture he had refinished this way my first thought was "AK candy"...  Go from this 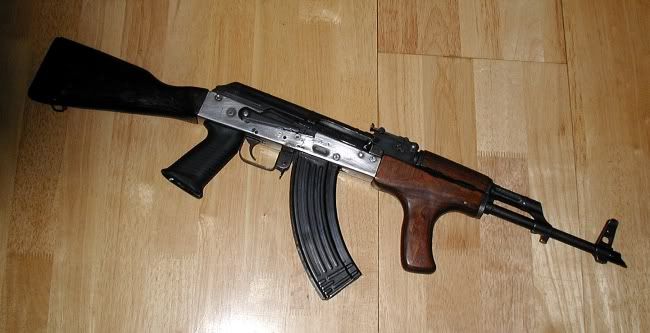 To this (don't mind the fresh black paint): 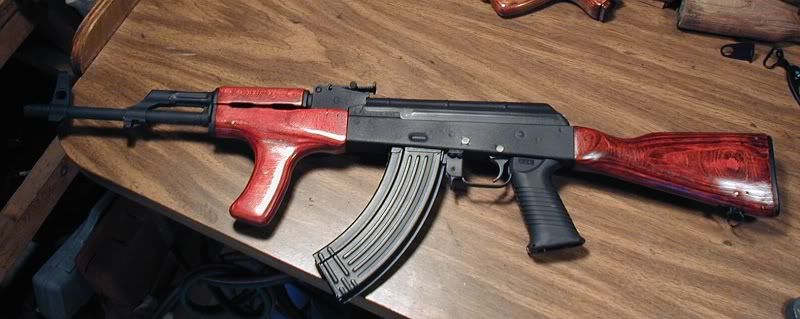 These Romanian kits came from Copes Distributing. I was very impressed with their service. There was a slight mistake in my order and they handled it quickly. Their packaging was also excellent. Each kit was wrapped in a thick plastic bag and then wrapped in several layers of paper. It is upsetting to open a package to find damage you know was done during shipping because of bad packaging. I refinished three sets of furniture, each one a deeper shade of red. First let's take a look at what I started with. 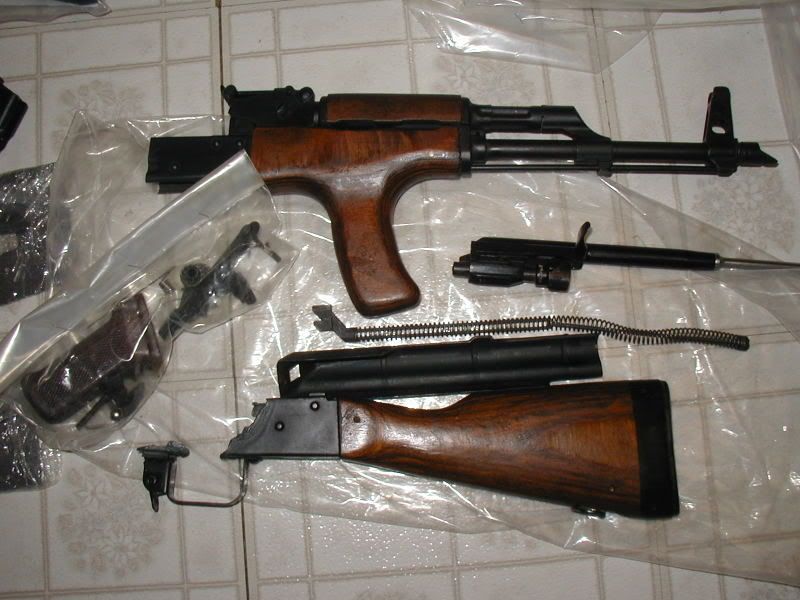 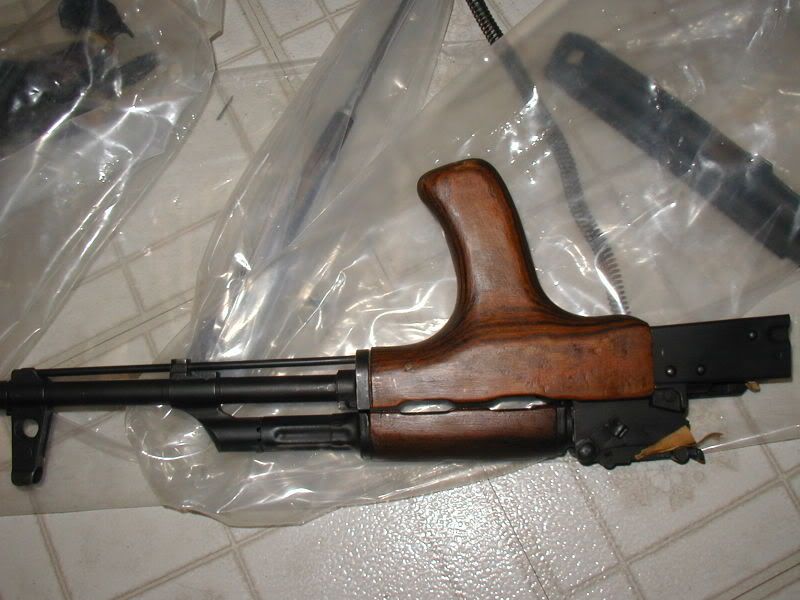 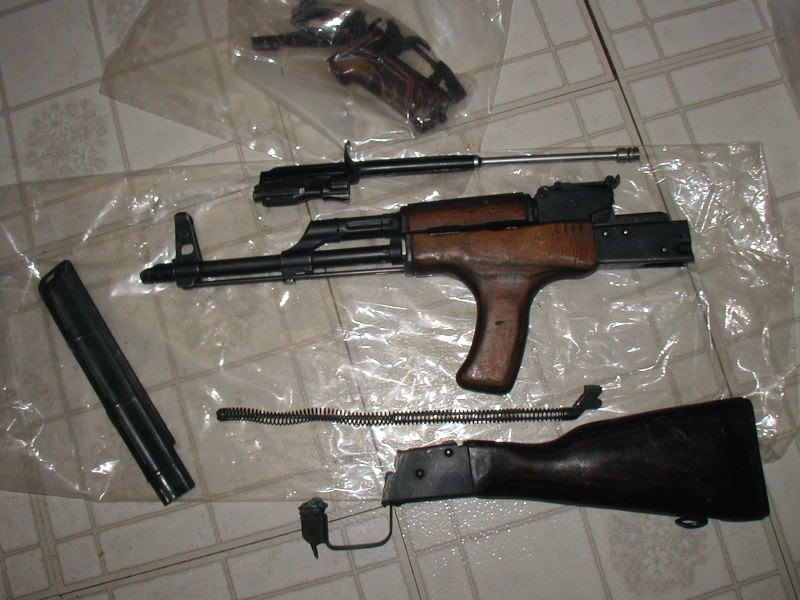 The pictures are not the best quality, but you can get a general idea of the condition of the furniture before I started. The wood is very dark and banged up. Here is the finished furniture: 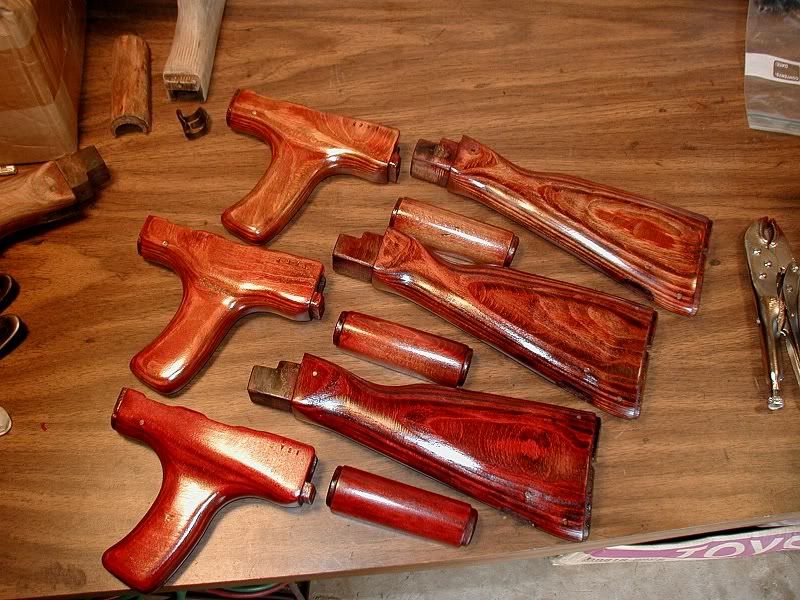  To start, you need to strip the wood. Here's a list of what you need: Wood stripper $7 plastic scraper $2 medium sized brush $0.50 foil pan or plastic tub $?? rubber gloves (if you're messy - I didn't bother with these because I can keep my hands clean while working with this stuff) $2 scotchbrite pads $?? access to water I bought a 2 quart can of kleen strip from Home Depot. I used maybe 1/8 of it in the process of stripping four kits worth of wood. Start by tossing one furniture kit in the pan, then liberally apply the stripper to the wood using your brush. I put enough on that there was some running off the sides of the wood. Leave for 45 minutes or so. When you return, you should see something like this: 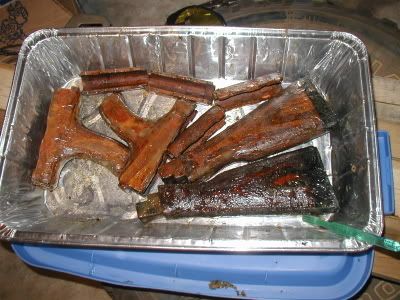 The old finish on the wood should be bubbled up. Take your plastic scraper and scrape off the old finish. It should come off easily. Don't put much pressure on the wood with the scraper, this will cause dents since the wood is wet. The old finish should peel off in sheets with each pass of the scraper. If you find it difficult to scrape up the finish, you may need to leave the stripper on the wood for another 15 minutes or so. If you find that most of the finish comes up easily, but small patches remain, go ahead and remove what you can. You can dab more stripper on those trouble spots and let it work for you. To show just how easily the old finish should come up, I used a piece of clear plastic packaging as a scraper. 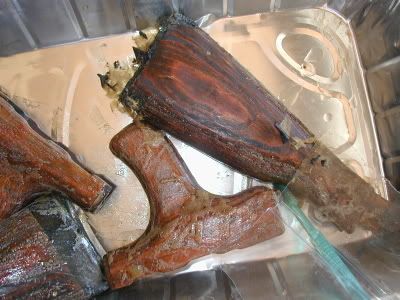 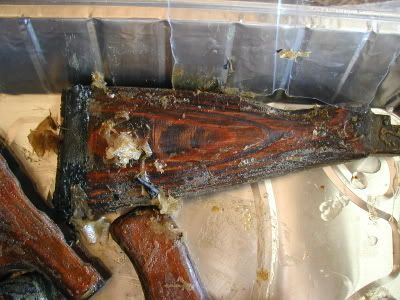 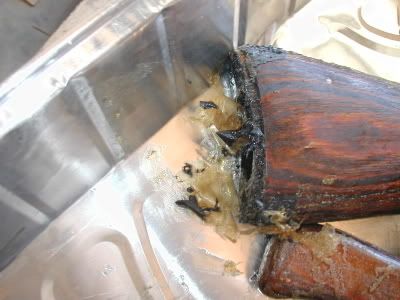 Scape the old finish off the wood, then take the scotchbrite pad to it under cold running water. You could also immerse the wood in a bucket of water to scrub it. You want to knock off any pieces of crud you can, but don't spend too much time with the wood in the water. I spent about thirty seconds on each piece. Take the wood out of the sink and pad it dry with a towel. Let it air dry for an hour or two before moving to the next step. If you have any dents you would like to raise, do it now. Place a slightly damp cloth over the dented area, then place a hot iron on the cloth. Hold it for a few seconds and check the dent. Repeat until the dent is raised. Sand the dried stripped wood beginning with 60 grit, then remove the 60 grit marks with 100 grit, remove the 100 grit marks with 150 gritt... to 220 grit. You will know what I mean when you try it. You want a place to get comfortable when you do this step, don't rush through it. Pay very close attention to the direction of grain and only sand in that direction. You will have to change directions back and forth 90 degrees many times during the sanding. Just finesse it. If you bear down on the wood to much you will make deep scratches that will be hard to remove. I try to only press down on the wood if there are spots I need to shave down, or bits of leftover finish to remove. Sand these spots with 60 grit, then gently sand with 60 grit to remove the deep scratches. The goal is to get down to the 220 grit and have a smooth surface with no visible scratch marks. Once you have the wood scratch-free, clean it with a tack cloth or a damp towel. You need to choose how you will stain/dye/finish the furniture at this point. I chose to use Rit dye and I strongly recommend this method, but some people use Formby's or Minwax products. If you are using Rit dye, just skip to the next step. If you decide to use one of the other wood finishing products, just follow the directions on the packaging. I will add a word of caution here: I have heard that it is difficult to touch up polyurethane finishes. I have no experience with polyurethane, so take this with a grain of salt. You might want to look into this further before making a decision. I have seen stocks finished with other products, and I still prefer the Rit dye method. For this how-to, I will assume you want a red or brown finish. You need the following items: Rit dyes: Golden Yellow #42 Scarlet #5 Dark Brown #25 (optional) mixing cup cheap paint brush rubbing alcohol 0000 steel wool Deft gloss clear spray Get the Rit dye in liquid form if you can. I couldn't find yellow liquid, so I made my own using the powder you can see in this picture: 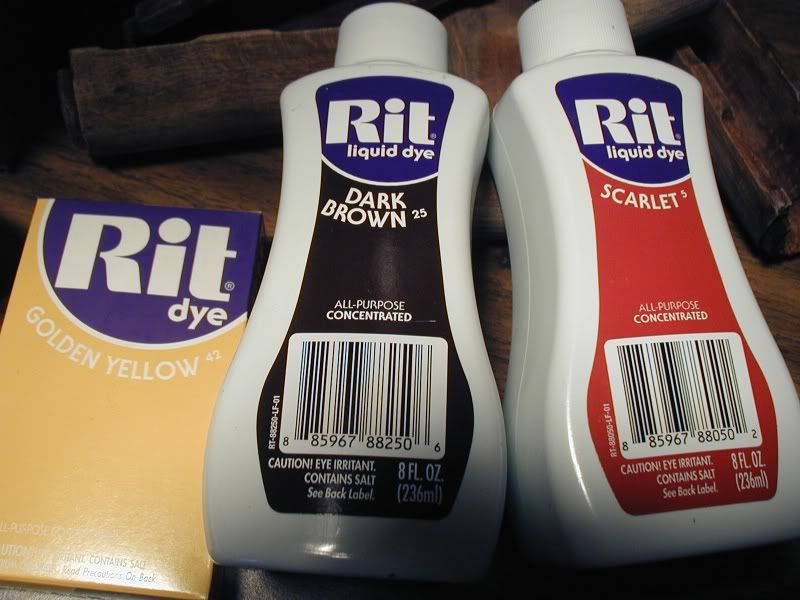 Just follow the directions to make dye from powder. You just add two cups of hot water for each one ounce package I believe. I tried two different methods when I did mine. For the brownest (least red) finish pictured at the beginning (the set on top) I used no alcohol in the mix. I mixed 4 parts red, 4 parts yellow, and one part brown. The finish turned out beautiful, but I don't recommend using no alcohol because the process takes much longer. Here's the "preferred" method: Mix 1 part yellow, 1 part red, and 4 parts alcohol. Stir these in your mixing cup. You can add a small amount of brown to the mix if you are looking for a darker brown finish. 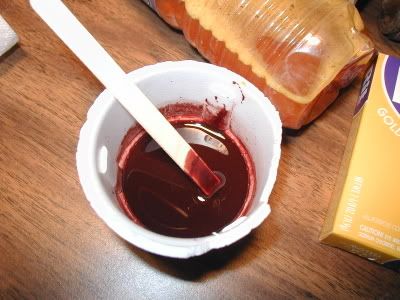 Test the mixture if you would like on a hidden part of the stock or on another piece of wood.  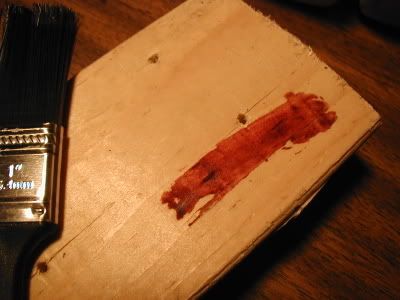 Apply the dye mix to your clean sanded furniture with the brush evenly. 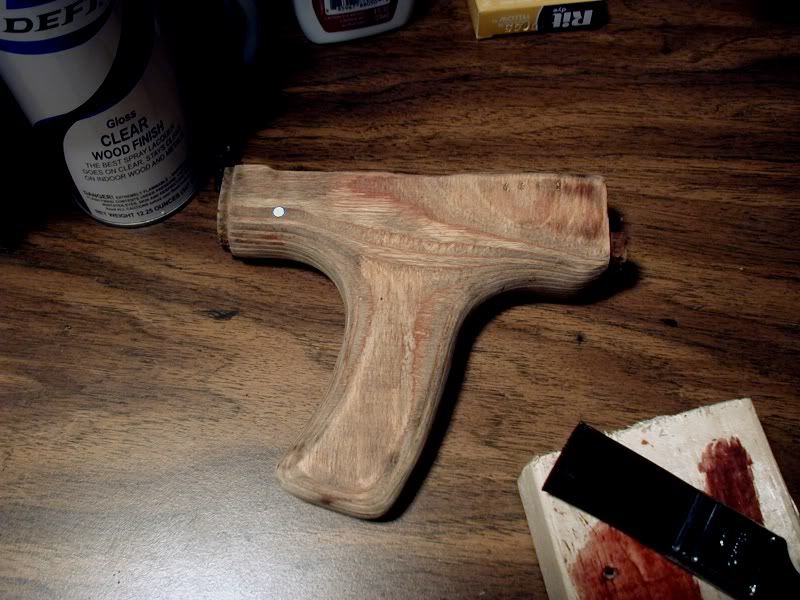 The alcohol really speeds up this process. The wood soaks in the dye much more quickly this way. Just brush on one coat, by the time you have brushed one side, the other side will probably be starting to look dry. The color you see when you first brush the dye on the wood will show you about the most tinted finish you could obtain with the dye mixture you are using. 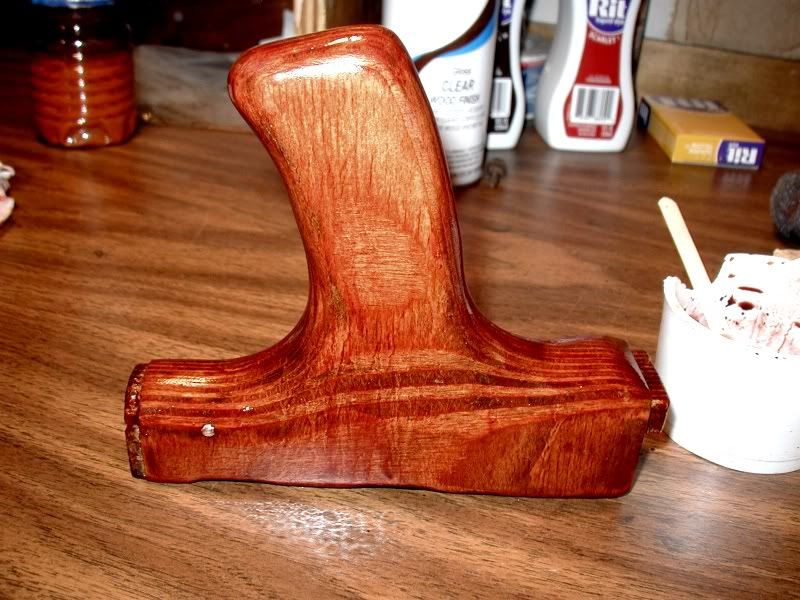 If you want a darker red, mix in more red dye, you get the picture. You will be able to lessen how much color comes through by buffing with the steel wool - even to the point of bringing the wood back to brown. Let the wood soak the dye for five minutes or so. When it's dry, it will have a very matte looking finish.  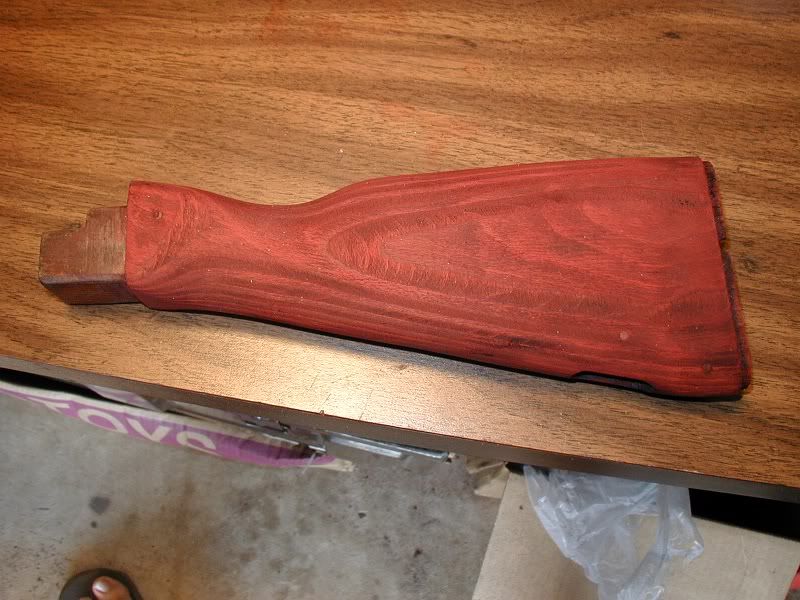 Buff the wood with steel wool. IMPORTANT: Buff very lightly if you want a bright red, or buff more if you want a more subdued, brown tone. The only difference between the second and third stock set was the amount of buffing I did with steel wool. For the deeper red finish I just barely knocked off the rough dried dye, and for the more brownish finish I really buffed the dye out well.  Either way, you need to buff enough to knock off the rougher textured dried dye on the surface. The wood should have a satin-like sheen to it when you are done. This doesn't take much buffing. 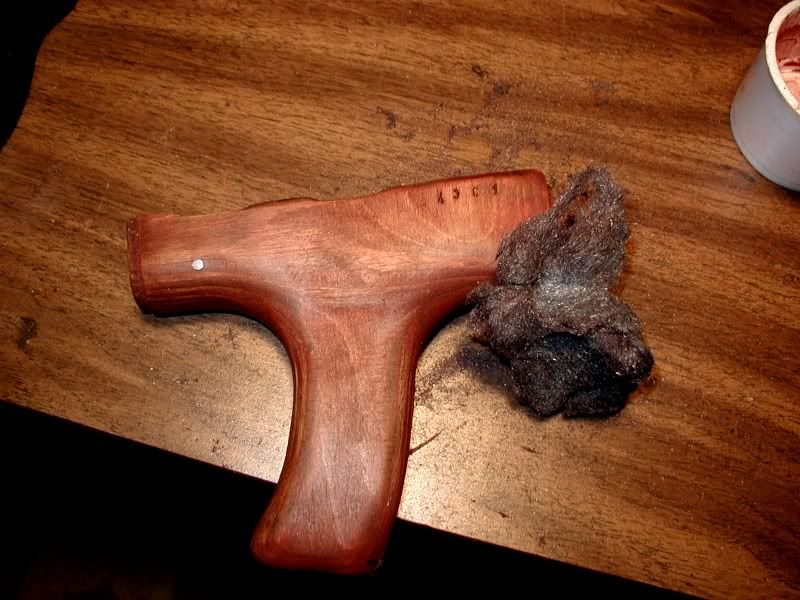 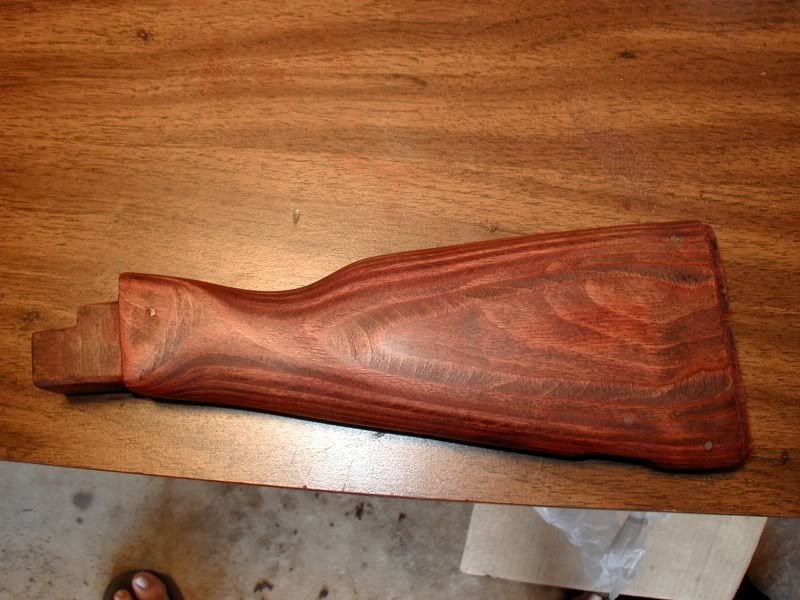 Knock off the crud with a paper towel and repeat this process three times to ensure a consistent finish. Before spraying with Deft gloss, allow the wood to dry completely. Make sure the surface of the wood is free of lint or crud. I just wiped the wood down with a clean towel, you can use tack cloth if you have it I'd imagine. Rig up a way to hold the furniture parts securely without getting your hands in the way. You can see what I used in the following pictures. Spray the first coat of Deft gloss. This stuff dries very quickly. It's usually dry to the touch in less than 15 minutes, and completely dry in an hour. Pay attention to the amount you spray. If you spray too much and see a run starting, just level the piece out and let it dry a bit before proceeding. Don't worry too much about the thickness of this first coat. 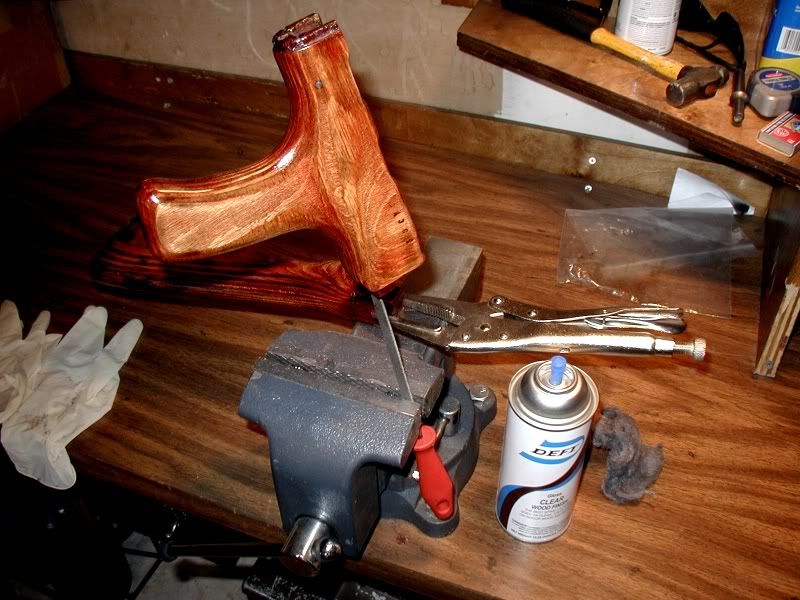 Once the Deft dries to the touch, buff it out lightly with the 0000 steel wool. Don't buff too much, just enough to turn the gloss finish to satin. Wipe the furniture down after buffing with a towel or tack cloth. Just make sure it's clean. Spray the second coat of Deft clear gloss. 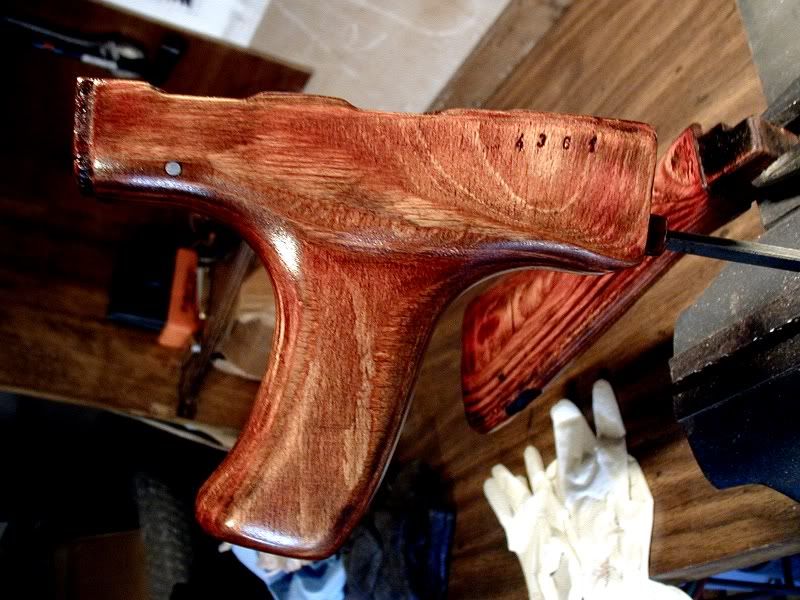 On this coat you want to get a consistent layer over the entire piece. Go for a layer thick enough that it covers up any surface imperfections. If you get any runs, just sand them down a bit with 220 grit. Buff it, clean it, and prepare to lay down the final coat. Spray this one as thick as you can without getting runs.  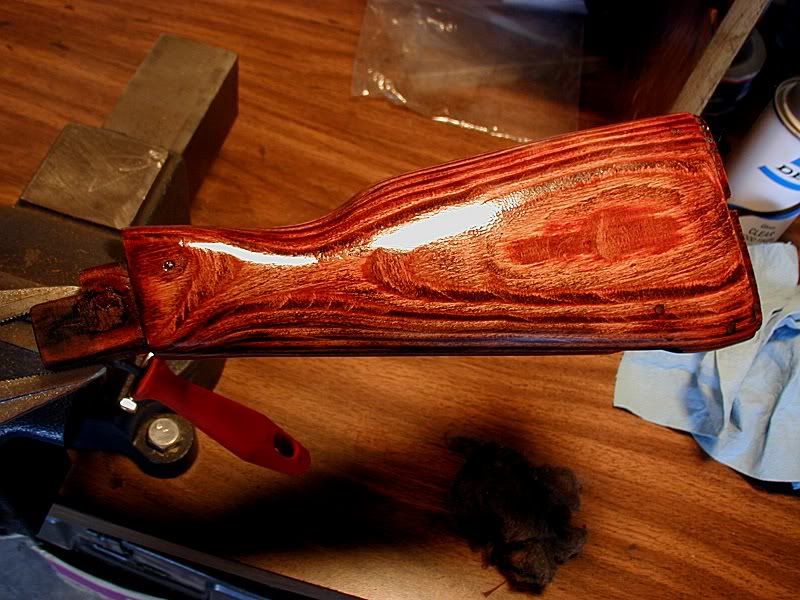 Enjoy! 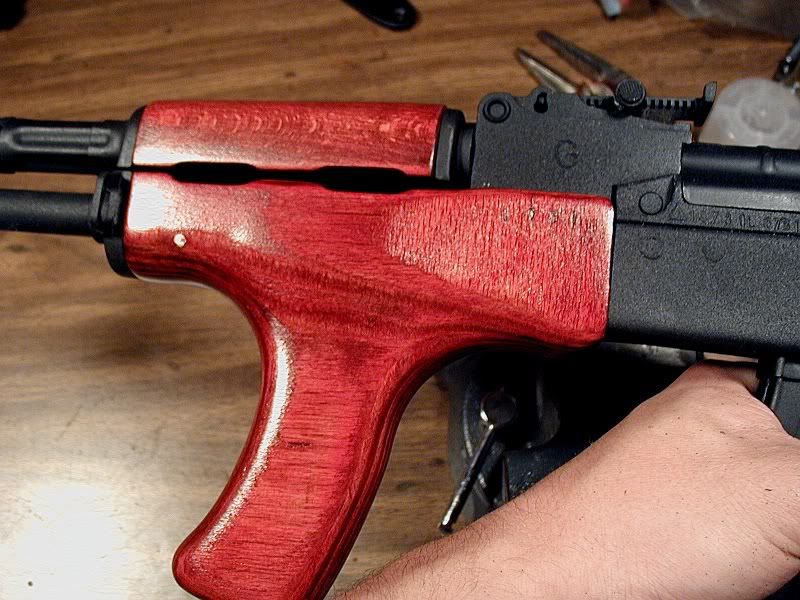  
|
|
|
|
[#1]
great writeup.
that romy shellac is a pain in the ass isnt it? |
|
|
|
[#2]
now see brian....u didnt need me
 awesome work my friend!!!!!!!!!!!!!!! let me tell u guys that when hoohaa came to our build party in the middle of march he had never messed w/ an AK...u have really stepped up!! this right here was most of my intentions on the build party for people to learn U just better watch out for the wife, she might go awal on ya if u dont spend some time w/ her!!  and then and then  and then afterwards and then afterwards 
|
|
|
|
[#3]
Great write up hoohaa!! Now I know what I am doing on my day off tomorrow.
|
|
|
|
[#4]
I don't think they used shellac. When you strip it, it resembles a thick plastic film. I'm more inclined to think they used a urethane type finish. |
|
|
|
|
[#5]
I don't know what it is they used, I just know that you have to let the stripper work for you. I found that 30 minutes just didn't cut it, so I waited until the stuff just came right up.
A big thanks to Eric (getit) for introducing me to this method. I was hooked the first time he brought out the furniture he had refinished using this method. It looked like AK candy or something.
|
|
|
|
[#6]
I used to use chemical stripper but found it less messy to use a heat gun on low power and a metal scraper. If it were a shellac finish, it would completely dissolve in a few minute of soaking in rubbing alcohol. |
|
|
|
|
[#7]
Tagged for later use
|
|
|
 Win a FREE Membership!
Sign up for the ARFCOM weekly newsletter and be entered to win a free ARFCOM membership. One new winner* is announced every week!
You will receive an email every Friday morning featuring the latest chatter from the hottest topics, breaking news surrounding legislation, as well as exclusive deals only available to ARFCOM email subscribers.

AR15.COM is the world's largest firearm community and is a gathering place for firearm enthusiasts of all types.
From hunters and military members, to competition shooters and general firearm enthusiasts, we welcome anyone who values and respects the way of the firearm.

Subscribe to our monthly Newsletter to receive firearm news, product discounts from your favorite Industry Partners, and more.
Copyright © 1996-2024 AR15.COM LLC. All Rights Reserved.
Any use of this content without express written consent is prohibited.
AR15.Com reserves the right to overwrite or replace any affiliate, commercial, or monetizable links, posted by users, with our own.


