|
[#1]
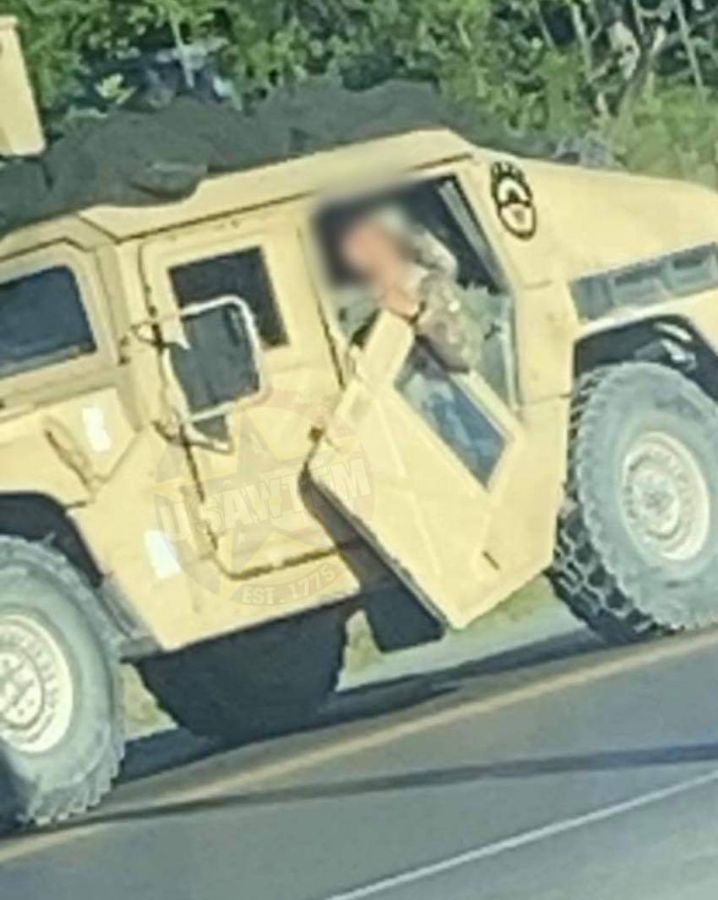
I know I've been bad about updating on the progress of my hardtop/C-pillar/bed rail install but I'll be making a big one soon. There's been lots of progress made!
In the mean time, I spotted this in the little town of Williamstown, KY, home of the big Ark Encounter. Gotta love the big chrome mirrors! |
|
|
|
KY, USA
|
[#2]
I just noticed it has an a2 brushguard slapped on a 998 bumperette. With some adaptor piece between them, homemade i suppose.
|
|
|
|
[#3]
Originally Posted By Aguas: I like those but im afraid to do anything that restricts airflow. It actually seems to push/direct air into the the radiator stack. Did notice any difference in my short drive. Tomorrow, I plan on a longer driver and will see. |
|
|
|
|
[#4]
Installed the b pillar gun mounts. Now to find some swing arms.
Also looking for a set of the full length Jack rails. I am getting the msg side steps and need the jack rails. |
|
|
|
|
[#5]
First side step showed up. Second will be here next week. Still looking for some full length Jack rails with the correct bolt pattern for these.
|
|
|
|
|
[Last Edit: jake-cutter]
[#6]
A big thank you to @stoner63a I now have a full set of MSG side steps. Now to find a set of full length Jack Rails.
|
|
|
|
|
[#7]
Originally Posted By jake-cutter: A big thank you to @stoner63a I now have a full set of MSG side steps. Now to find a set of full length Jack Rails. https://www.AR15.Com/media/mediaFiles/86875/IMG_20201001_190121_jpg-1615559.JPG Shoulder Diameter 1/2" Shoulder Length 1/4" Thread 3/8"-16TPI Thread Length 3/4" Head Height 1/8" Overall Length 1 3/4" Grade 8 I've found the bolts with the shoulder length of 3/8" but not 1/4", I thought about using the 3/8" shoulder length but with a washer or two that have a side cutout to a C shape like the Turret Weapons Support leveling shims. |
|
|
|
|
[#8]
Nice, factory in bed tire carrier up for sale for $400: https://www.facebook.com/groups/hmmwv.repair.maintenance.diy.group/permalink/2644508419196361/
|
|
|
|
|
[Last Edit: Ryan_Ruck]
[#9]
Question for the other owners here.
Of those of you who have Smart Start boxes, preferably KDS but input on the Nartrons would also be appreciated, I'm wondering if you can check glow plug voltage state for me. Last week when we first started getting cold weather, I noticed I was having hard starts. Figured it was an issue with my TSU as I was running an unknown takeout one from Austin as the last unknown takeout had the metal body separate from the sensor part and, it was firing off the glow plugs regardless of engine temp. With the cold hard starting, I assume maybe it wasn't really firing them off correctly or at all despite the wait light indicating it was. So ordered a brand new one and a set of 8 OEM plugs (from MacMotors so I know they're not Chinese). When I pulled the plugs I ohm'd them all out and 5 of the 8 tested out completely open. New plugs and TSU, super fast starts now. Out of curiosity, once I got everything replaced, I hooked my meter up to a glow plug lead and ran through the different states. Ignition off = 0v, ignition run with plugs firing = 22v, ignition run no glow plugs = 4v. I just want to make sure the 4v in a non-firing state is normal and not something that might cause the plugs to burn out. (And yes, I realize I still haven't gotten an update done since I got the hard top and stuff on.  ) )
|
|
|
|
|
[#10]
New toy for the truck came today!
Got myself a Blue Force Tracker radio tray to replace my old more basic tray. I got a really good price on it but, wasn't sure about spending the money on it initially. Now that I've got it in the truck and started mocking stuff up on it, I am very glad I did. Makes much better use of existing space than the old one. Extra thanks to the Joe that used panel adhesive/sealer instead of regular silicone to seal up whatever was previously in this spot.  Oh, what's this decal say?  Cleaned off a little and in the truck. Initially I was wondering why the hell there was a gap between the tabs and the dash. Then Aguas reminded me the new trucks have the dash plenum for the HVAC. Will have to get some square tube and make some standoffs when I permanently mount it. Like so: Not really what this was designed for but my VIC3 main box fits perfect in here! Driver's crew box is going to go where the VIC3 Lite main box normally goes: Front passenger's crew box is going to go where the front dual crew station box goes on the studs on top of the tray in the gap pic. The ever important cup holder is going to get flipped and go here: For the screen holder, I haven't decided if I'm going to get an actual broken BFT screen and gut it to put a tablet in it like some folks have done or just get a Panasonic ToughPad which can run Android apps. Passenger's side cup holder will go here: Got room in there for my Augi boxes: The keyboard area where the yellow sticker is on the front makes a nice little glove box for docs and, there's still a ton of unused space where the BFT CPU goes on the passenger's side. Super glad I bought this! The seller forgot to put the mounting plate in with it so he's sending it. Can't permanent mount it just yet. |
|
|
|
|
[#11]
Originally Posted By Ryan_Ruck: New toy for the truck came today! Got myself a Blue Force Tracker radio tray .... Looks like you have found a good complete one with all the kick plate parts. I've been looking for one of those for a while that is as complete as yours. The only problem is I don't want to spend the $400 average asking price. |
|
|
|
|
[Last Edit: Ryan_Ruck]
[#12]
Originally Posted By FKAM: Looks like you have found a good complete one with all the kick plate parts. I've been looking for one of those for a while that is as complete as yours. The only problem is I don't want to spend the $400 average asking price. Originally Posted By FKAM: Originally Posted By Ryan_Ruck: New toy for the truck came today! Got myself a Blue Force Tracker radio tray .... Looks like you have found a good complete one with all the kick plate parts. I've been looking for one of those for a while that is as complete as yours. The only problem is I don't want to spend the $400 average asking price. @FKAM Was $220 but shipping was about $100. Seller might still have a couple if you're interested: https://www.facebook.com/groups/1186578574714390/permalink/3493884870650404/ Just an FYI you'll have to set up shipping. I did UPS ground since he's got a UPS dropoff near him he said. ETA: Also has the mounting plate but as mentioned he forgot to put one in mine he shipped so had to ship it separate today. |
|
|
|
|
[#13]
Originally Posted By Ryan_Ruck: @FKAM Was $220 but shipping was about $100. Seller might still have a couple if you're interested: https://www.facebook.com/groups/1186578574714390/permalink/3493884870650404/ Thanx I'll check it out. |
|
|
|
|
[#14]
Originally Posted By Ryan_Ruck: New toy for the truck came today! For the screen holder, I haven't decided if I'm going to get an actual broken BFT screen and gut it to put a tablet in it like some folks have done or just get a Panasonic ToughPad which can run Android apps. Not near me so you'd have to find someone to pick-up and ship. https://www.publicsurplus.com/sms/all,wa/auction/view?auc=2652395 |
|
|
|
|
[#15]
Originally Posted By Mainsail: Not near me so you'd have to find someone to pick-up and ship. https://www.publicsurplus.com/sms/all,wa/auction/view?auc=2652395 Originally Posted By Mainsail: Originally Posted By Ryan_Ruck: New toy for the truck came today! For the screen holder, I haven't decided if I'm going to get an actual broken BFT screen and gut it to put a tablet in it like some folks have done or just get a Panasonic ToughPad which can run Android apps. Not near me so you'd have to find someone to pick-up and ship. https://www.publicsurplus.com/sms/all,wa/auction/view?auc=2652395 That's a lot of ToughPads.
|
|
|
|
|
[#16]
So been getting the truck ready for my son's car halloween event tonight. Had a bad battery but luckily had a spare Hawker Ryan had picked out for me years ago from Southern Metals that still works. Have the jack rails and side steps done and got in a swing arm too. I will say the special bolts for the side steps weren't needed as I don't plan on taking them off. Would still like to find pics of the quick release pins that prevent them from coming off.
|
|
|
|
|
[Last Edit: jake-cutter]
[#17]
Took it out for lot of loot car event for my son. Will be doing the same tonight in my driveway. The bins in the Ibis Tek bumper are perfect for candy.
|
|
|
|
|
[#18]
I wanted to drive the GMV around with a Trump 2020 Flag on the D Pillars but my Injection Pump is leaking out the driver side butterfly throttle valve, like, massively, it pools up in the gallery then cascades over the back of the block under accelleration.
|
|
|
|
|
[Last Edit: jake-cutter]
[#19]
I hate when parts go out like that. I'm dealing with an erratic oil pressure and a small coolant leak near the heater core lines. Going to replace the sender and gauge and check the grounds since I have to remove the radio tray to get in there. Most likely just a poor connection and some dielectric grease would fix, but since I going to take a heavy tray out to get access, might as well replace it. Luckily Mac Motors had everything and all parts will be here Thursday. For the coolant leak, just going to replace those hoses as they are the only ones that I did not replace when I did the engine swap. Almost didn't catch the coolant leak as it is small and just pooling in the body mount and not hitting the ground.
As for flags, does anybody have a good recommendation on mounting or ones they have bought? |
|
|
|
|
[#20]
Originally Posted By jake-cutter: I hate when parts go out like that. I'm dealing with an erratic oil pressure and a small coolant leak near the heater core lines. Going to replace the sender and gauge and check the grounds since I have to remove the radio tray to get in there. Most likely just a poor connection and some dielectric grease would fix, but since I going to take a heavy tray out to get access, might as well replace it. Luckily Mac Motors had everything and all parts will be here Thursday. For the coolant leak, just going to replace those hoses as they are the only ones that I did not replace when I did the engine swap. Almost didn't catch the coolant leak as it is small and just pooling in the body mount and not hitting the ground. As for flags, does anybody have a good recommendation on mounting or ones they have bought? I just put one on my antenna for my buddy's funeral procession when it drove by. Didn't have any issue driving with it on there either. 
|
|
|
|
|
[#21]
|
|
|
|
|
[#22]
Originally Posted By m35ben: https://www.AR15.Com/media/mediaFiles/390973/116891262_10159115941208606_632890030155-1678594.jpg Army air conditioning |
|
|
|
|
[#23]
ost
|
|
|
|
|
[#24]
Been a while since I've had enough time off to get out. Always fun, even when it's raining. The side steps are really grippy even when wet.
|
|
|
|
|
[#25]
Weird Request: For upcoming Mardi Gras parade, I was asked if my LVOSS system could be rigged to launch rolled T-shirts via compressed air. Bore 66mm, if you remove the electrode you get a 0.5" hole to the barrel. The cannon plug on the back is set low, closer to the bottom barrels so the "timing" might push the bottom two T-shirts out first then not have enough PSI to launch the top two. So a new dummy rear plate with a pipe fitting placed dead center of all 4 barrels to spread the PSI equally may be the answer. 24v Thomas Air Compressor 270047 already onboard GMV. Air tank strapped by "Gunner's feet", input line from Thomas Air Compressor, output line with single ball valve to launch all 8, or a T with ball valve to each LVOSS unit. Range only has to be about 20-25ft to reach the curb from center of the road. Clear shrink wrap tubing to keep T-shirts "pre-rolled" for quick and easy loading into each LVOSS barrel from the turret.
Another idea is a captive "piston" inside each barrel, drill and tap 4 holes for set screws to retain the piston. A plastic lid for spray paint cans fits perfectly in the 66mm bore. |
|
|
|
|
[Last Edit: stoner63a]
[#26]
Originally Posted By jake-cutter: Been a while since I've had enough time off to get out. Always fun, even when it's raining. The side steps are really grippy even when wet. https://www.AR15.Com/media/mediaFiles/86875/IMG_20201127_130844_jpg-1704358.JPG My truck was going to be used by the high school cheerleaders for a Christmas parade this month but the commies cancelled it. I got a bunch of progress on the 2nd CIF truck, GMV5, my keeper OIF1 2A11C has the 5149 DB2 Injection Pump leaking out the throttle butterfly valve so she is dead-lined. GMV5 got power washed with water and Simple Green, the Step Bumper that has been hanging off the trailer hitch the past 9 months has finally been bolted on. I need to hit the cargo bed with a coat of paint before laying down the special cut tread plate cargo bed liner, with a sand tan seat cushion bolted to the front corners. I have clip on aircraft lap belts that clip to the cargo D Rings. I've got 2 M1936 Ammo Can Bins along each wheelhouse, then two sand tan seat cushions to be bolted to a custom cut tread plate for each wheelhouse top. The MSG Assault Cargo Rail Kit needed some adjustments to fit this particular C Pillar, cut from the D Pillar 2x2 square tubing, rotated to fit the angled support tubes on each side. Should have that done before Christmas. My truck has some rivet nuts set into the approximate position of the early A Frame GMV Spare Tire Carrier, I don't know if I want to mount it there, my GSD wouldn't be able to get around between the crew compartment and cargo bed. I have an Ibistek hand-crank, lowerable spare tire carrier I might bolt between the Step Bumper and Airlift Bumper to be a hybrid of the CIF truck and this other truck: My original plan was this 7SFG GMV: Based on this original Commander's In Extremis Force CIF GMV: |
|
|
|
|
[#27]
Originally Posted By stoner63a: Weird Request: For upcoming Mardi Gras parade, I was asked if my LVOSS system could be rigged to launch rolled T-shirts via compressed air. Bore 66mm, if you remove the electrode you get a 0.5" hole to the barrel. The cannon plug on the back is set low, closer to the bottom barrels so the "timing" might push the bottom two T-shirts out first then not have enough PSI to launch the top two. So a new dummy rear plate with a pipe fitting placed dead center of all 4 barrels to spread the PSI equally may be the answer. 24v Thomas Air Compressor 270047 already onboard GMV. Air tank strapped by "Gunner's feet", input line from Thomas Air Compressor, output line with single ball valve to launch all 8, or a T with ball valve to each LVOSS unit. Range only has to be about 20-25ft to reach the curb from center of the road. Clear shrink wrap tubing to keep T-shirts "pre-rolled" for quick and easy loading into each LVOSS barrel from the turret. Another idea is a captive "piston" inside each barrel, drill and tap 4 holes for set screws to retain the piston. A plastic lid for spray paint cans fits perfectly in the 66mm bore. I wonder if it wouldn't be easier to just purpose build some PVC lookalike launchers to bolt in place of your real ones. That way you don't have to work around the design limitations of the real ones. |
|
|
|
|
[#28]
Either make a replica out of pvc or just have a guy in the turret with a t shirt launcher made out of pvc.
|
|
|
|
|
[#29]
Anyone looking for an Ibis Tek for a good price? Has the add-on lower push bumpers too!
https://www.facebook.com/groups/777074789048826/permalink/3594251330664477/ |
|
|
|
|
[#30]
That bumper went fast and was a great price especially since it included the push bumper parts.
If anyone is looking for a MK93 Cradle Beltfed has one for sale on ebay for a decent price since it includes a few other parts. He is know to accept lower offers. |
|
|
|
|
[#31]
Merry Christmas everyone. Hope everyone is enjoying their rides or staying warm.
Anyone know what is required to use a m11xx turret ring in a m1025 setup? Would like to change to a motorized or crank style as shown below. |
|
|
|
|
[Last Edit: stoner63a]
[#32]
There is a round-toothed drive ring like yours as well as a V-toothed drive ring. The round-toothed drive ring meshes with the manual traverse and lock assemblies you've posted.
The round toothed drive ring meshes with the green drive motor/chain/sprocket in welded mount. There are 2 different welded mounts with the identical motor/sprocket/chain. This assembly is associated with M1114 I believe. This mount holds the motor at a slightly different angle, M1151 I believe. I think these are later powered turret systems based on Army trying to standardize on parts. These motors are $1300 new: https://hobby.npcrobotics.com/product/npc-eb249/ The V-toothed meshes with the combined manual traverse/power traverse hydraulic-electric motors That tan Hydraulic-Electric Motor is $9619.97 NEW, hell, even the milled aluminum bracket is $6700 https://hobby.npcrobotics.com/product/npc-a0045512/ There are poly dust covers for all 3 drive motor types, made from cheap non-glueable vacuum formed poly. The tan motor just has a simple dust cap over the exposed sprocket gear itself, good to have if kids are going to be climbing around your rig, to protect little fingers. I have only seen replacement dust covers for the manual traverse unit you posted, and only the larger main cover, there is a separate lid that goes with it. The geared drive rings should replace the 3pc perforated lock ring bolted to the bottom of the turret support. I suppose with long enough bolts and whatever spacers you can fabricate you can make the manual traverse or power traverse work with either the stamped A2 turret Weapons Station Tray or the later cut plate Weapons Station Tray. The electric drive motors and the manual traverse assembly bolt to the heavy type bearing itself. The traverse lock can mount to either the heavy bearing itself or the cut plate adapter that bolts onto the K Bar. |
|
|
|
|
[Last Edit: stoner63a]
[#33]
Traverse Lock mounted to adapter plate on K Bar:
Traverse Lock mounted to heavy bearing, the 12 o'clock position of the Weapons Mount is about 6 o'clock in this photo, you can see the 2 tight groups of 4 holes at 4 and 8 o'clock and the wider spaced 5 holes between, the middle hole is about the actual 12 o'clock of the chicken foot Weapons Mount. For some applications depending on what combination of bearings, trays and spacers there are two milled aluminum spacers that are used with the milled adapter plate on the K Bar, they are shaped like 0 with 2 bolt holes, you can barely see them in this photo: |
|
|
|
|
[#34]
@stoner63a so based on the picture below, I take it the geared ring drops in from the top? Which would mean I would have to take the entire turret off from the top right?
|
|
|
|
|
[#35]
Alright, who “acquired” a humvee down in California!
|
|
|
|
|
[#36]
Originally Posted By airmandaniel: Alright, who “acquired” a humvee down in California! I have an alibi!
|
|
|
|
|
[Last Edit: stoner63a]
[#37]
Jake, going by this photograph of the manual crank assy on a silver bearing, I think you are going to need to find the adapter plate in TM 9-2320-387-24P Change 2 March 2002 edition, which are part of the Gunner Protection Kits
Figure 196E Item 1 (there are 2 different Item 1 Part Numbers) Item 1 Part #4662403-002 Bracket, Mounting, Traversing Gear Part of Kit #4662400-003 Item 1 Part #6432260-01M1 Bracket, Mounting, Traversing Gear Part of Kit #6433328 I tried hanging the manual crank assy from the thin bearing, thought maybe a 1" thick x 2x2 aluminum spacer block might work with the bolt hole and U slot you can see, in place of the full mounting bracket but those bolts would be so close that the motor torque combined with a cupola and OGPK/gunner shield would be too much pressure on that die cast or investment cast bracket. I have my M1114 combination manual crank/electro-hydraulic motor and bracket slung under the thin bearing using 3ea 3/8"-16 x 4" Grade 8 Bolts. There are 2 more heli-coiled bolt holes in the milled mounting bracket that I can scribe in the turret tray then drill through the tray and bearing flange for maximum strength. But there is still about 2" of air space between the bearing flange and the mount bracket flange. If I had access to a slip roller, I'd run a piece of 1" thick 2" wide x 12" long aluminum bar to bend it to the radius of the bearing, then drill the holes from the top to firmly anchor the drive motor for any adverse field use it would be subjected to. My set up (not based on TM) is similar to this but with the round A2 Turret Weapons Station: There is a local shop 10min from here that can probably do it for me, a similar piece with vertical and horizontal bolt holes may be a decent substitute for the traverse gear mounting bracket Jake needs. |
|
|
|
|
[#38]
Just a heads up for anyone doing a GMV build or just interested in some low viz radio warning stickers.
I finally snagged a set of repro stickers a guy on one of the Facebook groups did a while back. He's dropped the project and is not making them anymore (plus there were some spelling errors that need corrected) and there's no retail source for them. I'm going to find about getting the repros reproduced ( ) with the spelling corrected. It may take a little bit as I'm about to close on a house and will be moving through March but, rest assured I will not put these stickers on my truck without getting copies made since they were so hard to get in the first place. I'll also take some high res pics for anyone that would like them in case you want to source your own. |
|
|
|
|
[#39]
Originally Posted By Ryan_Ruck: Just a heads up for anyone doing a GMV build or just interested in some low viz radio warning stickers. I finally snagged a set of repro stickers a guy on one of the Facebook groups did a while back. He's dropped the project and is not making them anymore (plus there were some spelling errors that need corrected) and there's no retail source for them. I'm going to find about getting the repros reproduced ( ) with the spelling corrected. It may take a little bit as I'm about to close on a house and will be moving through March but, rest assured I will not put these stickers on my truck without getting copies made since they were so hard to get in the first place. I'll also take some high res pics for anyone that would like them in case you want to source your own. https://www.ar15.com/media/mediaFiles/102941/139493766_10164397664630251_185261434098-1785464.JPG |
|
|
|
|
[#40]
Originally Posted By stoner63a: Ryan, I am interested in 2 sets. Originally Posted By stoner63a: Originally Posted By Ryan_Ruck: Just a heads up for anyone doing a GMV build or just interested in some low viz radio warning stickers. I finally snagged a set of repro stickers a guy on one of the Facebook groups did a while back. He's dropped the project and is not making them anymore (plus there were some spelling errors that need corrected) and there's no retail source for them. I'm going to find about getting the repros reproduced ( ) with the spelling corrected. It may take a little bit as I'm about to close on a house and will be moving through March but, rest assured I will not put these stickers on my truck without getting copies made since they were so hard to get in the first place. I'll also take some high res pics for anyone that would like them in case you want to source your own. https://www.ar15.com/media/mediaFiles/102941/139493766_10164397664630251_185261434098-1785464.JPG 
|
|
|
|
|
[Last Edit: Ryan_Ruck]
[#41]
A bit of hard to find gear at a somewhat reasonable price for you folks not running a Rhino tire carrier. $600+shipping from L.A.
https://www.facebook.com/groups/1186578574714390/permalink/3779311342107754/ |
|
|
|
|
[#42]
Famous But Incompetent actually did something!
FBI Locates Armored Military Vehicle Stolen In California January 20, 2021  A military Humvee stolen from a National Guard facility in a Los Angeles suburb was found Wednesday morning, the FBI said. A search continues for the person or persons who stole the armored vehicle last Friday from the National Guard Armory in the city of Bell, the bureau said. The four-door vehicle painted a green camouflage is worth about $120,000. Officials did not say where or how it was located. A theft from a military facility carries a statutory maximum sentence of 10 years in federal prison, the FBI said. |
|
|
|
|
[Last Edit: Ryan_Ruck]
[#43]
Well, it's official! My truck has a new home!
It just so happened to come with my new home I closed on today.  The doors are all 16x12 and have openers. Not looking to do a ton of moving in the middle of Winter so I'm not planning to be fully settled in at the new place until the end of March. Just in time to start using the shop with some more temperate weather! And related funny story... I was browsing FB Marketplace a couple days just before closing was scheduled and I happened to see an ad for a pretty well priced 2 post 9,000lb lift for $1200. Not really funny by itself... The funny part being that the seller's name was the same guy I was buying the house from. So I've got this to setup in there! Only hitch is the shop doesn't have 240v run to it yet, just 120 from the house panel which is about maxed. There's an electric drop from the pole to another smaller 1 car garage that's also on the property and that's going to get run from there to the shop. That will definitely be getting done ASAP. Also going to replace the fluorescent bulbs with LED and add some more fixtures and, eventually I'll be insulating and adding HVAC to it. |
|
|
|
|
[#44]
Anyone have the part number for the turret lock plate and spacers that mount it to the k bar as shown below?
|
|
|
|
|
[#45]
Augi on G503 is making some new VIC 3 cell phone boxes that are Bluetooth and better than before. See link below.
https://forums.g503.com/viewtopic.php?f=64&t=321617&p=1873315#p1873315 |
|
|
|
|
[Last Edit: Ryan_Ruck]
[#46]
Well, here's something you don't see everyday.
(Finally a good shot of the hard top and bed rails in place which I know I still need to do a writeup on. )Made two 1 hour round trips. Truck handled the trailer just fine in terms of handling. Only complaint is the same one as always, lack of power. It wasn't too much worse than normal but I could definitely tell I was pulling the trailer, especially loaded down. Biggest load was my commercial grade zero turn, quad, and a number of other things to where it was completely full. I haven't tinkered with turning up my IP since I did the swap so it's still factory set and engine temp didn't budge above normal (granted it's mid/upper 30s right now) and EGTs never got above 900-920 on grade, which is on par with the highest I've seen at other times. My trailer lighting adapter which I built, and will share the details of, worked perfect. The 4 pin output is 100% but I do need to complete the whole 7 pin setup (including adding a Redarc trailer brake controller). The short version is I basically copied the XM381.com design. Now that the hard top stuff is mostly out of the way, one of the things on my short list are some performance mods. Namely a Wicked Wheel compressor wheel for the turbo, a Heath Diesel adjustable wastegate, IP adjustment, and timing adjustment. Not going to turn the truck into a hot rod but anything to add some power to these wheezy engines helps. |
|
|
|
|
[#47]
Originally Posted By Ryan_Ruck: Well, here's something you don't see everyday. https://www.ar15.com/media/mediaFiles/102941/IMG_2179a_jpg-1813996.JPG (Finally a good shot of the hard top and bed rails in place which I know I still need to do a writeup on. )Truck handled the trailer just fine in terms of handling. Only complaint is the same one as always, lack of power. It wasn't too much worse than normal but I could definitely tell I was pulling the trailer, especially loaded down. Biggest load was my commercial grade zero turn, quad, and a number of other things to where it was completely full. I haven't tinkered with turning up my IP since I did the swap so it's still factory set and engine temp didn't budge above normal (granted it's mid/upper 30s right now) and EGTs never got above 900-920 on grade, which is on par with the highest I've seen at other times. My trailer lighting adapter which I built, and will share the details of, worked perfect. The 4 pin output is 100% but I do need to complete the whole 7 pin setup (including adding a Redarc trailer brake controller). The short version is I basically copied the XM381.com design. Now that the hard top stuff is mostly out of the way, one of the things on my short list are some performance mods. Namely a Wicked Wheel compressor wheel for the turbo, a Heath Diesel adjustable wastegate, IP adjustment, and timing adjustment. Not going to turn the truck into a hot rod but anything to add some power to these wheezy engines helps. Here is something else you don't see  |
|
|
|
|
[#48]
Originally Posted By m35ben: Nice Here is something else you don't see https://www.ar15.com/media/mediaFiles/390973/20210206_145643-1813946.jpg Originally Posted By m35ben: Originally Posted By Ryan_Ruck: Well, here's something you don't see everyday. https://www.ar15.com/media/mediaFiles/102941/IMG_2179a_jpg-1813996.JPG (Finally a good shot of the hard top and bed rails in place which I know I still need to do a writeup on. )Truck handled the trailer just fine in terms of handling. Only complaint is the same one as always, lack of power. It wasn't too much worse than normal but I could definitely tell I was pulling the trailer, especially loaded down. Biggest load was my commercial grade zero turn, quad, and a number of other things to where it was completely full. I haven't tinkered with turning up my IP since I did the swap so it's still factory set and engine temp didn't budge above normal (granted it's mid/upper 30s right now) and EGTs never got above 900-920 on grade, which is on par with the highest I've seen at other times. My trailer lighting adapter which I built, and will share the details of, worked perfect. The 4 pin output is 100% but I do need to complete the whole 7 pin setup (including adding a Redarc trailer brake controller). The short version is I basically copied the XM381.com design. Now that the hard top stuff is mostly out of the way, one of the things on my short list are some performance mods. Namely a Wicked Wheel compressor wheel for the turbo, a Heath Diesel adjustable wastegate, IP adjustment, and timing adjustment. Not going to turn the truck into a hot rod but anything to add some power to these wheezy engines helps. Here is something else you don't see https://www.ar15.com/media/mediaFiles/390973/20210206_145643-1813946.jpg I give... What be it? Clearly not a Deuce or 5+ ton but it is certainly green. |
|
|
|
|
[#49]
BDRM wheel/hub assembly?
|
|
|
|
|
[#50]
Originally Posted By jake-cutter: BDRM wheel/hub assembly? That's what I was wondering but, like the man said, it's not really something you see everyday. |
|
|
|
 Win a FREE Membership!
Sign up for the ARFCOM weekly newsletter and be entered to win a free ARFCOM membership. One new winner* is announced every week!
You will receive an email every Friday morning featuring the latest chatter from the hottest topics, breaking news surrounding legislation, as well as exclusive deals only available to ARFCOM email subscribers.

AR15.COM is the world's largest firearm community and is a gathering place for firearm enthusiasts of all types.
From hunters and military members, to competition shooters and general firearm enthusiasts, we welcome anyone who values and respects the way of the firearm.

Subscribe to our monthly Newsletter to receive firearm news, product discounts from your favorite Industry Partners, and more.
Copyright © 1996-2024 AR15.COM LLC. All Rights Reserved.
Any use of this content without express written consent is prohibited.
AR15.Com reserves the right to overwrite or replace any affiliate, commercial, or monetizable links, posted by users, with our own.


