|
[#1]
How do you keep it from looking like crap after a year?
seems like there's going to be a lot of sanding and refinishing in your future. I'll take corian, thanks. |
|
|
|
[#2]
On the underside router in some cross bolts holes. I know on cheap laminate countertops theres slots you put special bolts and plates then tighten and glue it before you lay it down on the cabinets, then fasten down.
|
|
|
|
[#3]
Butcher block island, maybe. Butcher block countertops, hell no.
Why create more work for yourself? It'll have to be oiled/waxed regularly, will be prone to staining and moisture damage, can't put a hot pan on it, and will quite possibly hurt your property value if it's in anything less than perfect shape when you go to sell your house. |
|
|
|
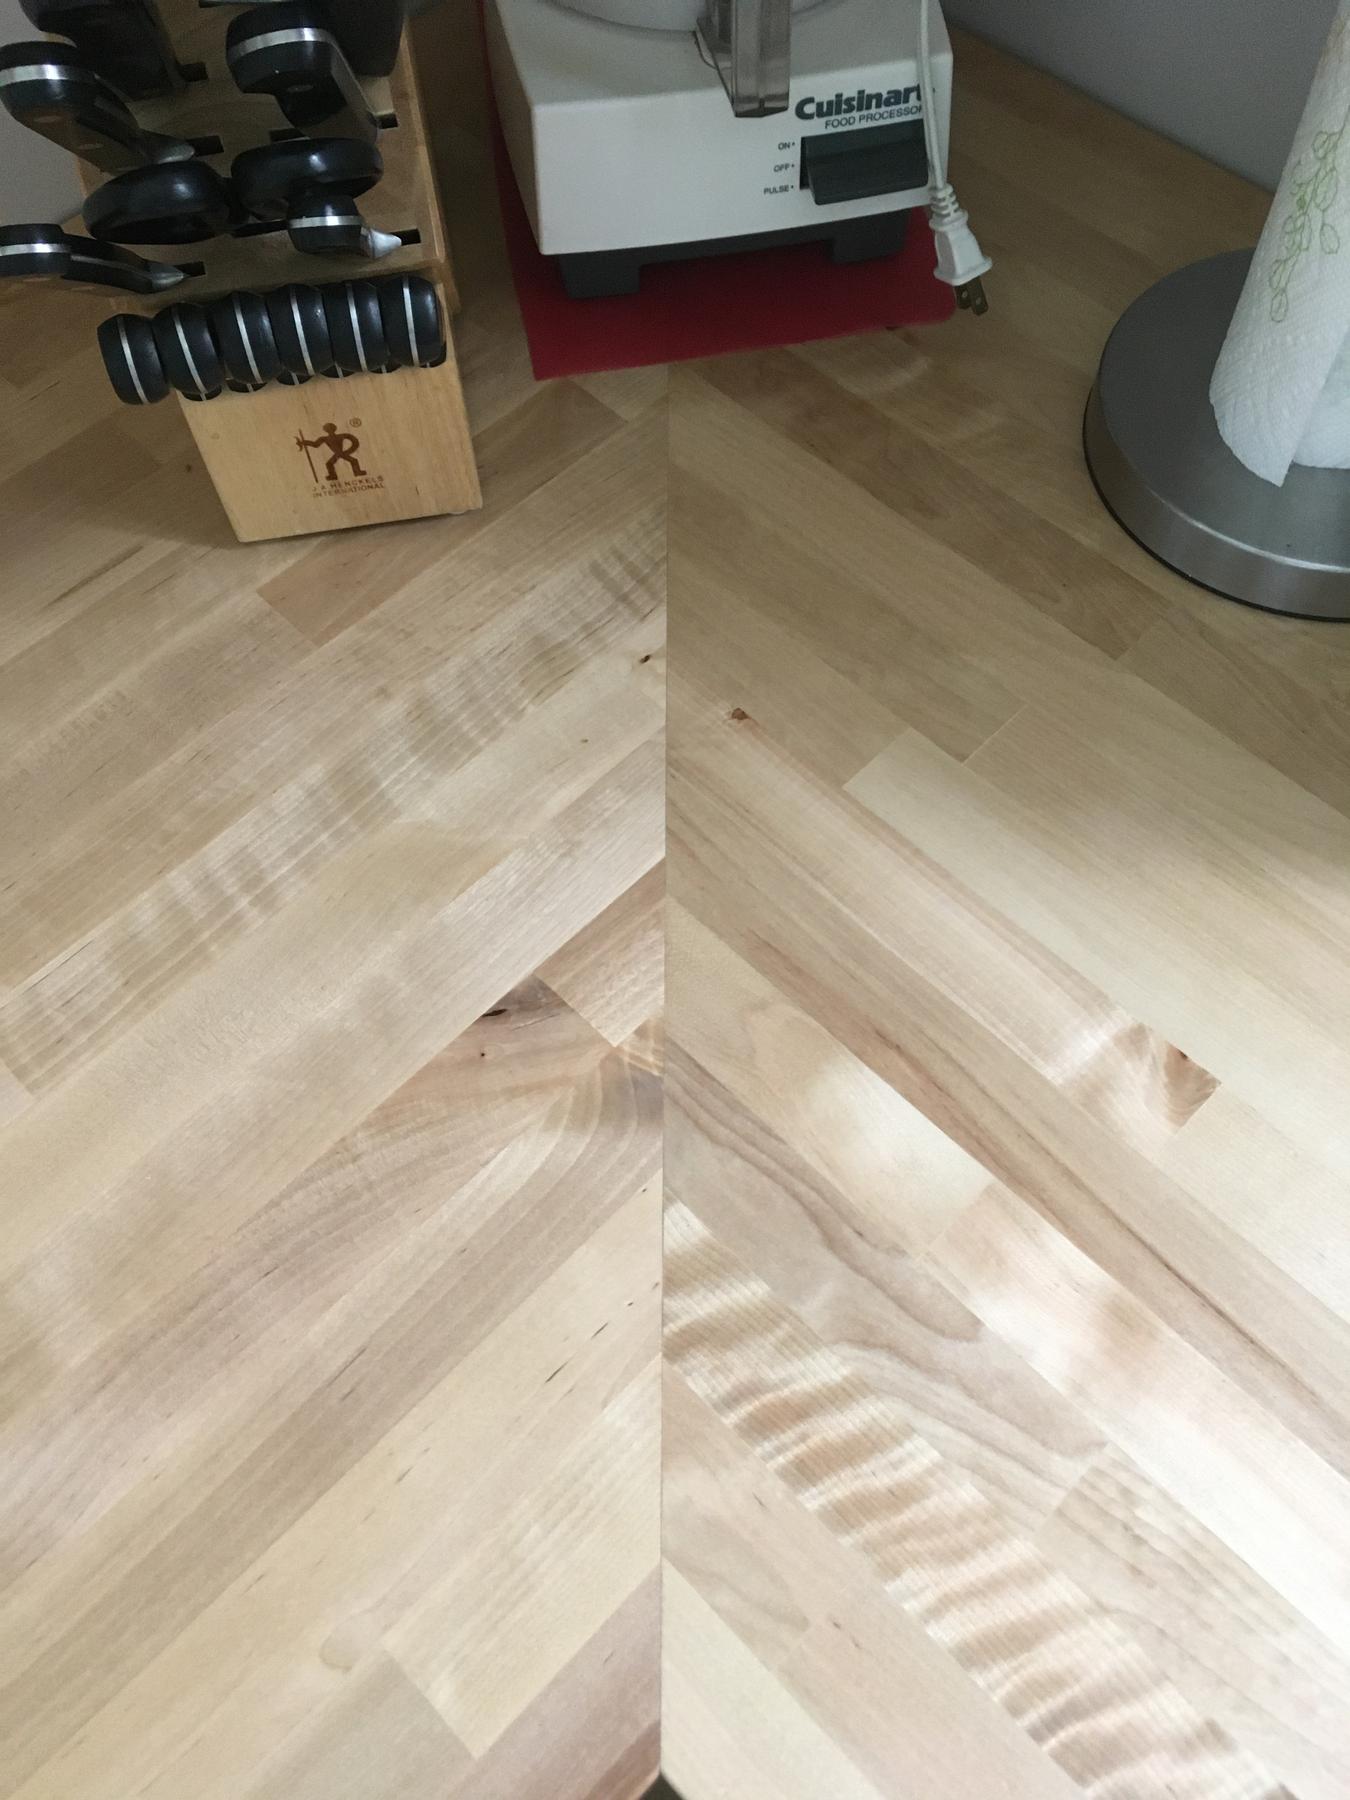
[#4]
A lot of fitting and sanding to get that corner tight. I bought a laminate top from HD for my last house. My brother that did countertops put it in. That corner angle was so bad only the ends met up with a gap in the middle. He spent almost an hour sanding and fitting to get it tight. You'd never know it was that far off to begin with.
|
|
|
|
[#5]
I put a cutting board style island and counter tops in my house using a wood called sapale. It’s extremely hard and they are gorgeous.
The amount of upkeep required to keep them looking good is insane, never again. |
|
|
|
[#6]
Not sure how after a period of time you would actually keep them clean as crap will seep into wood unlike stone
|
|
|
|
[#7]
Has anyone else actually done this work?
I am looking for methods and options on how to do the work, not a critique of the design. |
|
|
|
[#8]
I've been considering making an end grain butcher block top for the island in the new place. Kind of like the one they show in this vid on a smaller scale (skip to a minute in)
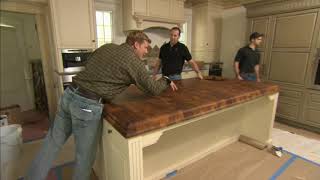 Grothouse Butcher Block Countertop in This Old House® Newtown, MA Project 2007 |
|
|
|
[#9]
I think jacobsk used an old bowling alley lane for his counters. I will see if I can find the thread.
|
|
|
|
[#10]
Quoted: On the underside router in some cross bolts holes. I know on cheap laminate countertops theres slots you put special bolts and plates then tighten and glue it before you lay it down on the cabinets, then fasten down. For the sink cut out use a round over on the top and bottom edges. Cut it with a jigsaw to rough cut the opening. Make a template to get it exact and finish it with a flush cut bit. Personally....I'd not do this but they do look good when installed. I'd sooner do a concrete or epoxy granite poured in place countertop. |
|
|
|
[#11]
so i have this idea that putting an inset butcher block would be awesome. would be like having your own cutting board all the time.
so butcher block slightly higher, right where you want your cutting area and then tile or whatever around it. so you brush off DOWN to the tile/whatever but you always havea built in cutting board |
|
|
|
[#12]
My wife and I installed cherry butcher block last year, and drawing from my experience as a cabinetmaker for 10 years, I did 5 coats of polyurethane before allowing anything to sit on it.
I did not have a mitered seam to contend with, but if I had, I would've templated with 1/8" lauan and figured out exactly what angle to cut so that my overhang was consistent. I'd recommend going with a straight seam in this case. Less material to purchase and a shorter seam. We did an overmount cast iron sink but I like the undermounts as well. |
|
|
|
[#13]
Quoted: I put a cutting board style island and counter tops in my house using a wood called sapale. It’s extremely hard and they are gorgeous. The amount of upkeep required to keep them looking good is insane, never again. https://www.AR15.Com/media/mediaFiles/232306/B431B25C-CEE2-4AF9-9857-B1624752B0CC_jpe-1660624.JPG sapele is a great guitarmaking wood also. good idea. sorry you're having a maintenance nightmare. |
|
|
|
[#14]
Easiest way:
Buy your block, unwrap it and let it sit flat for week or two to acclimate, in the kitchen. Remove the current counter top. Use one piece of paper and template the corner. Mark it so you know what is left and right, top and bottom. Take the template, and using a legit straight edge, draw a line, outside corner to inside corner. Buy or build an adjustable miter sled for a table saw. Buy some MDF, put your template on top, trace it, and cut so the thickness of the line is still showing, using the sled on a table saw. . Do the same for the other side. Match them up and hand sand a dry fit until it fits like a glove. Use them as your template for the real wood, repeating the process. Save the templates in a safe place, as it will require replacement with one kitchen accident and it gets damaged beyond refinishing. People will say it is a waste to do this essentially twice (mdf and block). Not knowing what tools you have, and assuming you are not using digital scanning with cnc equipment, it is the only way you will get a perfect joint. d |
|
|
|
[#15]
@Quoted:
My wife and I installed cherry butcher block last year, and drawing from my experience as a cabinetmaker for 10 years, I did 5 coats of polyurethane before allowing anything to sit on it. Did you have any trouble with the polyurethane surface finish caused by knife cuts or anything of that sort? I'd recommend going with a straight seam in this case. I've thought about just butting the two together. I am concerned the butcher block edge will be rounded over, even if it's just a tiny bit. Then, when two are butted together they will create a little "valley" that is unsightly. |
|
|
|
[#16]
Quoted: I think jacobsk used an old bowling alley lane for his counters. I will see if I can find the thread. It is in the what did you work on today thread. You will have to scroll through the other posts. https://www.ar15.com/forums/General/What-did-you-work-on-today-PIC-THREAD/139-2017760/?page=10#i71662286 |
|
|
|
[#17]
Quoted: Butcher block island, maybe. Butcher block countertops, hell no. And butcher blocks are end grain, not side grain. |
|
|
|
[#18]
Quoted: @Quoted: My wife and I installed cherry butcher block last year, and drawing from my experience as a cabinetmaker for 10 years, I did 5 coats of polyurethane before allowing anything to sit on it. Did you have any trouble with the polyurethane surface finish caused by knife cuts or anything of that sort? I'd recommend going with a straight seam in this case. I've thought about just butting the two together. I am concerned the butcher block edge will be rounded over, even if it's just a tiny bit. Then, when two are butted together they will create a little "valley" that is unsightly. We use cutting boards. The finish has held up very well for a year's worth of use, and we cook a lot at home. As far as the slight ease on the edge you may find, ours did not have anything until I ran my router over it. If what you order does come with an eased edge, a quick pass on the table-saw will be in order. A seam after that is easy. |
|
|
|
[#19]
Quoted: We use cutting boards. The finish has held up very well for a year's worth of use, and we cook a lot at home. As far as the slight ease on the edge you may find, ours did not have anything until I ran my router over it. If what you order does come with an eased edge, a quick pass on the table-saw will be in order. A seam after that is easy. I looked at the pictures of jacobsk's counter tops at the link posted above. He used a butt joint instead of a miter. I think it looks just fine. His is more rustic than I'd want but his counters are more rustic than mine will be. Honestly, I cannot imagine running an 8 foot long, maple counter top over my crappy table saw. It would be a case of "the tail wagging the dog". IF it has to be done, I will find some other way of doing it. My jointer's plane comes to mind. It's all tuned up and has a thick, hard, sharp blade and chip breaker. 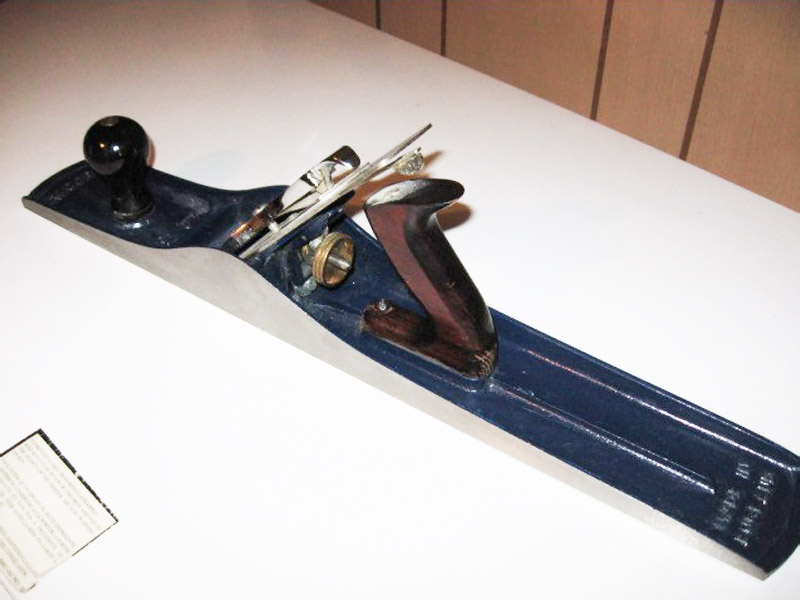
|
|
|
|
[#20]
Does anyone have favorable experience with a particular brand of the cross-joint bolt kits meant for holding sections of counter top together?
If none are favorable, then are there brands to avoid? |
|
|
|
[#21]
Quoted: We use cutting boards. The finish has held up very well for a year's worth of use, and we cook a lot at home. As far as the slight ease on the edge you may find, ours did not have anything until I ran my router over it. If what you order does come with an eased edge, a quick pass on the table-saw will be in order. A seam after that is easy. Had granite (real granite) for years. Wife had a friend visit and she did not understand why we still used thin plastic cutting mats. Granite will take the edge of that expensive knife just about instantly. The 'true' granite does not absorb water, does not stain, does not need 'sealing.' It was THE standard in chemistry labs for working surfaces for many many years. For the most psrt it also tends to be sort of plain. It is the inclusions in true granite that give it the appearance we like. Those inclusion are often the 'weak spots' in a 'granite' slab. Real integrates are igneous rocks, often inclusions in other types of stone. |
|
|
|
[#22]
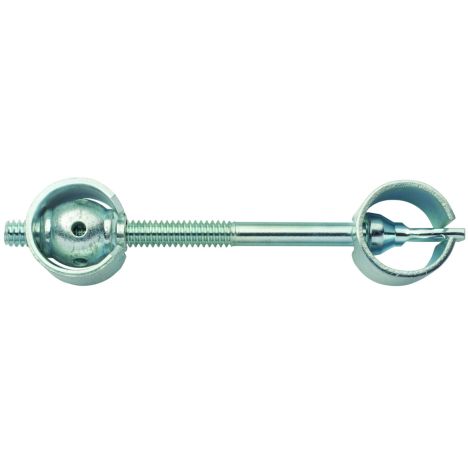
Oh, by the way, I also have one of these. :-)
.png)
|
|
|
|
[#23]
FWIW, we have wood (hickory) counters. Bought 3 slabs, cut them up, and glued two pieces together to make a counter for an island. Butt joint aligned with biscuits. Finished with polyurethane. We make sure to use cutting boards and don't set anything hot directly on the counters.
|
|
|
|
[#24]
I live near the John Boos store in Effingham, IL and have visited the old factory showroom to get material for projects. They make all kinds of butcher block style products. For mitered counter top joints, they mill in a pocket on the underside and have a special clamp that goes in and clamps the two pieces together.
|
|
|
|
[#25]
If you don't oil them frequently they weather check.
My parents did it when I was young. The entire kitchen. Cost them a fortune. Lasted 2 years before they tore them out and went stone If you want the look. Epoxy the tops and set it and forget it. But a bare butcher block top, you are infor a bad time. |
|
|
|
[#26]
im in the do stone for most of the counter top and possibly get a large butcher block cutting board to leave out on the counter if that is what you like.
live the looks of a butcher block counter but would jsut seem to be a pain to have to upkeep every 3 months. |
|
|
|
[#27]
I recently watched a video of using pocket hole screws to join them together - a little sanding on the seam was all that was required to keep the joint flat
|
|
|
|
[#28]
Quoted: im in the do stone for most of the counter top and possibly get a large butcher block cutting board to leave out on the counter if that is what you like. live the looks of a butcher block counter but would jsut seem to be a pain to have to upkeep every 3 months. A pain? You just rub some conditioner on it every once in a while. A combination of mineral oil and beeswax keeps them looking/performing nicely |
|
|
|
[#29]
Quoted: A pain? You just rub some conditioner on it every once in a while. A combination of mineral oil and beeswax keeps them looking/performing nicely What is the ratio of each and how often is 'once in a while'? Thanks |
|
|
|
[#30]
I'd be curious to know how many people in this thread actually have or had butcher block countertops.
We put some in our kitchen about 3 years ago and they have held up really well. They were meant to be a temporary thing until we get the whole kitchen remodeled , but they may very well end up staying. I made all the necessary cuts and then the wife stained them the color she wanted and we put on several coats of Watco butcher block finish. Its a clear finish thats food safe. Last year I spent an evening and scuffed them with some fine sandpaper and put on another coat and and they looked brand new. No complaints here- I'd do them again. I didn't make any corner cuts-none of mine had to mate with another. I'd probably biscuit joint them and sand smooth if they did. The sink is a farmhouse top mount, so it was just a U shaped cut. Didn't even have to be pretty as its all hidden. |
|
|
|
[#31]
Quoted: What is the ratio of each and how often is 'once in a while'? Thanks I use this stuff - maybe once a month. Just use it whenever it starts feeling dry. 
|
|
|
|
[#32]
Quoted: I'd be curious to know how many people in this thread actually have or had butcher block countertops. Me, too. I'd also like to hear from @jacobsk, the guy in the linked thread, who used the bowling alley lanes for his counters. It seemed the early responses were mostly negative towards wooden counters. Only a few people were clear about actually having the counters in their home and of those, most seem satisfied. |
|
|
|
[#33]
The thing is, I was only asking about how to make that giant miter joint for the corner.
A really good outcome of this discussion, one that has changed my plan - you've pointed out I don't need a miter, a butt joint also works. I am still uncertain how to attach the two sections across the seam. Guidance or past experiences on this is the reason for this thread. There are biscuits, pocket screws, cross bolts and various bottom surface hardware items to draw the two together, align them and keep them together. |
|
|
|
[#34]
Quoted: The thing is, I was only asking about how to make that giant miter joint for the corner. A really good outcome of this discussion, one that has changed my plan - you've pointed out I don't need a miter, a butt joint also works. I am still uncertain how to attach the two sections across the seam. Guidance or past experiences on this is the reason for this thread. There are biscuits, pocket screws, cross bolts and various bottom surface hardware items to draw the two together, align them and keep them together. I would use what most laminate counters use, those cross bolts. |
|
|
|
[#35]
Quoted: I'm going to be putting in butcher block counters. On one, I'll have a 45 degree miter cut to go around an inside corner. Anyone ever done this? Would you care to share any lessons learned? How did you close the mitered seam? How did you keep the top surfaces co-planar/aligned? How did you make the sink cut out? Any other tips? Would you do it again? We put BB countertops in about a year ago. A few things I don't like about them. 1. The wood seems very soft....drop a plate on it, or a chefs knife = dent in the wood. 2. The finish doesn't last very long...after a year, it's ready to be refinished again. Would I do it again? I would definitely look harder for other options. |
|
|
|
[#36]
Quoted: The thing is, I was only asking about how to make that giant miter joint for the corner. A really good outcome of this discussion, one that has changed my plan - you've pointed out I don't need a miter, a butt joint also works. I am still uncertain how to attach the two sections across the seam. Guidance or past experiences on this is the reason for this thread. There are biscuits, pocket screws, cross bolts and various bottom surface hardware items to draw the two together, align them and keep them together. Biscuits to align the seam. Glue and pocket screws/cross bolt things to hold it together. |
|
|
|
[#37]
We put in "butcher block" counter tops about 6 ish years ago. I made a movable island with one of the leftover pieces and a bunch of oak I salvaged from pallets. They have held up very well with minimal maintenance. About once a year I sand them with very fine paper on my random orbital and brush on food-grade oil/sealer. We use cutting boards and do not cut directly on them.
We considered miters but used butt joints in the end. I dont think the miters would have gone well with my OCD...... We also decided against bicuits. Thank god, because about two years later the faucet crapped out and I ended up replacing the sink while I was at it. Had to remove one section to it, and biscuit would have made that damn near impossible. Pocket screws are the answer..... Also, I sealed the seams with wood glue that dried very close to the color of our tops. Blends in almost perfectly. Used a track saw to cut them to length and for most of the sink cutout. If you are using an undermount sink, I would probably cut it out differently. |
|
|
|
[#38]
I've decided to go ahead and install the butcher block counters. I can get a whole new set of counters for only a few hundred bucks, because I am doing the work.
I'm going to use a butt jointed seam. I'm going to use cross-seam bolts to draw the joint together. I'm not going to use biscuits unless I have trouble getting and keeping the two surfaces level. I want to thank those of you who cautioned me against wooden counter tops. Honestly, I will use your various warnings as guidance for what to avoid in using them. I'll also take the comments as a warning to maintain them well. Thanks to all. I will post some pics when I get it done (most likely after Christmas). |
|
|
|
[#39]
@Trollslayer
Sorry I’m late to the party, I happened to stumble across this thread randomly, the mentions seem to not be working  Anyhow, we’re a few year into our bowling alley butcher block counters with some seriously heavy use. My wife is not nice to them. They’re holding up just fine, better than I expected, and I was somewhat skeptical when we opted to go this route. We used the milk paint brand tung oil to seal ours and I’ve only ever sealed them when I did the install. I think I did 3 coats that week. Nothing since and they’re still water & stain resistant. Folks who say they need a ton of maintenance either chose some other product which demanded constant reapplication or did something very different from what we’ve done I’m on the road right now. When I get home I’ll snap some images of our counter tops for you folks to decide. |
|
|
|
[#40]
So here we are, Bowling alley maple butcher block counter tops after use for 2-1/2 years and no reapplication of the (real) tung oil.
Note: not all “tung oil” is actually real Tung oil like MilkPaint. Hence the dissatisfaction many have after using a mix of varnishes sold under the name “tung oil”. MilkPaint is actually real deal old school tung oil that is both food safe, durable, and stain resistant. This is our primary food prep surface. My wife makes all of our meals (breakfast lunch and dinner) from scratch. We literally grow/raise most of our food, and purchase what we don’t from other local farms. This gets fruits, veggies, meats, etc cut on it daily. Second most used area next to the sink: it drives me nuts but my wife leaves wet dishes here all the time to dry. Other side of stove where I do my cutting when helping: Actual butcher block sealant which works: ETA are the pics upside down for you guys? Strange 
|
|
|
|
[#41]
Quoted: So here we are, Bowling alley maple butcher block counter tops after use for 2-1/2 years and no reapplication of the (real) tung oil. Note: not all “tung oil” is actually real Tung oil like MilkPaint. Hence the dissatisfaction many have after using a mix of varnishes sold under the name “tung oil”. MilkPaint is actually real deal old school tung oil that is both food safe, durable, and stain resistant. This is our primary food prep surface. My wife makes all of our meals (breakfast lunch and dinner) from scratch. We literally grow/raise most of our food, and purchase what we don’t from other local farms. This gets fruits, veggies, meats, etc cut on it daily. https://www.AR15.Com/media/mediaFiles/116241/1655A7BB-06DE-4574-838F-952B9035B0B1_jpe-1687072.JPG Second most used area next to the sink: it drives me nuts but my wife leaves wet dishes here all the time to dry. https://www.AR15.Com/media/mediaFiles/116241/53B3EBBD-0F7E-4951-BA05-3BD7E1501671_jpe-1687078.JPG Other side of stove where I do my cutting when helping: https://www.AR15.Com/media/mediaFiles/116241/C4179787-4DCD-487F-BCD0-86110497B765_jpe-1687080.JPG Actual butcher block sealant which works: https://www.AR15.Com/media/mediaFiles/116241/03585B0A-4551-42A3-B2C5-B56F03D7849C_jpe-1687082.JPG ETA are the pics upside down for you guys? Strange they are upside down, but the good thing about maple is it is really pretty either way |
|
|
|
[#42]
Jacobsk, thanks for the update and for taking the time to post the photos. The photos really helped a lot.
I ordered TheRealMilkPaint Tung Oil. Home Depot just texted me saying my counter tops have arrived. |
|
|
|
[#43]
Maybe for the 45 miter connection you would want to cut both 45. Then butt these sections together
Shim both sides on your saw horses so they are level/coplanar. Clamp down so they don’t move but not so much they twist Then clamp down a good track saw rail. the saw cuts through that 45 degree joint/seam. If it’s a good saw and a very good blade the joint should be pretty tight after the saw cut If it needs any tuning use something like a L-N or veritas low angle jack plane to take out any tight spots. The same might be able to be done with a router. As far as the joiner hardware goes, it’s probably all chinesium now. |
|
|
|
[#44]
The house we moved into a couple years ago has solid oak flooring for the counter tops. I was going to replace them right away, but they are holding up very well. I did sand and refinish them, which was an easy job. If they get buggered up, I'll do it again.
|
|
|
|
[#45]
I got started on this project. When I get some time I will post pics.
So far, I am very happy with both the counters received from Home Depot and with the tung oil received from Real Milk Paint. I cannot believe how much oil the maple is soaking up but I am loving the orange smell of the citrus solvent. |
|
|
|
[#46]
|
|
|
|
[#47]
Quoted: I got started on this project. When I get some time I will post pics. So far, I am very happy with both the counters received from Home Depot and with the tung oil received from Real Milk Paint. I cannot believe how much oil the maple is soaking up but I am loving the orange smell of the citrus solvent. @Trollslayer What kind of oil and solvent are you using? Thanks |
|
|
|
[#48]
It is Real Milk Paint's Tung Oil and their Citrus Solvent mixed 50:50.
|
|
|
|
[#49]
I have finished oiling one of the two counters. Now, it needs time to cure. The other will be done over the weekend. They'll both be ready for installation by the Christmas break.
PICS! I need pics. |
|
|
|
[#50]
Congrats on the progress Trollslayer.
I'm sure it'll look really good. |
|
|
 Win a FREE Membership!
Sign up for the ARFCOM weekly newsletter and be entered to win a free ARFCOM membership. One new winner* is announced every week!
You will receive an email every Friday morning featuring the latest chatter from the hottest topics, breaking news surrounding legislation, as well as exclusive deals only available to ARFCOM email subscribers.

AR15.COM is the world's largest firearm community and is a gathering place for firearm enthusiasts of all types.
From hunters and military members, to competition shooters and general firearm enthusiasts, we welcome anyone who values and respects the way of the firearm.

Subscribe to our monthly Newsletter to receive firearm news, product discounts from your favorite Industry Partners, and more.
Copyright © 1996-2024 AR15.COM LLC. All Rights Reserved.
Any use of this content without express written consent is prohibited.
AR15.Com reserves the right to overwrite or replace any affiliate, commercial, or monetizable links, posted by users, with our own.