|
[#1]
Quoted:
AV18, question for you if you don't mind. I have a Honda 4500 running watt generator that I would like the ability to connect to my first floor panel the way you recommended. I have the Amazon links you provided for the inlet and cable (thank you). Here is a description of my main and 1st floor panels for reference (I only want to be able to have generator power for the first floor panel): Main: very old 400A Zinsco panel on side of house, it has breakers for the 1st floor and 2nd floor panels. 1st floor panel: GE PowerMark Gold (Front Cat No: TM32FCD) What would I need to get to be able to connect with an interlok the way you mentioned? Much appreciated. Post a picture of the panel if you can. GE makes a couple interlocks but they are only for certain panels and your's isn't listed. When the manufacturer does make an interlock, the two other places that you can get them are www.interlockkit.com and http://www.natramelec.com/ See if you could match your panel to one of them. Just be aware that the aftermarket interlocks aren't UL listed for your panel so you may have an issue with an inspector. My remedy is to not pull a permit 
|
|
|
|
[#2]
Thanks AV18, it looks like the GE Kit K-8010 ( http://www.interlockkit.com/genelecmain01.htm ) is the one I would need (my GE panel appears to have been installed 'upside down' compared to the pic on their website). It also looks like I would need to add a Main breaker to the GE panel in the space provided for it so I can isolate the circuits? What size/type of breaker would I need for the generator? Thanks!
|
|
|
|
[#3]
Yeah, that panel doesn't have a main.
If the "guts" of the panel has the provision for a main breaker to be added, then you may be able to use this interlock kit made by GE for less money than the Interlockkit.com model: http://www.homedepot.com/webapp/wcs/stores/servlet/ProductDisplay?storeId=10051&productId=100674082&langId=-1&catalogId=10053&ci_sku=100674082&ci_src=18492716&cm_mmc=shopping-_-bingshop-_-27-_-100674082&locStoreNum=2001 
But buying a main breaker could cost a lot. Often, when a main breaker in a customer's panel is shot, I will buy an entire new panel for the same price as buying a main breaker. The model number you gave me is for the panel cover. You have to open the cover up and look for the model number on a label inside of the panel. There's some pictures of this earlier in the thread for reference. |
|
|
|
[#4]
I have Panel A. Had an electrician install it. It works fine; and nothing beats living normally while your neighbors fiddle-fuck around during an outage...
|
|
|
|
[#5]
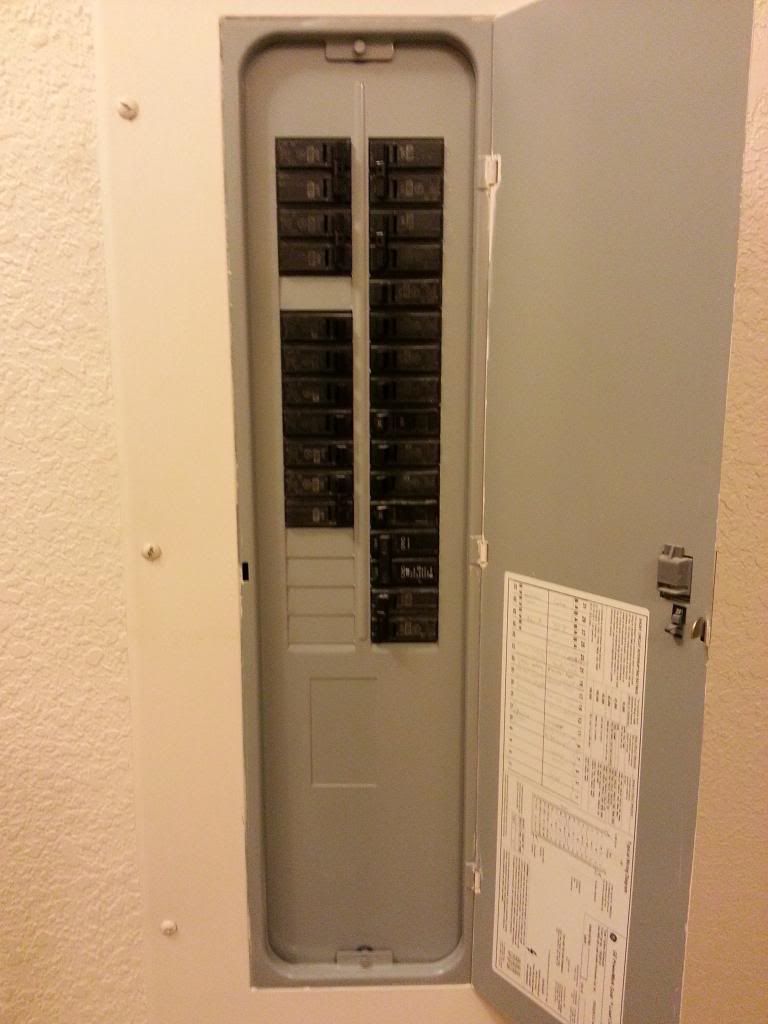
Glad I found this thread before I went the more expensive transfer switch route, thanks for pointing out the interlock option AV18. Well this is the panel I have: http://www.homedepot.com/p/GE-PowerMark-Gold-200-Amp-32-Space-40-Circuit-Main-Breaker-Panel-Contractor-Kit-TM3220CCU4K/100170693#.Uji_xz9r1v8 And it looks like I might be able use this 200A main breaker kit for $59??: http://www.homedepot.com/p/GE-PowerMark-Gold-200-Amp-Double-Pole-Main-Circuit-Breaker-Conversion-Kit-THQMV200DP/100165515?N=bm16Z1z11xxoZ1z0x9j6#.UjjAKD9r1v8
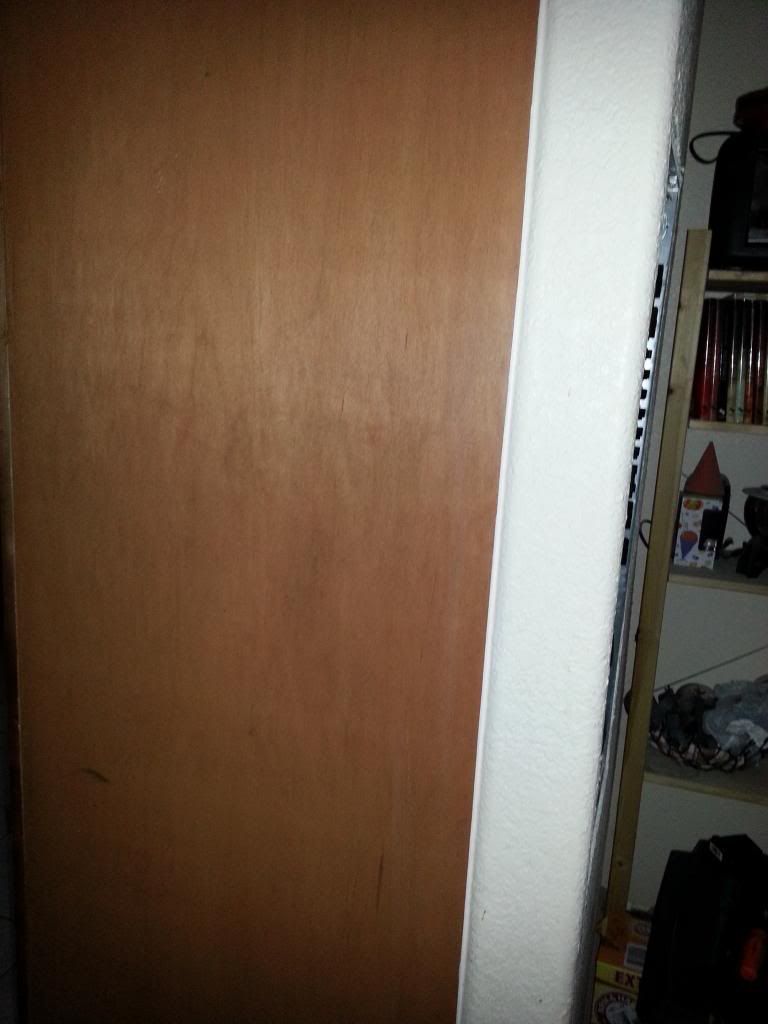
The shortest/easiest route is to make the ~3ft run to that wall behind the bookcase from the bottom of the panel, there is a laundry room behind that wall. I could use surface mounted conduit going to the exterior wall once I get inside the laundry room to avoid cutting more drywall. Here is a pic of the guts of the panel and a profile pic of the wall it is on, any super secret trade tips for running the 10/3 wire into the panel besides cutting drywall? 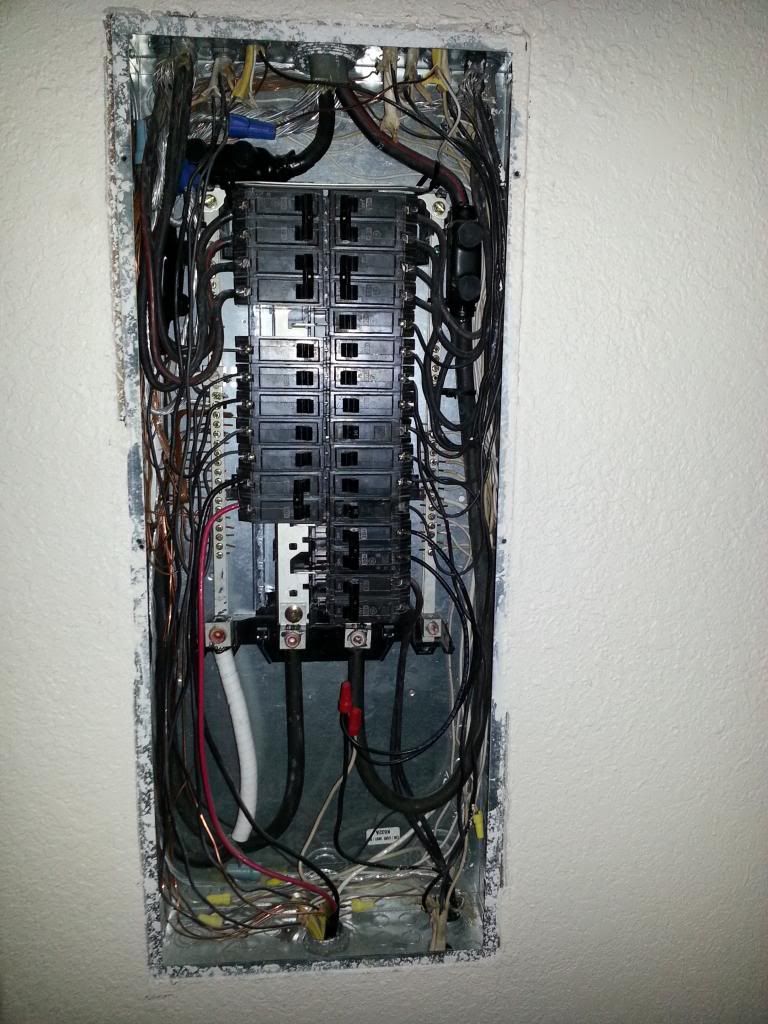
|
|
|
|
[#6]
Is that main breaker listed inside of the panel? If so, then you are good to go. The GE interlock kit I listed above will work on that panel with the main breaker installed. So it looks like you are set.
Apparently that panel was a replacement of an older panel. You can see the feeders are spliced which is why they decided to bottom feed it. As for running the cable to the inlet, I'm not sure of the layout. Maybe if you drew a diagram I would understand how it is better. |
|
|
|
[#7]
Quoted:
Is that main breaker listed inside of the panel? If so, then you are good to go. The GE interlock kit I listed above will work on that panel with the main breaker installed. So it looks like you are set. Apparently that panel was a replacement of an older panel. You can see the feeders are spliced which is why they decided to bottom feed it. As for running the cable to the inlet, I'm not sure of the layout. Maybe if you drew a diagram I would understand how it is better. Yea...that Main breaker is actually listed on the panel itself (panel says I can use either a 10,000 AIC or 22,000 AIC version of the Main breaker). I am not going to trouble you anymore w/diagrams etc, you just saved me hundreds of dollars. But lastly could you please let me know if the following method using notches in the stud with nail plates is code legal (last photo in link), or do I have to drill through the studs?: http://www.familyhandyman.com/electrical/wiring/fishing-electrical-wire-through-walls/view-all |
|
|
|
[#8]
I believe it is ok to do. That's a building code, not an electrical code, so I am not completely sure.
I notch studs often, I usually use a 4" holesaw to drill out a plug directly over the stud. Then I use an oscillating tool to notch the stud. Remember, you have to make a notch for the wire and you also have to make a notch for the nail plate. Then when you put the plug back into the hole it will sit flat and flush. Be careful in that wall, there is a lot of electric running thru it! If you don't mind the look of it, running a piece of conduit on the surface of the wall behind the panel may be the easiest thing to do. |
|
|
|
[#9]
Quoted:
I believe it is ok to do. That's a building code, not an electrical code, so I am not completely sure. I notch studs often, I usually use a 4" holesaw to drill out a plug directly over the stud. Then I use an oscillating tool to notch the stud. Remember, you have to make a notch for the wire and you also have to make a notch for the nail plate. Then when you put the plug back into the hole it will sit flat and flush. Be careful in that wall, there is a lot of electric running thru it! If you don't mind the look of it, running a piece of conduit on the surface of the wall behind the panel may be the easiest thing to do. You are the man, thanks for all of your professional advice, if I was in your neck of the woods I'd hire you and tip in beer as thanks. And don't worry...I ALWAYS cut power to whatever I'm working on and verify with a meter afterwards. Power will be cut to the entire panel...I never want to get bit
|
|
|
|
[#10]
AV18,
i need help. you can see from this post, http://www.ar15.com/forums/t_1_139/1531096_Manual_Transfer_Switch.html&page=2#i42757081 that i needed panel cover BRC0V40L1FM and breaker hold down BRHDK125. the panel cover worked perfect. the breaker hold down has me flummoxed. the root cause of my problem, i think, is that the breaker hold down BRHDK125 is not designed for use with a standard branch circuit type breaker. is this correct? the instructions for the BRHDK125 seem to infer that there should be a hole in the breaker assembly which the supplied (long) screw passes through, which in turn then mates with the supplied hold down. there is no hole in a standard branch circuit type breaker. or at least the 30A dual handle type i am using. so i got out my cordless drill and carefully drilled a quarter inch hole right through the breaker, from top to bottom. some small spring pieces and a couple of metal parts fell out afterward, but the breaker stills seems to work mostly. so, i put the screw through the hole, mounted the breaker, turned on the power, and then... just kidding, i did not drill a hole in the breaker. so what can you tell me about my issue? right now everything electrically works -- but there is no hold down in place on the backfed breaker, because, well, there is no hole in the backfed breaker. do i need a different breaker? what type? ETA: huh? what am i missing here? http://www.homedepot.com/p/Eaton-BR-Type-Hold-Down-Bolting-Screw-Kit-BRHDK125/100193360 PRODUCT OVERVIEW The Eaton Cutler-Hammer Type BR Circuit Breaker Hold-Down Screw Kit is designed to secure a double-pole circuit breaker to the main lug load center in back-feed main applications. It is for use on loadcenters 150 through 225 amperes. Use for single phase applications only. Compatible with Cutler-Hammer type BR circuit breakers and load centers Field installed 10 year warranty ANSI certified and CSA- and UL listed MFG Model # : BRHDK125 MFG Part # : BRHDK125 
where da screw go if no hole? thanks, ar-jedi 


|
|
|
|
[#11]
That retaining clip doesn't go between the 2 pole breakers. It goes between the 2 columns of breakers. You'll see how it has a little nipple sticking off one side of it, that faces your 2-pole breaker and holds it down.
It you look between the columns of breakers you will see the hole. This is something to do with the main breaker off since you are close to the bus. |
|
|
|
[#12]
Jedi,
Not sure if you are still in a holding pattern over the hold-down dilemma but 2p BR breakers w/ the standard through hole begin at 55A for use of the kit. You will need to use Eaton/Cutler Hammer breaker Cat# BR230B=30 Amp, 2-Pole, BR Plug-On Circuit Breaker, 10 KAIC. Wire Size #14-4, 120/240 VAC. with Qualified and Taped Hole. You could call Eaton 1-877-386-2273 to locate an area supplier |
|
|
|
[#13]
Quoted:
Jedi, Not sure if you are still in a holding pattern over the hold-down dilemma but 2p BR breakers w/ the standard through hole begin at 55A for use of the kit. You will need to use Eaton/Cutler Hammer breaker Cat# BR230B=30 Amp, 2-Pole, BR Plug-On Circuit Breaker, 10 KAIC. Wire Size #14-4, 120/240 VAC. with Qualified and Taped Hole. You could call Eaton 1-877-386-2273 to locate an area supplier ah-so: 
|
|
|
|
[#14]
Quoted:
That retaining clip doesn't go between the 2 pole breakers. It goes between the 2 columns of breakers. You'll see how it has a little nipple sticking off one side of it, that faces your 2-pole breaker and holds it down. It you look between the columns of breakers you will see the hole. This is something to do with the main breaker off since you are close to the bus. the clip is not the problem. mounting the clip is not the problem. having a hole through the breaker pair is the problem. ar-jedi |
|
|
|
[#15]
Here is my manual TS.
Its a Cutler Hammer made in the USA...from Harbor Freight. Seems like it was $400 at the time. A STEAL compared to the auto switches. As I am no electrician I had it installed by a pro. Spendy but at least if my house burns down it won't be because I did it wrong. Its rated for 200 amps constant (I think thats the right word). My old 16kw generator can't quite run both AC units or both heat pumps so when we have an outage we flip the breaker for the upstairs unit then switch over. Looking at that pic I am reminded that I have been meaning to paint that turd a nice gray color so it will disappear a bit better next to the house. |
|
|
|
[#16]
OST.
Awesome thread, tagging for when I get around to adding an interlock, L14-30 outlet, etc. |
|
|
|
[#17]
see also this thread: http://www.ar15.com/forums/t_10_17/670186_Wiring_furnace_for_temporary_generator_connection.html ar-jedi |
|
|
|
[#18]
Thanks! Also looks like a few of you guys have FiOS, my daily grind...
|
|
|
|
[#19]
Quoted:
Thanks! Also looks like a few of you guys have FiOS, my daily grind... last fall my power was off for 12 days after Sandy, but my FIOS worked the *entire* time -- i was roughing it on generator power and HDTV+internet! http://www.ar15.com/forums/t_10_17/661411_Sandy____12_days_without_power__what_worked__what_didn_t____.html ar-jedi |
|
|
|
[#20]
AR-Jedi,
Did you ever get the hold down kit installed? I am looking at the parts I may need for my panel (CH32B200J), and have found I will need either a CH8JSM or CH8JFM interlock. But I am clueless as to the purpose of the hold down kit, even after reading the instructions that come with it. I'm not sure if I will even need one. Also - what tools did you need to install the interlock? |
|
|
|
[#21]
Quoted:
AR-Jedi, Did you ever get the hold down kit installed? I am looking at the parts I may need for my panel (CH32B200J), and have found I will need either a CH8JSM or CH8JFM interlock. But I am clueless as to the purpose of the hold down kit, even after reading the instructions that come with it. I'm not sure if I will even need one. Also - what tools did you need to install the interlock? the breaker holddown is required because of the way the electrical code is written; main breakers must be mechanically secured, and since the interlocked backfed breaker is acting like a main breaker, by extension it must be mechanically secured. to install a square-D interlock kit, you need the following tools: -- drill -- screwdrivers -- cutting pliers the square-D interlock kits include a hold down bracket that is secured to an existing screw in the panel back. the hold down bracket retains the upper right most breaker. to install a cutler-hammer interlock, you need the following tools: -- screwdrivers -- cutting pliers the cutler-hammer interlock for the panel my family member has is not so much an add-on part like the square-d setup; instead it is a complete new front panel assembly complete with a movable plate. as noted in prior posts, a separate hold down is required as it is not included with the new front panel assembly. furthermore, as i found out, a special type of dual breaker is required -- one with a hole which accepts the hold down screw. i have not yet installed the hold down kit because i haven't ordered the correct breaker. ar-jedi |
|
|
|
[#22]
So a seperate hold down is required from the NEC, OK.
Looks like for my panel, that means I need a CH125RB, or maybe a CH125RBCS hold down. Still trying to figure out wha the CS (clamshell) name means. I did finally determine the difference between surface (on the wall) and flush mount (in the wall) meant - at least as far as how the front cover of the panel is designed. Your comments that the CH interlock is actually a whole new front cover with the sliding plate installed helped there (also makes me feel a little better about the price). Now just need to determine if there is a special breaker required, or if a standard 2 pole 30 amp will work. Thanks for feedback! |
|
|
|
[#23]
Quoted:
Your comments that the CH interlock is actually a whole new front cover with the sliding plate installed helped there (also makes me feel a little better about the price). Now just need to determine if there is a special breaker required, or if a standard 2 pole 30 amp will work. google around a bit for the best deal on the interlock panel, the prices seem to be all over the place. ar-jedi |
|
|
 Win a FREE Membership!
Sign up for the ARFCOM weekly newsletter and be entered to win a free ARFCOM membership. One new winner* is announced every week!
You will receive an email every Friday morning featuring the latest chatter from the hottest topics, breaking news surrounding legislation, as well as exclusive deals only available to ARFCOM email subscribers.

AR15.COM is the world's largest firearm community and is a gathering place for firearm enthusiasts of all types.
From hunters and military members, to competition shooters and general firearm enthusiasts, we welcome anyone who values and respects the way of the firearm.

Subscribe to our monthly Newsletter to receive firearm news, product discounts from your favorite Industry Partners, and more.
Copyright © 1996-2024 AR15.COM LLC. All Rights Reserved.
Any use of this content without express written consent is prohibited.
AR15.Com reserves the right to overwrite or replace any affiliate, commercial, or monetizable links, posted by users, with our own.


