VA, USA
|
[#1]
i am TOTALLY painting one of my AR's and my 700P with that method. those look GREAT!
|
|
|
VA, USA
|
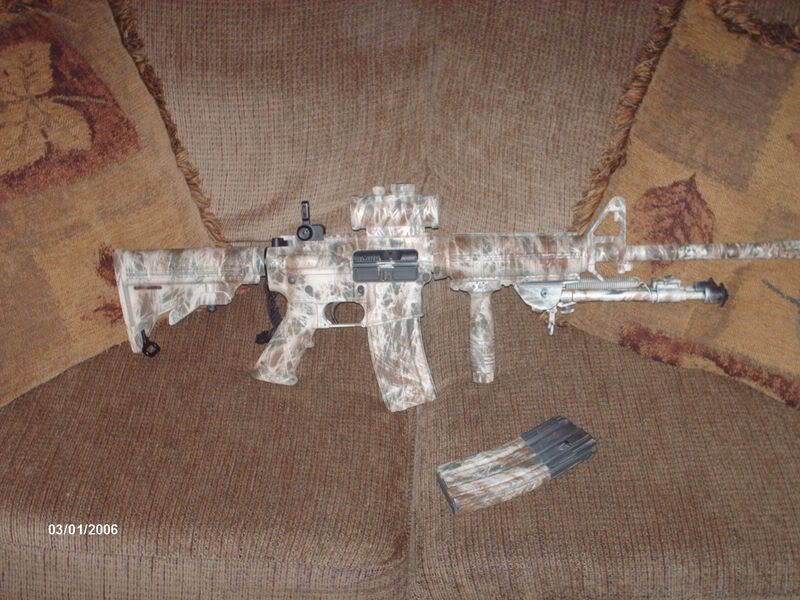
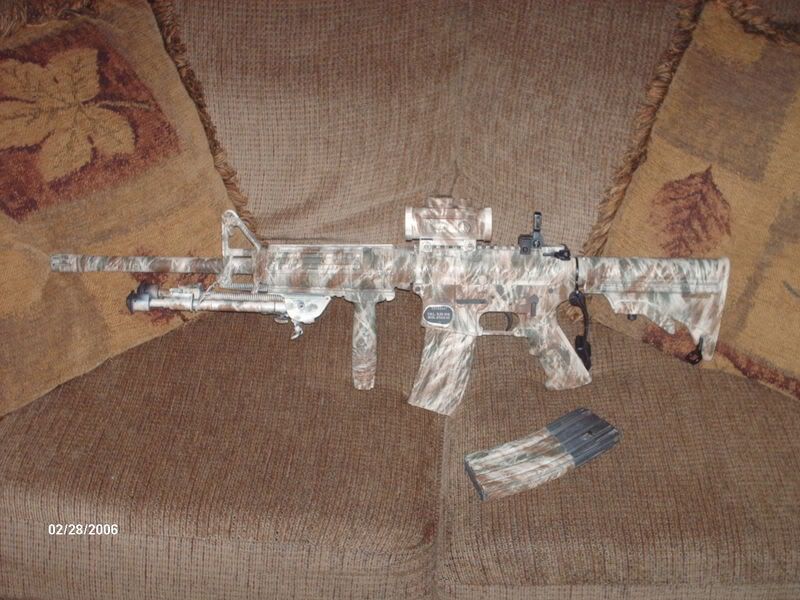
[#2]
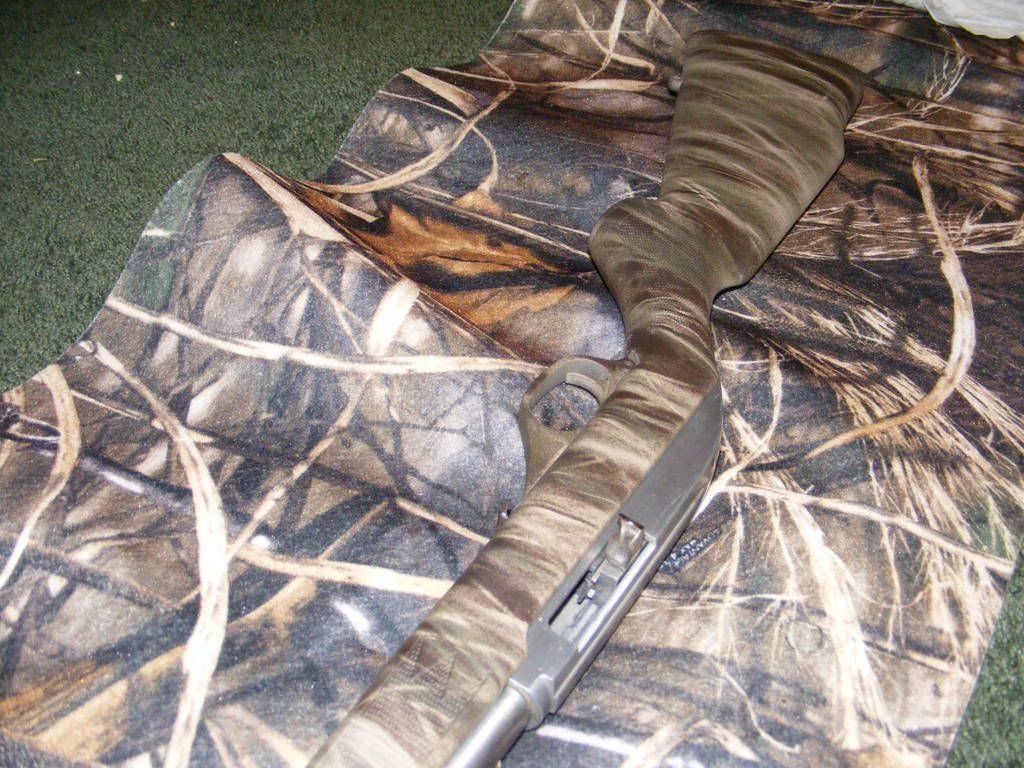
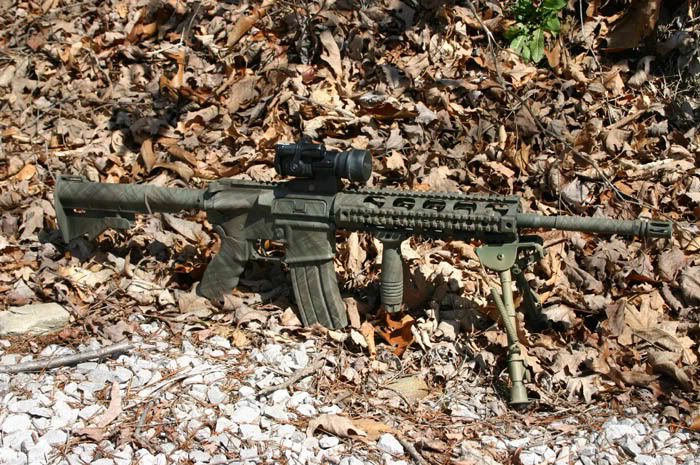
well, i said i was gonna do it. i finished it about 12:30 a.m. this morning. i am at work now, so no pics of it in the outdoors, but here's a few pics. yeah, i know it's not an AR, i'm gonna do that on monday or tuesday. i'm not really happy with these colors and i want to pick up something a little lighter.   
|
|
|
|
AL, USA
|
[#3]
None of my business...just my opinion...but from my experience it looks as though you either held the can too close to the rifle or tried to cover too much of the rifle with paint. Personally, I would have used more needles and less paint. I like to spray one color (say OD) in stripes that are about 5"-6" apart. Then go back and spray brown between the OD stripes. |
||
|
|
VA, USA
|
[Last Edit: hsracer]
[#4]
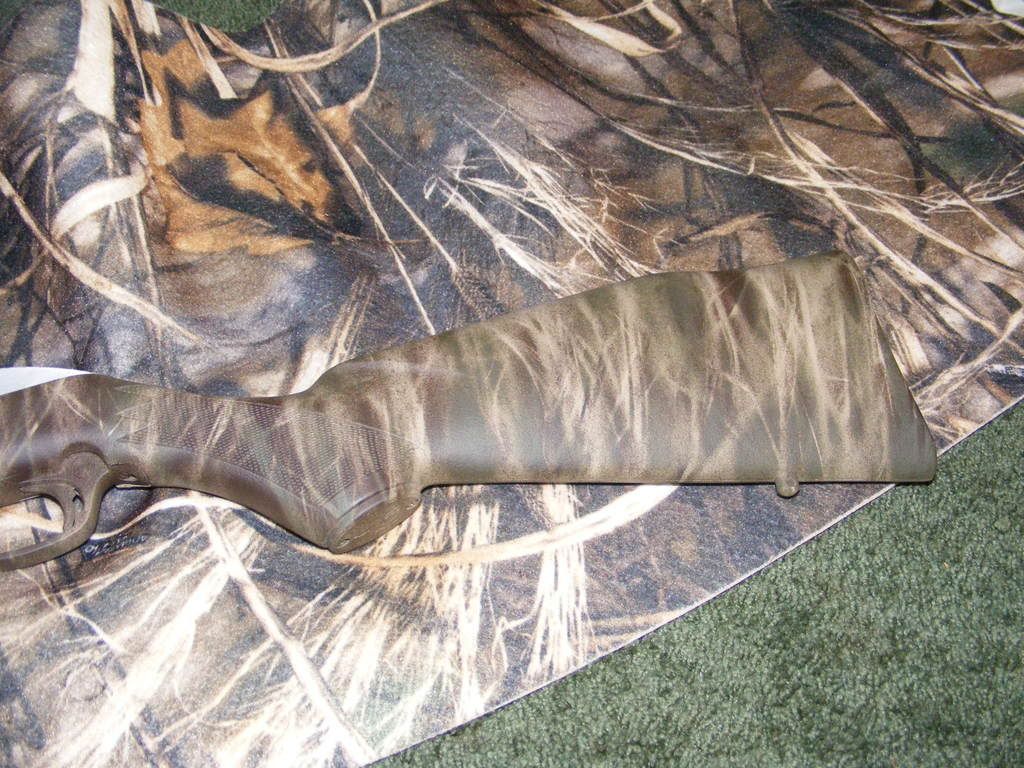
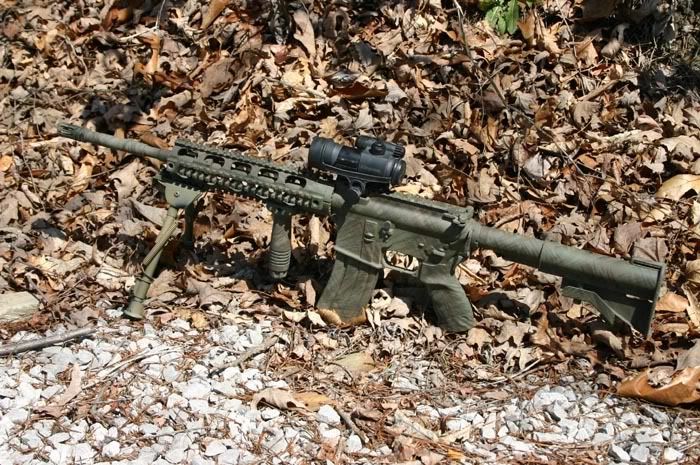
you are right. this was my first time ever trying to do anything like this, so i will learn from my mistakes. i may re-do it, or i might just leave it alone. i went home on my lunch break today to try to get some outdoor photos and only had time to upload 1 to photobucket, but i'm fairly pleased. i need to lighten the inside of the sun shade, it is way too dark in there.  
|
|||
|
|
AL, USA
|
[#5]
The pic outside looks much better...whether it is because of the lighting or it's the other side of the rifle...very effective looking in the grass. |
|
|
AL, USA
|
[#6]
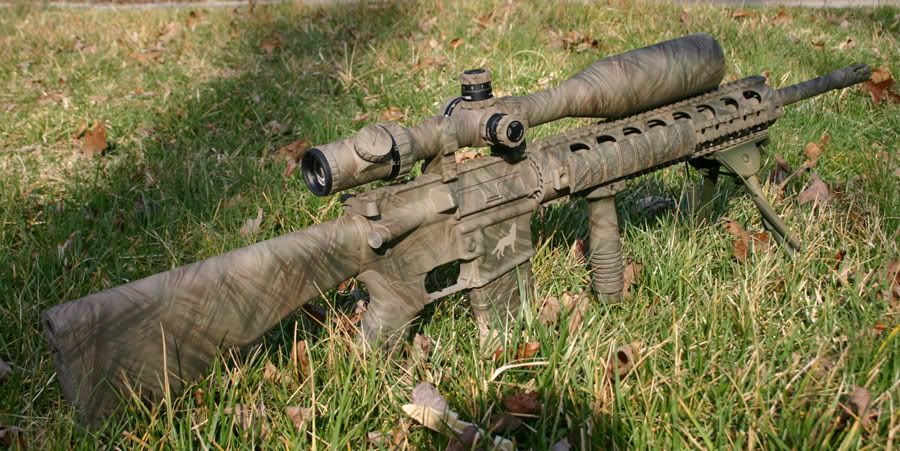
Per request from the OP, here's my pinestraw project.
Paint selection from left to right, Rust-Oleum multicolore texture,Deep Forest Green, Autumn Brown and textured Sandstone. Krylon Matte finish and el cheapo flat black I had lying aorund for possible dusting. Cleaned weapon of oil and dirt. Painted base coat of Sandstone. 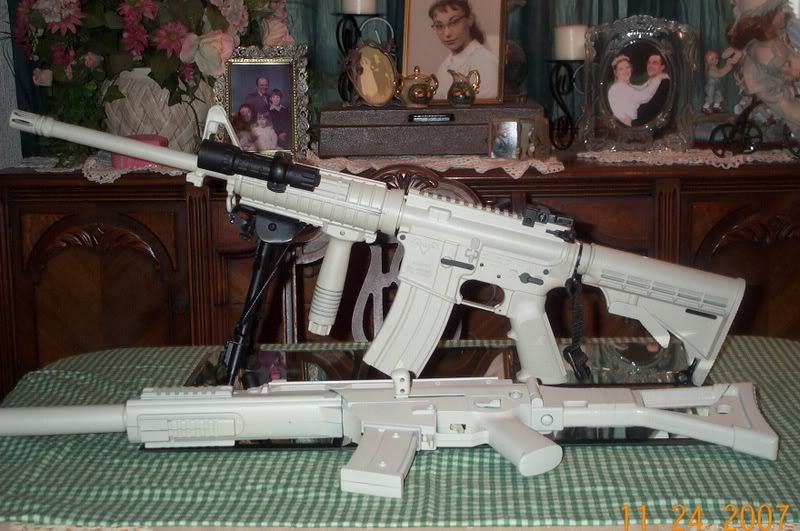 Painted Forest green first on my mags and red dot scope.   Then painted them with the Autumn Brown. 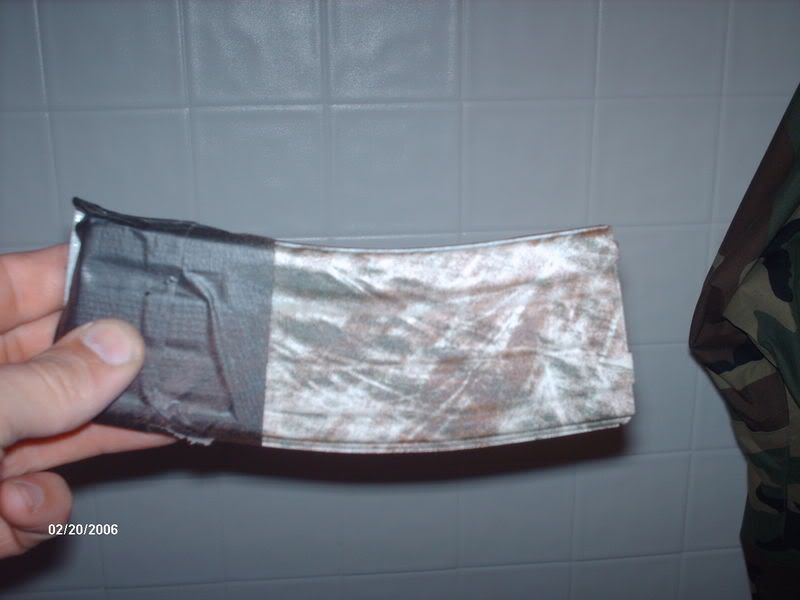  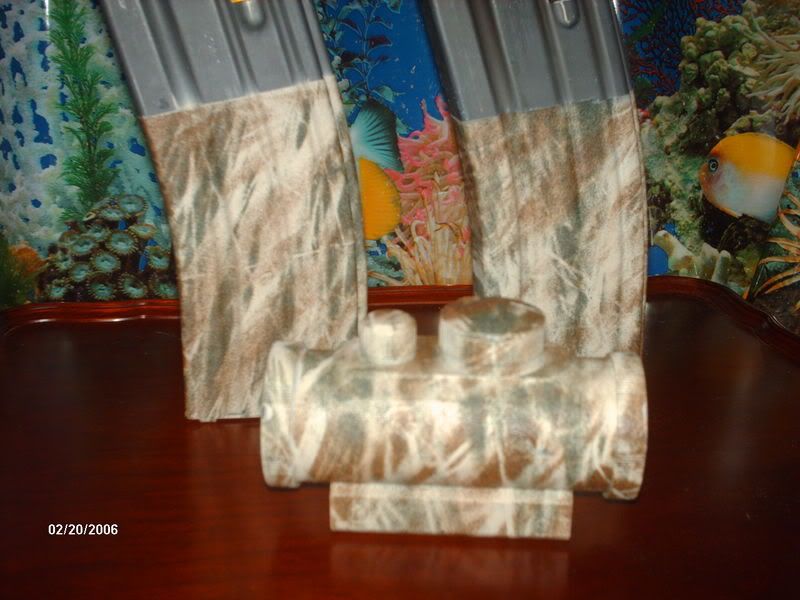 Dried everything over heat register inbetween coats. Yes,the dates on the camera are wrong. Hey guys and gals. I just finished doing the next steps on the left side of my rifle. I think I got too complex of a paint for my project as the Rust-Oleum Texured Multicolor paint is VERY thick and as sticky! Just the green spray over.  Brown added next. 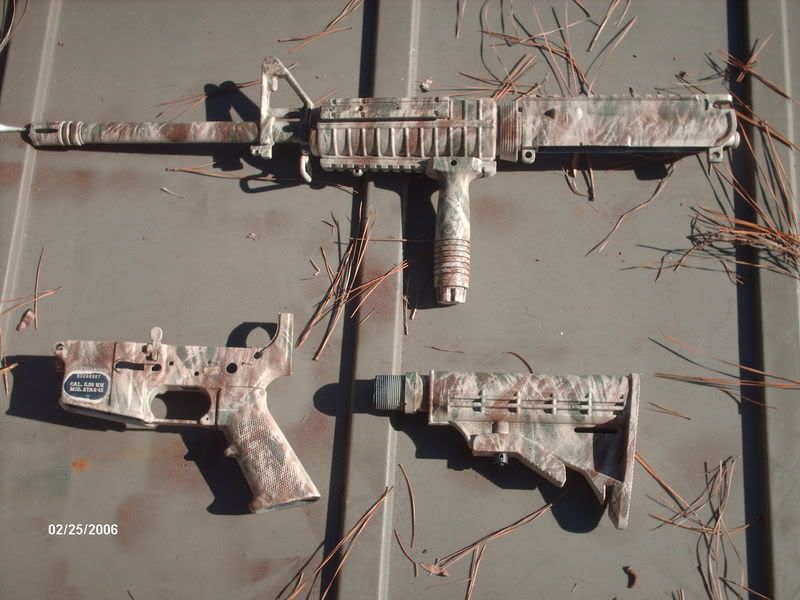   The thick paint totally covered the serial # so I took a swab and fingernail polish remover and stripped the paint from around it and over it. I will repaint it with a brush or leave it for the 'end of a hollow limb' look. Undecided as of yet.  Finished product. 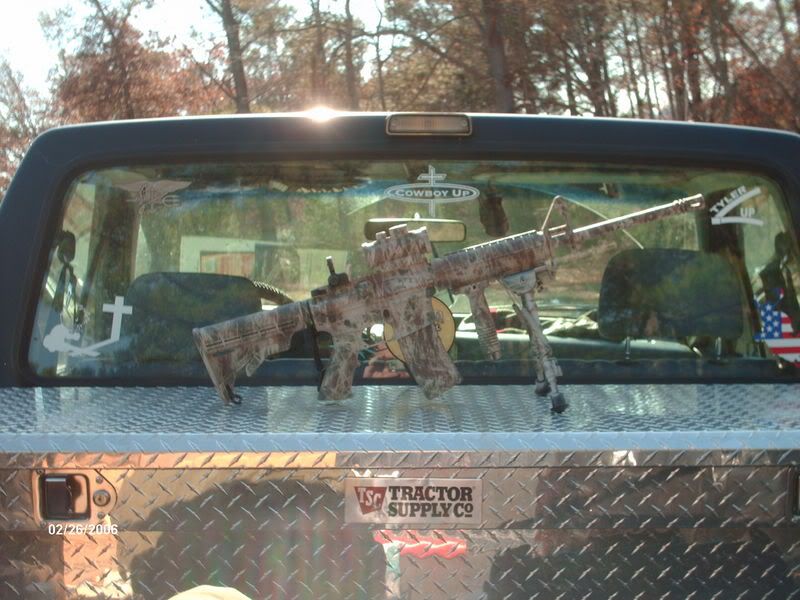  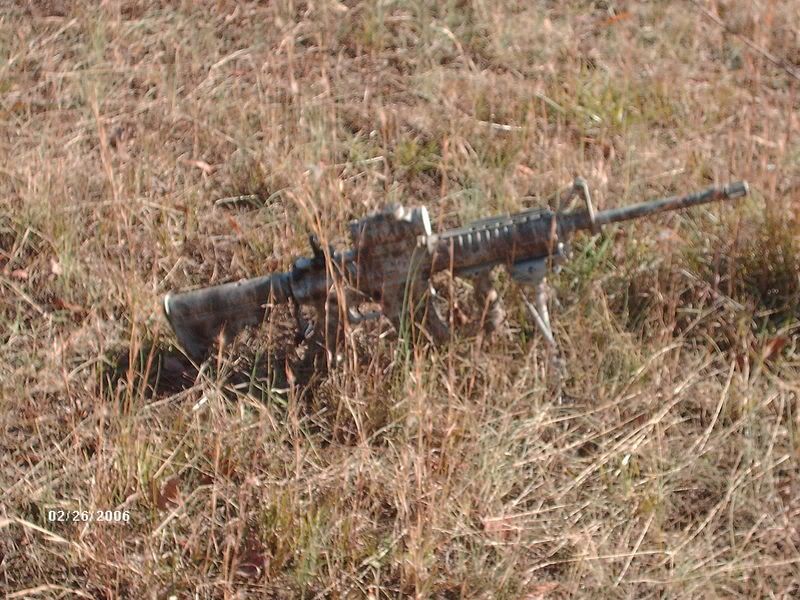 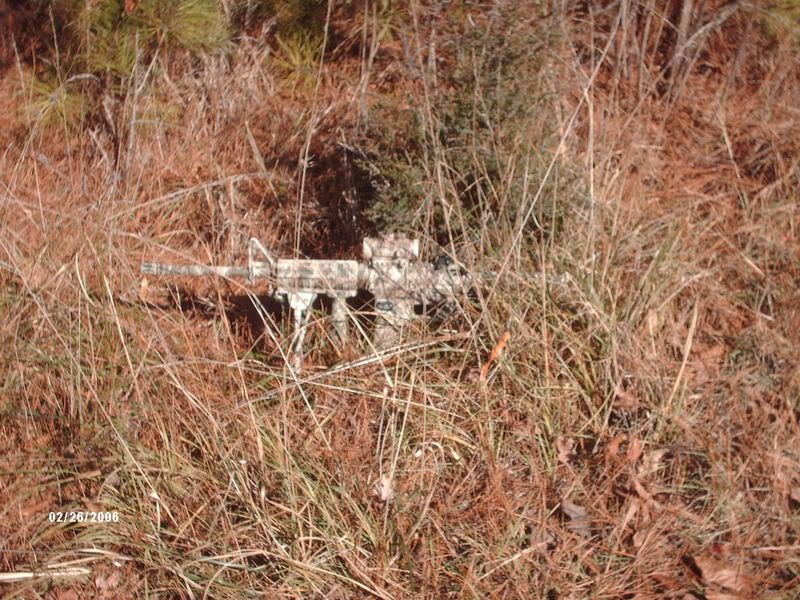  Pics aren't that good but you get the idea. If you like the tecnique and final look of the rifles in this thread and want to try it yourself...go for it! You might really be surprised at what you can do if you just try! Good luck and happy painting! |
|
|
AL, USA
|
[#7]
Better pics.
|
|
|
|
[#8]
tag
|
|
|
|
AL, USA
|
[#9]
Just finished my new Grip-Pod...I did not have any Norrell's Tan on hand so I used some Krylon Satin Nutmeg as a base coat on the Grip-Pod. Dug out my pine needles and finished it off with the same old Krylon OD, Brown and Khaki. You can see that the Grip-Pod has a bit more of a coyote look than the FDE of the Norrell's...same goes for the GGG front sight.   
|
|
|
AL, USA
|
[#10]
A few more pics just for the heck of it...  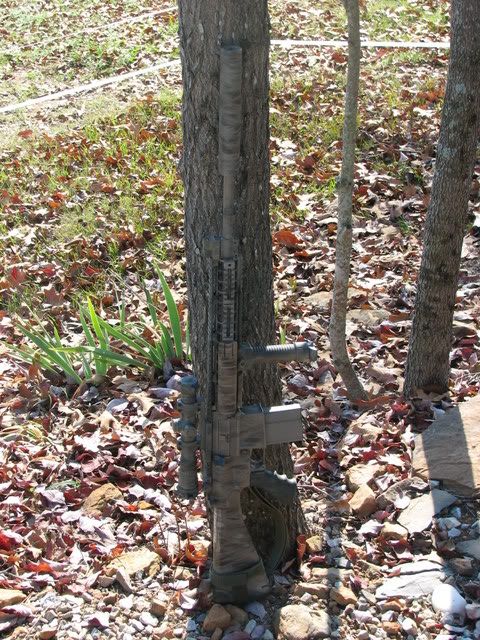 |
|
|
NY, USA
|
[#11]
Great work guys...I'm looking forward to a possible spray job in the near future.
|
|
|
PA, USA
|
[#12]
These look great. Awesome idea.
|
|
|
AL, USA
|
[#13]
Another pinestrawed AR...from lenny16 |
|
|
PA, USA
|
[#14]
Thanks for the resurection BJwar. My experiences with the pinestraw were these.
1. Cheap way to make a very nice unique rifle. 2. Matches the surroundings the best. 3. Everyone asks "Who did that???? That looks great. For me I'm looking for a long term finish so instead of Krylon I will be redoing mine with duracoat. The Krylon looks great but comes off easily. If your looking for an easy camo job try this 100% |
|
|
|
[#15]
Excellent job, brother!
|
|
|
|
|
[#16]
Thanks for resurrecting this thread! I had no idea those camo jobs were that easy....I think I might just beable to do it.
|
|
|
|
|
[Last Edit: all4freedom]
[#17]
To the OP, still the best looking camo job I have seen. I have been looking at camo for years now. You are the king of the can!
To me, nature is random. The OP threw those needles down on the flashlight in the tutorial. They weren't all straight and he didn't lay them at different angles when switching colors. At least that's what I saw. Going to give it a whirl one of these days. I just don't know if I could camo an AR. 
|
|
|
|
AL, USA
|
[#18]
Thanks... |
|
|
|
OH, USA
|
[#19]
Looks great I'm going to have to play around with it
|
|
|
|
[#20]
Tag for my summer project

|
|
|
|
WI, USA
|
[#21]
 IMPRESSIVE! Mike |
|
|
UT, USA
|
[#22]
tag
looks great!! I have to try this! |
|
|
|
[#23]
great looking rifle, ill have to try it...
|
|
|
|
|
[Last Edit: all4freedom]
[#24]
Well I took the plunge!
First of all, thanks to bjwar10 for the great idea. Thanks for this thread and the tutorials, it was a great help. I hope you don't mind me adding these pics, etc. Here we go... I've had a synthetic stock for a Mini-14 in the storage room for a couple years. Haven't used the Mini much since I got my AR. So, I figured this would be a good test run. I bought Krylon Flat Khaki, Olive and Brown from their "camo" line of paint. I also got a can of cheap flat black but ended up not using it. I went for a ride in the country this morning looking for some good prairie grass to use instead of pine needles because we don't have those 6" pine needles in this part of MO. I found some grass and got a good amount of it. It was a waste of time, it didn't work well at all IMO. It was too flimsy and hard to deal with. So I bit the bullet and went to the Dollar General and got a $5 corn straw broom. Man that thing was a pain to dismantle, but I got her done. A few test runs on cardboard and I was ready to go. I degreased the stock with brake cleaner and layed down a couple good coats of the flat khaki.  Then I tossed some straws on the stock and sprayed approx 10" away from the stock fairly quicky, working in the same direction as the straw was laying. I used olive first, then brown, but it really doesn't matter. 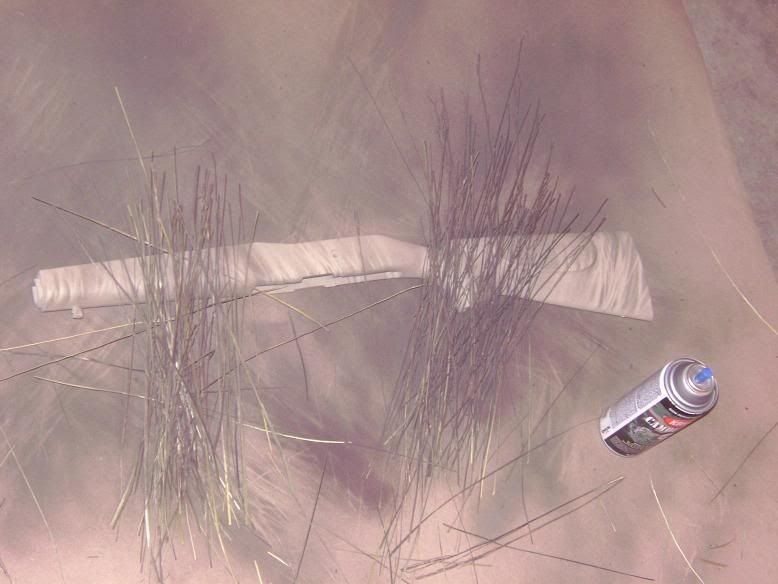 Then lay some more straws down at different angles elsewhere. 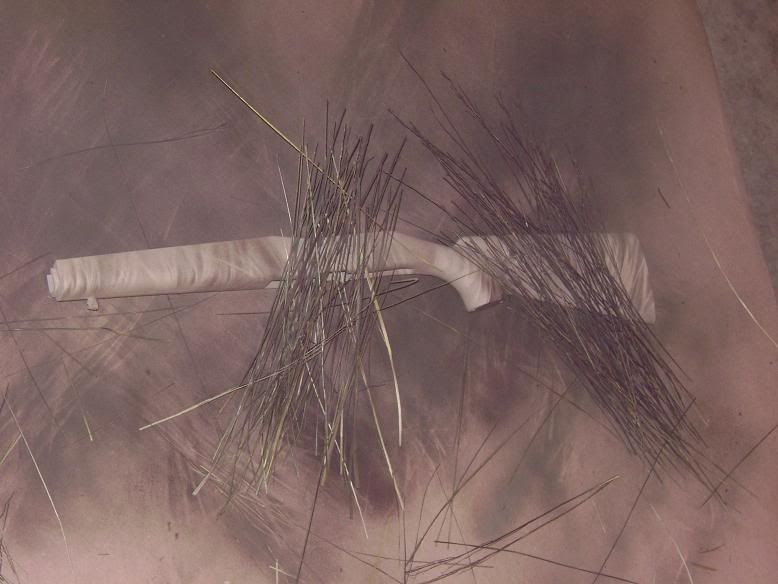 I started to see some coverage here. I started getting brave with the paint after this point. Heck with it, it's not like I'm painting a Bentley. 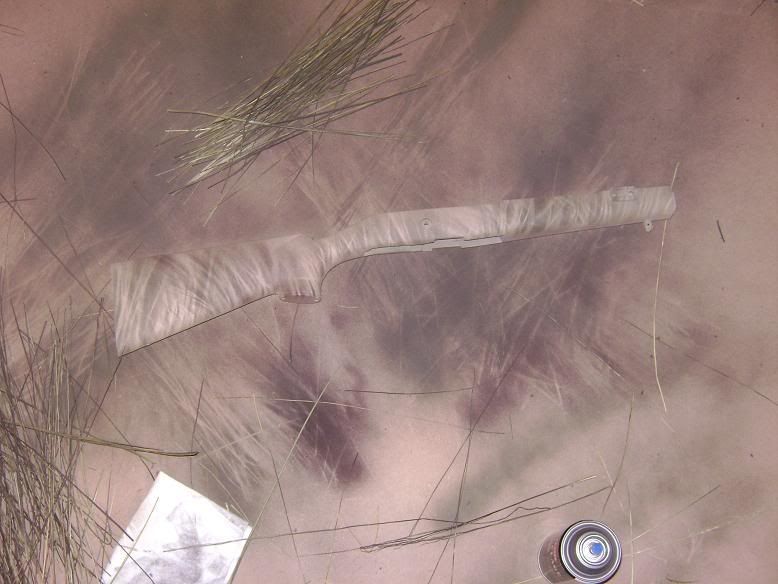 Then I laid the stock on its back to get some paint on the underneath side.  And again, moving the straws.  And the top of the stock... 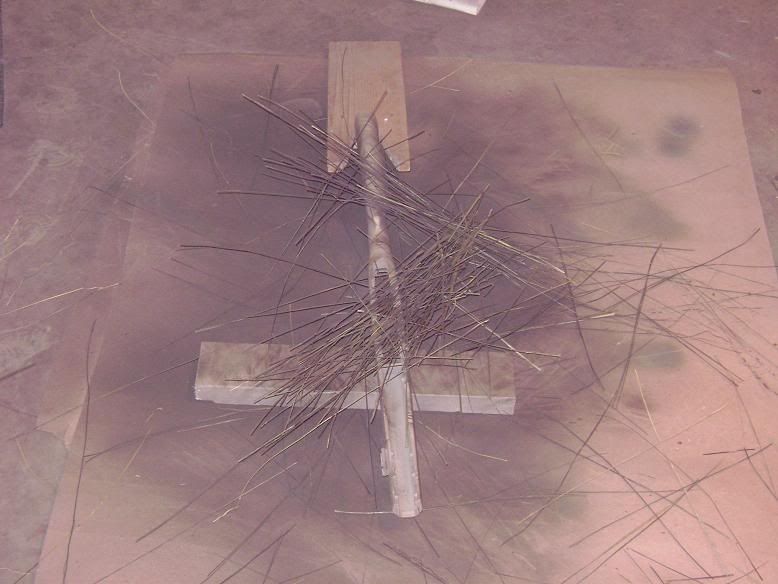 And here is the finished stock... 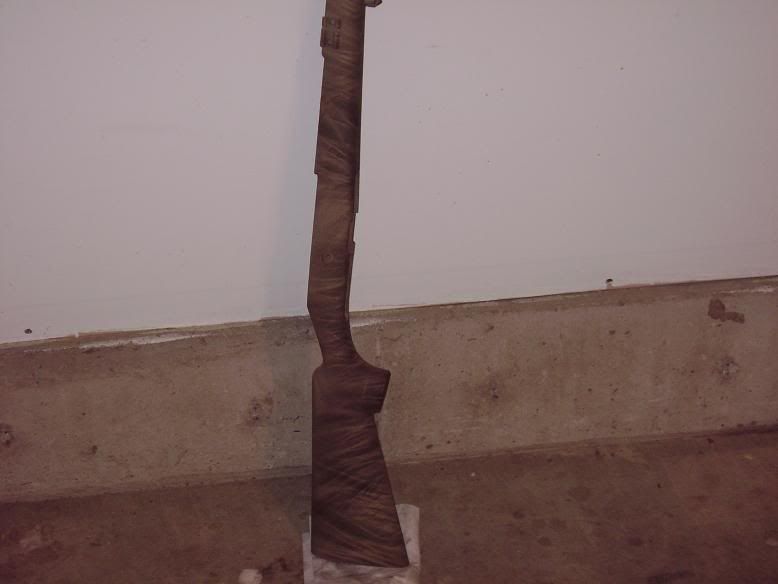 And here it is outside... 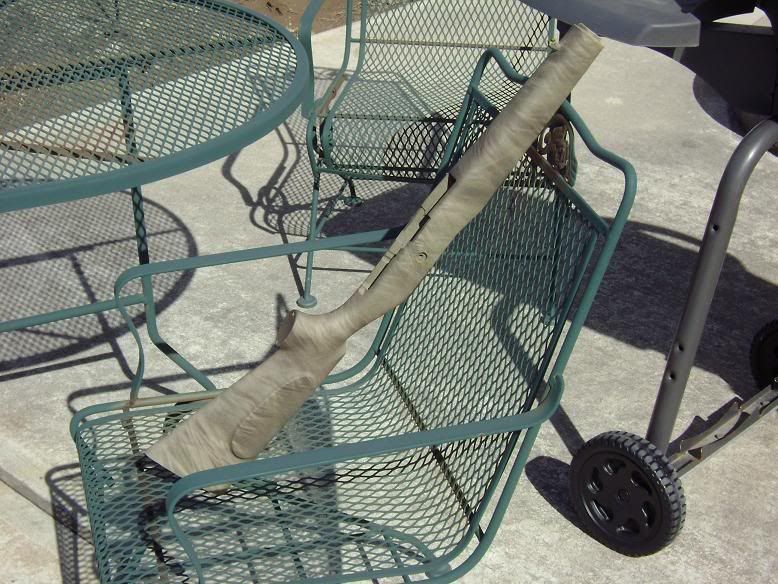 Here is a pic of it all put together. 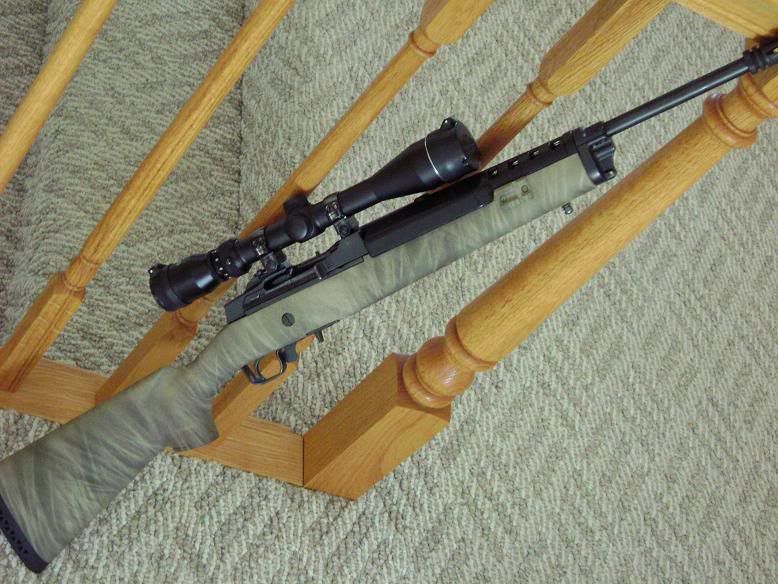 I will be honest, I was a bit unsure of how it was going to turn out. I expected it to be another one of those projects where I get a big idea then am disappointed by the results. So far I'm pretty happy with this one. I'm not sure if I will use a matte clear on it or not. Not today at least. |
|
|
|
|
[#26]
The camo krylon now has "Fusion Technology" which I figured was a joke. I am amazed thus far at how well it has stuck. I rubbed my thumb across the paint for a while, trying to get it to rub off. It hasn't yet. Keep us updated with pics of course.
|
|
|
|
AL, USA
|
[#27]
Thanks for posting your pics and procedure. That's kind of what I had hoped this thread would turn into so other folks could see that it is really pretty easy to do. I don't think I have seen anyone's project turn out bad. Your Mini looks great! |
|
|
|
AL, USA
|
[#28]
My pleasure. |
|
|
|
KY, USA
|
[Last Edit: eastky454]
[#29]
More Duracoat Broomstraw fodder for ya. Its an essential arms lower, cmmg upper and 18" middy barrel, yhm rifle length tube, and millet 4-16 ill. with tps rings. Colors are base of magpul FDE, aug green, dirt brown, and combat green shadows. Make sure you dont miss the howling coyote. Looks like I need a ARD really bad or mist the inside of the sunshade.
|
|
|
OK, USA
|
[#30]
I don't make it over to the refinishing threads much, but I'm sure glad I saw this thread. That pattern looks GREAT. Good job to all you guys. I can't wait to try this on my own.
|
|
|
|
[#31]
Be sure you post pics when you do. |
||
|
|
OK, USA
|
[#32]
Well, I had to try it. I didn't have pine needles, so I used tall grass. My old .22 became my first victim, and you guys are right, it is addictive.
   |
|
|
|
[#33]
Nice work. I tried the tall grass, but found it hard to work with. bjwar10 has created a monster.

|
|
|
|
AL, USA
|
[#34]

|
|
|
|
AL, USA
|
[#35]
One more time with the pine needles...    
|
|
|
AL, USA
|
[#36]
Installed...
|
|
|
|
[#37]
I was wondering how the heck this got pushed to page 2.
Krylon again this time? I'm tired of drooling over your rifle. Full specs on it please. |
|
|
|
AL, USA
|
[#38]
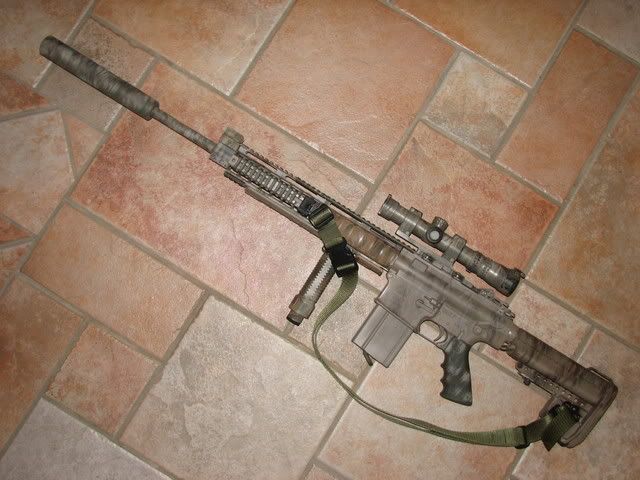
 Armalite AR10A4 with factory trigger and medium weight chrome-lined 20" barrel EMOD stock on VLTOR 5-position tube with Slash's buffer Hogue grip KAC 300m rear BUIS GG&G front BUIS Nightforce 2.5-10x24 NXS in Larue mount SWS E1 FF tube with TD panels Gripod Phantom 5C2 Modified CQB Solutions 3-point into adjustable 2-point SAS .30 suppressor 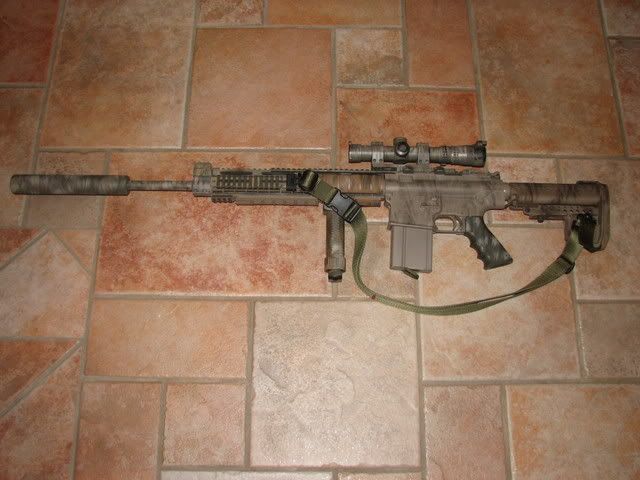
|
|
|
|
FL, USA
|
[Last Edit: sanchez24]
[#39]
I have truly been inspired by this post. This is a troy MCS in a "broom pattern"http://farm4.static.flickr.com/3008/2341089321_9103bc77bf.jpg?v=0. I will be finishing the rifle in another week or so. Just waiting on the stock. I followed the writeups but I added a lighter tan color as a fourth color. Let me know if it works or not. I'm not sure if I like it or not as much with the light (almost) white color. I will be doing an M4 with the same pattern colors as BJWAR10. Thanks again BJWAR, This has been alot of fun! A few more inside and outside.
Without Flash http://farm4.static.flickr.com/3168/2341082173_476ed163eb.jpg?v=0 With Flash http://farm3.static.flickr.com/2164/2341913742_93575490ac.jpg?v=0 Another Outside Shot http://farm3.static.flickr.com/2033/2341920806_665b5c686f.jpg?v=0 |
|
|
AL, USA
|
[#40]
My pleasure. FWIW I kind of like the white on that TROY chasis. I used Krylon khaki to get the shade slightly lighter than the Norrell's...not a lot of it just a few spots here and there. |
|
|
|
KY, USA
|
[#41]
Refinshed my KISS gun after adding a new FF tube from YHM. A new set of BUIS are on order to complete it. Duracoat colors are base of desert warrior dark earth, accented with AUG green, custom brown, and combat green.
|
|
|
KY, USA
|
[#42]
Nice job, guys...that stuff looks awesome.
I especially like all4freedoms mini-14. That thing looks slick. -Jbot |
|
|
|
[#43]
Why thank you. Some good looking guns on here. By far my favorite camo pattern. Bill Jordan ain't got nothin' on this. |
||
|
|
KY, USA
|
[#44]
updated with the new set of BUIS.
   I just cant make myself paint the aimpoint yet. The problem is the paint on lettering they use on them...there is no way to save it.......any suggestions? |
|
|
AL, USA
|
[#45]
Here is my scope with the base coat only (prior to krylon). After each of the light coats of KG, I took a q-tip and some MEK and removed the KG from the lettering and numbers. On the final VERY light misting, I left the KG and this is what it looks like. It subdued the areas without totally covering the lettering. My only thought for you is that the MEK might take the lettering off the Aimpoint... 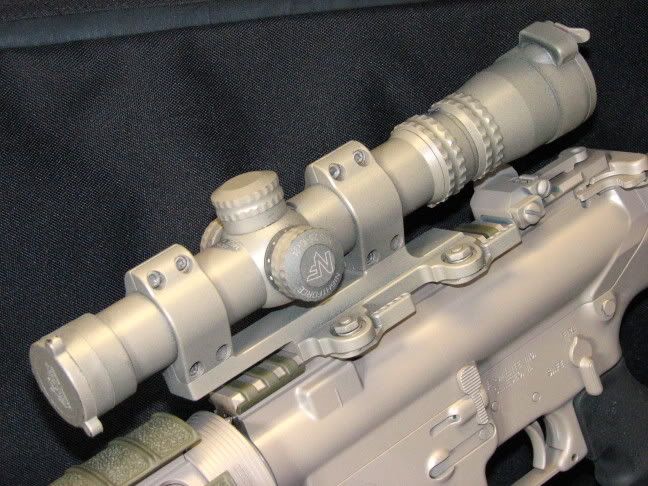 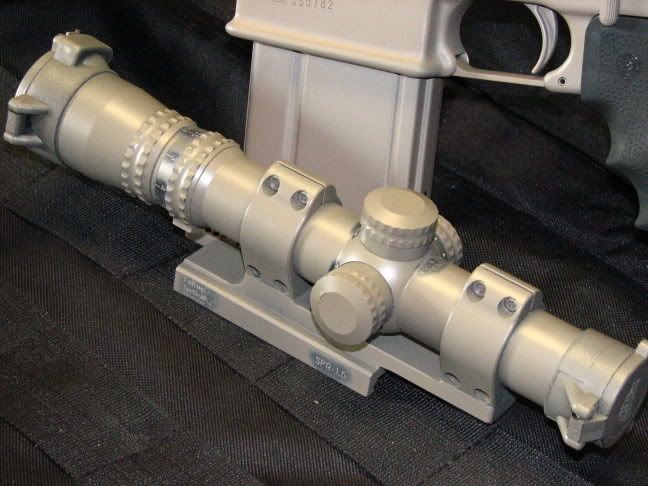 |
|
|
|
|
[#46]
Along the lines of what he said, you might just tape off the lettering then mist it with paint instead of putting it on heavy.
|
|
|
|
AL, USA
|
[#47]
I tried using tape and my biggest issue was when I went to remove the tape it peeled off some of the finish with it. YMMV |
|
|
|
NY, USA
|
[#48]
Has anyone tried the Testors Enamel Paint?
Either through and Airbrush/HVLP or rattle can. They do have some pretty cool camo package colors available. Testors That shotgun of mine getting stripped and degreased this weekend and pinestrawed. |
|
|
NY, USA
|
[Last Edit: perimedik]
[#49]
I did it...
Removed the Duracoat and rattle canned my Mossberg... Never thought I'd get the stones... Anyhow, stripped and degreased $1.99 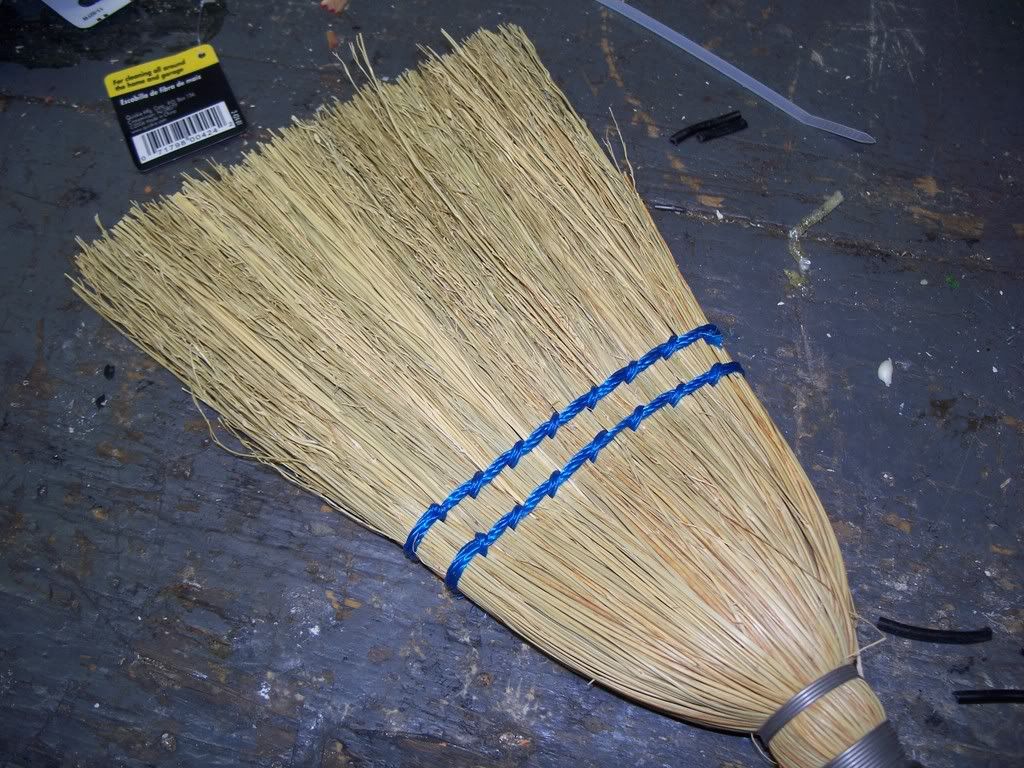 $4.79 for the rattle cans  Base coat Khaki then the Olive  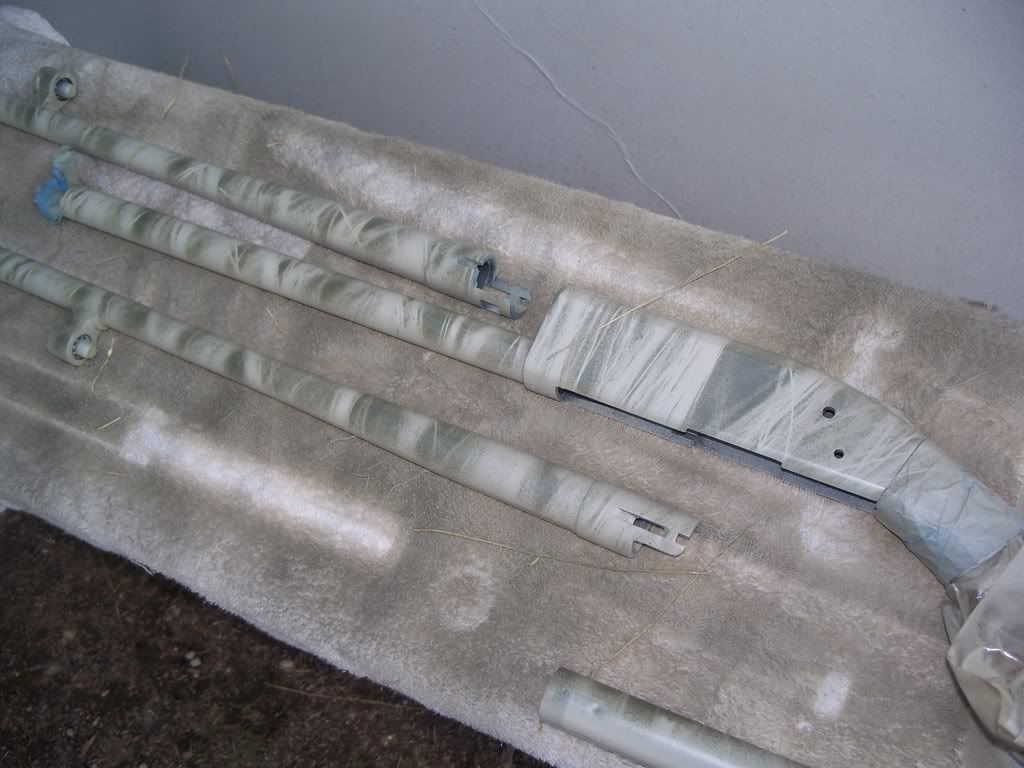 Followed with The Brown  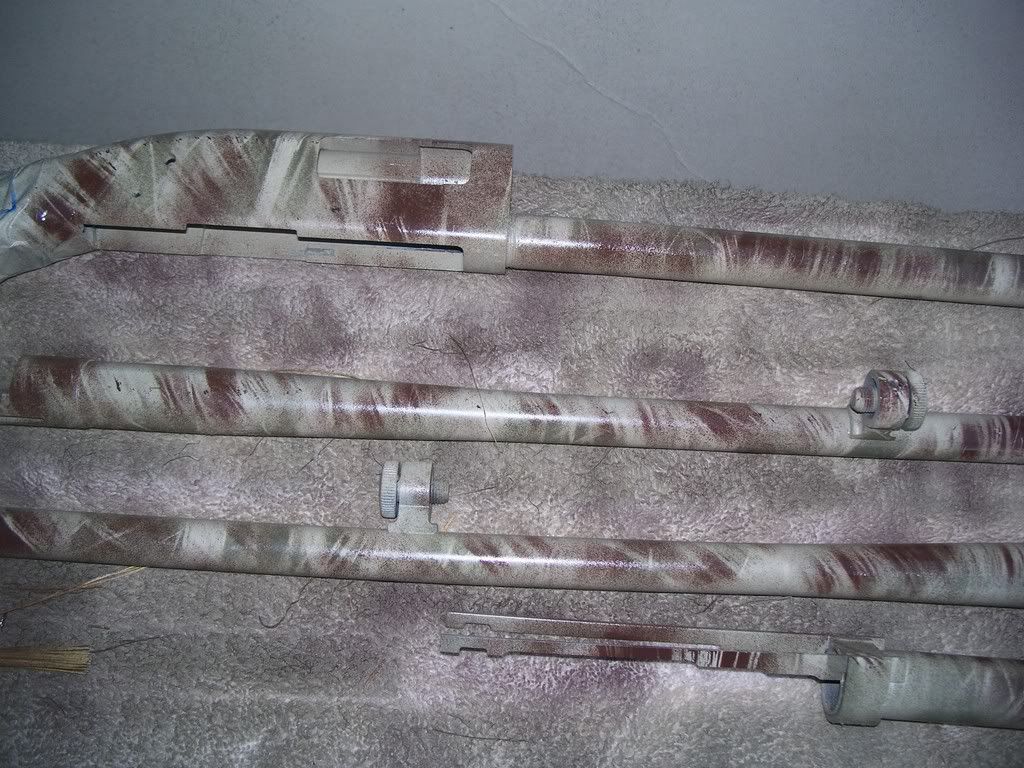 Parts 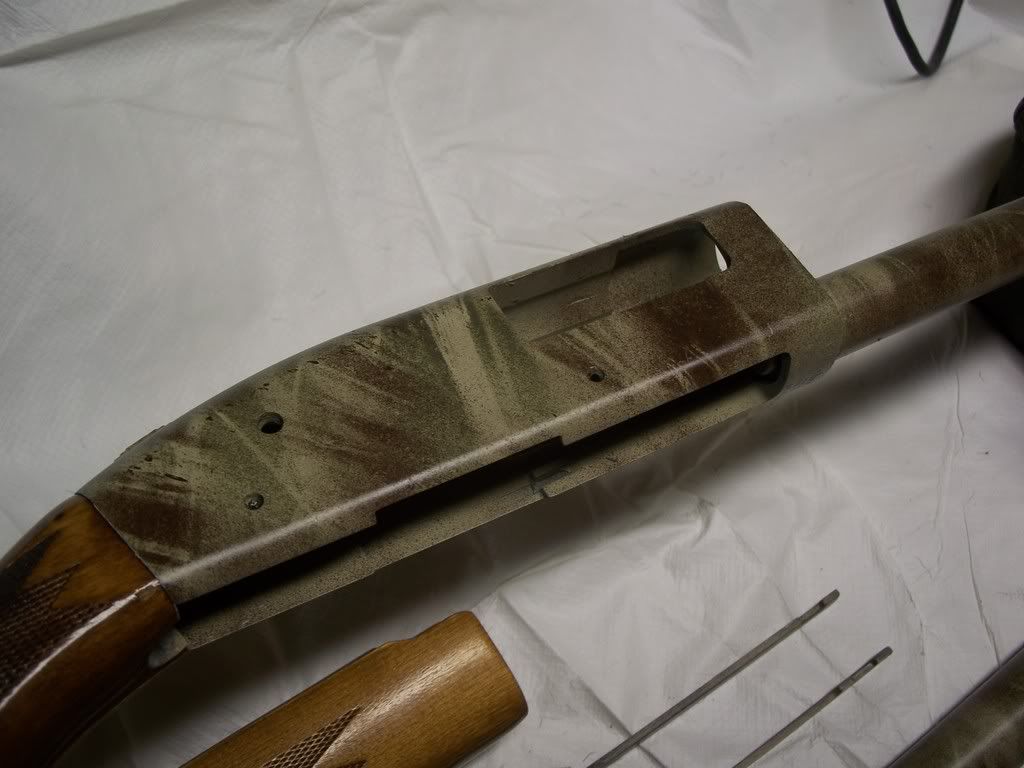  Fore end  Assembled  Great thread, I had to do it... What do you guys think, |
|
|
AL, USA
|
[#50]
Looks good to me...a great addition to the thread! 
|
|
|
 Win a FREE Membership!
Sign up for the ARFCOM weekly newsletter and be entered to win a free ARFCOM membership. One new winner* is announced every week!
You will receive an email every Friday morning featuring the latest chatter from the hottest topics, breaking news surrounding legislation, as well as exclusive deals only available to ARFCOM email subscribers.

AR15.COM is the world's largest firearm community and is a gathering place for firearm enthusiasts of all types.
From hunters and military members, to competition shooters and general firearm enthusiasts, we welcome anyone who values and respects the way of the firearm.

Subscribe to our monthly Newsletter to receive firearm news, product discounts from your favorite Industry Partners, and more.
Copyright © 1996-2024 AR15.COM LLC. All Rights Reserved.
Any use of this content without express written consent is prohibited.
AR15.Com reserves the right to overwrite or replace any affiliate, commercial, or monetizable links, posted by users, with our own.


 here are a couple of pics of the finished(?) piece. My thanks again to bjwar10 and the others who have posted. Preston
