|
[#1]
I'm off to the range for weekly drills. I'm hoping to come back with a few thousand cases of range brass with me.
|
|
|
|
|
[Last Edit: dryflash3]
[#2]
Do you have a 6 inch speed square? A basic must have for carpentry, and especially useful with a circular saw.
https://www.homedepot.com/p/Empire-7-in-Magnum-Aluminum-Rafter-Square-2990/205194666 Something like this. I use a cheap plastic Stanley one. But an aluminum one if you wish to splurge. It ensures you are fastening at a 90 degree angle. Use square inside the corner of your perimeter pieces as you drive screws. You can drive screws (2 at this time) at the 4 corners (without glue, this is called a dry fit) and the last joint should be really close to 90 degrees. Should be able to easily push last joint together. If you are happy with how square frame is (measure diagonal corner to corner, you should get the same number if frame is in square.) + or - 1/16 is fine. If out of square, a light tap with a mallet on the long side, should fix the issue. Now if your happy with the DRY fit, take one joint at a time apart, apply glue and screw into the existing holes. Should be easy peasy. If you are using 3 screws per joint, install after the 2 dry fitted screws are driven. Check for square again measuring diagonal. Adjust as needed, let dry several hours (overnight would be best). Now with frame finished cut supports, dry fitting them first ( with screws), then glue the in. Insert them from the top. Any glue smear will be covered up by the top. If you had a miter saw with a stop installed, that makes it very easy to get the pieces all the same size. But expensive. Oh that triangle you should get will also allow you to cut straight across a 2x4 or 2x6. Hold triangle on board and place saw against triangle. Move both until saw is on cut line. Triangle acts as a fence for a straight cut. You can also cut a "story board" that is the length you want minus the plate on the bottom of the saw. So story board is clamped to piece you want to cut, saw guides off story board=all cut pieces are the same length.  Circular Saw - Speed Square - Cut a Two By Four Square Like most utube videos, guy is close but has the part of the square that indexes off the 2x4 is backwards. Should index off the side you are starting the cut on. Video has that side of square on the back end of cut. Easier for square to move as you cut. Don't make the mistake in the video. But at least you can see how the speed square acts as a fence for the saw. Good luck. |
|
|
|
|
[#3]
Originally Posted By dryflash3: Do you have a 6 inch speed square? A basic must have for carpentry, and especially useful with a circular saw. https://www.homedepot.com/p/Empire-7-in-Magnum-Aluminum-Rafter-Square-2990/205194666 Something like this. I use a cheap plastic Stanley one. But an aluminum one if you wish to splurge. It ensures you are fastening at a 90 degree angle. Use square inside the corner of your perimeter pieces as you drive screws. You can drive screws (2 at this time) at the 4 corners (without glue, this is called a dry fit) and the last joint should be really close to 90 degrees. Should be able to easily push last joint together. If you are happy with how square frame is (measure diagonal corner to corner, you should get the same number if frame is in square.) + or - 1/16 is fine. If out of square, a light tap with a mallet on the long side, should fix the issue. Now if your happy with the DRY fit, take one joint at a time apart, apply glue and screw into the existing holes. Should be easy peasy. If you are using 3 screws per joint, install after the 2 dry fitted screws are driven. Check for square again measuring diagonal. Adjust as needed, let dry several hours (overnight would be best). Now with frame finished cut supports, dry fitting them first ( with screws), then glue the in. Insert them from the top. Any glue smear will be covered up by the top. If you had a miter saw with a stop installed, that makes it very easy to get the pieces all the same size. But expensive. Oh that triangle you should get will also allow you to cut straight across a 2x4 or 2x6. Hold triangle on board and place saw against triangle. Move both until saw is on cut line. Triangle acts as a fence for a straight cut. You can also cut a "story board" that is the length you want minus the plate on the bottom of the saw. So story board is clamped to piece you want to cut, saw guides off story board=all cut pieces are the same length. Like most utube videos, guy is close but has the part of the square that indexes off the 2x4 is backwards. Should index off the side you are starting the cut on. Video has that side of square on the back end of cut. Easier for square to move as you cut. Don't make the mistake in the video. But at least you can see how the speed square acts as a fence for the saw. Good luck. Thanks! I got the outer part of the upper frame assembled and the glue is drying now. Nice and square. |
|
|
|
|
[#4]
While the glue is drying, I'm going to clean up the press and trimmer and install the new parts on the trimmer. The press ram has some old, degraded, sticky lubricant on it and just a couple of small spots of rust where paint has chipped off. It's a really nice press and I'm beyond grateful to DryFlash3 for finding it for me.
Some questions, please: Press: 1. Degreasing/Cleaning the ram: CLP okay? 2. Lubrication of Ram: Slick2000 okay? 3. Should I disassemble the press to clean or inspect the parts of it I can't see? I have the exploded diagram in the RCBS manual for guidance. 4. Minor rust on the painted parts: Clean it off before paint? Scotchbrite? Solvent? Cleaner? 5. Minor rust on the painted parts: Leave it be and paint over with Rustoleum Automotive? 6. If I disassemble it, should I go ahead and give the whole thing a shot of paint, with proper masking, of course? 7. Brand/color of paint for best matching to RCBS factory paint? Trimmer: 1. Cleaning painted parts: CLP? 2. Cleaning internals: 99% ISO? 3. I have the Trim Pro 2 Power Case Trimmer user manual for lubrication with "light-weight multi-purpose grease." Is multi-purpose lithium grease okay? 4. Since I'm taking it apart to add the new parts, I'd like to give the base and motor housing a shot of paint. Same paint as above? Sorry for the question bomb. I want to do things right. Thanks!!! |
|
|
|
|
[#5]
Originally Posted By Cascade-Dude: Thanks! I got the outer part of the upper frame assembled and the glue is drying now. Nice and square. |
|
|
|
|
[Last Edit: dryflash3]
[#6]
Originally Posted By Cascade-Dude: While the glue is drying, I'm going to clean up the press and trimmer and install the new parts on the trimmer. The press ram has some old, degraded, sticky lubricant on it and just a couple of small spots of rust where paint has chipped off. It's a really nice press and I'm beyond grateful to DryFlash3 for finding it for me. Some questions, please: Press: 1. Degreasing/Cleaning the ram: CLP okay? 2. Lubrication of Ram: Slick2000 okay? 3. Should I disassemble the press to clean or inspect the parts of it I can't see? I have the exploded diagram in the RCBS manual for guidance. 4. Minor rust on the painted parts: Clean it off before paint? Scotchbrite? Solvent? Cleaner? 5. Minor rust on the painted parts: Leave it be and paint over with Rustoleum Automotive? 6. If I disassemble it, should I go ahead and give the whole thing a shot of paint, with proper masking, of course? 7. Brand/color of paint for best matching to RCBS factory paint? Trimmer: 1. Cleaning painted parts: CLP? 2. Cleaning internals: 99% ISO? 3. I have the Trim Pro 2 Power Case Trimmer user manual for lubrication with "light-weight multi-purpose grease." Is multi-purpose lithium grease okay? 4. Since I'm taking it apart to add the new parts, I'd like to give the base and motor housing a shot of paint. Same paint as above? Sorry for the question bomb. I want to do things right. Thanks!!! 1. Lube I use for all parts of press. 2.....no 3. Yes, clean and lube. 4. Small amount of CLP on spot to stop rust. Don't do anything else. Your press is a veteran, treat it with respect. Dings are character. Press with character is to be cherished. Especially one with old school features we like. New ones, meh. 5, 6 ,7 NO.....and especially no repaint. Remember loaner JR I loaded you. That's as close in color you can get. It was green, but not right. Too shinny, too green. Original finish was powder coat. That press was all rust with 20% of original paint left. Had to paint to save it. Yours is good as is. Trimmer Same as press, use CLP for lube and cleaning. No grease, you are over thinking this. I wouldn't paint it, see press paint comments. Don't waste you 99% on cleaning. Use it for home brew case lube. If you have a real thing for cleaning with isso, use the 70% stuff. |
|
|
|
|
[#7]
Originally Posted By dryflash3: Press 1. Lube I use for all parts of press. Check. 2.....no Check. 3. Yes, clean and lube. Check. 4. Small amount of CLP on spot to stop rust. Don't do anything else. Your press is a veteran, treat it with respect. Dings are character. Press with character is to be cherished. Especially one with old school features we like. New ones, meh. 5, 6 ,7 NO.....and especially no repaint. No paint. Check! I'll treat it like my '66 Mustang, which also has its dings of character. Your comments resonate with me. Remember loaner JR I loaded you. That's as close in color you can get. It was green, but not right. Too shinny, too green. Original finish was powder coat. That press was all rust with 20% of original paint left. Had to paint to save it. Yours is good as is.Check. Thanks for the clarification. I see the difference. Trimmer Same as press, use CLP for lube and cleaning. No grease, you are over thinking this. Check. The comment about grease comes from the maintenance section of the RCBS manual. I wouldn't paint it, see press paint comments.Check. Don't waste you 99% on cleaning. Use it for home brew case lube.Check. If you have a real thing for cleaning with isso, use the 70% stuff.Check. ISO is my go-to for cleaning anything electrical. And as a general-purpose solvent. Please see comments above. THANKS! |
|
|
|
|
[#8]
Originally Posted By Cascade-Dude: Please see comments above. THANKS! Wish the wet tumbling crowd would. Sometimes I give up and just quit posting a thread and let the ones with bad ideas run OP in circles. |
|
|
|
|
[#9]
Originally Posted By dryflash3: Just one of the things I like about you is you listen. Wish the wet tumbling crowd would. Sometimes I give up and just quit posting a thread and let the ones with bad ideas run OP in circles. Thanks! You can lead a horse to water ... I'm always thirsty for knowledge. |
|
|
|
|
[#10]
Originally Posted By dryflash3: Do you have a 6 inch speed square? A basic must have for carpentry, and especially useful with a circular saw. Something like this. I use a cheap plastic Stanley one. But an aluminum one if you wish to splurge. I know it as a rafter square. Yes, I have one. I was using a much larger framing square and it was awkward, which meant it was probably inaccurate. I dug out the rafter square and am using it. If you are happy with how square frame is (measure diagonal corner to corner, you should get the same number if frame is in square.) + or - 1/16 is fine. Now if your happy with the DRY fit, take one joint at a time apart, apply glue and screw into the existing holes. Should be easy peasy. So far, so good. If you are using 3 screws per joint, install after the 2 dry fitted screws are driven. 1. I'm assuming a third screw would be stronger/better? 2. I should have asked this before I glued them but, I should drill the pilot hole for the third hole after the joint is glued and dried for 24 hours, right? But at least you can see how the speed square acts as a fence for the saw. I did, thanks! Good luck. Thanks! Everything you posted has been a big help. I'm much happier with the results. Some comments and a couple questions above, if you please? The outside of the upper frame is glued and dried and square and I'm ready to add the third screws. Oh, I know it wasn't critical but I'm countersinking the screw heads with a countersink bit. I wasn't pleased with the way the screw heads looked/felt on my first try. I plan to putty them over before finishing. I had the countersink bits and its been years since I've used them, so I thought I'd go ahead and do it. I'm using both drills and the bit driver ... |
|
|
|
|
[#11]
On another subject, I'm expecting to come into possession of a few thousand rounds of range ammo next week.
Question 1: I think step one is giving all of them a wash in water, Dawn, and Lemi-Shine, if I'm remembering it correctly. In a plastic container over a couple/three days, giving it a shake from time to time. Do I have this right? Question 2: I have to get serious about Berdan primers now. I've heard of two main methods of finding them. 1) Breaking the decapping pin, 2) Looking inside the neck. The first seems expensive and the second seems time-consuming. Is it as simple as learning which head-stamps use them and which don't? Something tells me its' not that easy. Thanks! |
|
|
|
|
[#12]
Originally Posted By Cascade-Dude: Thanks! Everything you posted has been a big help. I'm much happier with the results. Some comments and a couple questions above, if you please? The outside of the upper frame is glued and dried and square and I'm ready to add the third screws. Oh, I know it wasn't critical but I'm countersinking the screw heads with a countersink bit. I wasn't pleased with the way the screw heads looked/felt on my first try. I plan to putty them over before finishing. I had the countersink bits and its been years since I've used them, so I thought I'd go ahead and do it. I'm using both drills and the bit driver ... When countersinking in wood, make countersink shallow, as screw will go in deeper when driven in. Different than in metal. Also precise trigger control and clutch adjusted correctly on drill will stop screwhead when flush. I ALWAYS use a drill with clutch when driving screws when I care about the screw head being flush. The impact driver is not for precise work. On a 2x4, I would use 2 screws, 2x6, 3 screws. 2. Pilot hole for third screw after the first 2 screws set the joint. |
|
|
|
|
[#13]
Originally Posted By Cascade-Dude: On another subject, I'm expecting to come into possession of a few thousand rounds of range ammo next week. Question 1: I think step one is giving all of them a wash in water, Dawn, and Lemi-Shine, if I'm remembering it correctly. In a plastic container over a couple/three days, giving it a shake from time to time. Do I have this right? Question 2: I have to get serious about Berdan primers now. I've heard of two main methods of finding them. 1) Breaking the decapping pin, 2) Looking inside the neck. The first seems expensive and the second seems time-consuming. Is it as simple as learning which head-stamps use them and which don't? Something tells me its' not that easy. Thanks! If you are not wet tumbling, you will only get cases clean on the outside. And add dry time unnecessary. And that's fine. Wet tumbling I consider an advanced technique that may be in your future. But get the basics down first. 2. The flashlight method needs practice. (shinning a strong light down case neck) Berdan cases have an indent (not a flashole) where you would expect to see a flashole on a Boxer case. So easy to get fooled into thinking you have a Boxer case. BTDT. The 2 tiny flasholes on either side of the indent can be hard to see with a dirty fouled case and untrained eyes. But you can see them with a good flashlight and are looking for them, that's a Berdan case. Remember the set of Lee primer punches I told you to get? (mine were mounted on the wood bases) https://www.midwayusa.com/product/1012829041?pid=297408 Link for those following along. Use the appropriate size to fish around to find a centered flashole. Takes practice and you can feel the pin on the punch drop into the flashole. Keeping punch in the flashole strike punch and remove primer. If you can't find the flashole when you feel around, probably Berdan. set aside in a labeled can. Several years from now you will be able to sort this can. That is one way to keep from breaking the decapping pin. Ways to not break decapping pin when sizing; A. Remember lesson #1 I taught you when sizing cases....never power through. There is a reason you are encountering unusual press handle resistance. Take case out and inspect. Rock in case? Berdan case? Case not properly lubed? Fix before returning case to press. B. Then there is the collet shaft the decapping pin is mounted to in the Lee Universal decapper or Hornady sizing die. This is a great feature RCBS dies lack. (I made sure OP got Hornady dies, why make him learn the hard way?) Tighten collet no tighter than it will take to deprime a crimped case without collet slipping up. This is trial and error, use crimped primed cases to set this. To test, gently try to decap a Berdan case, collet should raise up if set correctly. Doesn't raise up=collet too tight. Properly adjusted if you size a Berdan case the collet (with decapping pin) will slip up and not break, giving you the clue you screwed up and the proper adjustment on the collet saved your die from damage. (and dryflash3 was right So many folks crank down the collet nut, so it can't slip and break their decapping pin and the decapping shaft. So that's 2 proven methods, the third is headstamps. *Almost all USA brass cases will be Boxer primed, and *most foreign cases sold here. Steel cases can be either. Have a headstamp with just numbers...foreign Mil surplus most likely=flashlight test. Most likely Berdan. Until you gain experience you might want a list of Boxer and Berdan headstamps to refer to. I know of no source of Berdan primers that will fit a 223 case, so just put a plier pinch in the middle of the case and put in scrap bucket. In the future, if you see a pinched case, you already know it's a bad case. Good luck |
|
|
|
|
[#14]
Originally Posted By dryflash3: 1. Drill and install 3'rd screw after the first 2 or after glue has dried, doesn't matter. After 2 screws joint is set. When countersinking in wood, make countersink shallow, as screw will go in deeper when driven in. Different than in metal. Also precise trigger control and clutch adjusted correctly on drill will stop screwhead when flush. I ALWAYS use a drill with clutch when driving screws when I care about the screw head being flush. The impact driver is not for precise work. On a 2x4, I would use 2 screws, 2x6, 3 screws. 2. Pilot hole for third screw after the first 2 screws set the joint. Thanks! No clutch on the DeWalt power drill but I only use it for drilling. The other two have clutches. I don't normally use impact/hammer settings unless they're needed for the job, like drilling holes in concrete for red-hats. I usually run a couple of test screws through some scrap, starting with low torque and then increasing it until it will drive to where I want it. I don't think I was precise enough with the pilot holes first time around either. I used the angle on the countersink bit, where the cutting edge stops and the shaft begins, as my guide for depth. I barely had to goose the trigger on the drill to cut them. They seem to be in just deep enough to avoid any sanding problems. Also, the first time around, I tore up a lot of screws before I realized I should have been using a #3 Phillips tip instead of a #2. It's amazing how much easier they are to drive with the right tool. Thanks for the additional info on third holes. I won't use them for the 2x4's. Not sure if I'll get any time to work on it today but fingers, crossed. Thanks for the help! |
|
|
|
|
[#15]
Originally Posted By Cascade-Dude: Thanks! No clutch on the DeWalt power drill but I only use it for drilling. The other two have clutches. I don't normally use impact/hammer settings unless they're needed for the job, like drilling holes in concrete for red-hats. I usually run a couple of test screws through some scrap, starting with low torque and then increasing it until it will drive to where I want it. I don't think I was precise enough with the pilot holes first time around either. I used the angle on the countersink bit, where the cutting edge stops and the shaft begins, as my guide for depth. I barely had to goose the trigger on the drill to cut them. They seem to be in just deep enough to avoid any sanding problems. Also, the first time around, I tore up a lot of screws before I realized I should have been using a #3 Phillips tip instead of a #2. It's amazing how much easier they are to drive with the right tool. Thanks for the additional info on third holes. I won't use them for the 2x4's. Not sure if I'll get any time to work on it today but fingers, crossed. Thanks for the help! Go back to see Berdan primer info. @Cascade-Dude |
|
|
|
|
[#16]
Originally Posted By dryflash3: I have tried this and done several experiments and I found no benefit for a longer than 30 min Lemishine/Dawn soak. If you are not wet tumbling, you will only get cases clean on the outside. And add dry time unnecessary. And that's fine. Wet tumbling I consider an advanced technique that may be in your future. But get the basics down first. 2. The flashlight method needs practice. (shinning a strong light down case neck) Berdan cases have an indent (not a flashole) where you would expect to see a flashole on a Boxer case. So easy to get fooled into thinking you have a Boxer case. BTDT. The 2 tiny flasholes on either side of the indent can be hard to see with a dirty fouled case and untrained eyes. But you can see them with a good flashlight and are looking for them, that's a Berdan case. Remember the set of Lee primer punches I told you to get? (mine were mounted on the wood bases) https://www.midwayusa.com/product/1012829041?pid=297408 Link for those following along. Use the appropriate size to fish around to find a centered flashole. Takes practice and you can feel the pin on the punch drop into the flashole. Keeping punch in the flashole strike punch and remove primer. If you can't find the flashole when you feel around, probably Berdan. set aside in a labeled can. Several years from now you will be able to sort this can. That is one way to keep from breaking the decapping pin. Ways to not break decapping pin when sizing; A. Remember lesson #1 I taught you when sizing cases....never power through. There is a reason you are encountering unusual press handle resistance. Take case out and inspect. Rock in case? Berdan case? Case not properly lubed? Fix before returning case to press. B. Then there is the collet shaft the decapping pin is mounted to in the Lee Universal decapper or Hornady sizing die. This is a great feature RCBS dies lack. (I made sure OP got Hornady dies, why make him learn the hard way?) Tighten collet no tighter than it will take to deprime a crimped case without collet slipping up. This is trial and error, use crimped primed cases to set this. To test, gently try to decap a Berdan case, collet should raise up if set correctly. Doesn't raise up=collet too tight. Properly adjusted if you size a Berdan case the collet (with decapping pin) will slip up and not break, giving you the clue you screwed up and the proper adjustment on the collet saved your die from damage. (and dryflash3 was right So many folks crank down the collet nut, so it can't slip and break their decapping pin and the decapping shaft. So that's 2 proven methods, the third is headstamps. *Almost all USA brass cases will be Boxer primed, and *most foreign cases sold here. Steel cases can be either. Have a headstamp with just numbers...foreign Mil surplus most likely=flashlight test. Most likely Berdan. Until you gain experience you might want a list of Boxer and Berdan headstamps to refer to. I know of no source of Berdan primers that will fit a 223 case, so just put a plier pinch in the middle of the case and put in scrap bucket. In the future, if you see a pinched case, you already know it's a bad case. Good luck Wow, thank you very much. I just ordered .22 and .30 caliber Lee decappers. For the brass I don't need myself, I'd like to clean them up and de-prime those for which I have shell-holders. Then inspect them all so I can get more practice. Should I just dry-tumble them like I've been doing my own brass? Thanks! |
|
|
|
|
[#17]
Originally Posted By dryflash3: Was typing/editing my previous post when you posted this. Go back to see Berdan primer info. @Cascade-Dude |
|
|
|
|
[#18]
I have several hundreds of rounds of once-fired .223 and .300 BO brass I shot that need to be deprimed. When I get the press set up and the de-capper die dialed in properly, I'll start by depriming my own brass and getting the feel for it again. Then I'll deprime any .223 or .300 from the range brass in the same session. I got quite a feel for it while depriming 600 or more cases on your JR. Once I get that same feel on the rockchucker, I'm pretty confident I will be able to feel it when there's more pressure.
You taught me that technique is everything and I'm a believer. And that technique is largely about feeling the feedback coming back through the press handle and reacting appropriately to it. And that reloading is far more about "touch" than it is about force. Dealing with Berdan primers is clearly an example of that. |
|
|
|
|
[#19]
Candidate range brass process:
1. Sort it by caliber 2. Tumble it with polish 3. Sort by headstamp 4. Inspect every case 5. Sort cases: -- Discards -- Berdans and suspected Berdans -- Keepers, go to deprime -- Non-keepers I can deprime, go to deprime -- Non-keeper I can't deprime 6. Deprime 7. Keepers get reloaded 8. Non-keepers: TBD Thoughts? |
|
|
|
|
[#20]
Originally Posted By Cascade-Dude: Wow, thank you very much. I just ordered .22 and .30 caliber Lee decappers. For the brass I don't need myself, I'd like to clean them up and de-prime those for which I have shell-holders. Then inspect them all so I can get more practice. Should I just dry-tumble them like I've been doing my own brass? Thanks! |
|
|
|
|
[#21]
Originally Posted By Cascade-Dude: Candidate range brass process: 1. Sort it by caliber 2. Tumble it with polish 3. Sort by headstamp 4. Inspect every case 5. Sort cases: -- Discards -- Berdans and suspected Berdans -- Keepers, go to deprime -- Non-keepers I can deprime, go to deprime -- Non-keeper I can't deprime 6. Deprime 7. Keepers get reloaded 8. Non-keepers: TBD Thoughts? 44 and 45 can be tumbled together. How to tell? If one case mouth will enter another, that's a no go. Cases will "fuse together" with media, and the case that entered will still be dirty. Rest is fine. #8, That's your trading stash. |
|
|
|
|
[#22]
Originally Posted By dryflash3: 1. When tumbling, sort by case mouth. Anything 22 cal can be tumbled together, just like anything 30 cal. 44 and 45 can be tumbled together. How to tell? If one case mouth will enter another, that's a no go. Cases will "fuse together" with media, and the case that entered will still be dirty. Rest is fine. #8, That's your trading stash. Sounds good. Thanks! Regarding #8, my thoughts were already leaning in that direction. Thanks for the validation. |
|
|
|
|
[#23]
What about wobble? When I laid out the wood pieces on the concrete floor, they all laid flat. When I test fit them, the assembled square laid flat. After I glued the four joints, it had a wobble. Two corners about an 1/8" off the floor while the other two were flush. As I test-fit the braces, the wobble gets worse with each brace I add. All of the corners are square at the top and bottom and flush in both directions.
Will this resolve itself when I attach the top pieces or is this fatal and I need to start over yet again, please? Any idea what's causing this? Thanks! |
|
|
|
|
[#24]
Originally Posted By Cascade-Dude: What about wobble? When I laid out the wood pieces on the concrete floor, they all laid flat. When I test fit them, the assembled square laid flat. After I glued the four joints, it had a wobble. Two corners about an 1/8" off the floor while the other two were flush. As I test-fit the braces, the wobble gets worse with each brace I add. All of the corners are square at the top and bottom and flush in both directions. Will this resolve itself when I attach the top pieces or is this fatal and I need to start over yet again, please? Any idea what's causing this? Thanks! Flat concrete floor? Can look flat but not really flat, that's my guess from 100 miles away. Have a 4 ft level you can lay across this area and look for light below level. Look for a truly flat area if it exists. I put packing paper on my table saw (to catch glue droplets) and use that for my assembly's. Dead flat machined steel surface. If your top is rocking screwing down plywood will most likely not help. Maybe worth a try if it's not bad. If that doesn't help you will have to shim the low corner or corners. Then screw on top. With no table saw, will be hard to cut shims. mmmm |
|
|
|
|
[#25]
Originally Posted By dryflash3: Something moved between dry fitting and final assembly. Flat concrete floor? Can look flat but not really flat, that's my guess from 100 miles away. Have a 4 ft level you can lay across this area and look for light below level. Look for a truly flat area if it exists. I put packing paper on my table saw (to catch glue droplets) and use that for my assembly's. Dead flat machined steel surface. If your top is rocking screwing down plywood will most likely not help. Maybe worth a try if it's not bad. If that doesn't help you will have to shim the low corner or corners. Then screw on top. With no table saw, will be hard to cut shims. mmmm Sadly, with half the upstairs torn apart for remodeling, the basement floor is the only place I have to build this. How about a sheet of 1/2" steel underneath the wooden top? It would only add about a thousand bucks to the cost of the bench. I can get shims at Lowe's. Thanks! |
|
|
|
|
[#26]
Originally Posted By Cascade-Dude: Sadly, with half the upstairs torn apart for remodeling, the basement floor is the only place I have to build this. How about a sheet of 1/2" steel underneath the wooden top? It would only add about a thousand bucks to the cost of the bench. I can get shims at Lowe's. Thanks! Did you try the level on the floor? Sheet of 3/4 plywood shimmed so it doesn't rock would probably be plenty. Half sheet would probably work. Sorry, never bought shims, always made my own. |
|
|
|
|
[Last Edit: Cascade-Dude]
[#27]
Edited to add: After cooling off, I had an idea and it's described in the next post.
Two things. I checked the level on the floor at 16 spots and never saw a bit of light underneath the level. Our basement was built from the git-go as living space and has a very nicely finished surface. It doesn't surprise me that it's level. Second, after laying on that flat floor for a couple of days without me touching it, the wobble has quadrupled to a half inch or more. Utterly unusable, in my opinion. I think it's time for me to look at other options for a bench. Building one is clearly beyond my abilities and I'm getting tired of wasting time and lumber. |
|
|
|
|
[#28]
Now that the frustration has subsided, I can transition to problem-solving. I'm thinking about using 2" x 2" angle steel in between the top of the upper frame and the top, around the outside edge. I could clamp the wood 2x4s to it to force the frame level. And using shims to make sure the angle iron is level and fully supported. Furring strips on top of the cross-braces the bring them level with the top of the angle iron. I don't know how I'd attach wood to steel, though, from the top, without it interfering with the top laying flat. Maybe a wood screw through the 3/4" ply sub-top, through a pre-drilled hole in then angle, and into the top of the top rail. Then attach the melamine top as you described earlier. The lower frame will just have to remain out of kilter.
I have some 2x2 angle steel but not 16' of it. The steel would likely cost $100 or more but it would still be cheaper than buying a good bench. It's not the most aesthetic solution but, as far as I can see, it's a functional plan that would result in the flat work surface that is the main concern. And I can clean and acid wash the final metal pieces, prime them, and paint them. Probably black. If I had more time and patience, I'd send them out for powder-coat. With that in mind, I'm going to get back to work on what I've got going now while I think about my angle steel plan. |
|
|
|
|
[#29]
Originally Posted By Cascade-Dude: Two things. I checked the level on the floor at 16 spots and never saw a bit of light underneath the level. Our basement was built from the git-go as living space and has a very nicely finished surface. It doesn't surprise me that it's level. Second, after laying on that flat floor for a couple of days without me touching it, the wobble has quadrupled to a half inch or more. Utterly unusable, in my opinion. I think it's time for me to look at other options for a bench. Building one is clearly beyond my abilities and I'm getting tired of wasting time and lumber. Then it sounds like you have wet boards and they are warping as they dry. You really have to dig through the board pile to get usable lumber. Things I look for, reject a bent board, never buy a board with the pith (center of the tree, you can see the rings). They warp the worst. Of course is board is wet to the touch, no good. Lumber bundle has a plastic wrap and normally kept outside until needed. So easy to get wet. 1. Time between buying lumber, stored inside I assume? 2. Cutting to length? 3. Assembly? I'm thinking wood is not stable when assembled, then is drying out. Warps when drying. If you are going to buy, get heavy metal legs and frame with a laminated (2 inch thick) wood top. Then you can modify from there. After you price these you will see why I build my own. |
|
|
|
|
[#30]
Originally Posted By Cascade-Dude: Now that the frustration has subsided, I can transition to problem-solving. I'm thinking about using 2" x 2" angle steel in between the top of the upper frame and the top, around the outside edge. I could clamp the wood 2x4s to it to force the frame level. And using shims to make sure the angle iron is level and fully supported. Furring strips on top of the cross-braces the bring them level with the top of the angle iron. I don't know how I'd attach wood to steel, though, from the top, without it interfering with the top laying flat. Maybe a wood screw through the 3/4" ply sub-top, through a pre-drilled hole in then angle, and into the top of the top rail. Then attach the melamine top as you described earlier. The lower frame will just have to remain out of kilter. I have some 2x2 angle steel but not 16' of it. The steel would likely cost $100 or more but it would still be cheaper than buying a good bench. It's not the most aesthetic solution but, as far as I can see, it's a functional plan that would result in the flat work surface that is the main concern. And I can clean and acid wash the final metal pieces, prime them, and paint them. Probably black. If I had more time and patience, I'd send them out for powder-coat. With that in mind, I'm going to get back to work on what I've got going now while I think about my angle steel plan. That steel is not your answer. |
|
|
|
|
[#31]
Originally Posted By dryflash3: You posted this while I was making my previous post. That steel is not your answer. Thanks. What benches in the marketplace would you consider solid enough, please? If you know; given that you build your own. |
|
|
|
|
[#32]
I though you would ask what I have no experience with.

|
|
|
|
|
[Last Edit: dryflash3]
[#33]
Lots of options here,
https://www.amazon.com/s?k=laminated+wood+top+workbench+with+metal+legs&crid=3E6GNHL9GUT0T&sprefix=laminated+wood+top+workbench+with+metal+legs%2Caps%2C187&ref=nb_sb_noss https://www.harborfreight.com/tool-storage-organization/workbenches/large/48-in-workbench-with-light-58695.html Lots of mods needed. Get rid of back and build real shelfs. Pegboard is a real space waster. Add wood top. At least has some drawers. |
|
|
|
|
[#34]
Originally Posted By dryflash3: I though you would ask what I have no experience with. I sort of figured ... Thanks for the links. I'll start working through them. |
|
|
|
|
[#35]
Originally Posted By Cascade-Dude: I sort of figured ... Thanks for the links. I'll start working through them. |
|
|
|
|
[#36]
Originally Posted By dryflash3: Good luck. Thanks. If nothing else, I've validated that I'm no wood-worker and never will be one. |
|
|
|
|
[#37]
I think this is the sturdiest and most stable for the money. It has a 1 3/4" top. There are a lot of benches for half that but they don't list the thickness of the top and from the photos, they look to be 1".
Global Industrial Adjustable Height Maple Butcher Block Square Edge Workbench, 1-3/4" Top, 60" W X 30" D, Black |
|
|
|
|
[#38]
Originally Posted By Cascade-Dude: Thanks. If nothing else, I've validated that I'm no wood-worker and never will be one. |
|
|
|
|
[#39]
Originally Posted By Cascade-Dude: I think this is the sturdiest and most stable for the money. It has a 1 3/4" top. There are a lot of benches for half that but they don't list the thickness of the top and from the photos, they look to be 1". Global Industrial Adjustable Height Maple Butcher Block Square Edge Workbench, 1-3/4" Top, 60" W X 30" D, Black 1 3/4 thick top is close enough, that's a standard thickness anyway for a heavy duty bench. Price reflects that. Quality costs money. |
|
|
|
|
[#40]
Originally Posted By dryflash3: Just like reloading, you just need to be shown the way. True enough. If I didn't have to learn it before I could start reloading though, it would be a different matter. In the current context, it's just frustration piled on top of frustration. If I ever decide to learn wood-working, it will be because I want to learn wood-working. |
|
|
|
|
[#41]
Originally Posted By dryflash3: That's a fine looking bench. Easy to add a shelf below and shelfs above. 1 3/4 thick top is close enough, that's a standard thickness anyway for a heavy duty bench. Price reflects that. Quality costs money. My thoughts exactly. |
|
|
|
|
[#42]
Originally Posted By Cascade-Dude: True enough. If I didn't have to learn it before I could start reloading though, it would be a different matter. In the current context, it's just frustration piled on top of frustration. If I ever decide to learn wood-working, it will be because I want to learn wood-working. |
|
|
|
|
[#43]
Bench 3.0. Square. Straight. Wobble-free. Now if I can just keep it that way while I install the cross-braces and the rest of the legs.
It's not the prettiest thing in the world but it should work.  |
|
|
|
|
[#44]
Originally Posted By Cascade-Dude: Bench 3.0. Square. Straight. Wobble-free. Now if I can just keep it that way while I install the cross-braces and the rest of the legs. It's not the prettiest thing in the world but it should work. https://www.ar15.com/media/mediaFiles/582146/Bench_3_0-3185523.jpg What turned out to be you issue? If the joint are glued and screwed, it's stable right away with the screws. Will get stronger as glue dries. When fitting braces, they should be tight, but if you can't bang them in by hand they are too tight. Don't use a hammer to force braces in. It's plumb, don't make it cockeyed. Remember dry fit them first, drill pilot holes. Then use glue, locate them, and screw in place. Build it out with all shelfs and braces, top should be last. |
|
|
|
|
[#45]
Originally Posted By Cascade-Dude: Bench 3.0. Square. Straight. Wobble-free. Now if I can just keep it that way while I install the cross-braces and the rest of the legs. It's not the prettiest thing in the world but it should work. https://www.ar15.com/media/mediaFiles/582146/Bench_3_0-3185523.jpg Be hard to put your legs under bench with that in the way. I would run a brace between the sides about a foot back (leg room) to replace the front side bottom brace. This would be the support for the bottom shelf (with front to back braces). Where you keep bullets and other heavy items to help anchor the bench. If this is a "stand only" bench, front bottom brace is fine. |
|
|
|
|
[#46]
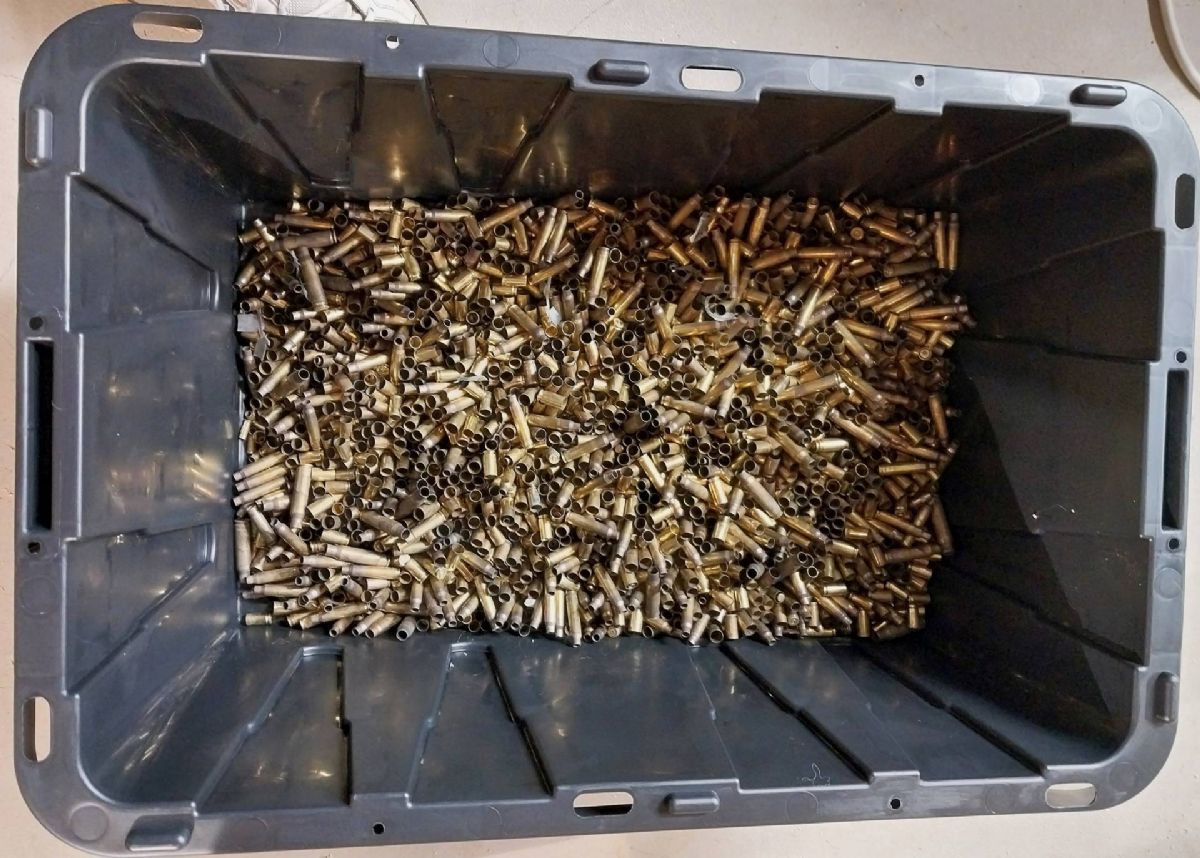
My range brass deal finally came through. I am now the proud owner of 60 pounds of range brass. It's from an indoor rifle range. It looks like there's a good percentage of 223 brass. I also see a lot of 9mm and some .45, as well as what I think is .308. I'm going to see if I can skim off enough 223 to fill up the tumbler and get it going, then start sorting the rest. I expect it will take more than one session.
|
|
|
|
|
[#47]
Originally Posted By dryflash3: The bottom brace on the front side, you planning to keep it? Be hard to put your legs under bench with that in the way. I would run a brace between the sides about a foot back (leg room) to replace the front side bottom brace. This would be the support for the bottom shelf (with front to back braces). Where you keep bullets and other heavy items to help anchor the bench. If this is a "stand only" bench, front bottom brace is fine. I don't have much time but I wanted to at least answer about the brace. First, there are four more legs I will attach once the cross-braces are in. The lower frame will have two fewer full-depth cross-braces than the top. Once the cross-braces and legs are attached, I will cut the lower frame member between the two additional front legs, add a cross brace near the rear, and a couple of short braces between it and the rear frame. It will have the same opening as versions 1 and 2, I'm just building it differently. You can see my failed attempt from version 1 laying horizontally on the floor in the background of the pick above. Detailed replies to above later. I want to get the tumbler running. Thanks! |
|
|
|
|
[#48]
Originally Posted By Cascade-Dude: I don't have much time but I wanted to at least answer about the brace. First, there are four more legs I will attach once the cross-braces are in. The lower frame will have two fewer full-depth cross-braces than the top. Once the cross-braces and legs are attached, I will cut the lower frame member between the two additional front legs, add a cross brace near the rear, and a couple of short braces between it and the rear frame. It will have the same opening as versions 1 and 2, I'm just building it differently. You can see my failed attempt from version 1 laying horizontally on the floor in the background of the pick above. Detailed replies to above later. I want to get the tumbler running. Thanks! Time to spend your money. If you are going to sort brass as a regular thing. https://www.midwayusa.com/product/1012981319?pid=847836 Seems like a lot of money for plastic trays that fit over a 5 gal bucket. But it will change your brass sorting life. I just used mine after my range session last weekend. |
|
|
|
|
[#49]
Originally Posted By dryflash3: Sounds like you are on the right track with the bench. Time to spend your money. If you are going to sort brass as a regular thing. https://www.midwayusa.com/product/1012981319?pid=847836 Seems like a lot of money for plastic trays that fit over a 5 gal bucket. But it will change your brass sorting life. I just used mine after my range session last weekend. Thanks! You're right on time. There's more 9mm than anything else and I'm spending more time separating 9mm from .40 than anything else. I sorted out 300 223 brass in an hour and a half and it's now in the tumbler. And I've only been through maybe half of it. About 50 .300 BO cases so far too. There are hundreds and hundreds of 9mm cases. |
|
|
|
|
[#50]
800 .223 brass
120 .300 BO brass I'd be happy if that's all there was. But here's also a great big pile of 9mm brass, maybe a couple hundred .40, and 40 or so 10mm. Plus some .308 and 7.62 x 39. And hundreds of pistol cases yet to be sorted. 60 pounds a month of range brass ought to get my brass locker filled up nice and fat. It's going faster than I thought it would. I'm 80% though it and have spent maybe four hours on it. |
|
|
|
 Win a FREE Membership!
Sign up for the ARFCOM weekly newsletter and be entered to win a free ARFCOM membership. One new winner* is announced every week!
You will receive an email every Friday morning featuring the latest chatter from the hottest topics, breaking news surrounding legislation, as well as exclusive deals only available to ARFCOM email subscribers.

AR15.COM is the world's largest firearm community and is a gathering place for firearm enthusiasts of all types.
From hunters and military members, to competition shooters and general firearm enthusiasts, we welcome anyone who values and respects the way of the firearm.

Subscribe to our monthly Newsletter to receive firearm news, product discounts from your favorite Industry Partners, and more.
Copyright © 1996-2024 AR15.COM LLC. All Rights Reserved.
Any use of this content without express written consent is prohibited.
AR15.Com reserves the right to overwrite or replace any affiliate, commercial, or monetizable links, posted by users, with our own.


